目录
0.简介
- 本文属于一个系列中的第二篇文章,这个系列会实现一个项目,这个项目主要使用Visual Studio 2019作为开发工具,创建WCF服务、创建Web应用程序调用WCF服务等功能
- 本文主要介绍如何通过 Visual Studio 2019 来创建一个ASP.NET Web应用程序,来使用上一章实现的WCF服务,这个服务实现的功能是返回数学中Pi的值。
1.环境
Visual Studio 2019 + c# + windows11
2.知识点
3.详细过程
1)创建空项目
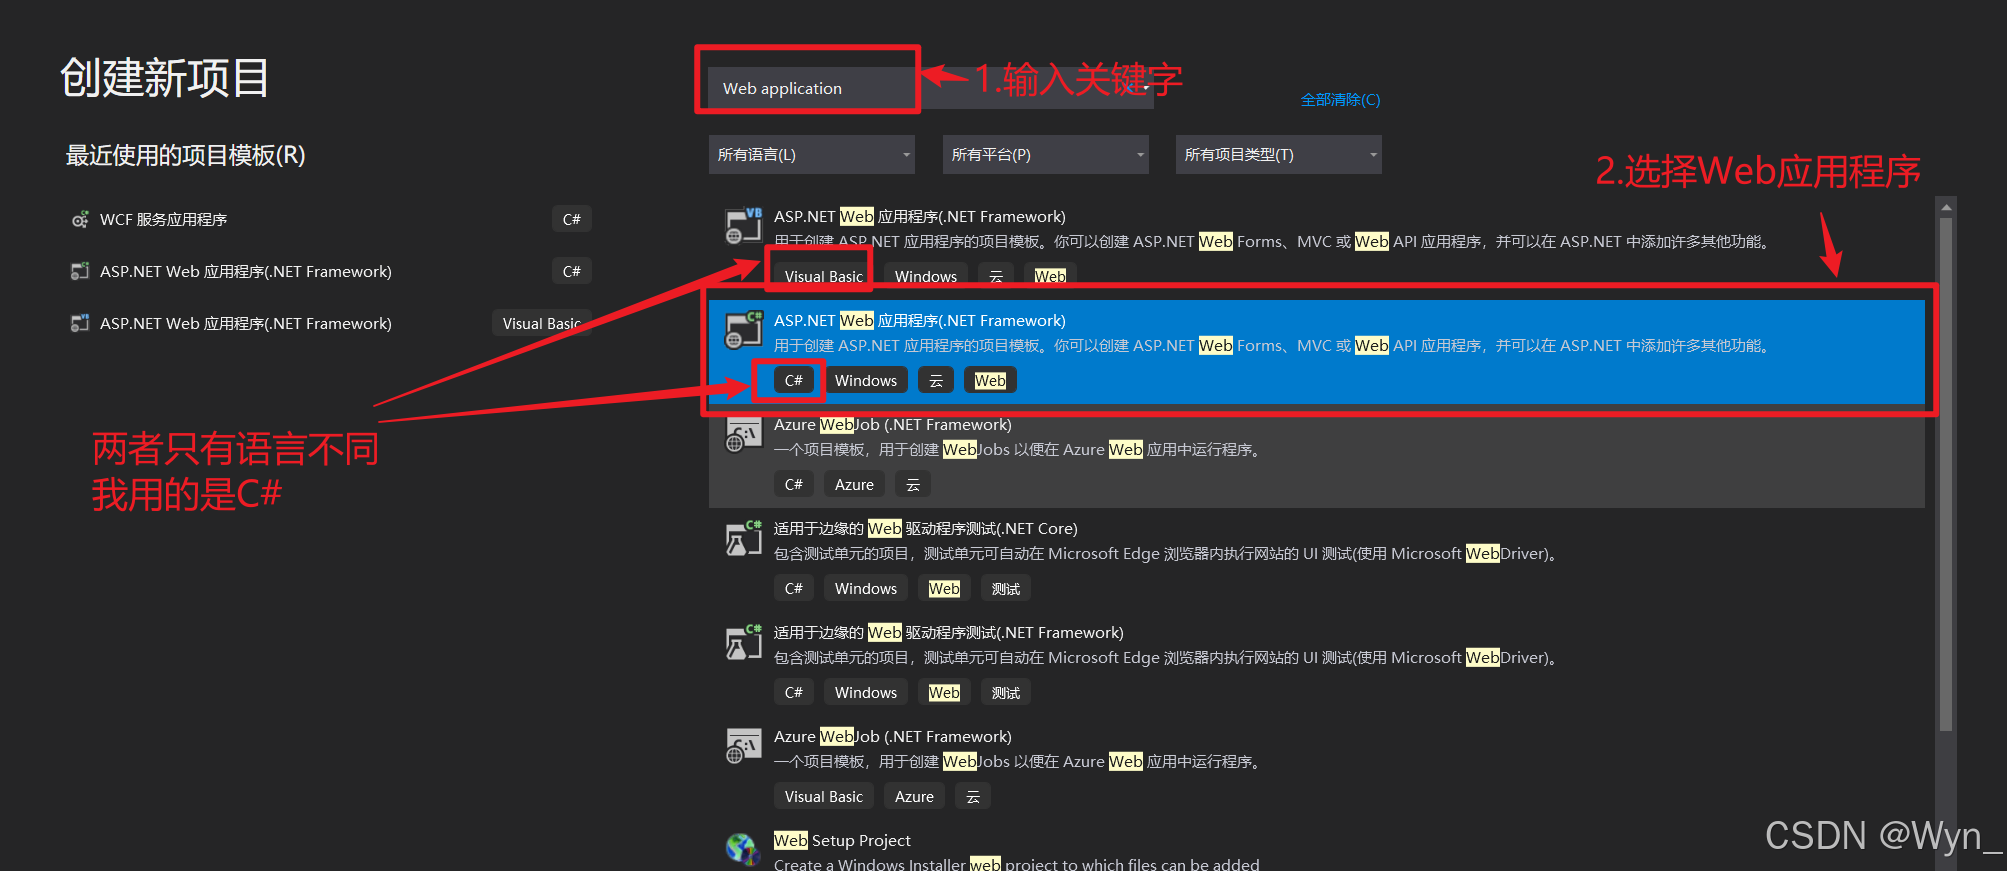
打开VS2019,添加新项目,搜索【web application】,找到【ASP.NET Web应用程序】,有两种,一个是VB语言,一个是C#语言,我选择的是C#

选择后,点击右下角的【下一步】
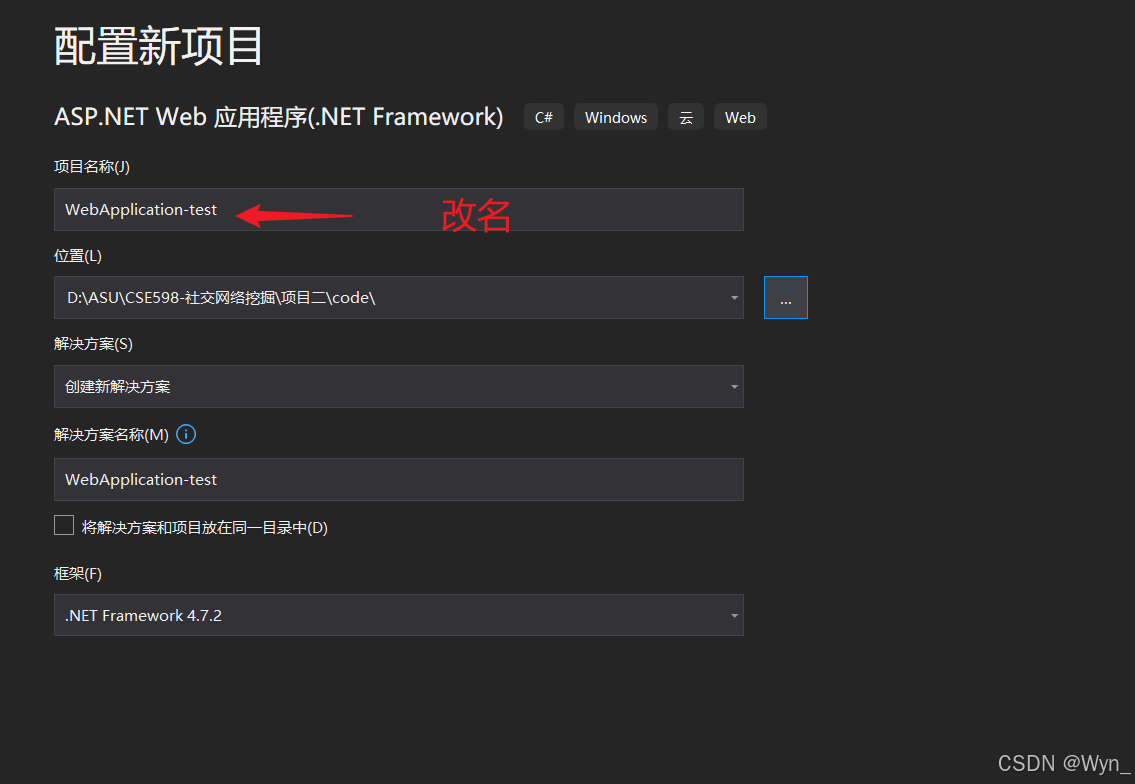
修改自定义的项目名称,点击右下角的【创建】
新窗口,模板选择【空】即可

新建的目录是这样的

2)添加Web表单
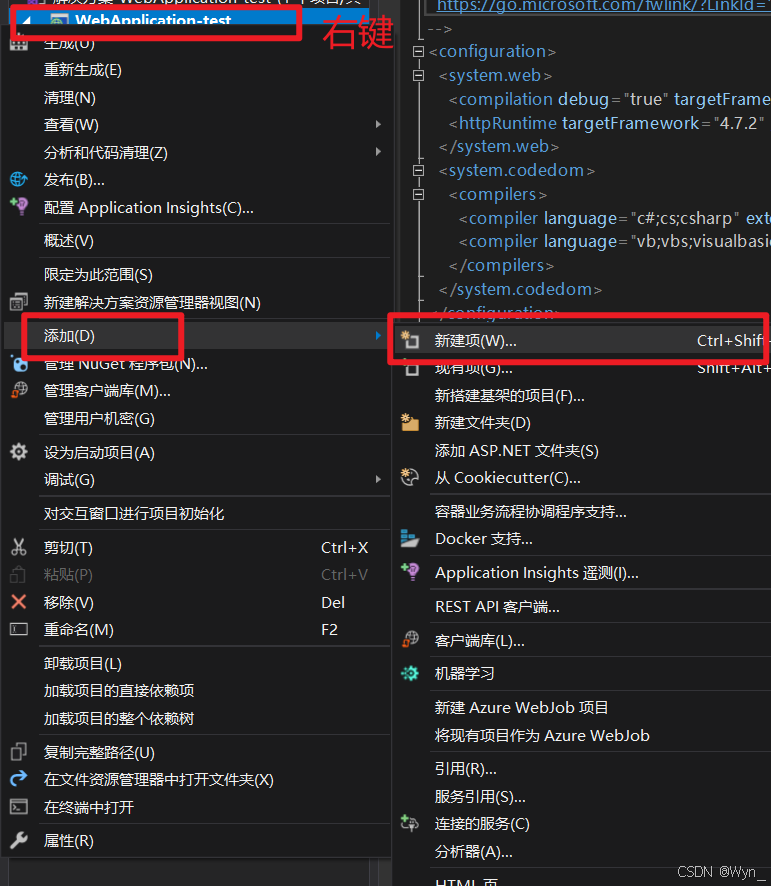
右键项目名字,选择【添加】-【新建项】
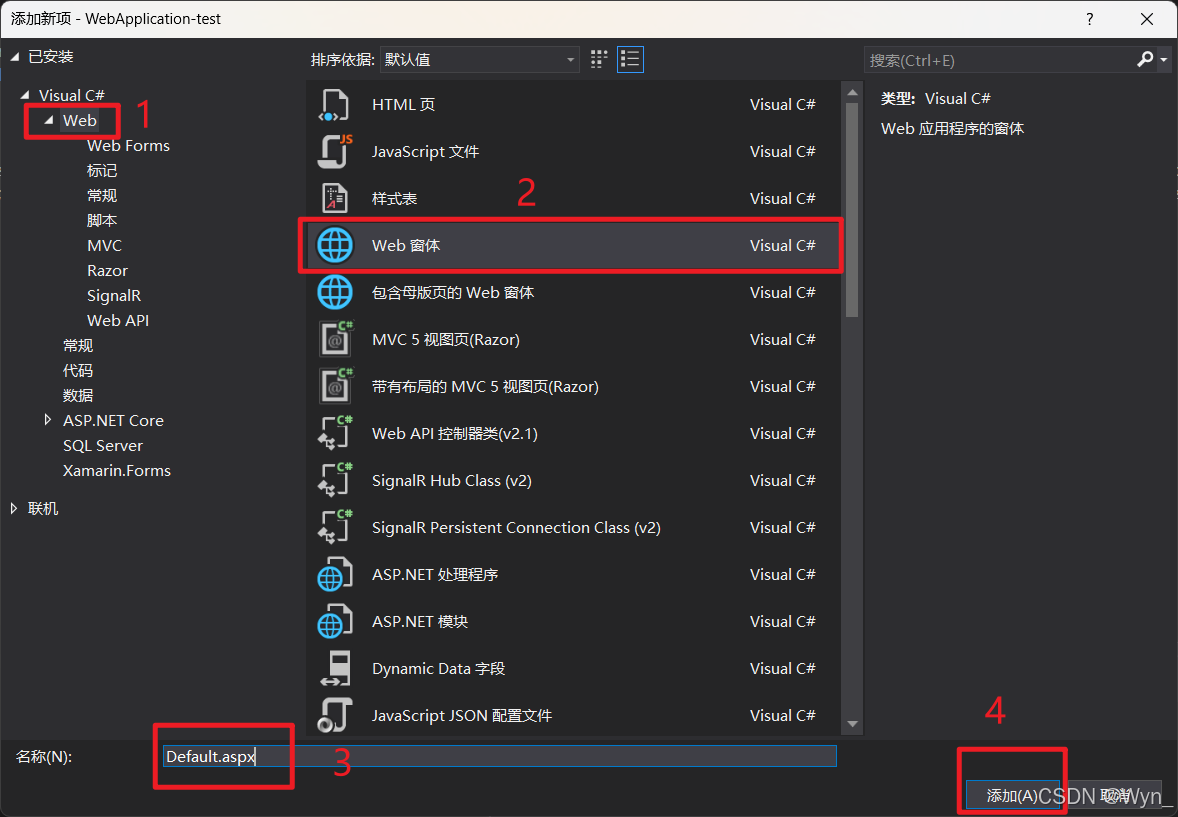
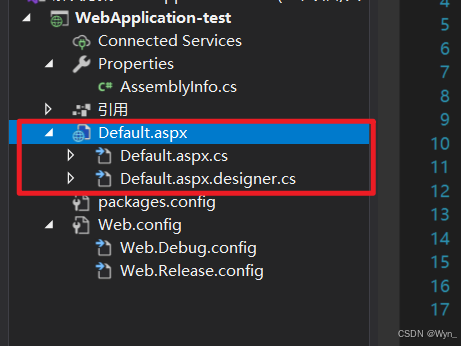
在【Web】中,选择【Web窗体】或【Web Form】,可以修改自定义名称,通常叫【Default】,点击添加
添加后目录如下
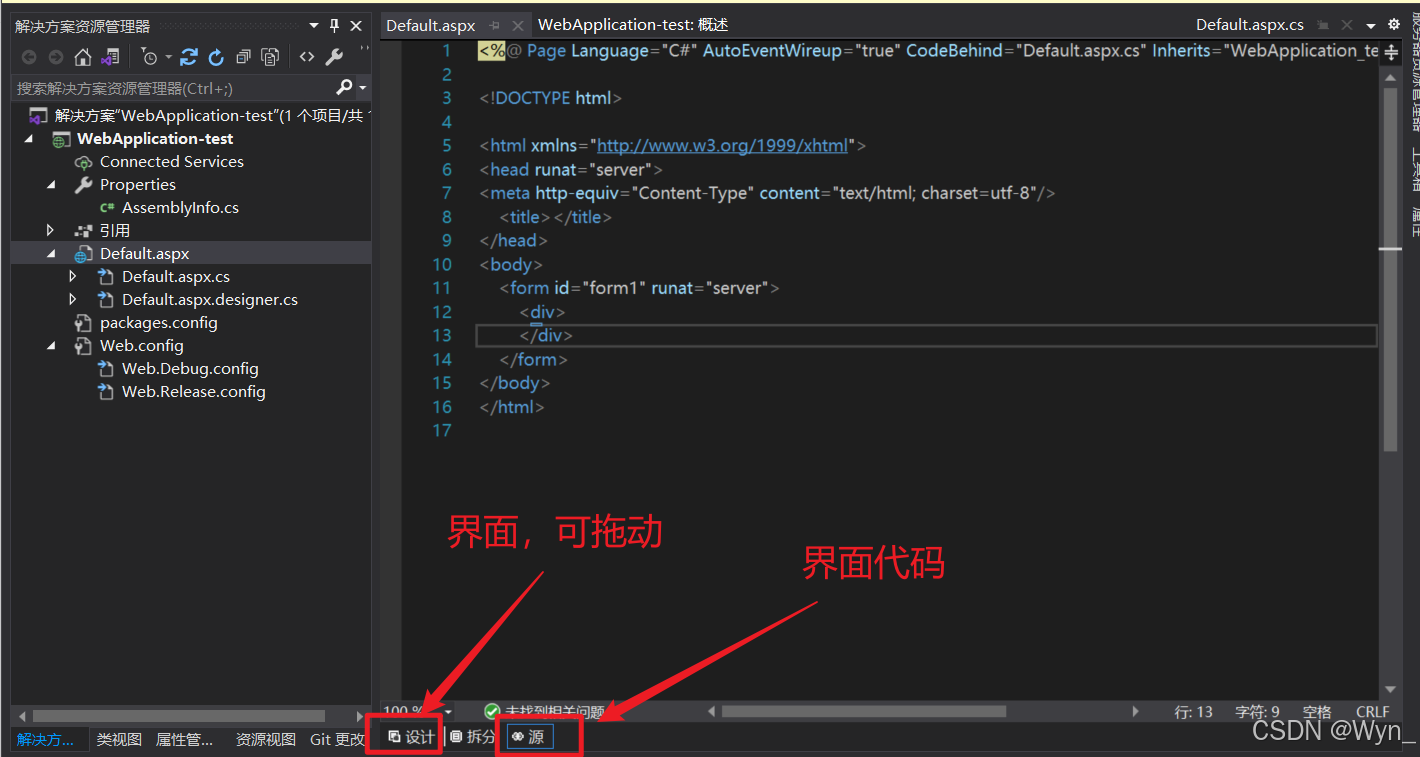
Default是一个页面,语言是xhtml,是html的变体
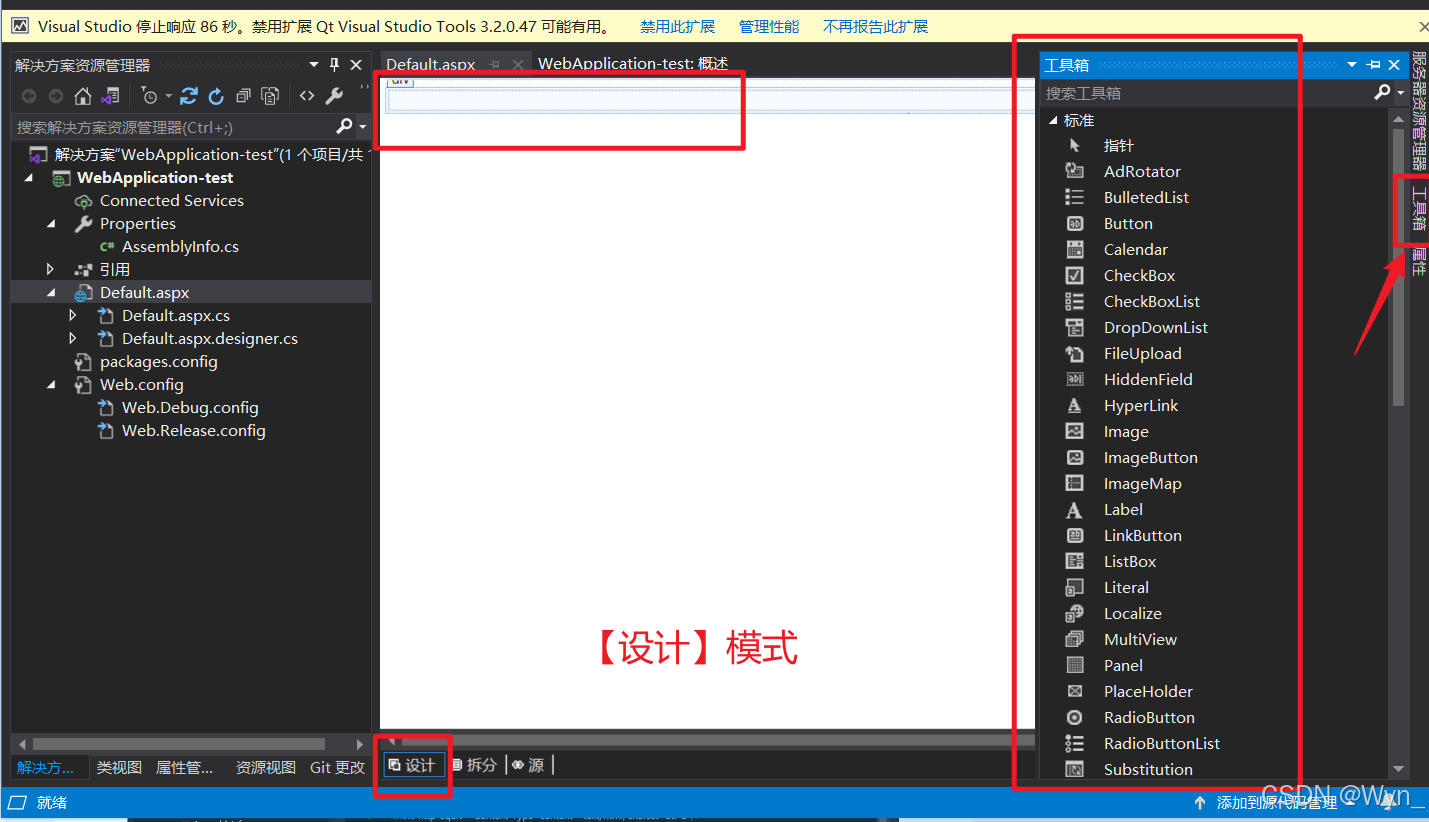
我们有两种形式编辑这个页面:用界面控件拖动的方式(类似GUI),以及纯代码书写,如下图所示,点击【设计】,是界面,可以拖动控件;点击【源】,则是纯代码。
如果使用【设计】模式,可以在右侧边栏的【工具箱】中找到很多控件,如button、label等,拖动即可
3)使用Web表单的GUI设计
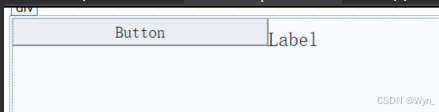
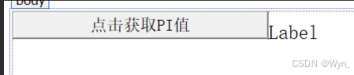
我们做一个最简单的界面,来显示WCF服务获取的PI值。我用了一个button和一个label
如果你想修改按钮的属性,注意,属性不是显示的TEXT,修改属性可以在【源】中修改button相关代码的【ID】字段
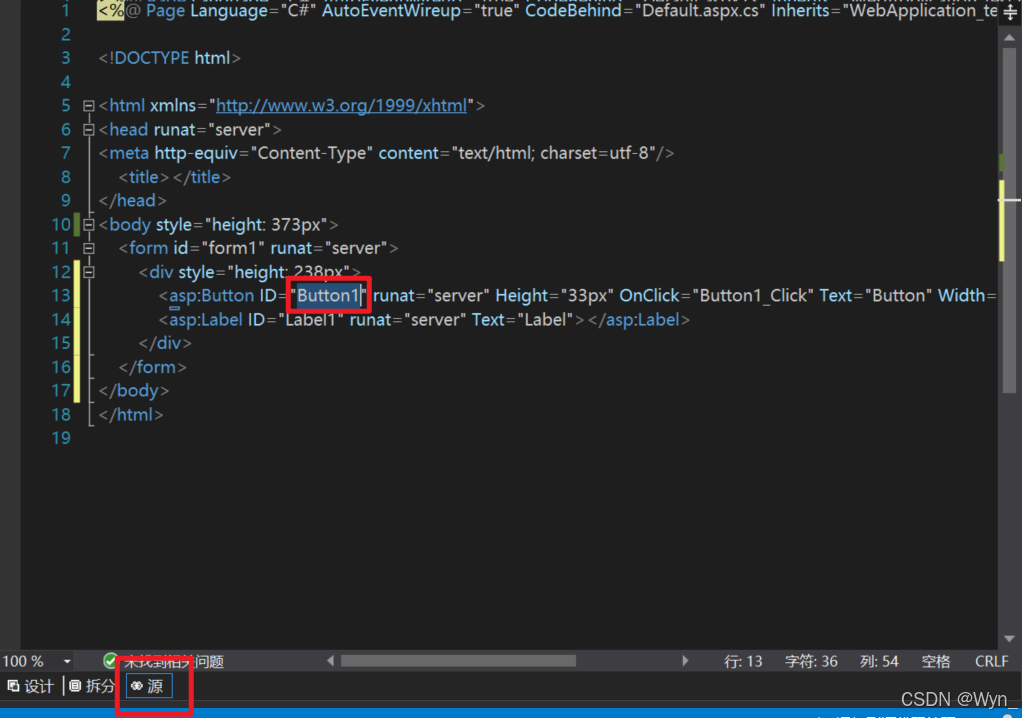
如果你想修改按钮的显示的文字,可以修改【Text】字段

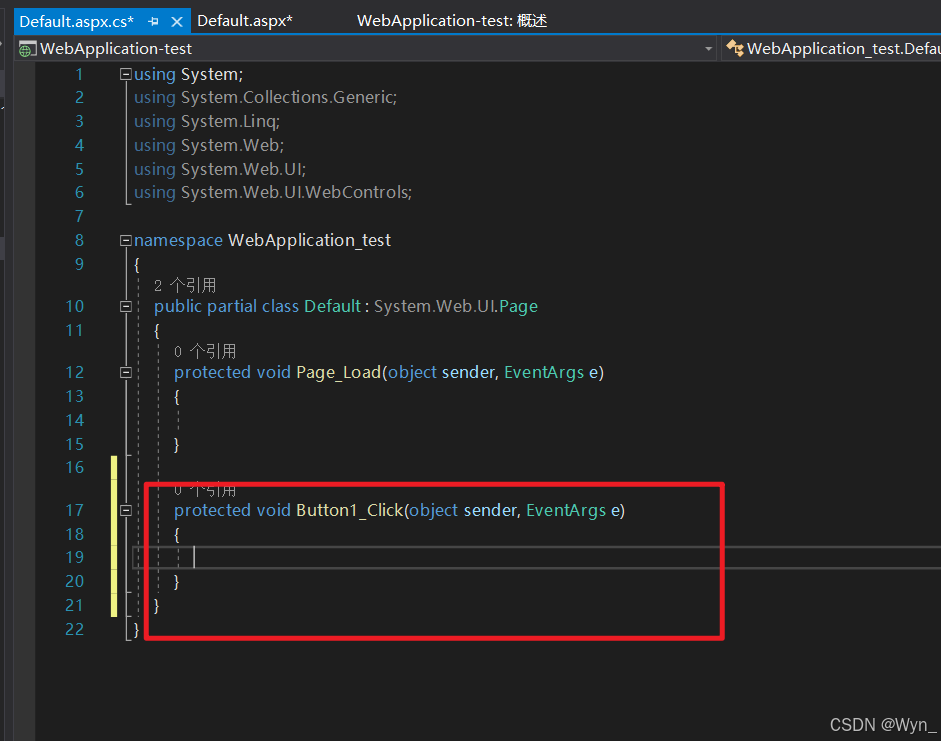
双击【button】会自动跳转到【Default.aspx.cs】文件,新增一个点击button后触发的接口,我们在这个接口中实现点击button需要做的事情:获取WCF服务的PI值
4)添加服务引用
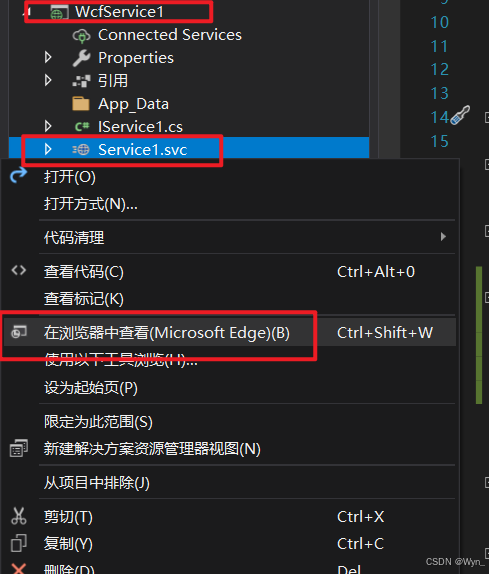
准备工作:复制WCF的服务链接
首先我们要打开WCF项目,注意是上一篇博客实现的WCF项目,我的WCF项目名字为【WcfService1】,然后找到【Service1.svc】,右键.svc,选择【在浏览器中查看】,这个时候会打开浏览器出现一个服务界面,复制这个链接。
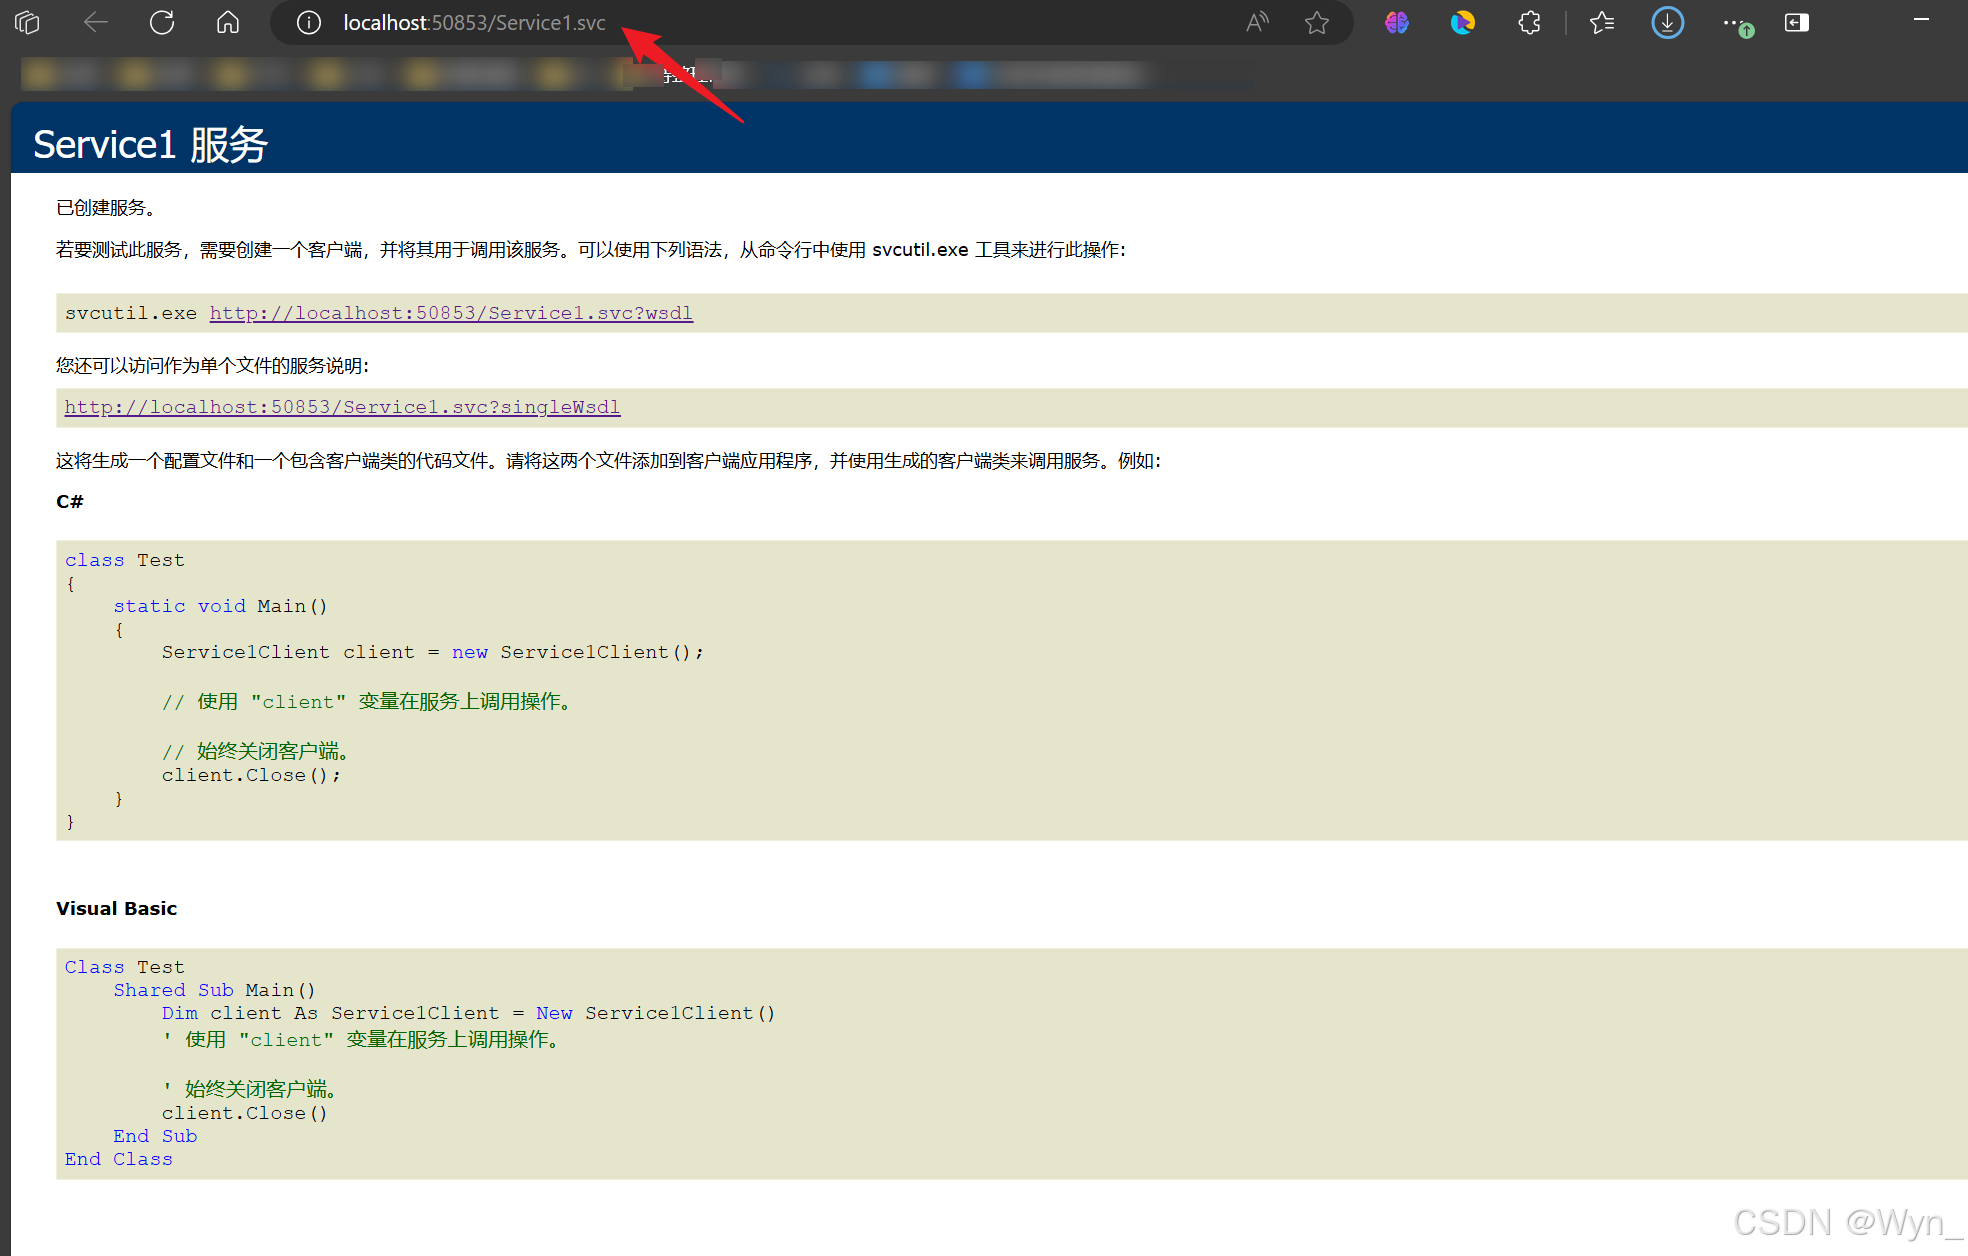
每个人的链接都不一样,请复制你的WCF服务链接

复制完链接后,我们的准备工作已经做完了,回到我们的Web项目,右键项目名称,选择【添加】-【服务引用】


请将复制的链接粘贴在【地址】中,然后点击【转到】,会出现Service1的列表
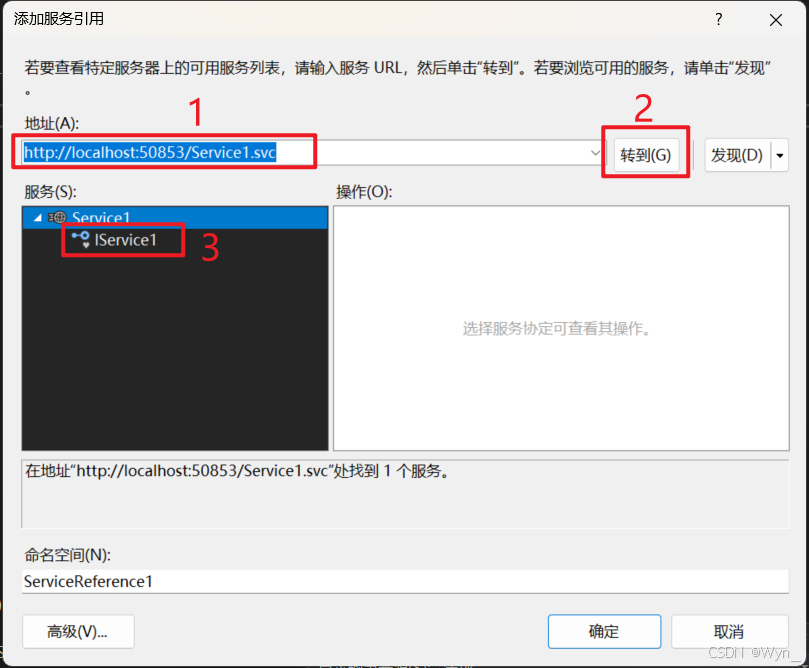
然后在服务窗口中,点一下IService1,也就是上图中的第3步,右侧空白处就会出现你这个服务所实现的具体服务名称
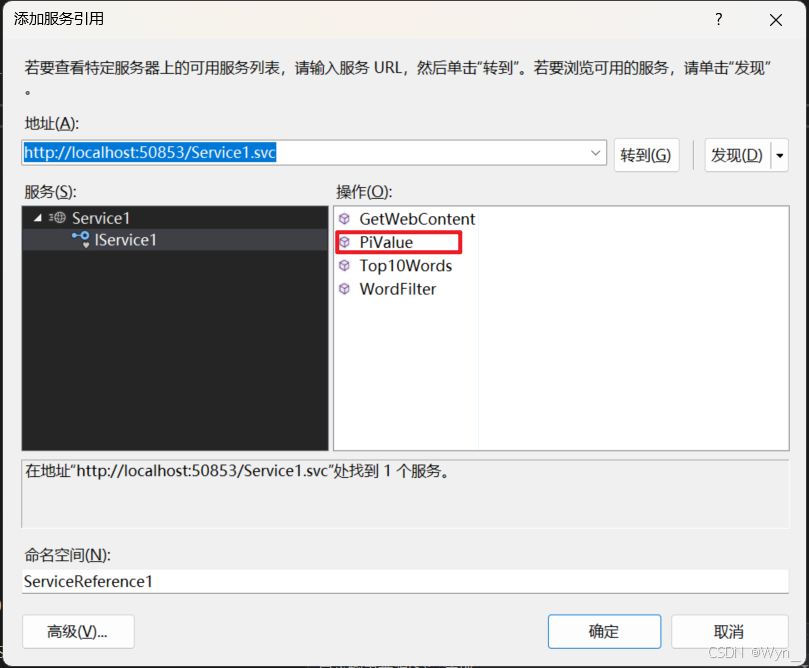
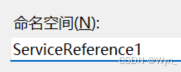
这里我们只是用PiValue就好,其余几个都是写的例子,你可以在下方的【命名空间】修改自己的服务名字,一会我们在代码里调用时需要用到这个名字,我就用默认的【ServiceReference1】,然后点击【确定】
5)在Web的button函数中调用服务,获取PI值
我们找到Web服务项目中的【】,找到双击button产生的点击函数,输入代码,将服务注册到按钮事件中
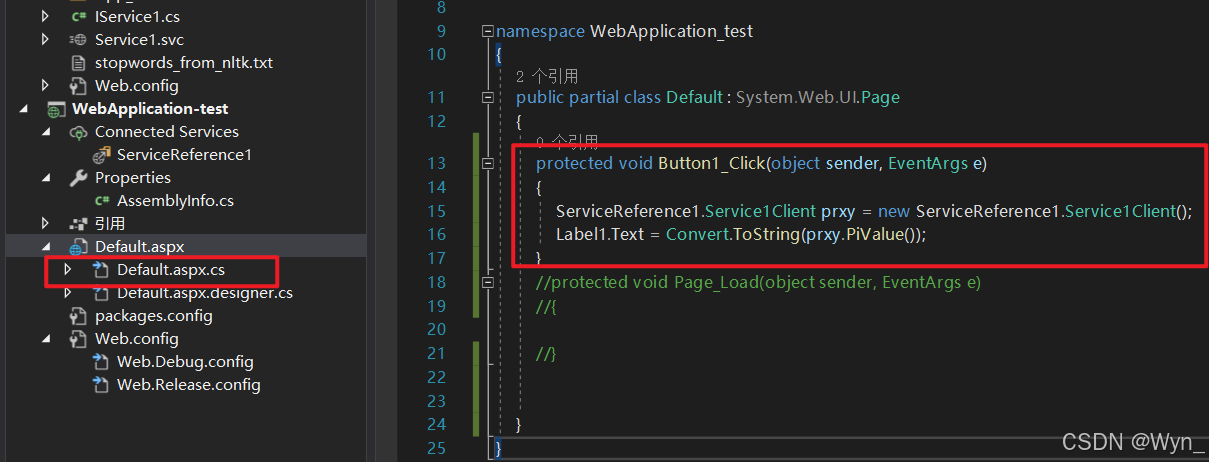
cs
protected void Button1_Click(object sender, EventArgs e)
{
    ServiceReference1.Service1Client prxy = new ServiceReference1.Service1Client();
    Label1.Text = Convert.ToString(prxy.PiValue());
}
6)测试
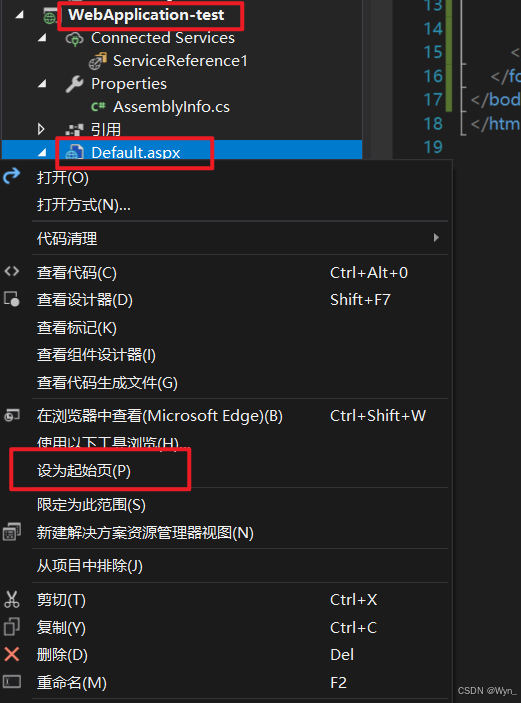
在Web项目,右键【Default.aspx】选择【设为起始页】,这样执行的时候就会从这个函数开始执行
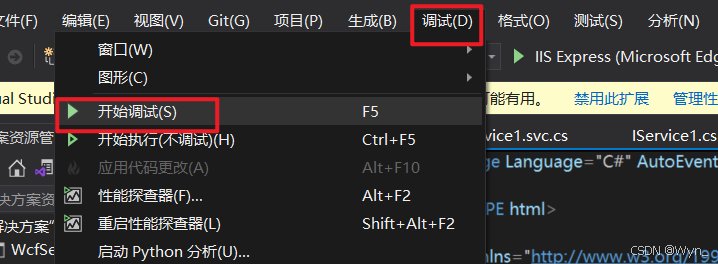
在VS2019上边栏中,选择【调试】-【开始调试】
会打开一个网页
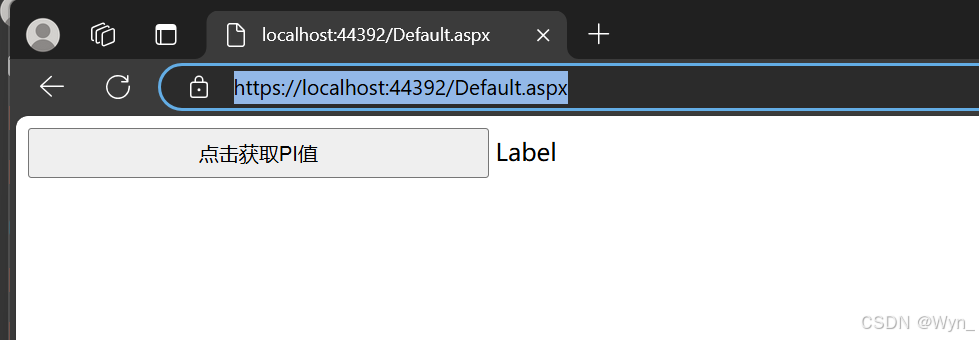
点击按钮,label处就会显示PI值了
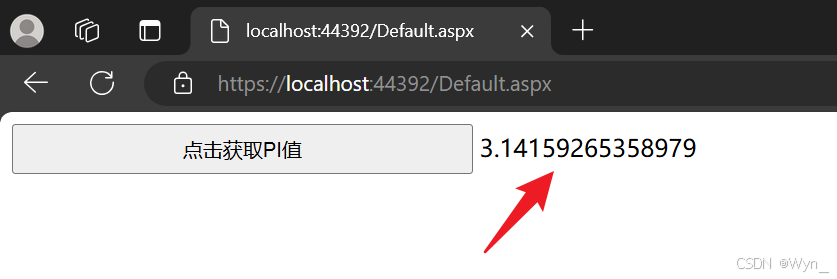
至此,WCF + ASP.NET Web的项目就结束啦,主要功能是实现在页面获取WCF服务产生的PI值,如有过程有问题,欢迎批评指正
--END--