【Harmony Next】七夕前学会创建开屏动画拿下女同事的芳心
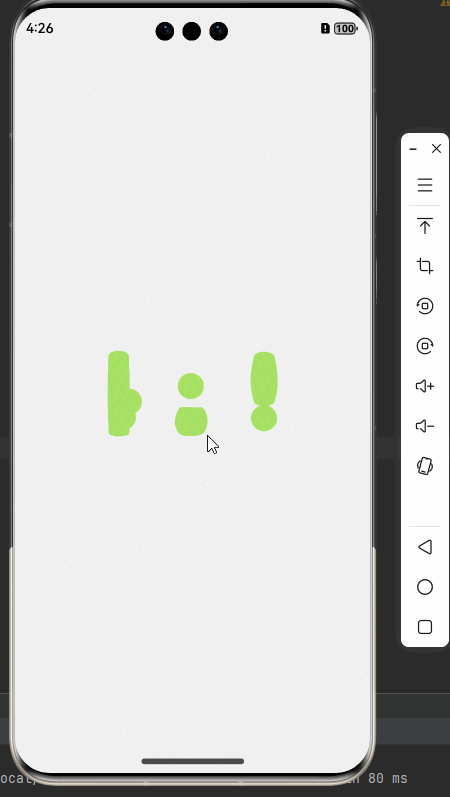
一个优秀的项目需要一个*格够高的动画来开启,下面教你用三步快速实现鸿蒙应用的开屏动画
1.创建窗口
使用windowStage.createSubWindow("splash_window")创建窗口对窗口进行管理,实现加载开屏动画
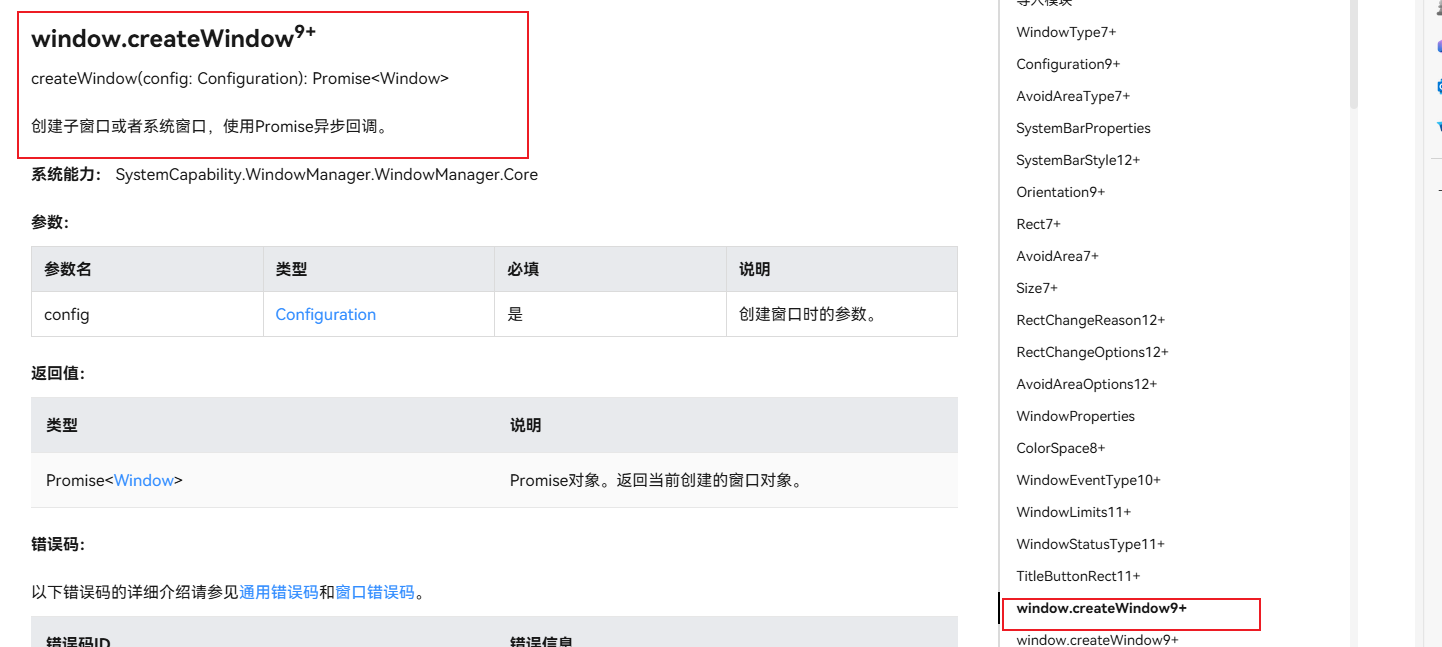
在UIAbility的生命周期里面创建窗口进行操作
tsx
async onWindowStageCreate(windowStage: window.WindowStage) {
   // Main window is created, set main page for this ability
   hilog.info(0x0000, 'testTag', '%{public}s', 'Ability onWindowStageCreate');
  actionWindowStageCreate(windowStage);
   const win = await windowStage.createSubWindow("splash_window")//创建窗口
   await win.showWindow()//显示窗口
   win.setUIContent("pages/SplashPage")//开屏动画的承载页面
   windowStage.loadContent('pages/YoutubePage', (err) => {//加载项目的主入口
     if (err.code) {
       hilog.error(0x0000, 'testTag', 'Failed to load the content. Cause: %{public}s', JSON.stringify(err) ?? '');
       return;
     }
     hilog.info(0x0000, 'testTag', 'Succeeded in loading the content.');
   });
 }
2.使用Canvas组件实现动画效果
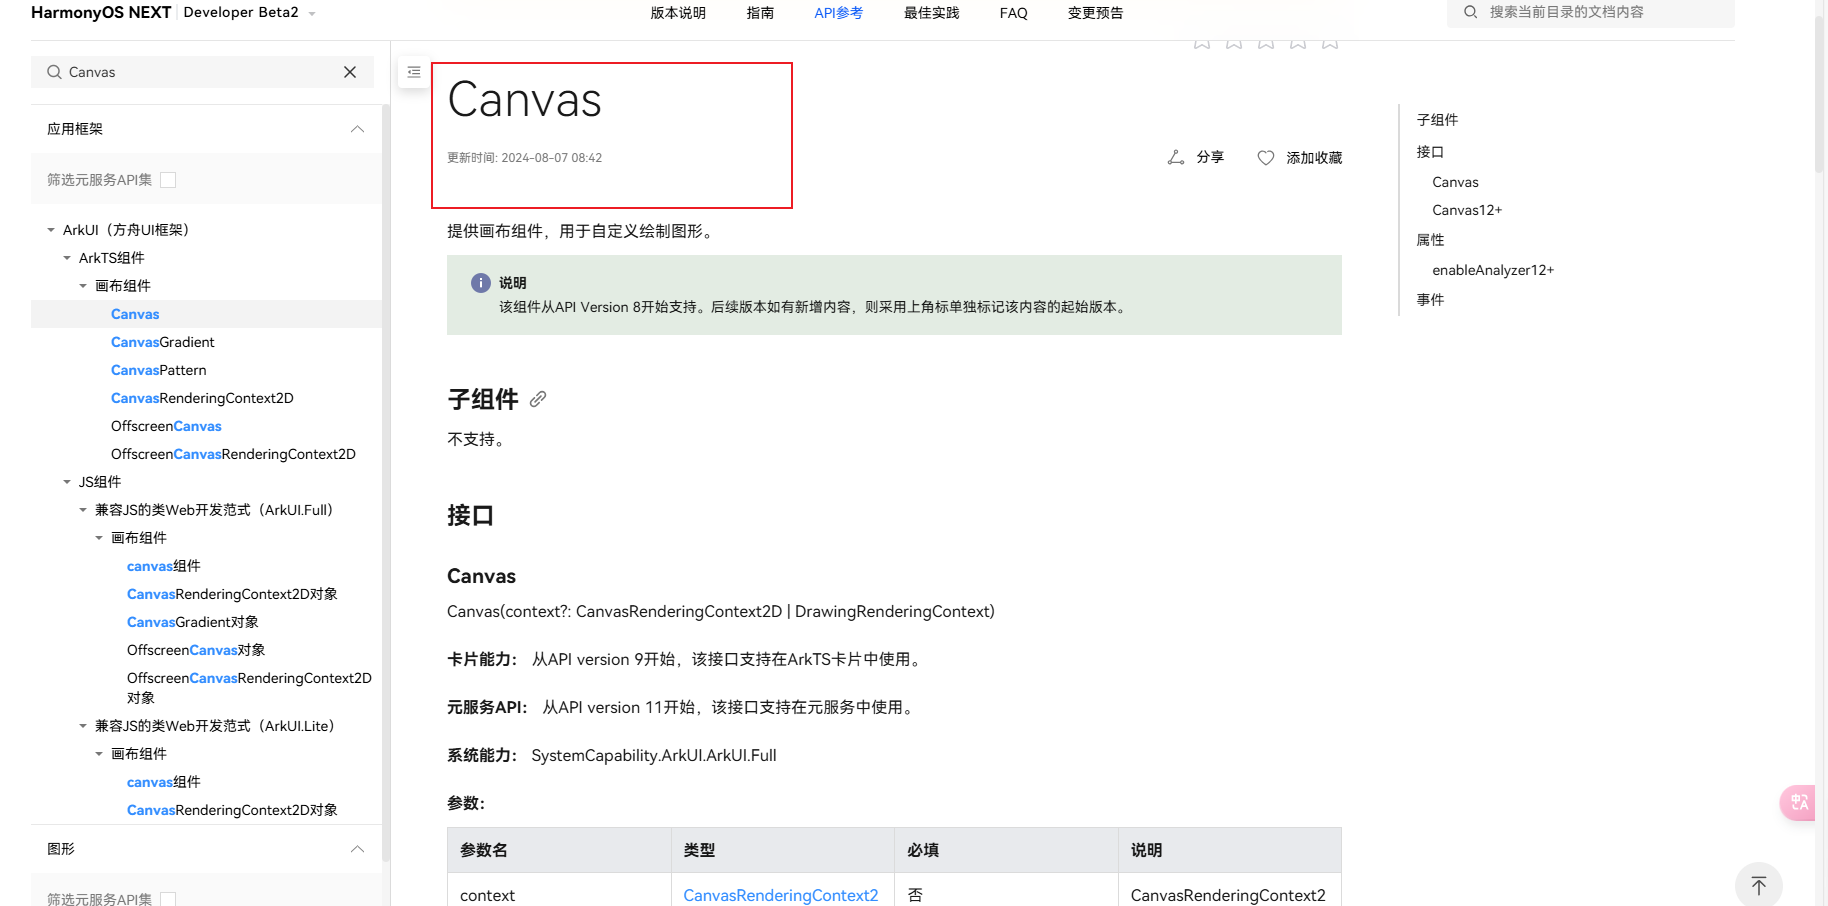
Canvas的动画实现
tsx
 private mainRenderingSettings: RenderingContextSettings = new RenderingContextSettings(true)
  private mainCanvasRenderingContext: CanvasRenderingContext2D =
    new CanvasRenderingContext2D(this.mainRenderingSettings)
  private animationItem ?: AnimationItem
  private path: string = "/lotties/ani_splash.json"
  @State pageOpacity: number = 1


Canvas(this.mainCanvasRenderingContext)
    .height(375)
    .width(375)
    .onReady(() => {
      //抗锯齿的设置
      this.mainCanvasRenderingContext.imageSmoothingEnabled = true;
      this.mainCanvasRenderingContext.imageSmoothingQuality = 'medium'
      this.animationItem = lottie.loadAnimation({
        container: this.mainCanvasRenderingContext, // 渲染上下文
        renderer: 'canvas', // 渲染方式
        loop: false, // 是否循环播放,默认true
        autoplay: true, // 是否自动播放,默认true
        contentMode: 'Fill', // 填充的模式
        frameRate: 60, //设置animator的刷帧率为30
        path: this.path, // json对象数据
      })
    })
}
.backgroundColor(Color.White)
.align(Alignment.Center)
.size(matchSize)
3.窗口的自我管理
窗口在创建后需要关闭后才能显示出程序的主入口窗口,当然一个优秀的窗口是不需要用户进行手动关闭的,需要在开屏动画页展示完成后关闭,类似于广告展示完毕后关闭
添加定时器进行实现(也可以将关闭的动作放在动画加载完的事件中去)
tsx
timer: number = -1
closeWin () {
  window.findWindow("splash_window").destroyWindow()
}
adTime:number = 0
aboutToAppear() {
  ScreenUtil.init(this)
  ScreenUtil.setFullScreen(true)
  this.timer = setInterval(() => {
    if(this.adTime === 0) {
      clearInterval(this.timer)
      this.closeWin()
      return
    }
    this.adTime--
  }, 2800)
}
核心的API: window.findWindow("splash_window").destroyWindow()
需要获取到当前的窗口再进行关闭,在创建的时候使用了关键字"splash_window"创建,使用window.findWindow可以获取到这个窗口然后进行相应的操作
完整的开屏动画页代码:
tsx
/**
 * 启屏页
 */
import { router, window } from '@kit.ArkUI'
import lottie, { AnimationItem } from '@ohos/lottie'
import { LogUtil } from '../utils/LogUtil'

import { ScreenUtil } from '../utils/ScreenUtil'
import { windowManager } from '../utils/windowManager'

let matchSize: SizeOptions = {
  width: "100%",
  height: "100%"
}

@Entry
@Component
struct SplashPage {
  private mainRenderingSettings: RenderingContextSettings = new RenderingContextSettings(true)
  private mainCanvasRenderingContext: CanvasRenderingContext2D =
    new CanvasRenderingContext2D(this.mainRenderingSettings)
  private animationItem ?: AnimationItem
  private path: string = "/lotties/ani_splash.json"
  @State pageOpacity: number = 1

  build() {
    Stack() {
      Canvas(this.mainCanvasRenderingContext)
        .height(375)
        .width(375)
        .onReady(() => {
          //抗锯齿的设置
          this.mainCanvasRenderingContext.imageSmoothingEnabled = true;
          this.mainCanvasRenderingContext.imageSmoothingQuality = 'medium'
          this.animationItem = lottie.loadAnimation({
            container: this.mainCanvasRenderingContext, // 渲染上下文
            renderer: 'canvas', // 渲染方式
            loop: false, // 是否循环播放,默认true
            autoplay: true, // 是否自动播放,默认true
            contentMode: 'Fill', // 填充的模式
            frameRate: 60, //设置animator的刷帧率为30
            path: this.path, // json对象数据
          })
        })
    }
    .backgroundColor(Color.White)
    .align(Alignment.Center)
    .size(matchSize)
  }
  timer: number = -1
  closeWin () {
    window.findWindow("splash_window").destroyWindow()
  }
  adTime:number = 0
  aboutToAppear() {
    ScreenUtil.init(this)
    ScreenUtil.setFullScreen(true)
    this.timer = setInterval(() => {
      if(this.adTime === 0) {
        clearInterval(this.timer)
        this.closeWin()
        return
      }
      this.adTime--
    }, 2800)
  }
aboutToDisappear(): void {
  windowManager.settingBarBlank()
  }
  pageTransition() {
    PageTransitionExit({ duration: 1000, curve: Curve.Ease })
      .opacity(0)
  }
}
本文由博客一文多发平台 OpenWrite 发布!