目录
[1. DataContext数据上下文](#1. DataContext数据上下文)
[2. Binding绑定源](#2. Binding绑定源)
[2.1 绑定实体](#2.1 绑定实体)
[2.2 绑定资源](#2.2 绑定资源)
[2.3 ElementName属性指明另一个控件作为数据源](#2.3 ElementName属性指明另一个控件作为数据源)
[2.4 RelativeSource属性绑定一个相对的数据源](#2.4 RelativeSource属性绑定一个相对的数据源)
[2.4.1 Self(绑定自身控件)](#2.4.1 Self(绑定自身控件))
[2.4.2 FindAncestor(找上级)](#2.4.2 FindAncestor(找上级))
[2.4.3 TemplatedParent绑定模板元素](#2.4.3 TemplatedParent绑定模板元素)
[3. Binding绑定模式](#3. Binding绑定模式)
[3.1 Mode属性](#3.1 Mode属性)
[3.2 值改变时机](#3.2 值改变时机)
[4. 前后端数据通知](#4. 前后端数据通知)
[4.1 INotifyPropertyChanged接口](#4.1 INotifyPropertyChanged接口)
[4.2 ObservableCollection泛型集合](#4.2 ObservableCollection泛型集合)
[5. 值转换器](#5. 值转换器)
[5.1 IValueConverter转换器](#5.1 IValueConverter转换器)
[5.2 IMultiValueConverter多值转换器](#5.2 IMultiValueConverter多值转换器)
[6. ValidationRule验证规则](#6. ValidationRule验证规则)
[7. 命令](#7. 命令)
[7.1 命令概述](#7.1 命令概述)
[7.2 ICommand接口](#7.2 ICommand接口)
[7.2.1 ICommand简单实现(不带参数)](#7.2.1 ICommand简单实现(不带参数))
[7.2.2 ICommand带参数实现](#7.2.2 ICommand带参数实现)
[7.2.3 ICommand的泛型参数实现](#7.2.3 ICommand的泛型参数实现)
[7.3 WPF事件转Command命令](#7.3 WPF事件转Command命令)
1. DataContext数据上下文
DataContext是获取或设置元素参与数据绑定时的数据上下文。也就是ViewModel
下面是MVVM模型的结构图:

Model作为属性存在于ViewModel中,而Model想要显示在Ul界面(View)上的,只需要将ViewModel赋值给View的DataContext(数据上下文)属性,View就可以引用ViewModel中的那些Model了。
案例如下:
首先我们定义一个ViewModel
cs
public class PersonViewModel
{
    private string name = "Tom";
    public string Name
    {
        get { return name; }
        set
        {
            name = value;
        }
    }

    private int age = 18;
    public int Age
    {
        get { return age; }
        set
        {
            age = value;
        }
    }
}
然后再前端cs文件中将ViewModel赋值给View的数据上下文
cs
public partial class MainWindow : Window
{
    public MainWindow()
    {
        InitializeComponent();

        // 绑定上下文
        panel.DataContext = new PersonViewModel();
    }
}
最后在xaml中进行绑定就可以显示数据了(以下几种方式都可,使用后面两种不用手动绑定上下文)
XML
<StackPanel x:Name="panel">
    <TextBlock Text="{Binding Name}" />
    <TextBlock Text="{Binding Age}" />
</StackPanel>
XML
<StackPanel x:Name="panel">
    <StackPanel.DataContext>
        <local:PersonViewModel />
    </StackPanel.DataContext>
    <TextBlock Text="{Binding Name}" />
    <TextBlock Text="{Binding Age}" />
</StackPanel>
XML
<Window.DataContext>
    <local:PersonViewModel />
</Window.DataContext>
<StackPanel x:Name="panel">
    <TextBlock Text="{Binding Name}" />
    <TextBlock Text="{Binding Age}" />
</StackPanel>
2. Binding绑定源
2.1 绑定实体
XML
<StackPanel x:Name="panel">
    <TextBlock Text="{Binding Name}" />
    <TextBlock Text="{Binding Age}" />
</StackPanel>
2.2 绑定资源
XML
<Window.Resources>
    <SolidColorBrush x:Key="BackgroundBrush" Color="Red" />
</Window.Resources>
<StackPanel>
    <TextBlock Text="{Binding Source={StaticResource BackgroundBrush}, Path=Color}" />
</StackPanel>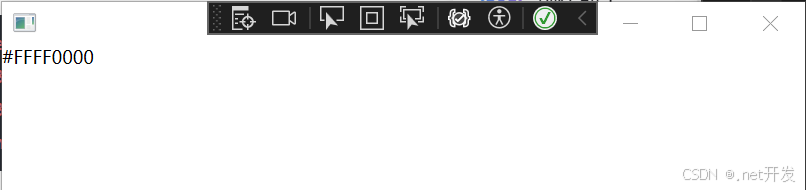
2.3 ElementName属性指明另一个控件作为数据源
XML
<StackPanel x:Name="panel">
    <TextBox x:Name="txt" Text="textBox" />
    <Label Content="{Binding ElementName=txt, Path=Text}" />
</StackPanel>
2.4 RelativeSource属性绑定一个相对的数据源
Mode:表示寻找相对数据源的模式,一共有4种模式
|-----------------|-------------------------------------------|
| 模式 | 说明 |
| PreviousData | 允许在当前显示的数据项列表中绑定上一个数据项(不是包含数据项的控件)。 |
| TemplatedParent | 引用应用了模板的元素,其中此模板中存在数据绑定元素。 |
| Self | 引用正在其上设置绑定的元素,并允许你将该元素的一个属性绑定到同一元素的其他属性上。 |
| FindAncestor | 引用数据绑定元素的父链中的上级。 这可用于绑定到特定类型的上级或其子类。 |
2.4.1 Self(绑定自身控件)
XML
 <StackPanel>
     <TextBlock Margin="10">
             <Run Text="Hello" />
             <Run Foreground="Green"
                  Text="{Binding RelativeSource={RelativeSource Mode=Self},
                 Path=Foreground}" />
     </TextBlock>
 </StackPanel>
2.4.2 FindAncestor(找上级)
XML
<StackPanel>
    <Border Margin="10">
        <Border Margin="20">
            <TextBlock>
                <Run Text="Hello" />
                <!--AncestorType:上级类型 RelativeSource:相对源 AncestorLevel:上级层级-->
                <Run Text="{Binding RelativeSource={RelativeSource Mode=FindAncestor,
                    AncestorType=Border,AncestorLevel=2}, Path=Margin}" />
            </TextBlock>
        </Border>
    </Border>
</StackPanel>
2.4.3 TemplatedParent绑定模板元素
XML
<Window.Resources>
    <ControlTemplate x:Key="MyControlTemplate" TargetType="Button">
        <Canvas>
            <Ellipse Width="{Binding RelativeSource={RelativeSource Mode=TemplatedParent},Path=Width}"
                     Height="{Binding RelativeSource={RelativeSource Mode=TemplatedParent},Path=Height}"
                     Fill="{Binding RelativeSource={RelativeSource Mode=TemplatedParent},Path=Background}"/>
        </Canvas>
    </ControlTemplate>
</Window.Resources>
<StackPanel>
    <Button Width="120" Height="45" Margin="5" Background="Green"
            Template="{StaticResource MyControlTemplate}">
    </Button>
</StackPanel>
3. Binding绑定模式
3.1 Mode属性
当一个实体的属性绑定到控件的属性之后,还需要指明这两者之间的绑定关系。这个就是Binding类的Mode属性,Mode属性是一个枚举类型。它有如下几个情况:
注:目标属性即前台UI,源属性即后台
|----------------|------------------------------------|
| 枚举值 | 说明 |
| TwoWay(常用) | 双向绑定,即导致更改源属性或目标属性时自动更新另一方。 |
| OneWay(常用) | 单向绑定,在更改绑定源(源)时更新绑定目标(目标)。 |
| OneTime | 一次绑定,在应用程序启动或数据上下文更改时,更新绑定目标。 |
| OneWayToSource | 在目标属性更改时,更新源属性。 |
| Default | 默认绑定,文本框的默认绑定是双向的,而其他大多数属性默认为单向绑定。 |
3.2 值改变时机
如果前端的值发生改变,后端的值在什么时候跟着改变。它由Binding类的UpdateSourceTrigger属性的值决定 。这个属性也是一个枚举类型。
|-----------------|-------------------------------------------------------------------|
| 枚举值 | 说明 |
| Default | 采用控件各自的UpdateSourceTrigger默认值。 |
| PropertyChanged | 每当绑定目标属性发生更改时,都会更新绑定源。 |
| LostFocus | 每当绑定目标元素失去焦点时,都会更新绑定源。 |
| Explicit | 仅在调用 System.Windows.Data.BindingExpression.UpdateSource 方法时更新绑定源。 |
4. 前后端数据通知
4.1 INotifyPropertyChanged接口
INotifyPropertyChanged接口,通知客户端属性值已更改。通常情况下 我们单独创建一个类来继承该接口,目的是ViewModel、Model都可以继承这个类,不用重复去写冗余代码。
cs
namespace WpfApp2.Common
{
    public class NotifyPropertyChanged :INotifyPropertyChanged
    {
        public event PropertyChangedEventHandler? PropertyChanged;
        /// <summary>
        /// 属性更改通知事件
        /// [CallerMemberName]添加该属性后,可以自动获取调用该方法的属性名作为参数
        /// </summary>
        /// <param name="propertyName"></param>
        protected virtual void OnPropertyChanged([CallerMemberName] string? propertyName = null)
        {
            PropertyChanged?.Invoke(this, new PropertyChangedEventArgs(propertyName));
        }
    }
}
cs
public class PersonViewModel : NotifyPropertyChanged
{
    private string name = "Tom";
    public string Name
    {
        get { return name; }
        set
        {
            name = value;
            OnPropertyChanged();
        }
    }
    private int age = 18;
    public int Age
    {
        get { return age; }
        set
        {
            age = value;
            OnPropertyChanged();
        }
    }
}
4.2 ObservableCollection泛型集合
ObservableCollection<T>泛型集合是一个动态数据集合,它可在添加、删除项目或刷新整个列表时提供通知。它继承了INotifyCollectionChanged和INotifyPropertyChanged,所以当元素数量发生变化时,前端界面也会同步发生变化。
首先定义界面用于测试:
XML
<Grid>
    <Grid.ColumnDefinitions>
        <ColumnDefinition Width="*" />
        <ColumnDefinition Width="*" />
    </Grid.ColumnDefinitions>
    <ListView x:Name="myList" ItemsSource="{Binding Persons}">
        <ListView.View>
            <GridView>
                <GridViewColumn Header="姓名" DisplayMemberBinding="{Binding Name}" Width="60" />
                <GridViewColumn Header="年龄" DisplayMemberBinding="{Binding Age}" Width="50" />
            </GridView>
        </ListView.View>
    </ListView>

    <StackPanel Grid.Column="1" Orientation="Vertical">
        <StackPanel Orientation="Horizontal" Height="Auto" Margin="10">
            <TextBlock Text="姓名:" />
            <TextBox x:Name="txtName" Width="200" />
        </StackPanel>
        <StackPanel Orientation="Horizontal" Height="Auto" Margin="10">
            <TextBlock Text="年龄:" />
            <TextBox x:Name="txtAge" Width="200" />
        </StackPanel>
        <Button Width="100" Height="20" Content="添加" Click="Add_Person" />
    </StackPanel>
</Grid>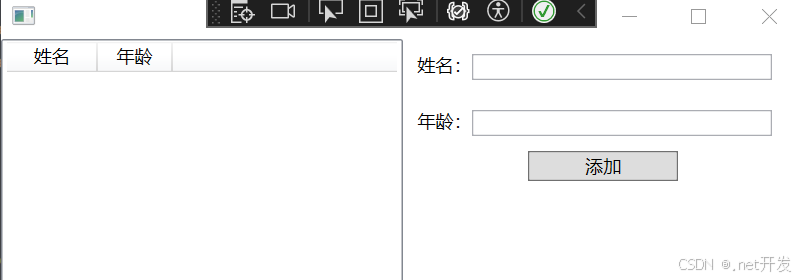
定义一个ViewModel对象,类型为ObservableCollection<PersonViewModel>:
cs
public class BindListViewModel
{
    public ObservableCollection<PersonViewModel> Persons { get; set; } = new();
}
实现添加按钮:
cs
private void Add_Person(object sender, RoutedEventArgs e)
{
    if (DataContext is BindListViewModel person)
    {
        PersonViewModel newPerson = new PersonViewModel()
        {
            Name = txtName.Text,
            Age = int.Parse(txtAge.Text)
        };
        person.Persons.Add(newPerson);
    }
}
运行效果:
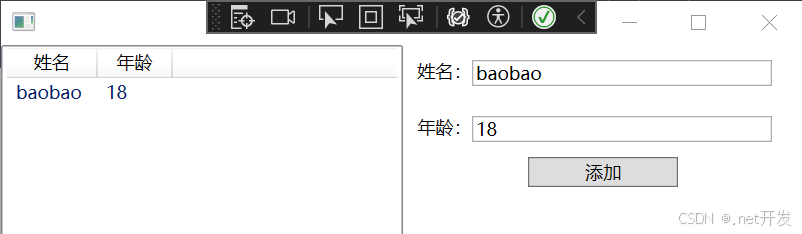
可以发现我们没有继承 INotifyPropertyChanged,但是依然实现说数据的通知,这是因为ObservableCollection继承了INotifyCollectionChanged和INotifyPropertyChanged。
5. 值转换器
5.1 IValueConverter转换器
前后端建立绑定时,定义一套自定义逻辑,让前端显示的数据与后端获取的数据建立一定的对应关系。
比如Person对象有一个年龄(Age)属性,我们在前端显示某个人的年龄时,可以根据不同的年龄,显示不同的背景颜色。这个时候,实际上是根据这个输入的整型数据返回一个不同颜色的画刷。
首先,我们定义一个根据年龄转换成不同颜色的画刷的转换器,继承IValueConverter接口,并实现它的方法:
cs
public class AgeToBrush : IValueConverter
{
    /// <summary>
    /// 根据自定义逻辑判断,返回一个object对象给前端XAML使用
    /// </summary>
    /// <param name="value"></param>
    /// <param name="targetType"></param>
    /// <param name="parameter"></param>
    /// <param name="culture"></param>
    /// <returns></returns>
    public object Convert(object value, Type targetType, object parameter, CultureInfo culture)
    {
        Brush brush = Brushes.White;
        if (value != null && int.TryParse(value.ToString(), out int age))
        {

            brush = age switch
            {
                <= 10 => Brushes.Green,
                <= 20 => Brushes.Yellow,
                <= 30 => Brushes.Orange,
                _ => Brushes.Red
            };
        }
        return brush;
    }

    /// <summary>
    /// 将前端输入的数据转换成另一个对象返回给后端的数据源
    /// </summary>
    /// <param name="value"></param>
    /// <param name="targetType"></param>
    /// <param name="parameter"></param>
    /// <param name="culture"></param>
    /// <returns></returns>
    public object ConvertBack(object value, Type targetType, object parameter, CultureInfo culture)
    {
        throw new Exception();
    }
}
讲转换器定义为资源:
XML
<Window.Resources>
    <local1:AgeToBrush x:Key="AgeToBrush" />
</Window.Resources>
进行绑定:
XML
<Window.Resources>
    <local1:AgeToBrush x:Key="AgeToBrush" />
</Window.Resources>
<StackPanel Margin="10">
    <StackPanel Orientation="Horizontal" Margin="5">
        <TextBlock Text="姓名:" />
        <TextBox x:Name="txtName" Width="100" />
    </StackPanel>
    <StackPanel Orientation="Horizontal" Margin="5">
        <TextBlock Text="年龄:" />
        <TextBox x:Name="txtAge" Width="100"
                 Background="{Binding Converter={StaticResource AgeToBrush},ElementName=txtAge,Path=Text}" />
    </StackPanel>
</StackPanel>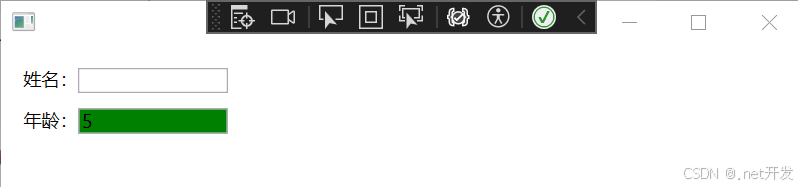
5.2 IMultiValueConverter多值转换器
实例:根据年龄以及存款进行显示评价
cs
public class MultiValueConverter : IMultiValueConverter
{
    // 第一个参数变成了values,表示它可以传入多个值
    public object Convert(object[] values, Type targetType, object parameter, CultureInfo culture)
    {
        string result = "";
        if (int.TryParse(values[0].ToString(), out int age) && decimal.TryParse(values[1].ToString(), out decimal money))
        {
            result = (age, money) switch
            {
                (<=20,>=50000) => "优秀",
                (>=40, <=50000) => "差劲",
                _ => "未知"
            };
        }
        return result;
    }

    public object[] ConvertBack(object value, Type[] targetTypes, object parameter, CultureInfo culture)
    {
        throw new NotImplementedException();
    }
}
XML
<Window.Resources>
    <local1:AgeToBrush x:Key="AgeToBrush" />
    <local1:MultiValueConverter x:Key="MultiValueConverter" />
</Window.Resources>
<StackPanel Margin="10">
    <StackPanel Orientation="Horizontal" Margin="5">
        <TextBlock Text="姓名:" />
        <TextBox x:Name="txtName" Width="100" />
    </StackPanel>
    <StackPanel Orientation="Horizontal" Margin="5">
        <TextBlock Text="年龄:" />
        <TextBox x:Name="txtAge" Width="100"
                 Background="{Binding Converter={StaticResource AgeToBrush},ElementName=txtAge,Path=Text}" />
    </StackPanel>
    <StackPanel Orientation="Horizontal" Margin="5">
        <TextBlock Text="存款:" />
        <TextBox x:Name="txtMoney" Width="100" />
    </StackPanel>
    <StackPanel Orientation="Horizontal" Margin="5">
        <TextBlock Text="评价:"/>
        <TextBlock>
            <Run>
                <Run.Text>
                    <MultiBinding Converter="{StaticResource MultiValueConverter}">
                        <Binding ElementName="txtAge" Path="Text" />
                        <Binding ElementName="txtMoney" Path="Text" />
                    </MultiBinding>
                </Run.Text>
            </Run>
        </TextBlock>
    </StackPanel>
</StackPanel>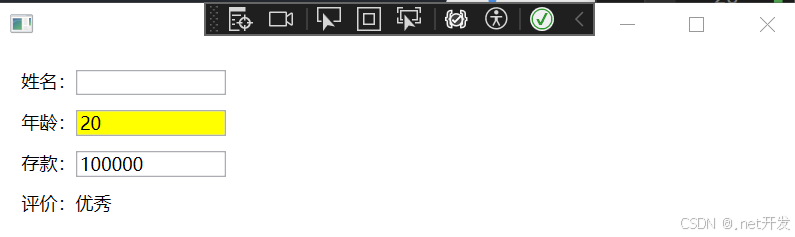
6. ValidationRule验证规则
ValidationRule是一个抽象类,提供创建自定义规则的一个方式,用于检查用户输入的有效性。
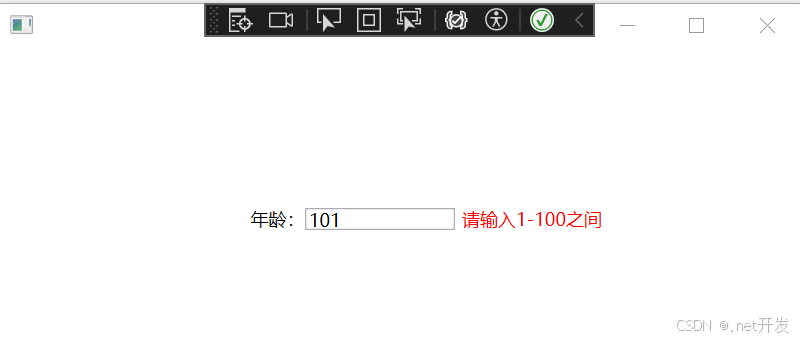
案例:判断用户输入年龄是否正常
- 定义验证规则,需要继承ValidationRule,并重写它的Validate方法
cs
public class AgeValidationRule : ValidationRule
{
    public override ValidationResult Validate(object value, CultureInfo cultureInfo)
    {
        if (int.TryParse(value.ToString(),out int age))
        {
            if (age >=1 && age <= 100)
            {
                return new ValidationResult(true, null);
            }
        }
        return new ValidationResult(false, "请输入1-100之间");
    }
}- 在xaml中绑定绑定验证规则(在进行错误信息展示时,ValidationRule会把验证结果保存在AdornedElementPlaceholder的AdornedElement属性中,所以,需要利用绑定的方法去绑定下面这个路径:AdornedElement.(Validation.Errors).CurrentItem.ErrorContent)
XML
 <Window.DataContext>
     <local3:ValidationRuleVIewModel />
 </Window.DataContext>
 <StackPanel Height="100" Width="200">
     <StackPanel Orientation="Horizontal">
         <TextBlock Text="年龄:" />
         <TextBox Width="100" Height="15">
             <!--文本绑定验证-->
             <TextBox.Text>
                 <Binding Path="Age" UpdateSourceTrigger="PropertyChanged">
                     <Binding.ValidationRules>
                         <local2:AgeValidationRule ValidatesOnTargetUpdated="True" />
                     </Binding.ValidationRules>
                 </Binding>
             </TextBox.Text>
             <!--显示错误信息-->
             <Validation.ErrorTemplate>
                 <ControlTemplate>
                     <DockPanel>
                         <TextBlock Foreground="Red" Margin="5,0,0,0" DockPanel.Dock="Right"
                             Text="{Binding ElementName=AdornedElementPlaceholder,Path=AdornedElement.(Validation.Errors).CurrentItem.ErrorContent}" />
                         <AdornedElementPlaceholder x:Name="AdornedElementPlaceholder" />
                     </DockPanel>
                 </ControlTemplate>
             </Validation.ErrorTemplate>
         </TextBox>
     </StackPanel>
</StackPanel>- 运行项目
7. 命令
7.1 命令概述
WPF 中的路由命令模型可分解为四个主要概念:命令、命令源、命令目标和命令绑定:
- 命令是要执行的操作。
- 命令源是调用命令的对象。
- 命令目标是在其上执行命令的对象。
- 命令绑定是将命令逻辑映射到命令的对象。
如上所述,命令 其实就是ICommand接口的实现,命令源 是调用命令的对象,这些对象一定会继承ICommandSource接口,而命令绑定 就像是一座桥梁,它将命令与逻辑代码建立一种映射,这座桥梁就是CommandBinding。最后使用Binding对象将命令与命令源建立绑定。
7.2 ICommand接口
7.2.1 ICommand简单实现(不带参数)
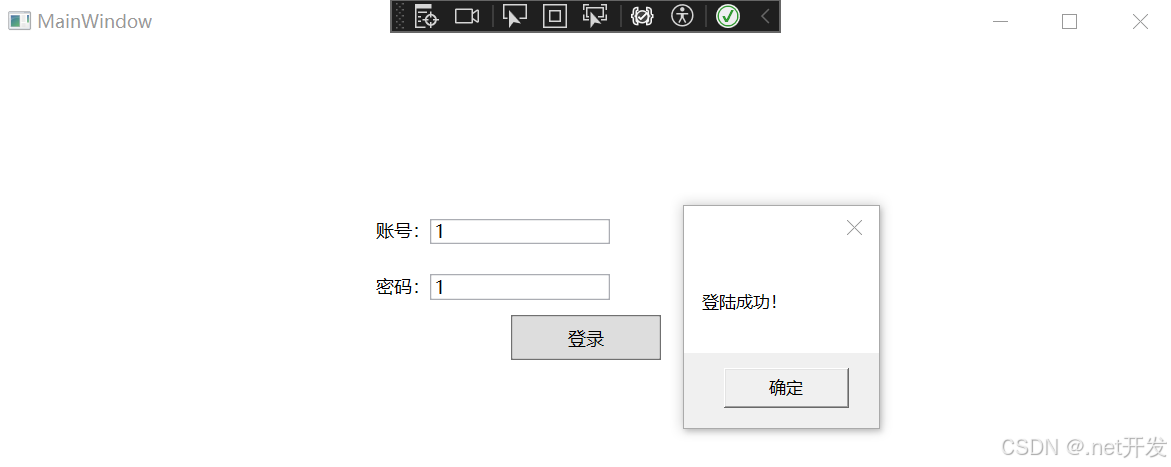
案例:模拟登陆
1. 实现ICommand(在这里定义了一个委托,因为我们虽然命令的执行逻辑一般是写在Execute中的,但是如果说项目庞大后,Execute中就会有许多内容,所以我们定义一个委托来代替我们完成)
cs
public class CommandDemo : ICommand
{
    private readonly Action _action; // 委托要执行的业务逻辑

    public CommandDemo(Action action)
    {
        _action = action;
    }

    public event EventHandler? CanExecuteChanged;

    /// <summary>
    /// 当前命令是否可以执行
    /// </summary>
    /// <param name="parameter"></param>
    /// <returns></returns>
    /// <exception cref="NotImplementedException"></exception>
    public bool CanExecute(object? parameter)
    {
        return true;
    }

    /// <summary>
    /// 执行命令
    /// </summary>
    /// <param name="parameter"></param>
    /// <exception cref="NotImplementedException"></exception>
    public void Execute(object? parameter)
    {
        _action?.Invoke();
    }
}- 建立ViewModel
cs
using System;
using System.Collections.Generic;
using System.Linq;
using System.Text;
using System.Threading.Tasks;
using System.Windows;
using WpfApp3.Common;

namespace WpfApp3.ViewMode
{
    public class ICommandViewModel : NotifyPropertyChanged
    {
        // 初始化命令
        public ICommandViewModel()
        {
            // 将登陆事件逻辑绑定到登陆命令
            LoginCommand = new CommandDemo(() =>
            {
                if (UserName == "1" && PassWord == "1")
                {
                    MessageBox.Show("登陆成功!");
                }
                else
                {
                    MessageBox.Show("用户名或密码错误!");
                }
            });
        }

        private string userName;

        public string UserName
        {
            get { return userName; }
            set
            {
                userName = value;
                OnPropertyChanged();
            }
        }

        private string passWord;

        public string PassWord
        {
            get { return passWord; }
            set
            {
                passWord = value;
                OnPropertyChanged();
            }
        }

        // 声明一个登陆命令
        public CommandDemo LoginCommand { get; set; }
    }

}
3. 在xaml中绑定命令
XML
    <Window.DataContext>
        <local1:ICommandViewModel />
    </Window.DataContext>
    <StackPanel Width="300" Height="200">
        <StackPanel Orientation="Horizontal" Margin="10">
            <TextBlock Text="账号:" />
            <TextBox Width="120" Text="{Binding UserName}" />
        </StackPanel>
        <StackPanel Orientation="Horizontal" Margin="10">
            <TextBlock Text="密码:" />
            <TextBox Width="120" Text="{Binding PassWord}" />
        </StackPanel>
        <Button Content="登录" Width="100" Height="30" Command="{Binding LoginCommand}" />
</StackPanel>- 运行项目
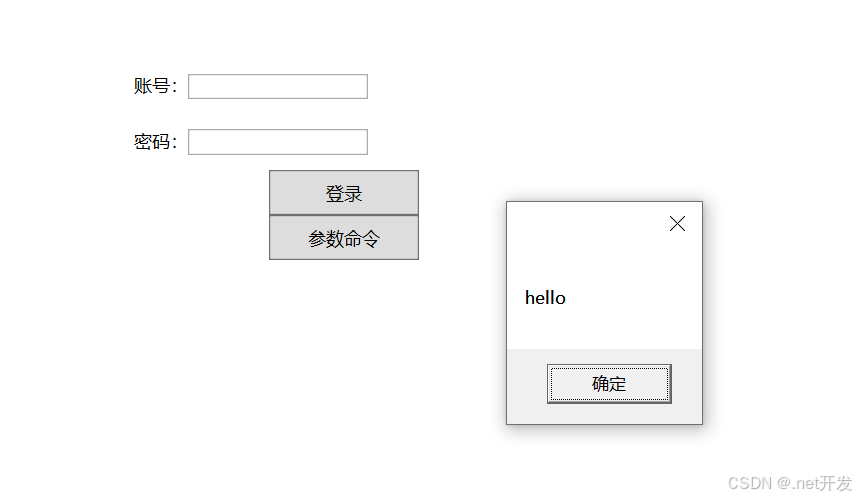
7.2.2 ICommand带参数实现
带参数的跟不带参数的实现是相似的,主需要做以下修改
- 定义带参数的委托并初始化
cs
private readonly Action<Object> _action2;

public CommandDemo(Action<Object> action)
{
    _action2 = action;
}- 在Execute方法中实现
cs
public void Execute(object? parameter)
{
    _action?.Invoke();
    _action2?.Invoke(parameter);
}- 在ViewModel中声明命令并实现
cs
public CommandDemo LoginCommand2 { get; set; }
cs
public ICommandViewModel()
{
    // 将登陆事件逻辑绑定到登陆命令
    LoginCommand2 = new CommandDemo(p =>
    {
        MessageBox.Show(p.ToString());
    });
}- 在xaml中进行绑定
XML
<Button Content="参数命令" Width="100" Height="30" Command="{Binding LoginCommand2}"
CommandParameter="hello"/>- 运行项目
7.2.3 ICommand的泛型参数实现
- 定义泛型委托命令并初始化
cs
 public class RelayCommand<T> : ICommand
 {
     public event EventHandler? CanExecuteChanged;
     private Action<T> _action { get; set; }
     public RelayCommand(Action<T> action)
     {
         _action = action;
     }

     public bool CanExecute(object? parameter)
     {
         return true;
     }

     public void Execute(object? parameter)
     {
         _action?.Invoke((T)parameter);
     }
}- 建ViewModel,初始化委托
cs
namespace WpfApp3.ViewMode
{
    public class ManyMultiCommandViewModel : NotifyPropertyChanged
    {
        public RelayCommand<InputCommandParam> MutilParamCommand { get; set; }
        public ManyMultiCommandViewModel()
        {
            MutilParamCommand = new RelayCommand<InputCommandParam>(p =>
            {
                MessageBox.Show($"Id:{p.Id},Name:{p.Name}");
            });
        }
    }

    // 声明接收多个参数的类型
    public class InputCommandParam
    {
        public int Id { get; set; }
        public string Name { get; set; }
    }
}- 创建值转换器
cs
public class MultiCommandParamConverter : IMultiValueConverter
{
    public object Convert(object[] values, Type targetType, object parameter, CultureInfo culture)
    {
        InputCommandParam input = new()
        {
            Id = System.Convert.ToInt32(values[0]),
            Name = values[1].ToString()
        };
        return input;
    }

    public object[] ConvertBack(object value, Type[] targetTypes, object parameter, CultureInfo culture)
    {
        throw new NotImplementedException();
    }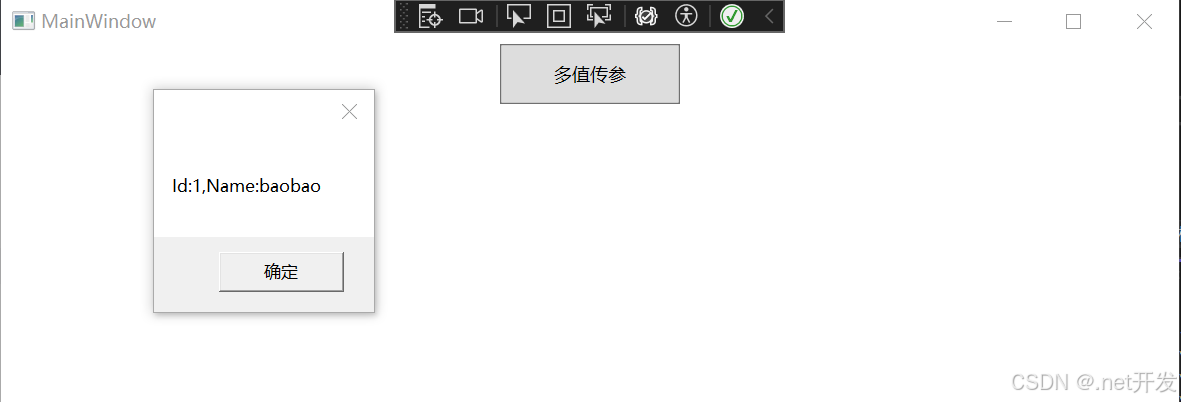
}- xaml中进行绑定
XML
<Window.DataContext>
    <local1:ManyMultiCommandViewModel />
</Window.DataContext>
<StackPanel>
    <Button Content="多值传参" Width="120" Height="40"
            Command="{Binding MutilParamCommand}">
        <Button.Resources>
            <local2:MultiCommandParamConverter x:Key="MultiCommandParamConverter" />
        </Button.Resources>
        <Button.CommandParameter>
            <!--Source:直接给参数赋值-->
            <MultiBinding Converter="{StaticResource MultiCommandParamConverter}">
                <Binding Source="1" />
                <Binding Source="baobao" />
            </MultiBinding>
        </Button.CommandParameter>
    </Button>
</StackPanel>- 运行项目
7.3 WPF事件转Command命令
什么是WPF事件转Command命令?就比如我们执行某个事件后需要通过这个事件去执行其他的命令。
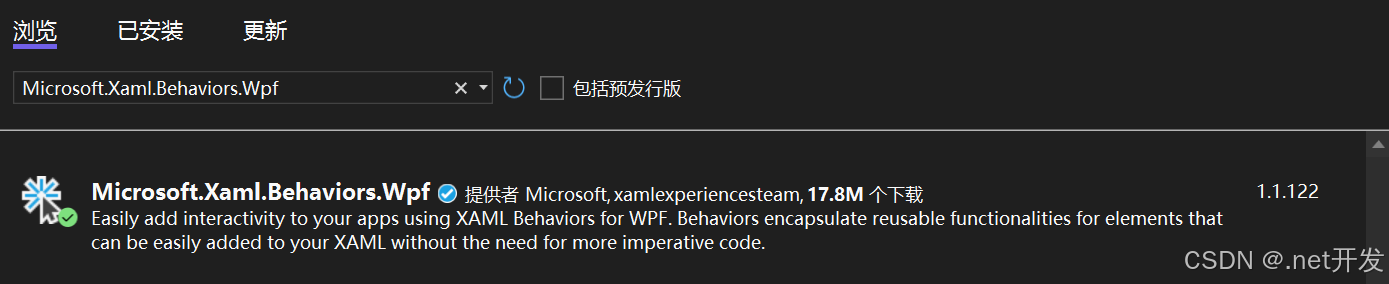
这时候就需要用到WPF提供的一个组件,它的名字叫Microsoft.Xaml.Behaviors.Wpf,通过NuGet去下载。
- 安装NuGet包
- 定义ViewModel,初始化命令
cs
public class EventToCommandViewModel : NotifyPropertyChanged
{
    public CommandDemo TextClick { get; set; }

    private string text;

    public string Text
    {
        get { return text; }
        set
        {
            text = value;
            OnPropertyChanged();
        }
    }

    public EventToCommandViewModel()
    {
        TextClick = new CommandDemo(p =>
        {
            Text += $"当前时间:{DateTime.Now},参数:{p} \n";
        });
    }
}- 在xaml中进行绑定(鼠标点击表格后实现TextClick命令操作)
XML
<Window.DataContext>
    <local1:EventToCommandViewModel />
</Window.DataContext>
<StackPanel>
    <TextBox TextWrapping="Wrap" Text="{Binding Path=Text}">
        <nuget1:Interaction.Triggers>
            <!--PreViewMouseDown:鼠标按下时引发的事件-->
            <nuget1:EventTrigger EventName="PreviewMouseDown">
                <nuget1:InvokeCommandAction Command="{Binding TextClick}"
                                            CommandParameter="hello">

                </nuget1:InvokeCommandAction>
            </nuget1:EventTrigger>
        </nuget1:Interaction.Triggers>
    </TextBox>
</StackPanel>- 运行项目
