前言
- 本系列教程我们来看看如何使用Android Studio去开发一个APK用于用户的实时行程记录
- 前两期我们已经熟悉了kotlin语言特性和android studio一个项目模板的项目结构,本节将设计一个简单的UI,包含一个图片和文本及其一个按钮,当用户按下按钮时候将输出用户的位置信息
01 添加位置权限
- 为了在Android应用中获取用户的位置信息,我们需要在
AndroidManifest.xml文件中添加位置相关的权限。(上一节我们提到过AndroidManifest描述了应用程序的组件以及应用程序的权限、主题和所需的库。) - 在
<manifest>标签内,添加如下代码:
xml
<uses-permission android:name="android.permission.ACCESS_FINE_LOCATION" />
<uses-permission android:name="android.permission.ACCESS_COARSE_LOCATION" />
<uses-permission android:name="android.permission.INTERNET" />ACCESS_FINE_LOCATION:允许应用程序访问精确的位置信息。ACCESS_COARSE_LOCATION:允许应用程序访问大致的位置信息。
02 设计程序界面
2-1 打开界面
-
我们这一节来设计一个简单的界面,回顾上一节,
res/layout/activity_main.xml描述了MainActivity的界面设计
-
我们在右上角找到split按钮如下:
-

-
如此一来我们就可以实时进行xml编写和查看效果展示了

2-2 导入图片
-
上一节说到,
res/drawable文件夹通常存放图像资源,这里我们导入一张下载好的图片,放到drawable中,这时候图像就可以通过@drawable/pyrmont被访问
-
我们在activity_main.xml中添加一个ImageView组件,并指定位置,这时候图片就被导入到我们的界面中了

-
这时候我们点击图片右侧圆形,拖动直至右边框,这样图片就被绑定到界面的右侧

-
这样无论是怎么样的设备,图像都会加载到屏幕的最右侧

-
同理我们把图片绑定到正中央,代码会根据拖动自动生成对应的代码

xml
<ImageView
    android:layout_width="271dp"
    android:layout_height="278dp"
    android:src="@drawable/pyrmont"
    app:layout_constraintBottom_toBottomOf="parent"
    app:layout_constraintEnd_toEndOf="parent"
    app:layout_constraintStart_toStartOf="parent"
    app:layout_constraintTop_toTopOf="parent"
    app:layout_constraintVertical_bias="0.291">
</ImageView>
2-3 添加文本
- 同样我们添加一个文本
xml
<TextView
    android:id="@+id/text_location"
    android:layout_width="match_parent"
    android:layout_height="wrap_content"
    android:layout_margin="10dp"
    android:text="当前位置"
    android:textSize="20sp"
app:layout_constraintTop_toBottomOf="@+id/imageView"></TextView>android:id="@+id/text_location": 为TextView设置了一个唯一标识符,这样我们可以在代码中引用它
android:layout_width="match_parent": 设置TextView的宽度为父容器(通常是Activity的布局)的宽度。android:layout_height="wrap_content": 设置TextView的高度为足够包裹其内容的最大高度。android:layout_margin="10dp": 在TextView的上下左右四个方向都添加了10dp的边距。dp(密度无关像素)是一个相对单位,用于根据屏幕密度调整元素的大小。android:text="当前位置": 设置TextView中显示的文本内容为"当前位置"。android:textSize="20sp": 设置文本的大小为20sp(scale-independent pixels,与密度无关的像素)。sp单位与dp类似,但它是专门为字体大小设计的,可以根据用户的字体大小偏好自动缩放。- 这里我们同样拖动文本框的上部分到派蒙图片的正下方,代码自动生成
app:layout_constraintTop_toBottomOf="@+id/imageView"></TextView>
2-4 添加按钮
- 这里我们来学习如何自定义样式的按钮,我要创建一个灰色背景色,白色按钮的样式
- 搜先我们先来添加颜色,上一节我们提到了
res/values/colors.xml中存放了基本的颜色
xml
<?xml version="1.0" encoding="utf-8"?>
<resources>
    <color name="black">#FF000000</color>
    <color name="white">#FFFFFFFF</color>
    <color name="gray">#A8A8A8</color> <!-- 灰色 -->
</resources>- 同时我们在在res文件夹下创建styles.xml,用于存档风格资源
xml
<?xml version="1.0" encoding="utf-8"?>
<resources>
    <style name="CustomGrayButtonStyle">
        <item name="android:textSize">30sp</item>
        <item name="android:textColor">@color/white</item> <!-- 白色文本 -->
        <item name="android:backgroundTint">@color/gray</item> <!-- 灰色背景 -->
        <item name="android:padding">10dp</item>
        <item name="android:layout_margin">10dp</item>
        <item name="android:layout_width">187dp</item>
        <item name="android:layout_height">113dp</item>
</style></resources>- 回到activity_main.xml,我们就可以直接引用这个按钮了
xml
<Button
    android:id="@+id/button_getLocation"
    android:text="开!"
    style="@style/CustomGrayButtonStyle"
    app:layout_constraintBottom_toBottomOf="parent"
    app:layout_constraintEnd_toEndOf="parent"
app:layout_constraintStart_toStartOf="parent" />-
同时我们绑定按钮在最下方的正中央

-
好至此我们简单的界面设计完毕,我们来完善代码
3 编写获取位置具体代码逻辑(方法1)
3-1 实例化控件
- 我们实例化刚刚设计的按钮和文本,我们需要导入库,这里导入一个
Toast,Toast是 Android 系统中提供的一种轻量级反馈机制,用于向用户显示简短的消息提示。它是一种非侵入式的 UI 元素,通常在屏幕底部以弹窗的形式出现,并在一段时间后自动消失,不会干扰用户的当前操作。
kotlin
import android.widget.Button
import android.widget.TextView
import android.widget.Toast- 记得我们第一节提到的延迟实例化的时候使用lateinit
kotlin
lateinit var button_location: Button
lateinit var text_location:TextView- 获取控件
kotlin
button_location = findViewById<Button>(R.id.button_getLocation)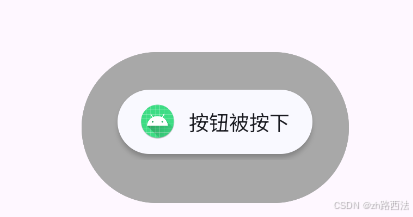
text_location=findViewById<TextView>(R.id.text_location) - 同时我们为按钮绑定一个函数,当用户按下按钮时,会弹出一个信息,过一会就会自动消失
kotlin
button_location.setOnClickListener {
	Toast.makeText(this, "按钮被按下", Toast.LENGTH_SHORT).show()
} 
3-2 获取位置
FusedLocationProviderClient是 Google Play 服务提供的一个类,用于简化对设备位置信息的访问。它是一个高级的 API,旨在提供更准确和更高效的位置信息,同时减少电池消耗。FusedLocationProviderClient结合了多种位置来源,包括 GPS、Wi-Fi 和移动网络,以提供最佳的位置信息。
kotlin
lateinit var fusedLocationProviderClient:FusedLocationProviderClient- 这里我们编写一个
getUserLocation函数,用于获取用户设备的当前地理位置。
kotlin
private fun getUserLocation() {
    if (ContextCompat.checkSelfPermission(this, android.Manifest.permission.ACCESS_FINE_LOCATION) != PackageManager.PERMISSION_GRANTED) {
        ActivityCompat.requestPermissions(this, arrayOf(android.Manifest.permission.ACCESS_FINE_LOCATION), 100)
        Toast.makeText(this,"未获取权限",Toast.LENGTH_LONG).show()
            return
    }

    val location=fusedLocationProviderClient.lastLocation
    location.addOnSuccessListener {
        if(it!=null)
        {
            val latitude = it.latitude.toString()
            val longitude = it.longitude.toString()
            text_location.text = "Latitude: $latitude\nLongitude:$longitude"
        }
    }
    location.addOnFailureListener {exception ->

        text_location.text=exception.localizedMessage

        Toast.makeText(this, "获取位置信息失败: ${exception.localizedMessage}", Toast.LENGTH_LONG).show()
    }

}- 搜先我们需要检查应用是否有访问精确位置(GPS)的权限
kotlin
ContextCompat.checkSelfPermission(this, android.Manifest.permission.ACCESS_FINE_LOCATION) != PackageManager.PERMISSION_GRANTE- 如果用户没有同意,我们需要
ActivityCompat.requestPermissions(this, arrayOf(android.Manifest.permission.ACCESS_FINE_LOCATION), 100)请求权限,并将请求码设置为100。同时,弹出一个 Toast 提示用户未获取权限。 - 如果应用有权限,调用
fusedLocationProviderClient.lastLocation方法来获取设备的最后已知位置。这个方法返回一个Task<Location>对象addOnSuccessListener添加一个成功监听器,当位置获取成功时,这个监听器会被调用。addOnFailureListener添加一个失败监听器,当位置获取失败时,这个监听器会被调用。
- 最后我们吧这个函数和按钮绑定
kotlin
button_location.setOnClickListener{
    getUserLocation()
}
3-3 运行
-
运行会进行位置提示,用户可以选择是否允许使用位置权限

-
同意权限将输出位置的经纬度信息

-
Android Studio 模拟器默认的经纬度位置通常是位于美国加利福尼亚州的谷歌总部附近,即纬度大约为 37.4219999,经度大约为 -122.084。这个位置是模拟器在启动时默认设置的,因此,如果你没有在模拟器设置中更改位置,那么应用获取到的位置信息将会是这个默认位置。

-
值得一提的是我们可以修改虚拟设备的GPS位置,找到Extended Controls

-
在Location中可以更改地理位置

-
此外细心的朋友会发现一个小问题,这里使用的定位是基于Google Play服务的,那如果用户手机不支持这个服务怎么办,后面我们会细说
4 导出APK
APK
- APK(Android Package Kit)是一种用于打包和分发Android应用程序的文件格式。它包含了应用程序的所有文件,如代码、资源、资产、证书和清单文件等。APK文件是Android操作系统中应用程序安装和更新的基本单元。
- APK文件通常具有
.apk扩展名,并且可以被安装在支持Android的设备上。
导出APK
-
成功在模拟器运行了这个小demo,相信各位已经迫不及待想在自己手机尝试了吧
-
在build中选择生成APK

-
这里我们选择APK

-
初次使用的话需要新建存储钥匙

-
这里看着填一下就行

-
创建完后选择钥匙存储地,再次next

-
选择APK生成位置,选择release版本,点击create等待片刻

-
APK生成成功后会出现提示

-
我们来到安装位置,就拿到我们的APK文件了

5 实机运行与问题分析
遇到问题
-
拿到APK放到手机上是否满心欢喜?没事,不出意外的话该出意外了
-
我们把APK移动到手机上,点击安装,运行,然后,完辣

-
仔细的朋友已经明白了,我的手机没有google play服务,天塌了亚(不是)
-
在用户设备不支持Google Play的情况下,我们可以使用其他方式来获取用户的地理位置。一个常见的选择是使用Android的
LocationManagerAPI,该API是Android原生支持的一部分,不需要依赖Google Play服务。
6 获取位置再战(方法2)
6-1 LocationManager
LocationListener是 Android 开发中的一个接口,它允许我们的应用接收关于设备位置变化的更新。当设备的位置发生改变时,系统会通过LocationListener调用我们的应用中实现的方法,以便我们能够根据这些变化做出相应的反应。- 我们继承自
LocationListener
kotlin
class MainActivity : AppCompatActivity(),LocationListener-
LocationListener接口包含以下三个方法:onLocationChanged(Location location): 当设备的位置发生变化时,这个方法会被调用。我们可以通过传递给这个方法的Location对象来获取新的位置信息,如经度、纬度、海拔等。onStatusChanged(String provider, int status, Bundle extras): 当位置提供者的状态发生变化时,这个方法会被调用。状态变化可能包括位置提供者变为可用、不可用或者位置更新发生错误。provider参数指定了位置提供者的名称,如LocationManager.GPS_PROVIDER或LocationManager.NETWORK_PROVIDER。onProviderEnabled(String provider): 当位置提供者被启用时,这个方法会被调用。这通常发生在用户在设置中启用 GPS 或网络位置服务时。onProviderDisabled(String provider): 当位置提供者被禁用时,这个方法会被调用。这通常发生在用户在设置中禁用 GPS 或网络位置服务时。
-
要使用
LocationListener,我们需要在我们的应用中实现这个接口,并在适当的时候注册和注销监听器。注册监听器通常是通过调用LocationManager.requestLocationUpdates()方法来完成的,而注销监听器则是通过调用LocationManager.removeUpdates()方法。 -
但值得一提的是,onStatusChanged,onProviderEnabled,onProviderDisabled这几个函数在API 29以上的版本被设置为过时了

-
我们继承自LocationListener,并点击红色灯泡选择复写方法

-
选择方法

-
代码自动就会为你生成
kotlin
override fun onLocationChanged(p0: Location) {
    TODO("Not yet implemented")
}
6-2 配置LocationMannager
-
LocationManager是 Android 系统中用于管理设备位置服务的类。它允许您访问各种位置提供者,如 GPS、Wi-Fi 和移动网络,以获取设备的当前位置。LocationManager提供了多种方法来查询和监听位置更新,以及管理位置提供者的状态。- GPS_PROVIDER: 提供最准确的位置数据,但功耗较高。
- NETWORK_PROVIDER: 使用设备的网络连接(如 Wi-Fi 和移动数据)来获取位置,速度较快但精度较低。
- PASSIVE_PROVIDER: 不主动获取位置,而是作为其他提供者的辅助,减少电量消耗。
kotlin
lateinit var location_mannager:LocationManager- 同样的我们创建一个getUserLocation的函数
kotlin
private fun getUserLocation()
{
    location_mannager=getSystemService(Context.LOCATION_SERVICE) as LocationManager
		    location_mannager.requestLocationUpdates(LocationManager.GPS_PROVIDER,5000,5f,this)
}
location_mannager=getSystemService(Context.LOCATION_SERVICE) as LocationManager- 这一行代码获取系统的
LocationManager服务。getSystemService(Context.LOCATION_SERVICE)返回一个Object,我们使用as关键字将其转换为LocationManager类型。这样,我们就可以使用LocationManager的方法来请求位置更新。
- 这一行代码获取系统的
- 后一行代码是请求位置更新的核心。
requestLocationUpdates方法接受四个参数:LocationManager.GPS_PROVIDER: 指定使用 GPS 作为位置提供者。您也可以使用其他提供者,如LocationManager.NETWORK_PROVIDER。5000: 这是更新间隔的时间,以毫秒为单位。在这个例子中,它设置为 5000 毫秒(5 秒)。5f: 这是位置变化的最小距离,以米为单位。在这个例子中,它设置为 5 米。这意味着设备的位置至少需要移动 5 米,才会触发位置更新。this: 这是指向当前活动(MainActivity)的引用,因为活动实现了LocationListener接口。当位置更新发生时,onLocationChanged方法会被调用。
-
我们进行requestLocationUpdates时根据IDE提示,我们需要在获取位置之前进行权限检查

-
和上面一样,我们选择让他帮我补全(doge)

-
如下

-
我们只需要添加,当用户权限被禁止时候,申请同步
kotlin
private fun getUserLocation()
{
    location_mannager=getSystemService(Context.LOCATION_SERVICE) as LocationManager
    if (ActivityCompat.checkSelfPermission(
            this,
            ACCESS_FINE_LOCATION
        ) != PackageManager.PERMISSION_GRANTED && ActivityCompat.checkSelfPermission(
            this,
            Manifest.permission.ACCESS_COARSE_LOCATION
        ) != PackageManager.PERMISSION_GRANTED
    ) {
        Toast.makeText(this,"Permission denied", Toast.LENGTH_SHORT).show()
        ActivityCompat.requestPermissions(
            this,
            arrayOf(Manifest.permission.ACCESS_FINE_LOCATION, Manifest.permission.ACCESS_COARSE_LOCATION),100
        )
        return
    }
    location_mannager.requestLocationUpdates(LocationManager.GPS_PROVIDER,5000,5f,this)
}
6-3 获取位置信息更新
- 回到onLocationChanged函数,这次我们直接生成APK,尝试,让后成功!
kotlin
override fun onLocationChanged(p0: Location) {
    text_location.text=p0.latitude.toString()+","+p0.longitude.toString()
Toast.makeText(this,""+p0.latitude.toString()+p0.longitude.toString(),Toast.LENGTH_SHORT).show()
}
6-4 实测
- 手机实测如下(具体的信息我就不公布了哈哈哈,因为他真的超级准...害怕史密达)

7 Geocoder(题外话)
- Geocoder 是一种编程接口,用于将地理坐标(如纬度和经度)转换为具体的地址信息,或者将地址信息转换为地理坐标。这种转换通常被称为地理编码(geocoding)和反向地理编码(reverse geocoding)。
- 在 Android 开发中,Geocoder 类提供了这种功能。它允许开发者在应用中实现位置搜索、地图显示、地址验证等功能。Geocoder 使用了多种数据源来提供尽可能准确的位置信息,包括街道名称、城市、州、邮政编码和国家等。
kotlin
override fun onLocationChanged(p0: Location) {
    val geocoder = Geocoder(this, Locale.getDefault())
    val addresses: List<Address>?
    try {
        addresses = geocoder.getFromLocation(p0.latitude, p0.longitude, 1)
        if (addresses != null && addresses.isNotEmpty()) {
            val address = addresses[0]
            val streetAddress = address.getAddressLine(0) ?: "No street address"
            val country = address.countryName ?: "No country found"
            val addressText = if (streetAddress.isNotBlank() && country.isNotBlank()) {
                "$streetAddress,$country"
            } else {
                "No detailed address available"
            }
            val latitudeText = "Latitude: ${p0.latitude.toString()}"
            val longitudeText = "Longitude: ${p0.longitude.toString()}"
            text_location.text = "$addressText\n$latitudeText\n$longitudeText"
            Toast.makeText(this, "$addressText\n$latitudeText\n$longitudeText", Toast.LENGTH_SHORT).show()
        }
    } catch (e: IOException) {
        e.printStackTrace()
        text_location.text = "Geocoder error"
        Toast.makeText(this, "Geocoder error", Toast.LENGTH_SHORT).show()
    }
}- 效果如下,手机版就不展示了,是可以用的

代码汇总
- 法1:
kotlin
package com.example.pathrecorderapp

import android.content.pm.PackageManager
import android.os.Bundle
import android.widget.Button
import android.widget.TextView
import androidx.activity.enableEdgeToEdge
import androidx.appcompat.app.AppCompatActivity
import androidx.core.app.ActivityCompat
import androidx.core.content.ContextCompat
import androidx.core.view.ViewCompat
import androidx.core.view.WindowInsetsCompat
import android.Manifest.permission.ACCESS_FINE_LOCATION
import android.widget.Toast
import com.google.android.gms.location.FusedLocationProviderClient
import com.google.android.gms.location.LocationServices

class MainActivity : AppCompatActivity()  {


    lateinit var button_location: Button
    lateinit var text_location:TextView
    lateinit var fusedLocationProviderClient:FusedLocationProviderClient

    override fun onCreate(savedInstanceState: Bundle?) {
        super.onCreate(savedInstanceState)
        enableEdgeToEdge()
        setContentView(R.layout.activity_main)


        fusedLocationProviderClient=LocationServices.getFusedLocationProviderClient(this)
        button_location = findViewById<Button>(R.id.button_getLocation)
        text_location=findViewById<TextView>(R.id.text_location)

        button_location.setOnClickListener{
            getUserLocation()


        }


        ViewCompat.setOnApplyWindowInsetsListener(findViewById(R.id.main)) { v, insets ->
            val systemBars = insets.getInsets(WindowInsetsCompat.Type.systemBars())
            v.setPadding(systemBars.left, systemBars.top, systemBars.right, systemBars.bottom)
            insets
        }
    }

    private fun getUserLocation() {
        if (ContextCompat.checkSelfPermission(this, android.Manifest.permission.ACCESS_FINE_LOCATION) != PackageManager.PERMISSION_GRANTED) {
            ActivityCompat.requestPermissions(this, arrayOf(android.Manifest.permission.ACCESS_FINE_LOCATION), 100)
            Toast.makeText(this,"未获取权限",Toast.LENGTH_LONG).show()
                return
        }

        val location=fusedLocationProviderClient.lastLocation
        location.addOnSuccessListener {
            if(it!=null)
            {
                val latitude = it.latitude.toString()
                val longitude = it.longitude.toString()
                text_location.text = "Latitude: $latitude\nLongitude:$longitude"
            }
        }
        location.addOnFailureListener {exception ->

            text_location.text=exception.localizedMessage

            Toast.makeText(this, "获取位置信息失败: ${exception.localizedMessage}", Toast.LENGTH_LONG).show()
        }

    }


}- 法2
kotlin
package com.example.pathrecorderapp

import android.Manifest
import android.content.pm.PackageManager
import android.os.Bundle
import android.widget.Button
import android.widget.TextView
import androidx.activity.enableEdgeToEdge
import androidx.appcompat.app.AppCompatActivity
import androidx.core.app.ActivityCompat
import androidx.core.content.ContextCompat
import androidx.core.view.ViewCompat
import androidx.core.view.WindowInsetsCompat
import android.Manifest.permission.ACCESS_FINE_LOCATION
import android.content.Context
import android.location.Address
import android.location.Geocoder
import android.location.Location
import android.location.LocationListener
import android.location.LocationManager
import android.widget.Toast
import com.google.android.gms.location.FusedLocationProviderClient
import com.google.android.gms.location.LocationServices
import java.io.IOException
import java.util.Locale

class MainActivity : AppCompatActivity(),LocationListener  {


    lateinit var button_location: Button
    lateinit var text_location:TextView
    lateinit var location_mannager:LocationManager

    override fun onCreate(savedInstanceState: Bundle?) {
        super.onCreate(savedInstanceState)
        enableEdgeToEdge()
        setContentView(R.layout.activity_main)


        button_location = findViewById<Button>(R.id.button_getLocation)
        text_location=findViewById<TextView>(R.id.text_location)

        button_location.setOnClickListener{

            getUserLocation()
        }


        ViewCompat.setOnApplyWindowInsetsListener(findViewById(R.id.main)) { v, insets ->
            val systemBars = insets.getInsets(WindowInsetsCompat.Type.systemBars())
            v.setPadding(systemBars.left, systemBars.top, systemBars.right, systemBars.bottom)
            insets
        }
    }
    private fun getUserLocation()
    {
        location_mannager=getSystemService(Context.LOCATION_SERVICE) as LocationManager
        if (ActivityCompat.checkSelfPermission(
                this,
                ACCESS_FINE_LOCATION
            ) != PackageManager.PERMISSION_GRANTED && ActivityCompat.checkSelfPermission(
                this,
                Manifest.permission.ACCESS_COARSE_LOCATION
            ) != PackageManager.PERMISSION_GRANTED
        ) {
            Toast.makeText(this,"Permission denied", Toast.LENGTH_SHORT).show()
            ActivityCompat.requestPermissions(
                this,
                arrayOf(Manifest.permission.ACCESS_FINE_LOCATION, Manifest.permission.ACCESS_COARSE_LOCATION),100
            )
            return
        }
        location_mannager.requestLocationUpdates(LocationManager.GPS_PROVIDER,5000,5f,this)
    }

    override fun onLocationChanged(p0: Location) {
        val geocoder = Geocoder(this, Locale.getDefault())
        val addresses: List<Address>?
        try {
            addresses = geocoder.getFromLocation(p0.latitude, p0.longitude, 1)
            if (addresses != null && addresses.isNotEmpty()) {
                val address = addresses[0]
                val streetAddress = address.getAddressLine(0) ?: "No street address"
                val country = address.countryName ?: "No country found"
                val addressText = if (streetAddress.isNotBlank() && country.isNotBlank()) {
                    "$streetAddress,$country"
                } else {
                    "No detailed address available"
                }
                val latitudeText = "Latitude: ${p0.latitude.toString()}"
                val longitudeText = "Longitude: ${p0.longitude.toString()}"
                text_location.text = "$addressText\n$latitudeText\n$longitudeText"
                Toast.makeText(this, "$addressText\n$latitudeText\n$longitudeText", Toast.LENGTH_SHORT).show()
            }
        } catch (e: IOException) {
            e.printStackTrace()
            text_location.text = "Geocoder error"
            Toast.makeText(this, "Geocoder error", Toast.LENGTH_SHORT).show()
        }
    }


}
总结
- 本节介绍了如何使用Andriod Studio进行界面设计,并使用了两种方式进行位置获取,并介绍 了APK的导出
- 如有错误,欢迎指出,下一节我们看看如何进行自动运行和数据自动保存画图