近期MySQL发布了8.0.40版本,与之前的版本相比,部分依赖包发生了变化,因此重新编译一版,也便于大家参考。
1. 下载源码
选择对应的版本、选择源码、操作系统
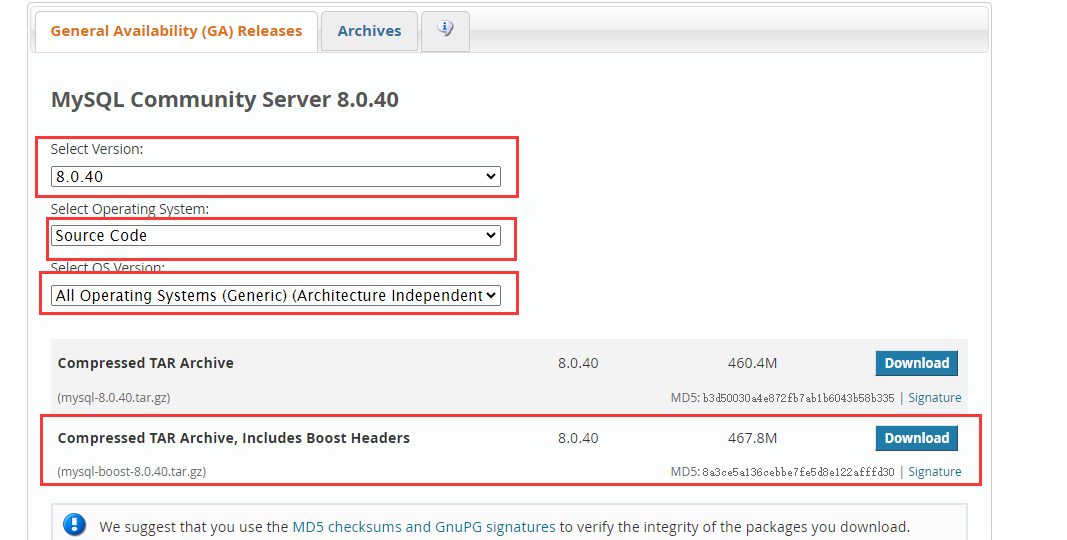
如果没有登录或者没有MySQL官网账号,可以选择只下载

2. 进行编译
上传至机器,解压源码
css
tar -zxvf mysql-boost-8.0.40.tar.gz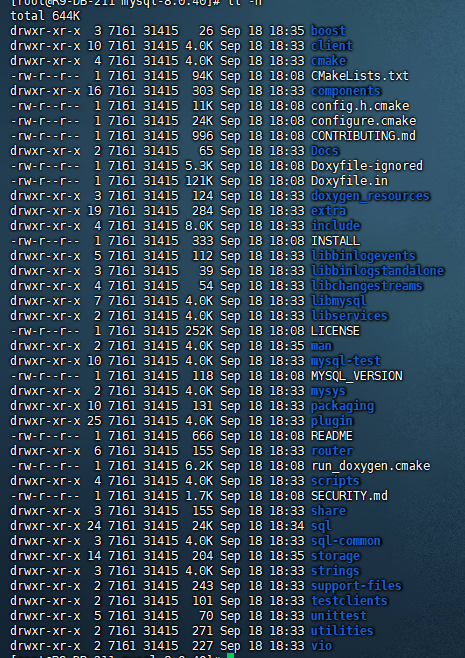
2.1 准备阶段
因为编译安装需要cmake、make等命令,因此需提前安装相关依赖包及命令
properties
yum install cmake make gcc gcc-c++ autoconf bison automake \
openssl openssl-devel zlib* fiex* libxml* \
ncurses-devel libmcrypt* libtool-ltdl-devel* -y
yum install gcc-toolset-12-gcc gcc-toolset-12-gcc-c++ gcc-toolset-12-binu
tils gcc-toolset-12-annobin-annocheck gcc-toolset-12-annobin-plugin-gcc -y
由于MySQL从8.0.16版本开始,要求cmake的版本是cmake3以上,gcc版本为gcc 11.*以上版本,而且MySQL8.0.40的gcc需要12.*版本,因此如果使用Centos7等较低版本的操作系统,cmake及gcc g++版本较低,需要升级后才能编译。相关包升级附在文末
创建相关目录
perl
mkdir  /usr/local/mysql
 mkdir -p /data/mysql/mysql3306/{data,logs,tmp,etc}
2.2 编译检查阶段
开始编译
properties
cmake -DINSTALL_PREFIX=/usr/local/mysql \
-DMYSQL_DATADIR=/data/mysql/mysql3306/data \
-DMYSQL_UNIX_ADDR=/data/mysql/mysql3306/tmp/mysql.sock \
-DMYSQL_TCP_PORT=3306 \
-DWITH_INNODB_STORAGE_ENGINE=1 -DWITH_EXTRA_CHARSETS=all \
-DFORCE_INSPECT=1 \
-DCONNECT_WITH_SYSTEMD=OFF \
-DDEFAULT_CHARSET=utf8mb4 \
-DDEFAULT_COLLATION=utf8mb4_unicode_ci \
-DWITH_BOOST=/usr/local/mysql-8.0.40/boost/boost_1_77_0  \
-DENABLE_DOWNLOADS=1
出现报错
sql
-- Running cmake version 3.26.5
-- This is .el9. as found from 'rpm -qf /'
-- Looking for a devtoolset compiler
-- Using /opt/rh/gcc-toolset-12/root/usr/bin/gcc
-- Using /opt/rh/gcc-toolset-12/root/usr/bin/g++
-- CMAKE_MODULE_PATH is /usr/local/mysql-8.0.40/cmake
-- MySQL 8.0.40
-- The C compiler identification is GNU 12.2.1
-- The CXX compiler identification is GNU 12.2.1
-- Detecting C compiler ABI info
-- Detecting C compiler ABI info - done
-- Check for working C compiler: /opt/rh/gcc-toolset-12/root/usr/bin/gcc - skipped
-- Detecting C compile features
-- Detecting C compile features - done
-- Detecting CXX compiler ABI info
-- Detecting CXX compiler ABI info - done
-- Check for working CXX compiler: /opt/rh/gcc-toolset-12/root/usr/bin/g++ - skipped
-- Detecting CXX compile features
-- Detecting CXX compile features - done
-- Source directory /usr/local/mysql-8.0.40
-- Binary directory /usr/local/mysql-8.0.40
CMake Error at CMakeLists.txt:642 (MESSAGE):
  Please do not build in-source.  Out-of source builds are highly
  recommended: you can have multiple builds for the same source, and there is
  an easy way to do cleanup, simply remove the build directory (note that
  'make clean' or 'make distclean' does *not* work)


  You *can* force in-source build by invoking cmake with
  -DFORCE_INSOURCE_BUILD=1
因此加上 -DFORCE_INSOURCE_BUILD=1 再编译一次
properties
cmake -DINSTALL_PREFIX=/usr/local/mysql \
-DMYSQL_DATADIR=/data/mysql/mysql3306/data \
-DMYSQL_UNIX_ADDR=/data/mysql/mysql3306/tmp/mysql.sock \
-DMYSQL_TCP_PORT=3306 \
-DWITH_INNODB_STORAGE_ENGINE=1 -DWITH_EXTRA_CHARSETS=all \
-DFORCE_INSPECT=1 \
-DCONNECT_WITH_SYSTEMD=OFF \
-DDEFAULT_CHARSET=utf8mb4 \
-DDEFAULT_COLLATION=utf8mb4_unicode_ci \
-DWITH_BOOST=/usr/local/mysql-8.0.40/boost/boost_1_77_0  \
-DENABLE_DOWNLOADS=1  \
-DFORCE_INSOURCE_BUILD=1
出现如下新报错信息
sql
CMake Error at cmake/readline.cmake:93 (MESSAGE):
Curses library not found. Please install appropriate package,
remove CMakeCache.txt and rerun cmake.On Debian/Ubuntu, package name is libncurses5-dev, on Redhat and derivates it is ncurses-devel.
Call Stack (most recent call first):
cmake/readline.cmake:127 (FIND_CURSES)
cmake/readline.cmake:221 (MYSQL_USE_BUNDLED_EDITLINE)
CMakeLists.txt:1929 (MYSQL_CHECK_EDITLINE)
-- Configuring incomplete, errors occurred!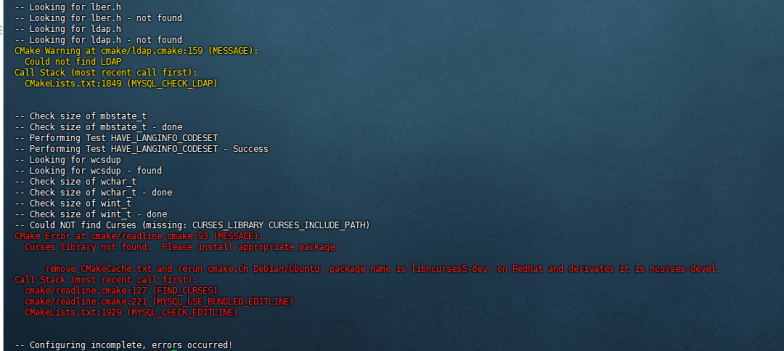 缺少ncurses-devel依赖包所致,按照提示进行安装
nginx
yum install -y ncurses-devel*再次编译出现新错误
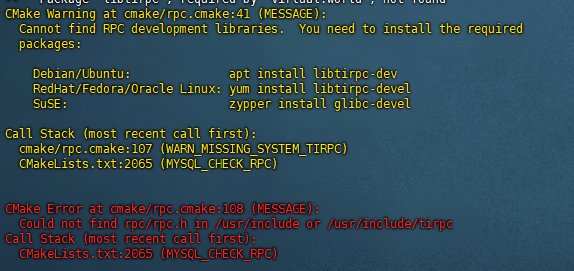
缺少依赖,继续补充
nginx
yum install libtirpc* -y安装后依旧报错(因为我的操作系统yum安装时没有libtirpc-devel),因此我选择查询出源码里的rpc.h文件,直接软连接到 /usr/include/ ,不建议这么操作,如果可以下载对应的安装包,建议安装依赖包
bash
find / -name rpc.h
/usr/local/mysql-8.0.40/extra/libevent/libevent-2.1.11-stable/include/event2/rpc.h
/usr/local/mysql-8.0.40/extra/tirpc/libtirpc-1.3.5/tirpc/rpc/rpc.h
/usr/local/mysql-8.0.40/plugin/group_replication/libmysqlgcs/src/bindings/xcom/xcom/windeps/sunrpc/rpc/rpc.h
ln -s /usr/local/mysql-8.0.40/extra/tirpc/libtirpc-1.3.5/tirpc/rpc/rpc.h   /usr/include/rpc/rpc.h
效果确实有效,继续进行编译,出现新问题:
sql
CMake Warning at cmake/rpc.cmake:30 (MESSAGE):
  Cannot find rpcgen executable.  You need to install the required packages:


    Debian/Ubuntu:              apt install rpcsvc-proto
    RedHat/Fedora/Oracle Linux: yum install rpcgen
    SuSE:                       zypper install glibc-devel


Call Stack (most recent call first):
  plugin/group_replication/libmysqlgcs/cmake/rpcgen.cmake:113 (WARN_MISSING_RPCGEN_EXECUTABLE)
  plugin/group_replication/libmysqlgcs/CMakeLists.txt:51 (INCLUDE)


CMake Error at plugin/group_replication/libmysqlgcs/cmake/rpcgen.cmake:114 (MESSAGE):
  Could not find rpcgen
Call Stack (most recent call first):
  plugin/group_replication/libmysqlgcs/CMakeLists.txt:51 (INCLUDE)
继续安装依赖包
nginx
yum install glibc-devel rpcgen -y直至build完成

2.3 进行编译及安装
开始make进行编译,为了加快点速度,我启用2个核心进行编译
nginx
make -j 2 编译过程中出现新问题
objectivec
/usr/include/rpc/rpc.h:38:10: fatal error: rpc/types.h: No such file or directory
   38 | #include <rpc/types.h>          /* some typedefs */
      |          ^~~~~~~~~~~~~
compilation terminated.
make[2]: *** [plugin/group_replication/libmysqlgcs/CMakeFiles/mysqlgcs.dir/build.make:99: plugin/group_replication/libmysqlgcs/CMakeFiles/mysqlgcs.dir/src/bindings/xcom/xcom/pax_msg.cc.o] Error 1
make[1]: *** [CMakeFiles/Makefile2:14468: plugin/group_replication/libmysqlgcs/CMakeFiles/mysqlgcs.dir/all] Error 2
make[1]: *** Waiting for unfinished jobs....
[ 14%] Built target oci_common_objlib
make: *** [Makefile:166: all] Error 2
主要是前面的rpc依赖处理所致,因此将rpc目录下所有文件都拷贝进来
typescript
cp  -rp  /usr/local/mysql-8.0.40/extra/tirpc/libtirpc-1.3.5/tirpc/rpc  /usr/include/rpc
In file included from /usr/include/rpc/rpc.h:38,
                 from /usr/local/mysql-8.0.40/plugin/group_replication/libmysqlgcs/src/bindings/xcom/xcom/pax_msg.cc:28:
/usr/include/rpc/types.h:98:10: fatal error: netconfig.h: No such file or directory
   98 | #include <netconfig.h>
      |          ^~~~~~~~~~~~~
compilation terminated.
make[2]: *** [plugin/group_replication/libmysqlgcs/CMakeFiles/mysqlgcs.dir/build.make:99: plugin/group_replication/libmysqlgcs/CMakeFiles/mysqlgcs.dir/src/bindings/xcom/xcom/pax_msg.cc.o] Error 1
make[1]: *** [CMakeFiles/Makefile2:14468: plugin/group_replication/libmysqlgcs/CMakeFiles/mysqlgcs.dir/all] Error 2
make[1]: *** Waiting for unfinished jobs....
[ 15%] Linking CXX static library librpl_channel_credentials_lib.a
[ 15%] Built target rpl_channel_credentials_lib
make: *** [Makefile:166: all] Error 2
继续复制依赖文件
bash
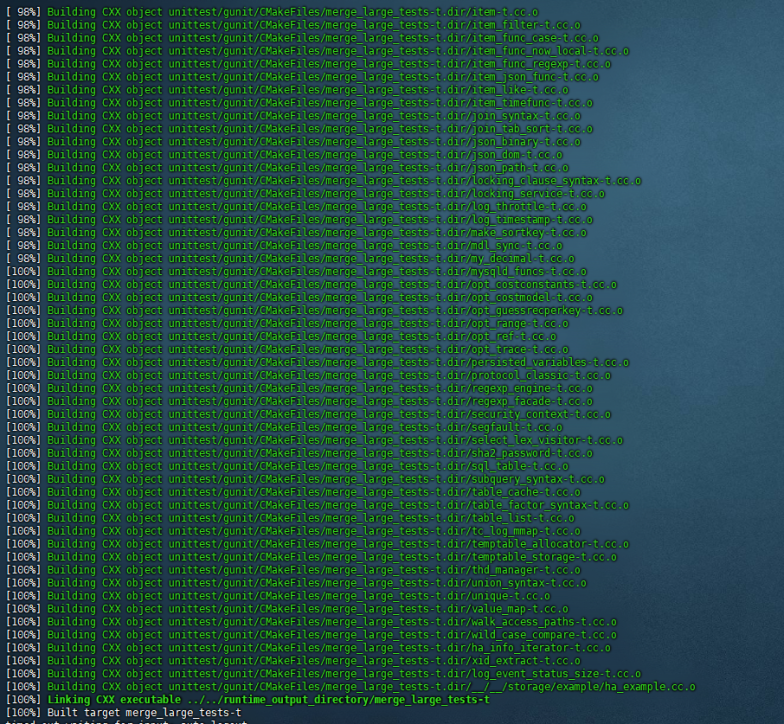
cp -rp /usr/local/mysql-8.0.40/extra/tirpc/libtirpc-1.3.5/tirpc/netconfig.h /usr/include/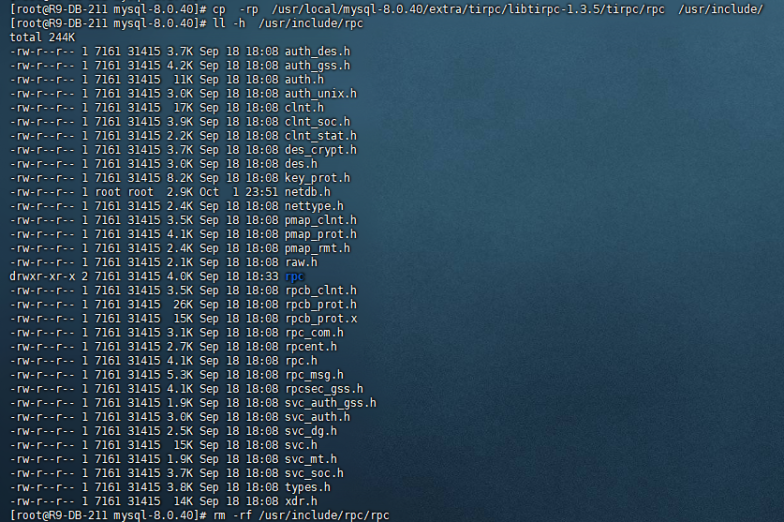 完成后顺利进行编译。出现如下信息:
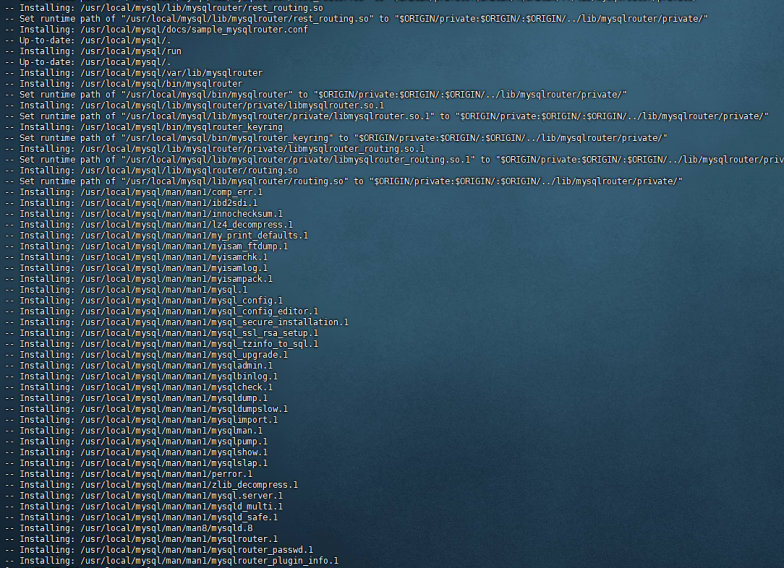
继续进行make install
nginx
make install完成后结果如下
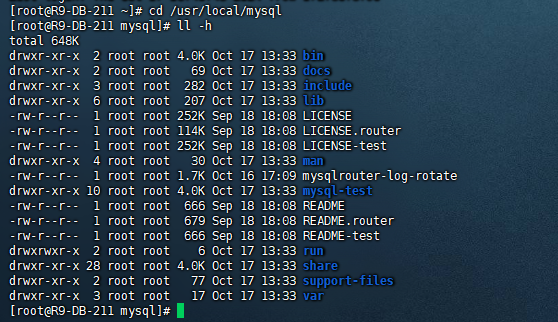
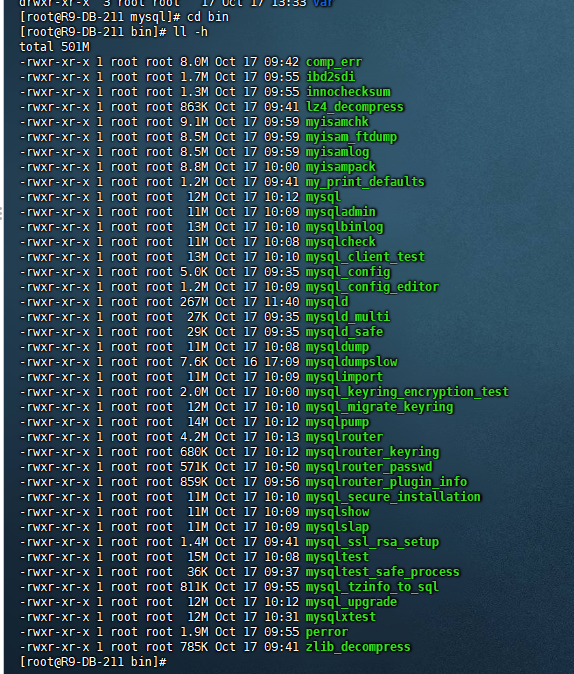
编译后MySQL内容如下
3. 安装数据库
创建数据库相关目录及配置文件
powershell
mkdir -p /data/mysql/mysql3306/{data,logs,tmp,etc}配置文件按需添加放在etc/my.cnf中
创建mysql用户并将数据库目录授权
properties
useradd  mysql
chown -R mysql:mysql /data/mysql/
初始化数据库
bash
cd /usr/local/mysql
bin/mysqld --defaults-file=/data/mysql/mysql3306/etc/my.cnf   --initialize  --user=mysql
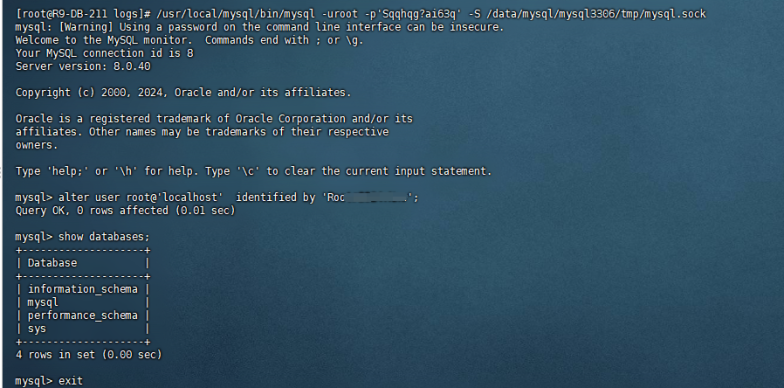
如果无异常,则在数据库日志中可以查看初始化的root@localhost账号密码
登录数据库并修改密码
4. 补充部分依赖安装问题
4.1 cmake3
centos7系统中cmake预装版本较低,而编译8.0.40时需要更cmake3版本,如果无法通过yum install安装时,需要自己下载安装包进行安装
例如我在Centos7系统上用的3.15.5版本,可以通过如下命令下载
ruby
wget https://down.24kplus.com/linux/cmake/cmake-3.15.5.tar.gz再解压、编译、安装即可
properties
wget https://down.24kplus.com/linux/cmake/cmake-3.15.5.tar.gz
  tar -zxvf cmake-3.15.5.tar.gz
  cd cmake-3.15.5
 ./bootstrap --prefix=/usr --datadir=share/cmake --docdir=doc/cmake && make
  make install
完成后检查cmake版本

4.2 gcc
对于gcc版本,MySQL8.0.40之前gcc11即可,8.0.40版本开始需要gcc12,如果可以yum方式直接安装比较方便,如果不能则需要临时调整到高版本yum源进行安装或下载安装包进行安装。本次使用的调整yum源的方式,步骤如下:
http
yum install scl-utils
yum install centos-release-scl centos-release-scl-rh
修改配置文件
nginx
vim /etc/yum.repos.d/CentOS-SCLo-scl.repo添加如下内容
ini
[centos-sclo-sclo]
name=CentOS-7 - SCLo sclo
baseurl=https://mirrors.aliyun.com/centos-vault/7.9.2009/sclo/$basearch/sclo/
gpgcheck=1
enabled=1
gpgkey=file:///etc/pki/rpm-gpg/RPM-GPG-KEY-CentOS-SIG-SCLo


[centos-sclo-sclo-testing]
name=CentOS-7 - SCLo sclo Testing
baseurl=http://buildlogs.centos.org/centos/7/sclo/$basearch/sclo/
gpgcheck=0
enabled=0
gpgkey=file:///etc/pki/rpm-gpg/RPM-GPG-KEY-CentOS-SIG-SCLo


[centos-sclo-sclo-source]
name=CentOS-7 - SCLo sclo Sources
baseurl=http://vault.centos.org/centos/7/sclo/Source/sclo/
gpgcheck=1
enabled=0
gpgkey=file:///etc/pki/rpm-gpg/RPM-GPG-KEY-CentOS-SIG-SCLo


[centos-sclo-sclo-debuginfo]
name=CentOS-7 - SCLo sclo Debuginfo
baseurl=http://debuginfo.centos.org/centos/7/sclo/$basearch/
gpgcheck=1
enabled=0
gpgkey=file:///etc/pki/rpm-gpg/RPM-GPG-KEY-CentOS-SIG-SCLo
再添加repo文件
nginx
vim /etc/yum.repos.d/CentOS-SCLo-scl-rh.repo添加如下内容
ini
# CentOS-SCLo-rh.repo
#
# Please see http://wiki.centos.org/SpecialInterestGroup/SCLo for more
# information


[centos-sclo-rh]
name=CentOS-7 - SCLo rh
baseurl=https://mirrors.aliyun.com/centos-vault/7.9.2009/sclo/$basearch/rh/
# mirrorlist=http://mirrorlist.centos.org?arch=$basearch&release=7&repo=sclo-rh
gpgcheck=1
enabled=1
gpgkey=file:///etc/pki/rpm-gpg/RPM-GPG-KEY-CentOS-SIG-SCLo


[centos-sclo-rh-testing]
name=CentOS-7 - SCLo rh Testing
baseurl=http://buildlogs.centos.org/centos/7/sclo/$basearch/rh/
gpgcheck=0
enabled=0
gpgkey=file:///etc/pki/rpm-gpg/RPM-GPG-KEY-CentOS-SIG-SCLo


[centos-sclo-rh-source]
name=CentOS-7 - SCLo rh Sources
baseurl=http://vault.centos.org/centos/7/sclo/Source/rh/
gpgcheck=1
enabled=0
gpgkey=file:///etc/pki/rpm-gpg/RPM-GPG-KEY-CentOS-SIG-SCLo


[centos-sclo-rh-debuginfo]
name=CentOS-7 - SCLo rh Debuginfo
baseurl=http://debuginfo.centos.org/centos/7/sclo/$basearch/
gpgcheck=1
enabled=0
gpgkey=file:///etc/pki/rpm-gpg/RPM-GPG-KEY-CentOS-SIG-SCLo
重建yum元数据缓存
properties
yum clean all
yum makecache
安装gcc g++
nginx
yum install devtoolset-11-gcc devtoolset-11-gcc-c++ devtoolset-11-binutils -y4.3 libtirpc-devel
由于在Roky9上直接yum方式无libtirpc-devel包,因此手动下载安装包进行安装。需要用和libtirpc版本一致的,如果不一致,则缺少依赖。因此我直接将2个包都下载并安装
nginx
wget http://rpmfind.net/linux/centos-stream/9-stream/BaseOS/x86_64/os/Packages/libtirpc-1.3.3-9.el9.x86_64.rpm
wget https://mirrors.tuna.tsinghua.edu.cn/centos-stream/9-stream/CRB/x86_64/os/Packages/libtirpc-devel-1.3.3-6.el9.x86_64.rpm
go
再本地安装
css
yum  localinstall libtirpc-1.3.3-9.el9.x86_64.rpm
yum localinstall -y  libtirpc-devel-1.3.3-9.el9.x86_64.rpm
4.4 重新构建及编译
由于我在构建和编译过程中有的包不存在或版本不对应,因此进行过一次重编译,及cmake时添加fresh选项
properties
cmake --fresh -DINSTALL_PREFIX=/usr/local/mysql \
-DMYSQL_DATADIR=/data/mysql/mysql3306/data \
-DMYSQL_UNIX_ADDR=/data/mysql/mysql3306/tmp/mysql.sock \
-DMYSQL_TCP_PORT=3306 \
-DWITH_INNODB_STORAGE_ENGINE=1 -DWITH_EXTRA_CHARSETS=all \
-DFORCE_INSPECT=1 \
-DCONNECT_WITH_SYSTEMD=OFF \
-DDEFAULT_CHARSET=utf8mb4 \
-DDEFAULT_COLLATION=utf8mb4_unicode_ci \
-DWITH_BOOST=/usr/local/mysql-8.0.40/boost/boost_1_77_0  \
-DENABLE_DOWNLOADS=1  \
-DFORCE_INSOURCE_BUILD=1