vitepress博客搭建
个人博客技术栈更新,快速搭建一个vitepress自定义博客
建议去博客查看文章,观感更佳。原文地址
模板仓库:
vitepress-blog-template
前言
服务器过期快一年了,博客也快一年没更新了,最近重新搭建了一下博客,记录一下搭建过程。
以前的博客是使用vuepress搭建的,这次换成了vitepress,vitepress是vuepress的下一代,使用vite构建,性能更好,体验更好
缺点:vitepress的插件生态还没有vuepress那么丰富,很多功能需要自己实现
优点:vitepress可配置项、api都比较多,大部分功能都能实现
相关链接:
vuepress博客
vuepress仓库地址
vitepress博客
vitepress仓库地址
旧版本预览:
| 首页 | 文章 | 标签 |
|---|---|---|
 |
 |
 |
博客介绍
- 自定义首页
- 网站加载页
- 全文搜索
- 全文图片放大
- 网站访问量统计
- GitHub评论系统
- 自动配置侧边栏
- 自动打包部署GitHub Pages
- 自动统计文章字数/阅读时间/最近更新时间
- 未完待续...
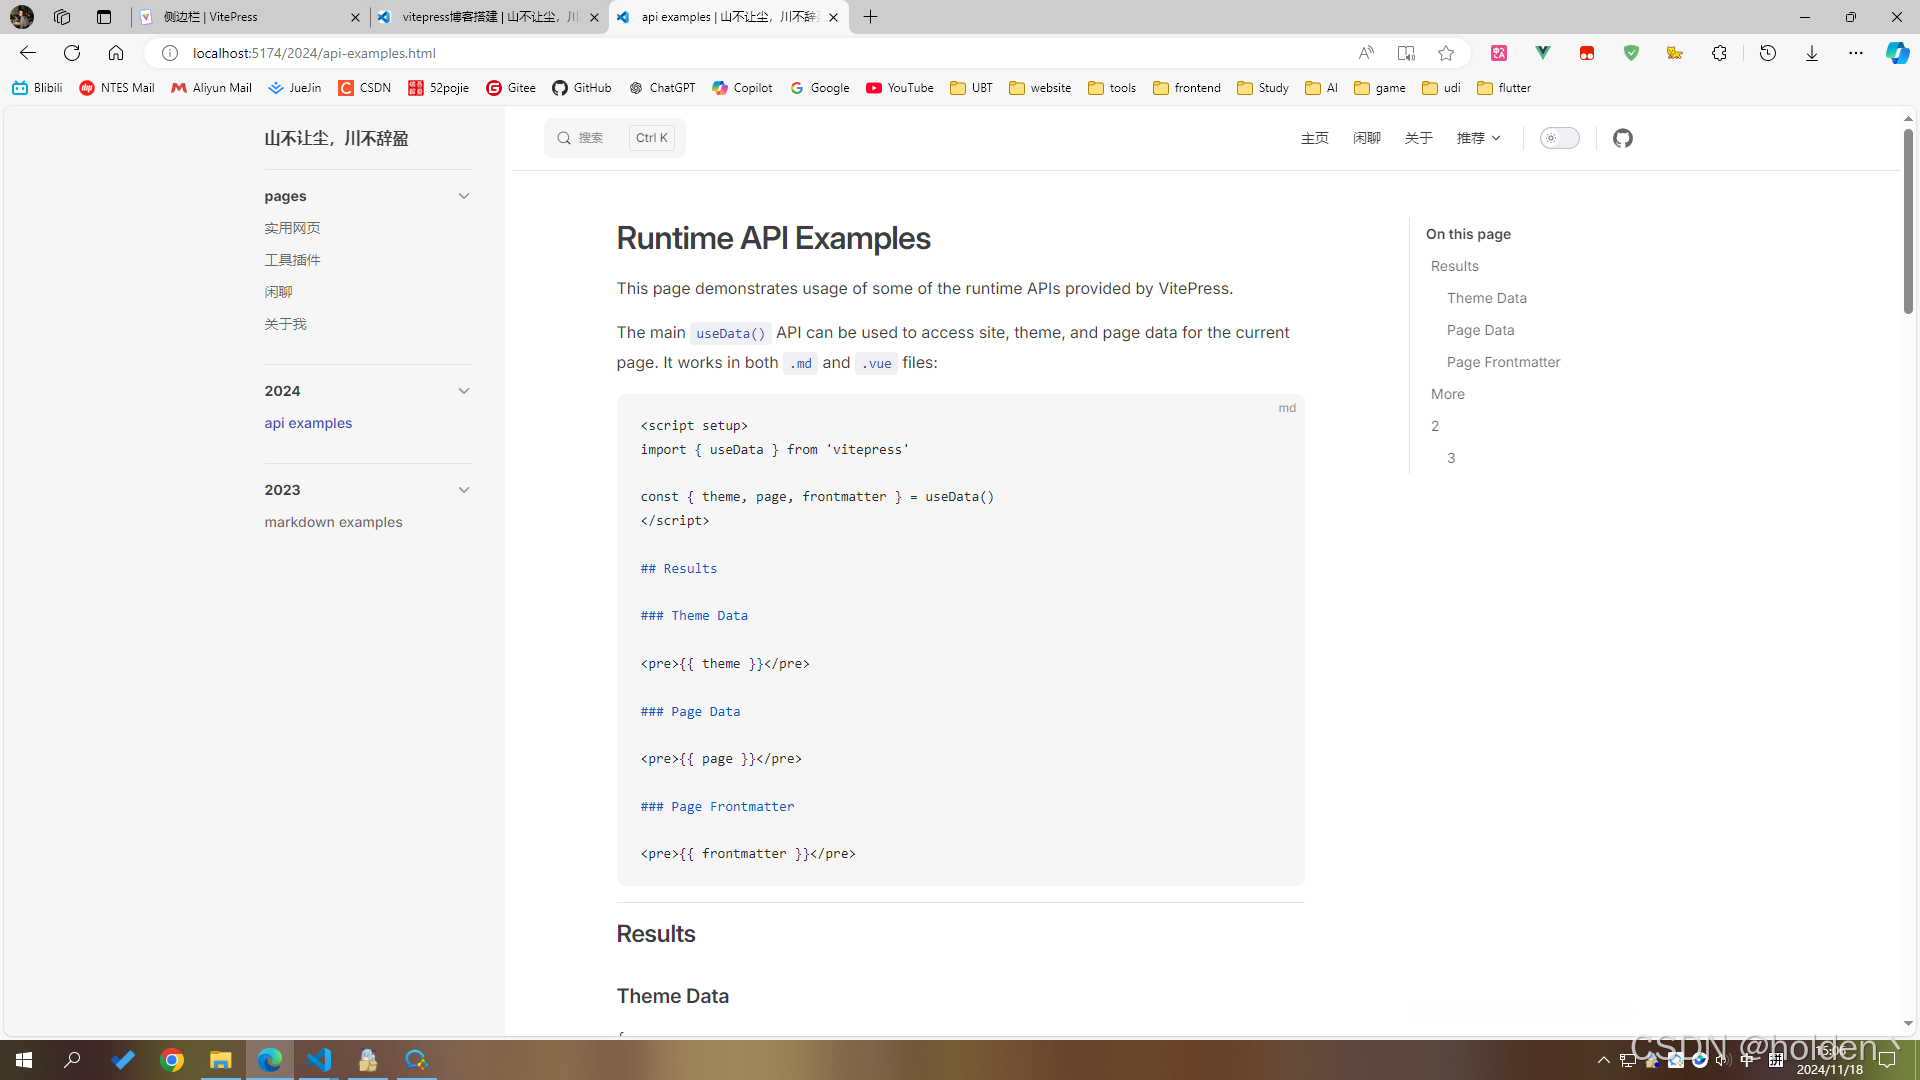
1. 安装
Node.js 18 及以上版本,推荐使用pnpm安装
sh
# 创建项目并安装 VitePress 依赖
mkdir blog
cd blog
pnpm init
pnpm add -D vitepress

# 使用 VitePress CLI 初始化目录结构
pnpm vitepress init
sh
┌ Welcome to VitePress!
│
◇ Where should VitePress initialize the config?
│ ./docs
│
◇ Site title:
│ My Awesome Project
│
◇ Site description:
│ A VitePress Site
│
◇ Theme:
│ ● Default Theme (Out of the box, good-looking docs)
│ ○ Default Theme + Customization
│ ○ Custom Theme
│
◇ Use TypeScript for config and theme files?
│  Yes
│
◆ Add VitePress npm scripts to package.json?
│  Yes
└
2. 运行
sh
pnpm docs:dev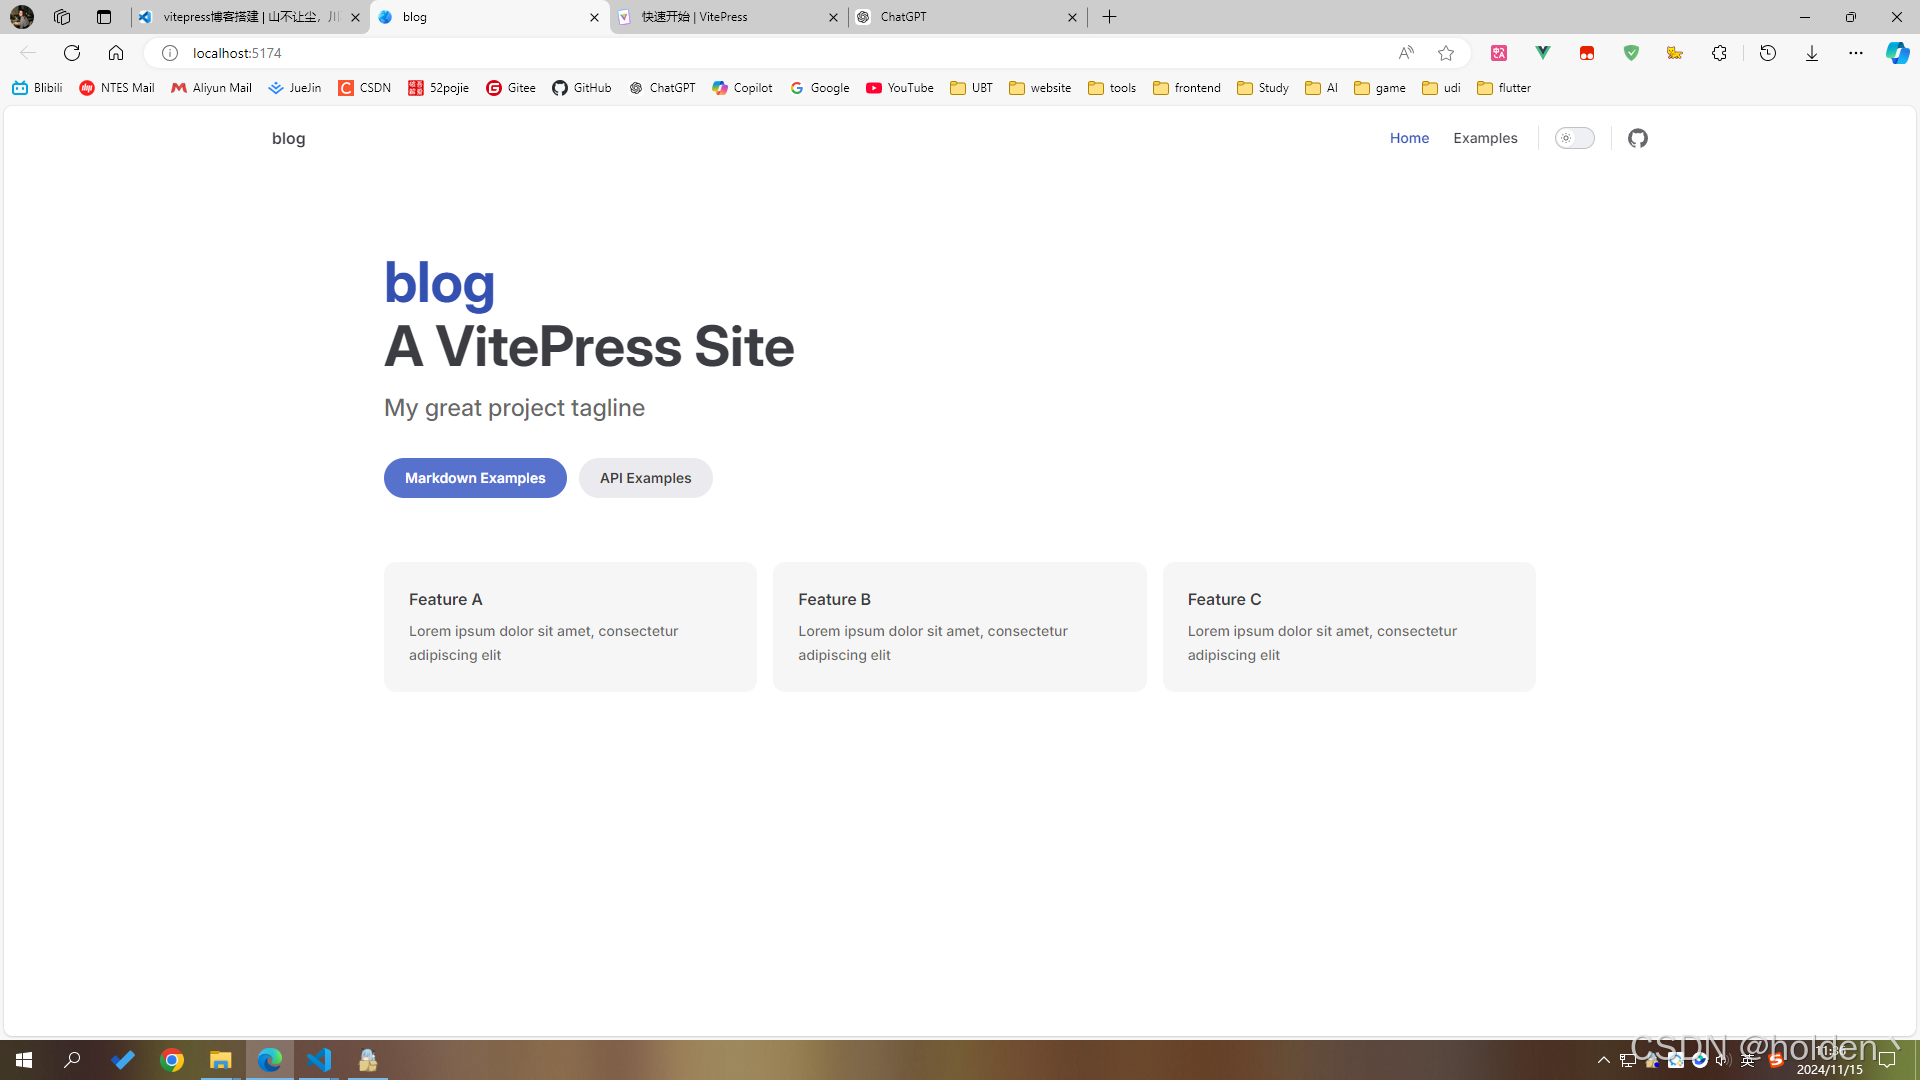
3. 结构
官方文档:vitepress目录结构
需要手动新建文件夹,我的目录结构如下:
.
├─ .github                # 配置GitHub Actions
├─ docs
│  ├─ .vitepress
│  │  ├─ components       # 自定义组件
│  │  ├─ plugins          # 自定义插件
│  │  ├─ theme            # 主题配置
│  │  ├─ utils            # 工具函数
│  │  └─ config.mts       # 配置文件
│  ├─ 2024
│  │  └─ xx.md            # 文章
│  ├─ img                 # 文章图片
│  ├─ pages               # 自定义页面
│  ├─ public              # 静态资源
│  └─ index.md            # 首页
└─ package.json
4. 导航栏
配置文件:/docs/.vitepress/config.mts
4.1 标题
官方文档:vitepress站点标题和图标
ts{2}
export default defineConfig({
  title:'山不让尘,川不辞盈',
  // ...
})
4.2 搜索
官方文档:vitepress搜索
有多种方式可以实现,我采用的是 vitepress-plugin-pagefind 插件
该插件支持i18n,具体配置请查看文档
sh
pnpm add vitepress-plugin-pagefind pagefind
ts{1,7-18}
import { pagefindPlugin } from 'vitepress-plugin-pagefind'

export default defineConfig({
  title:'山不让尘,川不辞盈',
  vite:{
    plugins:[
     pagefindPlugin({
        btnPlaceholder: '搜索',
        placeholder: '搜索文档',
        emptyText: '空空如也',
        heading: '共: {{searchResult}} 条结果',
        customSearchQuery(input) {
          return input
            .replace(/[\u4E00-\u9FA5]/g, ' $& ')
            .replace(/\s+/g, ' ')
            .trim()
        },
      }),
    ]
  }
  // ...
})
4.3 导航链接
官方文档:vitepress导航链接
配置中的link是md文件的地址,比如:/pages/about 对应 docs/pages/about.md
ts{4-19}
export default defineConfig({
  title:'山不让尘,川不辞盈',
  themeConfig:{
   nav: [
      { text: '主页', link: '/' },
      { text: '闲聊', link: '/pages/comment' },
      { text: '关于', link: '/pages/about' },
      {
        text: '推荐',
        items: [
          {
            items: [
              { text: '实用网页', link: '/pages/webPage' },
              { text: '工具插件', link: '/pages/tools' },
            ],
          },
        ],
      },
    ],
  }
  // ...
})
4.4 社交链接
官方文档:vitepress社交链接
ts{3-15}
export default defineConfig({
  themeConfig: {
    socialLinks: [
      { icon: 'github', link: 'https://github.com/vuejs/vitepress' },
      { icon: 'twitter', link: '...' },
      // 可以通过将 SVG 作为字符串传递来添加自定义图标:
      {
        icon: {
          svg: '<svg role="img" viewBox="0 0 24 24" xmlns="http://www.w3.org/2000/svg"><title>Dribbble</title><path d="M12...6.38z"/></svg>',
        },
        link: '...',
        // 也可以为无障碍添加一个自定义标签 (可选但推荐):
        ariaLabel: 'cool link',
      },
    ],
  },
})
4.5 效果
配置完后效果图:

5. 布局框架
5.1 Naive UI
(1)安装
图标库:xicons material
时间库:dayjs
sh
pnpm add -D @css-render/vue3-ssr naive-ui @vicons/material dayjs(2)配置
新建 .vitepress/theme/index.ts 文件
ts
import { defineComponent, h, inject } from 'vue'
import DefaultTheme from 'vitepress/theme'
import { NConfigProvider } from 'naive-ui'
import { setup } from '@css-render/vue3-ssr'
import { useRoute } from 'vitepress'

const { Layout } = DefaultTheme

const CssRenderStyle = defineComponent({
  setup() {
    const collect = inject<() => string>('css-render-collect')
    return {
      style: collect ? collect() : '',
    }
  },
  render() {
    return h('css-render-style', {
      innerHTML: this.style,
    })
  },
})

const VitepressPath = defineComponent({
  setup() {
    const route = useRoute()
    return () => {
      return h('vitepress-path', null, [route.path])
    }
  },
})

const NaiveUIProvider = defineComponent({
  render() {
    return h(
      NConfigProvider,
      { abstract: true, inlineThemeDisabled: true },
      {
        default: () => [
          h(Layout, null, { default: this.$slots.default?.() }),
          import.meta.env.SSR ? [h(CssRenderStyle), h(VitepressPath)] : null,
        ],
      }
    )
  },
})

export default {
  extends: DefaultTheme,
  Layout: NaiveUIProvider,
  enhanceApp: ({ app }) => {
    if (import.meta.env.SSR) {
      const { collect } = setup(app)
      app.provide('css-render-collect', collect)
    }
  },
}
.vitepress/config.mts 文件
ts{3,8-10,12-30}
import { defineConfig } from 'vitepress'

const fileAndStyles: Record<string, string> = {}

export default defineConfig({
  // ...
  vite: {
    ssr: {
      noExternal: ['naive-ui', 'date-fns', 'vueuc'],
    },
  },
  postRender(context) {
    const styleRegex = /<css-render-style>((.|\s)+)<\/css-render-style>/
    const vitepressPathRegex = /<vitepress-path>(.+)<\/vitepress-path>/
    const style = styleRegex.exec(context.content)?.[1]
    const vitepressPath = vitepressPathRegex.exec(context.content)?.[1]
    if (vitepressPath && style) {
      fileAndStyles[vitepressPath] = style
    }
    context.content = context.content.replace(styleRegex, '')
    context.content = context.content.replace(vitepressPathRegex, '')
  },
  transformHtml(code, id) {
    const html = id.split('/').pop()
    if (!html) return
    const style = fileAndStyles[`/${html}`]
    if (style) {
      return code.replace(/<\/head>/, `${style}</head>`)
    }
  },
  // ...
})
(3)解决ts报错
安装vite
sh
pnpm add -D vite vue根目录下新建 type.d.ts 文件
ts
/// <reference types="vite/client" />

interface ImportMetaEnv {}

interface ImportMeta {
  readonly env: ImportMetaEnv
}
(5)测试
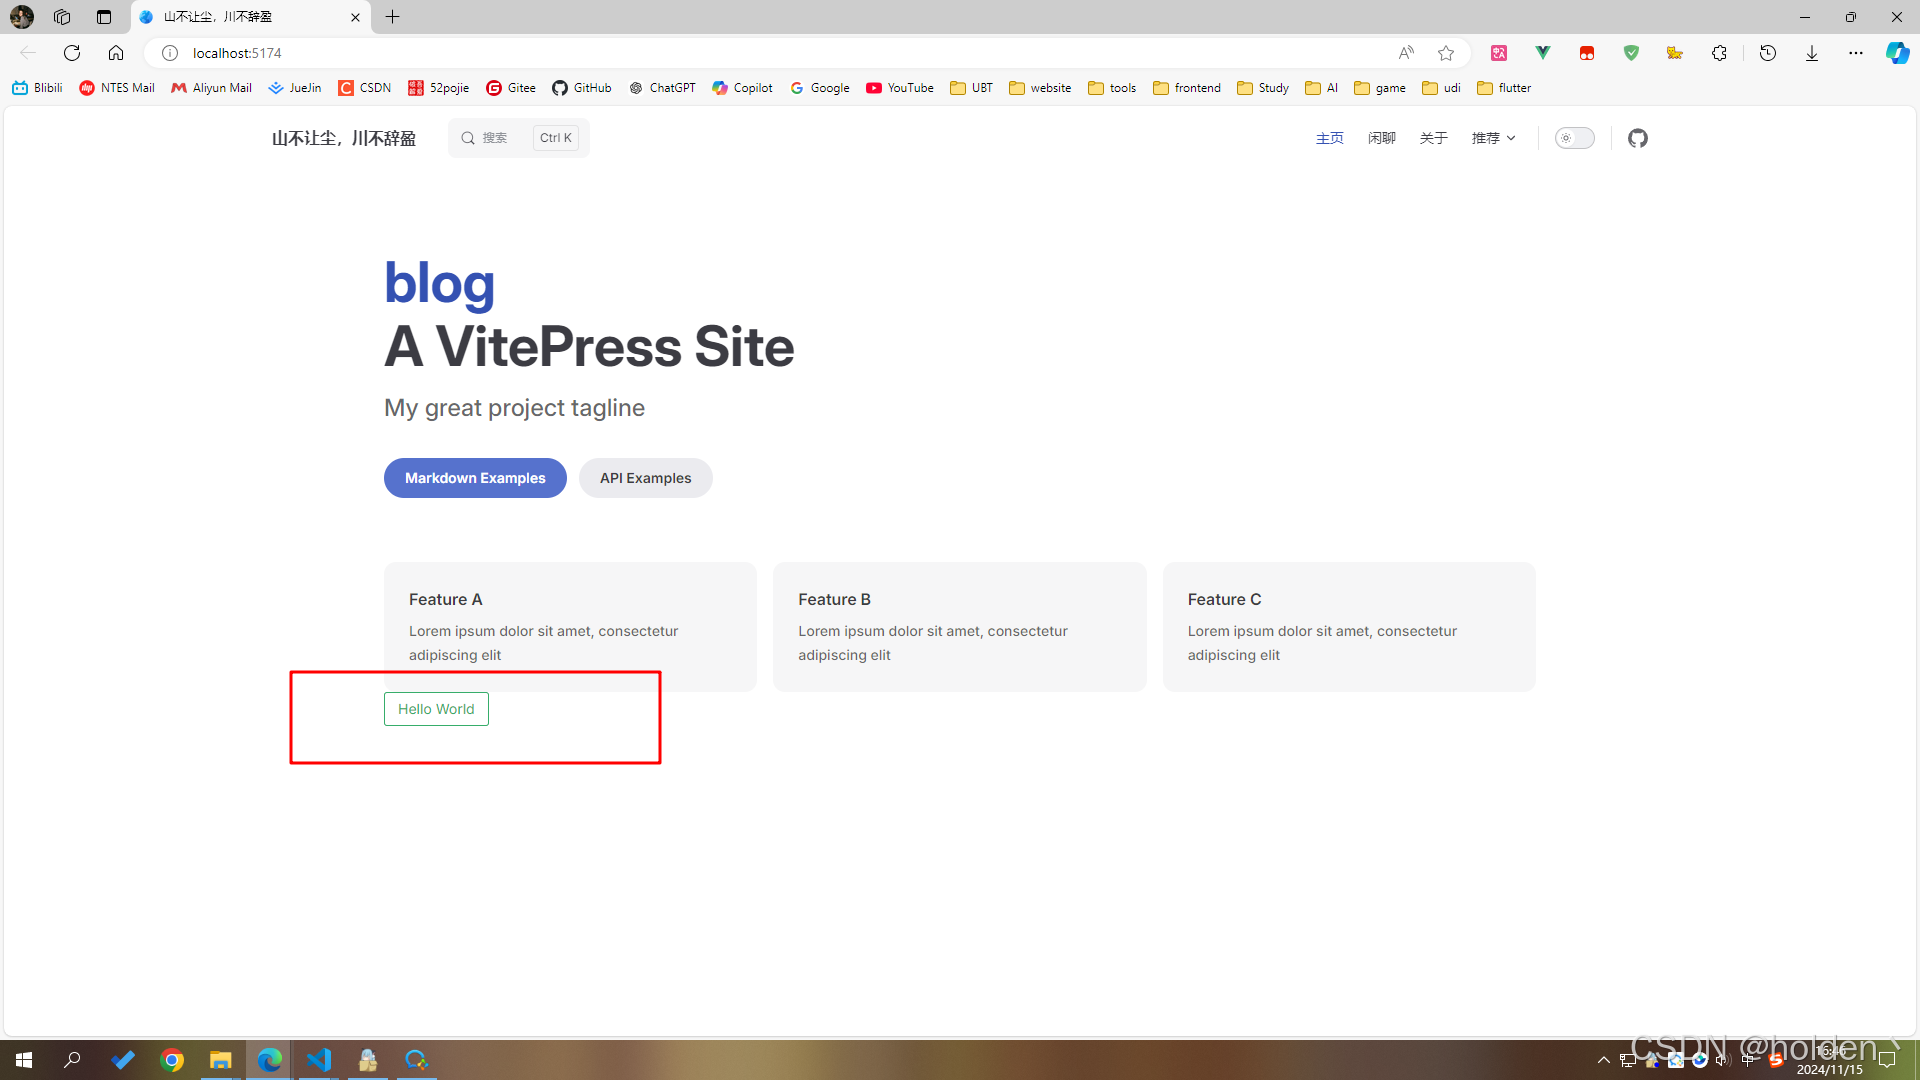
在 docs/index.md 文件中测试
js
<script setup>
import { NButton } from 'naive-ui'
</script>

<NButton>Hello World</NButton>
按钮正常出现 ,则配置完成
5.2 Sass
此项为选配,按需安装
(1)安装
sh
pnpm add -D sass(2)忽视告警
安装sass会出现此告警,目前没有发现什么问题
Deprecation Warning: The legacy JS API is deprecated and will be removed in Dart Sass 2.0.0
.vitepress/config.mts
ts{5-13}
import { defineConfig } from 'vite'

export default defineConfig({
  // ...
  vite:{
    css: {
     preprocessorOptions: {
       scss: {
          api: 'modern-compiler', // or 'modern'
        },
      },
    },
  }
  // ...
})
6. 首页
默认首页是docs/index.md
6.1 自定义组件
由于想自己写首页样式,所以仅保留 layout: home
新建 docs/.vitepress/components/ArticleList.vue 文件
vue
<script setup lang="ts"></script>

<template>
  <div class="artical-list"></div>
</template>

<style scoped lang="scss">
.artical-list {
  width: 100%;
  height: 100%;
  color: var(--black-color-1);
}
</style>
修改 docs/index.md 文件
md
---
layout: home
---

<script setup>
import ArticleList from './.vitepress/components/ArticleList.vue'
</script>

<ArticleList />
此时首页会白屏,因为自定义组件没有内容
6.2 设置文章信息
首先得了解 vitepress frontmatter . 文章可以在顶部自定义信息,如标题、描述、作者、标签、时间等,自定义信息后,可使用各种api访问
-
在 docs文件夹下新建 2023、2024 、pages 文件夹,移入示例文章
此项目的是以文件夹的名称按年份排序,个人习惯,可根据个人需求调整

-
frontmatter 可自定义key,我的配置如下(
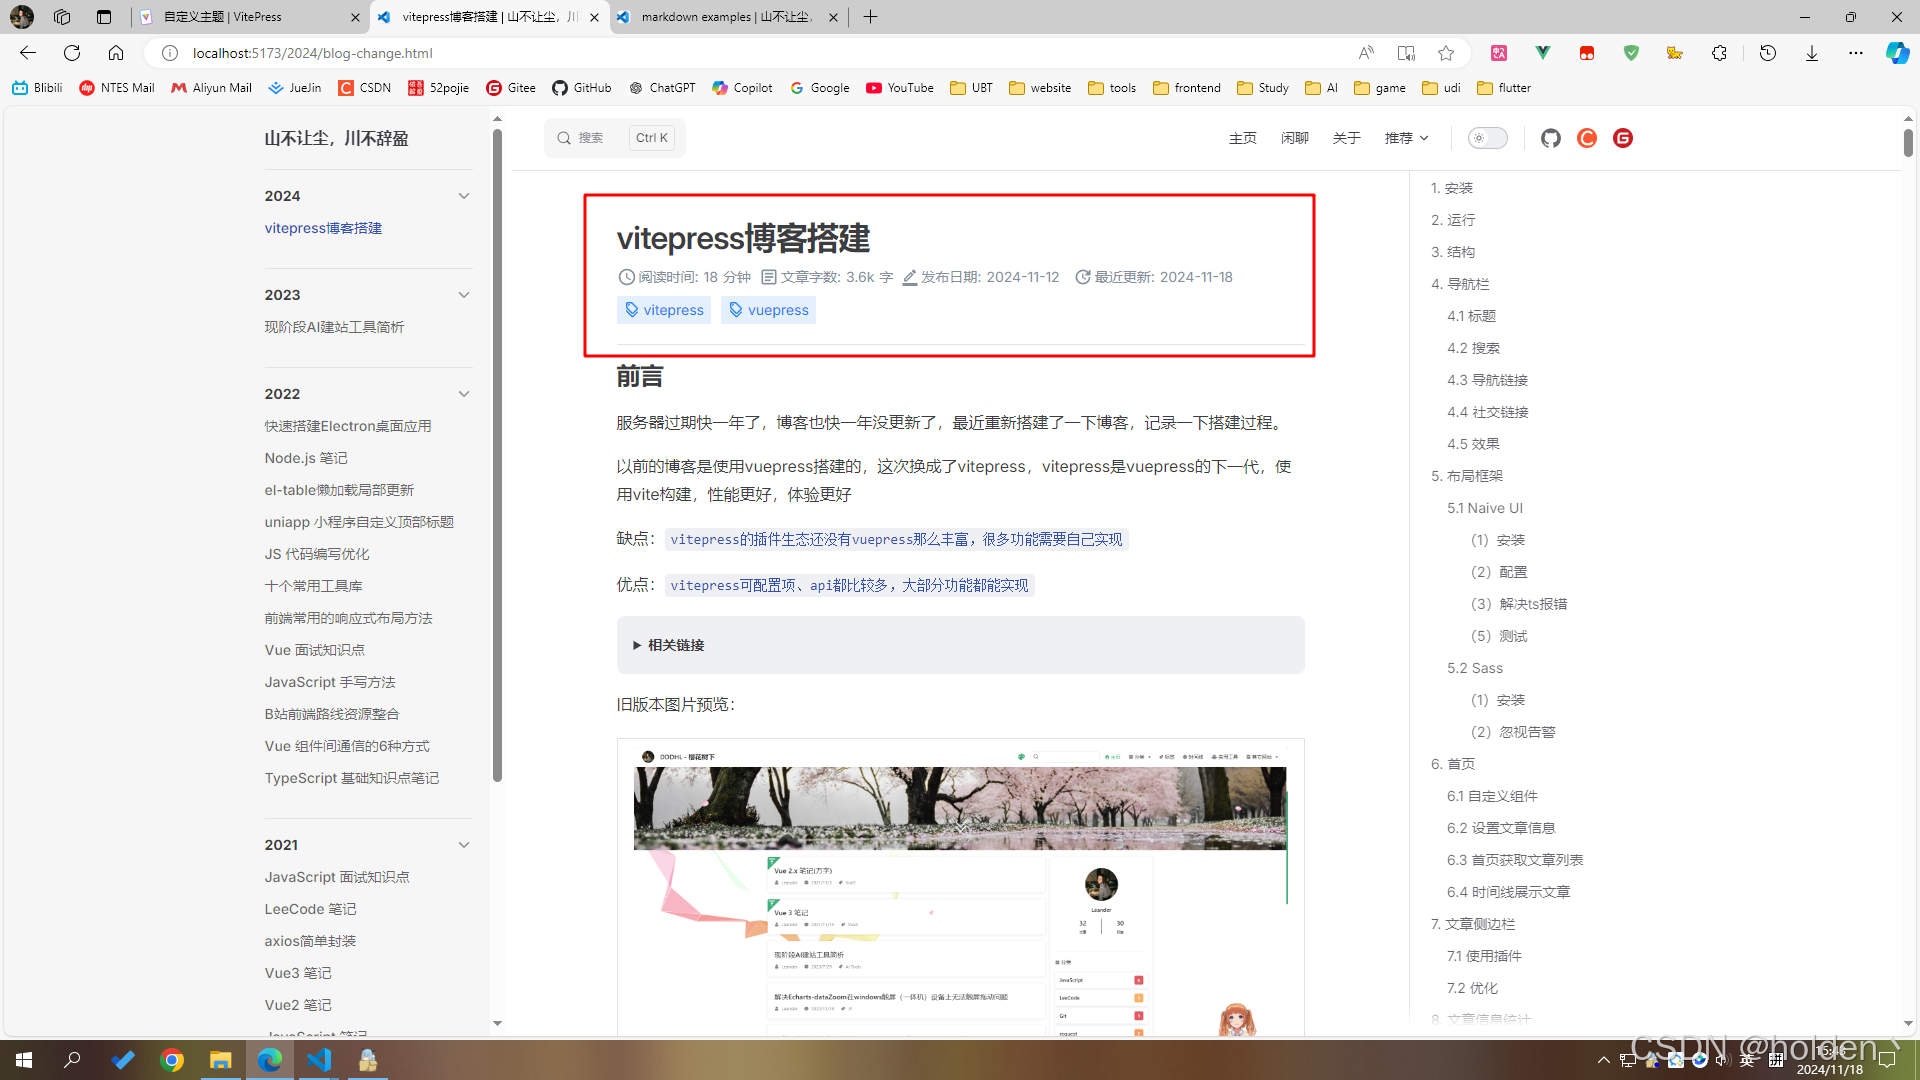
每个文章都需要配置):md--- title: vitepress博客搭建 date: 2024-11-12 info: 个人博客技术栈更新,快速搭建一个vitepress自定义博客 tags: - vitepress - vuepress --- -
示例md
next/pre指的是文章底部的下一篇/上一篇sidebar指的是左侧文章列表about.md文件md--- title: 关于我 date: 2024-11-12 prev: false next: false --- # 关于我 这里是关于我页面webPage.md文件md--- title: 实用网页 date: 2024-11-12 prev: false next: false sidebar: false --- # 实用网页 这里是实用网页页面
6.3 首页获取文章列表
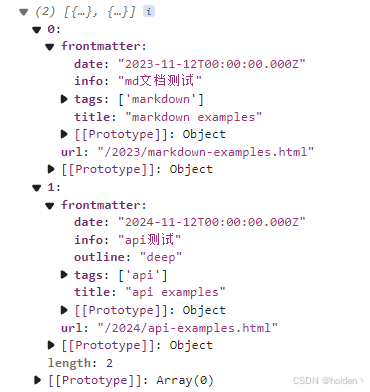
官方文档:vitepress createcontentloader
VitePress 提供了一个 createContentLoader 辅助函数,可通过它获取到匹配的文章列表信息
-
ESM模式
package.jsonjson"type": "module" -
新建
.vitepress/utils/posts.data.ts文件tsimport { createContentLoader } from 'vitepress' export default createContentLoader('../docs/*/*.md' /* options */) -
在主页组件中引入并打印
.vitepress/components/ArticleList.vue此处用了类型忽略ts// @ts-ignore import { data as posts } from '../utils/posts.data' console.log(posts)
6.4 时间线展示文章
此处可以自行设计,我使用的是时间线展示。
-
首先,需要定义一些暗色和亮色的公共样式
官方文档:vitepress 自定义css
新建
.vitepress/theme/styles/global.css&.vitepress/theme/styles/rewrite.css文件此处是区分重写样式和个人自定义的样式,可根据个人需求调整
global.css文件css@import './rewrite.css'; :root { --border-color-1: rgb(242, 243, 245); --black-color-1: rgb(60, 60, 67); --grey-color-1: rgb(134, 144, 156); --grey-color-2: rgb(229, 230, 235); --blue-color-1: rgb(22, 93, 255); --border-radius: 8px; img { display: block; margin: auto; cursor: pointer; } .vp-doc { h2:first-of-type { margin: 10px 0 16px; padding-top: 15px; } } .VPHome { margin-bottom: 23px; } } .dark { --border-color-1: rgba(255, 255, 255, 0.08); --black-color-1: rgba(255, 255, 255, 0.9); --grey-color-1: rgba(255, 255, 255, 0.5); --grey-color-2: rgb(72, 72, 73); --blue-color-1: rgb(60, 126, 255); }rewrite.css文件css.VPNavBar.home.top { border-bottom: 1px solid #f2f3f5; } .dark { .VPNavBar.home.top { border-bottom: 1px solid #000; } } :root { .vp-doc .custom-block { padding: 8px 16px; } .vp-doc .custom-block :first-child:first-child { margin: 8px 0; } .VPMenuGroup > .title { font-size: 0.7em; } /* 链接 */ .vp-doc a { background: linear-gradient(var(--vp-c-brand-soft), var(--vp-c-brand-soft)) no-repeat center bottom / 100% 2px; text-decoration: none; transition: 0.2s; } .vp-doc a:hover { border-radius: 0.2em; background: linear-gradient(var(--vp-c-brand-soft), var(--vp-c-brand-soft)) no-repeat center bottom / 100% 100%; } .vp-doc strong { background: linear-gradient(var(--vp-c-brand-soft), var(--vp-c-brand-soft)) no-repeat center bottom / 100% 40%; } .vp-doc s { opacity: 0.6; } /* 文章目录hover */ .VPDocOutlineItem.root > li > a, .VPDocOutlineItem.nested > li > a { padding-left: 5px; padding-right: 5px; border-radius: 5px; } .VPDocOutlineItem.root > li > a:first-child:hover, .VPDocOutlineItem.root > li > a:first-child.active, .VPDocOutlineItem.nested li > a:hover, .VPDocOutlineItem.nested li > a.active { background-color: var(--grayA3); } } -
导入样式
官方文档:vitepress 自定义主题
新建
.vitepress/theme/index.ts文件tsimport './styles/global.css' // ... -
主页设计
不多解释,放置一个头像
docs/public/assets/avatar.jpg即可。注意:此处深色区域,过滤了
/pages/路径下的文章,因为该路径下的文件是作为独立页面展示的,参考博客中的关于我/闲聊。ts<script setup lang="ts"> import { NTimeline, NTimelineItem, NIcon, NBackTop, NTag } from 'naive-ui' import { useRouter } from 'vitepress' import dayjs from 'dayjs' import { EmailOutlined, DiscountOutlined } from '@vicons/material' // @ts-ignore import { data as posts } from '../utils/posts.data' const router = useRouter() const list = posts .filter((item) => !item.url.includes('/pages/')) .map((item) => ({ ...item, unixDate: dayjs(item.frontmatter.date).unix(), })) .sort((a, b) => b.unixDate - a.unixDate) .map((item) => { const { unixDate, ...rest } = item return rest }) const jump = (path: string) => { router.go(path) } </script> <template> <div class="artical-list"> <section class="left-wrapper"> <img class="avatar" src="/assets/avatar.jpg" alt="avatar" /> <p class="name">holden</p> <p class="text">快不快乐有天总过去</p> <div class="email"> <NIcon :size="23"> <EmailOutlined /> </NIcon> holden.lee@aliyun.com </div> </section> <section class="right-wrapper"> <n-timeline size="large"> <n-timeline-item v-for="item in list"> <template #icon> <div class="icon"> <p>{{ dayjs(item.frontmatter.date).format('YYYY-MM-DD') }}</p> <div class="dot"></div> </div> </template> <template #default> <div class="card" @click="jump(item.url)"> <div class="title">{{ item.frontmatter.title }}</div> <div class="tags"> <n-tag :bordered="false" type="info" v-for="tagItem in item.frontmatter.tags"> {{ tagItem }} <template #icon> <n-icon :size="16" :component="DiscountOutlined" /> </template> </n-tag> </div> <div class="info">{{ item.frontmatter.info ?? '无简介' }}</div> <div class="date">{{ dayjs(item.frontmatter.date).format('YYYY-MM-DD') }}</div> </div> </template> </n-timeline-item> </n-timeline> </section> <n-back-top :right="10" /> </div> </template> <style scoped lang="scss"> .artical-list { width: 100%; height: 100%; color: var(--black-color-1); display: flex; .left-wrapper { position: sticky; top: 92px; margin-top: 3vh; border: 1px solid var(--border-color-1); width: 250px; height: 300px; display: flex; flex-direction: column; align-items: center; border-radius: var(--border-radius); p { margin: 0; } .avatar { width: 100px; border-radius: 100%; user-select: none; cursor: auto; margin: 40px 0 0 0; } .name { font-size: 20px; margin: 10px 0; } .text { font-size: 14px; color: var(--grey-color-1); user-select: none; } .email { width: 100%; height: 25px; display: flex; align-items: center; justify-content: center; cursor: pointer; margin-top: 10px; } } .right-wrapper { margin-left: 150px; margin-top: 3vh; width: calc(100% - 250px - 150px); min-width: 300px; :deep(.n-timeline-item-timeline__line) { background-color: var(--grey-color-2); } .card { cursor: pointer; } .icon { width: 6px; height: 6px; position: relative; p { position: absolute; margin: 0; width: 130px; left: -140px; top: -2px; font-size: 12px; line-height: 12px; height: 12px; text-align: right; } .dot { width: 100%; height: 100%; border-radius: 100%; background-color: var(--blue-color-1); } } .card { width: 100%; min-height: 120px; color: var(--black-color-1); border: 1px solid var(--border-color-1); border-radius: var(--border-radius); padding: 15px; display: flex; flex-direction: column; justify-content: space-around; .title { font-size: 20px; font-weight: 700; cursor: pointer; } .tags { width: 100%; display: flex; flex-wrap: wrap; .n-tag { margin-right: 10px; } } .info, .date { font-size: 14px; color: var(--grey-color-1); margin-top: 5px; overflow: hidden; white-space: nowrap; text-overflow: ellipsis; } .date { display: none; } } } } @media (max-width: 730px) { .artical-list { flex-direction: column; .left-wrapper { min-width: 300px; width: 100%; position: static; } .right-wrapper { margin-left: 0; width: 100%; .icon { p { display: none; } } } .card { .date { display: block !important; } .info { display: none !important; } } } } </style> -
效果图

7. 文章侧边栏
官方文档:vitepress 侧边栏
正常情况下,需要手动配置侧边栏
ts
export default {
  themeConfig: {
    sidebar: [
      {
        text: 'Guide',
        items: [
          { text: 'Introduction', link: '/introduction' },
          { text: 'Getting Started', link: '/getting-started' },
          ...
        ]
      }
    ]
  }
}
7.1 使用插件
插件可以自动生成侧边栏并且根据文章名称日期排序
sh
pnpm add -D vitepress-sidebar.vitepress/config.mts 文件,具体配置请看官方文档
ts
import { generateSidebar } from 'vitepress-sidebar'
// ...

const autoSidebar = () => {
  let result: any = generateSidebar({
    documentRootPath: '/docs',
    collapseDepth: 2,
    useTitleFromFrontmatter: true,
    sortMenusByFrontmatterDate: true,
    sortMenusOrderByDescending: true,
  })
  return result.map((year) => ({
    ...year,
    items: year.items.reverse(),
  }))
}

export default defineConfig({
  // ...
  themeConfig: {
    sidebar: autoSidebar(),
  },
  // ...
})
配置完成后的效果
7.2 优化
侧边栏中,会显示docs文件夹下所有的md,包括了我们需要单独显示的pages目录
如果直接在autoSideBar函数中过滤pages目录下的文件,则无法跳转,因此得从页面下手,css隐藏。(如果不需要隐藏该目录的话,以下步骤忽视)
-
新建
.vitepress/theme/MyLayout.vue文件ts<script setup lang="ts"> import DefaultTheme from 'vitepress/theme' import { useRoute } from 'vitepress' import { watch, nextTick, onMounted } from 'vue' const { Layout } = DefaultTheme const route = useRoute() onMounted(() => { hideSpecificSidebarItem() }) watch( () => route.path, (_, oldPath) => { if (oldPath === '/') { nextTick(() => { hideSpecificSidebarItem() }) } } ) // 隐藏pages function hideSpecificSidebarItem() { const sidebarItems = document.querySelectorAll( '#VPSidebarNav > .group' ) as NodeListOf<HTMLElement> sidebarItems.forEach((item, index) => { const textContent = item.querySelector('.text')?.textContent?.trim() if (textContent === 'pages') { item.style.display = 'none' sidebarItems[index + 1].style.borderTop = 'none' } }) } </script> <template> <Layout></Layout> </template> <style scoped lang="scss"></style> -
修改
.vitepress/theme/index.ts文件tsimport MyLayout from './MyLayout.vue' // ... const NaiveUIProvider = defineComponent({ render() { return h( NConfigProvider, { abstract: true, inlineThemeDisabled: true }, { default: () => [ h(MyLayout, null, { default: this.$slots.default?.() }), import.meta.env.SSR ? [h(CssRenderStyle), h(VitepressPath)] : null, ], } ) }, }) // ... -
效果

8. 文章信息统计
-
新建
.vitepress/utils/getReadingTime.ts文件tsexport function getWords(content: string): RegExpMatchArray | null { // 仅匹配英文单词,忽略标点和纯数字 return content.match(/\b[a-zA-Z]+(?:['-]?[a-zA-Z]+)?\b/gu) } export function getChinese(content: string): RegExpMatchArray | null { // 匹配中文字符 return content.match(/[\u4E00-\u9FD5]/gu) } export function getEnWordCount(content: string): number { // 英文单词数量 return getWords(content)?.length || 0 } export function getCnWordCount(content: string): number { // 中文字符数量 return getChinese(content)?.length || 0 } export function getWordNumber(content: string): number { // 总字数统计 const enWordCount = getEnWordCount(content) const cnWordCount = getCnWordCount(content) return enWordCount + cnWordCount } export function getReadingTime(content: string, cnWordPerMinute = 350, enWordPerMinute = 160) { const trimmedContent = content.trim() const enWord = getEnWordCount(trimmedContent) const cnWord = getCnWordCount(trimmedContent) const totalWords = enWord + cnWord const words = totalWords >= 1000 ? `${Math.round(totalWords / 100) / 10}k` : totalWords const readingTime = cnWord / cnWordPerMinute + enWord / enWordPerMinute const readTime = Math.ceil(readingTime) return { readTime, words, } } -
新建
.vitepress/plugins/headerPlugin.ts文件tsimport { Plugin } from 'vite' import { getReadingTime } from '../utils/getReadingTime' import fs from 'fs' export function HeaderPlugin(): Plugin { return { name: 'header-plugin', enforce: 'pre', async transform(code, id) { if (!id.match(/\.md\b/)) return null const cleanContent = cleanMarkdownContent(code) // 获取文件的最近更新时间 const lastUpdated = getLastUpdatedTime(id) // 获取阅读时间和字数 const { readTime, words } = getReadingTime(cleanContent) // 插入组件到文章中 code = insertReadingTimeAndWords( `<ArticleHeader readTime="${readTime}" words="${words}" lastUpdated="${lastUpdated}" />`, code ) return code }, } } // 获取文件的最近更新时间 function getLastUpdatedTime(filePath: string): string { const stats = fs.statSync(filePath) const lastModifiedTime = stats.mtime return lastModifiedTime.toLocaleString() } // 插入目标字符串到第一个一级标题后 function insertReadingTimeAndWords(target: string, source: string) { const headerRegex = /(^#\s.+$)/m return source.replace(headerRegex, `$1\n\n${target}`) } // 去掉 Frontmatter function cleanMarkdownContent(content: string): string { return content.replace(/^---[\s\S]+?---\n+/g, '').trim() } -
.vitepress/config.mts文件tsimport { HeaderPlugin } from './plugins/headerPlugin' // ... export default defineConfig({ vite: [ // ... HeaderPlugin(), ], }) -
新建
.vitepress/components/ArticleHeader.vue组件ts<script setup lang="ts"> import { AccessTimeFilled, ArticleOutlined, BorderColorOutlined, UpdateOutlined, DiscountOutlined, } from '@vicons/material' import { NIcon, NTag } from 'naive-ui' import { useData } from 'vitepress' import dayjs from 'dayjs' const { frontmatter } = useData() defineProps<{ readTime: string words: string lastUpdated: string }>() </script> <template> <div class="header"> <section class="info"> <div class="read"> <NIcon :size="20"> <AccessTimeFilled /> </NIcon> 阅读时间: <p>{{ readTime }}</p> 分钟 </div> <div class="words"> <NIcon :size="20"> <ArticleOutlined /> </NIcon> 文章字数: <p>{{ words }}</p> 字 </div> <div class="write"> <NIcon :size="18"> <BorderColorOutlined /> </NIcon> 发布日期: <p>{{ dayjs(frontmatter.date).format('YYYY-MM-DD') }}</p> </div> <div class="update"> <NIcon :size="20"> <UpdateOutlined /> </NIcon> 最近更新: <p>{{ dayjs(lastUpdated).format('YYYY-MM-DD') }}</p> </div> </section> <section class="tags"> <n-tag :bordered="false" type="info" v-for="item in frontmatter.tags"> {{ item }} <template #icon> <n-icon :size="16" :component="DiscountOutlined" /> </template> </n-tag> </section> </div> </template> <style scoped lang="scss"> .header { width: 100%; .info { width: 100%; display: flex; margin-top: 5px; margin-bottom: 5px; flex-wrap: wrap; font-size: 14px; color: var(--grey-color-1); .read, .words, .write, .update { display: flex; align-items: center; justify-content: center; margin-right: 8px; p { margin: 0 5px; } i { margin-right: 2px; } } } .tags { width: 100%; display: flex; flex-wrap: wrap; .n-tag { margin-right: 10px; margin-bottom: 10px; } } } </style> -
配置全局组件
.vitepress/theme/index.tstsimport ArticleHeader from '../components/ArticleHeader.vue' // ... export default { extends: DefaultTheme, Layout: NaiveUIProvider, enhanceApp: ({ app }) => { import ArticleHeader from '../components/ArticleHeader.vue' if (import.meta.env.SSR) { const { collect } = setup(app) app.provide('css-render-collect', collect) } }, } -
效果

9. 评论插件
我使用的是:@giscus/vue,无跟踪,无广告,永久免费,github邮箱通知,支持暗色切换。
9.1 安装配置
-
新建一个
公开仓库,打开仓库 Settings,勾选 Discussions,开启评论区私有仓库的话访客无法查看讨论

-
GitHub 安装 giscus

-
giscus 配置
安装完毕后,点击 Configure 配置 giscus,选中刚刚创建的仓库,点击保存

-
项目中安装
shpnpm add -D @giscus/vue
9.2 获取设置
-
去官方文档获取设置
-
填写自己的仓库信息

-
滚到到下边,获取设置

9.3 使用
利用默认布局组件 Layout 的 doc-after 插槽将 giscus 组件放入页面中
官方文档:vitepress 布局插槽
.vitepress/theme/MyLayout.vue 文件
ts
<script setup lang="ts">
import Giscus from '@giscus/vue'
import { useRoute,useData } from "vitepress";
const { page } = useData()
// ...
</script>
<template>
  <Layout>
     <template #doc-after>
        <div style="margin-top: 24px">
          <Giscus
            :key="page.filePath"
            repo="lee-holden/vitepress-blog-template"
            repo-id="R_kgDONRAkeA"
            category="Announcements"
            category-id="IC_kwDONRAkeM4CkXRA"
            mapping="title"
            strict="0"
            reactions-enabled="1"
            emit-metadata="0"
            input-position="top"
            lang="zh-CN"
            crossorigin="anonymous"
          />
        </div>
    </template>
  </Layout>
</template>

<style scoped lang="scss"></style>
效果
9.4 优化
尝试切换亮/暗样式会发现评论组件不会跟随切换,这需要与 giscus 通信实现。
giscus 可以通过 message 与 giscus iframe 通信,所以我们在切换样式时通知 giscus 同步切换即可,恰好vitepress提供了 isDark 数据,我们可以监听它进行切换
官方文档:vitepress useData
官方文档:giscus-to-parent-message-events
.vitepress/theme/MyLayout.vue 文件
ts
<script setup lang="ts">
const { page, isDark } = useData()
import { useRoute, useData, inBrowser } from 'vitepress'

watch(isDark, (dark) => {
  if (!inBrowser) return

  const iframe = document.querySelector('giscus-widget')?.shadowRoot?.querySelector('iframe')

  iframe?.contentWindow?.postMessage(
    { giscus: { setConfig: { theme: dark ? 'dark' : 'light' } } },
    'https://giscus.app'
  )
})

// ...
</script>

<template>
  <Layout>
    <template #doc-after>
      <div style="margin-top: 24px">
        <Giscus
          :key="page.filePath"
          repo="lee-holden/vitepress-blog-template"
          repo-id="R_kgDONRAkeA"
          category="Announcements"
          category-id="IC_kwDONRAkeM4CkXRA"
          mapping="title"
          strict="0"
          reactions-enabled="1"
          emit-metadata="0"
          input-position="top"
          :theme="isDark ? 'dark' : 'light'"
          lang="zh-CN"
          crossorigin="anonymous"
        />
      </div>
    </template>
  </Layout>
</template>

<style scoped lang="scss"></style>
效果
10. 项目配置
10.1 prettier
-
安装vscode拓展:Prettier - Code formatter
-
安装prettier库
shpnpm add -D prettier -
项目根目录,新建
.prettierrc文件json{ "printWidth": 100, "tabWidth": 2, "useTabs": false, "semi": false, "singleQuote": true, "quoteProps": "as-needed", "jsxSingleQuote": false, "trailingComma": "es5", "bracketSpacing": true, "jsxBracketSameLine": false, "arrowParens": "always", "proseWrap": "preserve", "htmlWhitespaceSensitivity": "css", "endOfLine": "lf" } -
项目根目录,新建
.vscode/settings.jsonjson{ "editor.defaultFormatter": "esbenp.prettier-vscode", "editor.formatOnSave": true, "[javascript]": { "editor.defaultFormatter": "esbenp.prettier-vscode" }, "[typescript]": { "editor.defaultFormatter": "esbenp.prettier-vscode" }, "[json]": { "editor.defaultFormatter": "esbenp.prettier-vscode" }, "[html]": { "editor.defaultFormatter": "esbenp.prettier-vscode" }, "[css]": { "editor.defaultFormatter": "esbenp.prettier-vscode" }, "[scss]": { "editor.defaultFormatter": "esbenp.prettier-vscode" }, "[vue]": { "editor.defaultFormatter": "esbenp.prettier-vscode" }, "prettier.configPath": "./.prettierrc" } -
项目根目录,新建
.prettierignore文件jsoncache node_modules dist temp public !docs -
格式化全部文件
shpnpm prettier --write .
10.2 git
-
项目根目录,新建
.gitignore文件jsonnode_modules .temp docs/.vitepress/cache dist cache .eslintcache components.d.ts .env.local .env.\*.local npm-debug.log* yarn-debug.log* yarn-error.log* pnpm-debug.log* meta.json -
配置git仓库并且推送
shgit init git add . git commit -m 'first commit' git remote add origin git@github.com:lee-holden/vitepress-blog-template.git git push -u origin master
11. 自动部署GitHub Pages
官方文档:vitepress 部署
-
设置根目录
官方文档:vitepress 根目录设置
如果你使用的是 Github 页面并部署到 user.github.io/repo/,请将 base 设置为 /repo/。
.vitepress/config.mts文件ts// ... export default defineConfig({ base: '/vitepress-blog-template/', // 替换成你的仓库名称 // ... }).vitepress/components/ArticleList.vuets<script setup lang="ts"> // ... const jump = (path: string) => { router.go('vitepress-blog-template' + path) } </script> // ... -
开启GitHub Pages 功能

-
项目根目录,新建
.github/workflows/deploy.yml官方示例yml# 构建 VitePress 站点并将其部署到 GitHub Pages 的示例工作流程 # name: Deploy VitePress site to Pages on: # 在针对 `main` 分支的推送上运行。如果你 # 使用 `master` 分支作为默认分支,请将其更改为 `master` push: branches: [main] # 允许你从 Actions 选项卡手动运行此工作流程 workflow_dispatch: # 设置 GITHUB_TOKEN 的权限,以允许部署到 GitHub Pages permissions: contents: read pages: write id-token: write # 只允许同时进行一次部署,跳过正在运行和最新队列之间的运行队列 # 但是,不要取消正在进行的运行,因为我们希望允许这些生产部署完成 concurrency: group: pages cancel-in-progress: false jobs: # 构建工作 build: runs-on: ubuntu-latest steps: - name: Checkout uses: actions/checkout@v4 with: fetch-depth: 0 # 如果未启用 lastUpdated,则不需要 # - uses: pnpm/action-setup@v3 # 如果使用 pnpm,请取消此区域注释 # with: # version: 9 # - uses: oven-sh/setup-bun@v1 # 如果使用 Bun,请取消注释 - name: Setup Node uses: actions/setup-node@v4 with: node-version: 20 cache: npm # 或 pnpm / yarn - name: Setup Pages uses: actions/configure-pages@v4 - name: Install dependencies run: npm ci # 或 pnpm install / yarn install / bun install - name: Build with VitePress run: npm run docs:build # 或 pnpm docs:build / yarn docs:build / bun run docs:build - name: Upload artifact uses: actions/upload-pages-artifact@v3 with: path: docs/.vitepress/dist # 部署工作 deploy: environment: name: github-pages url: ${{ steps.deployment.outputs.page_url }} needs: build runs-on: ubuntu-latest name: Deploy steps: - name: Deploy to GitHub Pages id: deployment uses: actions/deploy-pages@v4我的pnpm配置ymlname: Deploy VitePress site to Pages on: push: branches: - master - main workflow_dispatch: permissions: contents: read pages: write id-token: write concurrency: group: pages cancel-in-progress: false jobs: build: runs-on: ubuntu-latest steps: - name: Checkout uses: actions/checkout@v4 with: fetch-depth: 1 # 如果启用了 vitepress lastUpdated,则改成 0 - uses: pnpm/action-setup@v3 with: version: 9 - name: Setup Node uses: actions/setup-node@v4 with: node-version: 20 cache: pnpm - name: Setup Pages uses: actions/configure-pages@v4 - name: Install dependencies run: pnpm install - name: Build with VitePress run: pnpm docs:build - name: Upload artifact uses: actions/upload-pages-artifact@v3 with: path: docs/.vitepress/dist # 部署工作 deploy: environment: name: github-pages url: ${{ steps.deployment.outputs.page_url }} needs: build runs-on: ubuntu-latest name: Deploy steps: - name: Deploy to GitHub Pages id: deployment uses: actions/deploy-pages@v4 -
推送代码到仓库,查看Action
此处可以看到,Action已经成功运行,点进去可以看到build和部署进程,如果出现报错,可以查看报错信息


-
部署成功
12. 访问统计
用的是 busuanzi
-
安装
shpnpm add -D busuanzi.pure.js -
.vitepress/theme/index.ts文件tsimport { inBrowser } from 'vitepress' import busuanzi from 'busuanzi.pure.js' // ... export default { extends: DefaultTheme, Layout: NaiveUIProvider, enhanceApp: ({ app, router }) => { app.component('ArticleHeader', ArticleHeader) if (import.meta.env.SSR) { const { collect } = setup(app) app.provide('css-render-collect', collect) } if (inBrowser) { router.onAfterRouteChanged = () => { busuanzi.fetch() } } }, } -
.vitepress/theme/MyLayout.vue文件在网站底部插槽放入,官方文档:vitepress 布局插槽
ts<template> <Layout> <template #layout-bottom> <div class="bottom"> <div> 本站总访问量 <span id="busuanzi_value_site_pv" class="font-bold">--</span> 次 本站访客数 <span id="busuanzi_value_site_uv" class="font-bold">--</span> 人次 </div> <p>前端狗都不如 © 2021-2024 holden</p> </div> </template> </Layout> <!-- ... --> </template> <style lang="scss" scoped> .bottom { margin-left: 5%; width: 90%; height: 100px; display: flex; flex-direction: column; align-items: center; justify-content: center; border-top: 1px solid var(--border-color-1); text-align: center; p { margin-top: 5px; } } </style> -
效果
可以自行调整底部样式

13. 网站加载
部署Github Pages后发现,白屏时间比较长,此时可以考虑使用加载页
-
新建
.vitepress/components/Loading.vue文件ts<script setup lang="ts"></script> <template> <div class="loading"> <div class="loader"> <div v-for="_ in 5"></div> </div> </div> </template> <style scoped lang="scss"> $color: #3451b2; .loading { width: 100vw; height: 100vh; display: flex; justify-content: center; align-items: center; } .loader { position: relative; } .loader > div:nth-child(2) { -webkit-animation: pacman-balls 1s -0.99s infinite linear; animation: pacman-balls 1s -0.99s infinite linear; } .loader > div:nth-child(3) { -webkit-animation: pacman-balls 1s -0.66s infinite linear; animation: pacman-balls 1s -0.66s infinite linear; } .loader > div:nth-child(4) { -webkit-animation: pacman-balls 1s -0.33s infinite linear; animation: pacman-balls 1s -0.33s infinite linear; } .loader > div:nth-child(5) { -webkit-animation: pacman-balls 1s 0s infinite linear; animation: pacman-balls 1s 0s infinite linear; } .loader > div:first-of-type { width: 0px; height: 0px; border-right: 25px solid transparent; border-top: 25px solid $color; border-left: 25px solid $color; border-bottom: 25px solid $color; border-radius: 25px; -webkit-animation: rotate_pacman_half_up 0.5s 0s infinite; animation: rotate_pacman_half_up 0.5s 0s infinite; position: relative; left: -30px; } .loader > div:nth-child(2) { width: 0px; height: 0px; border-right: 25px solid transparent; border-top: 25px solid $color; border-left: 25px solid $color; border-bottom: 25px solid $color; border-radius: 25px; -webkit-animation: rotate_pacman_half_down 0.5s 0s infinite; animation: rotate_pacman_half_down 0.5s 0s infinite; margin-top: -50px; position: relative; left: -30px; } .loader > div:nth-child(3), .loader > div:nth-child(4), .loader > div:nth-child(5), .loader > div:nth-child(6) { background-color: $color; width: 15px; height: 15px; border-radius: 100%; margin: 2px; width: 10px; height: 10px; position: absolute; -webkit-transform: translate(0, -6.25px); transform: translate(0, -6.25px); top: 25px; left: 70px; } @-webkit-keyframes cube-transition { 25% { -webkit-transform: translateX(50px) scale(0.5) rotate(-90deg); transform: translateX(50px) scale(0.5) rotate(-90deg); } 50% { -webkit-transform: translate(50px, 50px) rotate(-180deg); transform: translate(50px, 50px) rotate(-180deg); } 75% { -webkit-transform: translateY(50px) scale(0.5) rotate(-270deg); transform: translateY(50px) scale(0.5) rotate(-270deg); } 100% { -webkit-transform: rotate(-360deg); transform: rotate(-360deg); } } @keyframes cube-transition { 25% { -webkit-transform: translateX(50px) scale(0.5) rotate(-90deg); transform: translateX(50px) scale(0.5) rotate(-90deg); } 50% { -webkit-transform: translate(50px, 50px) rotate(-180deg); transform: translate(50px, 50px) rotate(-180deg); } 75% { -webkit-transform: translateY(50px) scale(0.5) rotate(-270deg); transform: translateY(50px) scale(0.5) rotate(-270deg); } 100% { -webkit-transform: rotate(-360deg); transform: rotate(-360deg); } } @-webkit-keyframes pacman-balls { 75% { opacity: 0.7; } 100% { -webkit-transform: translate(-100px, -6.25px); transform: translate(-100px, -6.25px); } } @keyframes pacman-balls { 75% { opacity: 0.7; } 100% { -webkit-transform: translate(-100px, -6.25px); transform: translate(-100px, -6.25px); } } @-webkit-keyframes rotate_pacman_half_down { 0% { -webkit-transform: rotate(90deg); transform: rotate(90deg); } 50% { -webkit-transform: rotate(0deg); transform: rotate(0deg); } 100% { -webkit-transform: rotate(90deg); transform: rotate(90deg); } } @keyframes rotate_pacman_half_down { 0% { -webkit-transform: rotate(90deg); transform: rotate(90deg); } 50% { -webkit-transform: rotate(0deg); transform: rotate(0deg); } 100% { -webkit-transform: rotate(90deg); transform: rotate(90deg); } } @-webkit-keyframes rotate_pacman_half_up { 0% { -webkit-transform: rotate(270deg); transform: rotate(270deg); } 50% { -webkit-transform: rotate(360deg); transform: rotate(360deg); } 100% { -webkit-transform: rotate(270deg); transform: rotate(270deg); } } @keyframes rotate_pacman_half_up { 0% { -webkit-transform: rotate(270deg); transform: rotate(270deg); } 50% { -webkit-transform: rotate(360deg); transform: rotate(360deg); } 100% { -webkit-transform: rotate(270deg); transform: rotate(270deg); } } </style> -
.vitepress/theme/MyLayout.vue文件ts<script setup lang="ts"> // ... import { watch, nextTick, onMounted, ref } from 'vue' import Loading from '../components/Loading.vue' const loading = ref(true) onMounted(() => { loading.value = false }) // ... </script> <template> <Loading v-show="loading" /> <Layout v-show="!loading"> <!-- ... --> </Layout> </template> -
效果

14. 图片放大
vitepress文章中,图片点击没有任何效果,可以使用 vitepress-plugin-image-viewer 这个插件
-
安装
If you use pnpm to install, you need to install viewerjs additionally.shpnpm add vitepress-plugin-image-viewer viewerjs -
.vitepress/theme/index.ts文件ts// ... import 'viewerjs/dist/viewer.min.css' import imageViewer from 'vitepress-plugin-image-viewer' import vImageViewer from 'vitepress-plugin-image-viewer/lib/vImageViewer.vue' // ... export default { extends: DefaultTheme, Layout: NaiveUIProvider, enhanceApp: ({ app, router }) => { app.component('ArticleHeader', ArticleHeader) app.component('vImageViewer', vImageViewer) if (import.meta.env.SSR) { const { collect } = setup(app) app.provide('css-render-collect', collect) } if (inBrowser) { router.onAfterRouteChanged = () => { busuanzi.fetch() } } }, setup() { const route = useRoute() imageViewer(route) }, } -
效果

总结
从0创建vitepress博客,一步步来,收获满满。
有什么问题欢迎到评论区咨询,一起交流学习。