这里写目录标题
-
- [1.目标检测 Detection](#1.目标检测 Detection)
- [2.实例分割 segment](#2.实例分割 segment)
- [3.图像分类 classify](#3.图像分类 classify)
- [4.关键点估计 Keypoint detection](#4.关键点估计 Keypoint detection)
- [5.视频帧检测 video detect](#5.视频帧检测 video detect)
- [6.视频帧分类 video classify](#6.视频帧分类 video classify)
- [7.旋转目标检测 obb detect](#7.旋转目标检测 obb detect)
- 8.替换yolo11模型
- 给我点个赞吧,谢谢了
笔记本 华为matebook14s,windows系统,cpu
1.装Label-studio
2.装Label-studio-ml-backend
3.装ultralytics
4.装docker desktop 并点击启动

配置好docker-composel.yml文件32 33行
32表示从docker容器里访问容器外的网址,label-studio默认端口8080
33表示label-studio API KEY ,获取方式
  - LABEL_STUDIO_URL=http://host.docker.internal:8080
 - LABEL_STUDIO_API_KEY=d3ece86209a6a0ca850d468d6c42fa3d7d78be47
点击label-studio头像-》点击Account & settings-》复制access token


然后拉取镜像,第一次耗时一个小时左右。记得科学上网呦
cd label_studio_ml\examples\yolo\
docker-compose up --build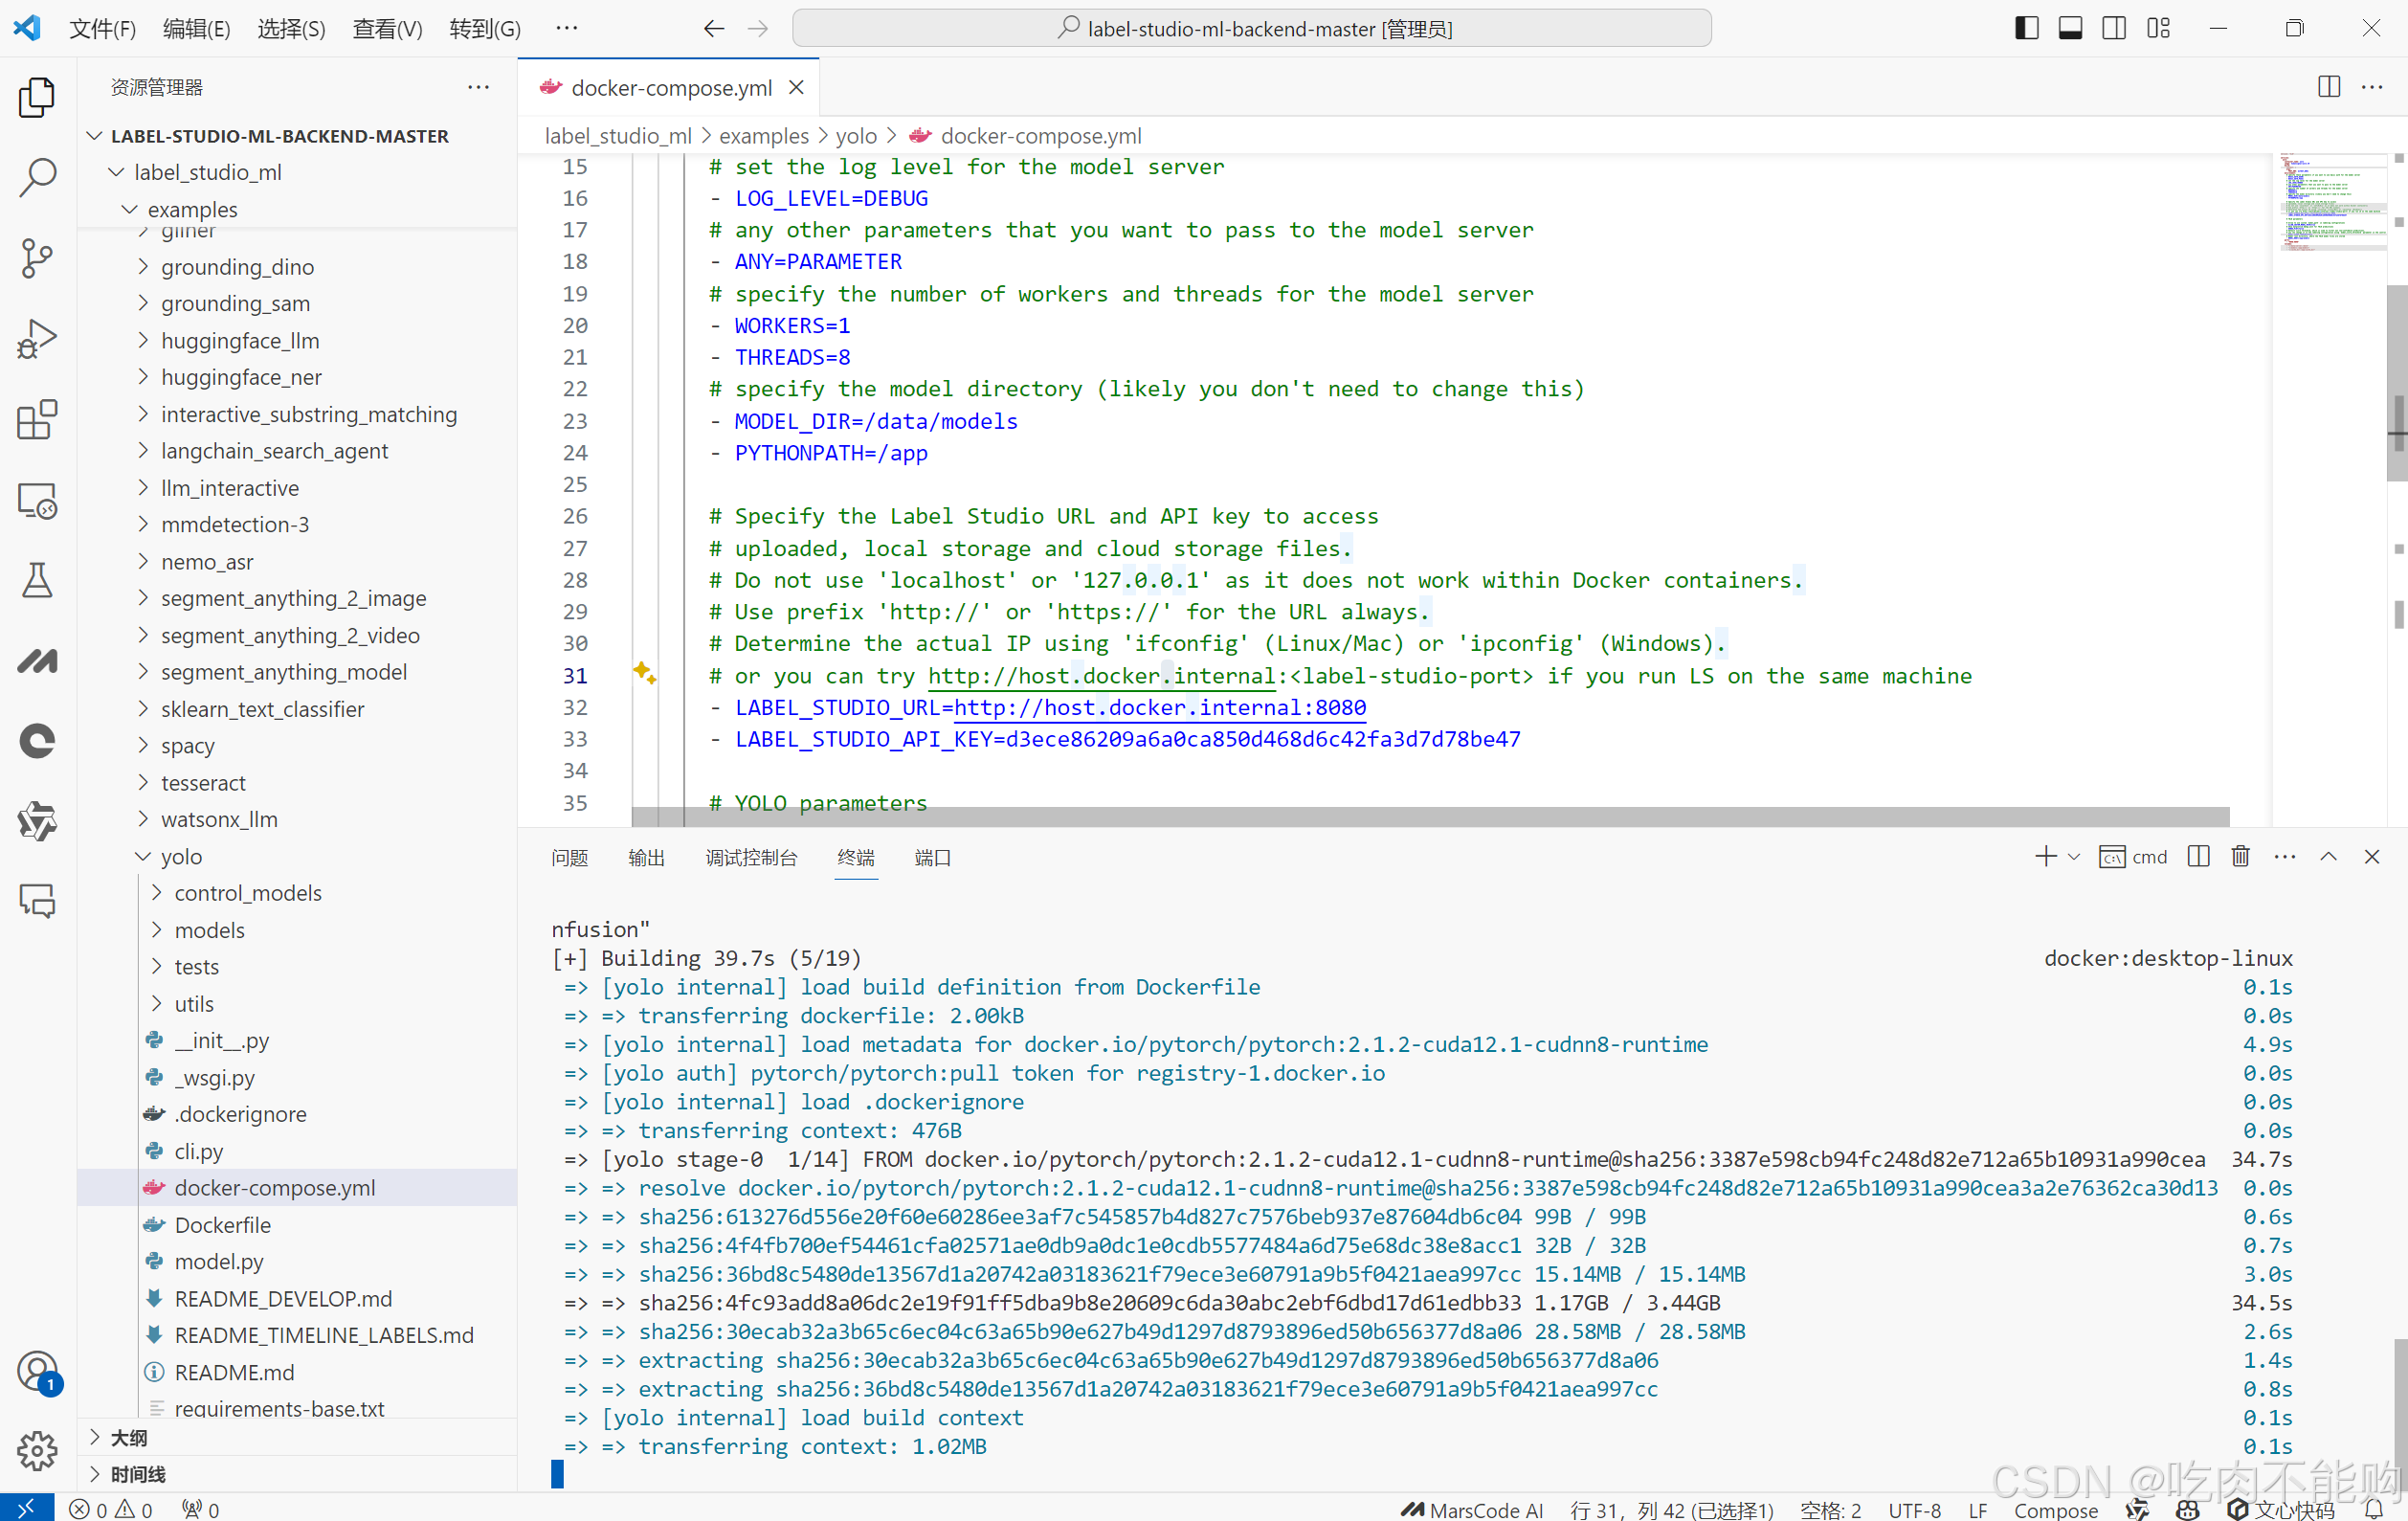
结果如下就表示启动docker成功:

在label-studio 后台model处导入label-studio-ml-backend默认网址:

如果连接成功,会有测试通过,显示connected,否则报错
自行修改参考docker-compose.yml第46行
ports:
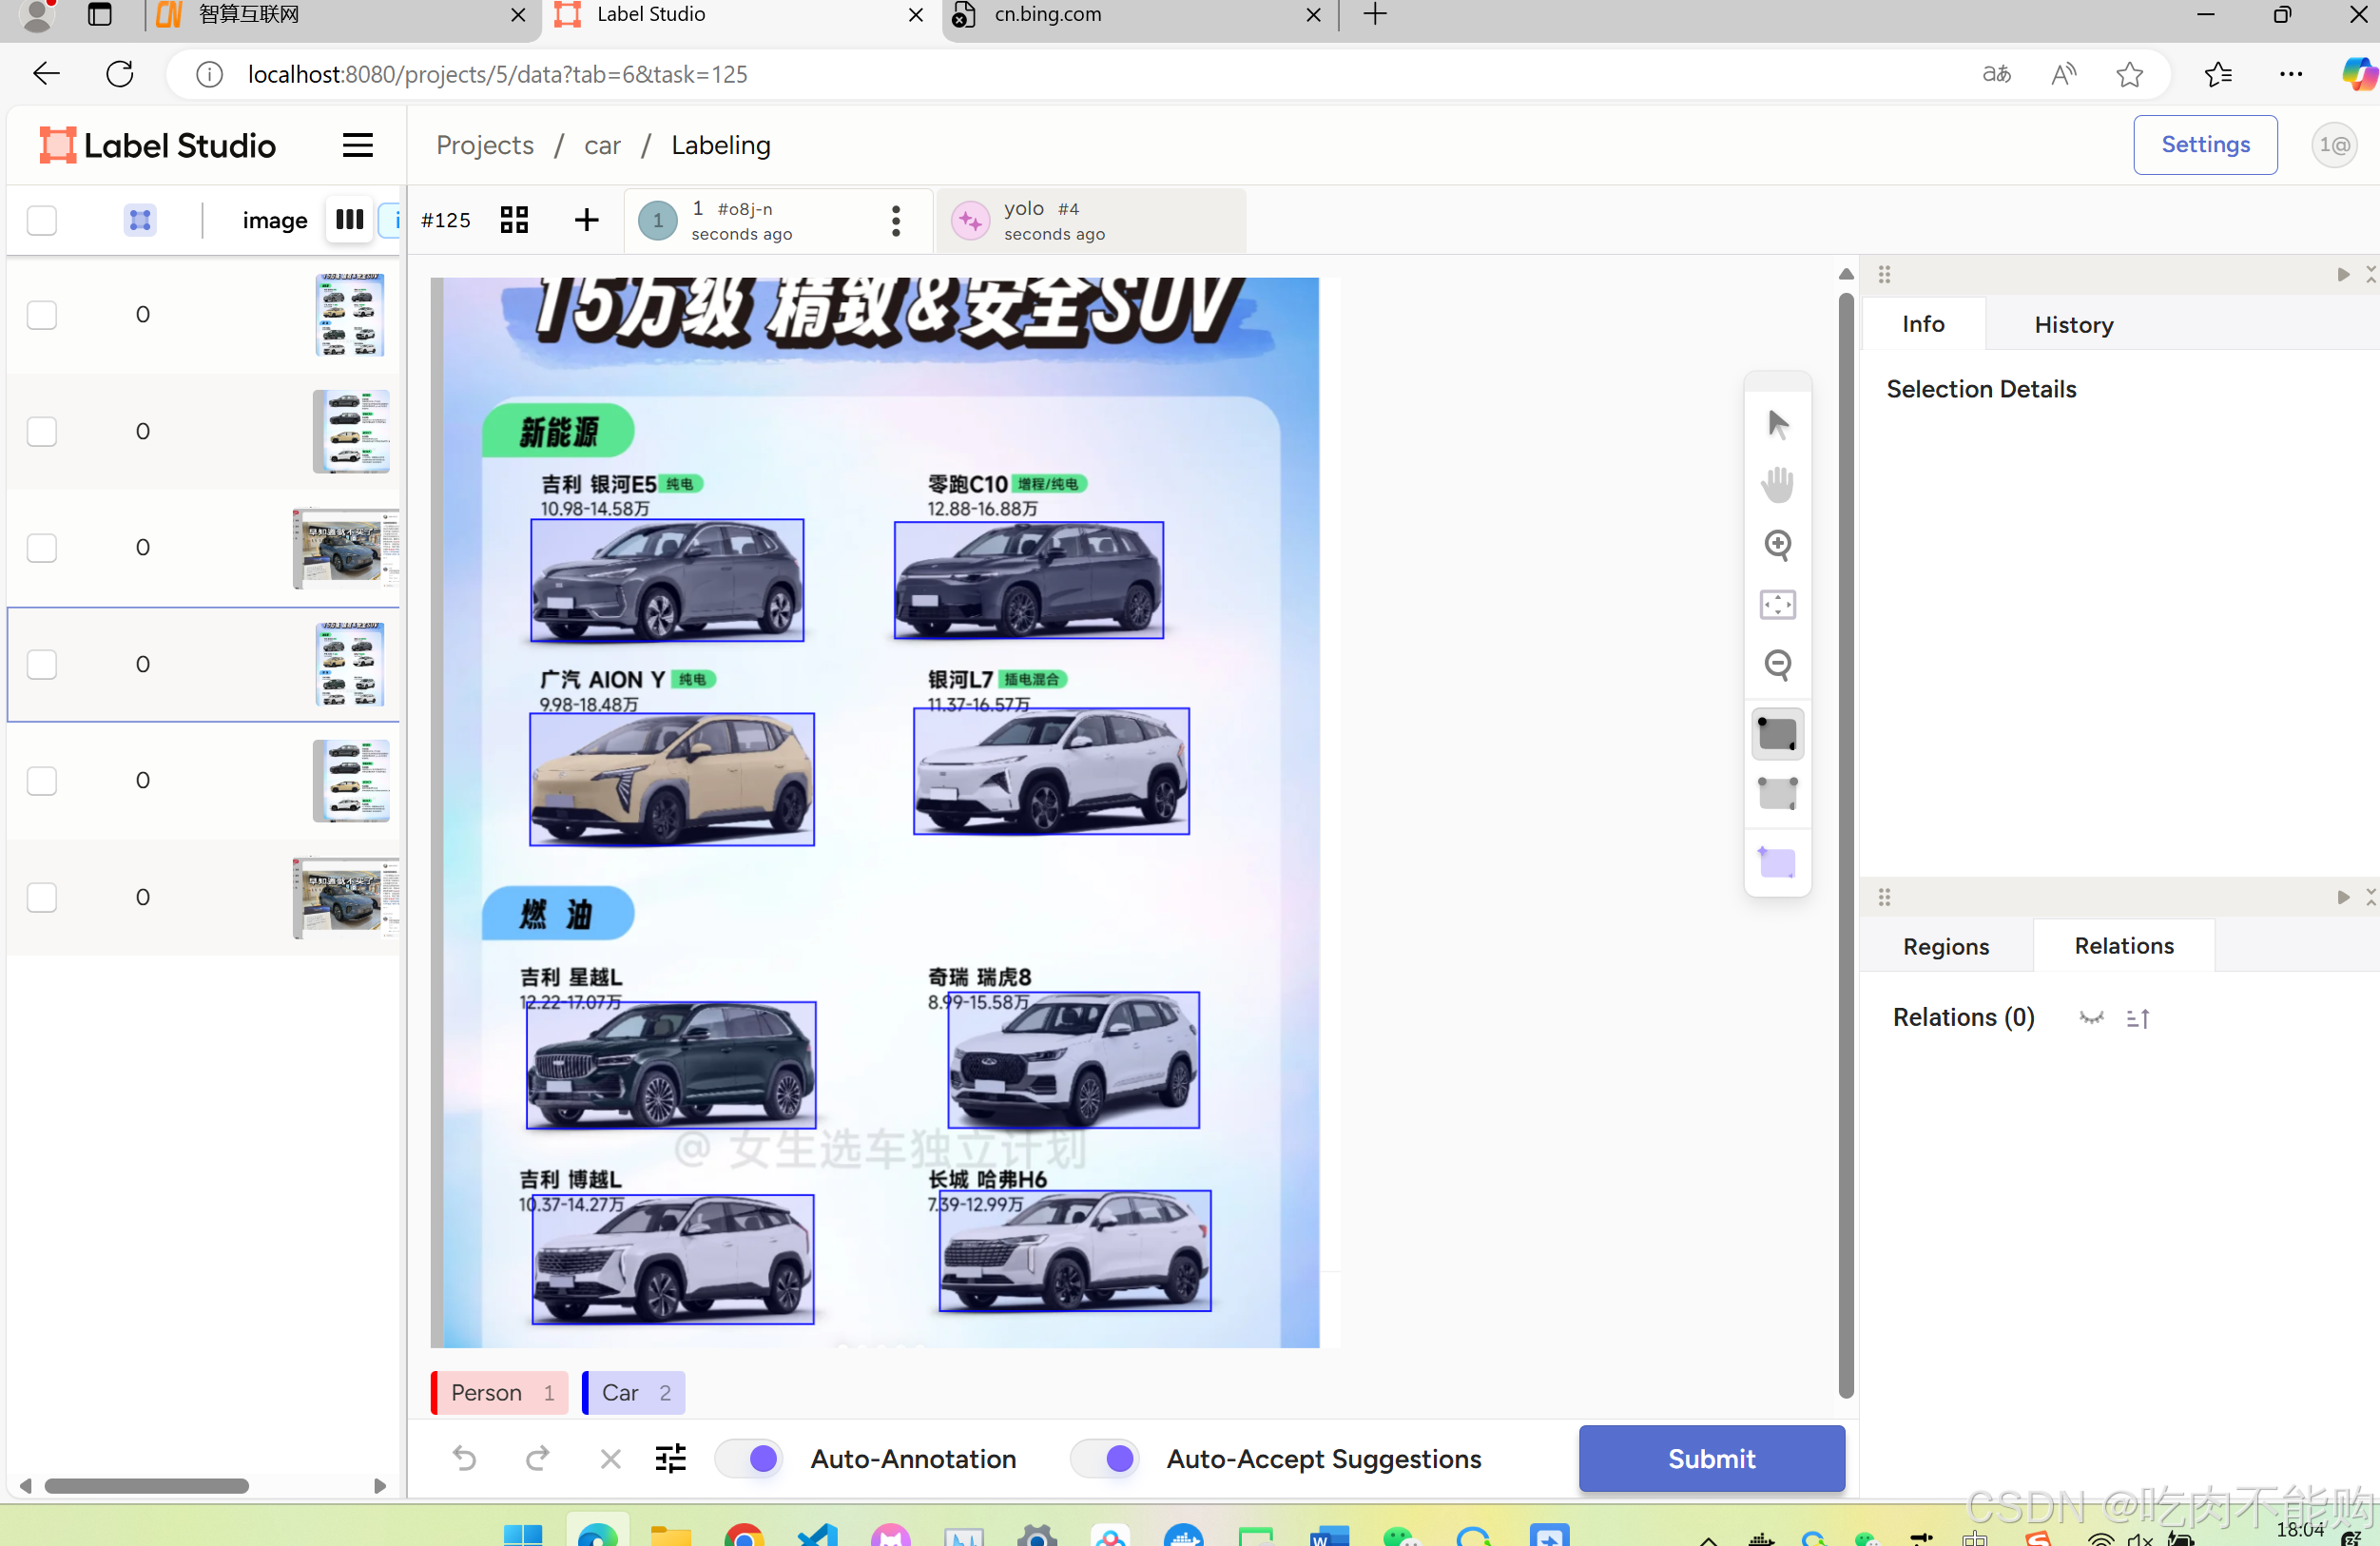
- "9090:9090"1.目标检测 Detection
导入示例标注配置:
<View>
  <Image name="image" value="$image"/>
  <RectangleLabels name="label" toName="image" model_score_threshold="0.25" opacity="0.1">
    <Label value="Person" background="red"/>
    <Label value="Car" background="blue"/>
  </RectangleLabels>
</View>
最后成功
2.实例分割 segment
替换分割模型,
只需要在标签处修改:
<View>
  <Image name="image" value="$image"/>
  <PolygonLabels name="label" toName="image" model_score_threshold="0.25" opacity="0.1">
    <Label value="Car" background="blue"/>
    <Label value="Person" background="red"/>
  </PolygonLabels>
</View>
然后删除目标检测的预测框就可以:
选中图片-》点击左上角 6 Tasks-》Delete Predictions

然后点击随便一张图片,重新预测结果

3.图像分类 classify
替换图像分类的标签
<View>
  <Image name="image" value="$image"/>
  <Choices name="choice" toName="image" model_score_threshold="0.25">
    <Choice value="Airplane" predicted_values="aircraft_carrier,airliner,airship,warplane"/>
    <Choice value="Car" predicted_values="limousine,minivan,jeep,sports_car,passenger_car,police_van"/>
  </Choices>
</View>
结果显示在左下角的分类里。

4.关键点估计 Keypoint detection
替换标签:
<View>
  <RectangleLabels name="keypoints_bbox" toName="image" model_skip="true">
    <Label value="person"/>
  </RectangleLabels>

  <KeyPointLabels name="keypoints" toName="image"
    model_score_threshold="0.75" model_point_threshold="0.5"
    model_add_bboxes="true" model_point_size="1"
    model_path="yolov8n-pose.pt"
  >
    <Label value="nose" predicted_values="person" model_index="0" background="red" />

    <Label value="left_eye" predicted_values="person" model_index="1" background="yellow" />
    <Label value="right_eye" predicted_values="person" model_index="2" background="yellow" />

    <Label value="left_ear" predicted_values="person" model_index="3" background="purple" />
    <Label value="right_ear" predicted_values="person" model_index="4" background="purple" />

    <View>
      <Label value="left_shoulder" predicted_values="person" model_index="5" background="green" />
      <Label value="left_elbow" predicted_values="person" model_index="7" background="green" />
      <Label value="left_wrist" predicted_values="person" model_index="9" background="green" />

      <Label value="right_shoulder" predicted_values="person" model_index="6" background="blue" />
      <Label value="right_elbow" predicted_values="person" model_index="8" background="blue" />
      <Label value="right_wrist" predicted_values="person" model_index="10" background="blue" />
    </View>

    <View>
      <Label value="left_hip" predicted_values="person" model_index="11" background="brown" />
      <Label value="left_knee" predicted_values="person" model_index="13" background="brown" />
      <Label value="left_ankle" predicted_values="person" model_index="15" background="brown" />

      <Label value="right_hip" predicted_values="person" model_index="12" background="orange" />
      <Label value="right_knee" predicted_values="person" model_index="14" background="orange" />
      <Label value="right_ankle" predicted_values="person" model_index="16" background="orange" />
    </View>
  </KeyPointLabels>

  <Image name="image" value="$image" />
</View>
展示结果:

5.视频帧检测 video detect
标签
<View>
    <Video name="video" value="$video"/>
    <VideoRectangle name="box" toName="video" model_tracker="botsort" model_conf="0.25" model_iou="0.7" />
    <Labels name="label" toName="video">
      <Label value="Person" background="red"/>
      <Label value="Car" background="blue"/>
    </Labels>
</View>
第一次处理视频会比较长,因为他是完整的预测完才加载;后台可以显示当前处理到多少frame

展示效果如下:

6.视频帧分类 video classify
标签:
<View>
  <Video name="video" value="$video"/>
  <TimelineLabels
          name="label" toName="video"
          model_trainable="false" model_score_threshold="0.25">
    <Label value="Ball" predicted_values="soccer_ball" />
    <Label value="hamster" />
  </TimelineLabels>
</View>
测试失败

7.旋转目标检测 obb detect
测试失败
8.替换yolo11模型
下载好然后放到models目录下

修改
\label-studio-ml-backend\label-studio-ml-backend-master\label_studio_ml\examples\yolo\requirements.txt
把ultralytics更新为
ultralytics~=8.3.20
否则不支持yolo11,
重启docker
docker-compose down
docker-compose up --build
就可以了
记得替换标签时,加入model_path="yolo11n.pt"
例如目标检测:
<View>
  <Image name="image" value="$image"/>
  <PolygonLabels name="label" toName="image" model_score_threshold="0.25" opacity="0.1" model_path="yolo11n.pt">
    <Label value="Car" background="blue"/>
    <Label value="Person" background="red"/>
  </PolygonLabels>
</View>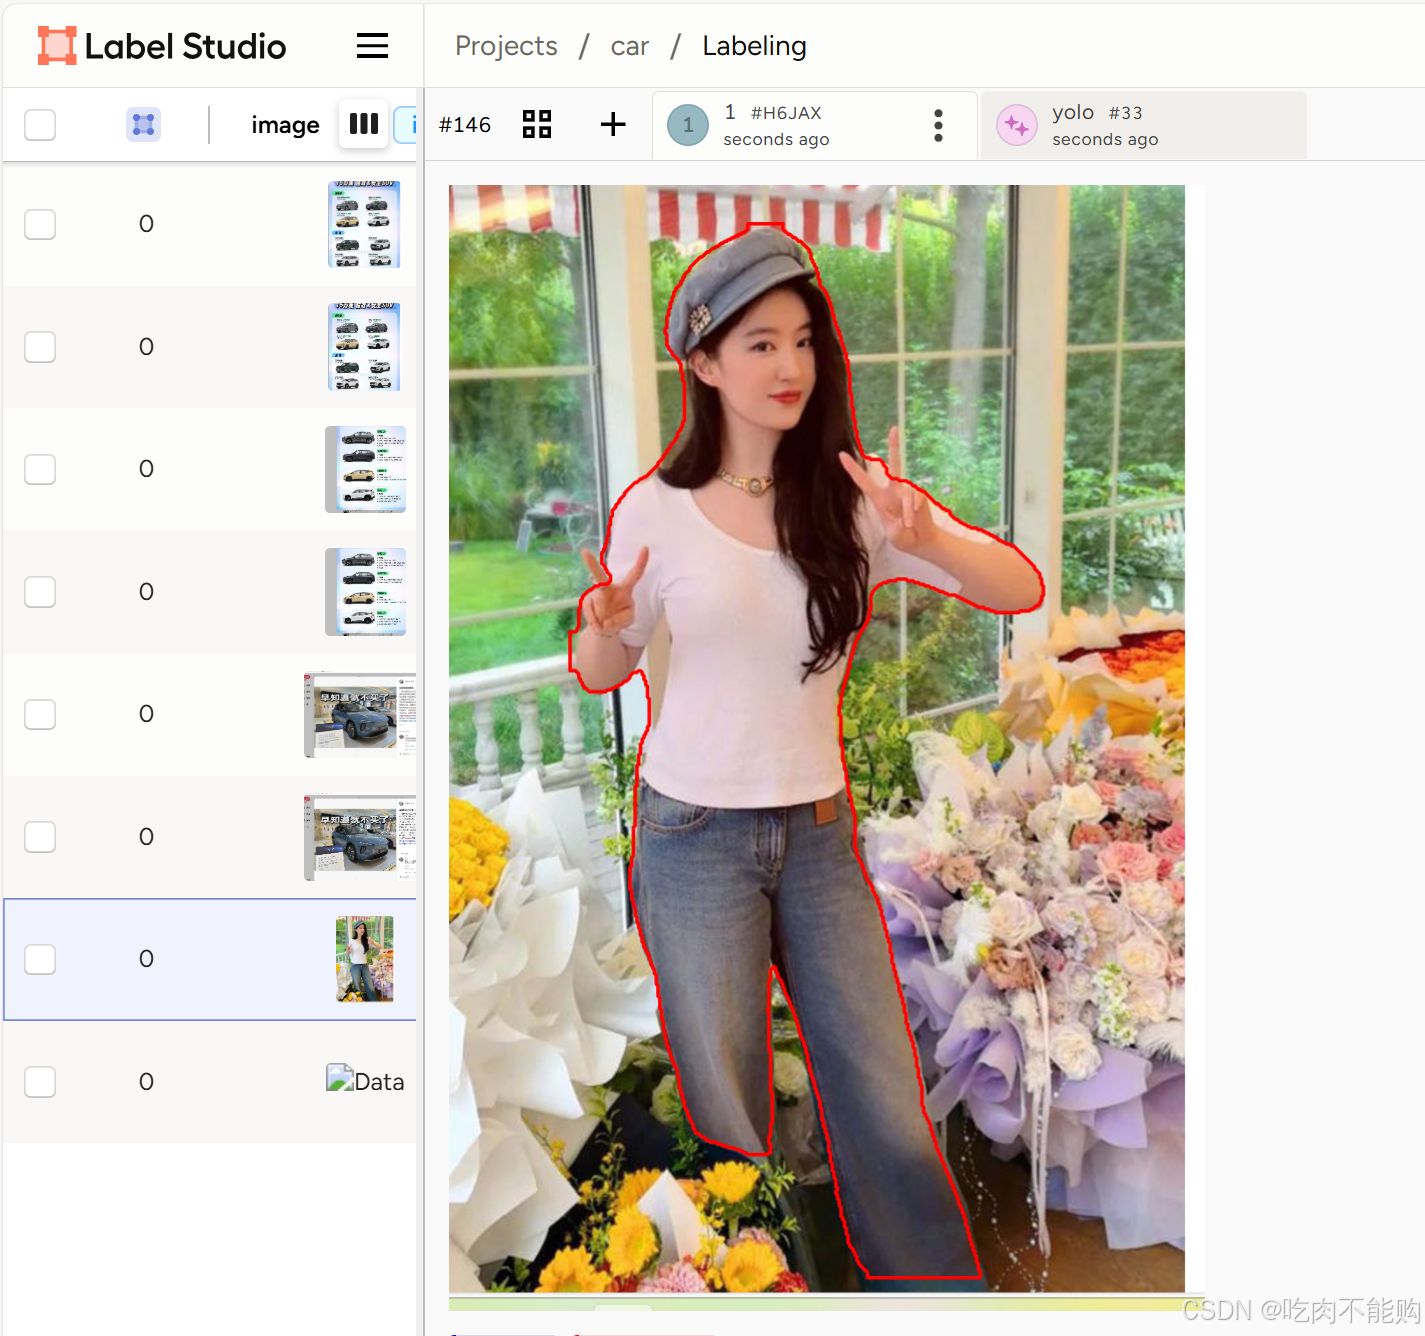
实测下来,
都能用
给我点个赞吧,谢谢了
附录coco80类名称
为了方便大家修改标签信息,我附上coco数据集80类名称,自行参考:
person(人)
bicycle(自行车)
car(轿车)
motorcycle(摩托车)
airplane(飞机)
bus(公共汽车)
train(火车)
truck(卡车)
boat(船)
traffic light(交通灯)
fire hydrant(消防栓)
stop sign(停车标志)
parking meter(停车收费表)
bench(长凳)
bird(鸟)
cat(猫)
dog(狗)
horse(马)
sheep(羊)
cow(牛)
elephant(大象)
bear(熊)
zebra(斑马)
giraffe(长颈鹿)
backpack(背包)
umbrella(雨伞)
handbag(手提包)
tie(领带)
suitcase(手提箱)
frisbee(飞盘)
skis(滑雪板)
snowboard(滑雪单板)
sports ball(体育用球)
kite(风筝)
baseball bat(棒球棒)
baseball glove(棒球手套)
skateboard(滑板)
surfboard(冲浪板)
tennis racket(网球拍)
bottle(瓶子)
wine glass(酒杯)
cup(杯子)
fork(叉子)
knife(刀)
spoon(勺子)
bowl(碗)
banana(香蕉)
apple(苹果)
sandwich(三明治)
orange(橙子)
broccoli(西兰花)
carrot(胡萝卜)
hot dog(热狗)
pizza(披萨)
donut(甜甜圈)
cake(蛋糕)
chair(椅子)
couch(长沙发)
potted plant(盆栽)
bed(床)
dining table(餐桌)
toilet(马桶)
tv(电视)
laptop(笔记本电脑)
mouse(鼠标)
remote(遥控器)
keyboard(键盘)
cell phone(手机)
microwave(微波炉)
oven(烤箱)
toaster(烤面包机)
sink(水槽)
refrigerator(冰箱)
book(书)
clock(时钟)
vase(花瓶)
scissors(剪刀)
teddy bear(泰迪熊)
hair drier(吹风机)
toothbrush(牙刷)