本地推流,服务器拉流全流程
环境准备:准备一台服务器,其中openssl最好为1.1.1版本(可以直接使用ubuntu20.04操作系统)
服务器拉流
1、 安装环境依赖
bash
sudo apt-get update
sudo apt-get install unzip
sudo apt-get install gcc g++
sudo apt-get install libpcre3 libpcre3-dev
sudo apt-get install zlib1g zlib1g-dev
sudo apt-get install yasm
2 、安装nginx和nginx-http-flv-module
bash
cd /usr/local/
sudo wget http://nginx.org/download/nginx-1.19.5.tar.gz
sudo tar -zxvf nginx-1.19.5.tar.gz
sudo mv nginx-1.19.5 nginx
cd nginx
sudo wget https://github.com/winshining/nginx-http-flv-module/archive/master.zip
sudo unzip master.zip
sudo ./configure --prefix=/usr/local/nginx --add-module=./nginx-http-flv-module-master --with-http_ssl_module
本部分如果报如下错误,原因主要是没有检测到openssl,因此需要进行路径的指定;
bash
./configure: error: SSL modules require the OpenSSL library.
You can either do not enable the modules, or install the OpenSSL library
into the system, or build the OpenSSL library statically from the source
with nginx by using --with-openssl=<path> option.这里可直接长传openssl-1.1.0h.tar.gz这个文件,我这里是直接上传至root路径下,使用tar进行解压到当前路径;
bash
cd /usr/local/nginx
sudo ./configure --prefix=/usr/local/nginx --add-module=./nginx-http-flv-module-master --with-http_ssl_module --with-openssl=/root/openssl-1.1.0h
再进行安装
bash
sudo make && sudo make install这里可能报错如下错误,显示在尝试复制 conf/koi-win 文件到 /usr/local/nginx/conf 目录时出现了问题,提示这两个文件实际上是同一个文件。
bash
cp conf/koi-win '/usr/local/nginx/conf'
cp: 'conf/koi-win' and '/usr/local/nginx/conf/koi-win' are the same file
make[1]: *** [objs/Makefile:1618: install] Error 1
make[1]: Leaving directory '/usr/local/nginx'
make: *** [Makefile:11: install] Error 2
root@iZ2ze2bgtgn8177sed0v0fZ:/usr/local/nginx#需要重新进行编译,添加--conf-path=/usr/local/nginx/nginx.conf,再进行安装即可
bash
sudo ./configure --prefix=/usr/local/nginx --add-module=./nginx-http-flv-module-master --with-http_ssl_module --with-openssl=/root/openssl-1.1.0h --conf-path=/usr/local/nginx/nginx.conf
sudo make && sudo make install利用Vim编辑nginx配置(因为前面所指定的配置文件路径在/usr/local/nginx/nginx.conf,所以调配也是这个)
bash
cd /usr/local/nginx
sudo vim /usr/local/nginx/nginx.conf
配置内容如下(根据自己文件路径进行修改,开放服务器9909,9938,80,443端口)
#user  nobody;
worker_processes  1;

#error_log  logs/error.log;
#error_log  logs/error.log  notice;
#error_log  logs/error.log  info;

#pid        logs/nginx.pid;


events {
    worker_connections  1024;
}


http {
    include       mime.types;
    default_type  application/octet-stream;
    sendfile            on;
    keepalive_timeout  65;
    server {
        listen       9938;
        server_name  localhost;
        location /live {
            flv_live on;
            chunked_transfer_encoding  on;
            add_header 'Access-Control-Allow-Origin' * always;
            add_header 'Access-Control-Allow-Credentials' 'true';
        }
        location / {
            root   html;
            index  index.html index.htm;
        }
        error_page   500 502 503 504  /50x.html;
        location = /50x.html {
            root   html;
        }
    }
  include /usr/local/nginx/conf/vhost/*.conf;
}

rtmp {
    out_queue               4096;
    out_cork                 8;
    max_streams             128;
    timeout                 15s;
    drop_idle_publisher     15s;
    log_interval 5s;
    log_size     1m;
    server {
        listen 9909;      #监听的端口号
        #server_name 127.0.0.1;
        application live {     #自定义的名字
            live on;
       }
        application hls {
            live on;
            hls on;
            hls_path /tmp/hls;
            hls_fragment 1s;
            hls_playlist_length 3s;
       }
    }
}
检验nginx配置是否有问题,输出successful则代表配置无误
bash
cd /usr/local/nginx/sbin
./nginx -t
先启动,再重启nginx服务
bash
./nginx
./nginx -s reload
查看nginx启动端口
bash
sudo netstat -tulnp | grep nginx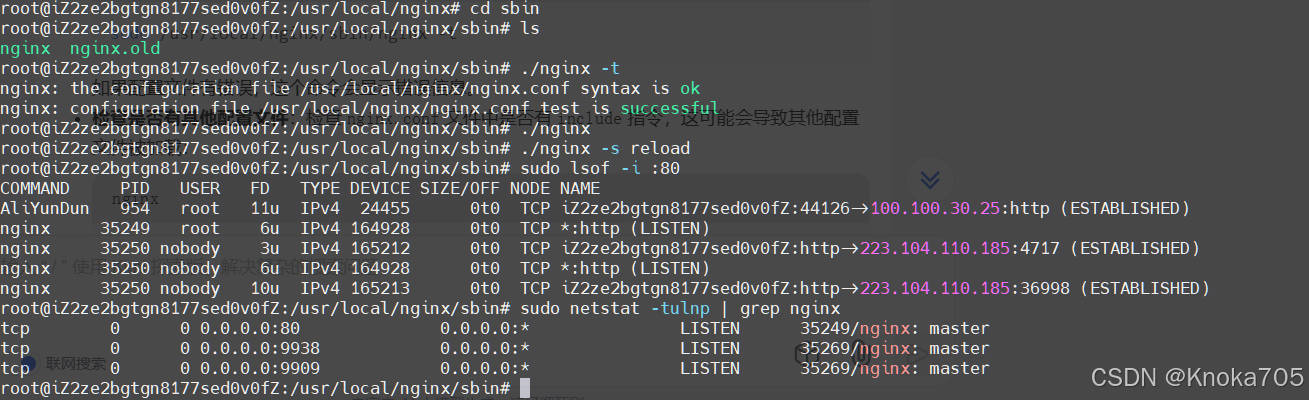
进入当前公网ip下9938:http://101.200.135.211:9938/,能够访问,代表配置成功

3 、服务器安装ffmpeg
3.1 安装nasm
cd /usr/local
sudo wget https://www.nasm.us/pub/nasm/releasebuilds/2.14/nasm-2.14.tar.gz
sudo tar -zxvf nasm-2.14.tar.gz
cd nasm-2.14
sudo ./configure
sudo make && sudo make install
3.2 安装×264
cd /usr/local
sudo wget https://code.videolan.org/videolan/x264/-/archive/master/x264-master.zip
sudo unzip x264-master.zip
cd x264-master
sudo ./configure --enable-static --enable-shared
sudo make && sudo make install
3.3 安装ffmpeg
cd /usr/local
sudo wget http://www.ffmpeg.org/releases/ffmpeg-4.3.tar.gz
sudo tar -zxvf ffmpeg-4.3.tar.gz
cd ffmpeg-4.3
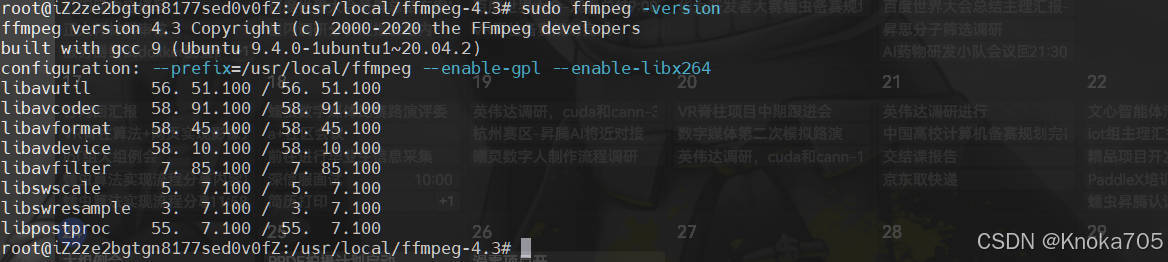
sudo ./configure --prefix=/usr/local/ffmpeg --enable-gpl --enable-libx264
sudo make && sudo make install
sudo cp /usr/local/ffmpeg/bin/* /usr/bin/
sudo vim /etc/ld.so.conf添加如下配置
include /usr/local/lib/
/usr/local/lib/
保存后进行重载
sudo ldconfig
sudo ffmpeg -version
完成
客户端推流
1、Windows端
安装ffmpeg并配置环境变量:官网:FFmpeg
下载后解压并添加系统环境变量,如: D:\develop\ffmpeg-master-latest-win64-gpl\bin
终端输入命令推流到指定rtmp服务器
ffmpeg -f dshow -i video="USB2.0 HD UVC WebCam" -vcodec libx264 -pix_fmt yuv420p -s 400x200 -framerate 15 -r 25 -preset:v ultrafast -tune zerolatency -f flv rtmp://119.3.211.142:9909/live/1012、Orange Pi Ai Pro/昇腾等设备
通过python代码推流到指定rtmp服务器,注意需要事先安装ffmpeg并配置环境变量
python
if __name__ == '__main__':
    context = init_acl(DEVICE_ID)

    # 初始化模型
    det_model = YoloV5(model_path=trained_model_path)

    # 打开摄像头
    cap = cv2.VideoCapture(0)

    # 使用 FFmpeg 创建 RTSP 流
    command = f'ffmpeg -re -i pipe:0 -f flv rtmp://101.200.135.211:9909/live/101'
    process = subprocess.Popen(command.split(), stdin=subprocess.PIPE)

    while cap.isOpened():  # 在摄像头打开的情况下循环执行
        ret, frame = cap.read()  # 读取一帧图像

        if not ret:
            break

        # 前处理、推理、后处理,得到最终推理图片
        img_res, det_result_str = det_model.infer(frame)

        # 将处理后的帧转换为字节流
        _, buffer = cv2.imencode('.jpg', img_res)
        frame_bytes = buffer.tobytes()

        # 写入帧到 FFmpeg 进程
        process.stdin.write(frame_bytes)

    # 释放资源
    cap.release()
    cv2.destroyAllWindows()
    det_model.release()  # 释放模型相关资源
    deinit_acl(context, 0)  # 去初始化 ACL

    # 关闭 FFmpeg 进程
    process.stdin.close()
    process.terminate()
    process.wait()
帧到 FFmpeg 进程
        process.stdin.write(frame_bytes)

    # 释放资源
    cap.release()
    cv2.destroyAllWindows()
    det_model.release()  # 释放模型相关资源
    deinit_acl(context, 0)  # 去初始化 ACL

    # 关闭 FFmpeg 进程
    process.stdin.close()
    process.terminate()
    process.wait()