1、全局在main.js文件中引入 jsplumb
import jsPlumb from 'jsplumb'
Vue.prototype.$jsPlumb = jsPlumb.jsPlumb
2、在使用的页面进行初始化实例,注意要在mounted中触发
jsPlumbLeftInit() {
    this.jsRightPlumb = this.$jsPlumb.getInstance({
      Container: "svgRightLine", //选择器id
      dragOptions: {
        containment: "children",
      },
      EndpointStyle: { radius: 0.1, fill: "#6173FA" }, //端点样式
      PaintStyle: { stroke: "#6173FA", strokeWidth: 8 }, // 绘画样式,默认8px线宽  #456
      Connector: ["Flowchart", { gap: 1 }], //要使用的默认连接器的类型:折线,流程等Flowchart
    });
}
3、通过接口API获取到渲染的数据
eg:
   let data =[[{},{},{},{}],[{},{},{},{}]]
每一条数据要有一个唯一的标识‼️‼️
画线的source和target都是在页面中找唯一的ID类名进行渲染的。
4、页面UI是多边形展示,通过css画出来页面并绑定唯一的ID值。
5、jsplumb 斜线样式
const connectorOptions = {
endpoint: "Dot",
connector: "Straight",
paintStyle: {
stroke: color,
strokeWidth: 4,
dashstyle: lineType,
},
hoverPaintStyle: {
stroke: "#1E90FF",
},
isSource: true,
isTarget: true,
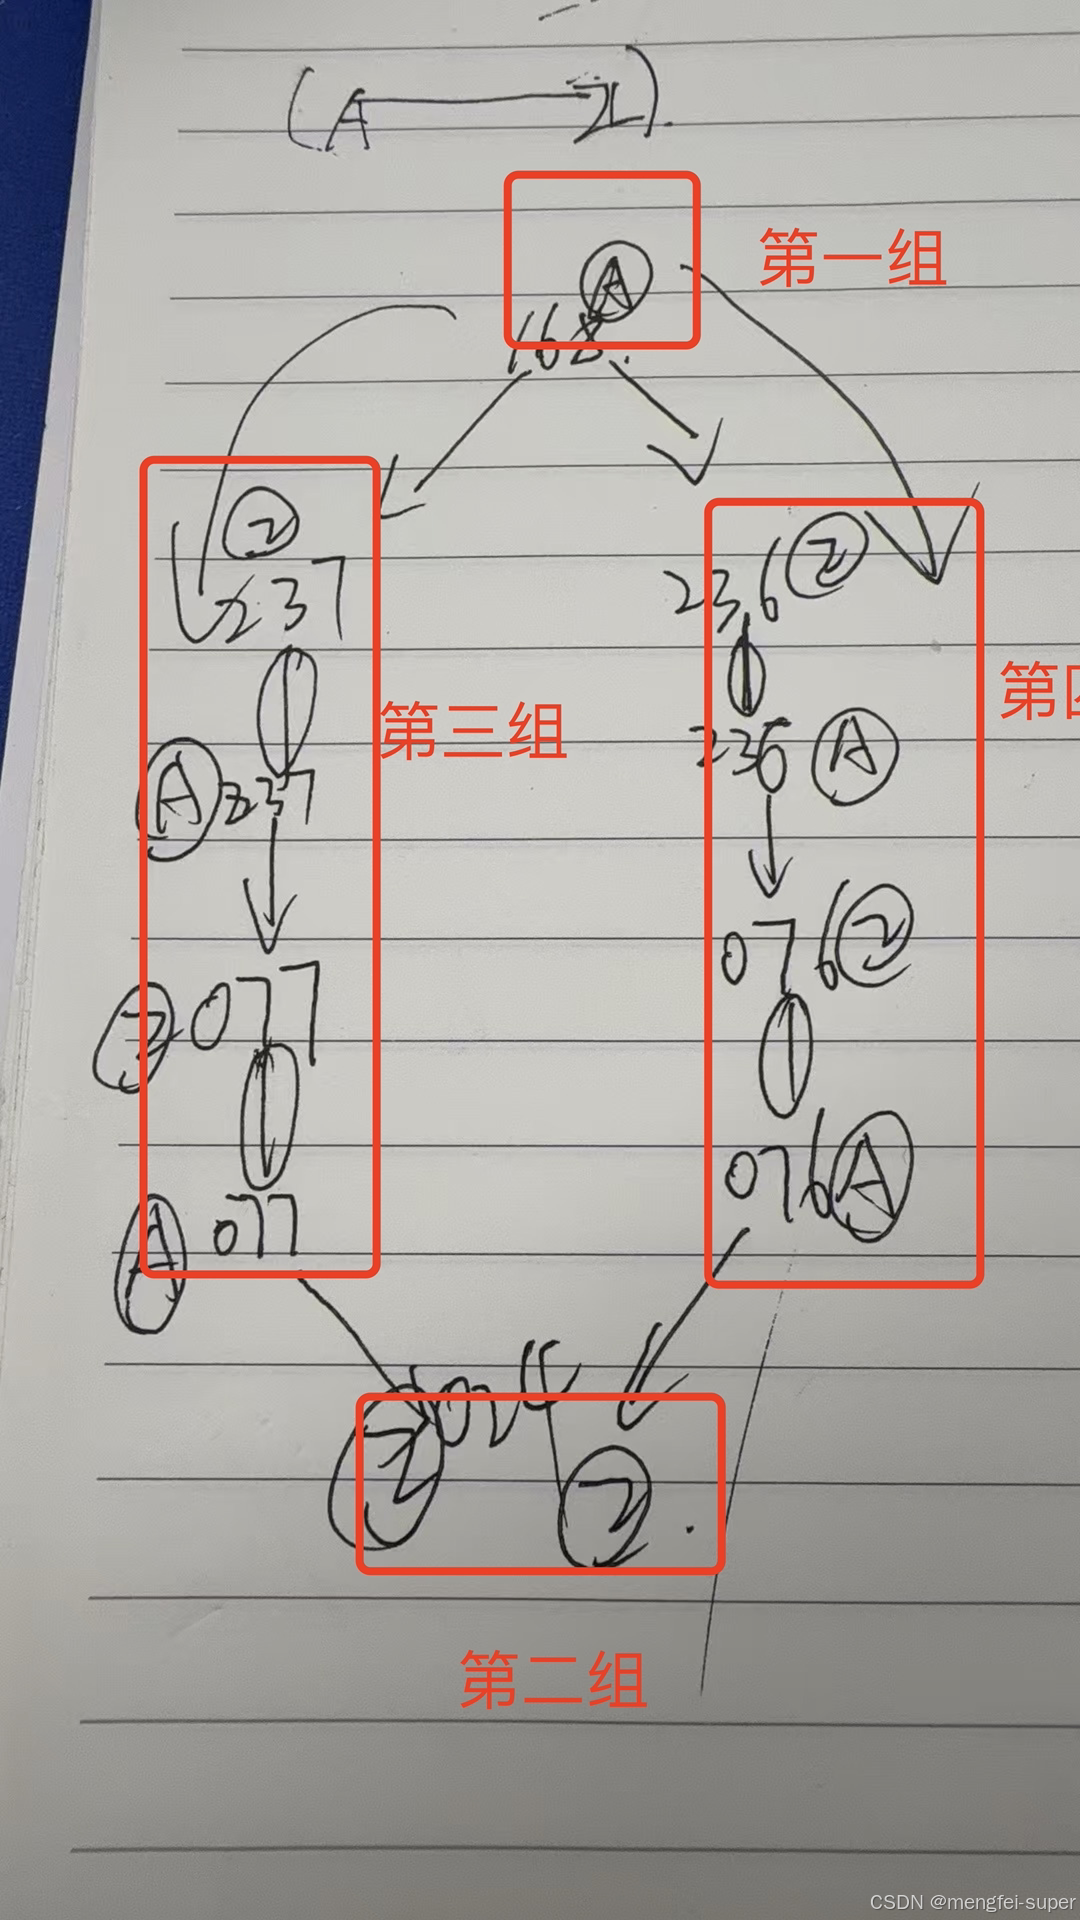
};6、画线逻辑
(1)固定渲染【第一组】【第二组】的点;
(2)依次渲染【第三组】【第四组】的店,注意组装数据;
7、阻止用户拖拽连线的端点方法
(1)在页面渲染流程图的同级写个div,设置样式。
position:absolute;
z-index:99;
(2)流程图的圈圈支持点击动作,跳转到连线的详情页面,单独在父元素设置样式。
position:absolute;
z-index:100;
8、最后就皆大欢喜啦~
但是jsplumb插件是有专业方法API来实现的,但是不知道为什么我的代码不行,有大佬可以指教。
附上专业API方法:
// 获取指定元素的DOM元素
let node = document.getElementById('portId')
// 禁用节点的拖放
jsPlumb.setDraggable(node, false);
// 启用节点的拖放功能
jsPlumb.setDraggable(node, true);