目录
在上一篇中介绍了在Ubuntu22.04的Docker中部署MQTT服务器,然后在window上测试订阅和发布:
https://blog.csdn.net/silent_dusbin/article/details/144143144
本篇介绍在正点原子Linux开发板imx6ull芯片下,配置MQTT客户端上传数据到Ubuntu中Docker部署的MQTT服务器。
使用QT自带的MQTT模块部署客户端
在QT的.pro文件中加入MQTT模块:QT += mqtt
创建一个class专门用于MQTT客户端通讯
cpp
#include <QObject>
#include <QMqttClient>

class MqttClient : public QObject
{
    Q_OBJECT

public:
    explicit MqttClient(QObject *parent = nullptr);

    void connectToBroker(const QString &host, quint16 port);
    void publishMessage(const QString &topic, const QString &message);
    void subscribeToTopic(const QString &topic);

private slots:
    void onConnected();
    void onMessageReceived(const QByteArray &message, const QMqttTopicName &topic);

private:
    QMqttClient *m_client;
};
这个类定义了MQTT客户端常用到的几种操作:连接服务器(connectToBroker),发布消息(publishMessage),订阅消息(subscribeToTopic)。
然后还定义了两个信号槽函数:连接信号槽(onConnected),用于抓取连接状态。onMessageReceived用于监听订阅消息。
class MqttClient的实现如下:
cpp
#include "mqttclient.h"
#include <QDebug>

MqttClient::MqttClient(QObject *parent) : QObject(parent)
{
    m_client = new QMqttClient(this);

    connect(m_client, &QMqttClient::connected, this, &MqttClient::onConnected);
    connect(m_client, &QMqttClient::messageReceived, this, &MqttClient::onMessageReceived);
}

void MqttClient::connectToBroker(const QString &host, quint16 port)
{
    m_client->setHostname(host);
    m_client->setPort(port);
    m_client->connectToHost();
}

void MqttClient::publishMessage(const QString &topic, const QString &message)
{
    if (m_client->state() == QMqttClient::Connected) {
        m_client->publish(topic, message.toUtf8());
    } else {
        qDebug() << "MQTT客户端未连接";
    }
}

void MqttClient::subscribeToTopic(const QString &topic)
{
    if (m_client->state() == QMqttClient::Connected) {
        m_client->subscribe(topic);
    } else {
        qDebug() << "MQTT客户端未连接";
    }
}

void MqttClient::onConnected()
{
    qDebug() << "MQTT客户端已连接";
}

void MqttClient::onMessageReceived(const QByteArray &message, const QMqttTopicName &topic)
{
    qDebug() << "接收到主题为" << topic.name() << "的消息:" << message;
}
使用QT在ui界面上生成按钮
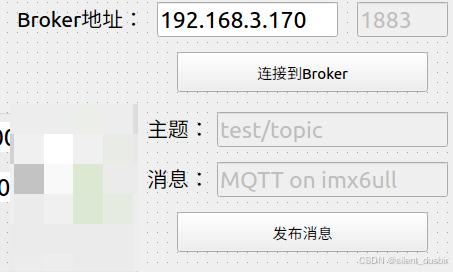
连接到Broker按钮调用connectToBroker(const QString &host, quint16 port)
发布消息按钮调用publishMessage(const QString &topic, const QString &message)
Broker的主机IP地址,端口号,主题,消息内容全部可以从界面上获得。
在Windows上订阅相应主题测试
使用mosquitto for Windows 订阅,CMD命令mosquitto_sub -h 192.168.3.170 -p 1883 test/topic

然后在QT界面点击发布按钮,就能在Windows的订阅状态下看到发来的消息了。
在imx6ull上订阅Windows发布的消息
同样的操作,在QT上生成订阅按钮

订阅后在Windows上发布消息

正点原子开发板上显示的订阅到的信息
bash
接收到主题为"test/topic" 的消息: "Hello Windows MQTT"