1. 基于Linux的简单区块链实现
1.1. 环境准备
确保使用的 Linux 系统(如 Ubuntu、CentOS 等)已安装 Python 3。
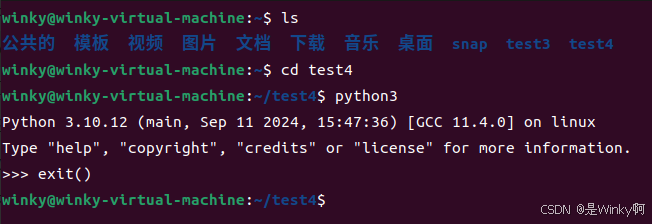
在终端输入python3命令,若出现 Python 解释器的版本信息等提示,则表示已安装;
若提示未找到命令,则需根据 Linux 系统的包管理工具(如 Ubuntu 下的 apt-get 或 CentOS 下的 yum)安装 Python 3。例如,在 Ubuntu 系统中,可执行sudo apt-get install python3命令进行安装。

1.2. 代码编写与运行
在 Linux 终端中,使用文本编辑器Vim建一个新的 Python 文件,命名为blockchain.py。
在终端输入
python
vim blockchain.py进入 Vim 编辑模式。按i键进入插入模式,开始粘贴代码。粘贴完成后,按Esc键返回普通模式,输入:wq保存并退出。
将以下代码复制粘贴到blockchain.py文件中:
python
import hashlib
import time
import json

class Block:
    def __init__(self, index, previous_hash, data):
        self.index = index
        self.timestamp = time.time()
        self.data = data
        self.previous_hash = previous_hash
        self.hash = self.calculate_hash()

    def calculate_hash(self):
        block_string = json.dumps(self.__dict__, sort_keys=True).encode()
        return hashlib.sha256(block_string).hexdigest()

class Blockchain:
    def __init__(self):
        self.chain = []
        self.create_block(0)  # 创世区块

    def create_block(self, data):
        previous_block = self.chain[-1] if self.chain else None
        previous_hash = previous_block.hash if previous_block else "0"
        block = Block(len(self.chain), previous_hash, data)
        self.chain.append(block)
        self.save_block_to_file(block)  # 保存到文件
        return block

    def save_block_to_file(self, block):
        with open('blockchain.txt', 'a') as f:
            f.write(f"{block.index},{block.timestamp},{block.data},{block.hash},{block.previous_hash}\n")

    def print_chain(self):
        for block in self.chain:
            print(f"Index: {block.index}, Timestamp: {block.timestamp}, Data: {block.data}, Hash: {block.hash}, Previous Hash: {block.previous_hash}")

# 实验:创建区块链并添加区块
blockchain = Blockchain()
blockchain.create_block("First block data")
blockchain.create_block("Second block data")
blockchain.print_chain()在终端中,进入blockchain.py所在的目录,键入
python
python3 blockchain.py运行程序
1.3. 结果查看与分析
运行程序后得到结果
python
winky@winky-virtual-machine:~/test4$ python3 blockchain.py
Index: 0, Timestamp: 1733812989.9273984, Data: 0, Hash: 30812df98c3dffcb2b2a91bbdbb9d6d41279a631b82e717b6aeff6d0e647c69c, Previous Hash: 0
Index: 1, Timestamp: 1733812989.9276085, Data: First block data, Hash: f5541f21c8766db11dc55023cd673662506ba755af4e490d56ef6e66e956c98f, Previous Hash: 30812df98c3dffcb2b2a91bbdbb9d6d41279a631b82e717b6aeff6d0e647c69c
Index: 2, Timestamp: 1733812989.9276638, Data: Second block data, Hash: 53f8b9f63230cd7edb4c1b98598bfab884a5a35cd22e74b8098c941bbb892b53, Previous Hash: f5541f21c8766db11dc55023cd673662506ba755af4e490d56ef6e66e956c98f
区块链程序成功运行并生成了包含三个区块的区块链。显示的区块链信息分别是:
索引(Index):每个区块都有一个唯一的索引,从 0 开始。这里显示了三个区块,索引分别为 0、1、2,表明区块链正确地依次添加了这些区块。
时间戳(Timestamp):记录了区块创建的时间,以 Unix 时间戳的形式呈现(自 1970 年 1 月 1 日以来的秒数)。例如,第一个区块的时间戳为 1733812989.9273984,第二个区块为 1733812989.9276085,第三个区块为 1733812989.9276638。可以看到时间戳非常接近,这符合在短时间内连续创建区块的情况。
数据(Data):显示了每个区块存储的数据。创世区块(索引为 0)的数据为 "0",第二个区块的数据为 "First block data",第三个区块的数据为 "Second block data"。这表明在创建区块时,数据被正确地传入并记录。
哈希值(Hash):每个区块都有一个唯一的哈希值,用于标识区块的内容。哈希值是通过对区块的所有属性进行计算得到的,任何一个属性的微小变化都会导致哈希值的巨大改变。例如,第一个区块的哈希值为 30812df98c3dffcb2b2a91bbdbb9d6d41279a631b82e717b6aeff6d0e647c69c,后续区块的哈希值也各不相同,并且每个区块的 Previous Hash 属性都指向前一个区块的哈希值,形成了区块链的链式结构。
前一个区块的哈希值(Previous Hash):这是区块链中链接各个区块的关键。可以看到,除了创世区块(其前一个哈希值为 0,表示没有前一个区块),其他区块的 Previous Hash 都正确地指向了前一个区块的哈希值。例如,第二个区块的 Previous Hash 为 30812df98c3dffcb2b2a91bbdbb9d6d41279a631b82e717b6aeff6d0e647c69c,与第一个区块的哈希值一致;第三个区块的 Previous Hash 为 f5541f21c8766db11dc55023cd673662506ba755af4e490d56ef6e66e956c98f,与第二个区块的哈希值一致。
程序运行后,会在当前目录下生成一个名为blockchain.txt的文件,保存以上生成结果。使用文本编辑器打开该文件,查看其中的内容,确认区块数据是否已按照预期格式保存。每个区块的数据应包含索引、时间戳、数据、哈希值和前一个区块的哈希值,且区块之间通过哈希值形成链状结构。
文件内容如下:

2. 扩展区块链功能与智能合约执行
2.1. 编写智能合约代码
在 Linux 终端中,使用文本编辑器Vim建一个新的 Python 文件,命名为contract.py。
在终端输入
python
vim contract.py进入 Vim 编辑模式。按i键进入插入模式,开始粘贴代码。粘贴完成后,按Esc键返回普通模式,输入:wq保存并退出。
将以下代码复制粘贴到contract.py文件中:
python
import hashlib
import time
import json

# 定义区块类
class Block:
    def __init__(self, index, previous_hash, data, contract=None):
        self.index = index
        self.timestamp = time.time()
        self.data = data
        self.previous_hash = previous_hash
        self.hash = self.calculate_hash()
        self.contract = contract

    def calculate_hash(self):
        block_string = json.dumps(self.__dict__, sort_keys=True).encode()
        return hashlib.sha256(block_string).hexdigest()

# 定义区块链类
class Blockchain:
    def __init__(self):
        self.chain = []
        self.contracts = []
        self.create_block(0, "Genesis Block")

    def create_block(self, data, contract=None):
        previous_block = self.chain[-1] if self.chain else None
        previous_hash = previous_block.hash if previous_block else "0"
        block = Block(len(self.chain), previous_hash, data, contract)
        self.chain.append(block)
        self.save_block_to_file(block)
        if contract:
            self.contracts.append(contract)
        return block

    def save_block_to_file(self, block):
        with open('blockchain.txt', 'a') as f:
            f.write(f"{block.index},{block.timestamp},{block.data},{block.hash},{block.previous_hash}\n")

    def print_chain(self):
        for block in self.chain:
            print(f"Index: {block.index}, Timestamp: {block.timestamp}, Data: {block.data}, Hash: {block.hash}, Previous Hash: {block.previous_hash}")

# 定义合约类
class Contract:
    def __init__(self, creator, beneficiary, amount, status="Pending"):
        self.creator = creator
        self.beneficiary = beneficiary
        self.amount = amount
        self.status = status

    def create(self):
        print(f"Contract created by {self.creator} for {self.beneficiary} with amount {self.amount}.")
        with open('contracts.txt', 'a') as f:
            f.write(f"Creator: {self.creator}, Beneficiary: {self.beneficiary}, Amount: {self.amount}, Status: {self.status}\n")

    def execute(self):
        self.status = "Executed"
        print(f"Contract executed. Transferring {self.amount} from {self.creator} to {self.beneficiary}.")
        with open('contracts.txt', 'r') as f:
            lines = f.readlines()
        with open('contracts.txt', 'w') as f:
            for line in lines:
                if str(self.creator) in line and str(self.beneficiary) in line and str(self.amount) in line:
                    f.write(line.replace(self.status, "Executed"))
                else:
                    f.write(line)
        blockchain.create_block(f"Contract {self.creator}-{self.beneficiary} executed", self)

    def query_status(self):
        print(f"Contract status: {self.status}")

# 全局区块链实例
blockchain = Blockchain()

# 查询合约状态函数
def query_contract_status(contract_id):
    with open('contracts.txt', 'r') as f:
        lines = f.readlines()
    for line in lines:
        if contract_id in line:
            return line.split(',')[-1].strip()
    return "Contract not found"

# 查询合约历史记录函数
def query_contract_history(contract_id):
    history = []
    with open('blockchain.txt', 'r') as f:
        lines = f.readlines()
    for line in lines:
        if contract_id in line:
            history.append(line)
    return history

if __name__ == "__main__":
    # 创建合约实例
    contract1 = Contract("Alice", "Bob", 100)
    # 创建合约
    contract1.create()
    # 执行合约(转账)
    contract1.execute()
    # 查询合约状态
    contract1.query_status()
    # 查询合约状态(通过函数)
    print(query_contract_status("Alice"))
    # 查询合约历史记录
print(query_contract_history("Alice"))在终端中,进入contract.py所在的目录,键入
python
python3 contract.py运行程序
2.2. 结果查看与分析
运行程序后得到结果
python
winky@winky-virtual-machine:~/test4$ python3 contract.py
Contract created by Alice for Bob with amount 100.
Contract executed. Transferring 100 from Alice to Bob.
Contract status: Executed
Status: Pending
['1,1733819158.3580446,Contract Alice-Bob executed,9649bc55b6ba44cd6db20872fe3362cc4846f763ceb7929be0f8b113fb196f85,5aa3bb9c8ea1d9a487f63f148f2d923bf2285d8001946a5eee542c534279f912\n']
