这里的安装配置以我个人在应用中的实际情况为准。参考了该博客Python------PyQt5在PyCharm的配置与应用(保姆级教程)
一、pip安装PyQt5
bash
pip install PyQt5 -i https://pypi.tuna.tsinghua.edu.cn/simple
pip install PyQt5-tools -i https://pypi.tuna.tsinghua.edu.cn/simple
二、配置designer和pyuic到Pycharm的External Tools(外部工具)


这里Name随便起,我的Program是D:\Program Files (x86)\Python\Python39\Lib\site-packages\qt5_applications\Qt\bin\designer.exe和自己Python安装路径有关。
bash
working directory:
$FileDir$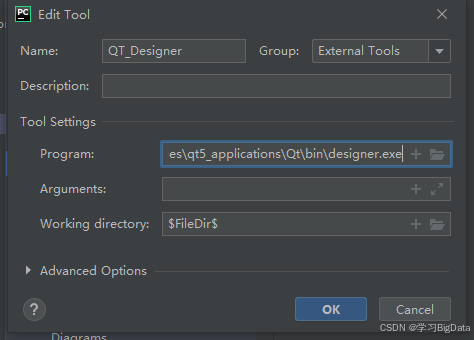
这里Name随便起,我的Program是D:\Program Files (x86)\Python\Python39\Scripts\pyuic5.exe和自己Python安装路径有关。
bash
working directory:
$FileDir$
aguments:
$FileName$ -o $FileNameWithoutExtension$.py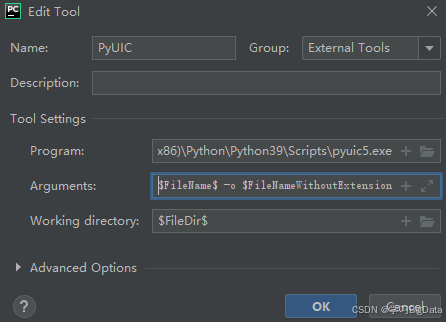
配置完成。
三、简单使用designer和pyuic


使用Widget,放入一个label简单的演示。直接将label拖过去就可以了。

ctrl+s 保存到指定的位置。
生成了一个UI文件

鼠标右键点击该ui文件,选择PyUIC

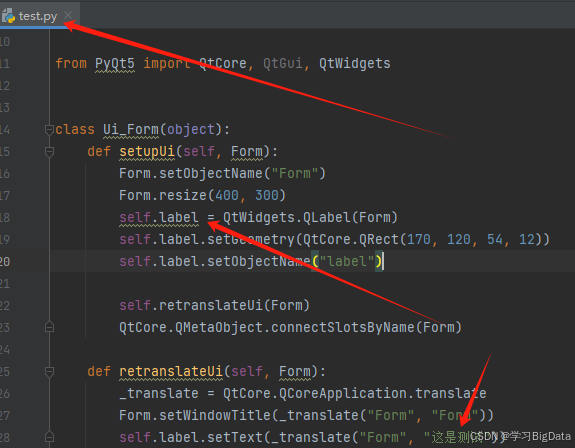
可以看到生成了一个python文件,里面包含了一个label控件,可以看到setText方法中的文字与我们填写的文字一样。
至此安装结束