关联链接:uniapp-vue3(上)
文章目录
- 七、咸虾米壁纸项目实战
-
- 7.1.咸虾米壁纸项目概述
- 7.2.项目初始化公共目录和设计稿尺寸测量工具
- 7.3.banner海报swiper轮播器
- 7.4.使用swiper的纵向轮播做公告区域
- 7.5.每日推荐滑动scroll-view布局
- 7.6.组件具名插槽定义公共标题模块
- 7.7.细节拉满磨砂背景定位布局做专题组件
- 7.8.设置项目底部tab页面切换标签
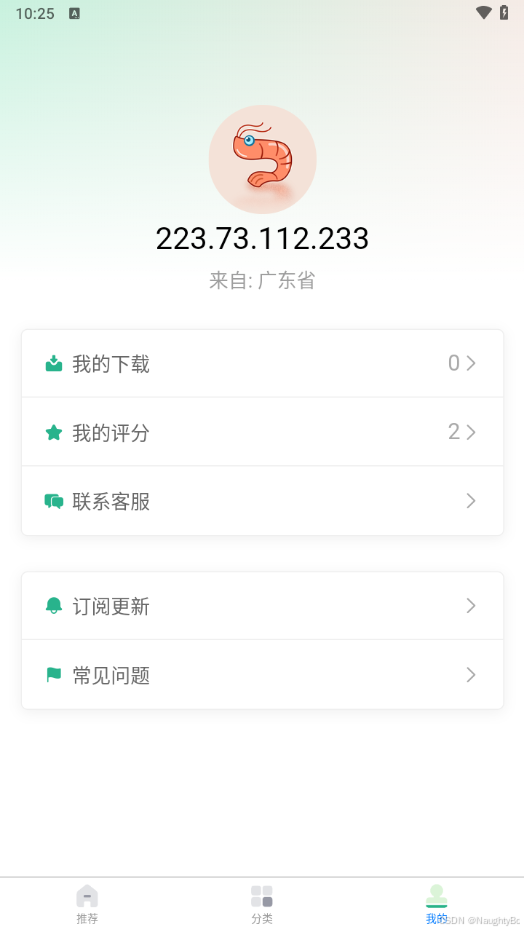
- 7.10.个人中心页面布局
- 7.11.ifdef条件编译实现多终端匹配和客服消息
- 7.12.设置页面全局渐变线性渐变背景色
- 7.13.定义scss颜色变量deep()修改子组件css样式
- 7.14.创建分类列表完成各页面的跳转
- 7.15.全屏页面absolute定位布局和fit-content内容宽度
- 7.16.遮罩层状态转换及日期格式化
- 7.17.uni-popup弹窗层制作弹出信息内容效果
- 7.18.评分弹出框uni-rate组件的属性方法
- 7.19.自定义头部导航栏布局&获取系统信息getSystemInfo状态栏和胶囊按钮
- 7.21.抽离公共方法用条件编译对抖音小程序适配
- 7.22.完善页面布局实现各个页面的串联
- 八、封装网络请求对接各个页面的真实接口
-
- 8.1.调用网络接口在首页展示真实数据并渲染
- 8.2.使用Promise封装request网络请求&对封装的request请求进行传参
- 8.4.给专题组件通过defineProps声明变量传值渲染
- 8.6.调试分类列表接口将数据渲染到页面中
- 8.7.分类页跳转到分类列表页面,从onLoad获取参数作为接口的参数获取对应的数据
- 8.8.触底加载更多阻止无效的网络请求
- 8.9.骨架屏和触底加载load-more样式的展现
- 8.10.分类列表存入Storage在预览页面读取缓存展示,通过swiper的事件实现真正的壁纸预览及切换
- 8.12.==(选学但重要)巧妙解决首次加载额外的图片网络消耗==
- 8.13.展示每张壁纸的专属信息
- 8.14.对接评分接口对壁纸进行滑动提交打分&通过本地缓存修改已评分过的状态
- 8.16.saveImageToPhotosAlbum保存壁纸到相册&openSetting调用客户端授权信息及各种异常处理
- 8.19.onShareAppMessage分享好友和分享微信朋友圈&对分享页面传参进行特殊处理
- 8.21.处理popup底部弹窗空缺安全区域及其他页面优化
- 九、其他功能页面实现
- 十、多个常见平台的打包上线
- 项目预览图
七、咸虾米壁纸项目实战
7.1.咸虾米壁纸项目概述
咸虾米壁纸扫码体验(搜索咸虾米壁纸)
7.2.项目初始化公共目录和设计稿尺寸测量工具
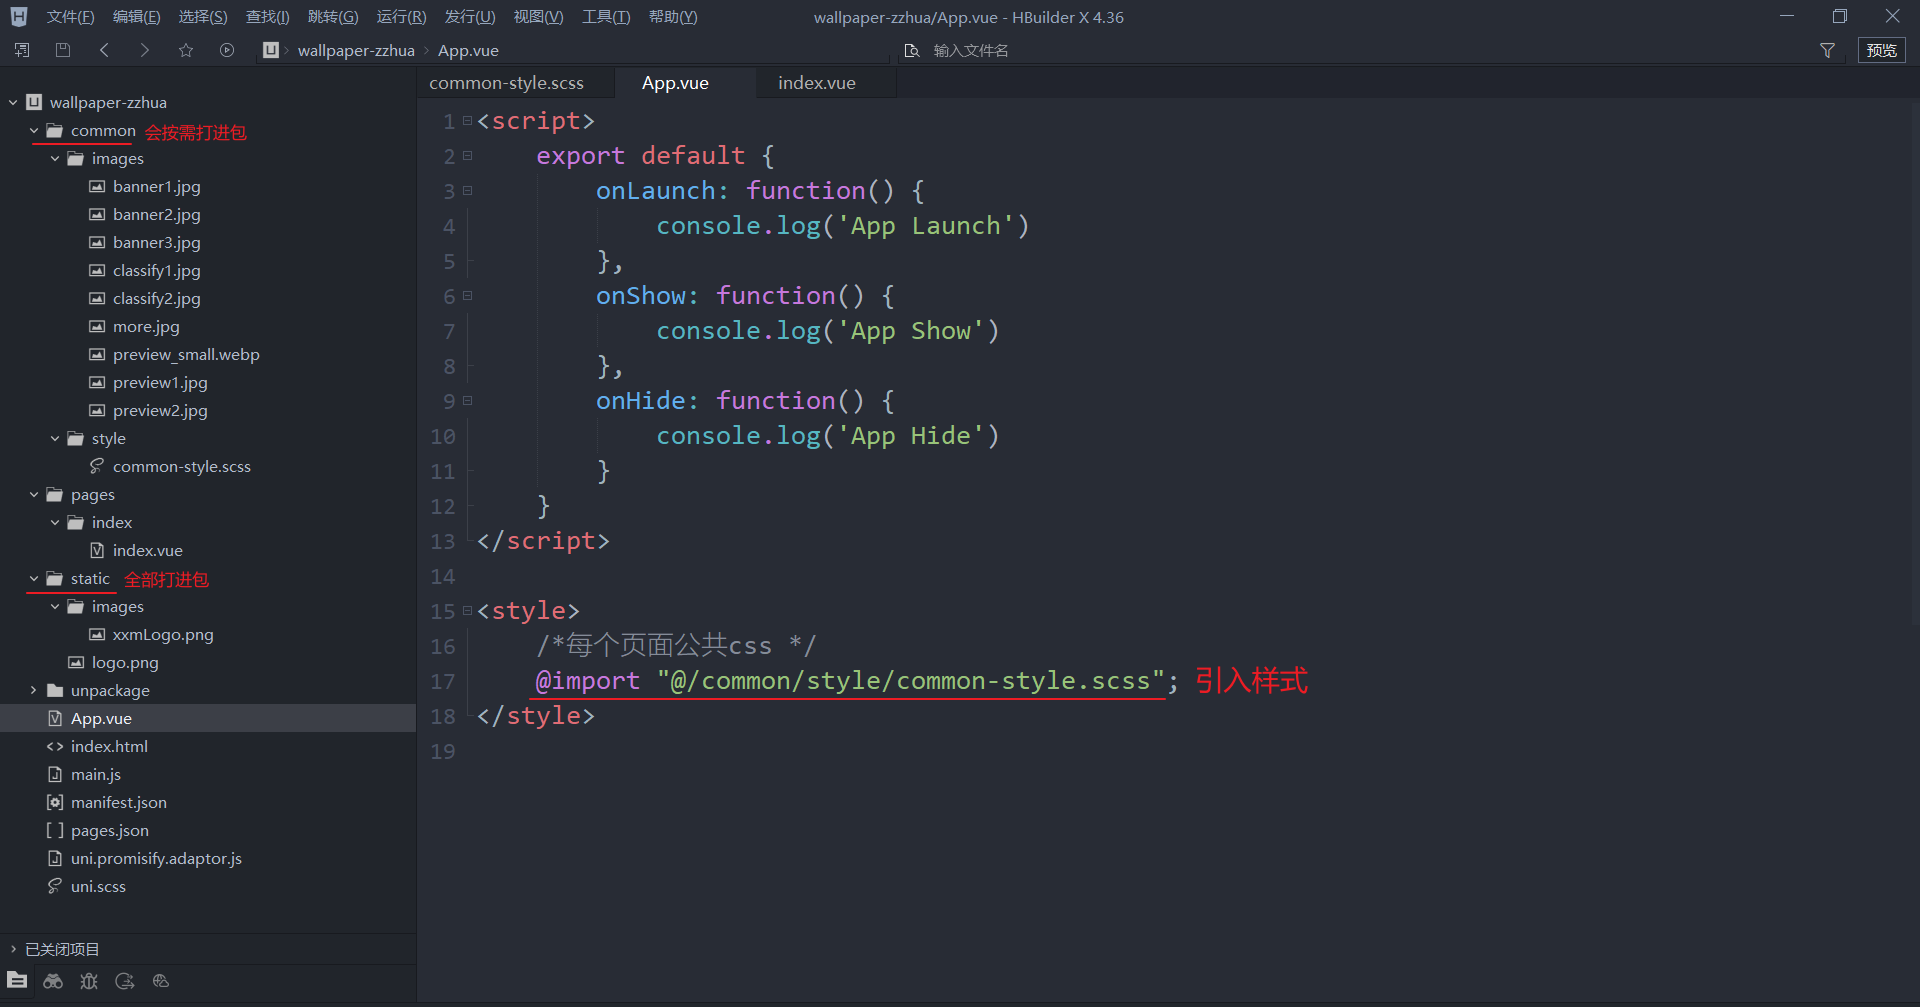
css
// common-style.scss文件
view {
	// border: 5px solid red;
    // 使用怪异盒模型
	box-sizing: border-box;
}
7.3.banner海报swiper轮播器
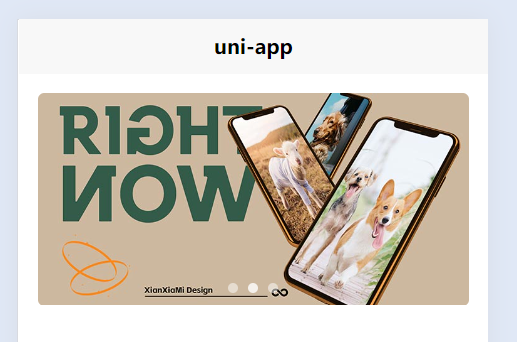
html
<template>
	<view class="homeLayout">
		<view class="banner">
			<swiper indicator-dots indicator-color="rgba(255,255,255,.5)" indicator-active-color="rgba(255,255,255,.8)" autoplay circular>
				<swiper-item>
					<image src="@/common/images/banner1.jpg" mode="aspectFill"></image>
				</swiper-item>
				<swiper-item>
					<image src="@/common/images/banner2.jpg" mode="aspectFill"></image>
				</swiper-item>
				<swiper-item>
					<image src="@/common/images/banner3.jpg" mode="aspectFill"></image>
				</swiper-item>
			</swiper>
		</view>
	</view>
</template>

<script setup>

</script>

<style lang="scss" scoped>
.homeLayout {
	.banner {
		width: 750rpx;
        /* 设置banner的内边距 */
		padding: 30rpx 0;
		swiper {
			height: 340rpx;
			width: 750rpx;
			&-item {
                /* swiper-item内边距, 与banner的内边距相同 */
				padding: 0 30rpx;
				image {
					border-radius: 10rpx;
					overflow: hidden;
					height: 100%;
					width: 100%;
				}
			}
		}
	}
}
</style>
7.4.使用swiper的纵向轮播做公告区域
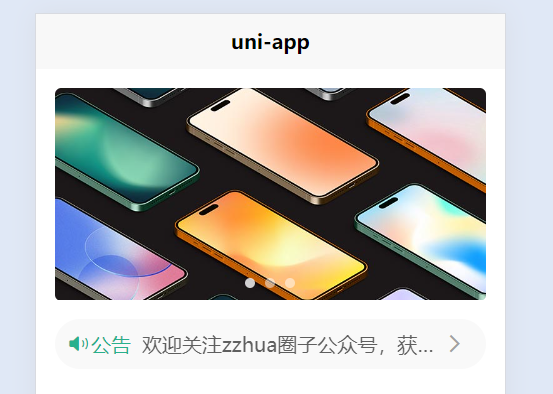
html
<template>
    <view class="homeLayout">

        <view class="notice">
            <view class="left">
                <uni-icons type="sound-filled" size="20" color="#28b08c"></uni-icons>
                <text>公告</text>
            </view>
            <view class="center">
                <swiper autoplay vertical :interval="1500" circular>
                    <swiper-item>
                        <text class="text">
                            欢迎关注zzhua圈子公众号,获取壁纸请前往www.baidu.com
                        </text>
                    </swiper-item>
                    <swiper-item>
                        <text class="text">获取壁纸请前往www.baidu.com</text>
                    </swiper-item>
                    <swiper-item>
                        <text class="text">欢迎关注zzhua圈子公众号</text>
                    </swiper-item>
                </swiper>
            </view>
            <view class="right">
                <uni-icons type="forward" size="20" color="#a1a1a1"></uni-icons>
            </view>
        </view>
    </view>

</template>

<script setup>

</script>

<style lang="scss" scoped>
    .homeLayout {

        ...

        .notice {
            display: flex;
            align-items: center;
            border-radius: 40rpx;
            height: 80rpx;
            margin: 0 30rpx;
            line-height: 80rpx;
            background-color: #f9f9f9;
            .left {
                width: 140rpx;
                color: #28b08c;
                display: flex;
                align-items: center;
                justify-content: center;
            }
            .center {
                flex: 1;
                color: #5f5f5f;
                height: 100%;
                swiper {
                    height: 100%;
                    swiper-item {
                        text {
                            white-space: nowrap;
                        }
                        overflow: hidden;
                        text-overflow: ellipsis;
                    }
                }
            }
            .right {
                width: 70rpx;
            }
        }
    }
</style>
7.5.每日推荐滑动scroll-view布局
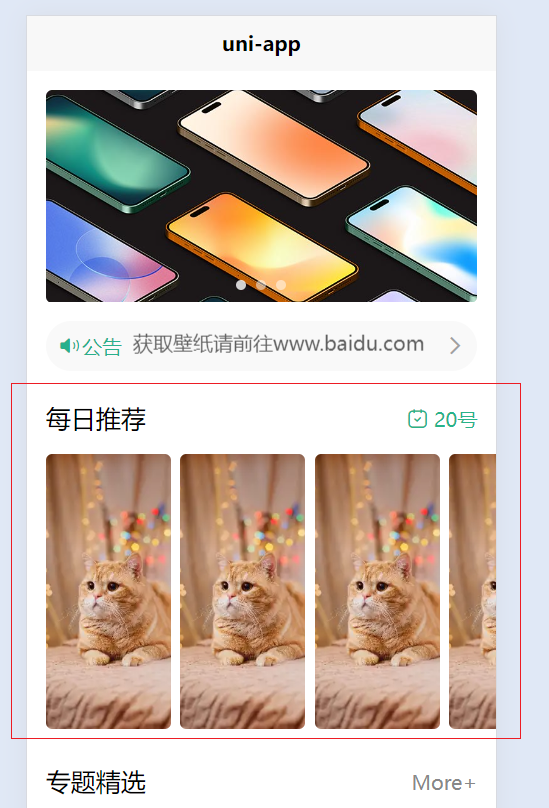
html
<template>
	<view class="homeLayout">
		...

		<view class="select">
			<common-title>
				<template #name>
					<text>每日推荐</text>
				</template>
				<template #custom>
					<view class="date">
						<uni-icons type="calendar" size="20" color="#28b389" class="cal-icon"></uni-icons>
						<uni-dateformat date="2020/10/20 20:20:20" :threshold="[0,0]" format="dd号"></uni-dateformat>
					</view>
				</template>
			</common-title>
			<view class="content">
				<scroll-view scroll-x>
                    <!-- 这里使用v-for循环, 在先程序中不显示图片,解决办法是不要使用v-for循环,而是复制粘贴 -->
					<view class="box" v-for="i in 8">
						<image src="../../common/images/preview_small.webp" mode="aspectFill"></image>
					</view>
				</scroll-view>
			</view>
		</view>

		<view class="theme">
			<common-title>
				<template #name>
					<text>专题精选</text>
				</template>
				<template #custom>
					<navigator url="" class="more">More+</navigator>
				</template>
			</common-title>
		</view>
	</view>

</template>

<script setup>

</script>

<style lang="scss" scoped>
.homeLayout {

    ...

	.select {
		padding-top: 50rpx;
		.common-title {
			.date {
				display: flex;
				align-items: center;
				color: #28b389;
				.cal-icon {
					margin-right: 6rpx;
				}
			}
		}
		.content {
			width: 720rpx;
			margin-left: 30rpx;
			margin-top: 30rpx;
			scroll-view {
                /* 让行内块元素,不换行,以便于横向滚动 */
				white-space: nowrap;
				.box {
					display: inline-block;
					width: 200rpx;
					height: 440rpx;
					margin-right: 15rpx;
					border-radius: 10rpx;
					overflow: hidden;
					image {
						width: 100%;
						height: 100%	;
					}
					/* 设置最后1项的右外边距,以便与右侧边距距离保持一致 */
					&:last-child {
						margin-right: 30rpx;
					}
				}
			}

		}
	}

	.theme {
		padding-top: 50rpx;
		.more {
			font-size: 32rpx;
			color: #888;
		}
	}
}
</style>
7.6.组件具名插槽定义公共标题模块
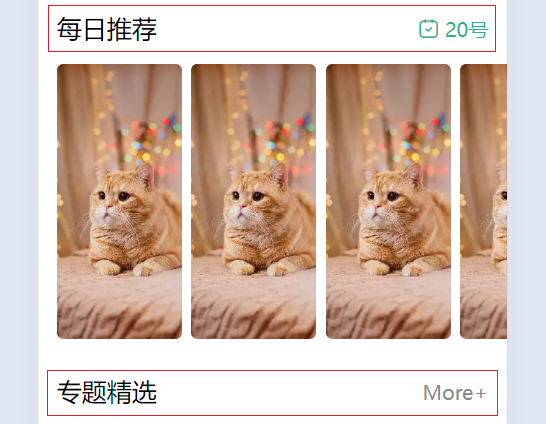
html
<template>
    <view class="common-title">
        <view class="name">
            <slot name="name">名称</slot>
        </view>
        <view class="custom">
            <slot name="custom">自定义</slot>
        </view>
    </view>
</template>

<script setup>

</script>

<style lang="scss" scoped>

    .common-title {
        display: flex;
        justify-content: space-between;
        align-items: center;
        // border: 1px solid red;
        margin: 0 30rpx;
        .name {
            font-size: 40rpx;
        }
    }

</style>
7.7.细节拉满磨砂背景定位布局做专题组件
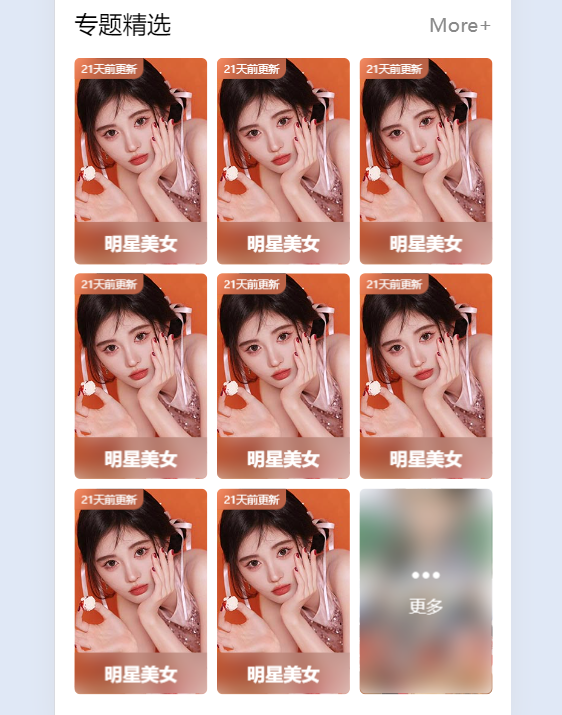
html
<template>
	<view class="homeLayout">
		...
		<view class="theme">
			<common-title>
				<template #name>
					<text>专题精选</text>
				</template>
				<template #custom>
					<navigator url="" class="more">More+</navigator>
				</template>
			</common-title>

			<view class="content">
				<theme-item v-for="i in 8"></theme-item>
				<theme-item :isMore="true"></theme-item>
			</view>
		</view>
	</view>

</template>

<script setup>

</script>

<style lang="scss" scoped>
.homeLayout {
	.theme {
		padding: 50rpx 0 50rpx;
		.more {
			font-size: 32rpx;
			color: #888;
		}

		.content {
			/* 采用网格布局 */
			display: grid;
			grid-template-columns: repeat(3, 1fr);
			gap: 15rpx;
			padding: 30rpx 30rpx 0;
		}
	}
}
</style>
html
<template>
    <view class="theme-item">
        <navigator url="/pages/index/index" class="box" v-if="!isMore">
            <image class="pic" src="@/common/images/classify1.jpg" mode="aspectFill"></image>
            <view class="mask">明星美女</view>
            <view class="tag">21天前更新</view>
        </navigator>

        <navigator url="/pages/index/index" class="box more" v-if="isMore">
            <image class="pic" src="@/common/images/more.jpg" mode="aspectFill"></image>
            <view class="mask">
                <uni-icons type="more-filled" size="30" color="#fff"></uni-icons>
                <view class="text">更多</view>
            </view>
        </navigator>
    </view>
</template>

<script setup>

    defineProps({
        isMore:{
            type: Boolean,
            default: false
        }
    })

</script>

<style lang="scss" scoped>

    .theme-item {
        .box {
            height: 340rpx;
            border-radius: 10rpx;
            overflow: hidden;
            position: relative;
            .pic { /* 不使用image标签是因为小程序会报警告 */
                /* image标签默认有设置的宽度为320*240px, 所以需要重新设置下image的宽度*/
                /* 因为外面用了网格布局, 这里就不用麻烦的去设置具体的宽度了 */
                width: 100%;
                /* 设置为100%,使用.box重新设定的高度 */
                height: 100%;
            }
            .mask {
                position: absolute;
                bottom: 0;
                width: 100%;
                height: 70rpx;
                background-color: rgba(0, 0, 0, 0.08);
                /* 磨砂滤镜效果 */
                backdrop-filter: blur(20rpx);
                color: #fff;
                text-align: center;
                line-height: 70rpx;
                font-weight: bold;
                font-size: 30rpx;
            }
            .tag {
                position: absolute;
                top: 0;
                left: 0;
                background-color: rgba(250, 129, 90, 0.7);
                color: #fff;
                backdrop-filter: blur(20rpx);
                font-size: 22rpx;
                padding: 6rpx 14rpx;
                border-bottom-right-radius: 20rpx;
                /* 由于字体不能再小了,于是手动缩放!! */
                transform: scale(0.8);
                transform-origin: 0 0;
            }
        }

        .box.more {
            .mask {
                width: 100%;
                height: 100%;
                background-color: rgba(255, 255,255, 0.15);
                display: flex;
                flex-direction: column;
                justify-content: center;
                font-size: 28rpx;
                font-weight: normal;
                .text {
                    margin-top: -20rpx;
                }
            }
        }
    }

</style>
7.8.设置项目底部tab页面切换标签
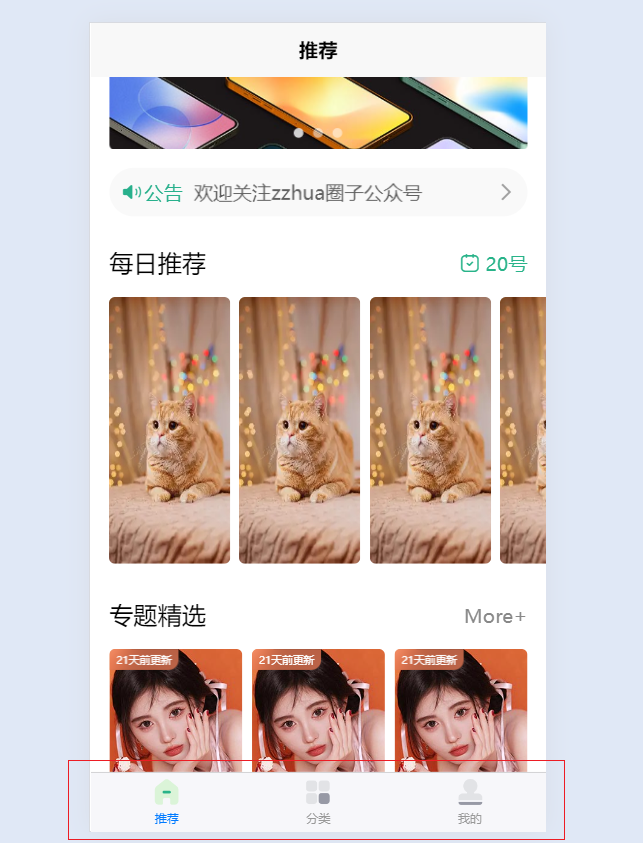
json
{
	"pages": [ //pages数组中第一项表示应用启动页
		{
			"path" : "pages/classify/classify",
			"style" :
			{
				"navigationBarTitleText" : "分类"
			}
		},
		{
			"path": "pages/index/index",
			"style": {
				"navigationBarTitleText": "推荐"
			}
		},
		{
			"path" : "pages/user/user",
			"style" :
			{
				"navigationBarTitleText" : "我的"
			}
		}

	],
	"globalStyle": {
		"navigationBarTextStyle": "black",
		"navigationBarTitleText": "zzhua壁纸",
		"navigationBarBackgroundColor": "#F8F8F8",
		"backgroundColor": "#F8F8F8"
	},
	"tabBar": {
		"list": [
			{
				"text": "推荐",
				"pagePath": "pages/index/index",
				"iconPath": "static/images/home.png",
				"selectedIconPath": "static/images/home-h.png"
			},
			{
				"text": "分类",
				"pagePath": "pages/classify/classify",
				"iconPath": "static/images/classify.png",
				"selectedIconPath": "static/images/classify-h.png"
			},
			{
				"text": "我的",
				"pagePath": "pages/user/user",
				"iconPath": "static/images/user.png",
				"selectedIconPath": "static/images/user-h.png"
			}
		]
	},
	"uniIdRouter": {}
}
7.10.个人中心页面布局
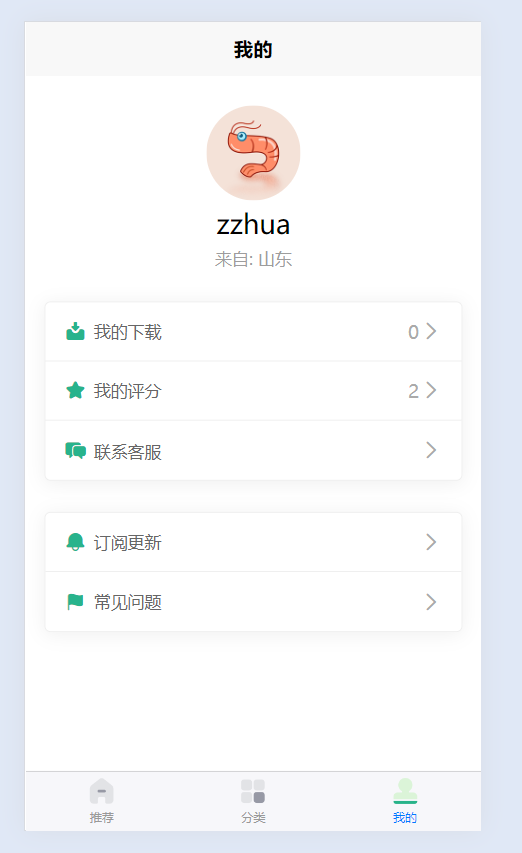
html
<template>
    <view class="userLayout">
        <view class="user-info">
            <view class="avatar">
                <image mode="aspectFill" src="../../static/images/xxmLogo.png"></image>
            </view>
            <view class="nick-name">zzhua</view>
            <view class="origin">来自: 山东</view>
        </view>

        <view class="section">
            <view class="list">
                <view class="row">
                    <view class="left">
                        <uni-icons type="download-filled" size="20" color="#28b38c"></uni-icons>
                        <text class="text">我的下载</text>
                    </view>
                    <view class="right">
                        <text class="text">0</text>
                        <uni-icons type="right" size="20" color="#aaa"></uni-icons>
                    </view>
                </view>
                <view class="row">
                    <view class="left">
                        <uni-icons type="star-filled" size="20" color="#28b38c"></uni-icons>
                        <text class="text">我的评分</text>
                    </view>
                    <view class="right">
                        <text class="text">2</text>
                        <uni-icons type="right" size="20" color="#aaa"></uni-icons>
                    </view>
                </view>
                <view class="row">
                    <view class="left">
                        <uni-icons type="chatboxes-filled" size="20" color="#28b38c"></uni-icons>
                        <text class="text">联系客服</text>
                    </view>
                    <view class="right">
                        <text class="text"></text>
                        <uni-icons type="right" size="20" color="#aaa"></uni-icons>
                    </view>
                </view>
            </view>

        </view>

        <view class="section">
            <view class="list">
                <view class="row">
                    <view class="left">
                        <uni-icons type="notification-filled" size="20" color="#28b38c"></uni-icons>
                        <text class="text">订阅更新</text>
                    </view>
                    <view class="right">
                        <text class="text"></text>
                        <uni-icons type="right" size="20" color="#aaa"></uni-icons>
                    </view>
                </view>
                <view class="row">
                    <view class="left">
                        <uni-icons type="flag-filled" size="20" color="#28b38c"></uni-icons>
                        <text class="text">常见问题</text>
                    </view>
                    <view class="right">
                        <text class="text"></text>
                        <uni-icons type="right" size="20" color="#aaa"></uni-icons>
                    </view>
                </view>
            </view>

        </view>

    </view>

</template>

<script setup>


</script>

<style lang="scss" scoped>
    .userLayout {
        .user-info {
            display: flex;
            flex-direction: column;
            align-items: center;
            padding: 50rpx 0;
            .avatar {
                width: 156rpx;
                height: 156rpx;
                border-radius: 50%;
                overflow: hidden;
                image {
                    // image标签有默认的宽高,因此必须修改它
                    width: 100%;
                    height: 100%;
                }
                vertical-align: bottom;
            }
            .nick-name {
                padding: 10rpx;
                font-size: 44rpx;
            }
            .origin {
                font-size: 28rpx;
                color: #9d9d9d;
            }
        }

        .section {
            margin: 0 30rpx;
            margin-bottom: 50rpx;
            border: 1px solid #eee;
            border-radius: 10rpx;
            box-shadow: 0 4rpx 30rpx rgba(0, 0, 0, 0.06);
            .list {
                .row {
                    display: flex;
                    justify-content: space-between;
                    align-items: center;
                    padding: 0 30rpx;
                    height: 98rpx;
                    border-bottom: 1px solid #eee;
                    &:last-child {
                        border-bottom: none;
                    }
                    .left {
                        display: flex;
                        align-items: center;
                        .text {
                            color: #666;
                            font-size: 28rpx;
                            padding-left: 10rpx;
                        }
                    }
                    .right {
                        display: flex;
                        align-items: center;
                        .text {
                            color: #aaa;
                        }
                    }
                }
            }
        }
    }
</style>
7.11.ifdef条件编译实现多终端匹配和客服消息
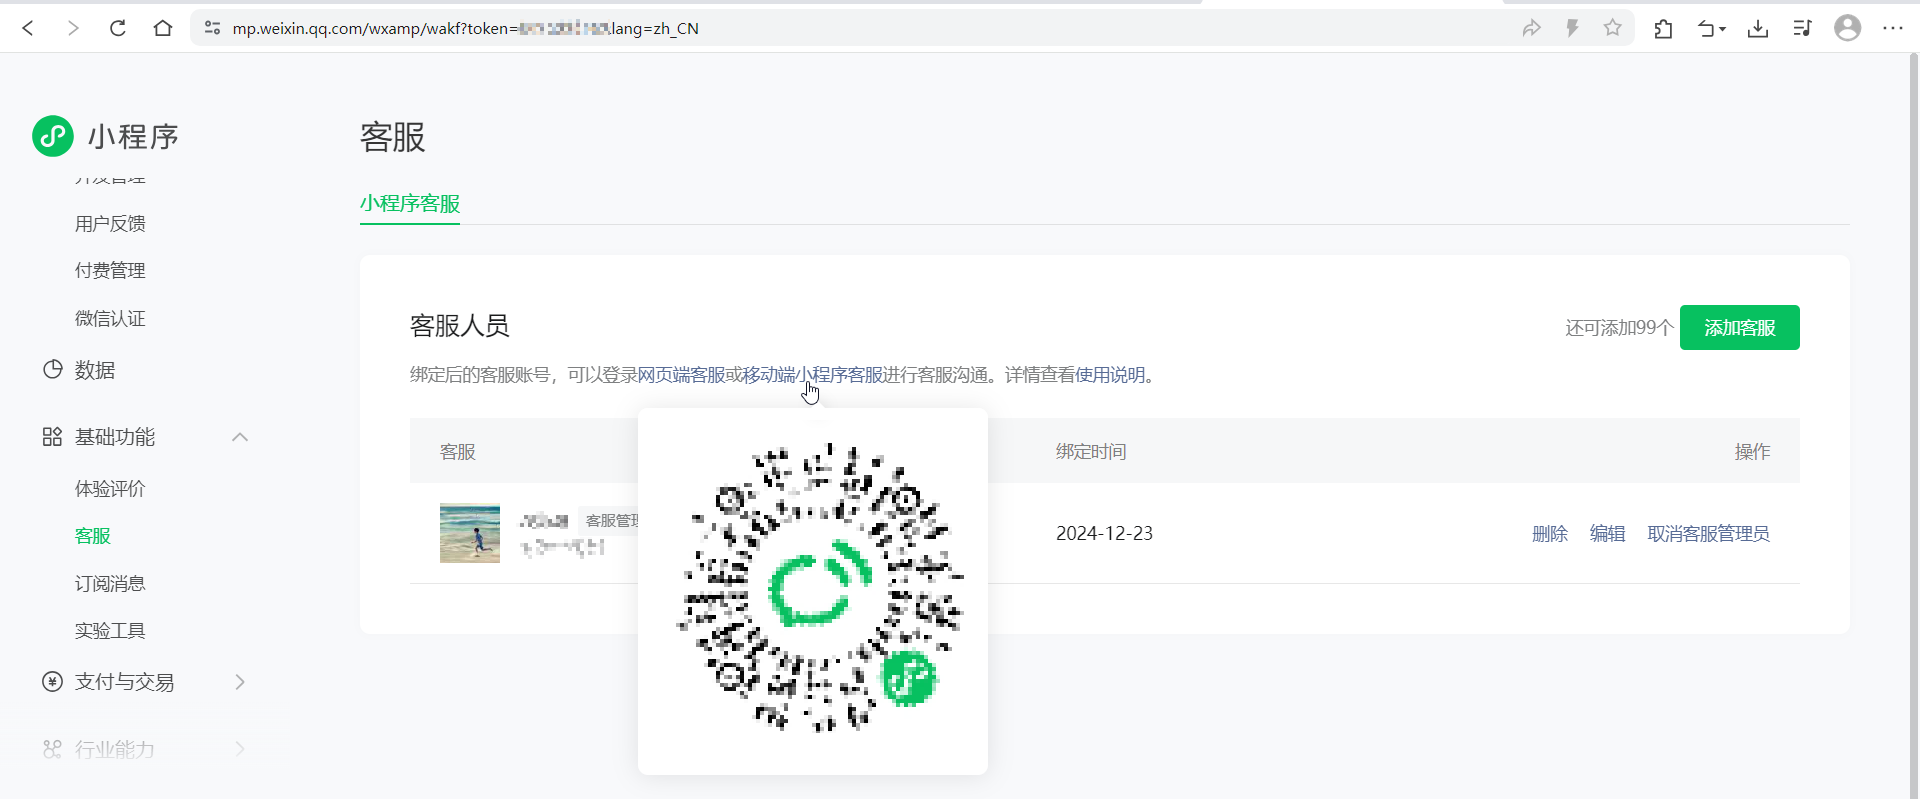
微信小程序添加客服
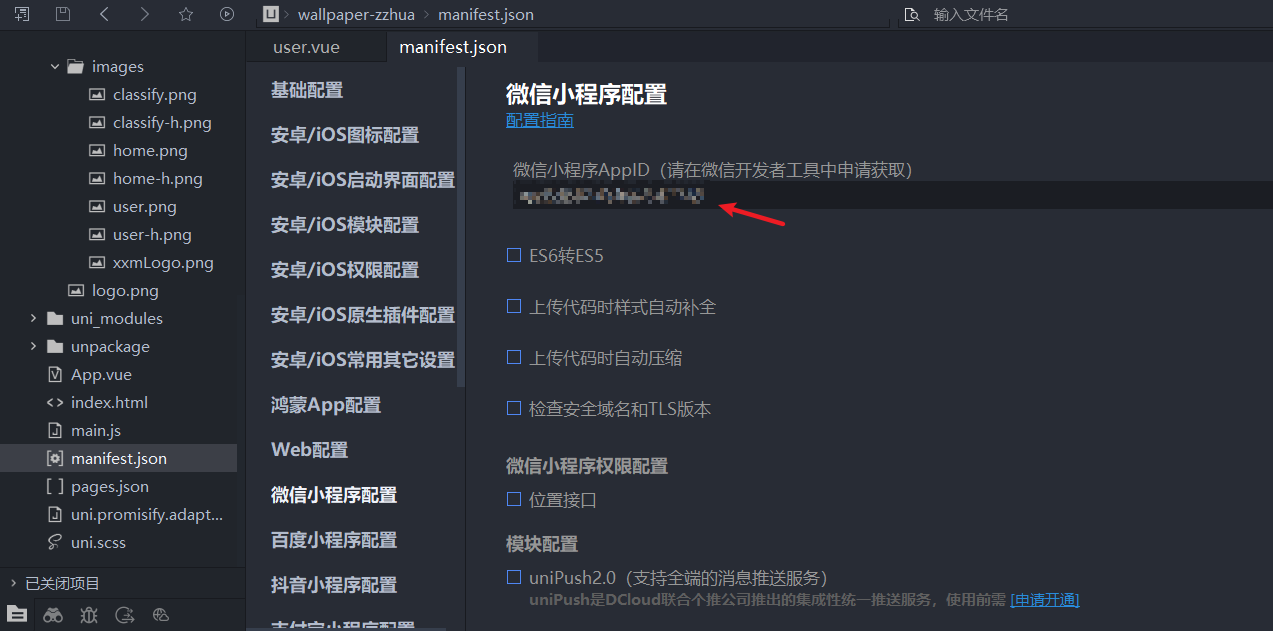
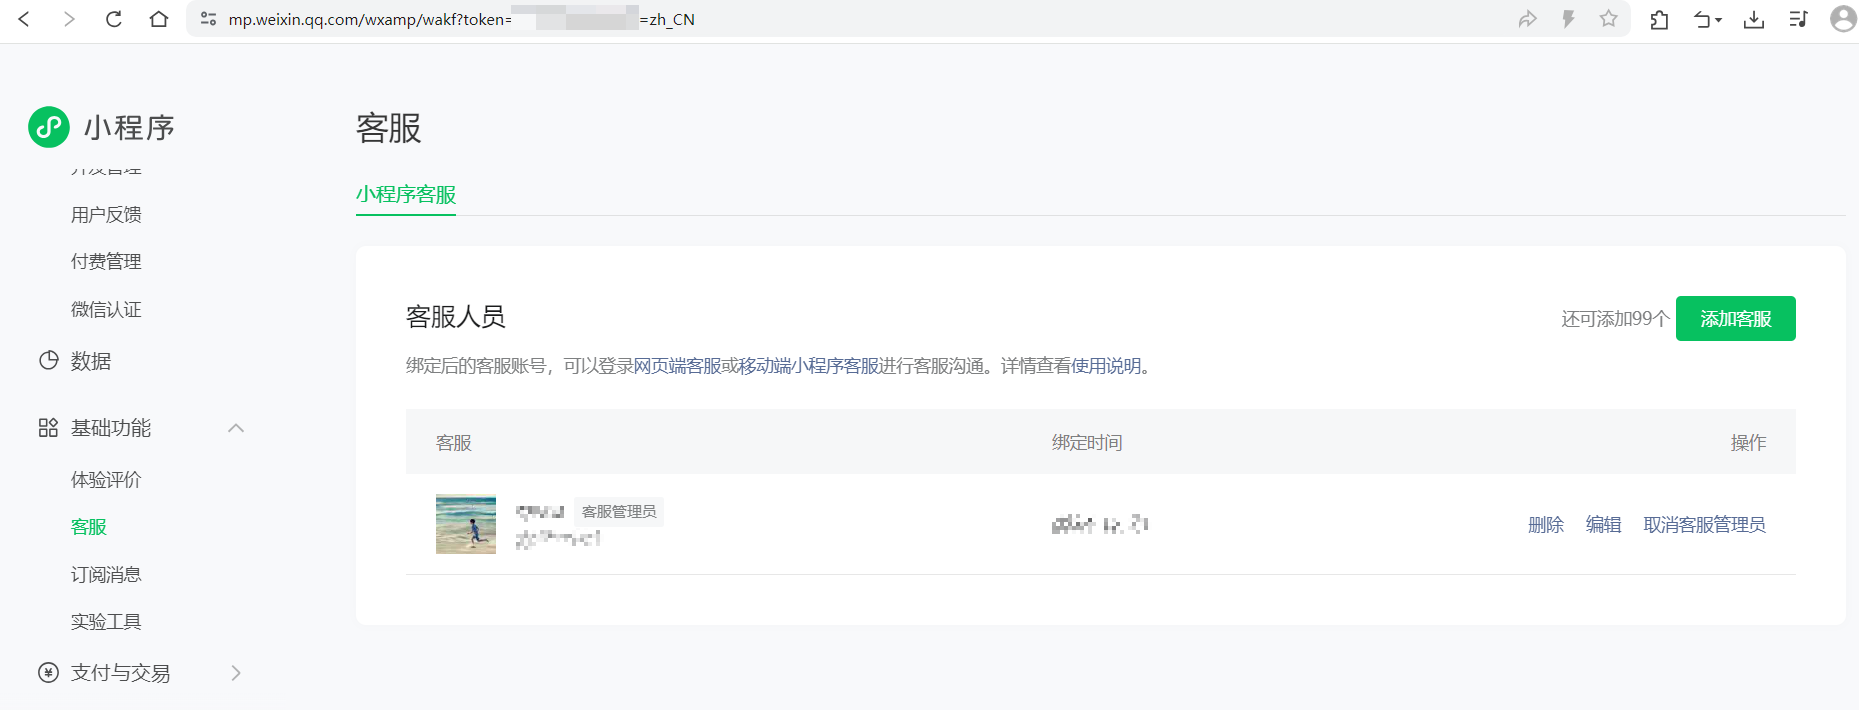
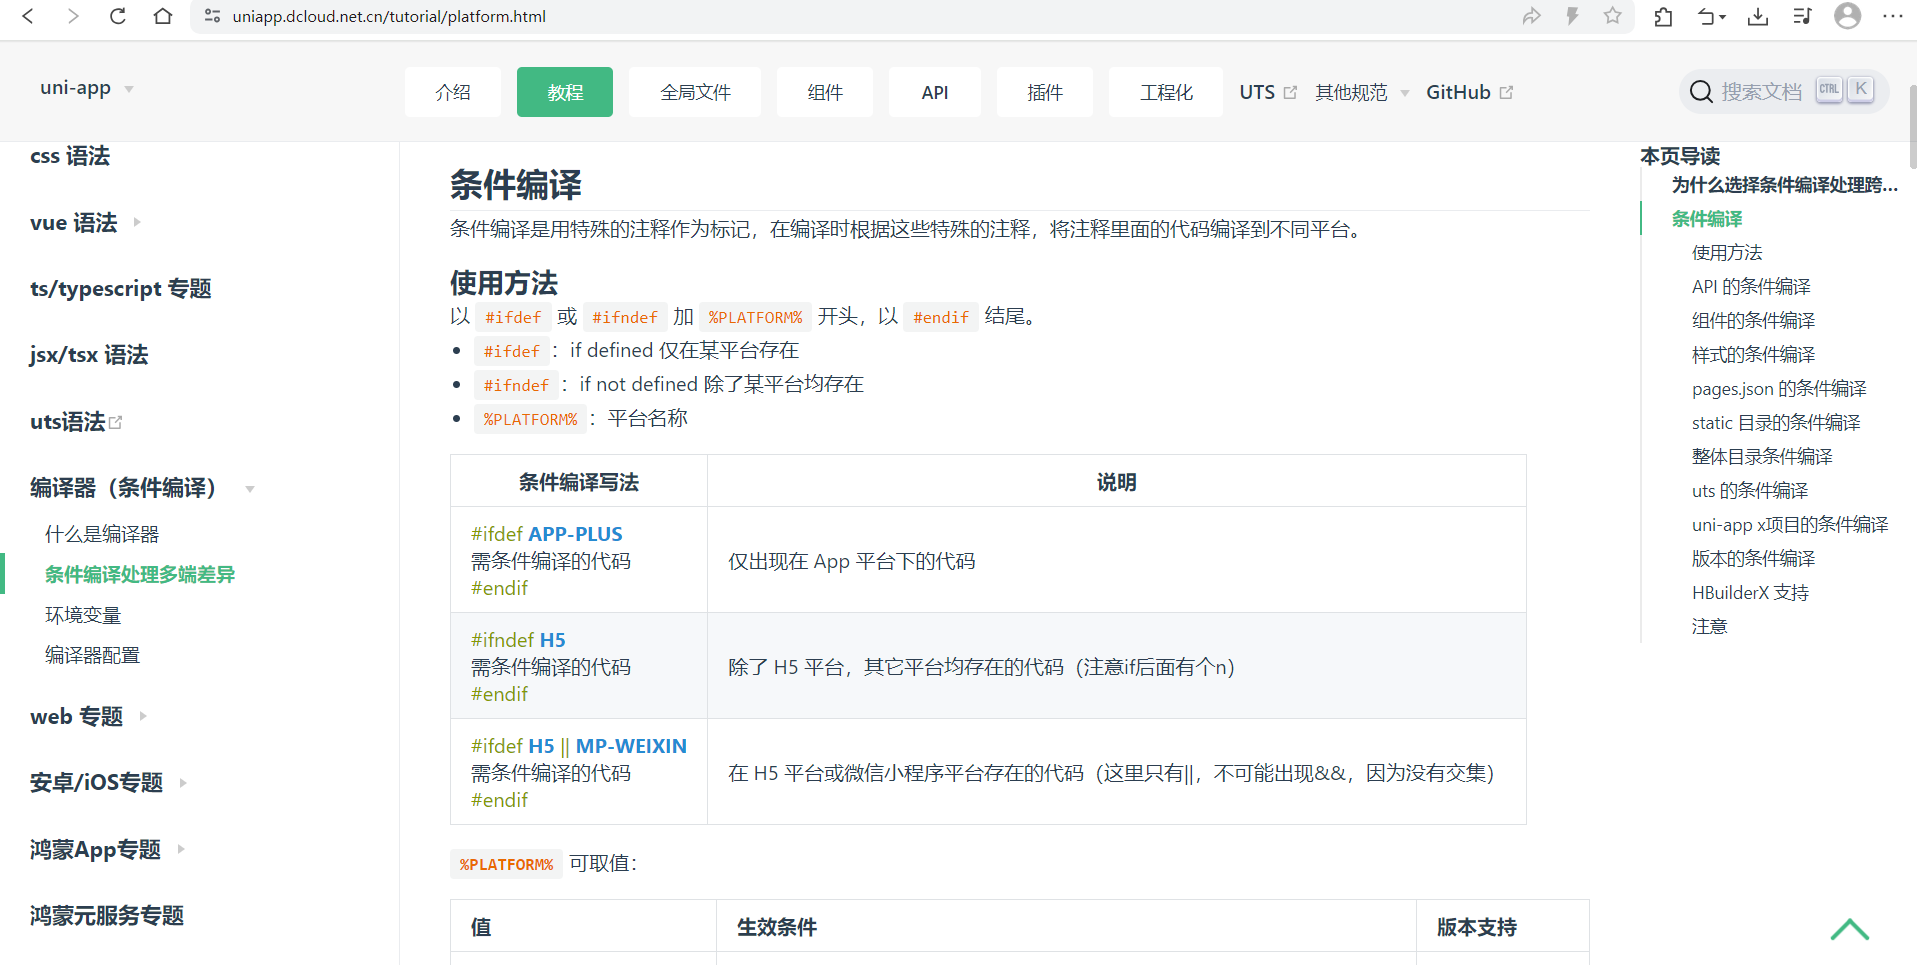
条件编译
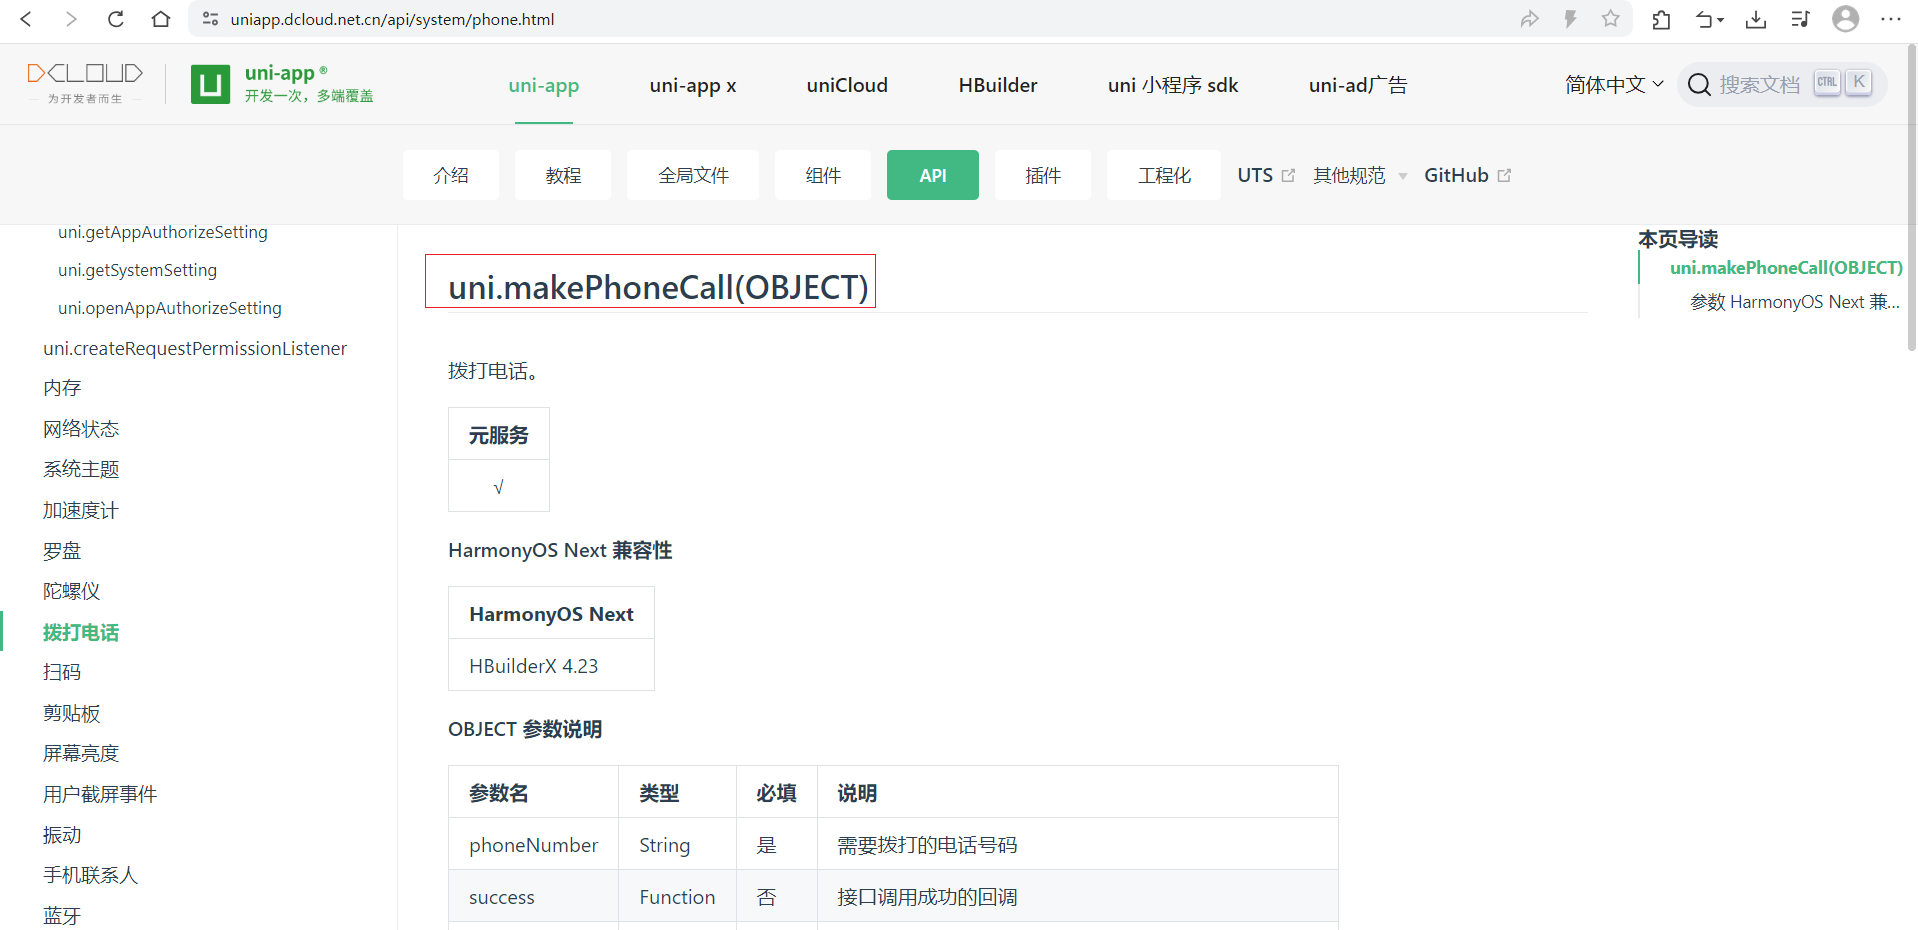
拨打电话
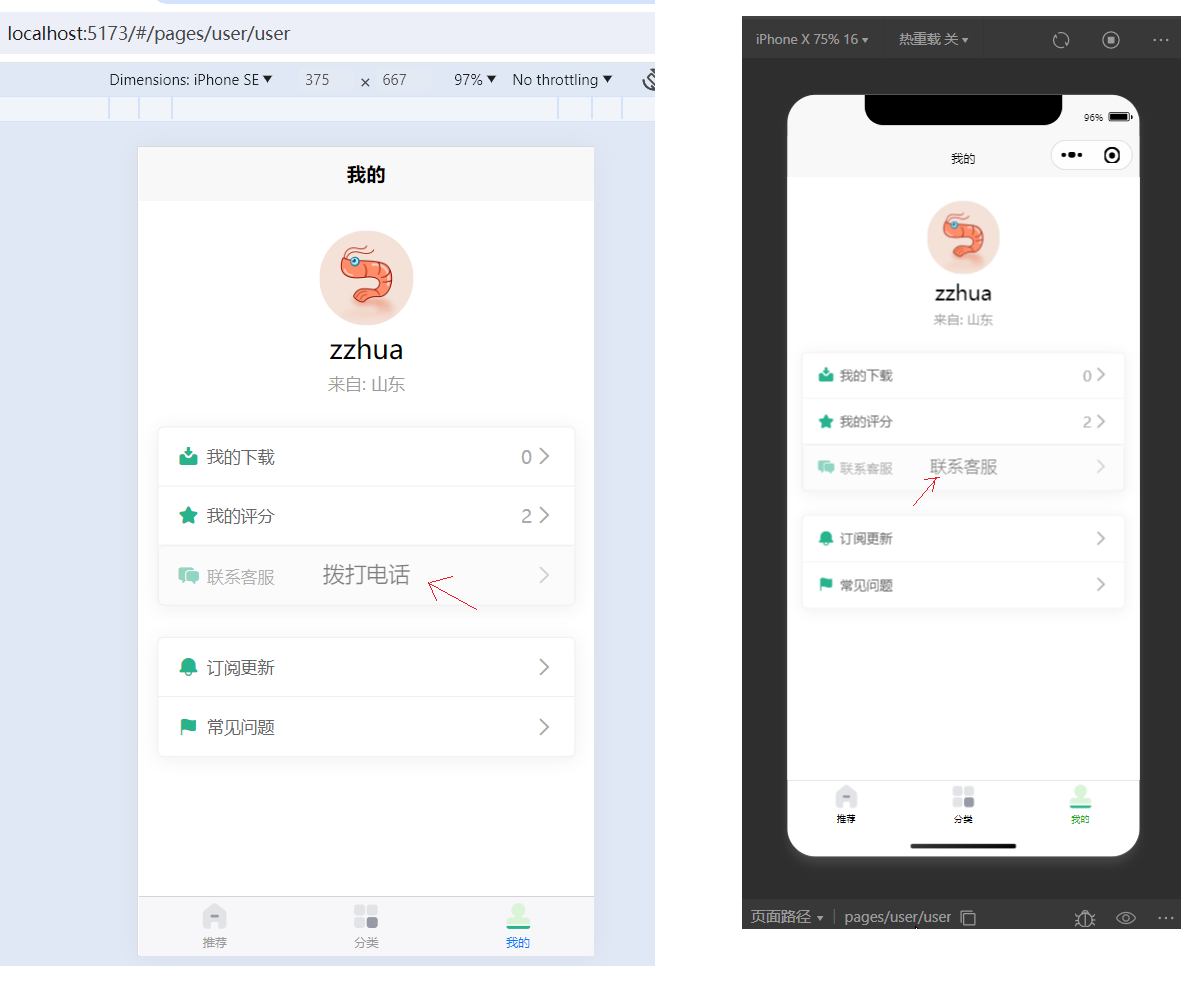
示例
html
<view class="row">
    <view class="left">
        <uni-icons type="chatboxes-filled" size="20" color="#28b38c"></uni-icons>
        <text class="text">联系客服</text>
    </view>
    <view class="right">
        <text class="text"></text>
        <uni-icons type="right" size="20" color="#aaa"></uni-icons>
    </view>

    <!-- 只能使用button 配合open-type才能调用客服的功能,因此使用css将整个按钮盖住 -->
    <!-- #ifdef MP --> <!-- 微信小程序才使用这个代码 -->
    <button open-type="contact">联系客服</button>
    <!-- #endif -->
    <!-- #ifndef MP --> <!-- 非微信小程序使用这个代码 -->
    <button @click="callTel">拨打电话</button>
    <!-- #endif -->
</view>

<script setup>
	const callTel = ()=>{
		uni.makePhoneCall({
			phoneNumber: '15100000000'
		})
	}
</script>
7.12.设置页面全局渐变线性渐变背景色
1、将pages.json中的页面设置style为"navigationStyle": "custom",取消默认的导航栏
2、定义渐变颜色,然后将类名直接添加到父级布局元素上即可
css
view,swiper,swiper-item {
	box-sizing: border-box;
}

.pageBg {
	background:  /* 在上面的渐变会盖住下面的渐变,呈现层叠的效果 */

	linear-gradient(to bottom, transparent, #fff 400rpx),
	linear-gradient(to right, rgba(200, 241, 222, 1.0), rgba(245, 235, 230, 1.0))
	;
	min-height: 80vh;
}
3、例如分类页面
html
<template>
	<view class="classLayout pageBg">

		<view class="classify">
			<theme-item v-for="i in 14"></theme-item>
		</view>

	</view>

</template>

<script setup>


</script>

<style lang="scss" scoped>
.classLayout {
	.classify {
		padding: 30rpx;
		display: grid;
		grid-template-columns: repeat(3, 1fr);
		gap: 15rpx;
	}
}
</style>
7.13.定义scss颜色变量deep()修改子组件css样式
1、项目根目录下,创建common/style/base-style.scss
scss
$brand-theme-color:#28B389;      //品牌主体色

$border-color:#e0e0e0;           //边框颜色
$border-color-light:#efefef;     //边框亮色

$text-font-color-1:#000;         //文字主色
$text-font-color-2:#676767;      //副标题颜色
$text-font-color-3:#a7a7a7;      //浅色
$text-font-color-4:#e4e4e4;      //更浅
2、在项目根目录下的uni.scss文件中引入base-style.scss
css
@import "@/common/style/base-style.scss"; /* 记得带分号 */
...
3、在页面中使用
css
.left {
    width: 140rpx;
    color: $brand-theme-color; /* 使用自定义变量 */
    display: flex;
    align-items: center;
    justify-content: center;
}
4、样式穿透
css
/* 1、改变组件内部的样式,比如下面改变了uni-icon组件内部的样式。
   2、下面这种写法兼容性不错。
   3、注意写的位置,要改哪里的组件,就写到包含目标元素的选择器那里去。
     比如写到<style>的最上面,则该页面的图标的颜色全部都会修改掉
   4、如果前面没有:deep(),在小程序中不生效*/
:deep() {
    .uni-icons {
        color: $brand-theme-color !important;
    }
}
/*
原因之一是:样式穿透。样式穿透就是vue在处理组件的时候,会给当前页面中所使用的组件处理后的html元素都添加1个data-v-xxx的属性, 然后在所写的样式中,如果使用了scoped,那么就会在我们所写的选择器的基础上,再添加上这个属性去选择元素。那这样的话,如果所使用的组件内部又引入了其它的组件,那么引入的其它的组件就没有这个data-v-xxx的属性,因此所写的样式对这些引入的其它的组件就没法生效了。加上样式穿透后,加入样式穿透的地方就不会加上这个data-v-xxx属性了,这样引入的其它的组件中的元素即便没有data-v-xxx属性,也能选择了
比如:
<style lang="scss" scoped>
.testLayout {
	/* :deep */ .uni-icons {
		color: red !important;
	}
}
</style>

会处理成
.testLayout .uni-icons[data-v-727d09f0] {
    color: red !important;
}
而
<style lang="scss" scoped>
.testLayout {
	:deep  .uni-icons {
		color: red !important;
	}
}
会处理成
.testLayout[data-v-727d09f0] .uni-icons {
    color: red !important;
}

原因之二是:h5编译之后和小程序编译之后的组件不一样
h5编译之后是
<uni-text data-v-d31e1c47="" data-v-727d09f0="" class="uni-icons uniui-folder-add" style="color: rgb(51, 51, 51); font-size: 1.875rem;">::before</uni-text>
而微信小程序编译后是(相比于上面嵌入了2层)
<uni-icons class="data-v-xxx">
	<text>::before</text>
</uni-icons>
*/
因此上面的解决方案,也可以直接使用vue3的样式穿透
:deep .uni-icons {
    color: $brand-theme-color !important;
}
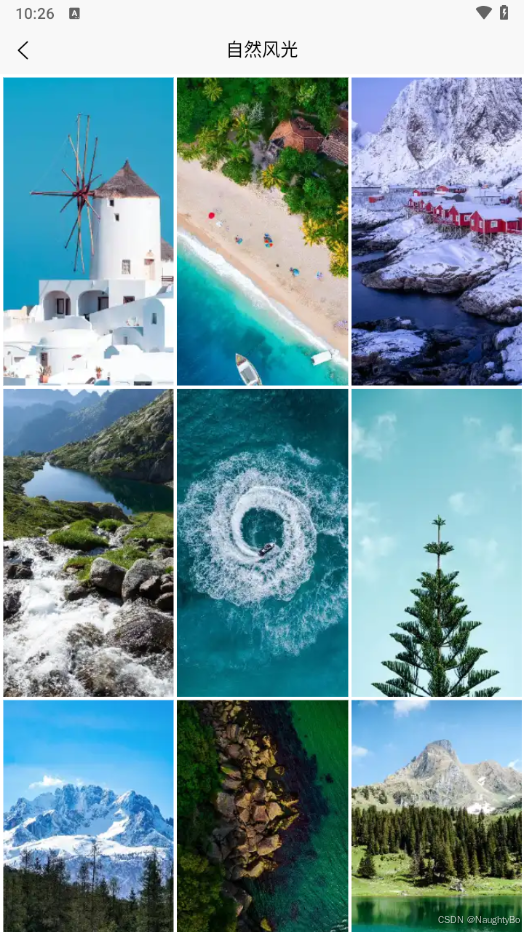
7.14.创建分类列表完成各页面的跳转
分类列表布局
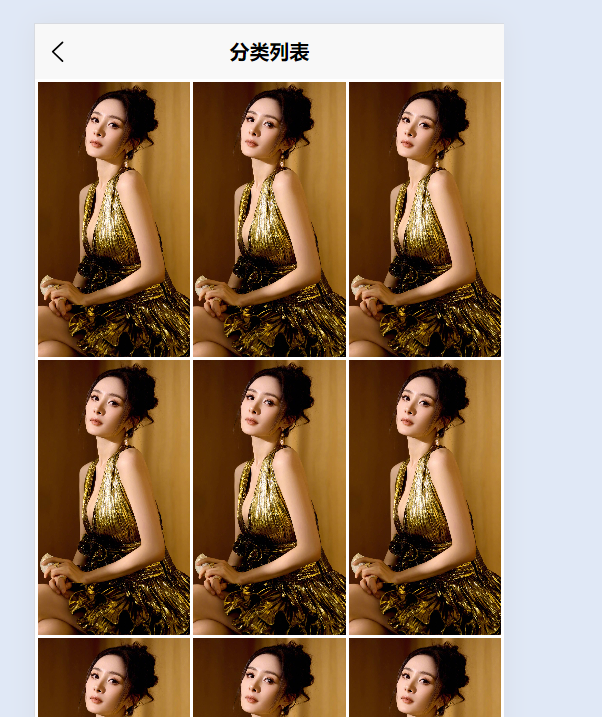
html
<template>
	<view class="classlist">

		<view class="content">

			<navigator url="" class="item" v-for="i in 10">
				<!-- 加上aspectFill之后,图片与图片的间隙视觉上消失了 -->
				<image src="../../common/images/preview2.jpg" mode="aspectFill"></image>
			</navigator>

		</view>

	</view>

</template>

<script setup>


</script>

<style lang="scss" scoped>
.classlist {
	.content {
		display: grid;
		grid-template-columns: repeat(3, 1fr);
		gap: 5rpx;
		padding: 5rpx;
		.item {
			/* 设置高度,以便于图片设置height:100% */
			height: 440rpx;
			image {
				/* 因为上面采用了网格布局,所以这里就覆盖image默认的宽度240px */
				width: 100%;
				/* 覆盖image默认的高度320px */
				height: 100%;
				/* 避免底部的空白间隙 */
				display: block;
			}
		}
	}
}
</style>
页面跳转到分类列表页
专题精选跳转到分类列表页面
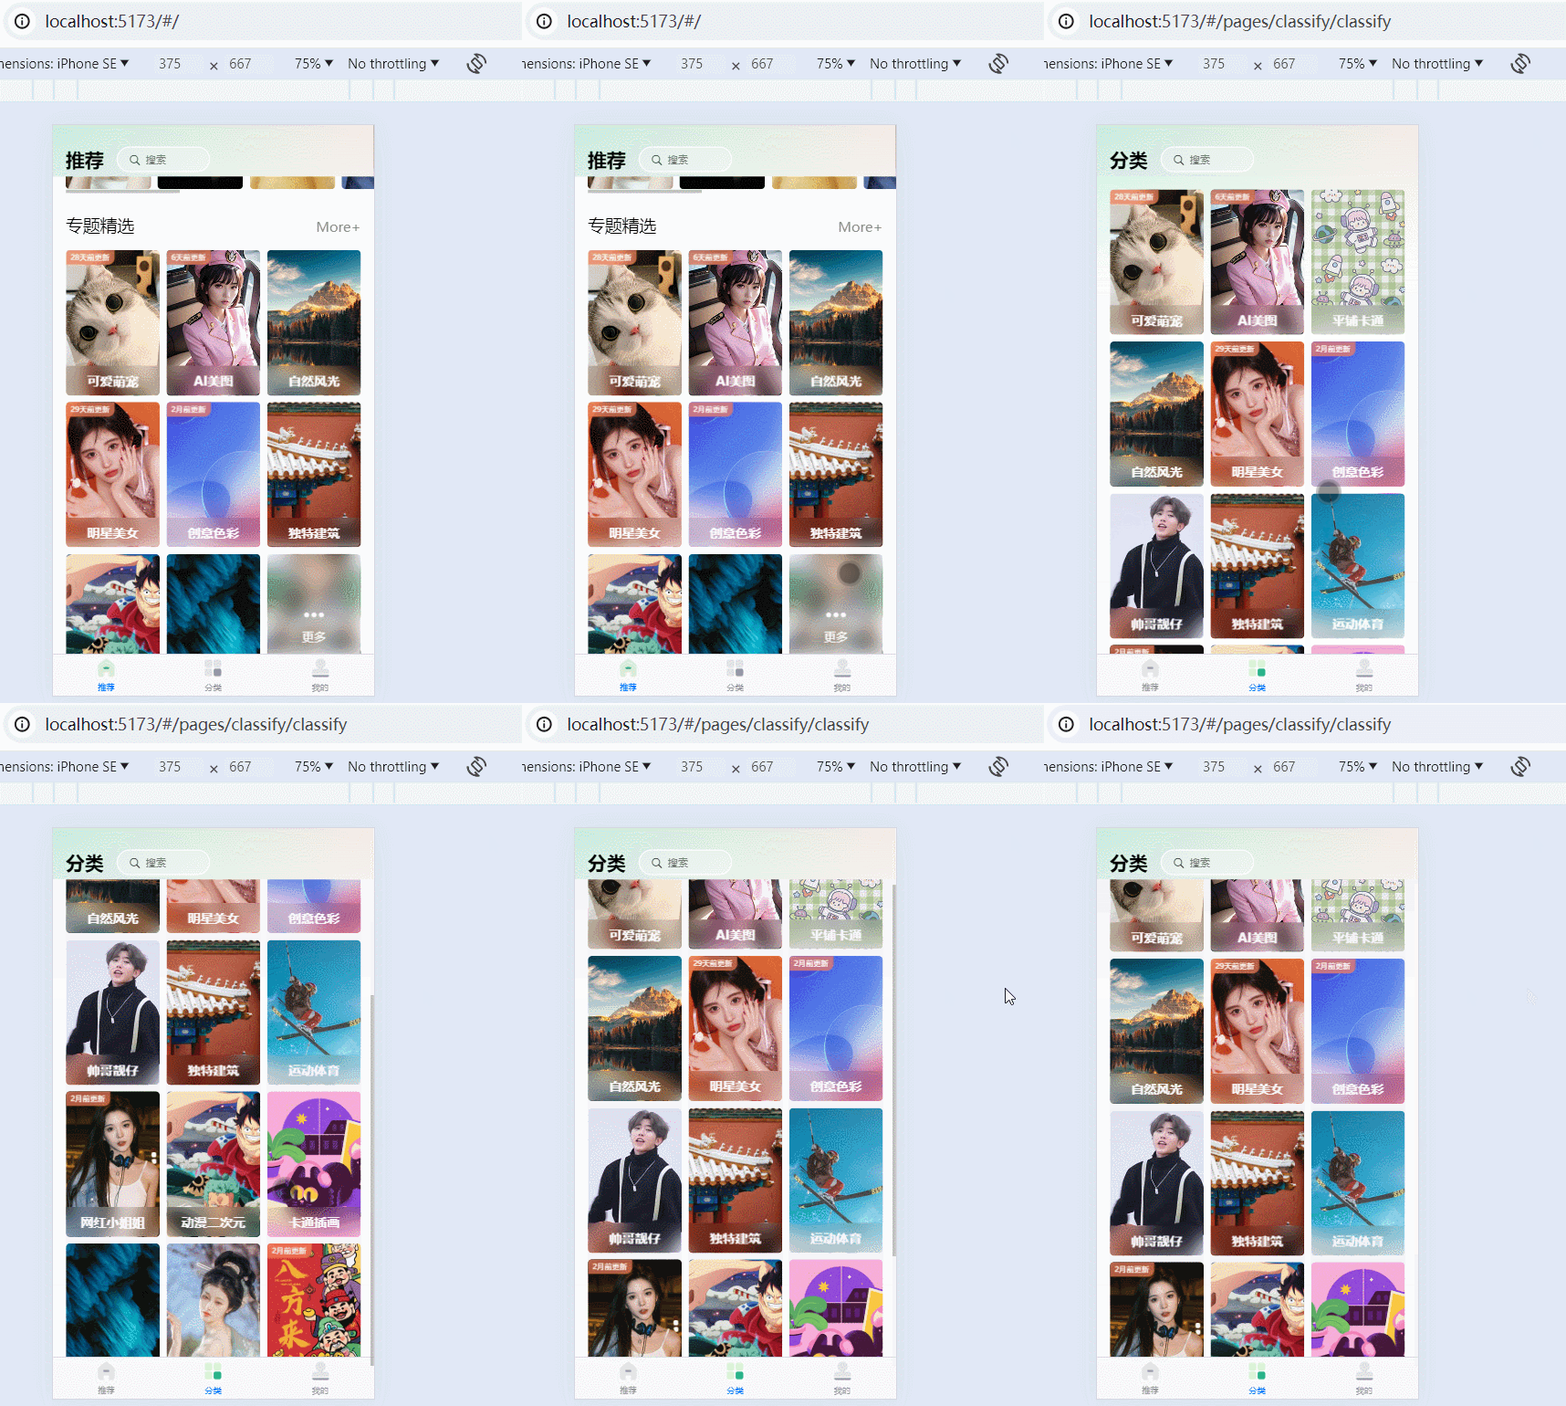
html
<view class="theme-item">
    <!-- navigator默认的open-type就是navigate,所以这里可以省略 -->
    <navigator url="/pages/classlist/classlist" open-type="navigate" ...>
        ...
    </navigator>

    <!-- 由于/pages/classify/classify是tabBar,所以要用reLaunch -->
    <navigator url="/pages/classify/classify" open-type="reLaunch" ...>
        ...
    </navigator>
</view>
我的下载跳转到分类列表页
html
<!-- 1、将view标签改为navigator标签
     2、为了不影响布局,可以设置不渲染a标签,如下;
                     也可以绑定点击事件,通过调用api的方式跳转
                     也可以单独给a标签设置下样式-->
<navigator url="/pages/classlist/classlist" class="row" :render-link="false">
    <view class="left">
       ...
    </view>
    <view class="right">
        ...
    </view>
</navigator>
7.15.全屏页面absolute定位布局和fit-content内容宽度
1、pages.json中将navigationStyle设置为custom,来去掉导航栏
2、使用width:fit-content和水平相等的公式,让图片数量标记居中
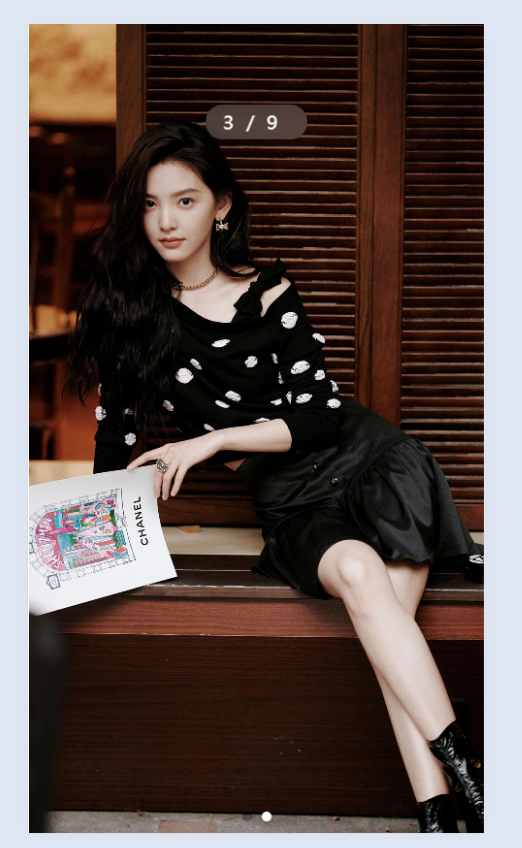
html
<template>
    <view class="preview">

        <!-- 图片滑播 -->
        <swiper circular indicator-dots indicator-active-color="#fff">
            <swiper-item v-for="i in 2">
                <image src="@/common/images/preview1.jpg" mode="aspectFill"></image>
            </swiper-item>
        </swiper>

        <!-- 遮罩层 -->
        <view class="mask">
            <view class="goBack"></view>
            <view class="count">3/9</view>
            <view class="time"></view>
            <view class="date"></view>
            <view class="footer">
                <view class="box">
                    <uni-icons type="info" size="28"></uni-icons>
                    <view class="text">信息</view>
                </view>
                <view class="box">
                    <uni-icons type="info" size="28"></uni-icons>
                    <view class="text">信息</view>
                </view>
                <view class="box">
                    <uni-icons type="info" size="28"></uni-icons>
                    <view class="text">信息</view>
                </view>
            </view>
        </view>

    </view>

</template>

<script setup>


</script>

<style lang="scss" scoped>
    .preview {
        width: 100%;
        /* 占满整个高度 */
        height: 100vh; /* 需要去掉导航栏,否则会出现滚动条,不好看 */
        /* 让轮播图铺满整个画面 */
        swiper {
            width: 100%;
            height: 100%;
            image {
                width: 100%;
                height: 100%;
            }
        }

        position: relative;

        .mask {

            .count {
                /* 寻找最近的1个包含块 */
                position: absolute;
                top: 10vh;
                left: 0;
                right: 0;
                margin: 0 auto;
                /* 水平相等的公式 */
                /* 居中的关键就是要设置宽度,额外的惊喜是这个属性可以自适应宽度 */
                width: fit-content;

                font-size: 28rpx;
                padding: 8rpx 28rpx;
                border-radius: 40rpx;
                letter-spacing: 20rpx;

                background-color: rgba(255, 255, 255, 0.2);
                color: #fff;

                backdrop-filter: blur(20rpx);
            }
        }
    }
</style>
7.16.遮罩层状态转换及日期格式化
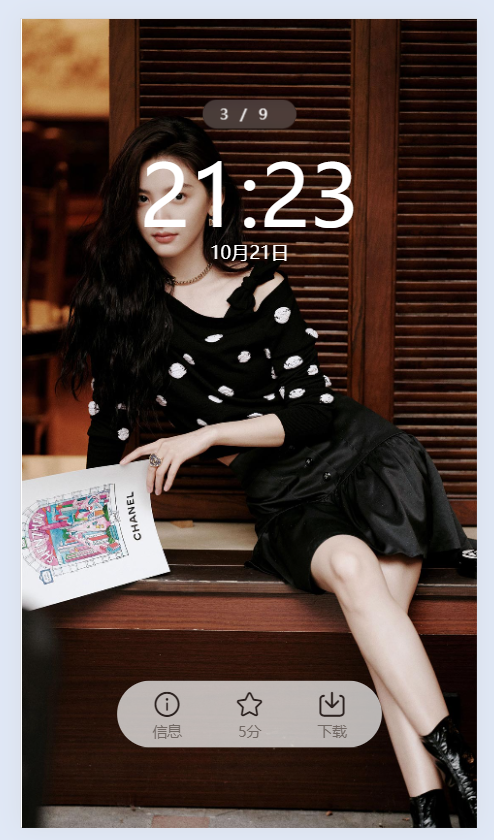
html
<template>
	<view class="preview">

		<!-- 图片滑播 -->
		<swiper circular>
			<swiper-item v-for="i in 2">
				<image @click="maskChange" src="@/common/images/preview1.jpg" mode="aspectFill"></image>
			</swiper-item>
		</swiper>

		<!-- 遮罩层 -->
		<view class="mask" v-show="maskState">
			<view class="goBack"></view>
			<view class="count">3/9</view>
			<view class="time">
				<uni-dateformat :date="new Date()" format="hh:mm"></uni-dateformat>
			</view>
			<view class="date">
				<uni-dateformat :date="new Date()" format="mm月dd日"></uni-dateformat>
			</view>
			<view class="footer">
				<view class="box">
					<uni-icons type="info" size="28"></uni-icons>
					<view class="text">信息</view>
				</view>
				<view class="box">
					<uni-icons type="star" size="28"></uni-icons>
					<view class="text">5分</view>
				</view>
				<view class="box">
					<uni-icons type="download" size="28"></uni-icons>
					<view class="text">下载</view>
				</view>
			</view>
		</view>

	</view>

</template>

<script setup>
	import { ref } from 'vue';

	const maskState = ref(true)

	function maskChange() {
		console.log('halo');
		maskState.value = !maskState.value
	}

</script>

<style lang="scss" scoped>
.preview {
	width: 100%;
	/* 占满整个高度 */
	height: 100vh; /* 需要去掉导航栏,否则会出现滚动条,不好看 */
	/* 让轮播图铺满整个画面 */
	swiper {
		width: 100%;
		height: 100%;
		image {
			width: 100%;
			height: 100%;
		}
	}

	position: relative;

	.mask {

		.count {
			/* 寻找最近的1个包含块 */
			position: absolute;
			top: 10vh;
			left: 0;
			right: 0;
			margin: 0 auto;
			/* 水平相等的公式 */
			/* 居中的关键就是要设置宽度,额外的惊喜是这个属性可以自适应宽度 */
			width: fit-content;

			padding: 8rpx 28rpx;
			border-radius: 40rpx;
			letter-spacing: 20rpx;
			font-size: 24rpx;

			// background-color: rgba(0, 0, 0, 0.2);
			background-color: rgba(255, 255, 255, 0.2);
			color: #fff;

			backdrop-filter: blur(20rpx);
		}

		.time {
			position: absolute;
			/* 在上面10vh的基础上,再加60rpx */
			top: calc(10vh + 60rpx);
			left: 0;
			right: 0;
			width: fit-content;
			margin: 0 auto;
			font-size: 140rpx;
			color: #fff;
			text-shadow: 0 4rpx rbga(0,0,0,.3);
		}

		.date {
			position: absolute;
			top: calc(10vh + 230rpx);
			left: 0;
			width: fit-content;
			margin: auto;
			left: 0;
			right: 0;
			font-size: 30rpx;
			color: #fff;
			text-shadow: 0 4rpx rbga(0,0,0,.3);
		}

		.footer {
			position: absolute;
			bottom: 10vh;
			background-color: rgba(255, 255, 255, .7);
			display:flex;
			left: 0;
			right: 0;
			margin: auto;
			width: fit-content;
			padding: 0 15rpx;
			border-radius: 80rpx;

			.box {
				height: 110rpx;
				padding: 0 40rpx;
				display: flex;
				flex-direction: column;
				justify-content: center;
				align-items: center;
				.uni-icons {
					color: #2b211f !important;
				}
				.text {
					font-size: 24rpx;
					color: #716863;
				}
			}
		}

	}
}
</style>
7.17.uni-popup弹窗层制作弹出信息内容效果
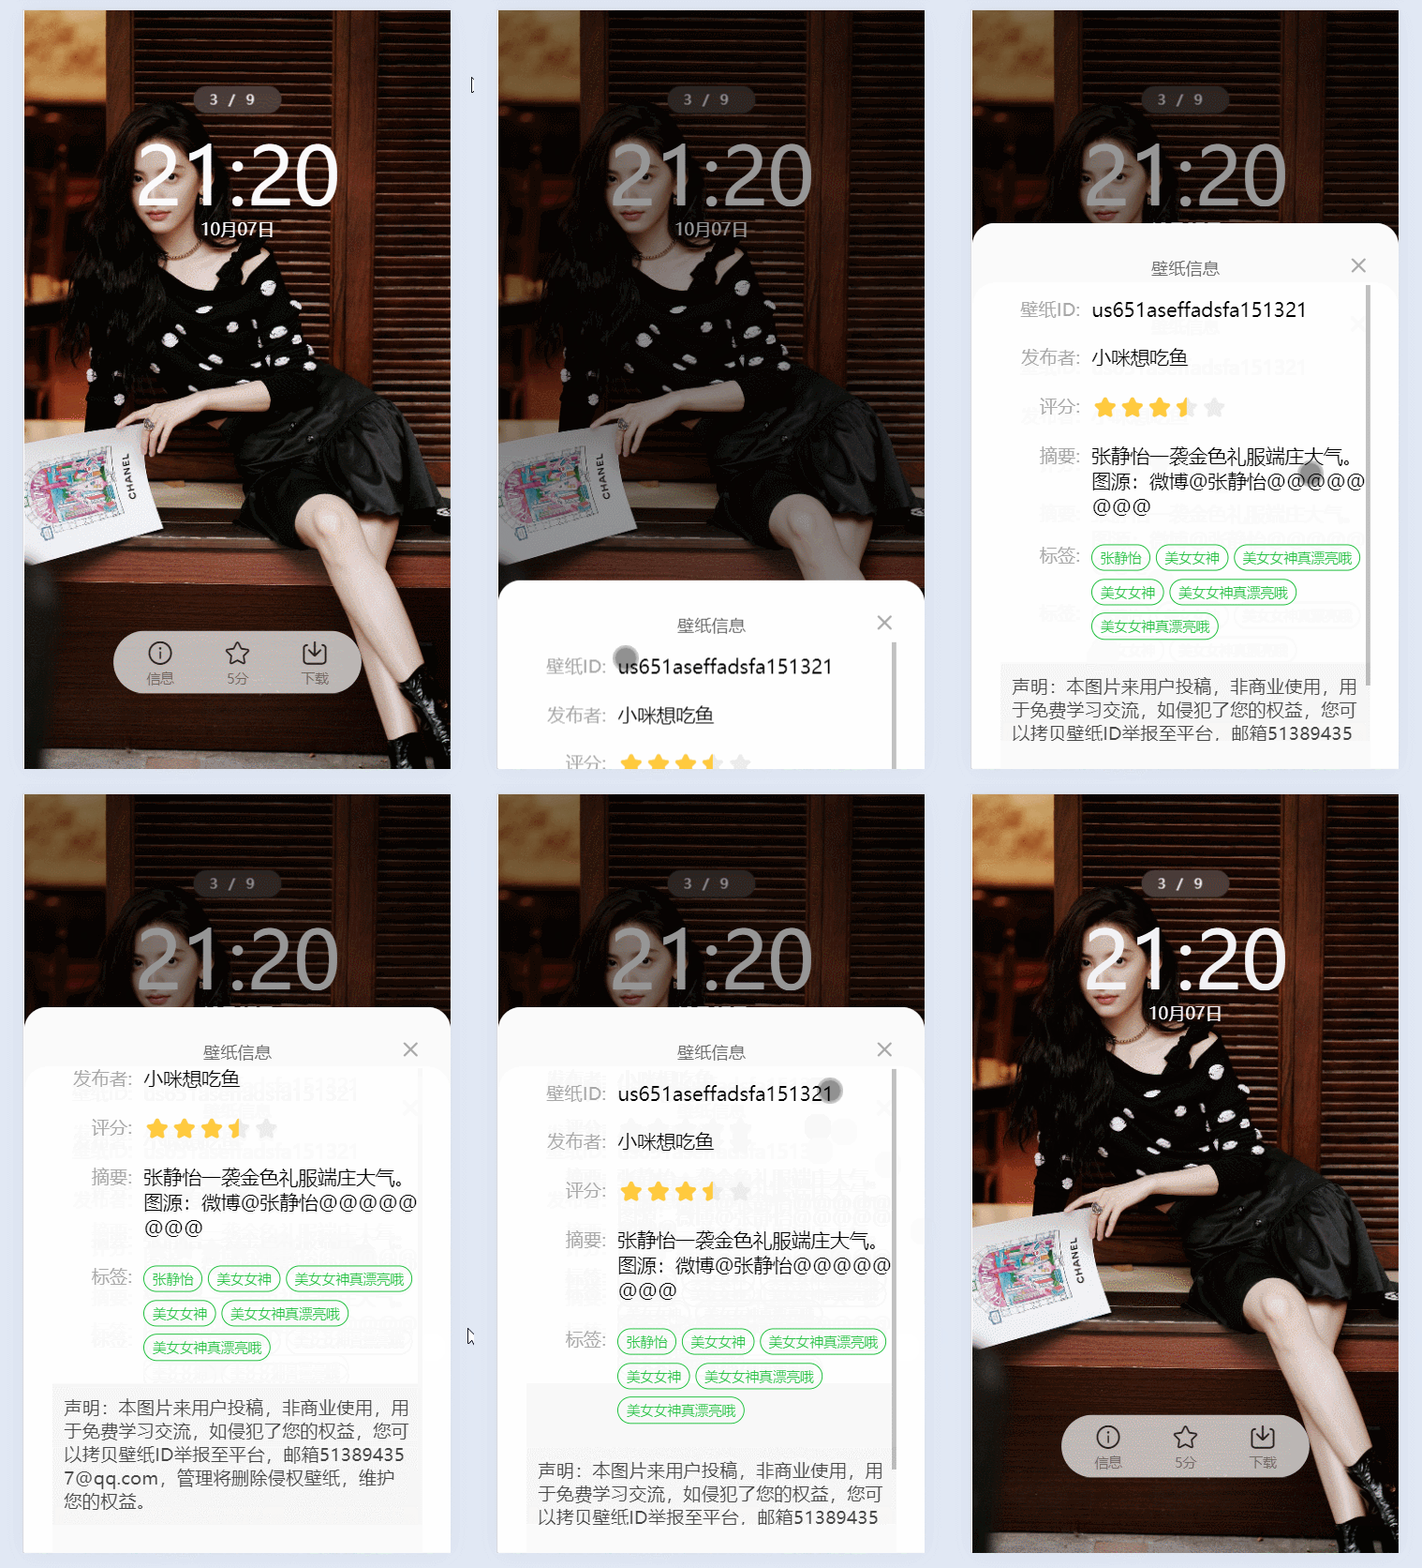
html
<template>
	<view class="preview">

		<!-- 图片滑播 -->
		<swiper circular>
			<swiper-item v-for="i in 2">
				<image @click="maskChange"
                       src="@/common/images/preview1.jpg" mode="aspectFill"></image>
			</swiper-item>
		</swiper>

		<!-- 遮罩层 -->
		<view class="mask" v-show="maskState">
			...
		</view>

		<uni-popup
			class="infoPop"
			ref="infoPopRef"
			background-color="#fff"
			type="bottom" border-radius="40rpx 40rpx 0 0">
			<view class="content-area">

				<!-- 头部,固定高度 -->
				<view class="infoPopHeader">
					<view class="title">壁纸信息</view>
					<view class="close-box" @click="closePopInfo">
						<uni-icons type="closeempty" size="20"></uni-icons>
					</view>
				</view>

				<!-- 给scroll-view设定最大高度,当下面的内容超过最大高度时,才出现滚动条 -->
				<scroll-view scroll-y>
					<!-- 下面为内容 -->
					<view class="content">
						<view class="row">
							<view class="label">壁纸ID:</view>
							<view class="value">us651aseffadsfa151321</view>
						</view>
						<view class="row">
							<view class="label">发布者:</view>
							<view class="value">小咪想吃鱼</view>
						</view>
						<view class="row">
							<view class="label">评分:</view>
							<view class="value">
								<uni-rate :readonly="true" :value="3.5" />
							</view>
						</view>
						<view class="row abstract">
							<view class="label">摘要:</view>
							<view class="value">张静怡一袭金色礼服端庄大气。图源:微博@张静怡@@@@@@@@</view>
						</view>
						<view class="row tag">
							<view class="label">标签:</view>
							<view class="value">
								<uni-tag text="张静怡" :inverted="true" :circle="true" type="success"></uni-tag>
								<uni-tag text="美女女神" :inverted="true" :circle="true" type="success"></uni-tag>
								<uni-tag text="美女女神真漂亮哦" :inverted="true" :circle="true" type="success"></uni-tag>
								<uni-tag text="美女女神" :inverted="true" :circle="true" type="success"></uni-tag>
								<uni-tag text="美女女神真漂亮哦" :inverted="true" :circle="true" type="success"></uni-tag>
								<uni-tag text="美女女神真漂亮哦" :inverted="true" :circle="true" type="success"></uni-tag>
							</view>
						</view>
						<view class="declare">
							声明:本图片来用户投稿,非商业使用,用于免费学习交流,如侵犯了您的权益,您可以拷贝壁纸ID举报至平台,邮箱513894357@qq.com,管理将删除侵权壁纸,维护您的权益。
						</view>
					</view>
				</scroll-view>


			</view>
		</uni-popup>

	</view>

</template>

<script setup>
	import { onMounted, ref } from 'vue';

	const maskState = ref(true)

	function maskChange() {
		maskState.value = !maskState.value
	}

	const infoPopRef = ref(null)
	const popInfo = ()=>{
		infoPopRef.value.open()
	}
	const closePopInfo = ()=>{
		infoPopRef.value.close()
	}
	/* onMounted(()=>{
		popInfo()
	}) */

</script>

<style lang="scss" scoped>
.preview {
	width: 100%;
	/* 占满整个高度 */
	height: 100vh; /* 需要去掉导航栏,否则会出现滚动条,不好看 */
	/* 让轮播图铺满整个画面 */
	swiper {
		width: 100%;
		height: 100%;
		image {
			width: 100%;
			height: 100%;
		}
	}


	.infoPop {
		.content-area {
			padding: 50rpx;
			.infoPopHeader {
				height: 60rpx;
				line-height: 60rpx;
				text-align: center;
				position: relative;
				width: 100%;
				.title {
					color: $text-font-color-2;
					font-size: 30rpx;
				}
				.close-box {
					position: absolute;
					right: 0;
					top: -4rpx;
					display: flex;
					align-items: center;
					:deep .uni-icons {
						color: $text-font-color-3 !important;
					}
				}
			}

			scroll-view {
				/* 设置scroll-view的最大高度 */
				max-height: 60vh;
				.content {
					.row {
						display: flex;
						align-items: flex-start;
						padding: 20rpx 0;
						.label {
							color: $text-font-color-3;
							width: 140rpx;
							text-align: right;
						}
						.value {

							/* 因为是flex左右布局,左边固定宽度,当右边过宽度过大时,会挤压左边,所以设置width:0,不让右边挤压左边 */
							flex: 1;
							width: 0;

							/* 让字能够断开换行 */
							word-break: break-all;

							color: $text-font-color-1;
							padding-left: 20rpx;
							font-size: 34rpx;

							.uni-tag {
								display: inline-block;
								margin: 0 10rpx 10rpx 0;
							}
						}
					}

					.declare {
						word-break: break-all;
						color: #484848;
						background-color: #f6f6f6;
						padding: 20rpx;
						margin-top: 10rpx;
					}
				}
			}
		}
	}
}
</style>
7.18.评分弹出框uni-rate组件的属性方法
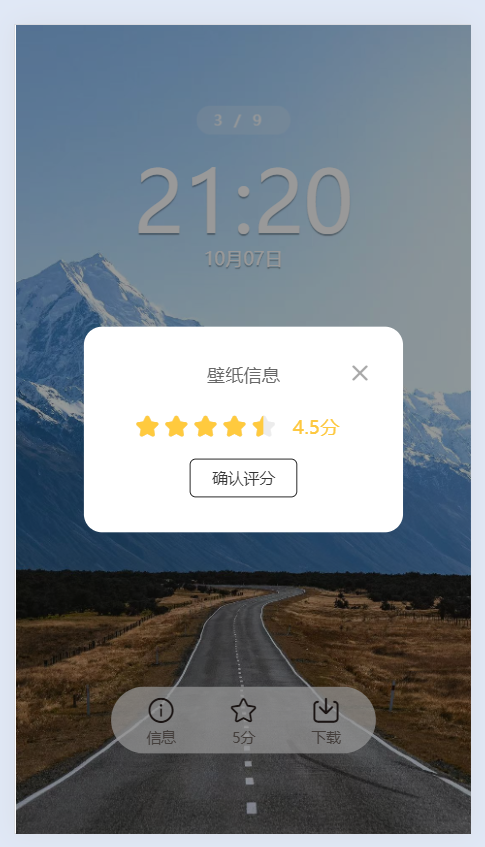
html
<template>
    <view class="preview">

        <!-- 图片滑播 -->
        <swiper circular>
            <swiper-item v-for="i in 2">
                <image @click="maskChange" src="@/common/images/preivew3.jpg" mode="aspectFill"></image>
            </swiper-item>
        </swiper>

        ...

        <uni-popup class="ratePop" ref="ratePopRef" type="center" :mask-click="false">

            <view class="content-area">

                <!-- 头部,固定高度 -->
                <view class="popHeader">
                    <view class="title">壁纸信息</view>
                    <view class="close-box" @click="closePopRate">
                        <uni-icons type="closeempty" size="20"></uni-icons>
                    </view>
                </view>

                <view class="rate-body">
                    <uni-rate v-model="starNum" allow-half touchable></uni-rate>
                    <text class="score">{{starNum}}分</text>
                </view>

                <view class="rate-footer">
                    <button plain type="default" size="mini">确认评分</button>
                </view>

            </view>

        </uni-popup>
    </view>

</template>

<script setup>
    import { onMounted, ref } from 'vue';

    const ratePopRef = ref(null)
    const popRate = ()=>{
        ratePopRef.value.open()
    }
    const closePopRate = ()=>{
        ratePopRef.value.close()
    }
    const starNum = ref(1)


</script>

<style lang="scss" scoped>
    .preview {
        width: 100%;
        /* 占满整个高度 */
        height: 100vh; /* 需要去掉导航栏,否则会出现滚动条,不好看 */
        /* 让轮播图铺满整个画面 */
        swiper {
            width: 100%;
            height: 100%;
            image {
                width: 100%;
                height: 100%;
            }
        }

        .popHeader {
            height: 60rpx;
            line-height: 60rpx;
            text-align: center;
            position: relative;
            width: 100%;
            .title {
                color: $text-font-color-2;
                font-size: 30rpx;
            }
            .close-box {
                position: absolute;
                right: 0;
                top: -4rpx;
                display: flex;
                align-items: center;
                :deep .uni-icons {
                    color: $text-font-color-3 !important;
                }
            }
        }

        .ratePop {
            .content-area {
                background-color: #fff;
                width: 70vw;
                padding: 50rpx;
                border-radius:30rpx;
                .rate-body {
                    padding: 30rpx;
                    display: flex;
                    align-items: center;
                    .score {
                        flex: 1;
                        text-align: center;
                        overflow: hidden;
                        color: #fdc840;
                        left: 40rpx;
                    }
                }
                .rate-footer {
                    text-align: center;
                    button {
                        border-color: #222222;
                    }
                }
            }
        }
    }
</style>
7.19.自定义头部导航栏布局&获取系统信息getSystemInfo状态栏和胶囊按钮
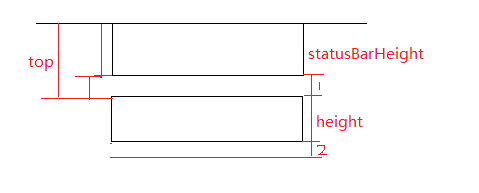
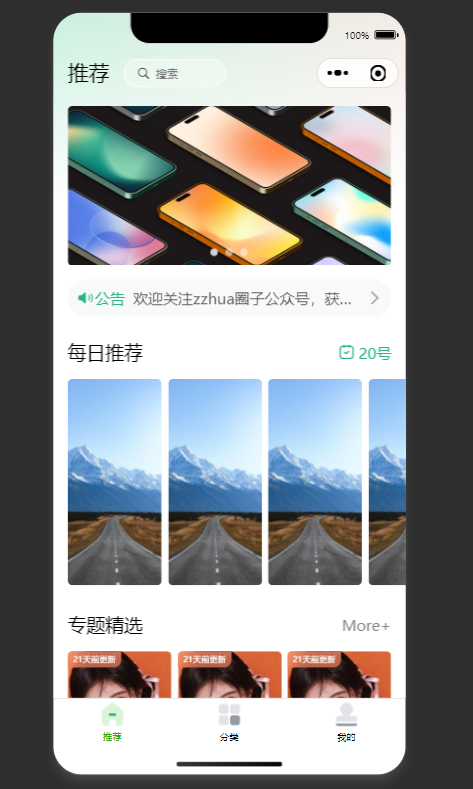
html
<template>

    <view class="layout">

        <view class="navBar">
            <view class="statusBar" :style="{height:statusBarHeight + 'px'}"></view>
            <view class="titleBar" :style="{height: titleBarHeight + 'px'}">
                <view class="title">推荐</view>
                <view class="search">
                    <uni-icons class="icon" type="search"></uni-icons>
                    <text class="text">搜索</text>
                </view>
            </view>
        </view>

        <!-- 因为上面采用了固定定位,所以这里是为了占据高度 -->
        <view class="fill" :style="{height: barHeight + 'px'}"></view>

    </view>

</template>

<script setup>

    import {ref} from 'vue'

    // safeArea: {top: 44, left: 0, right: 375, bottom: 778, width: 375, ...}
    // statusBarHeight: 44
    const SYSTEM_INFO = uni.getSystemInfoSync()
    const statusBarHeight = ref(SYSTEM_INFO.statusBarHeight)

    // {width: 86, height: 32, left: 281, top: 48, right: 367, ...}
    console.log(uni.getMenuButtonBoundingClientRect(), '胶囊按钮');
    const {top,height} = uni.getMenuButtonBoundingClientRect()
    const titleBarHeight = ref(height + 2 * (top - statusBarHeight.value))

    const barHeight = ref(statusBarHeight.value + titleBarHeight.value)
    console.log(barHeight.value);
</script>

<style lang="scss" scoped>

    .layout {
        .navBar {
            position: fixed;
            top: 0;
            left: 0;
            width: 100%;
            background: linear-gradient(to bottom, transparent, #fff 400rpx),
                linear-gradient(to right, rgba(200, 241, 222, 1.0), rgba(245, 235, 230, 1.0));
            z-index: 1;

            .statusBar {
                // border: 1px solid red;
            }
            .titleBar {
                height: 40px;
                padding: 0 30rpx;
                display: flex;
                align-items: center;
                // border: 1px solid red;
                .title {
                    font-size: 44rpx;
                }
                .search {
                    margin-left: 30rpx;
                    width: 220rpx;
                    height: 60rpx;
                    padding: 0 24rpx;
                    border-radius: 60rpx;
                    background-color: rgba(255,255,255,.3);
                    border: 2px solid #f9f9f9;
                    display: flex;
                    align-items: center;
                    .icon {
                        color: #777;
                    }
                    .text {
                        color: #777;
                        font-size: 24rpx;
                        padding-left: 10rpx;
                    }
                }
            }
        }
    }

</style>
7.21.抽离公共方法用条件编译对抖音小程序适配
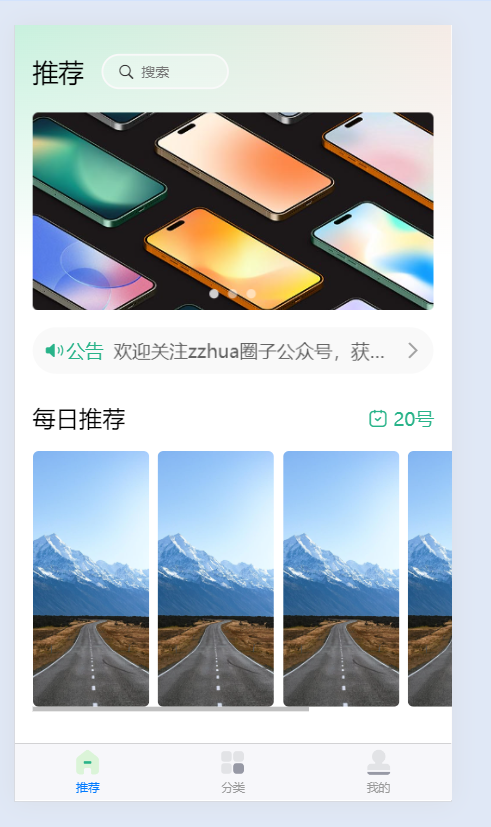
1、抽取system.js
js
const SYSTEM_INFO = uni.getSystemInfoSync()

// 状态栏高度
export const getStatusBarHeight = ()=>SYSTEM_INFO.statusBarHeight|| 20

// 标题高度 + 上下外边距
export const getTitleBarHeight = ()=>{
	if(uni.getMenuButtonBoundingClientRect) {
		const {top, height} = uni.getMenuButtonBoundingClientRect()
		return height + 2 * (top - getStatusBarHeight())
	} else {
		return 40
	}
}

// 导航条整体高度
export const getNavBarHeight = ()=>{
	return getStatusBarHeight() + getTitleBarHeight()
}

// 适配抖音小程序左边的logo
export const getLeftIconLeft = ()=> {
	// #ifdef MP-TOUTIAO
		let {leftIcon:{left,width}}  = tt.getCustomButtonBoundingClientRect();
		return left+ parseInt(width);
	// #endif

	// #ifndef MP-TOUTIAO
		return 0
	// #endif
}
2、创建custom-nav-bar组件,并导入system.js
html
<template>

    <view class="layout">

        <view class="navBar">
            <view class="statusBar" :style="{height:getStatusBarHeight() + 'px','margin-left': getLeftIconLeft() + 'px'}"></view>
            <view class="titleBar" :style="{height: getTitleBarHeight() + 'px'}">
                <view class="title">推荐</view>
                <view class="search">
                    <uni-icons class="icon" type="search"></uni-icons>
                    <text class="text">搜索</text>
                </view>
            </view>
        </view>

        <!-- 因为上面采用了固定定位,所以这里是为了占据高度 -->
        <view class="fill" :style="{height: getNavBarHeight() + 'px'}"></view>

    </view>

</template>

<script setup>

    import {ref} from 'vue'

    import { getStatusBarHeight,getTitleBarHeight,getNavBarHeight,getLeftIconLeft } from '@/utils/system';


</script>
7.22.完善页面布局实现各个页面的串联
1、预览页添加返回按钮
html
<template>
    <view class="goBack" @click="goBack" :style="{top: getStatusBarHeight() + 'px'}">
        <uni-icons type="left"></uni-icons>
    </view>
</template>

<script setup>

    import { getStatusBarHeight } from '@/utils/system.js';

    //返回上一页
	const goBack = () => {
		uni.navigateBack({
			success: () => {

			},
			fail: (err) => {
				uni.reLaunch({
					url:"/pages/index/index"
				})
			}
		})
	}

</script>
2、专题精选添加跳转预览页
html
<template>
    <view class="box" @click="goPreview()" v-for="i in 8">
        <image class="pic" src="@/common/images/preview3.jpg"></image>
    </view>
</template>

<script setup>
    const goPreview = () => {
        uni.navigateTo({
            url: '/pages/preview/preview'
        })
    }
</script>
3、创建notice公告页面和detail公告详情页
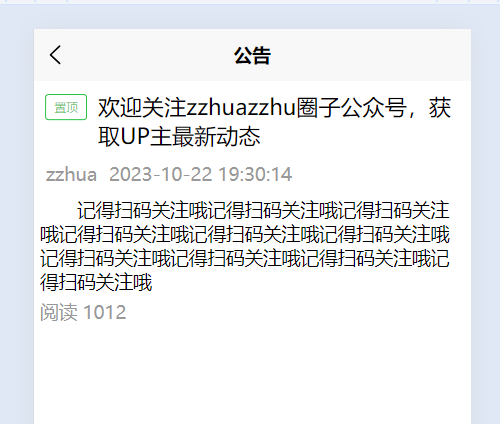
html
<template>
    <view class="noticeLayout">
        <view class="title-header">
            <view class="title-tag">
                <uni-tag text="置顶" :inverted="true" type="success"></uni-tag>
            </view>
            <view class="title">欢迎关注zzhuazzhu圈子公众号,获取UP主最新动态</view>
        </view>
        <view class="info">
            <view class="author">
                zzhua
            </view>
            <view class="datetime">
                2023-10-22 19:30:14
            </view>
        </view>
        <view class="content">
            记得扫码关注哦记得扫码关注哦记得扫码关注哦记得扫码关注哦记得扫码关注哦记得扫码关注哦记得扫码关注哦记得扫码关注哦记得扫码关注哦记得扫码关注哦
        </view>
        <view class="footer">
            <text>阅读 {{1012}}</text>
        </view>
    </view>

</template>

<script setup>

    import {ref} from "vue";

</script>

<style lang="scss" scoped>
    .noticeLayout {
        padding: 10rpx;
        .title-header {
            display: flex;
            padding-top: 10rpx;
            .title-tag {
                width: 100rpx;
                padding-right: 10rpx;
                text-align: center;
                .uni-tag {
                    font-size: 20rpx;
                }
            }
            .title {
                flex: 1;
                word-break: break-all;
                font-size: 38rpx;
            }
        }
        .info {
            color: #999;
            display: flex;
            margin: 20rpx 10rpx;
            .author {
                margin-right: 20rpx;
            }
        }
        .content {
            text-indent: 2em;
        }
        .footer {
            color: #999;
            margin-top: 10rpx;
        }
    }
</style>
八、封装网络请求对接各个页面的真实接口
8.1.调用网络接口在首页展示真实数据并渲染
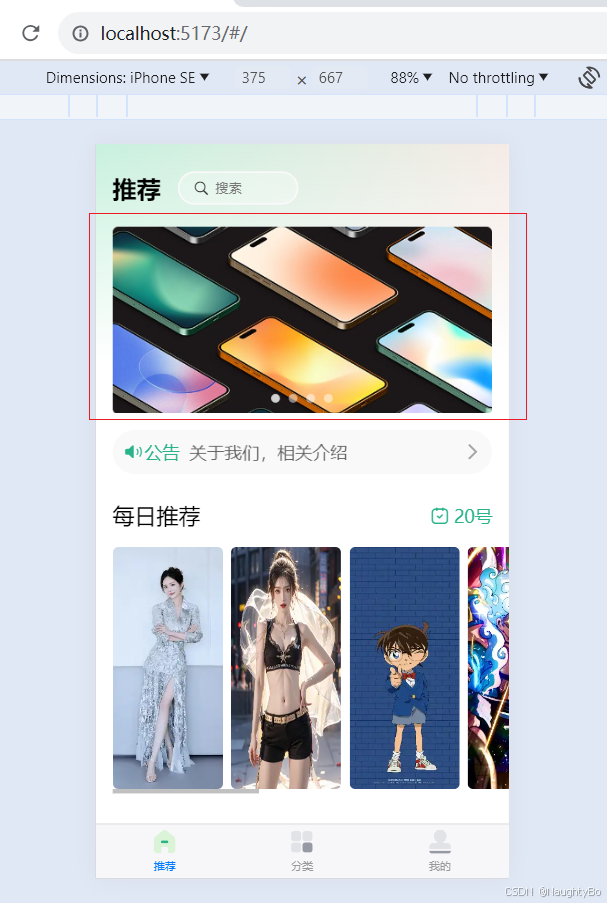
html
<template>
    <view class="banner">
        <swiper indicator-dots indicator-color="rgba(255,255,255,.5)" indicator-active-color="rgba(255,255,255,.8)"  circular>
            <swiper-item v-for="banner in bannerList" :key="banner._id">
                <image :src="banner.picurl" mode="aspectFill"></image>
            </swiper-item>
        </swiper>
    </view>
</template>

<script setup>
	import { ref } from 'vue';

	const bannerList = ref([]);

	async function getBannerList() {
        try {
           let res = await uni.request({
                url:'https://tea.qingnian8.com/api/bizhi/homeBanner'
            })
            console.log(res,'res');
            if(res.data.errCode === 0) {
                bannerList.value = res.data.data
            }
        } catch(err) {
            uni.showToast({titlte:'加载失败'})
        }
	}

	getBannerList()
</script>
8.2.使用Promise封装request网络请求&对封装的request请求进行传参
1、根目录下,创建api目录,创建apis.js
2、根目录下的utils目录下,创建request.js
3、在页面中使用封装的apis.js
request.js
js
const BASE_URL = 'https://tea.qingnian8.com/api/bizhi';

export function request(config={}){	/* 如果没有传参,则使用默认的{} */
	let {
		url,
		data={},
		method="GET",
		header={} // 如果没有解构出header属性,则使用{}
	} = config

	url = BASE_URL+url

	// header['access-key'] = "xxm123321@#"
	header['access-key'] = "abc123"

	return new Promise((resolve,reject)=>{
		uni.request({
			url,
			data,
			method,
			header,
			success:res=>{
				if(res.data.errCode===0){
					resolve(res.data) // 给promise1个成功的状态
				}else if(res.data.errCode === 400){
					uni.showModal({
						title:"错误提示",
						content:res.data.errMsg,
						showCancel:false
					})
					reject(res.data) // 给promise1个失败的状态
				}else{
					uni.showToast({
						title:res.data.errMsg,
						icon:"none"
					})
					reject(res.data)// 给promise1个失败的状态
				}
			},
			fail:err=>{
				reject(err) // 给promise1个失败的状态
			}
		})
	})
}
apis.js
js
import {request} from "@/utils/request.js"

export function apiGetBanner(){
	return request({
		url:"/homeBanner"
	})
}

export function apiGetDayRandom(){
	return request({url:"/randomWall"})
}

export function apiGetNotice(data={}){ // 直接传入的数据就作为data
	return request({
		url:"/wallNewsList",
		data
	})
}


export function apiGetClassify(data={}){
	return request({
		url:"/classify",
		data
	})
}


export function apiGetClassList(data={}){
	return request({
		url:"/wallList",
		data
	})
}


export function apiGetSetupScore(data={}){
	return request({
		url:"/setupScore",
		data
	})
}


export function apiWriteDownload(data={}){
	return request({
		url:"/downloadWall",
		data
	})
}


export function apiDetailWall(data={}){
	return request({
		url:"/detailWall",
		data
	})
}


export function apiUserInfo(data={}){
	return request({
		url:"/userInfo",
		data
	})
}


export function apiGetHistoryList(data={}){
	return request({
		url:"/userWallList",
		data
	})
}


export function apiNoticeDetail(data={}){
	return request({
		url:"/wallNewsDetail",
		data
	})
}


export function apiSearchData(data={}){
	return request({
		url:"/searchWall",
		data
	})
}
index.vue
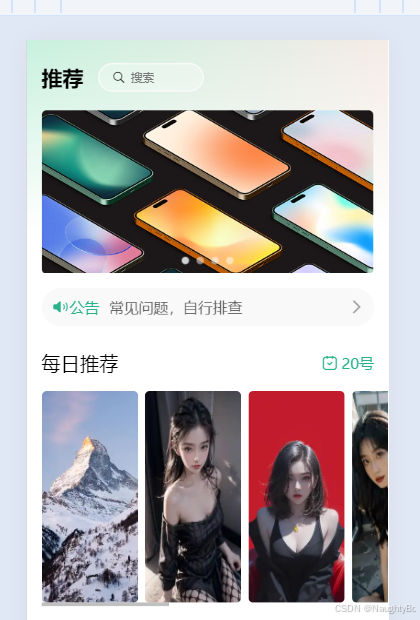
html
<script setup>

    import { ref } from 'vue';

    import { apiGetBanner } from '@/api/apis';

    const bannerList = ref([])

    const getBannerList = async ()=> {
        let res = await apiGetBanner()
        bannerList.value = res.data
    }

</script>
8.4.给专题组件通过defineProps声明变量传值渲染
处理显示时间的js工具
common.js
js
export function compareTimestamp(timestamp) {
  const currentTime = new Date().getTime();
  const timeDiff = currentTime - timestamp;

  if (timeDiff < 60000) {
    return '1分钟内';
  } else if (timeDiff < 3600000) {
    return Math.floor(timeDiff / 60000) + '分钟';
  } else if (timeDiff < 86400000) {
    return Math.floor(timeDiff / 3600000) + '小时';
  } else if (timeDiff < 2592000000) {
    return Math.floor(timeDiff / 86400000) + '天';
  } else if (timeDiff < 7776000000) {
    return Math.floor(timeDiff / 2592000000) + '月';
  } else {
    return null;
  }
}
defineProps声明变量传值

index.vue
html
<template>
    ...
    <view class="theme">

        <common-title>
            <template #name>
                <text>专题精选</text>
            </template>
            <template #custom>
                <navigator url="" class="more">More+</navigator>
            </template>
        </common-title>

        <view class="content">
            <theme-item v-for="item in classifyList" :item="item" :key="item._id">
            </theme-item>
            <theme-item :isMore="true">
            </theme-item>
        </view>

    </view>
    ...
</template>
theme-item.vue
html
<template>
    <view class="theme-item">
        <navigator url="/pages/classlist/classlist" open-type="navigate" class="box" v-if="!isMore">
            <image class="pic" :src="item.picurl" mode="aspectFill"></image>
            <view class="mask">{{item.name}}</view>
            <view class="tag" v-if="compareTimestamp(item.updateTime)">{{compareTimestamp(item.updateTime)}}前更新</view>
        </navigator>

        <navigator url="/pages/classify/classify" open-type="reLaunch" class="box more" v-if="isMore">
            <image class="pic" src="@/common/images/more.jpg" mode="aspectFill"></image>
            <view class="mask">
                <uni-icons type="more-filled" size="30" color="#fff"></uni-icons>
                <view class="text">更多</view>
            </view>
        </navigator>
    </view>
</template>

<script setup>
    import { compareTimestamp } from '@/utils/common';
    defineProps({
        isMore:{
            type: Boolean,
            default: false
        },
        item: {
            type: Object,
            default() {
                return {
                    picurl: '@/common/images/classify1.jpg',
                    name: '默认名称',
                    updateTime: Date.now()
                }
            }
        }
    })

</script>
8.6.调试分类列表接口将数据渲染到页面中
由于是tabBar页面,只有第一次点击分类页的tabBar时,才会请求数据
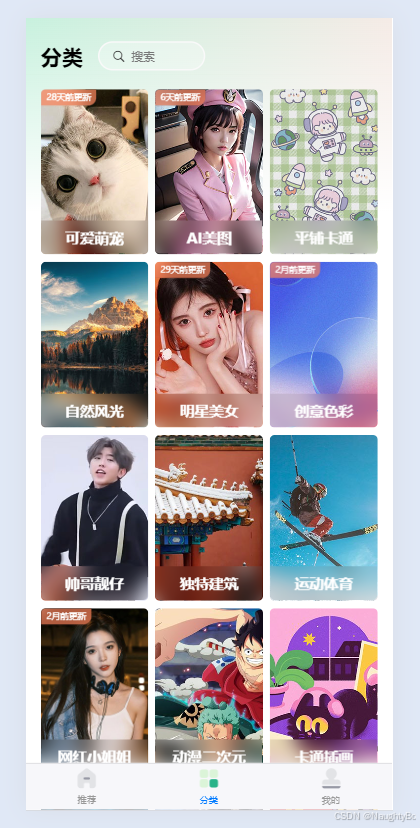
html
<template>
    <view class="classLayout pageBg">
        <custom-nav-bar title="分类"></custom-nav-bar>
        <view class="classify">
            <theme-item :item="item" v-for="item in classifyList" :key="item._id">
            </theme-item>
        </view>

    </view>

</template>

<script setup>

    import { ref } from 'vue';
    import { apiGetClassify } from '@/api/apis';

    const classifyList = ref([])

    const getClassifyList = async ()=> {
        let res = await apiGetClassify({pageSize: 15})
        classifyList.value = res.data
    }
    getClassifyList()


</script>

<style lang="scss" scoped>
    .classLayout {
        .classify {
            padding: 30rpx;
            display: grid;
            grid-template-columns: repeat(3, 1fr);
            gap: 15rpx;
        }
    }
</style>
8.7.分类页跳转到分类列表页面,从onLoad获取参数作为接口的参数获取对应的数据
示例
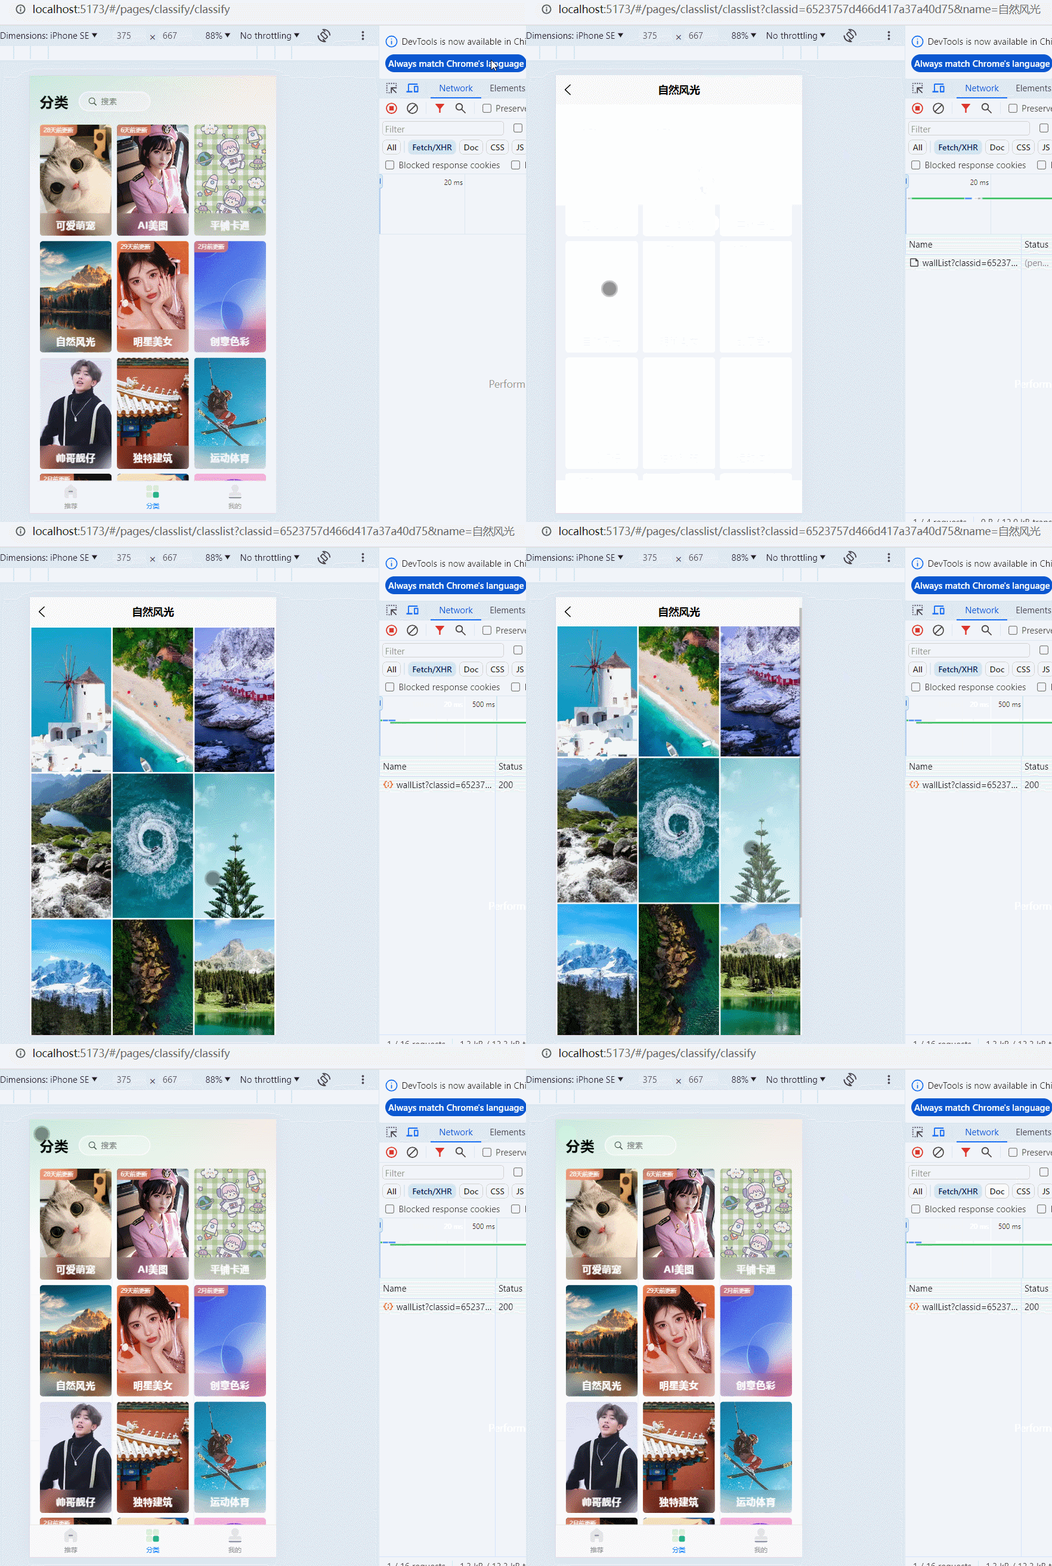
分类页是tabBar页面,用到的是theme-item组件,所以修改theme-item组件,实现页面跳转
html
<template>
    <view class="theme-item">
        <!-- 页面请求参数和名字 -->
        <navigator :url="`/pages/classlist/classlist?classid=${item._id}&name=${item.name}`" open-type="navigate" class="box" v-if="!isMore">
            <image class="pic" :src="item.picurl" mode="aspectFill"></image>
            <view class="mask">{{item.name}}</view>
            <view class="tag" v-if="compareTimestamp(item.updateTime)">{{compareTimestamp(item.updateTime)}}前更新</view>
        </navigator>

        <navigator url="/pages/classify/classify" open-type="reLaunch" class="box more" v-if="isMore">
            <image class="pic" src="@/common/images/more.jpg" mode="aspectFill"></image>
            <view class="mask">
                <uni-icons type="more-filled" size="30" color="#fff"></uni-icons>
                <view class="text">更多</view>
            </view>
        </navigator>
    </view>
</template>

<script setup>
    import { compareTimestamp } from '@/utils/common';
    defineProps({
        isMore:{
            type: Boolean,
            default: false
        },
        item: {
            type: Object,
            default() {
                return {
                    picurl: '@/common/images/classify1.jpg',
                    name: '默认名称',
                    updateTime: Date.now() - 1000 *60 *60 *24 *100
                }
            }
        }
    })

</script>
classlist.vue
html
<template>
	<view class="classlist">

		<view class="content">

			<navigator url="" class="item" v-for="classify in classifyList" :key="classify._id">
				<!-- 加上aspectFill之后,图片于图片的间隙消失 -->
				<image :src="classify.smallPicurl" mode="aspectFill"></image>
			</navigator>

		</view>

	</view>

</template>

<script setup>
	import { ref } from 'vue';
	import { apiGetClassList } from '@/api/apis';
	import {onLoad} from "@dcloudio/uni-app"

	// 查询请求参数
	const queryParam = {}

	const classifyList = ref([])
	const getClassList = async ()=>{
		let res = await apiGetClassList(queryParam);
		classifyList.value = res.data
	}

	onLoad((e)=>{

		// 解构,获取页面上的query参数
		let {
			classid=null,
			name=null
		} = e

		queryParam.classid = classid

		// 设置导航栏标题
		uni.setNavigationBarTitle({
			title:name
		})
		getClassList()
	})


</script>
执行问题验证
这个问题应该就是对async和await的原理有点忘了,它不会对调用处有影响,而是async函数代码块中的才有应影响。
1、在setup中执行await和async的函数,是否会阻塞组件的渲染,就是说假设这个函数调用时间过长,页面元素有没有展示出来,是否会阻塞setup下面代码的执行。(测试1个耗时20s的接口)
html
<template>
	<view class="">
		<div>
			我是写固定的模板
            <text>{{name}}</text>
		</div>
		<view v-for="str in strList">
			{{str}}
		</view>

	</view>

</template>

<script setup>

	import {ref} from "vue";

	const strList = ref([])

    const name = ref('zzhua')

	const getList = async () => {
		let res = await uni.request({
			url:'http://localhost:8080/getList?useTime=20'
		})
		strList.value = res.data
	}

	getList()

	// 1. 上面调用getList不会影响这句代码的执行
    // 2. 都不会影响到这句代码的执行了,当然更影响不了当前组件的渲染了,只是数据回来后,会重新渲染视图
	console.log(123);

</script>
2、在onload中调用await和async函数,是否会阻塞组件的渲染
html
<template>
    <view class="">
        <div>
            我是写固定的模板
            <text>{{name}}</text>
        </div>
        <view v-for="str in strList">
            {{str}}
        </view>

    </view>

</template>

<script setup>

    import {ref} from "vue";
    import {onLoad} from '@dcloudio/uni-app'

    const strList = ref([])

    const name = ref('zzhua')

    const getList = async () => {
        let res = await uni.request({
            url:'http://localhost:8080/getList?useTime=10'
        })
        strList.value = res.data
    }

    onLoad(()=>{
        console.log(456)
        // 输出结果是 123、456、789,渲染页面,并没有任何阻塞,数据回来之后,渲染出列表
        // 这说明getList的调用并不会影响到上下2行代码的执行
        getList()
        console.log(789)
    })

    console.log(123);

</script>
8.8.触底加载更多阻止无效的网络请求
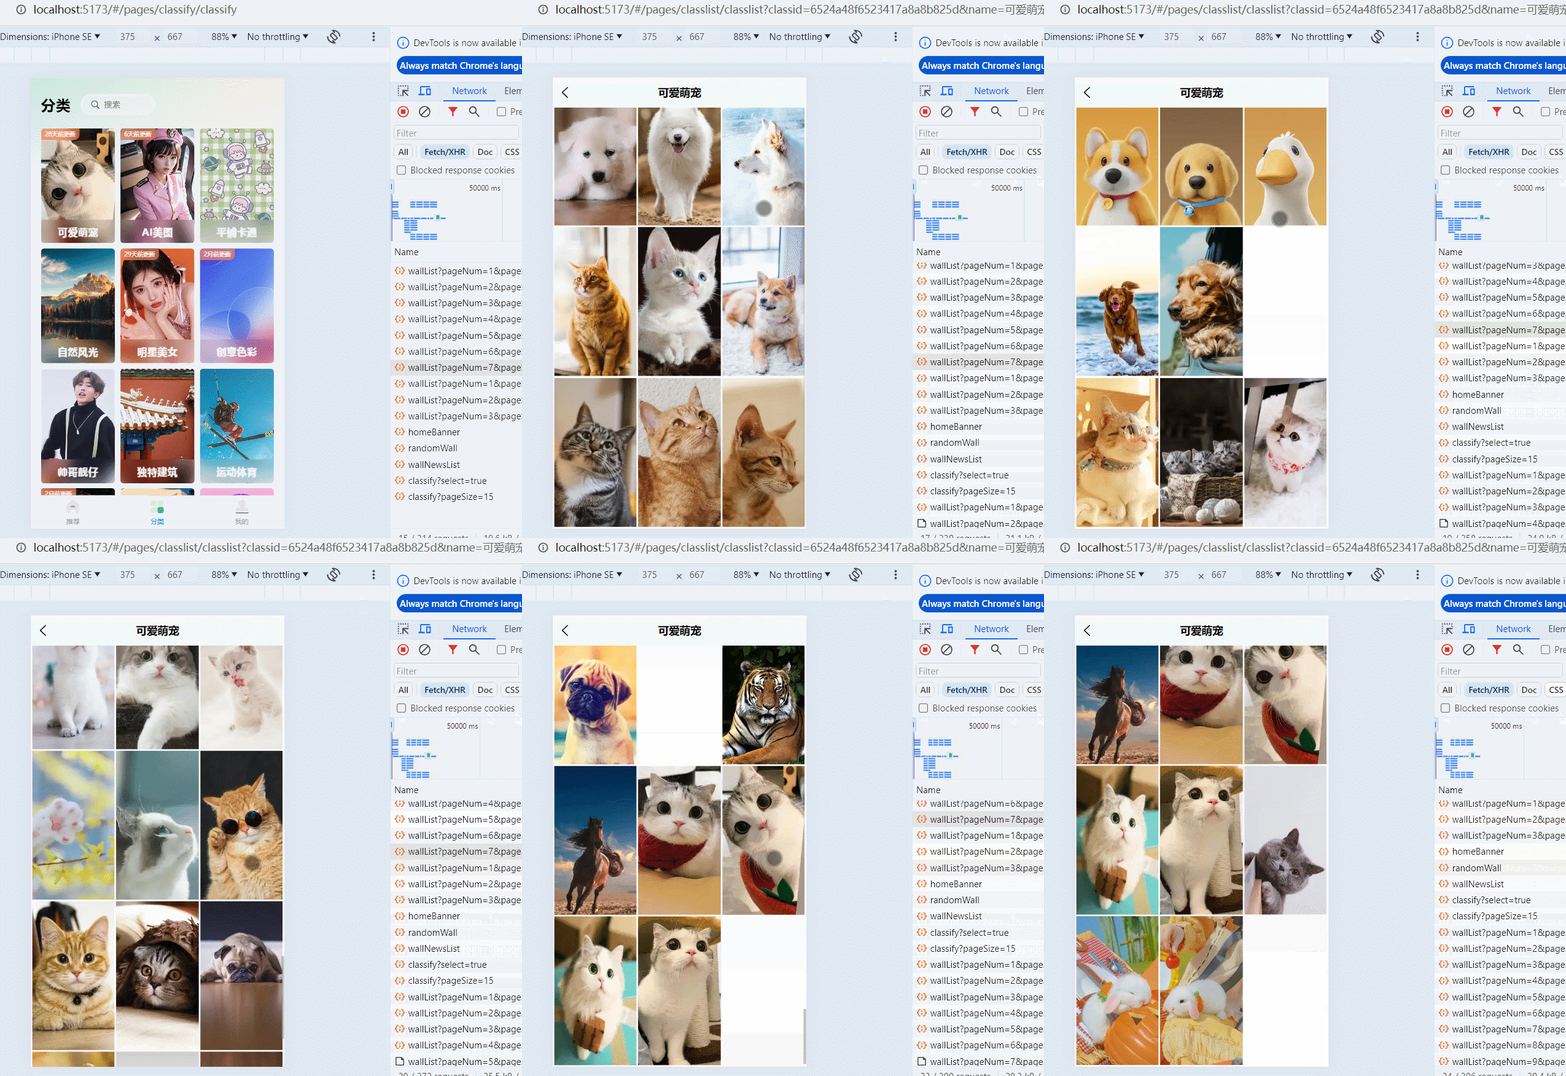
分类列表页加载更多实现
html
<template>
	<view class="classlist">

		<view class="content">

			<navigator url="" class="item" v-for="classify in classifyList" :key="classify._id">
				<!-- 加上aspectFill之后,图片于图片的间隙消失 -->
				<image :src="classify.smallPicurl" mode="aspectFill"></image>
			</navigator>

		</view>

	</view>

</template>

<script setup>
	import { ref } from 'vue';
	import { apiGetClassList } from '@/api/apis';
	import {onLoad, onReachBottom} from "@dcloudio/uni-app"

	let noData = false

	// 查询请求参数
	const queryParam = {
		pageNum: 1,
		pageSize: 12
	}
	const classifyList = ref([])
	const getClassList = async ()=>{
		let res = await apiGetClassList(queryParam);
		if(res.data.length === 0) {
			noData = true
			return
		} else {
			classifyList.value = [...classifyList.value, ...res.data]
		}
	}

	onLoad((e)=>{
		// 解构,获取页面上的query参数
		let {
			classid=null,
			name=null
		} = e
		queryParam.classid = classid
		// 设置导航栏标题
		uni.setNavigationBarTitle({
			title:name
		})
		getClassList()
	})

    // 触底加载更多
	onReachBottom(()=>{
		if(noData) {
			return
		}
		++queryParam.pageNum
		getClassList()
	})


</script>

<style lang="scss" scoped>
.classlist {
	.content {
		display: grid;
		grid-template-columns: repeat(3, 1fr);
		gap: 5rpx;
		padding: 5rpx;
		.item {
			/* 设置高度,以便于图片设置height:100% */
			height: 440rpx;
			image {
				/* 因为上面采用了网格布局,所以这里就覆盖image默认的宽度240px */
				width: 100%;
				/* 覆盖image默认的高度320px */
				height: 100%;
				/* 避免底部的空白间隙 */
				display: block;
			}
		}
	}
}
</style>
8.9.骨架屏和触底加载load-more样式的展现
1、可以使用官方的uni-load-more插件,或者插件市场的加载更多的插件
2、模拟骨架屏和数据加载效果
3、底部安全区
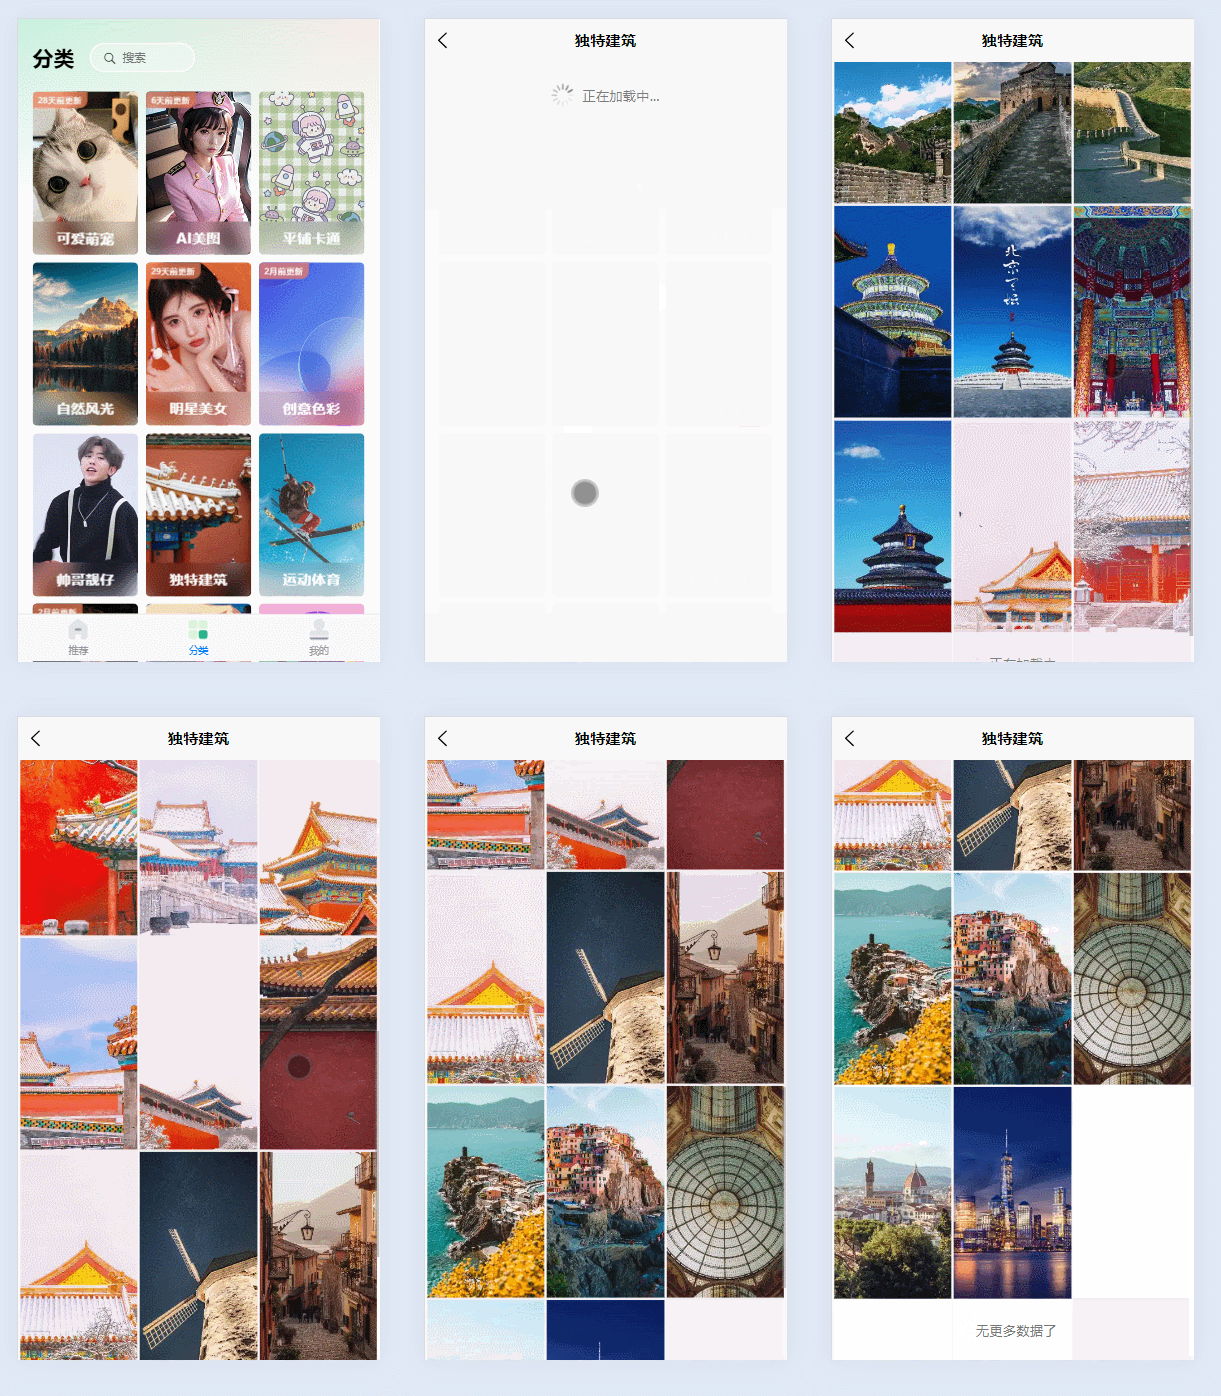
html
<template>
    <view class="classlist">

        <view class="content">
            <navigator url="" class="item"
                       v-for="classify in classifyList"
                       :key="classify._id">
                <!-- 加上aspectFill之后,图片于图片的间隙消失 -->
                <image :src="classify.smallPicurl" mode="aspectFill"></image>
            </navigator>
        </view>

        <view class="loader-more">
            <uni-load-more :status="noData?'noMore':'loading'"
                           :content-text="{contentrefresh:'正在加载中...',
                                          contentdown:'加载更多',
                                          contentnomore:'无更多数据了'}">
            </uni-load-more>
        </view>

        <!-- 安全高度,用来占位 -->
        <view class="safe-area-inset-bottom"></view>
    </view>

</template>

<script setup>
    import { ref } from 'vue';
    import { apiGetClassList } from '@/api/apis';
    import {onLoad, onReachBottom} from "@dcloudio/uni-app"

    // 无数据了,初始标记:有数据
    const noData = ref(false)

    // 查询请求参数
    const queryParam = {
        pageNum: 1,
        pageSize: 12
    }
    const classifyList = ref([])
    const getClassList = async ()=>{

        let res = await apiGetClassList(queryParam);

        if(res.data.length === 0) {
            // 标记没有数据了
            noData.value = true
            return
        }

        classifyList.value = [...classifyList.value, ...res.data]
    }

    // 获取页面查询参数加载
    onLoad((e)=>{
        // 解构,获取页面上的query参数
        let {
            classid=null,
            name=null
        } = e
        queryParam.classid = classid
        // 设置导航栏标题
        uni.setNavigationBarTitle({
            title:name
        })
        getClassList()
    })

    // 触底加载
    onReachBottom(()=>{
        if(noData.value) {
            return
        }
        ++queryParam.pageNum
        getClassList()
    })


</script>

<style lang="scss" scoped>
    .classlist {
        .content {
            display: grid;
            grid-template-columns: repeat(3, 1fr);
            gap: 5rpx;
            padding: 5rpx;
            .item {
                /* 设置高度,以便于图片设置height:100% */
                height: 440rpx;
                image {
                    /* 因为上面采用了网格布局,所以这里就覆盖image默认的宽度240px */
                    width: 100%;
                    /* 覆盖image默认的高度320px */
                    height: 100%;
                    /* 避免底部的空白间隙 */
                    display: block;
                }
            }
        }
    }

    .loader-more {
        padding: 20rpx 0;
    }

    /* 安全区高度 */
    .safe-area-inset-bottom{
        height: env(safe-area-inset-bottom);
    }
</style>
8.10.分类列表存入Storage在预览页面读取缓存展示,通过swiper的事件实现真正的壁纸预览及切换
1、前面在分类列表页面获取到了小图的链接,其实对应的大图链接只需要把小图链接的后缀由_small.webp改为.jpg,就是对应的大图的链接,以减少网络开销
2、存储这里使用的是uniapp提供的storage的api,可以使用pinia
3、分类列表页请求完数据时候,将数据存入storage中,跳转到预览页面时携带要预览的图片id,在预览页中从storage中获取所有图片数据,确定图片索引,在swiper中展示点击的图片
4、处理图片滑动时,数据的变化
5、问题:当把数据给到swiper后,由于都是高清大图,会一次性加载所有大图。原因就在于swiper中的image标签会引入所有的图片
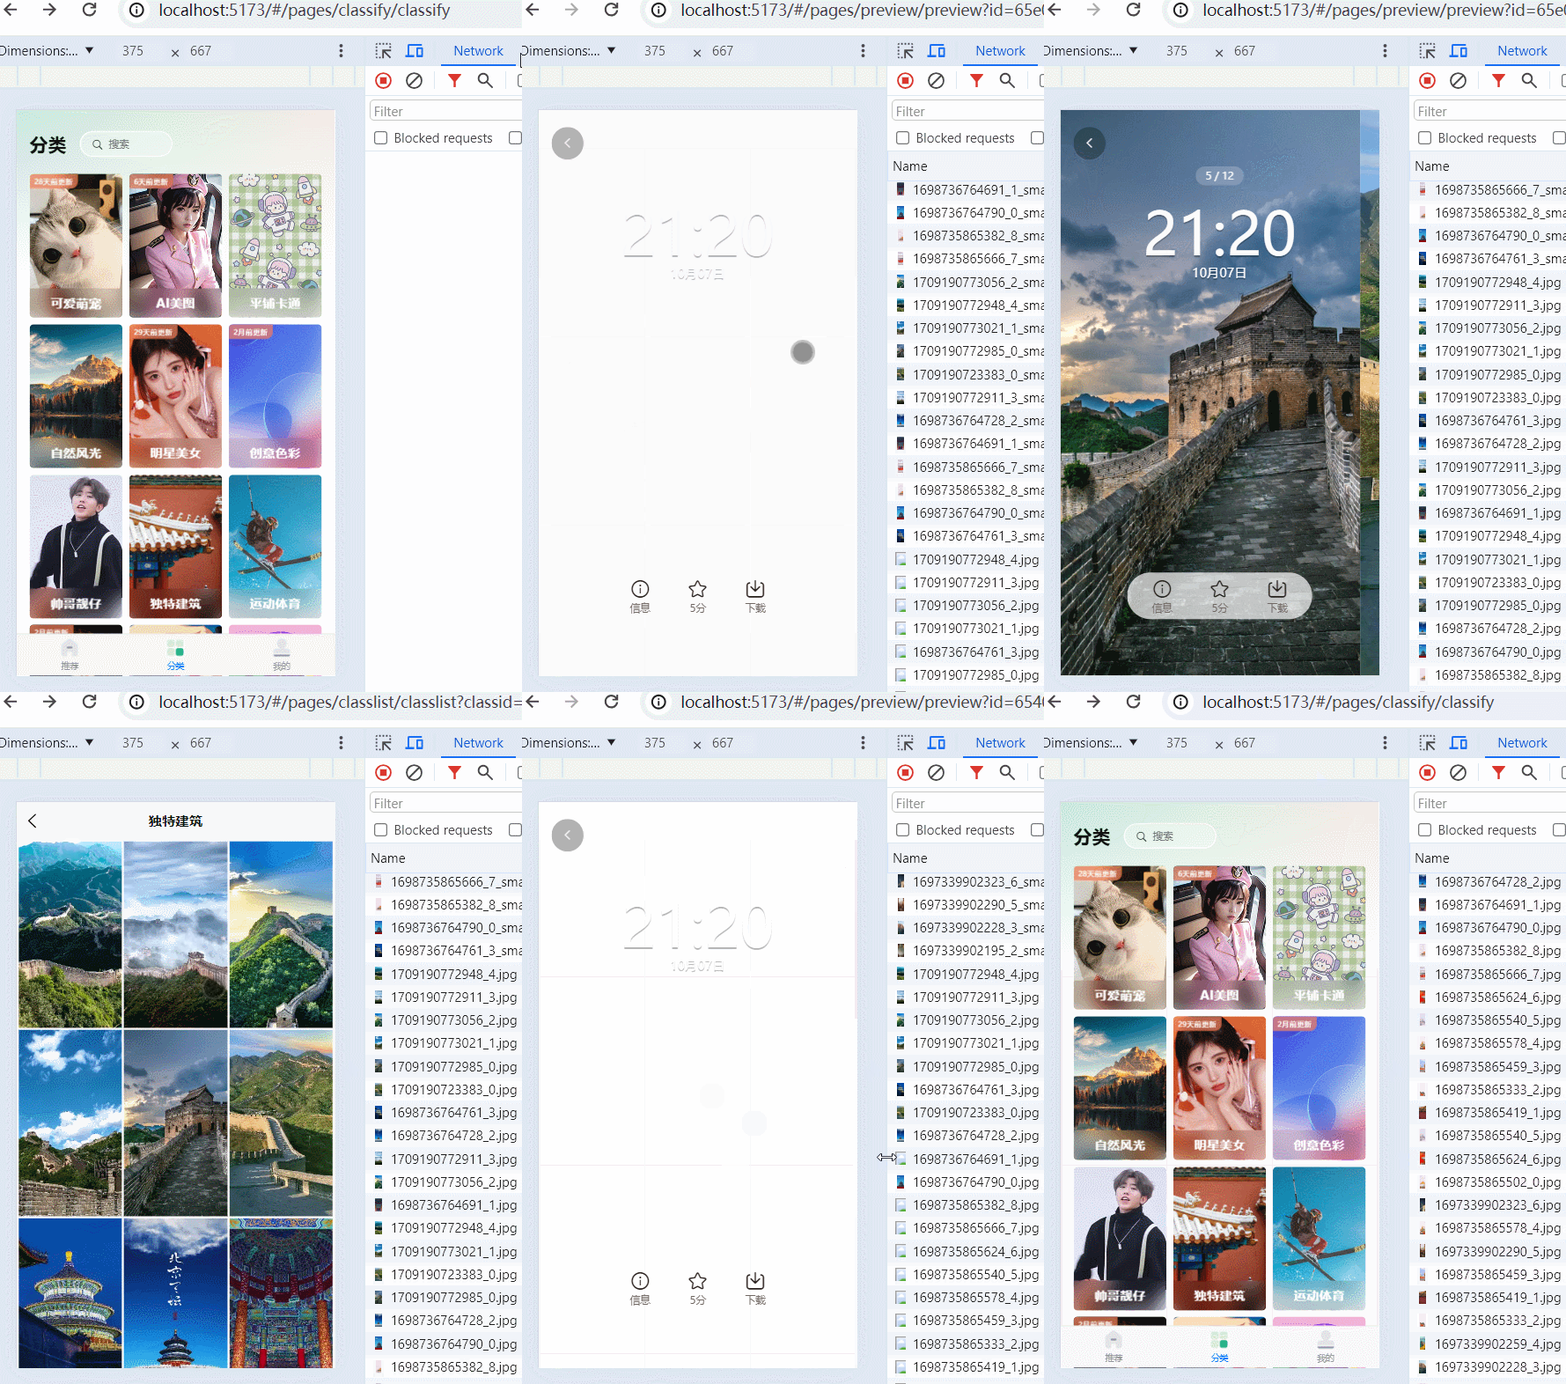
classList.vue
html
<template>
    <view class="classlist">


        <view class="content">
            <navigator :url="`/pages/preview/preview?id=${classify._id}`" class="item" v-for="classify in classifyList" :key="classify._id">
                <!-- 加上aspectFill之后,图片于图片的间隙消失 -->
                <image :src="classify.smallPicurl" mode="aspectFill"></image>
            </navigator>

        </view>

        <view class="loader-more">
            <uni-load-more :status="noData?'noMore':'loading'" :content-text="{contentrefresh:'正在加载中...',contentdown:'加载更多',contentnomore:'无更多数据了'}"></uni-load-more>
        </view>

        <!-- 安全高度 -->
        <view class="safe-area-inset-bottom"></view>
    </view>

</template>

<script setup>
    import { ref } from 'vue';
    import { apiGetClassList } from '@/api/apis';
    import {onLoad, onReachBottom} from "@dcloudio/uni-app"

    // 无数据了,初始标记:有数据
    const noData = ref(false)

    // 查询请求参数
    const queryParam = {
        pageNum: 1,
        pageSize: 12
    }
    const classifyList = ref([])
    const getClassList = async ()=>{

        let res = await apiGetClassList(queryParam);

        if(res.data.length === 0) {
            // 标记没有数据了
            noData.value = true
            return
        }

        classifyList.value = [...classifyList.value, ...res.data]

        // 存入storage
        uni.setStorageSync('storagePicList', classifyList.value)
    }

    // 获取页面查询参数加载
    onLoad((e)=>{
        // 解构,解构不到则赋值,获取页面上的query参数
        let {
            classid=null,
            name=null
        } = e
        queryParam.classid = classid
        // 设置导航栏标题
        uni.setNavigationBarTitle({
            title:name
        })
        getClassList()
    })

    // 触底加载
    onReachBottom(()=>{
        if(noData.value) {
            return
        }
        ++queryParam.pageNum
        getClassList()
    })


</script>

<style lang="scss" scoped>
    .classlist {
        .content {
            display: grid;
            grid-template-columns: repeat(3, 1fr);
            gap: 5rpx;
            padding: 5rpx;
            .item {
                /* 设置高度,以便于图片设置height:100% */
                height: 440rpx;
                image {
                    /* 因为上面采用了网格布局,所以这里就覆盖image默认的宽度240px */
                    width: 100%;
                    /* 覆盖image默认的高度320px */
                    height: 100%;
                    /* 避免底部的空白间隙 */
                    display: block;
                }
            }
        }
    }
</style>
preview.vue
html
<template>
	<view class="preview">


		<!-- 图片滑播 -->
		<swiper circular :current="currentIdx" @change="swiperChange"><!-- 当前滑动的图片的索引 -->
			<swiper-item v-for="item in picList" :key="item._id">
				<image @click="maskChange" :src="item.picUrl" mode="aspectFill"></image>
			</swiper-item>
		</swiper>

		<!-- 遮罩层 -->
		<view class="mask" v-show="maskState">

			<view class="goBack" @click="goBack" :style="{top: getStatusBarHeight() + 'px'}">
				<uni-icons type="left"></uni-icons>
			</view>
			<view class="count">{{currentIdx + 1}} / {{picList.length}}</view>
			<view class="time">

				<uni-dateformat :date="new Date()" format="hh:mm"></uni-dateformat>
			</view>
			<view class="date">
				<uni-dateformat :date="new Date()" format="MM月dd日"></uni-dateformat>
			</view>
			<view class="footer">
				<view class="box" @click="popInfo">
					<uni-icons type="info" size="28"></uni-icons>
					<view class="text">信息</view>
				</view>
				<view class="box" @click="popRate">
					<uni-icons type="star" size="28"></uni-icons>
					<view class="text">5分</view>
				</view>
				<view class="box">
					<uni-icons type="download" size="28"></uni-icons>
					<view class="text">下载</view>
				</view>
			</view>

		</view>


	</view>

</template>

<script setup>
	import { onMounted, ref } from 'vue';
	import {onLoad, onReachBottom} from "@dcloudio/uni-app"
	import { getStatusBarHeight } from '@/utils/system';

	const picList = ref([])
	const currentIdx = ref(0)

	// 从缓存中拿到壁纸列表
	let storagePicList = uni.getStorageSync("storagePicList") || []
	picList.value = storagePicList.map(item => {
		// 记得要返回
		return {
			...item,
			picUrl: item.smallPicurl.replace("_small.webp", ".jpg")
		}
	})

	onLoad(({id})=>{
		// 拿到id,寻找索引
		console.log('onLoad...', id);
		currentIdx.value = picList.value.findIndex(item=>item._id == id)
	})
	const swiperChange = (e) => {
		// 更新当前预览图的索引
		currentIdx.value = e.detail.current
	}

    //返回上一页
	const goBack = () => {
		uni.navigateBack({
			success: () => {

			},
			fail: (err) => {
				uni.reLaunch({
					url:"/pages/index/index"
				})
			}
		})
	}

    ...
</script>
8.12.(选学但重要)巧妙解决首次加载额外的图片网络消耗
1、swiper会造成没滑到的图片也全部请求过来了,造成额外的流量消耗
2、可以给swiper-item中的image标签加上v-if,判断当前正在预览的图的索引与图片本身的索引是否一致,如果一致,则v-if为true。由于其它与当前正在预览的图片的索引不一致的image标签就不会渲染了,也就不会请求额外的图片了。
3、但是,第2步会造成已经看过的图片,再滑回去的时候又出现短暂的空白,因为当前预览图片的索引在滑动过程中不是想要去预览的图片的索引。所以,这个时候,再保存1个已经看过的图片的数组,在第2步的v-if加上判断只要是已经看过的,也显示出来。
4、除了已经看过的要显示出来,应当把当前预览的图片的左右2张也要预加载出来
5、以上做好之后,又发现2个问题:
- currentInfo初始值不应该设置ref(null),由于模板中有用到currentInfo,并且currentInfo是在onLoad钩子和滑动图片的时候才会对它重新赋值,所以初始渲染的时候,由于为null所以会报错误,但是onLoad执行后,currentInfo立即就有值了,所以就没问题了。这也说明了setup,模板渲染,onLoad执行顺序的问题。可以设置初始值为
ref({}),或者使用es11的语法currentInfo?.score,或者加上v-if的判断,当currentInfo有值时,再渲染。 - 在分类列表页点击某张图片,进入预览页时,它先一闪而过前面这张图片,然后立即滑动到所点击的图片。在小程序中有这个问题,在h5中没有发现这个问题。给出的解决办法是给整个preview模板加上v-if="currentInfo._id",当currentInfo被赋值时,才展示模板。
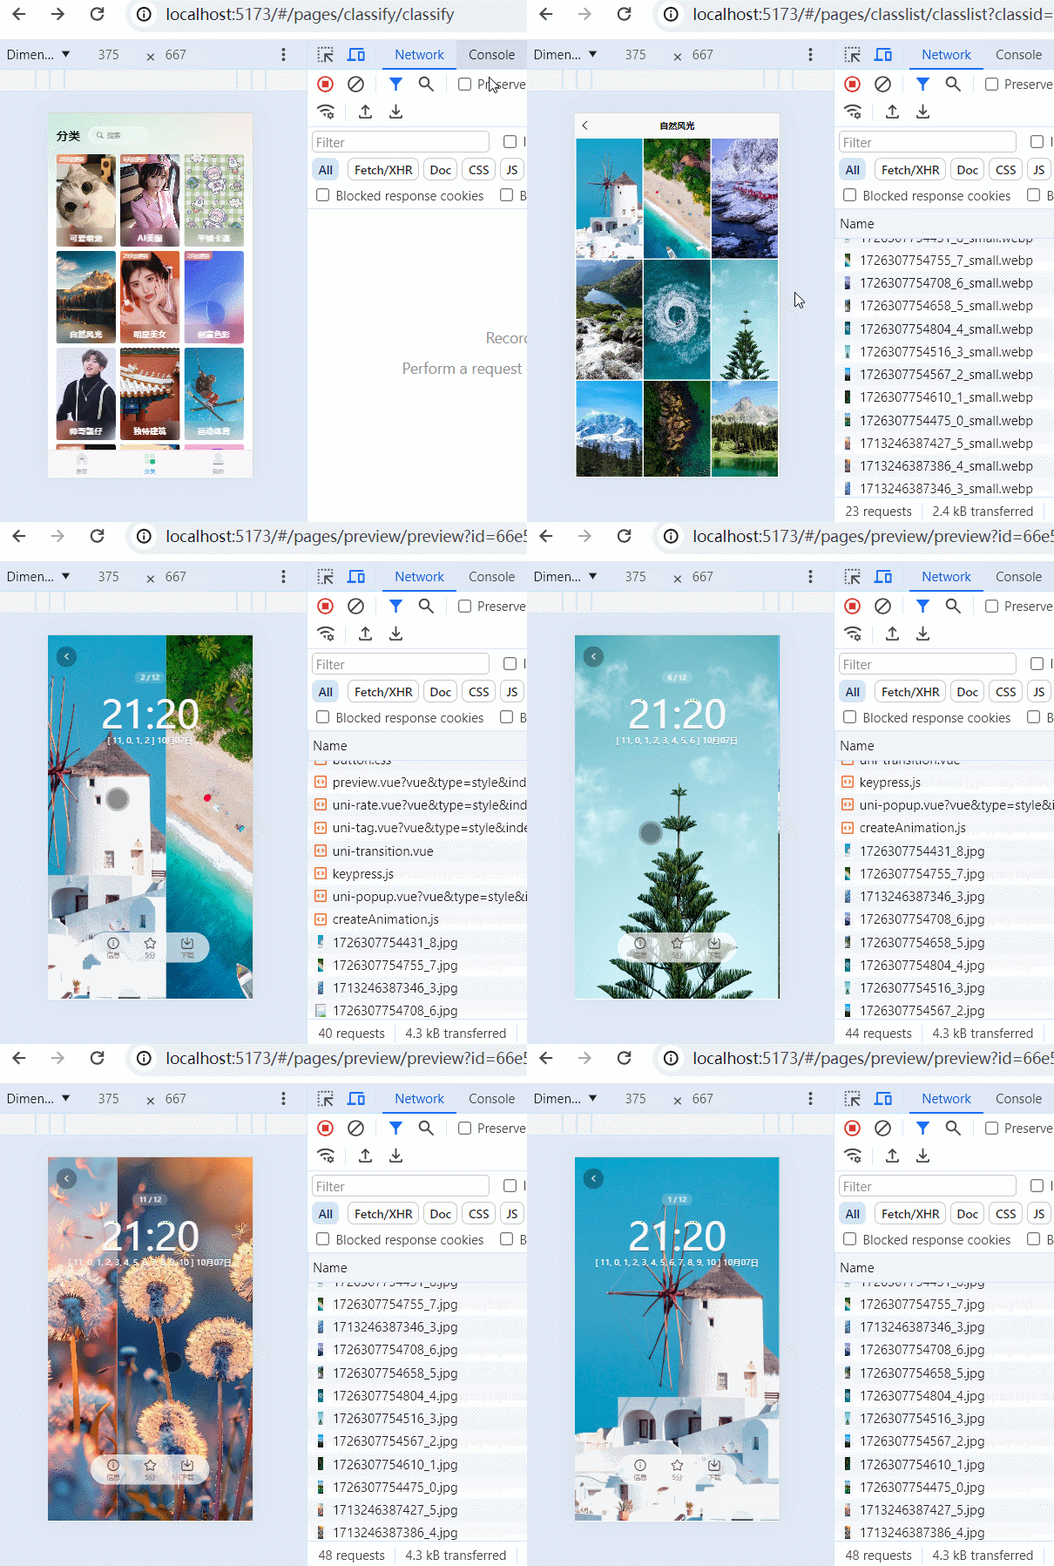
preview.vue
分析下流程:首先在分类列表页面中点击要预览的图片页面,执行预览页的setup中的js代码,获取到了缓存中的所有图片的链接,执行完后,此时渲染页面,但由于readImgs是空数组,所以所有Image标签中的v-if判断都为false,所以引入的图片都不展示,然后onLoad执行,获取到了要预览的图片索引,并且将前后2张的图片索引加入到了readImgs数组中,由于响应式数据发生变化,重新渲染页面,其中,在readImgs数组中的Image标签的v-if判断为true,其它的为false,所以只有判断为true的Image展示出来了。当滑动时,readImgs数组发生变化,由于响应式数据发生变化,继续重新渲染页面。
html
<template>
    <view class="preview" v-if="currentInfo._id">


        <!-- 图片滑播 -->
        <swiper circular :current="currentIdx" @change="swiperChange"><!-- 当前滑动的图片的索引 -->
            <swiper-item v-for="(item,idx) in picList" :key="item._id">
                <image v-if="readImgs.includes(idx)" @click="maskChange" :src="item.picUrl" mode="aspectFill"></image>
            </swiper-item>
        </swiper>

        <!-- 遮罩层 -->
        <view class="mask" v-show="maskState">

            <view class="goBack" @click="goBack" :style="{top: getStatusBarHeight() + 'px'}">
                <uni-icons type="left"></uni-icons>
            </view>
            <view class="count">{{currentIdx + 1}} / {{picList.length}}</view>
            <view class="time">
                21:20
            </view>
            <view class="date">
                {{readImgs}}
                10月07日
            </view>


        </view>

    </view>

</template>

<script setup>
    import { onMounted, ref } from 'vue';
    import {onLoad, onReachBottom} from "@dcloudio/uni-app"
    import { getStatusBarHeight } from '@/utils/system';

    // 所有图片
    const picList = ref([])
    // 当前正在预览图片的索引
    const currentIdx = ref(null)
    // 所以已浏览过的图片的索引
    const readImgs = ref([])

    // 从缓存中拿到壁纸列表
    let storagePicList = uni.getStorageSync("storagePicList") || []
    picList.value = storagePicList.map(item => {
        // 记得要返回
        return {
            ...item,
            picUrl: item.smallPicurl.replace("_small.webp", ".jpg")
        }
    })

    function handleReadImgs(currIdx) {
        // 前一张图片索引
        let prevIdx = currIdx!=0?currIdx - 1:picList.value.length-1
        let nextIdx = currIdx!=picList.value.length-1?currIdx+1:0
        console.log(prevIdx, currIdx, nextIdx);
        readImgs.value.push(prevIdx, currIdx, nextIdx)
        readImgs.value = [...new Set(readImgs.value)]
        console.log('readImgs', readImgs.value);
    }

    onLoad(({id})=>{
        // 拿到id,寻找索引
        console.log('onLoad...', id);
        currentIdx.value = picList.value.findIndex(item=>item._id == id)
        handleReadImgs(currentIdx.value)
    })
    const swiperChange = (e) => {
        // 更新当前预览图的索引
        let currIdx = e.detail.current
        // 当前图片索引
        currentIdx.value = currIdx
        handleReadImgs(currIdx)
    }

    ...

    //返回上一页
    const goBack = () => {
        uni.navigateBack({
            success: () => {

            },
            fail: (err) => {
                uni.reLaunch({
                    url:"/pages/index/index"
                })
            }
        })
    }


</script>
8.13.展示每张壁纸的专属信息
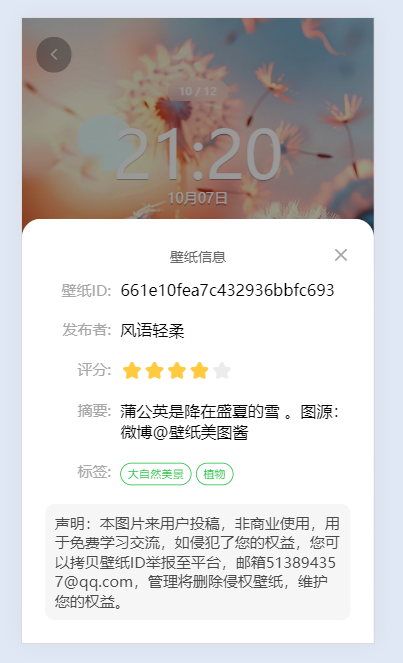
上1个接口已经拿到了数据,直接从缓存中获取即可
html
<template>

    ...

    <uni-popup
			class="infoPop"
			ref="infoPopRef"
			background-color="#fff"
			type="bottom" border-radius="40rpx 40rpx 0 0">
			<view class="content-area">
				<!-- 头部,固定高度 -->
				<view class="popHeader">
					<view class="title">壁纸信息</view>
					<view class="close-box" @click="closePopInfo">
						<uni-icons type="closeempty" size="20"></uni-icons>
					</view>
				</view>

				<!-- 给scroll-view设定最大高度,当下面的内容超过最大高度时,才出现滚动条 -->
				<scroll-view scroll-y>
					<!-- 下面为内容 -->
					<view class="content">
						<view class="row">
							<view class="label">壁纸ID:</view>
							<view class="value">{{currentInfo._id}}</view>
						</view>
						<view class="row">
							<view class="label">发布者:</view>
							<view class="value">{{currentInfo.nickname}}</view>
						</view>
						<view class="row">
							<view class="label">评分:</view>
							<view class="value">
								<uni-rate :readonly="true" :value="currentInfo.score" />
							</view>
						</view>
						<view class="row abstract">
							<view class="label">摘要:</view>
							<view class="value">{{currentInfo.description}}</view>
						</view>
						<view class="row tag">
							<view class="label">标签:</view>
							<view class="value">
								<uni-tag v-for="(tab,idx) in currentInfo.tabs" :key="idx" :text="tab" :inverted="true" :circle="true" type="success"></uni-tag>
							</view>
						</view>
						<view class="declare">
							声明:本图片来用户投稿,非商业使用,用于免费学习交流,如侵犯了您的权益,您可以拷贝壁纸ID举报至平台,邮箱513894357@qq.com,管理将删除侵权壁纸,维护您的权益。
						</view>
					</view>
				</scroll-view>


			</view>
		</uni-popup>

</template>

<script setup>

	import { onMounted, ref } from 'vue';
	import {onLoad, onReachBottom} from "@dcloudio/uni-app"
	import { getStatusBarHeight } from '@/utils/system';

    // 所有图片
	const picList = ref([])
	// 当前正在预览图片的索引
	const currentIdx = ref(null)
	// 所以已浏览过的图片的索引
	const readImgs = ref([])

    // 当前正在预览的壁纸的信息
	const currentInfo = ref({}); // 这里不要用ref(null), 否则刚开始渲染的时候,就会报错了
                                 // 或者用ref(null), 但用的地方就要加 currentInfo?.xxx

	// 从缓存中拿到壁纸列表
	let storagePicList = uni.getStorageSync("storagePicList") || []
	picList.value = storagePicList.map(item => {
		// 记得要返回
		return {
			...item,
			picUrl: item.smallPicurl.replace("_small.webp", ".jpg")
		}
	})

	function handleReadImgs(currIdx) {
		// 前一张图片索引
		let prevIdx = currIdx!=0? currIdx - 1 : picList.value.length-1
		let nextIdx = currIdx!=picList.value.length-1? currIdx + 1 :0
		console.log(prevIdx, currIdx, nextIdx);
		readImgs.value.push(prevIdx, currIdx, nextIdx)
		readImgs.value = [...new Set(readImgs.value)]
	}

	onLoad(({id})=>{
		// 拿到id,寻找索引
		console.log('onLoad...', id);
		currentIdx.value = picList.value.findIndex(item=>item._id == id)
		handleReadImgs(currentIdx.value)

        // 更新当前预览壁纸的信息
		currentInfo.value = picList.value[currentIdx.value]
	})
	const swiperChange = (e) => {
		// 更新当前预览图的索引
		let currIdx = e.detail.current
		// 当前图片索引
		currentIdx.value = currIdx
		handleReadImgs(currIdx)

        // 更新当前预览壁纸的信息
		currentInfo.value = picList.value[currentIdx.value]
	}

</script>
8.14.对接评分接口对壁纸进行滑动提交打分&通过本地缓存修改已评分过的状态
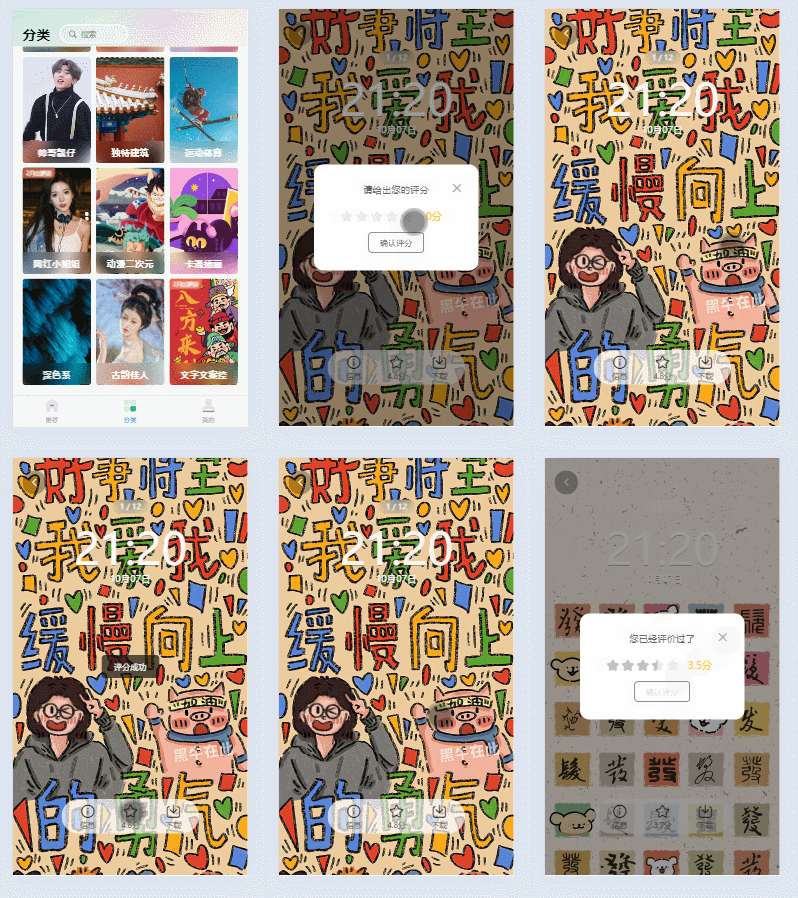
1、分类列表页接口返回的列表的每条数据有score为壁纸整体评分,userScore代表用户针对指定壁纸的评分(userScore为当前用户评分过了才有),将列表页数据存入缓存
2、用户从分类列表页进入预览页,从缓存中读取列表页数据,初始化响应式数据picList代表列表数据,currentInfo代表当前正在预览的壁纸数据
3、评分框的评分使用starNum响应式数据控制。打开评分框时,判断currentInfo是否有userScore属性,如果有,表示已经评分过了,此时给starNum赋值,并且不允许评分,如果没有userScore属性,表示还没评分过,则允许用户评分,点击确认评分,发送请求,响应成功后,添加currentInfo的userScore属性,并存入缓存,以便于从预览页返回到分类列表页,但是此时又不会请求接口数据,又来到预览页,从缓存中加载数据,初始化响应式数据picList代表列表数据
classList.vue
html
<template>
	<view class="classlist">


		<view class="content">
			<navigator :url="`/pages/preview/preview?id=${classify._id}`" class="item" v-for="classify in classifyList" :key="classify._id">
				<!-- 加上aspectFill之后,图片于图片的间隙消失 -->
				<image :src="classify.smallPicurl" mode="aspectFill"></image>
			</navigator>

		</view>

		<view class="loader-more">
			<uni-load-more :status="noData?'noMore':'loading'" :content-text="{contentrefresh:'正在加载中...',contentdown:'加载更多',contentnomore:'无更多数据了'}"></uni-load-more>
		</view>

		<!-- 安全高度 -->
		<view class="safe-area-inset-bottom"></view>
	</view>

</template>

<script setup>
	import { ref } from 'vue';
	import { apiGetClassList } from '@/api/apis';
	import {onLoad, onReachBottom} from "@dcloudio/uni-app"

	// 无数据了,初始标记:有数据
	const noData = ref(false)

	// 查询请求参数
	const queryParam = {
		pageNum: 1,
		pageSize: 12
	}
	const classifyList = ref([])
	const getClassList = async ()=>{

		let res = await apiGetClassList(queryParam);

		if(res.data.length === 0) {
			// 标记没有数据了
			noData.value = true
			return
		}

		classifyList.value = [...classifyList.value, ...res.data]
		uni.setStorageSync('storagePicList', classifyList.value)
	}

	// 获取页面查询参数加载
	onLoad((e)=>{
		// 解构,获取页面上的query参数
		let {
			classid=null,
			name=null
		} = e
		queryParam.classid = classid
		// 设置导航栏标题
		uni.setNavigationBarTitle({
			title:name
		})
		getClassList()
	})

	// 触底加载
	onReachBottom(()=>{
		if(noData.value) {
			return
		}
		++queryParam.pageNum
		getClassList()
	})


</script>

<style lang="scss" scoped>
.classlist {
	.content {
		display: grid;
		grid-template-columns: repeat(3, 1fr);
		gap: 5rpx;
		padding: 5rpx;
		.item {
			/* 设置高度,以便于图片设置height:100% */
			height: 440rpx;
			image {
				/* 因为上面采用了网格布局,所以这里就覆盖image默认的宽度240px */
				width: 100%;
				/* 覆盖image默认的高度320px */
				height: 100%;
				/* 避免底部的空白间隙 */
				display: block;
			}
		}
	}
}
</style>
preview.vue
html
<template>
	<view class="preview">


		<!-- 图片滑播 -->
		<swiper circular :current="currentIdx" @change="swiperChange"><!-- 当前滑动的图片的索引 -->
			<swiper-item v-for="(item,idx) in picList" :key="item._id">
				<image v-if="readImgs.includes(idx)" @click="maskChange" :src="item.picUrl" mode="aspectFill"></image>
			</swiper-item>
		</swiper>

		<!-- 遮罩层 -->
		<view class="mask" v-show="maskState">

			<view class="goBack" @click="goBack" :style="{top: getStatusBarHeight() + 'px'}">
				<uni-icons type="left"></uni-icons>
			</view>
			<view class="count">{{currentIdx + 1}} / {{picList.length}}</view>
			<view class="time">
				21:20
			</view>
			<view class="date">
				10月07日
			</view>
			<view class="footer">
				<view class="box" @click="popInfo">
					<uni-icons type="info" size="28"></uni-icons>
					<view class="text">信息</view>
				</view>
				<view class="box" @click="popRate">
					<uni-icons type="star" size="28"></uni-icons>
					<view class="text">{{currentInfo.score}}分</view>
				</view>
				<view class="box">
					<uni-icons type="download" size="28"></uni-icons>
					<view class="text">下载</view>
				</view>
			</view>

		</view>

		<uni-popup
			class="infoPop"
			ref="infoPopRef"
			background-color="#fff"
			type="bottom" border-radius="40rpx 40rpx 0 0">
			<view class="content-area">
				<!-- 头部,固定高度 -->
				<view class="popHeader">
					<view class="title">壁纸信息</view>
					<view class="close-box" @click="closePopInfo">
						<uni-icons type="closeempty" size="20"></uni-icons>
					</view>
				</view>

				<!-- 给scroll-view设定最大高度,当下面的内容超过最大高度时,才出现滚动条 -->
				<scroll-view scroll-y>
					<!-- 下面为内容 -->
					<view class="content">
						<view class="row">
							<view class="label">壁纸ID:</view>
							<view class="value">{{currentInfo._id}}</view>
						</view>
						<view class="row">
							<view class="label">发布者:</view>
							<view class="value">{{currentInfo.nickname}}</view>
						</view>
						<view class="row">
							<view class="label">评分:</view>
							<view class="value">
								<uni-rate
									:readonly="true"
									:value="currentInfo.score"
									/>
							</view>
						</view>
						<view class="row abstract">
							<view class="label">摘要:</view>
							<view class="value">{{currentInfo.description}}</view>
						</view>
						<view class="row tag">
							<view class="label">标签:</view>
							<view class="value">
								<uni-tag v-for="(tab,idx) in currentInfo.tabs" :key="idx" :text="tab" :inverted="true" :circle="true" type="success"></uni-tag>
							</view>
						</view>
						<view class="declare">
							声明:本图片来用户投稿,非商业使用,用于免费学习交流,如侵犯了您的权益,您可以拷贝壁纸ID举报至平台,邮箱513894357@qq.com,管理将删除侵权壁纸,维护您的权益。
						</view>
					</view>
				</scroll-view>


			</view>
		</uni-popup>

		<uni-popup class="ratePop" ref="ratePopRef" type="center" :mask-click="false">

			<view class="content-area">

				<!-- 头部,固定高度 -->
				<view class="popHeader">
					<view class="title">{{!!currentInfo.userScore?'您已经评价过了':'请给出您的评分'}}</view>
					<view class="close-box" @click="closePopRate">
						<uni-icons type="closeempty" size="20"></uni-icons>
					</view>
				</view>

				<view class="rate-body">
					<uni-rate
						v-model="starNum"
						:disabled="!!currentInfo.userScore"
						allow-half
						touchable>
					</uni-rate>
					<text class="score">{{starNum}}分</text>
				</view>

				<view class="rate-footer">
					<button plain type="default"
						:disabled="!!currentInfo.userScore"
						size="mini" @click="submitRate">确认评分</button>
				</view>

			</view>

		</uni-popup>
	</view>

</template>

<script setup>
	import { onMounted, ref } from 'vue';
	import { onLoad, onReachBottom} from "@dcloudio/uni-app"
	import { getStatusBarHeight } from '@/utils/system';
	import { apiGetSetupScore } from '@/api/apis.js'

	// 所有图片
	const picList = ref([])
	// 当前正在预览图片的索引
	const currentIdx = ref(null)
	// 所以已浏览过的图片的索引
	const readImgs = ref([])

	const currentInfo = ref(null);

	// 从缓存中拿到壁纸列表
	let storagePicList = uni.getStorageSync("storagePicList") || []
	picList.value = storagePicList.map(item => {
		// 记得要返回
		return {
			...item,
			picUrl: item.smallPicurl.replace("_small.webp", ".jpg")
		}
	})

	function handleReadImgs(currIdx) {
		// 前一张图片索引
		let prevIdx = currIdx!=0?currIdx - 1:picList.value.length-1
		let nextIdx = currIdx!=picList.value.length-1?currIdx+1:0
		console.log(prevIdx, currIdx, nextIdx);
		readImgs.value.push(prevIdx, currIdx, nextIdx)
		readImgs.value = [...new Set(readImgs.value)]
		console.log('readImgs', readImgs.value);
	}

	onLoad(({id})=>{
		// 拿到id,寻找索引
		console.log('onLoad...', id);
		currentIdx.value = picList.value.findIndex(item=>item._id == id)
		handleReadImgs(currentIdx.value)
		currentInfo.value = picList.value[currentIdx.value]
	})
	const swiperChange = (e) => {
		// 更新当前预览图的索引
		let currIdx = e.detail.current
		// 当前图片索引
		currentIdx.value = currIdx
		handleReadImgs(currIdx)
        // 滑动图片时,更新currentInfo
		currentInfo.value = picList.value[currentIdx.value]
	}


	// 遮罩层
	const maskState = ref(true)
	function maskChange() {
		console.log('halo');
		maskState.value = !maskState.value
	}

	// 信息弹框
	const infoPopRef = ref(null)
	const popInfo = ()=>{
		infoPopRef.value.open()
	}
	const closePopInfo = ()=>{
		infoPopRef.value.close()
	}

	// 评分相关
	const ratePopRef = ref(null)
	// 弹出评分框
	const popRate = ()=>{
		// 打开评分框时, 判断当前用户对该壁纸是否已有评分
		if(currentInfo.value.userScore) {
			starNum.value = currentInfo.value.userScore
		}
		ratePopRef.value.open()
	}
	const closePopRate = ()=>{
		ratePopRef.value.close()
		// 关闭评分框时,将评分置为0
		starNum.value = 0
	}
	// 评分框显示的评分
	const starNum = ref(0)
	// 提交评分
	const submitRate = async () => {
		try {
			uni.showLoading()
			// 解构, 并赋给新变量
			let {
                classid,
                _id:wallId
            } = currentInfo.value
			let res = await apiGetSetupScore({classid,wallId,userScore:starNum.value})
			console.log(res,'resss');
			if(res.errCode === 0) {
				uni.showToast({
					title: '评分成功',
					icon: 'none'
				})
				// 给响应式数据(数组中的元素)添加1个userScore属性(在当前预览滑动过程中需要知道是否给当前壁纸有过评分)
				picList.value[currentIdx.value].userScore = starNum.value
				// 更新缓存(评完分,退出预览后,并再次进入预览时,需要知道给哪些壁纸有过评分)
				uni.setStorageSync('storagePicList', picList.value)
				// 关闭评分框
				closePopRate()
			}
		} finally {
			uni.hideLoading()
		}
	}


	//返回上一页
	const goBack = () => {
		uni.navigateBack({
			success: () => {

			},
			fail: (err) => {
				uni.reLaunch({
					url:"/pages/index/index"
				})
			}
		})
	}

</script>
8.16.saveImageToPhotosAlbum保存壁纸到相册&openSetting调用客户端授权信息及各种异常处理
实现源码:开发微信小程序,将图片下载到相册的方法
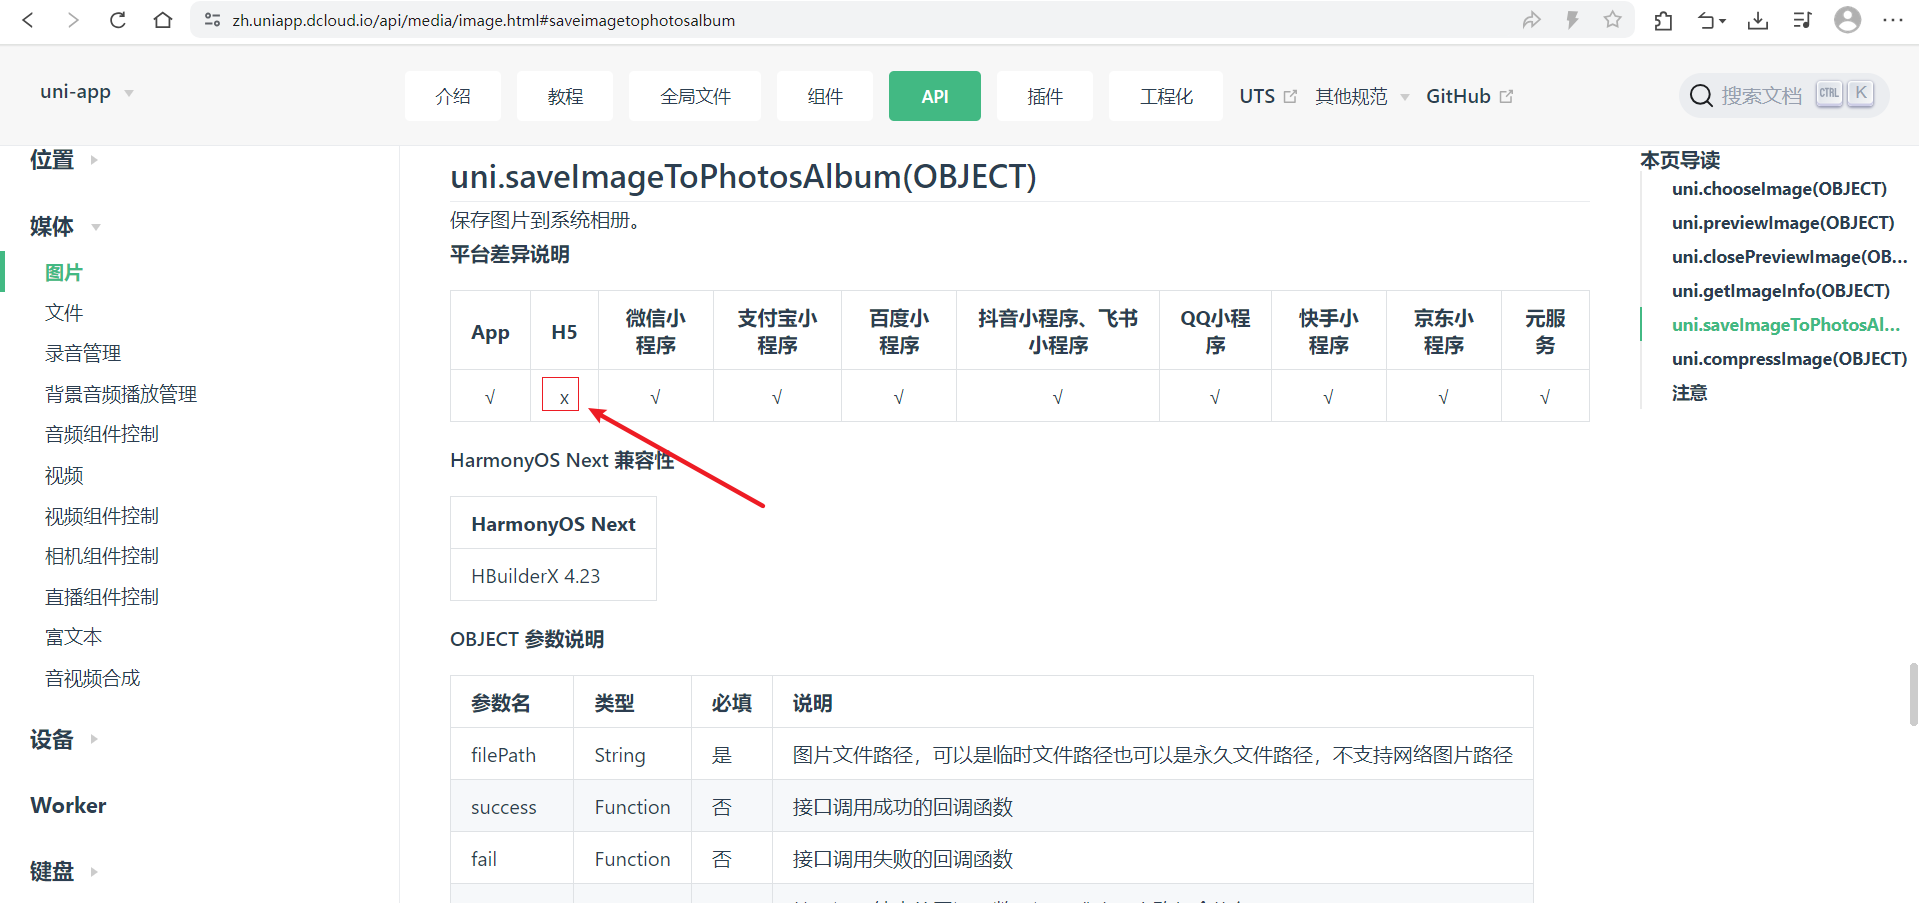
1、h5不支持这个api,所以可以使用条件编译,针对h5做特别处理。但是这个api也不支持网络连接。
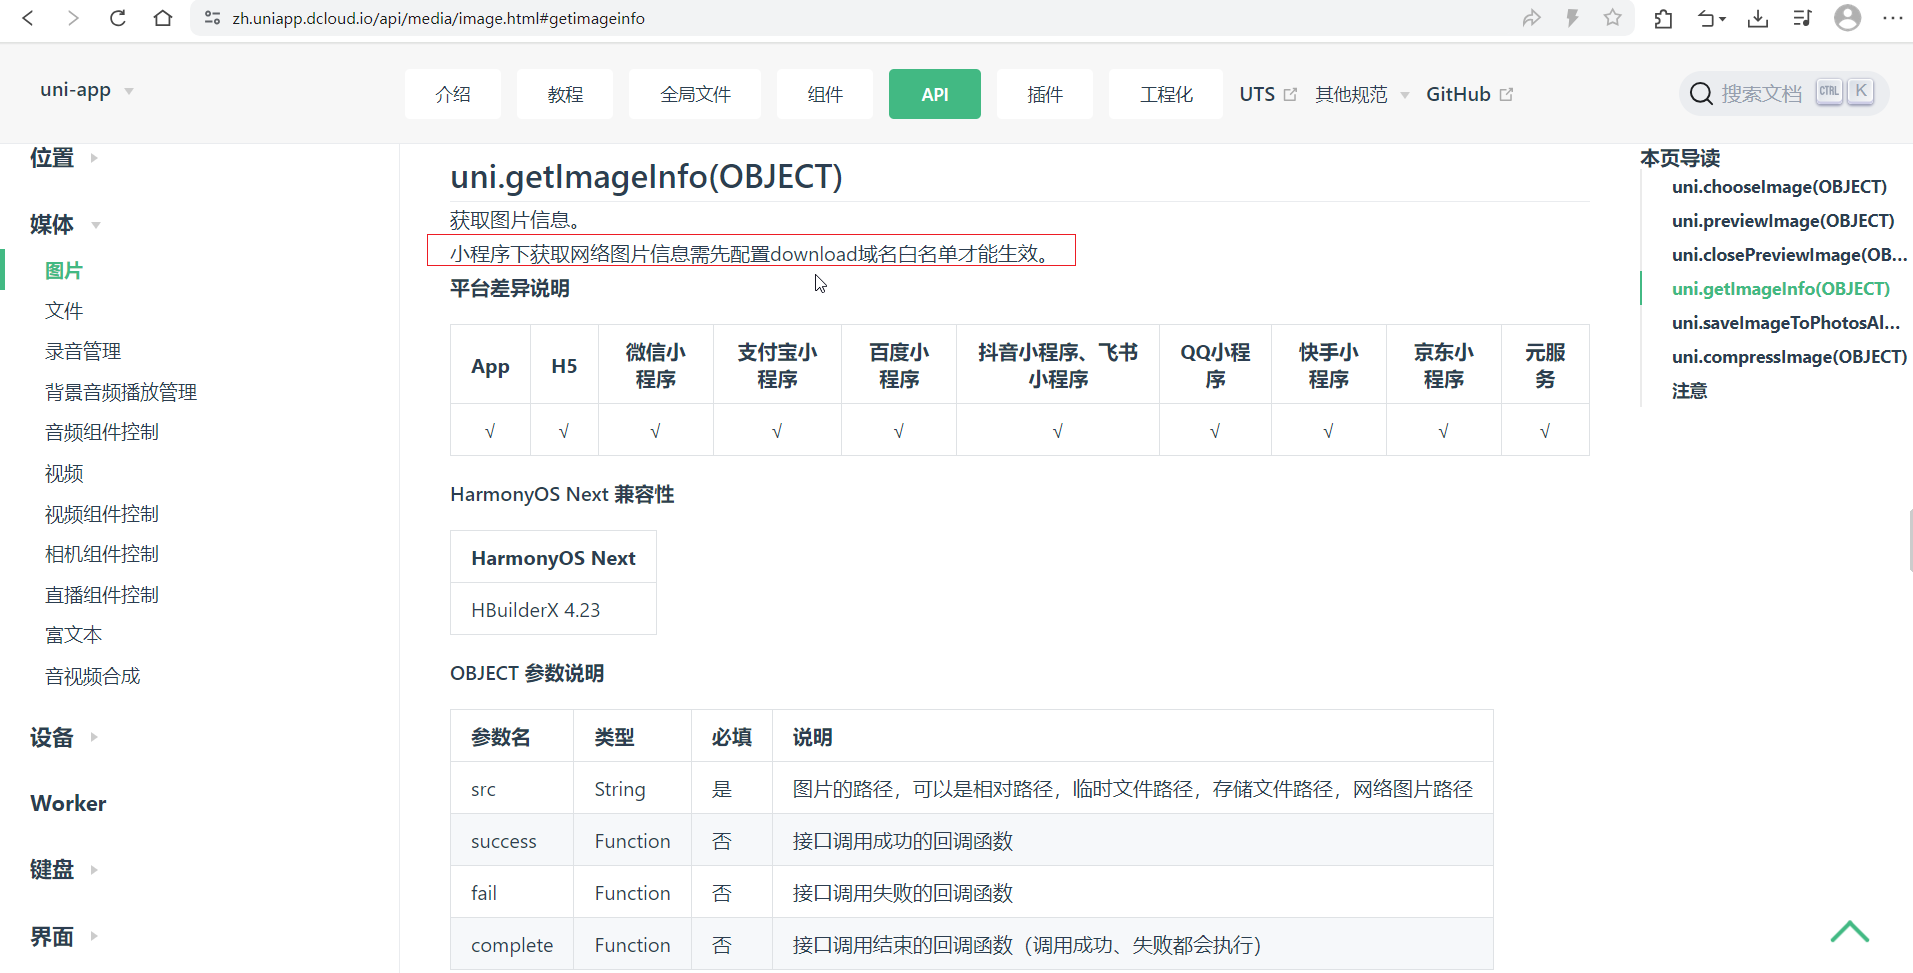
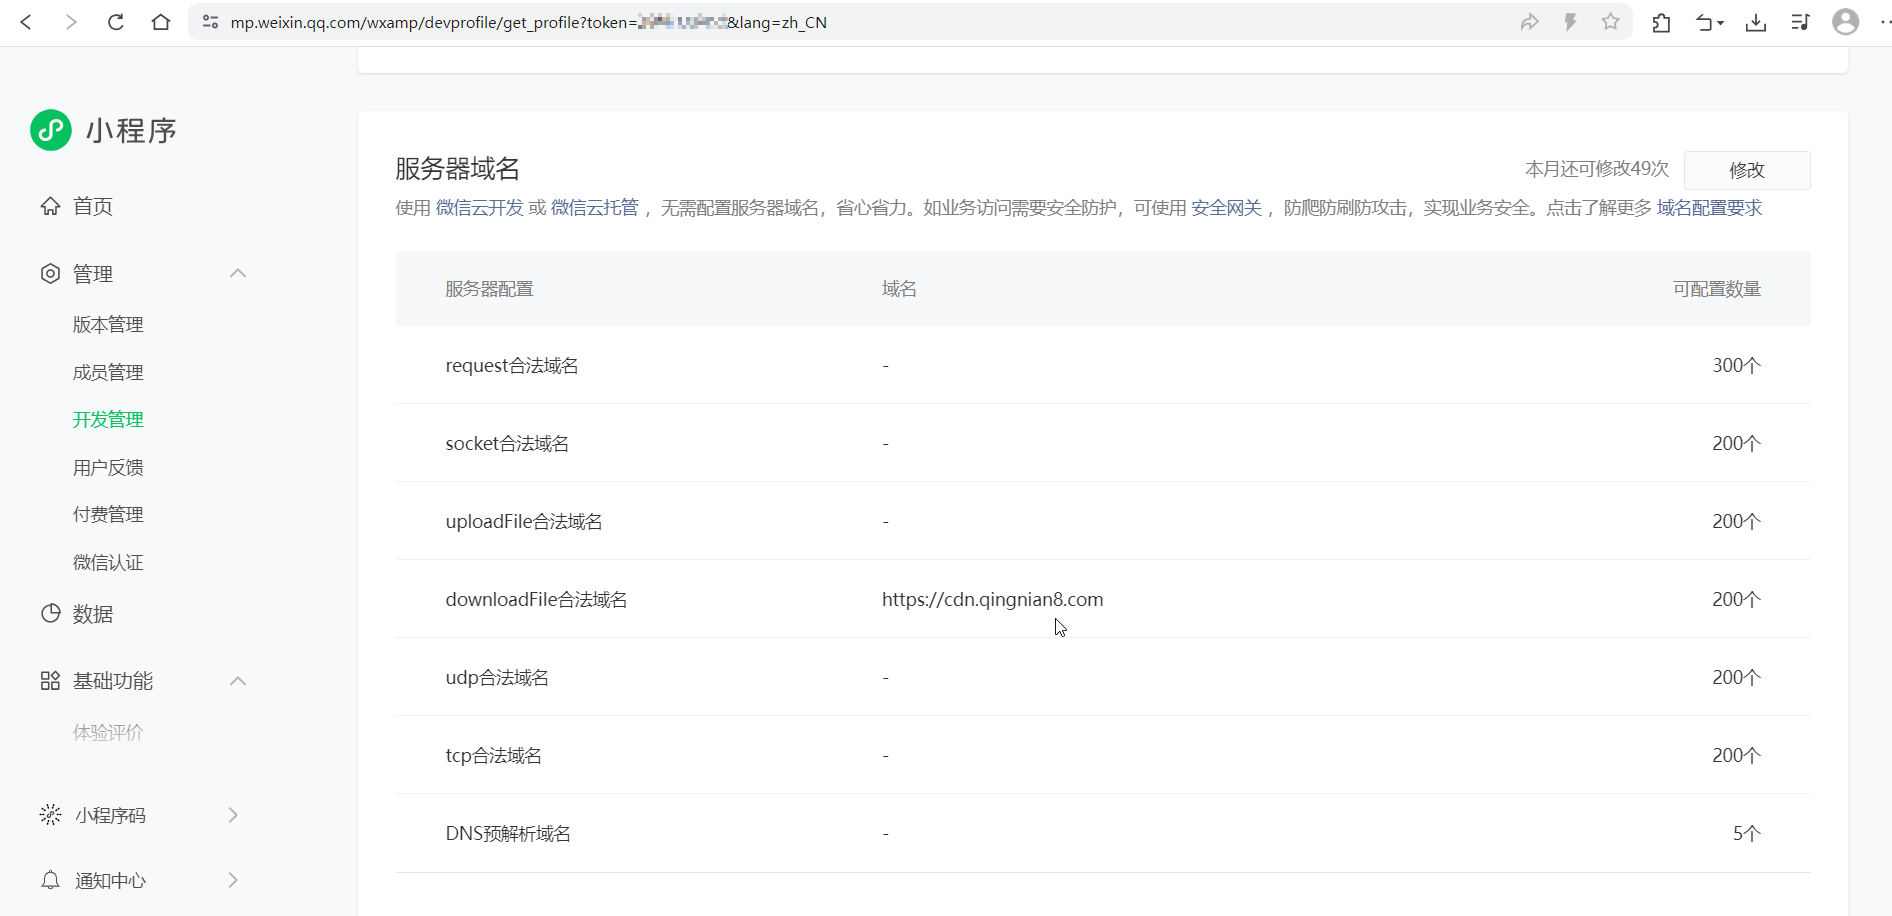
2、uni.getImageInfo这个api需要配置小程序download域名白名单
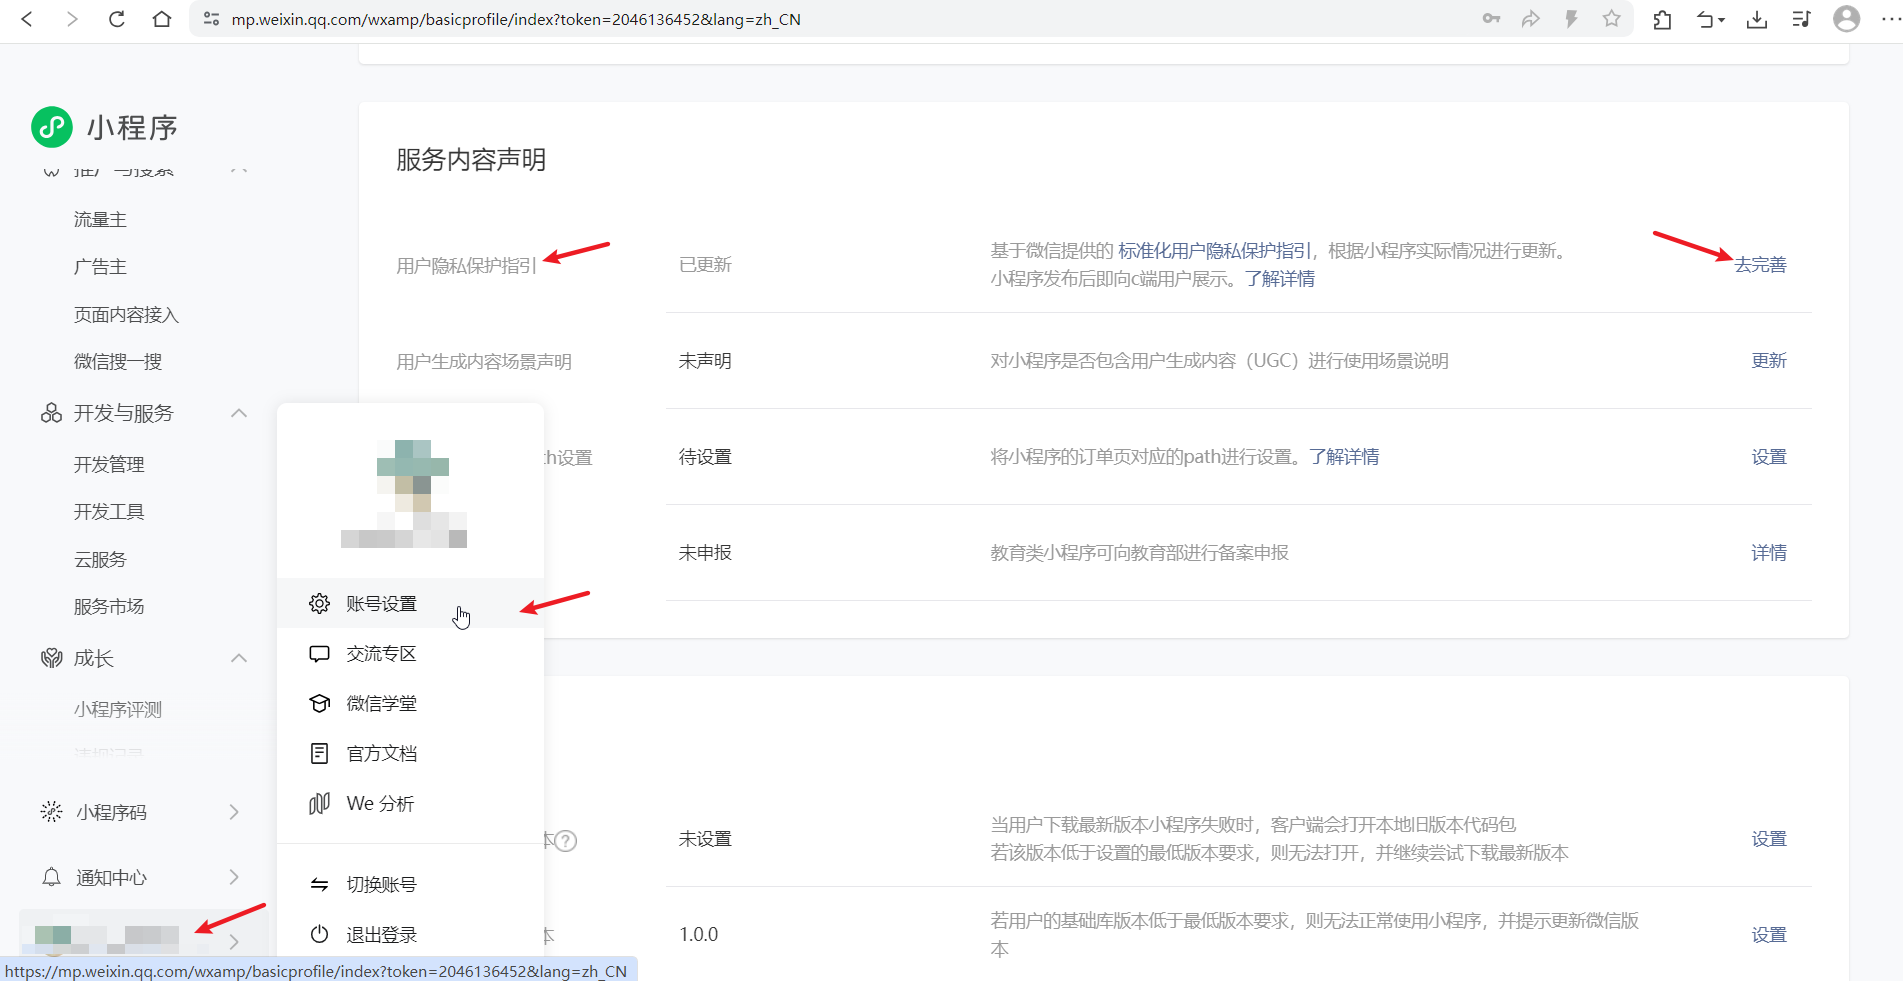
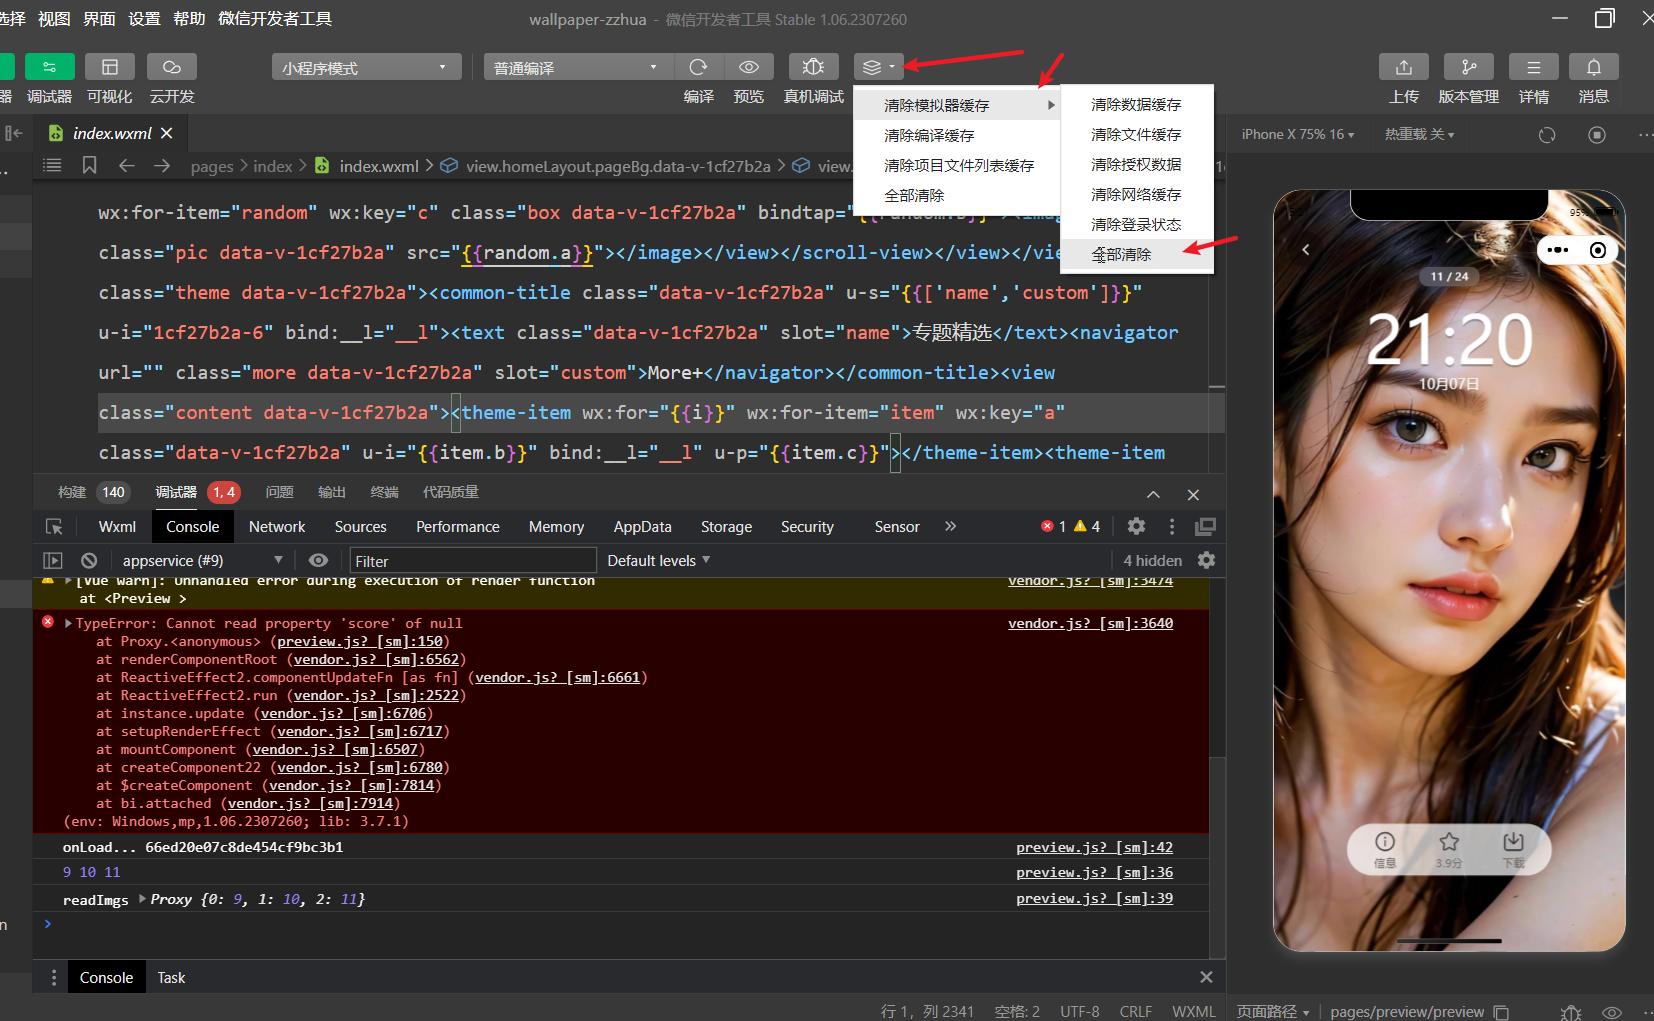
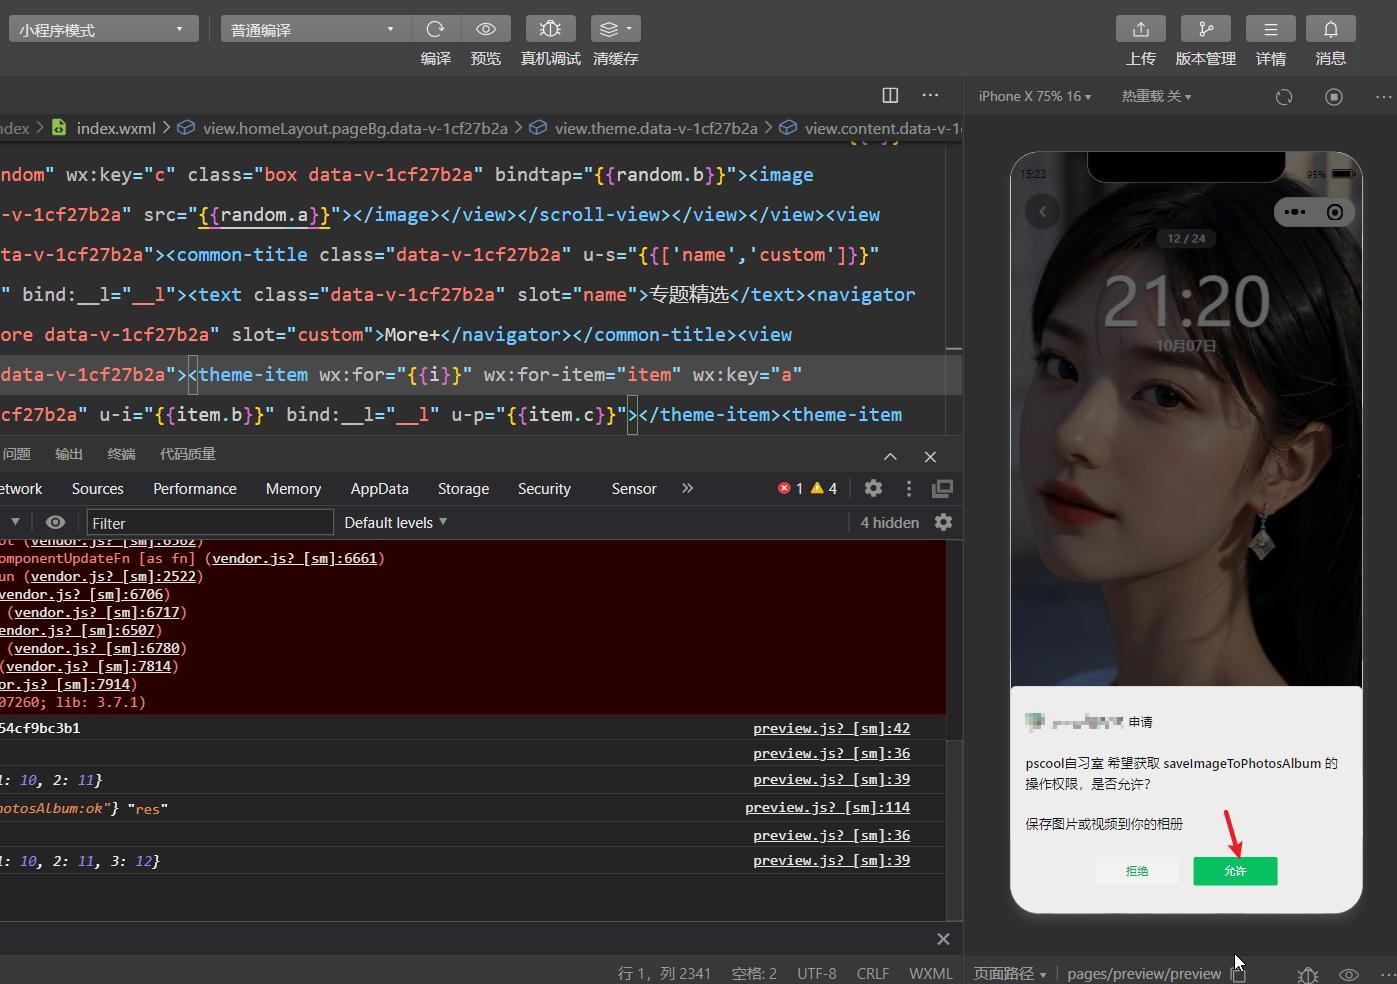
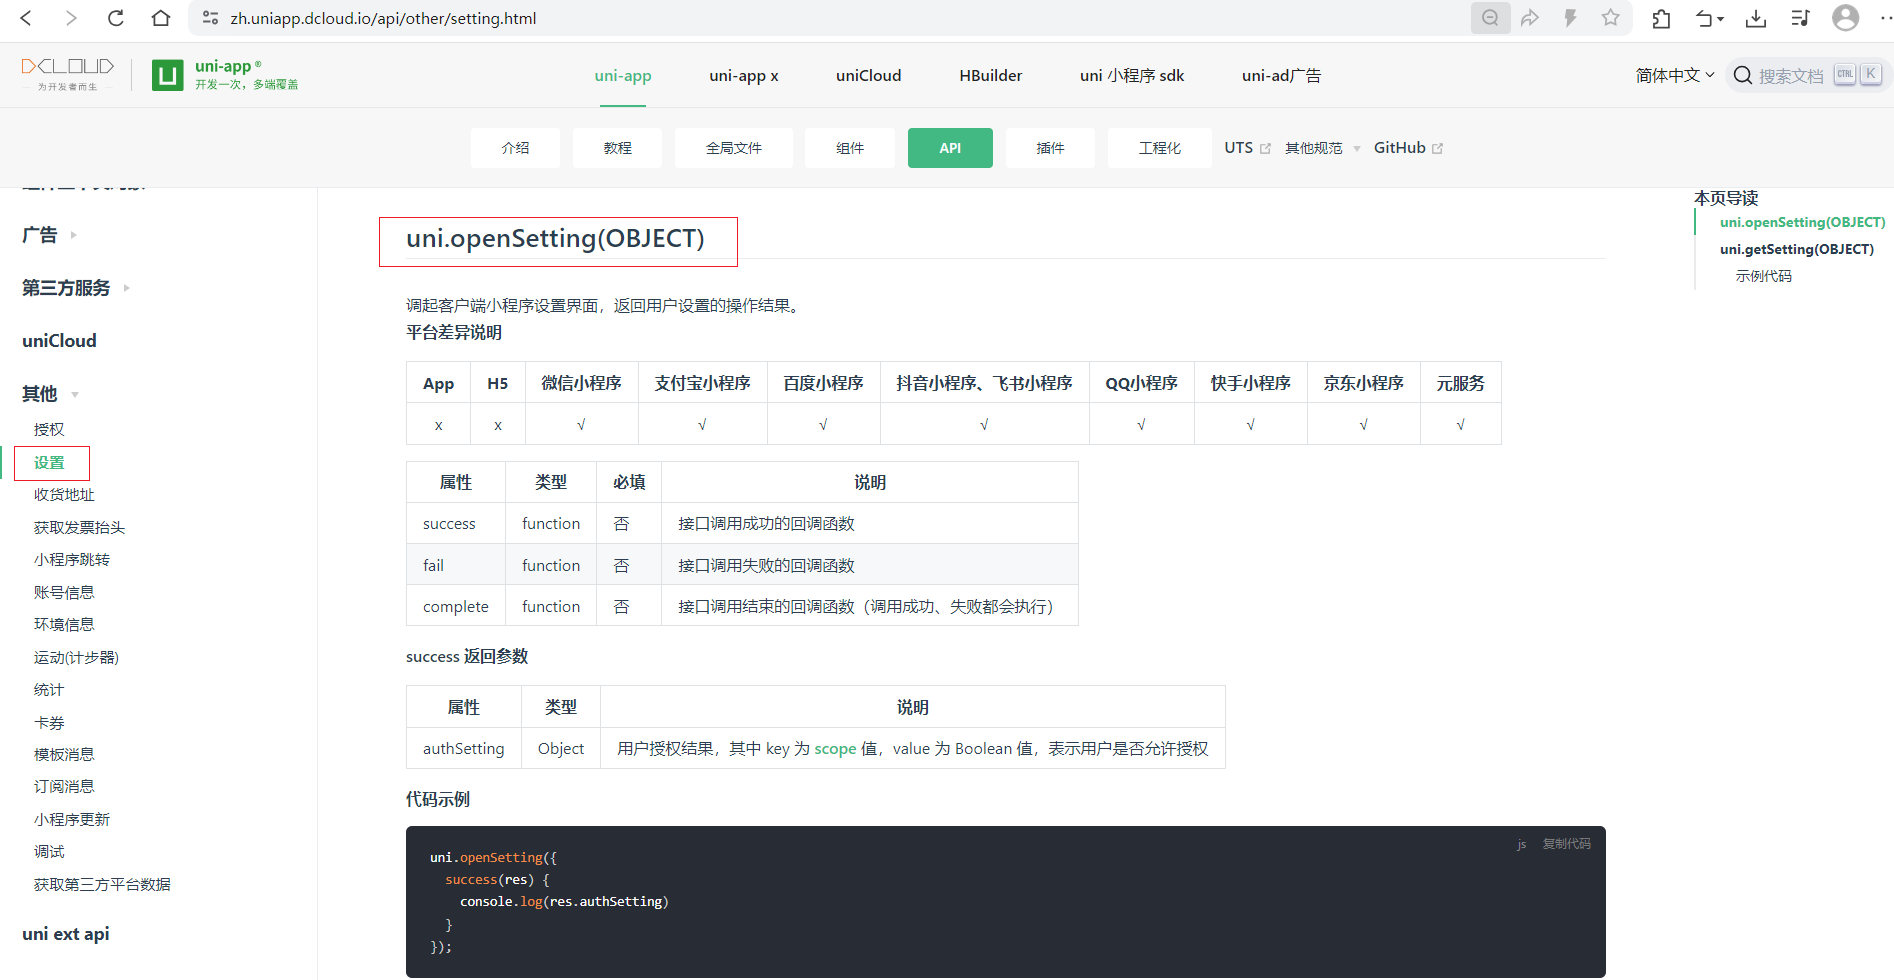
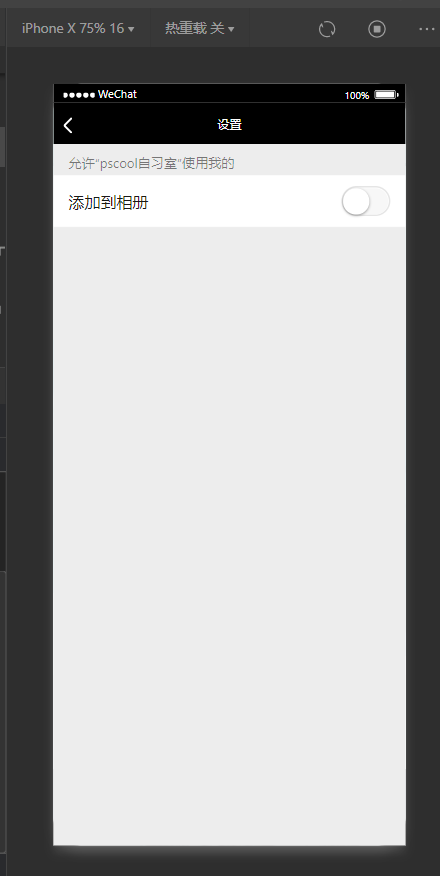
js
// 只粘贴下载的代码
// 下载图片
async function downloadImg(picUrl) {

    // #ifdef H5
    uni.showModal({
        content: "请长按保存壁纸",
        showCancel: false
    })
    // #endif

    // #ifndef H5

    try {

        uni.showLoading({
            title:'下载中...',
            mask:true
        })

        let {classid, _id:wallId} = currentInfo.value

        let res = await apiWriteDownload({
            classid,wallId
        })

        if(res.errCode != 0) {
            throw res //??抛1个不是异常的对象?? 可以这样抛,捕捉的异常就是这个对象
        }

        uni.getImageInfo({
            src:picUrl,
            success:(e)=>{
                // 微信小程序的输出
                /* errMsg: "getImageInfo:ok"
					   height: 2341
					   orientation: "up"
					   path: "http://tmp/3mrqVOUXbnGS92752db53bbe41ccb6f74ede12ceacee.jpg"
					   type: "jpeg"
					   width: 1080
					*/
                // console.log(e,'e');
                uni.saveImageToPhotosAlbum({
                    filePath: e.path,
                    success: (res)=>{  // 只会在用户第1次的时候弹出时,点击允许,才回调该成功函数。用户在第1次点击拒绝后,再次点击下载,会直接走fail
                        console.log(res,'saveImageToPhotosAlbum-res');
                    },
                    fail: (err) => {

                        // 用户点击拒绝时, 会回调该fail方法(或者用户上次已经点了拒绝,此时点击下载,将不会弹出申请授权 允许的按钮,直接fail)
                        // {errMsg: "saveImageToPhotosAlbum:fail auth deny"} "saveImageToPhotosAlbum-err"

                        // 用户拒绝授权后,弹出要用户手动打开设置的弹框,用户打开了设置并且返回了,此时用户已经授权了,
                        // 但是这个时候,用户再次点击下载,在弹出的界面不选择保存,而选择取消时,会出现下面的错误信息
                        // {errMsg: "saveImageToPhotosAlbum:fail cancel"} "saveImageToPhotosAlbum-err"

                        console.log(err, 'saveImageToPhotosAlbum-err');

                        if(err.errMsg === 'saveImageToPhotosAlbum:fail cancel') {
                            uni.showToast({
                                title:'保存失败,请重新点击下载',
                                icon: 'none'
                            })
                            return
                        }

                        uni.showModal({
                            title: '提示',
                            content: '需要授权保存相册',
                            success: (res) => {
                                if(res.confirm) { // 用户点击了确认

                                    console.log('确认授权了');

                                    // 会弹出1个设置界面,要用户手动打开对应的设置(用户可以打开,也可以不打开), 用户点击返回后,再执行下面的回调
                                    uni.openSetting({
                                        success: (setting) => {
                                            /* 用户不打开,就点击返回 setting
												   authSetting: {scope.writePhotosAlbum: false}
												   errMsg: "openSetting:ok"
												   用户打开,点击返回 setting
												   authSetting: {scope.writePhotosAlbum: true}
												   errMsg: "openSetting:ok"
												*/
                                            console.log(setting, 'openSetting-setting');
                                            if(setting.authSetting['scope.writePhotosAlbum']) {
                                                uni.showToast({
                                                    title: '获取授权成功',
                                                    icon: 'none'
                                                })
                                                // 用户手动打开设置之后,再次点击下载,就直接下载了
                                            }else {
                                                uni.showToast({
                                                    title: '获取授权失败',
                                                    icon: 'none'
                                                })
                                            }
                                        }
                                    })
                                }
                            }
                        })

                    }
                    ,
                    complete: () => {
                        uni.hideLoading()
                    }
                })
            }
        })
    } catch (error) {
        console.log('error~~', error);
        uni.hideLoading()
    }
    // #endif

}
8.19.onShareAppMessage分享好友和分享微信朋友圈&对分享页面传参进行特殊处理
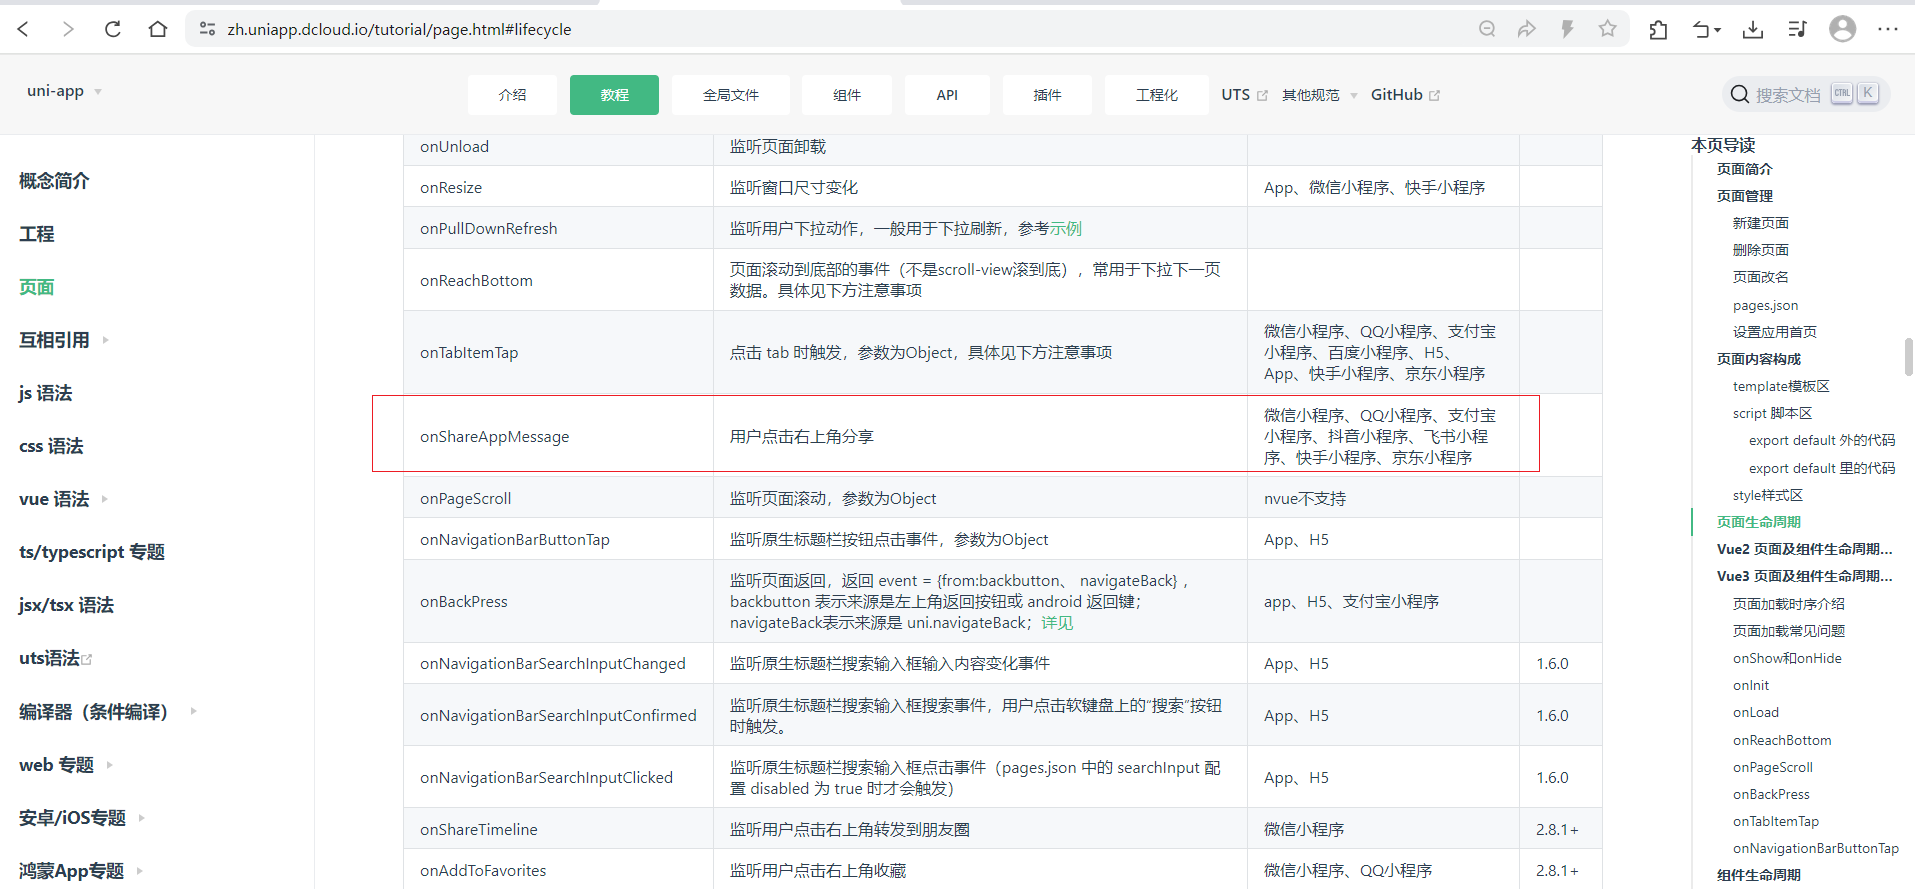
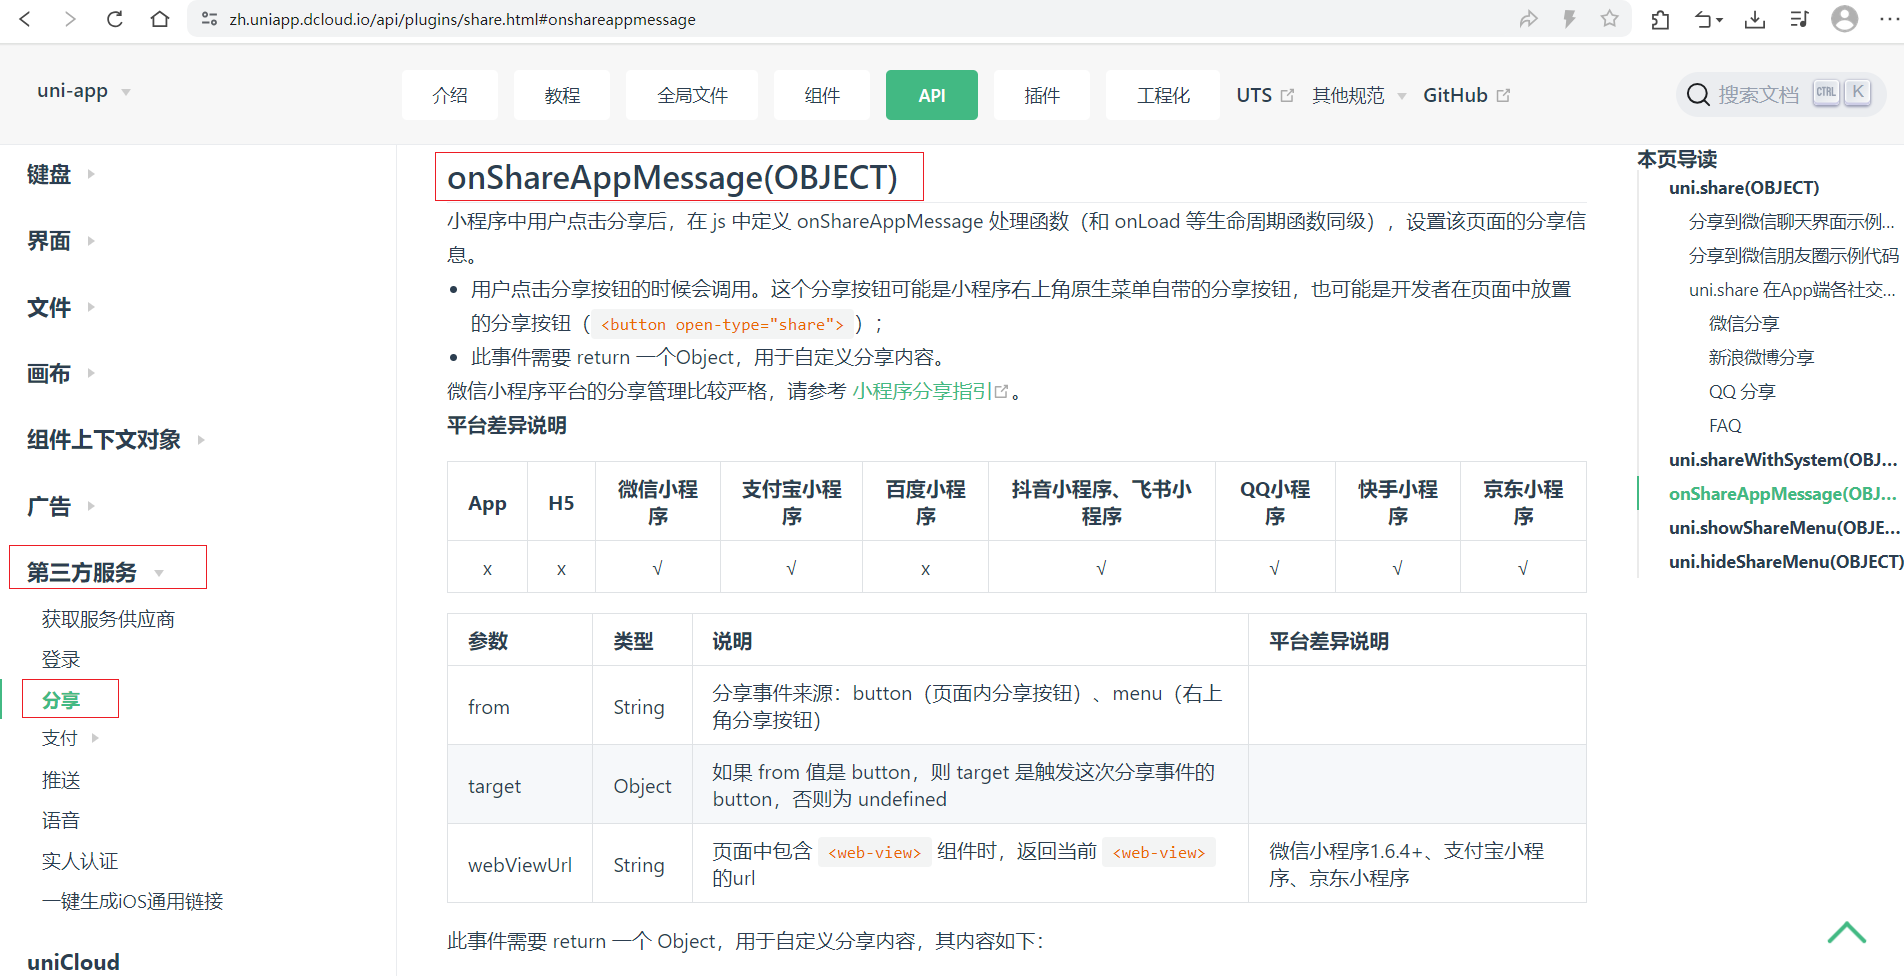
1、从@dcloudio/uni-app导入onShareAppMessage,它类似于onLoad回调一样,当用户点击微信小程序右上角的3个点的菜单,弹出来的框中选择发送给朋友,就会弹出
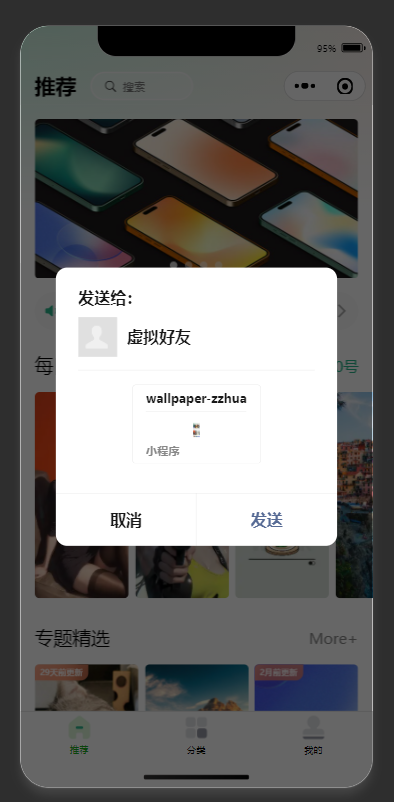
2、也可以直接使用button按钮直接弹出<button open-type="share">分享</button>
3、可以设置标题和分享页面的路径
js
//分享给好友
onShareAppMessage((e) => {
	return {
		title: "咸虾米壁纸,好看的手机壁纸",
		path: "/pages/classify/classify"
	}
})
4、分享朋友圈(我这里是灰色的,分享不了,不知道是不是要开通什么权限之类的)
js
//分享朋友圈
onShareTimeline(() => {
	return {
		title: "咸虾米壁纸,好看的手机壁纸"
	}
})
5、分类列表实现分享
html
<template>
    <view class="classlist">

        <view class="loadingLayout" v-if="!classList.length && !noData">
            <uni-load-more status="loading"></uni-load-more>
        </view>

        <view class="content">
            <navigator :url="'/pages/preview/preview?id='+item._id" class="item"
                       v-for="item in classList"
                       :key="item._id"
                       >
                <image :src="item.smallPicurl" mode="aspectFill"></image>
            </navigator>
        </view>

        <view class="loadingLayout" v-if="classList.length || noData">
            <uni-load-more :status="noData?'noMore':'loading'"></uni-load-more>
        </view>

        <view class="safe-area-inset-bottom"></view>
    </view>
</template>

<script setup>
    import { ref } from 'vue';
    import {onLoad,onUnload,onReachBottom,onShareAppMessage,onShareTimeline} from "@dcloudio/uni-app"

    import {apiGetClassList,apiGetHistoryList} from "@/api/apis.js"
    import {gotoHome} from "@/utils/common.js"
    //分类列表数据
    const classList = ref([]);
    const noData = ref(false)

    //定义data参数
    const queryParams = {
        pageNum:1,
        pageSize:12
    }
    let pageName;

    onLoad((e)=>{
        let {id=null,name=null,type=null} = e;
        if(type) queryParams.type = type;
        if(id) queryParams.classid = id;

        pageName = name
        //修改导航标题
        uni.setNavigationBarTitle({
            title:name
        })
        //执行获取分类列表方法
        getClassList();
    })

    onReachBottom(()=>{
        if(noData.value) return;
        queryParams.pageNum++;
        getClassList();
    })

    //获取分类列表网络数据
    const getClassList = async ()=>{
        let res;
        if(queryParams.classid) res = await apiGetClassList(queryParams);
        if(queryParams.type) res = await apiGetHistoryList(queryParams);

        classList.value = [...classList.value , ...res.data];
        if(queryParams.pageSize > res.data.length) noData.value = true;
        uni.setStorageSync("storgClassList",classList.value);
        console.log(classList.value);
    }


    //分享给好友
    onShareAppMessage((e)=>{
        return {
            title:"咸虾米壁纸-"+pageName,
            path:"/pages/classlist/classlist?id="+queryParams.classid+"&name="+pageName
        }
    })


    //分享朋友圈
    onShareTimeline(()=>{
        return {
            title:"咸虾米壁纸-"+pageName,
            query:"id="+queryParams.classid+"&name="+pageName
        }
    })

    // 【退出页面时,清理缓存】
    onUnload(()=>{
        uni.removeStorageSync("storgClassList")
    })

</script>

<style lang="scss" scoped>
    .classlist{
        .content{
            display: grid;
            grid-template-columns: repeat(3,1fr);
            gap:5rpx;
            padding:5rpx;
            .item{
                height: 440rpx;
                image{
                    width: 100%;
                    height: 100%;
                    display: block;
                }
            }
        }
    }
</style>
6、preview.vue预览页实现分享
js
onLoad(async (e) => {
    currentId.value = e.id;
    if(e.type == 'share'){
        let res = await apiDetailWall({id:currentId.value});
        classList.value = res.data.map(item=>{
            return {
                ...item,
                picurl: item.smallPicurl.replace("_small.webp", ".jpg")
            }
        })
    }
    currentIndex.value = classList.value.findIndex(item => item._id == currentId.value)
    currentInfo.value = classList.value[currentIndex.value]
    readImgsFun();
})

//返回上一页
const goBack = () => { // 当当前是分享时,无法返回上一页,走到fail,跳转到首页
    uni.navigateBack({
        success: () => {

        },
        fail: (err) => {
            uni.reLaunch({
                url:"/pages/index/index"
            })
        }
    })
}

//分享给好友
onShareAppMessage((e)=>{
    return {
        title:"咸虾米壁纸",
        path:"/pages/preview/preview?id="+currentId.value+"&type=share"
    }
})


//分享朋友圈
onShareTimeline(()=>{
    return {
        title:"咸虾米壁纸",
        query:"id="+currentId.value+"&type=share" /* 添加类型为type,根据这个参数再去请求后台 */
    }
})
8.21.处理popup底部弹窗空缺安全区域及其他页面优化
页面跳转
1、首页的每日推荐点击图片直接跳转到预览页,预览列表时每日推荐返回的每一张图片
2、首页的专题精选跳转到分类列表页
3、首页的专题精选的更多跳转到分类页
3、分类页点击图片跳转到分类列表页
4、点击分类列表页中的图片跳转到预览页
5、修改路径:uni_modules\uni-popup\components\uni-popup\uni-popup.vue
在349行左右的位置,注释掉:
javascript
// paddingBottom: this.safeAreaInsets + 'px',不建议这样改,可以直接修改uni-popup的safe-area属性为false即可。
6、跳转到分类列表页是需要分类id和名称的,如果没有分类id,则让用户跳转到首页,这里封装统一的跳转到首页的逻辑,页面中直接引入,判断之后,跳转到首页
js
export function gotoHome(){
    uni.showModal({
        title:"提示",
        content:"页面有误将返回首页",
        showCancel:false,
        success: (res) => {
            if(res.confirm){
                uni.reLaunch({
                    url:"/pages/index/index"
                })
            }
        }
    })
}
九、其他功能页面实现
9.1.获取个人中心接口数据渲染到用户页面中&共用分类列表页面实现我的下载和评分页面
1、个人页面,头部使用view占据头部状态栏高度
2、用户ip和地区作为用户信息,对于userInfo初始值设置为ref(null)的问题,使用v-if判断userInfo不为null时,再渲染整个页面。同时加上v-else,当用户来到个人中心,请求用户数据,但还没有返回时,显示加载中
3、从个人页面点击我的下载跳转到分类列表页,而分类列表页最初的逻辑是根据传过来的分类id去请求分类列表数据,并做了触底加载,现在改成如果传过来的参数有type,则按照type来请求另外1个接口获取分类列表数据
User.vue
html
<template>
    <view class="userLayout pageBg" v-if="userinfo">
        <view :style="{height:getNavBarHeight()+'px'}"></view>
        <view class="userInfo">
            <view class="avatar">
                <image src="../../static/images/xxmLogo.png" mode="aspectFill"></image>
            </view>
            <view class="ip">{{userinfo.IP}}</view>
            <view class="address">来自于:
                {{ userinfo.address.city || userinfo.address.province || userinfo.address.country}}

            </view>
        </view>


        <view class="section">
            <view class="list">
                <navigator
                           url="/pages/classlist/classlist?name=我的下载&type=download"
                           class="row">
                    <view class="left">
                        <uni-icons type="download-filled" size="20" ></uni-icons>
                        <view class="text">我的下载</view>
                    </view>
                    <view class="right">
                        <view class="text">{{userinfo.downloadSize}}</view>
                        <uni-icons type="right" size="15" color="#aaa"></uni-icons>
                    </view>
                </navigator>

                <navigator
                           url="/pages/classlist/classlist?name=我的评分&type=score"
                           class="row">
                    <view class="left">
                        <uni-icons type="star-filled" size="20"></uni-icons>
                        <view class="text">我的评分</view>
                    </view>
                    <view class="right">
                        <view class="text">{{userinfo.scoreSize}}</view>
                        <uni-icons type="right" size="15" color="#aaa"></uni-icons>
                    </view>
                </navigator>

                <view class="row">
                    <view class="left">
                        <uni-icons type="chatboxes-filled" size="20"></uni-icons>
                        <view class="text">联系客服</view>
                    </view>
                    <view class="right">
                        <view class="text"></view>
                        <uni-icons type="right" size="15" color="#aaa"></uni-icons>
                    </view>
                    <!-- #ifdef MP -->
                    <button open-type="contact">联系客服</button>
                    <!-- #endif -->
                    <!-- #ifndef MP -->
                    <button @click="clickContact">拨打电话</button>
                    <!-- #endif -->


                </view>
            </view>
        </view>

        <view class="section">
            <view class="list">
                <navigator url="/pages/notice/detail?id=653507c6466d417a3718e94b" class="row">
                    <view class="left">
                        <uni-icons type="notification-filled" size="20"></uni-icons>
                        <view class="text">订阅更新</view>
                    </view>
                    <view class="right">
                        <view class="text"></view>
                        <uni-icons type="right" size="15" color="#aaa"></uni-icons>
                    </view>
                </navigator>

                <navigator url="/pages/notice/detail?id=6536358ce0ec19c8d67fbe82" class="row">
                    <view class="left">
                        <uni-icons type="flag-filled" size="20"></uni-icons>
                        <view class="text">常见问题</view>
                    </view>
                    <view class="right">
                        <view class="text"></view>
                        <uni-icons type="right" size="15" color="#aaa"></uni-icons>
                    </view>
                </navigator>
            </view>
        </view>

    </view>

    <view class="loadingLayout" v-else>
        <view :style="{height:getNavBarHeight()+'px'}"></view>
        <uni-load-more status="loading"></uni-load-more>
    </view>

</template>

<script setup>
    import {getNavBarHeight} from "@/utils/system.js"
    import {apiUserInfo} from "@/api/apis.js"
    import { ref } from "vue";

    const userinfo = ref(null)

    const clickContact = ()=>{
        uni.makePhoneCall({
            phoneNumber:"114"
        })
    }

    const getUserInfo = ()=>{
        apiUserInfo().then(res=>{
            console.log(res);
            userinfo.value = res.data
        })
    }

    getUserInfo();
</script>

<style lang="scss" scoped>
    .userLayout{
        .userInfo{
            display: flex;
            align-items: center;
            justify-content: center;
            flex-direction: column;
            padding:50rpx 0;
            .avatar{
                width: 160rpx;
                height: 160rpx;
                border-radius: 50%;
                overflow: hidden;
                image{
                    width: 100%;
                    height: 100%;
                }
            }
            .ip{
                font-size: 44rpx;
                color:#333;
                padding:20rpx 0 5rpx;
            }
            .address{
                font-size: 28rpx;
                color:#aaa;
            }
        }

        .section{
            width: 690rpx;
            margin:50rpx auto;
            border:1px solid #eee;
            border-radius: 10rpx;
            box-shadow: 0 0 30rpx rgba(0,0,0,0.05);
            .list{
                .row{
                    display: flex;
                    justify-content: space-between;
                    align-items: center;
                    padding:0 30rpx;
                    height: 100rpx;
                    border-bottom: 1px solid #eee;
                    position: relative;
                    background: #fff;
                    &:last-child{border-bottom:0}
                    .left{
                        display: flex;
                        align-items: center;
                        :deep(){
                            .uni-icons{
                                color:$brand-theme-color !important;
                            }
                        }
                        .text{
                            padding-left: 20rpx;
                            color:#666
                        }
                    }
                    .right{
                        display: flex;
                        align-items: center;
                        .text{
                            font-size: 28rpx;
                            color:#aaa;

                        }
                    }
                    button{
                        position: absolute;
                        top:0;
                        left:0;
                        height: 100rpx;
                        width:100%;
                        opacity: 0;
                    }
                }
            }
        }
    }
</style>
classList.vue
html
<template>
    <view class="classlist">

        <view class="loadingLayout" v-if="!classList.length && !noData">
            <uni-load-more status="loading"></uni-load-more>
        </view>

        <view class="content">
            <navigator :url="'/pages/preview/preview?id='+item._id" class="item"
                       v-for="item in classList"
                       :key="item._id"
                       >
                <image :src="item.smallPicurl" mode="aspectFill"></image>
            </navigator>
        </view>

        <view class="loadingLayout" v-if="classList.length || noData">
            <uni-load-more :status="noData?'noMore':'loading'"></uni-load-more>
        </view>

        <view class="safe-area-inset-bottom"></view>
    </view>
</template>

<script setup>
    import { ref } from 'vue';
    import {onLoad,onUnload,onReachBottom,onShareAppMessage,onShareTimeline} from "@dcloudio/uni-app"

    import {apiGetClassList,apiGetHistoryList} from "@/api/apis.js"
    import {gotoHome} from "@/utils/common.js"
    //分类列表数据
    const classList = ref([]);
    const noData = ref(false)

    //定义data参数
    const queryParams = {
        pageNum:1,
        pageSize:12
    }
    let pageName;

    onLoad((e)=>{
        let {id=null,name=null,type=null} = e;
        if(type) queryParams.type = type;
        if(id) queryParams.classid = id;

        pageName = name
        //修改导航标题
        uni.setNavigationBarTitle({
            title:name
        })
        //执行获取分类列表方法
        getClassList();
    })

    onReachBottom(()=>{
        if(noData.value) return;
        queryParams.pageNum++;
        getClassList();
    })

    //获取分类列表网络数据
    const getClassList = async ()=>{
        let res;
        if(queryParams.classid) res = await apiGetClassList(queryParams);
        if(queryParams.type) res = await apiGetHistoryList(queryParams);

        classList.value = [...classList.value , ...res.data];
        if(queryParams.pageSize > res.data.length) noData.value = true;
        uni.setStorageSync("storgClassList",classList.value);
        console.log(classList.value);
    }


    //分享给好友
    onShareAppMessage((e)=>{
        return {
            title:"咸虾米壁纸-"+pageName,
            path:"/pages/classlist/classlist?id="+queryParams.classid+"&name="+pageName
        }
    })


    //分享朋友圈
    onShareTimeline(()=>{
        return {
            title:"咸虾米壁纸-"+pageName,
            query:"id="+queryParams.classid+"&name="+pageName
        }
    })

    onUnload(()=>{
        uni.removeStorageSync("storgClassList")
    })

</script>

<style lang="scss" scoped>
    .classlist{
        .content{
            display: grid;
            grid-template-columns: repeat(3,1fr);
            gap:5rpx;
            padding:5rpx;
            .item{
                height: 440rpx;
                image{
                    width: 100%;
                    height: 100%;
                    display: block;
                }
            }
        }
    }
</style>
9.3.使用mp-html富文本插件渲染公告详情页面
1、可以使用内置组件rich-text来渲染html内容
2、可以使用插件my-html渲染html内容

newsDetail.vue
html
<template>
	<view class="noticeLayout">
		<view class="title-header">
			<view class="title-tag" v-if="news.select">
				<uni-tag text="置顶" :inverted="true" type="success"></uni-tag>
			</view>
			<view class="title">{{news.title}}</view>
		</view>
		<view class="info">
			<view class="author">
				{{news.author}}
			</view>
			<view class="datetime">
				<uni-dateformat :date="news.publish_date"></uni-dateformat>
			</view>
		</view>
		<view class="content">
			<!-- <rich-text :nodes="news.content"></rich-text> -->
			<mp-html :content="news.content"></mp-html>
		</view>
		<view class="footer">
			<text>阅读 {{news.view_count}}</text>
		</view>
	</view>

</template>

<script setup>

import {ref} from "vue";

	import {onLoad} from '@dcloudio/uni-app'
	import { apiNoticeDetail } from "../../api/apis";
	const news = ref({})
	onLoad(({id})=>{
		apiNoticeDetail({id}).then(res=>{
			news.value = res.data
		})
	})

</script>

<style lang="scss" scoped>
.noticeLayout {
	padding: 10rpx;
	.title-header {
		display: flex;
		padding-top: 10rpx;
		.title-tag {
			width: 100rpx;
			text-align: center;
			.uni-tag {
				font-size: 20rpx;
			}
		}
		.title {
			flex: 1;
			word-break: break-all;
			font-size: 38rpx;
			margin-left: 10rpx;
		}
	}
	.info {
		color: #999;
		display: flex;
		margin: 20rpx 10rpx;
		font-size: 24rpx;
		.author {
			margin-right: 20rpx;
		}
	}
	.content {

	}
	.footer {
		color: #999;
		margin-top: 10rpx;
		font-size: 24rpx;
	}
}
</style>
9.4.搜索页面布局及结合数据缓存展示搜索历史&对接搜索接口预览搜索结果
1、使用扩展组件uni-search-bar,uv-empty
2、完成搜索,加载数据,
3、点击搜索到的壁纸,进入预览
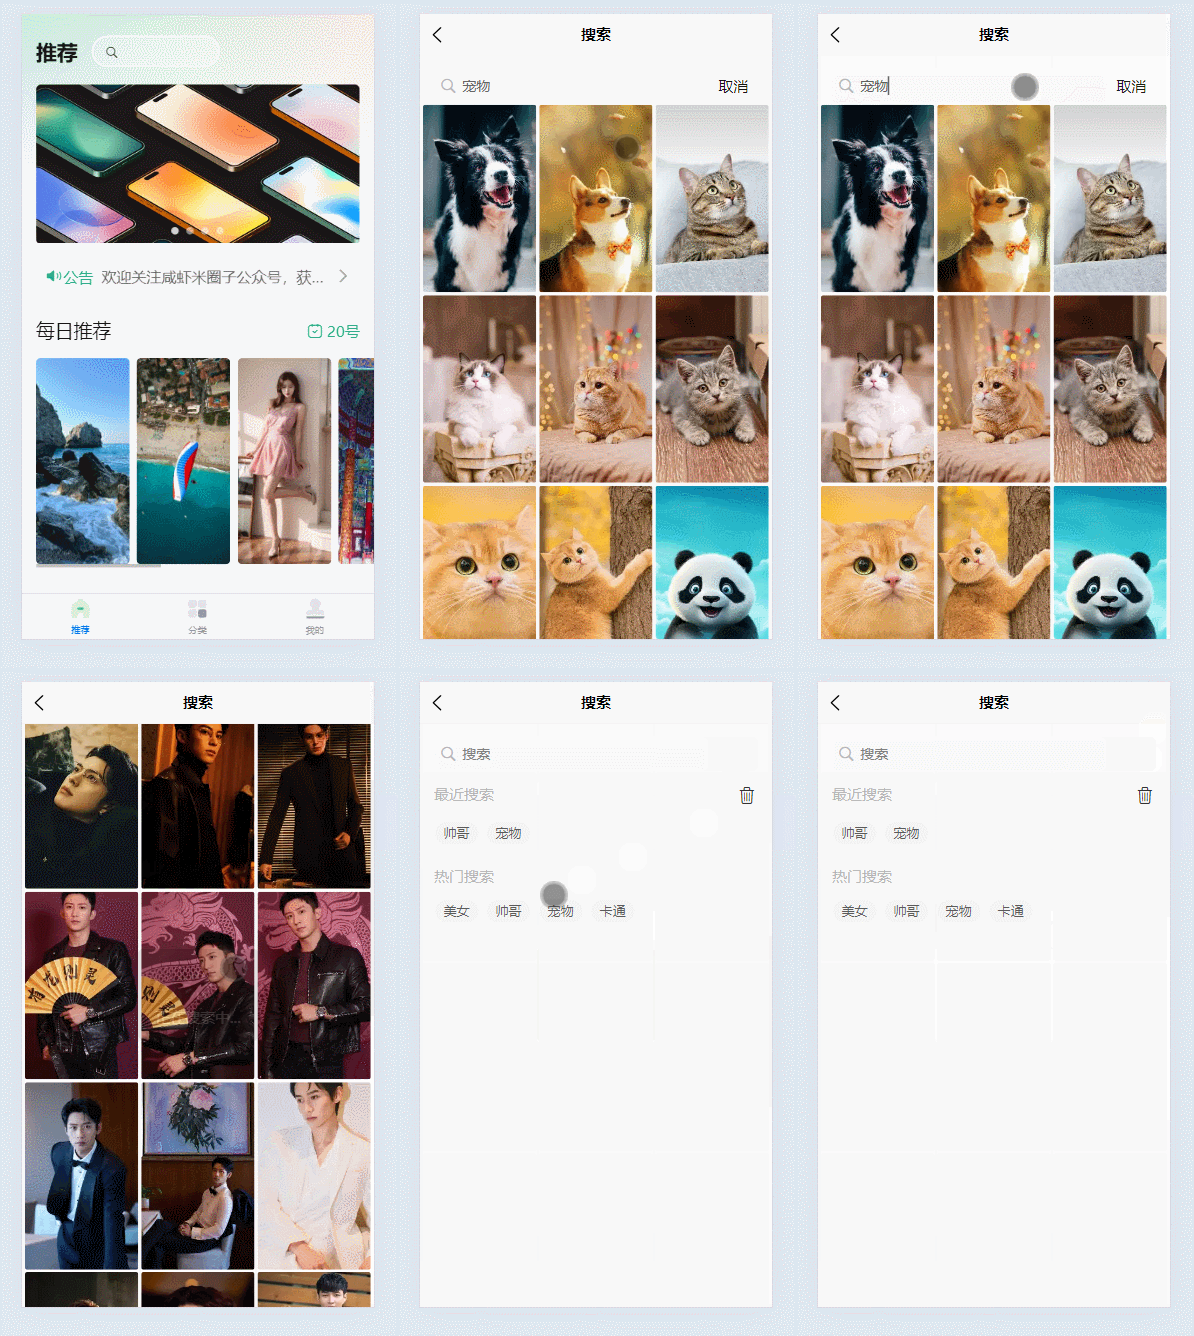
html
<template>
	<view class="searchLayout">

		<view class="search-part">

			<div class="ipt-container">
				<view class="ipt-area">
					<uni-icons class="uni-icons" type="search" size="20" color="#b7b6bb"></uni-icons>
					<input v-model="queryParam.keyword" confirm-type="search" @confirm="handleConfirm" class="ipt" type="text" placeholder="搜索"/>
				</view>
				<view class="text" @click="cancelSearch" v-show="isSearch">
					取消
				</view>
			</div>

			<view class="history" v-show="historys.length > 0 && !isSearch">
				<view class="search-title">
					<view class="title">最近搜索</view>
					<uni-icons @click="removeHistorys" type="trash" size="24"></uni-icons>
				</view>
				<view class="search-content">
					<view @click="clickItem(history)" v-for="history in historys" :key="history">{{history}}</view>
				</view>
			</view>

			<view class="hot" v-show="!isSearch">
				<view class="search-title">
					<view class="title">热门搜索</view>
				</view>
				<view class="search-content">
					<view v-for="hot in hots" :key="hot" @click="clickItem(hot)">{{hot}}</view>
				</view>
			</view>


		</view>

		<view class="content-wrapper" v-show="isSearch">
			<uv-empty mode="search" icon="http://cdn.uviewui.com/uview/empty/search.png" v-if="noData"></uv-empty>
			<view class="content" v-else>
				<view class="item" v-for="wall in wallList" :key="wall._id" @click="goPreview(wall._id)">
					<image class="image" :src="wall.smallPicurl" mode="aspectFill"></image>
				</view>
			</view>
			<view v-if="!noData">
				<uni-load-more :status="loadingStatus" :content-text="{contentrefresh:'正在加载中...',contentdown:'加载更多',contentnomore:'无更多数据了'}"></uni-load-more>
			</view>
			<view class="safe-area-inset-bottom"></view>
		</view>

	</view>
</template>

<script setup>

import {ref} from "vue";
import {apiSearchData} from '@/api/apis.js'
import {onReachBottom, onUnload } from '@dcloudio/uni-app'

// 查询关键字
const queryParam = ref({
	pageNum: 1,
	pageSize: 12,
	keyword: ''
})
// 查询历史记录
const historys = ref([])
// 热词搜索
const hots = ref(['美女','帅哥','宠物','卡通'])
// 壁纸查询结果
const wallList = ref([])
// 标记正在搜索中
const isSearch = ref(false)
// 标记查询没有结果
const noData = ref(false)
// 标记还有更多数据可供继续查询
const hasMoreData = ref(true)
// 加载状态
const loadingStatus = ref('loading')

historys.value = uni.getStorageSync('historys') || []

function handleConfirm() {
	if(!queryParam.value.keyword) {
		uni.showToast({
			title:'请输入内容',
			icon: 'error'
		})
		return
	}
	let existingIndex = historys.value.findIndex(item => item === queryParam.value.keyword)
	if(existingIndex != -1) {
		historys.value.splice(existingIndex, 1)
	}
	historys.value.unshift(queryParam.value.keyword)
	if(historys.value.length > 10) {
		historys.value.splice(10)
	}
	uni.setStorageSync('historys', historys.value)
	// 标记正在搜索
	isSearch.value = true
	noData.value = false
	hasMoreData.value  = true
	wallList.value = []
	queryParam.value.pageNum = 1
	loadingStatus.value = 'loading'
	doSearch()

}

async function doSearch() {
	let stopLoading = true
	try {
		uni.showLoading({
			title:'正在搜索中...',
			mask:true
		})
		let res = await apiSearchData(queryParam.value)
		if(res.data.length === 0) {
			hasMoreData.value = false
			if(queryParam.value.pageNum === 1) {
				noData.value = true
			} else {
				uni.hideLoading()
				stopLoading = false
				uni.showToast({
					title:'没有更多数据了',
					icon: 'error'
				})
			}
			loadingStatus.value = 'noMore'
		} else {
			wallList.value = [...wallList.value, ...res.data]
			loadingStatus.value = 'more'
			uni.setStorageSync('storagePicList', wallList.value)
		}
	} finally {
		if(stopLoading) {
			uni.hideLoading()
		}
	}
}

function clickItem(history) {
	queryParam.value.keyword = history
	queryParam.value.pageNum = 1
	queryParam.value.pageSize = 12
	handleConfirm()
}

// 取消搜索
function cancelSearch() {
	isSearch.value = false
	queryParam.value.keyword = ''
	wallList.value = []
}

onReachBottom(()=>{

	if(isSearch.value && hasMoreData.value) {
		queryParam.value.pageNum++
		doSearch()
	}

})

function removeHistorys() {
	uni.showModal({
		title:'删除',
		content: '确认要删除所有历史搜索吗?',
		success(res) {
			if(res.confirm) {
				uni.removeStorageSync('historys')
				historys.value = []
			} else {
				uni.showToast({
					title:'下次别乱点哦,知道了吗~',
					icon: 'loading'
				})
			}
		}
	})
}

function goPreview(id) {
	uni.navigateTo({
		url: '/pages/preview/preview?id=' + id
	})
}

//关闭时清空缓存
onUnload(()=>{
	uni.removeStorageSync("storagePicList");
	uni.removeStorageSync('historys')
})
</script>

<style lang="scss" scoped>
.search-part {
	margin-left: 30rpx;
	margin-right: 30rpx;
}
.searchLayout {
	padding-top: 30rpx;
	.ipt-container {
		display: flex;
		align-items: center;
		.text {
			padding: 0 20rpx;
			color: #151515;
		}
		.ipt-area {
			position: relative;
			flex: 1;
			.uni-icons {
				position: absolute;
				top: 15rpx;
				left: 10rpx;
			}
			.ipt {
				background-color: #f8f8f8;
				line-height: 70rpx;
				color: #666;
				height: 70rpx;
				padding: 0 60rpx;
				border-radius: 10rpx;
				font-size: 30rpx;
			}
		}
	}

	.search-title {
		padding: 30rpx 0;
		display: flex;
		justify-content: space-between;
		.title {
			color: #b5b5b5;
		}
	}
	.search-content {
		display: flex;
		flex-wrap: wrap;
		&>view {
			padding: 6rpx 20rpx;
			background-color: #f4f4f4;
			border-radius: 40rpx;
			margin: 0 15rpx 15rpx 0;
			color: #5b5b5b;
			font-size: 28rpx;
			word-break: break-all;
			max-width: 200rpx;
			max-height: 60rpx;
			overflow: hidden;
			text-overflow: ellipsis;
			white-space: nowrap;
		}
	}

	.content-wrapper {
		padding: 0 6rpx;
		margin-top: 6rpx;
		.content {
			display: grid;
			grid-template-columns: repeat(3, 1fr);
			gap: 6rpx;
			.image {
				width: 100%;
				height: 200px;
				display: block;
				border-radius: 5rpx;
			}
		}
	}
}
</style>
9.6.banner中navigator组件跳转到其他小程序及bug解决
1、首页banner跳转到其它小程序
html
<view class="banner">
    <swiper circular indicator-dots
            indicator-color="rgba(255,255,255,0.5)"
            indicator-active-color="#fff"
            autoplay>
        <swiper-item v-for="item in bannerList" :key="item._id">

            <!-- 跳转到其它小程序 -->
            <navigator v-if="item.target == 'miniProgram'"
                       :url="item.url"
                       target="miniProgram"
                       :app-id="item.appid">
                <image :src="item.picurl" mode="aspectFill"></image>
            </navigator>

            <!-- 跳转到当前小程序的其它页面 -->
            <navigator v-else
                       :url="`/pages/classlist/classlist?${item.url}`">
                <image :src="item.picurl" mode="aspectFill"></image>
            </navigator>

        </swiper-item>
    </swiper>
</view>
2、首页专题精选,点击More+跳转到分类页(tabBar页面)
html
<view class="theme">

    <common-title>
        <template #name>
            <text>专题精选</text>
        </template>
        <template #custom>
            <navigator url="/pages/classify/classify"
                       open-type="reLaunch" class="more">
                More+
            </navigator>
        </template>
    </common-title>

    <view class="content">
        <theme-item v-for="item in classifyList"
                    :item="item"
                    :key="item._id">
        </theme-item>
        <theme-item :isMore="true"></theme-item>
    </view>
</view>
十、多个常见平台的打包上线
10.1.打包发行微信小程序的上线全流程
注册地址:https://mp.weixin.qq.com/
1、注册小程序账号:https://mp.weixin.qq.com/
2、登录后,来到账号设置
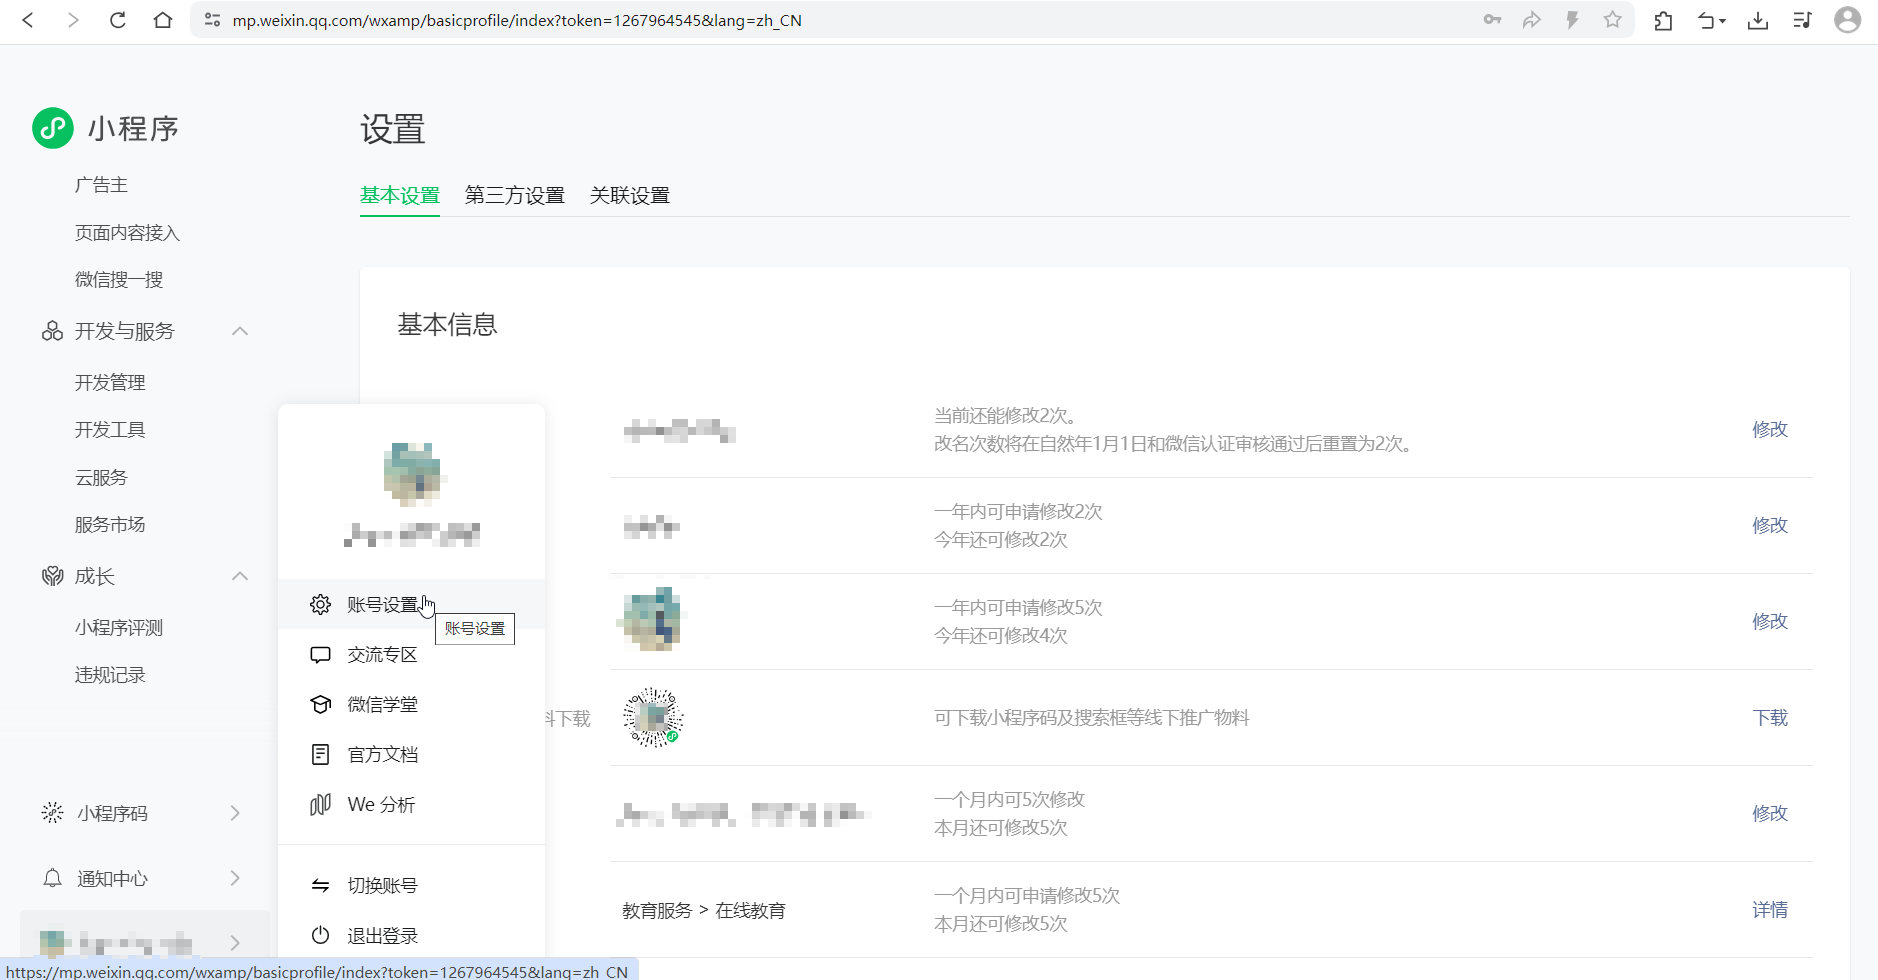
3、点击设置下面的去认证,扫码支付30元。点击备案,完成个人备案。
4、进入开发管理,可以获取到appid。设置服务器request合法域名,设置download合法域名。
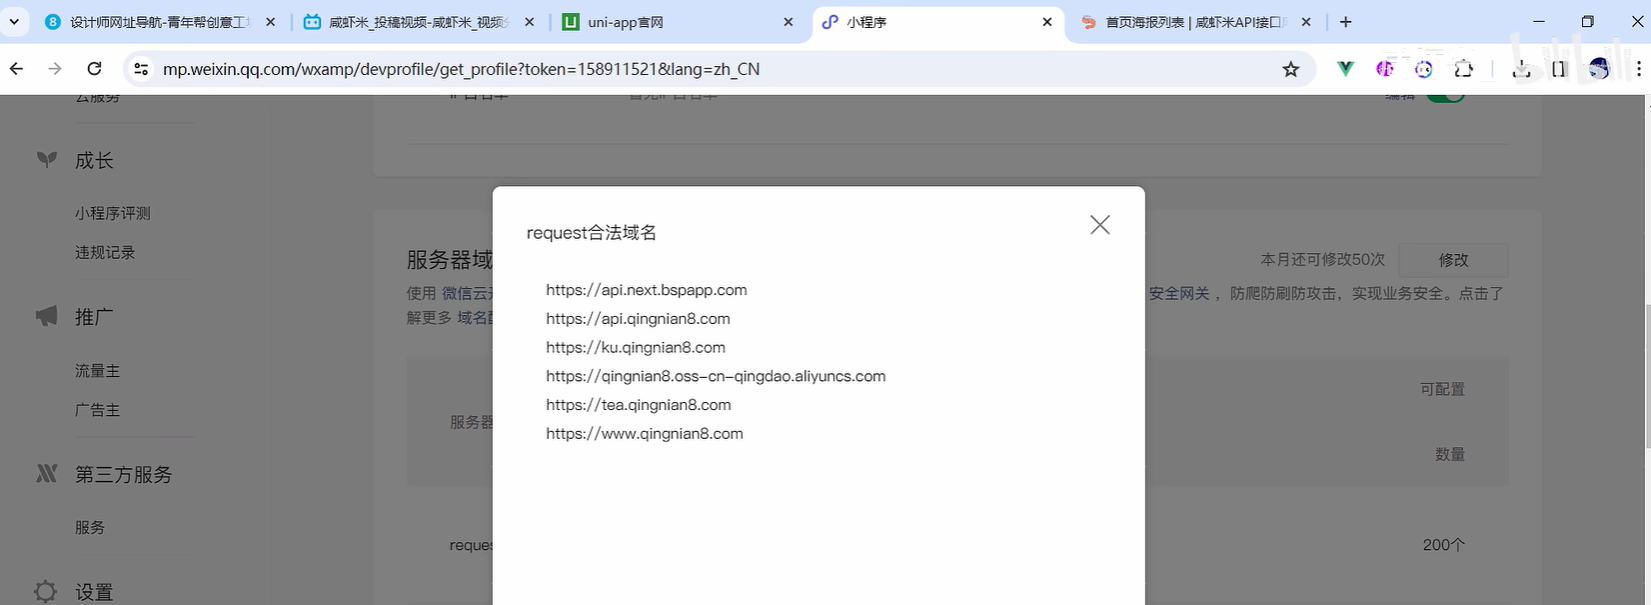
5、来到hbuilder,点击mainfest.json,选择微信小程序,填写appid,并勾选上传代码时自动压缩。
6、点击发行,选择小程序-微信,填写名称和appid,点击发行。此时会自动打开微信小程序,并且打的包在hbuilder的根目录下,unpackage/dist/dev/mp-weixin中。来到微信小程序开发软件,点击上传,填写版本号,然后上传。上传成功之后,来到小程序后台管理->版本管理。点击提交审核。等待审核完成,后期可能需要继续来到这个页面手动点击审核完成,就会有1个线上版本。
10.2.打包抖音小程序条件编译抖音专属代码
开发平台地址:https://developer.open-douyin.com/
10.3.打包H5并发布上线到unicloud的前端网页托管
拓展阅读:uniCloud服务空间前端网页托管绑定自定义配置网站域名
1、来到mainfest.json,填写页面标题,路由模式选择hash,运行的基础路径填写/xxmwall/
2、点击发行,选择网站-PC Web或手机,等待打包完成。在unpackage/dist/build下会生成web目录,将这个目录更名为xxmwall,将此文件夹上传到unicloud服务空间中托管
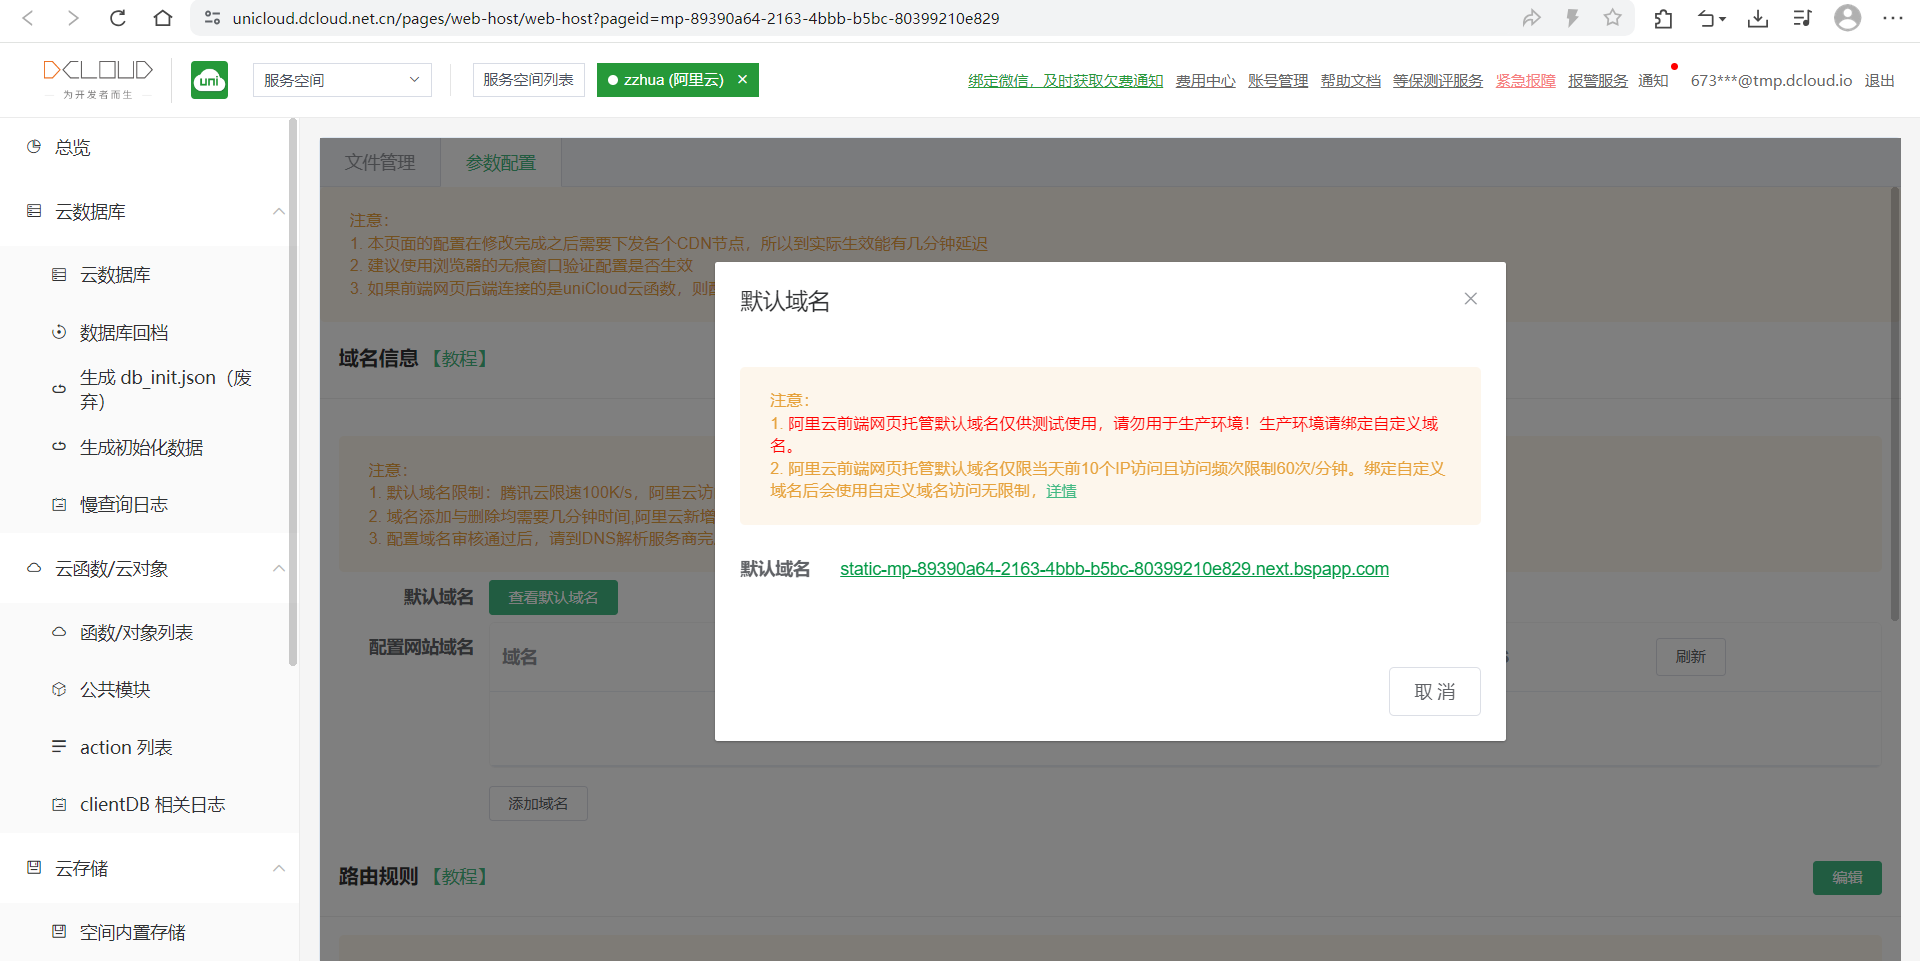
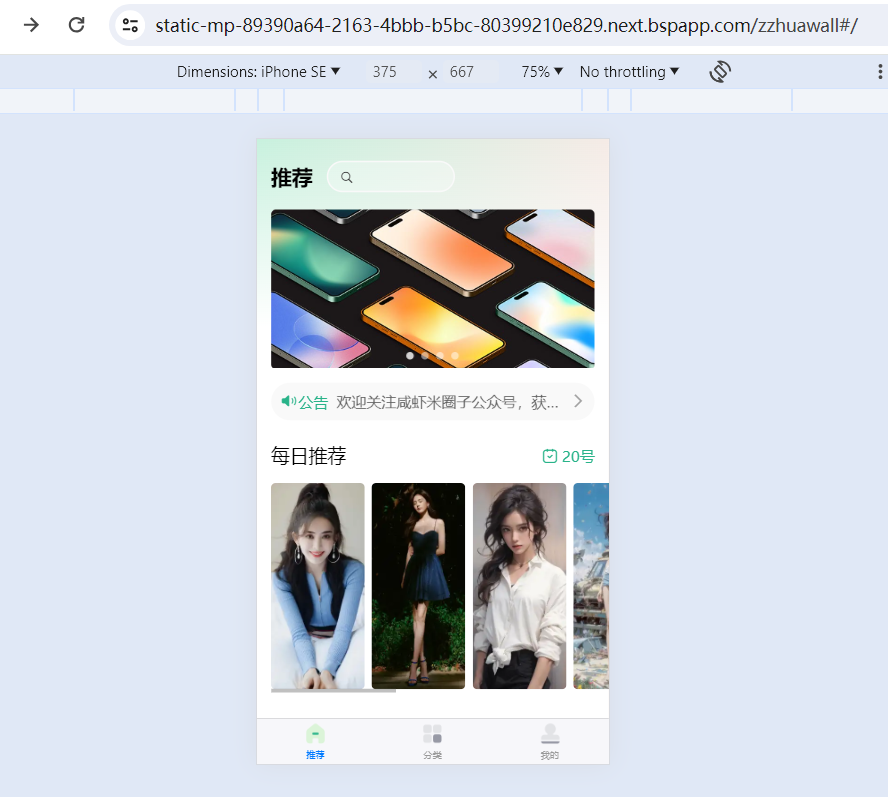
10.4.打包安卓APP并安装运行
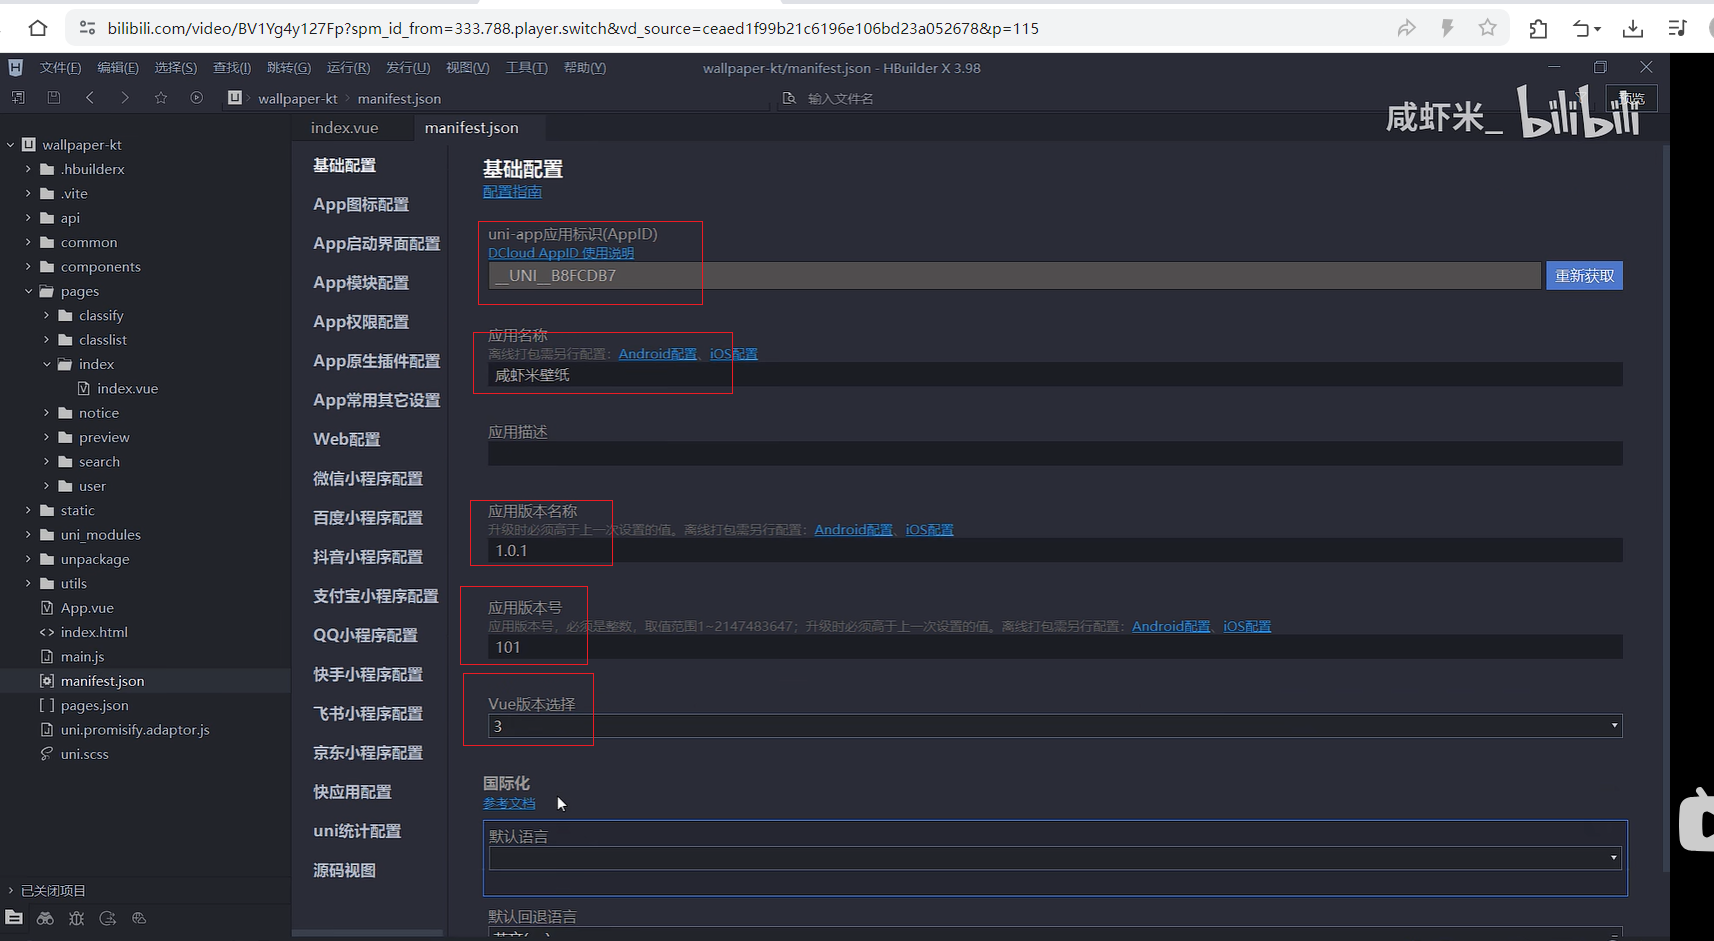
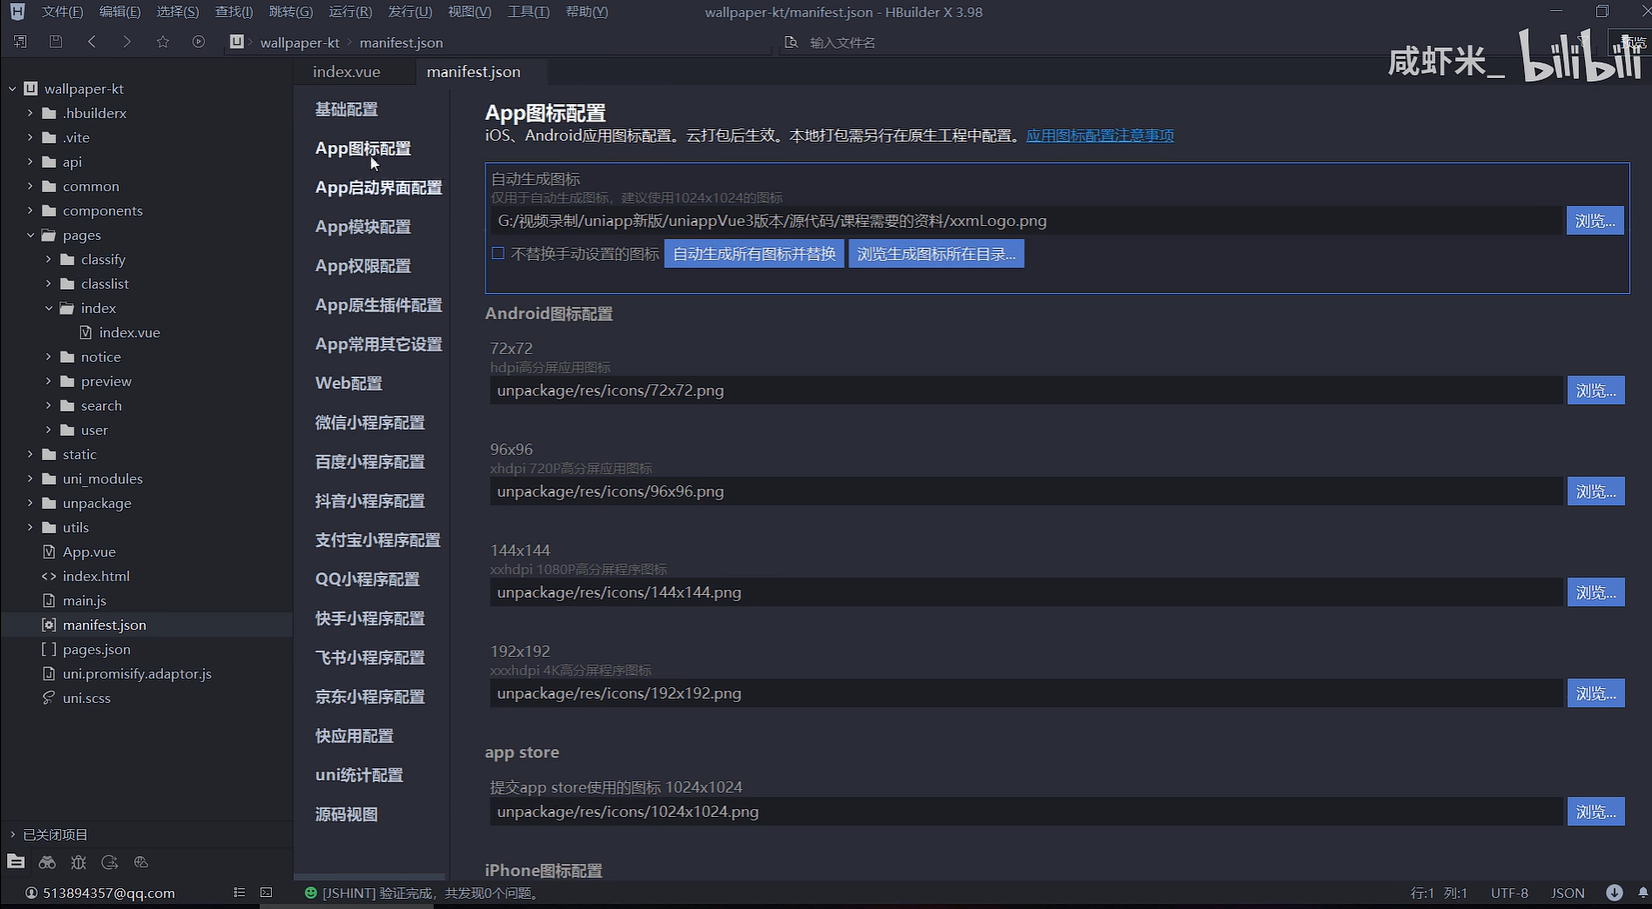
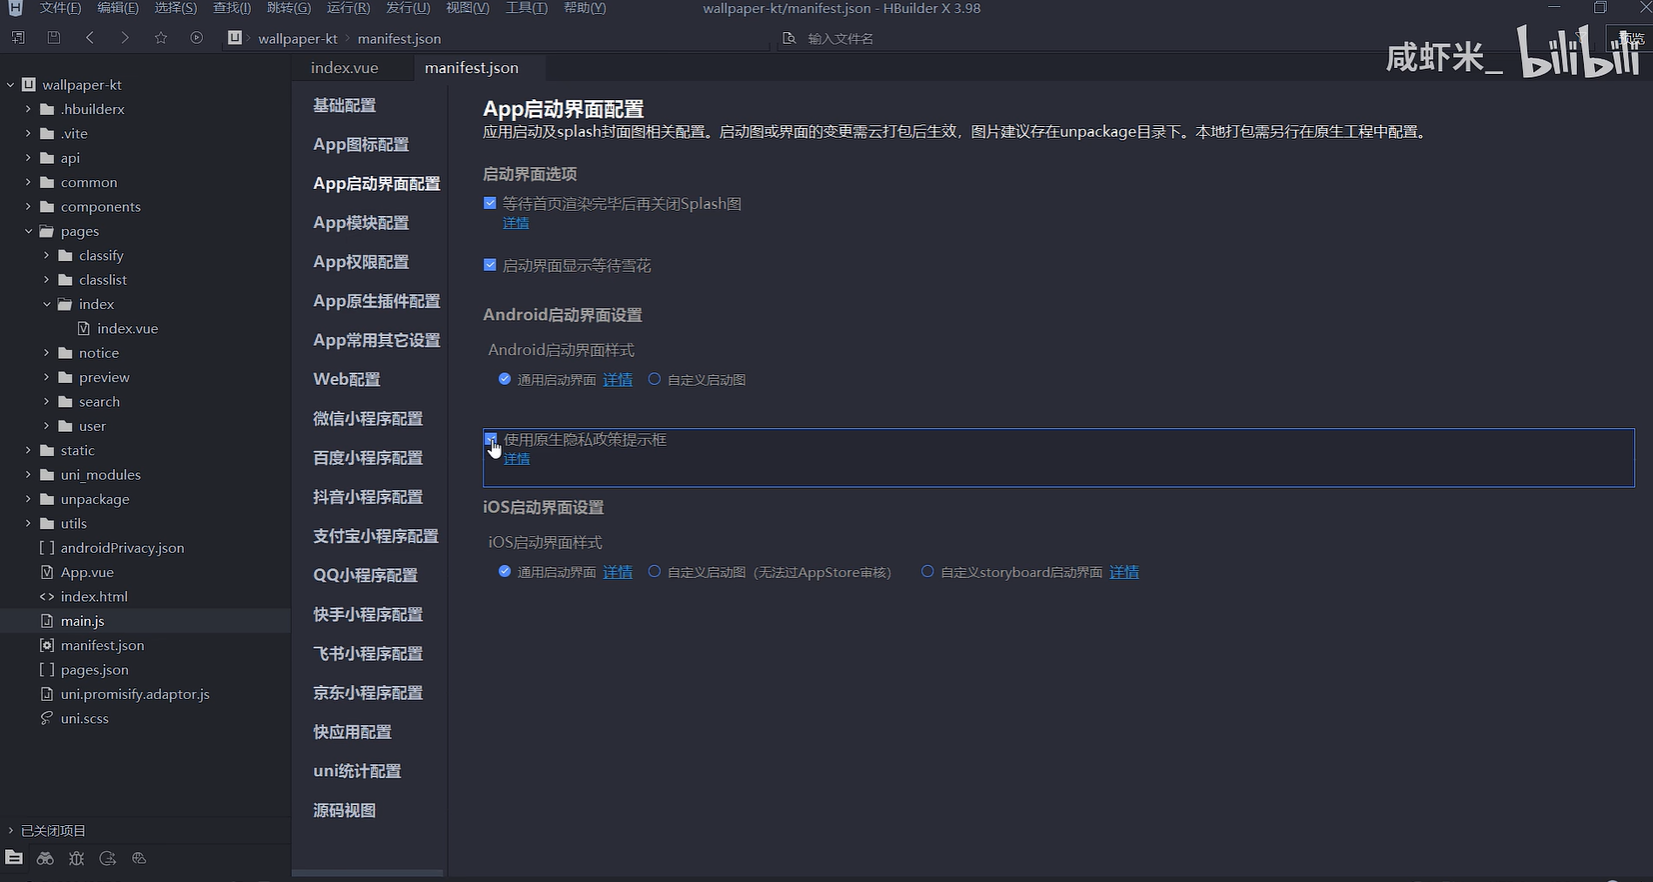
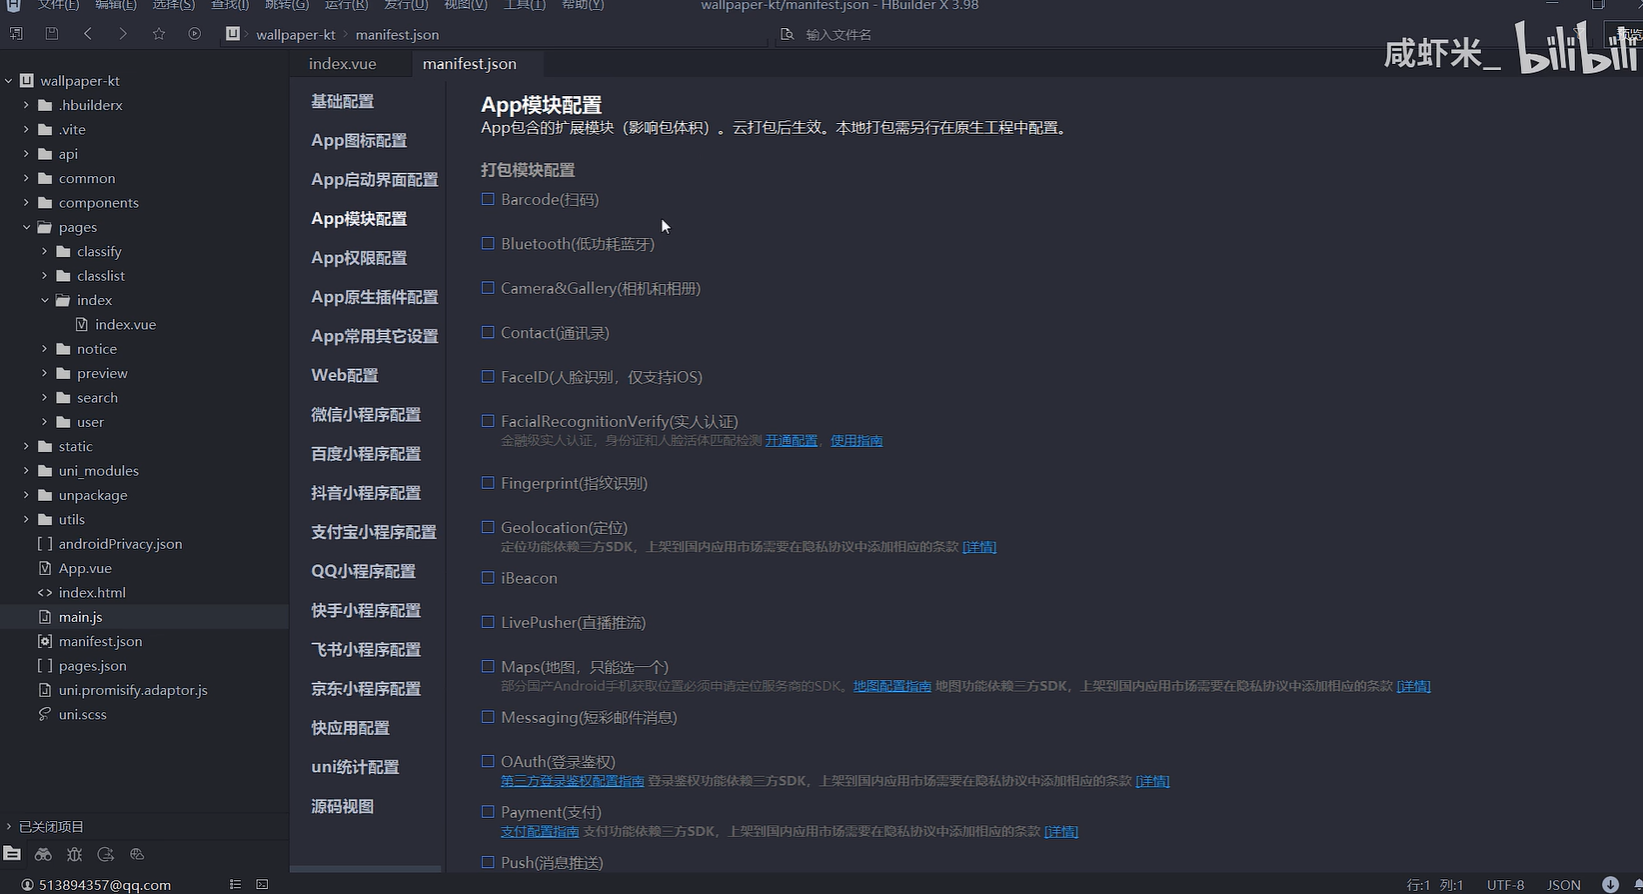
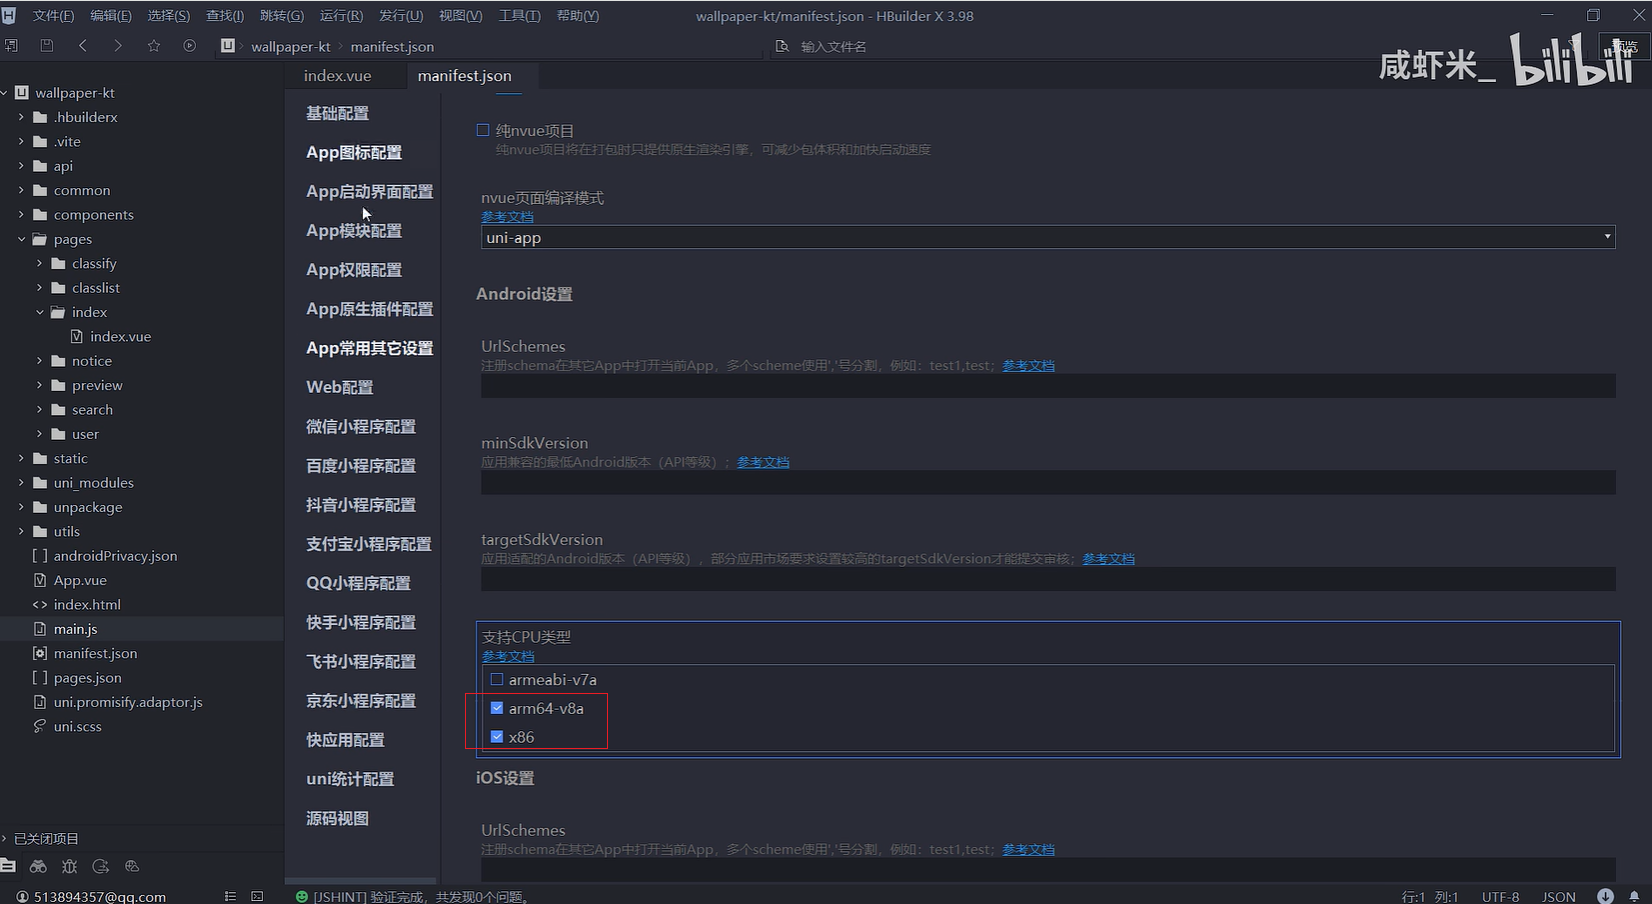
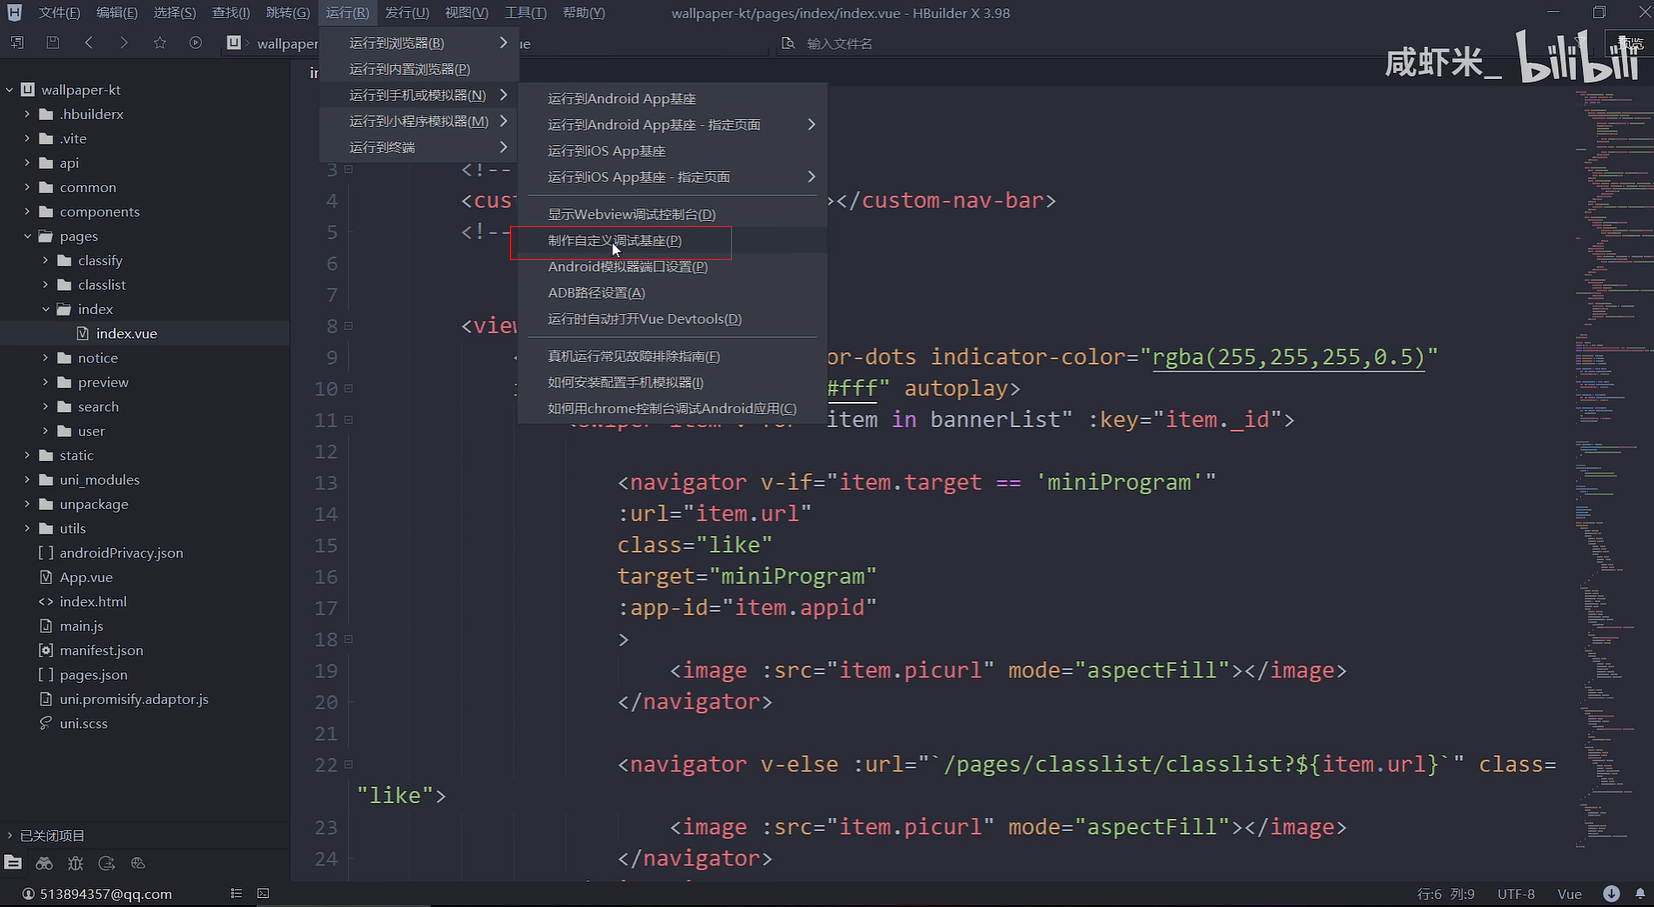
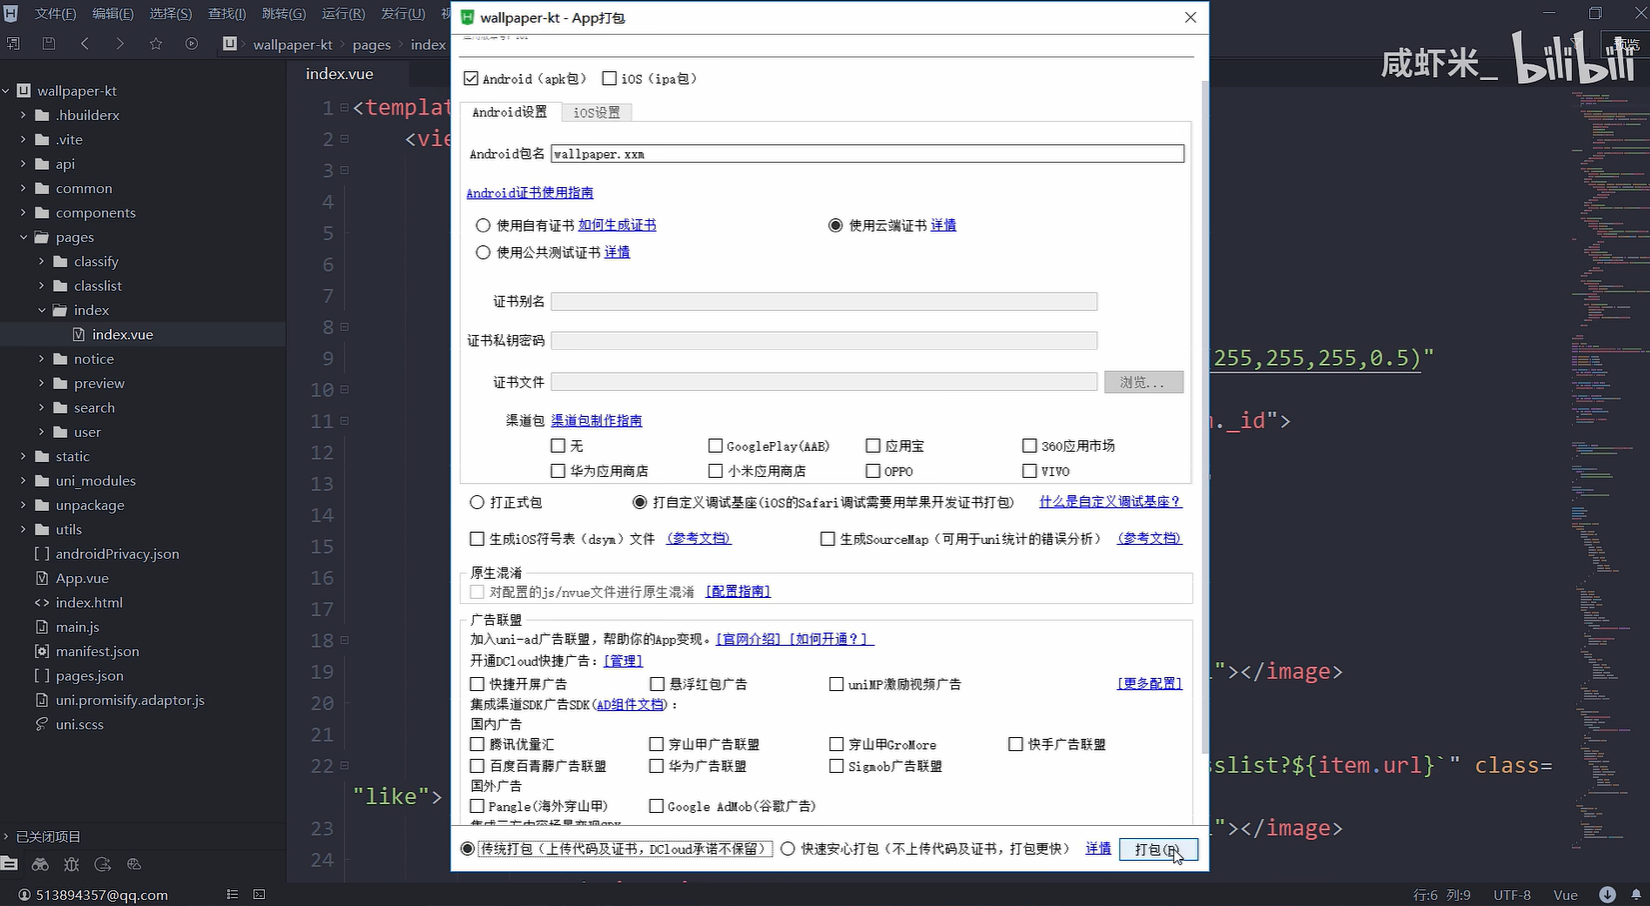
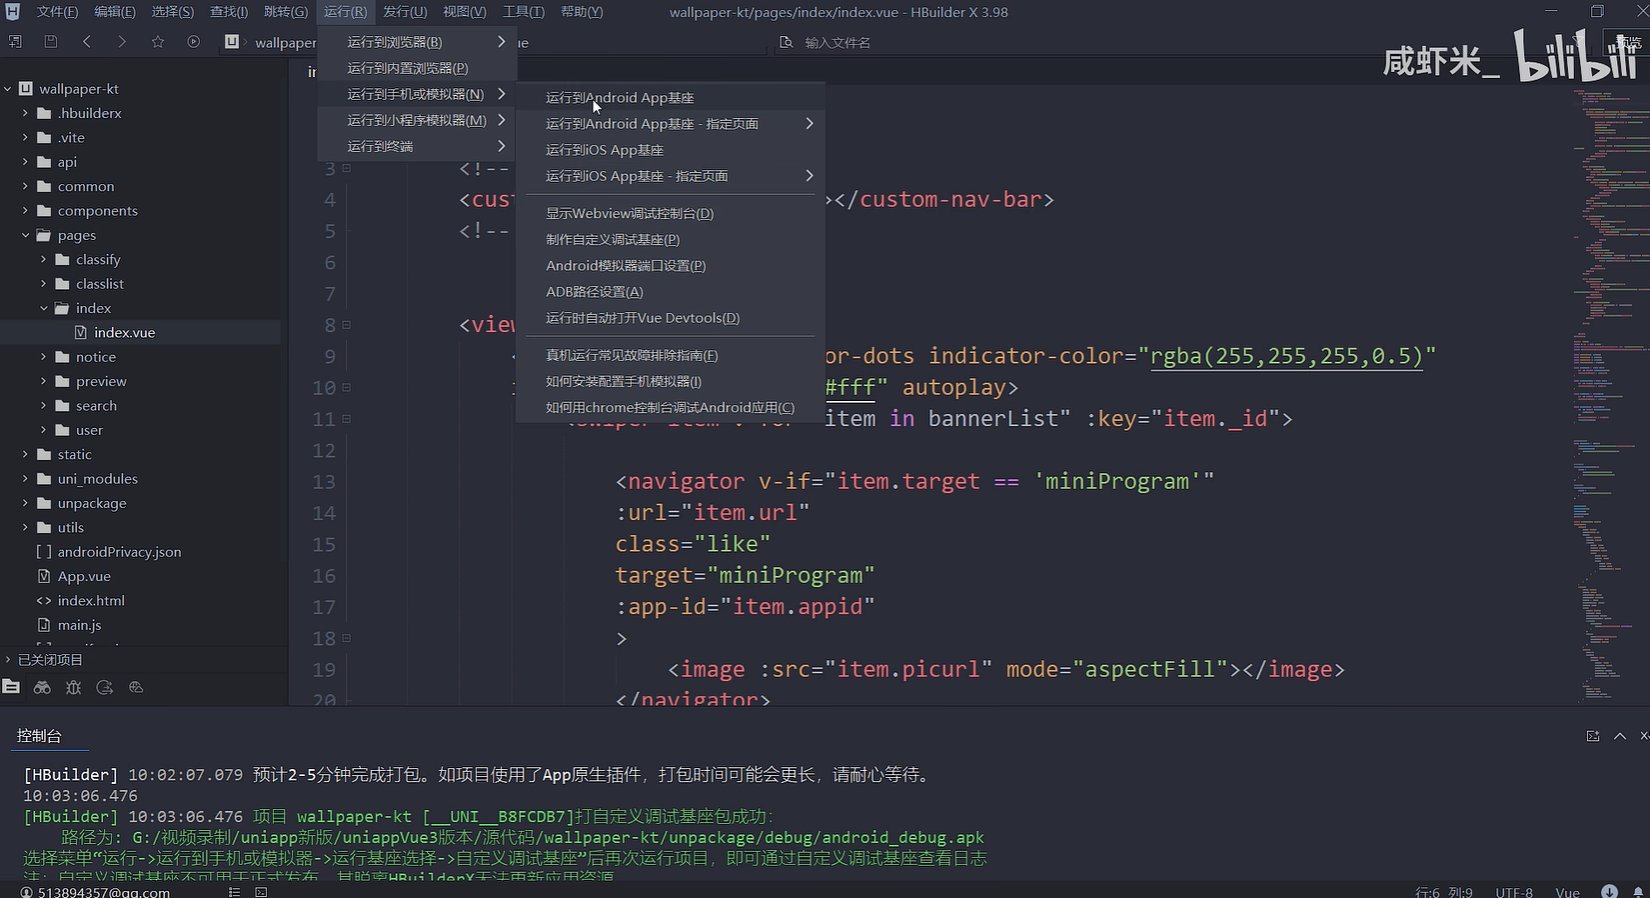
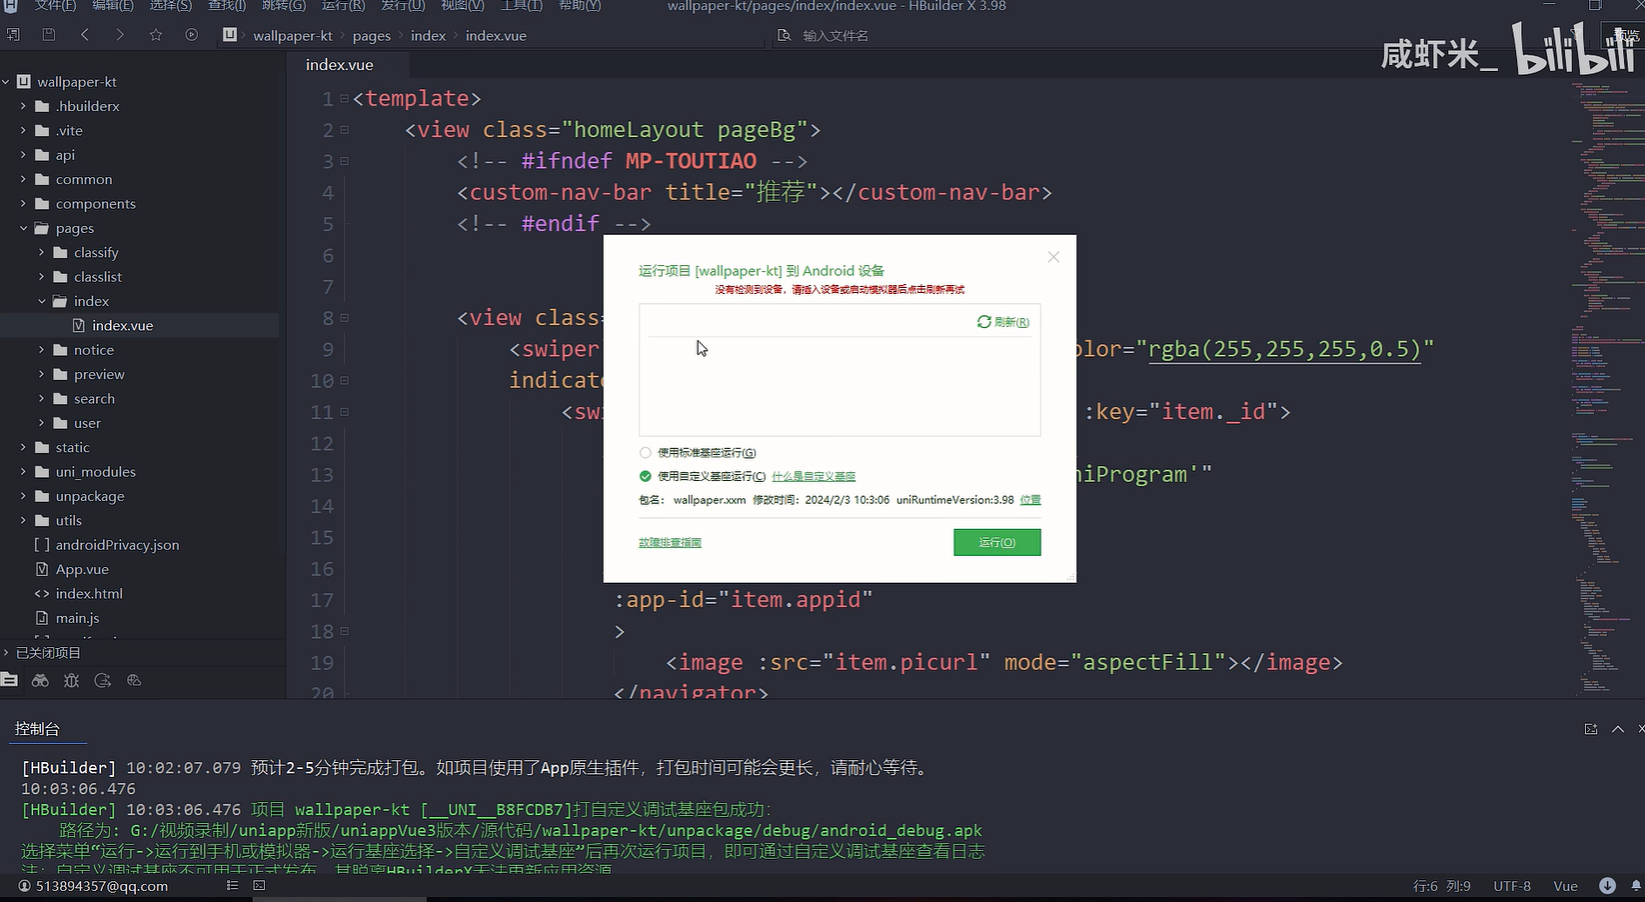
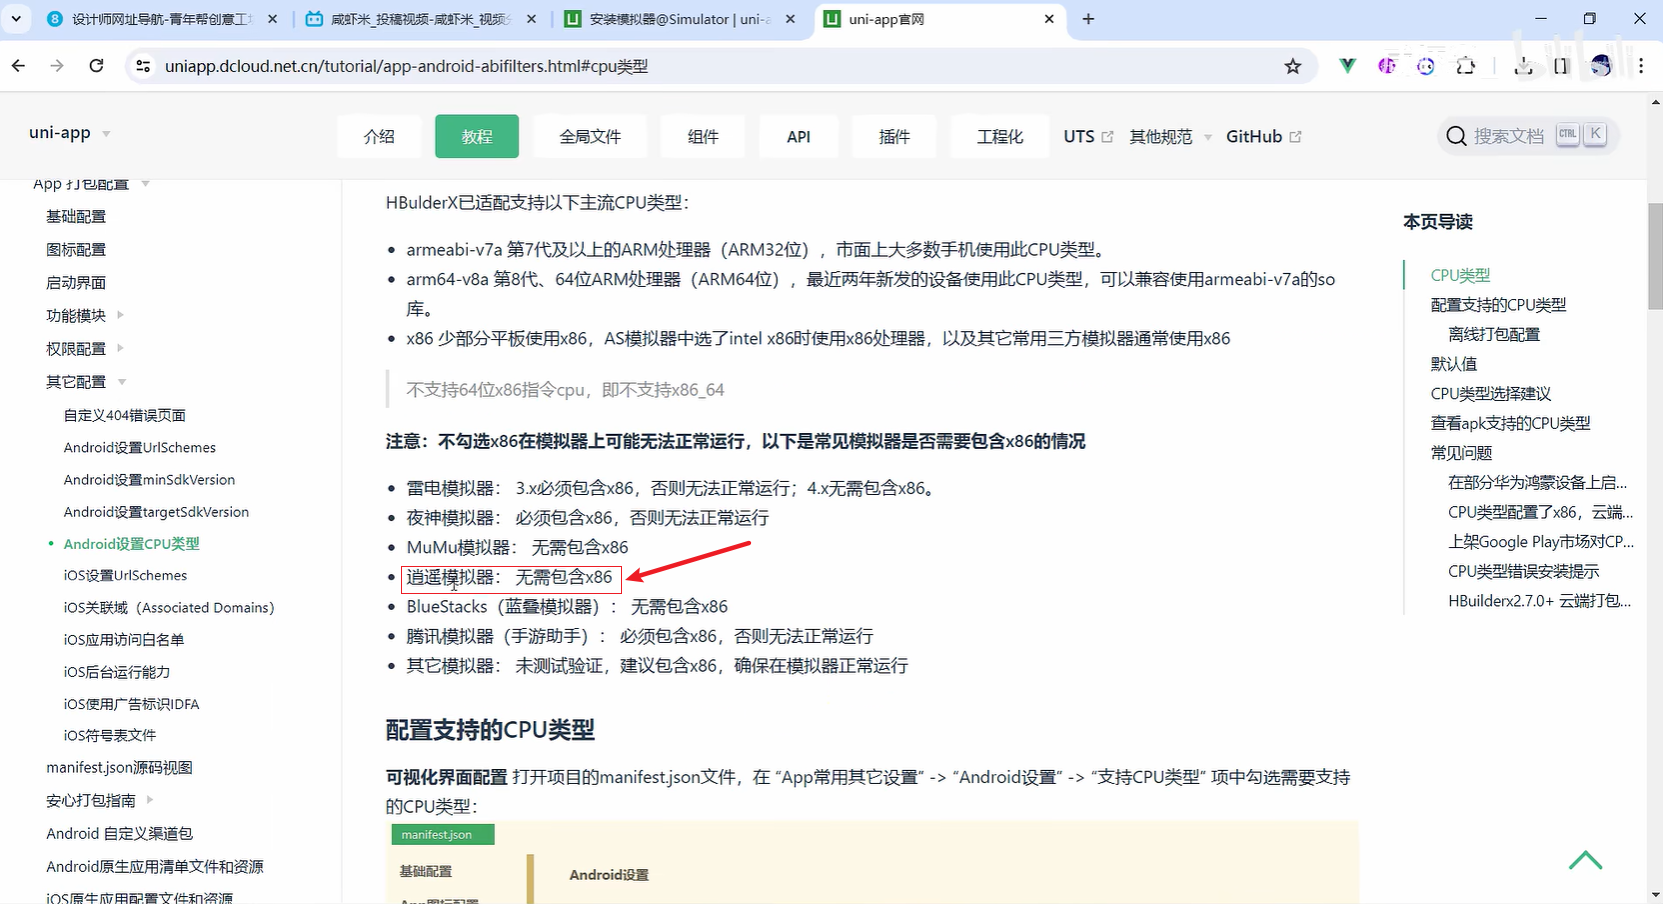
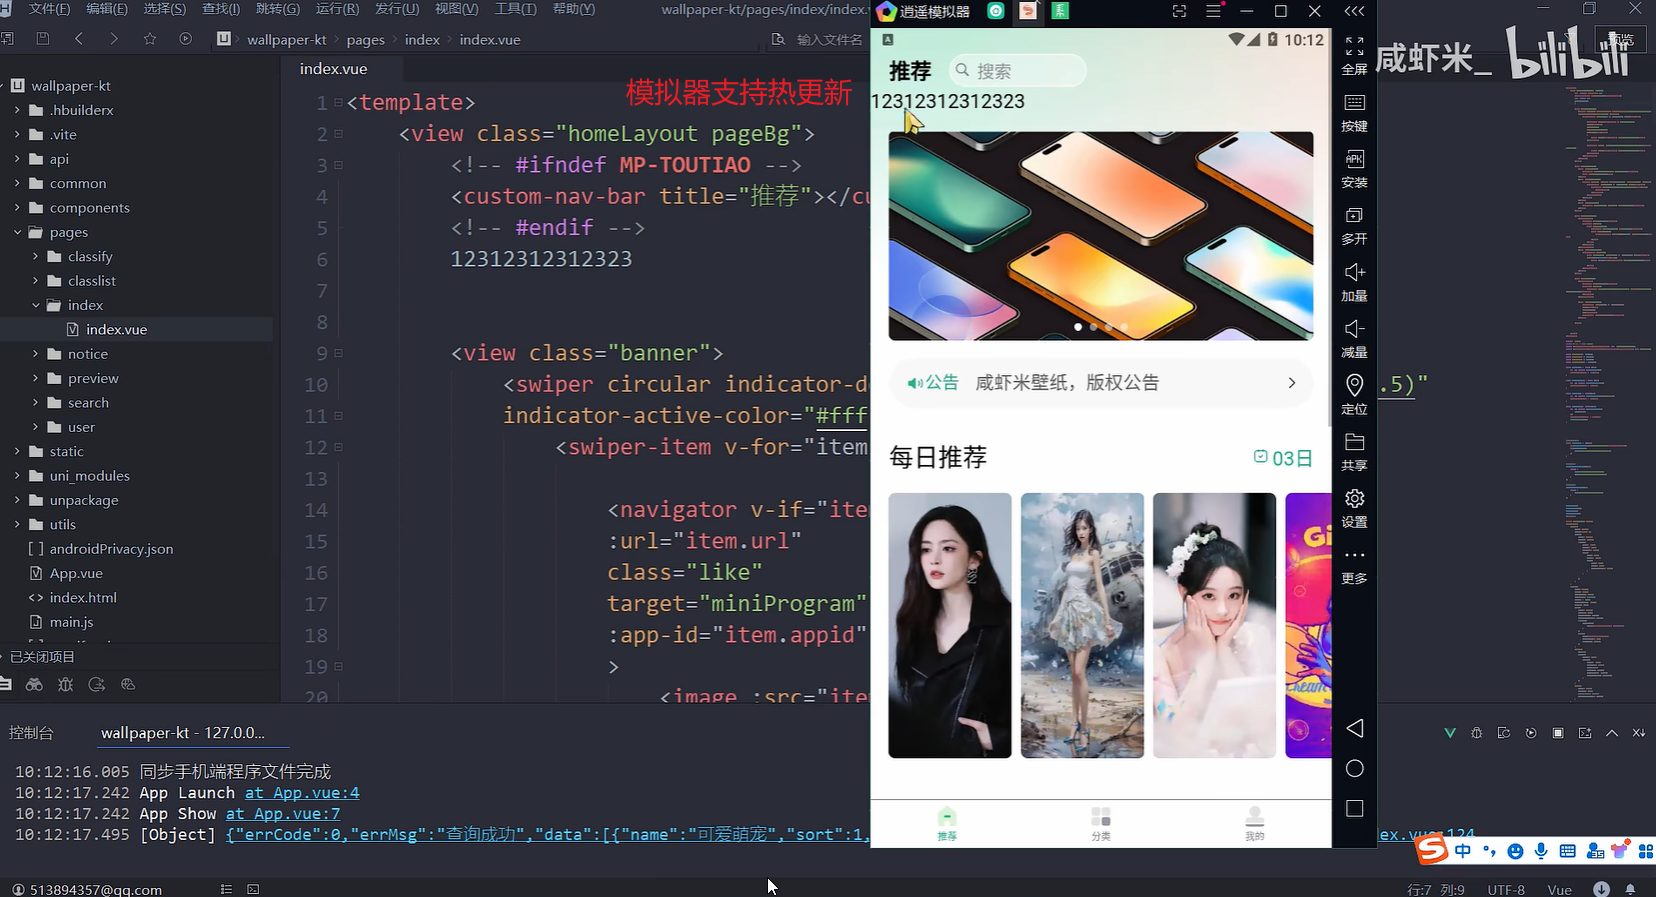
开始打正式包
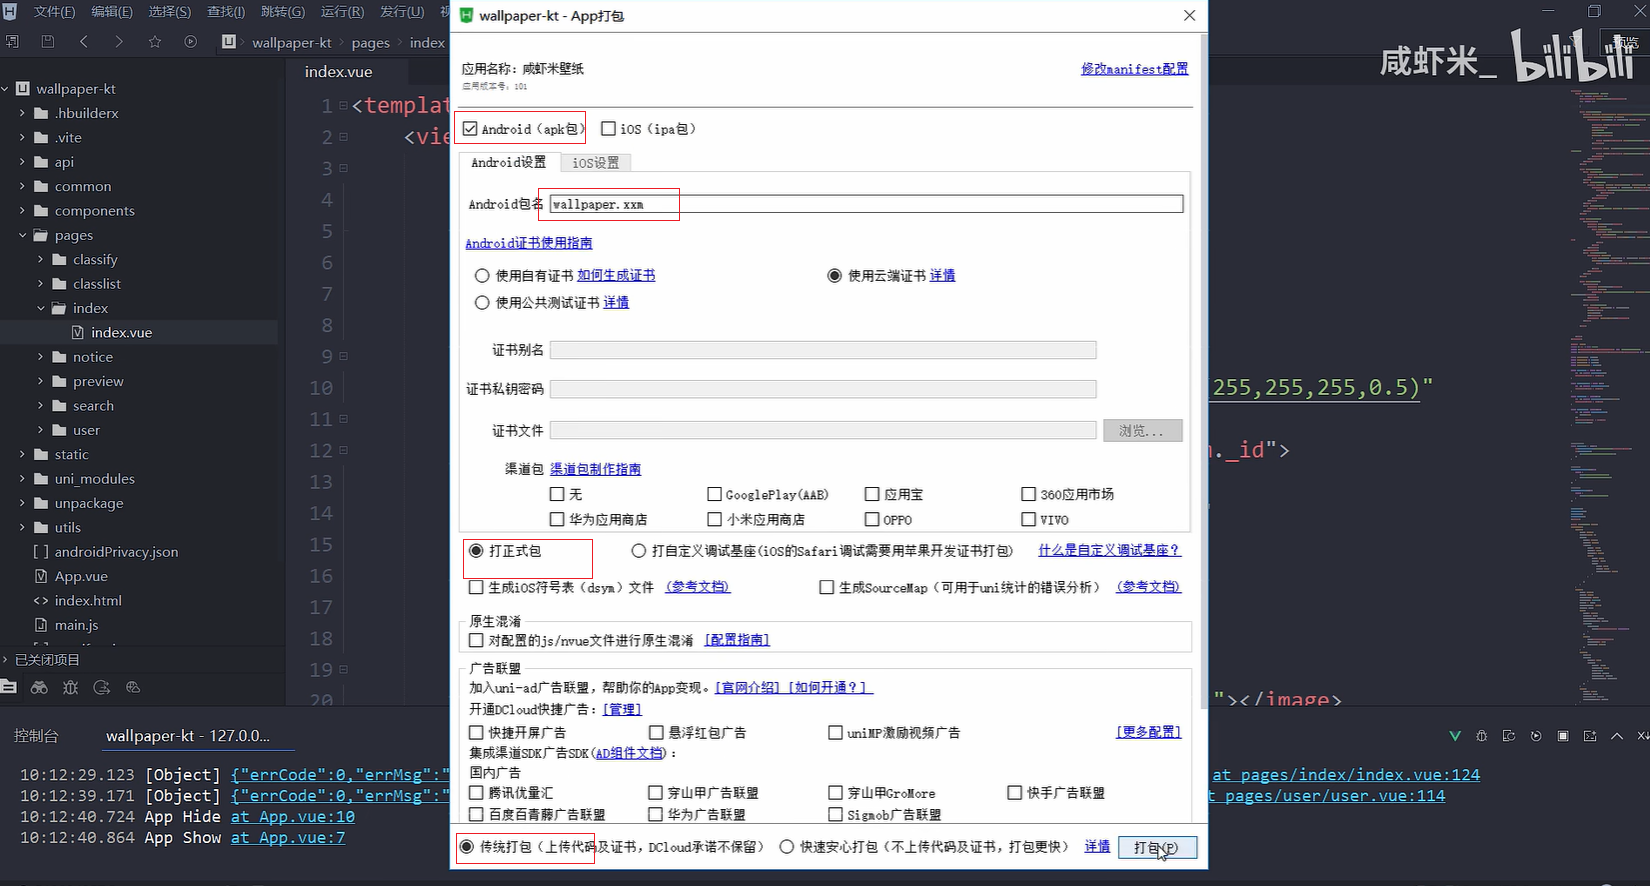
等待打包完成
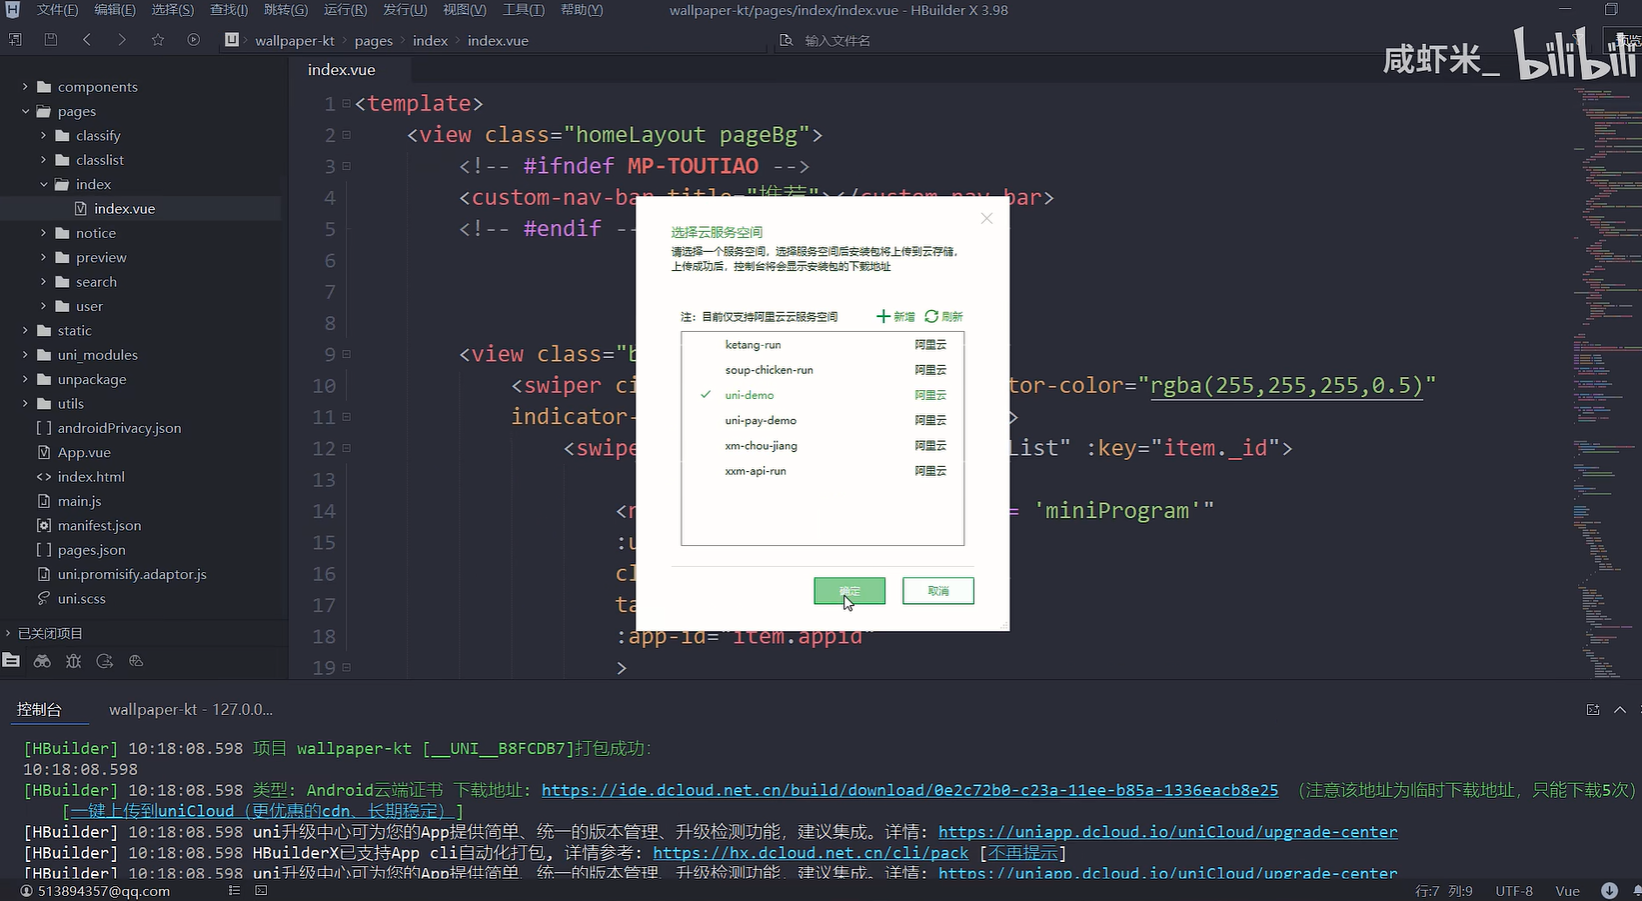
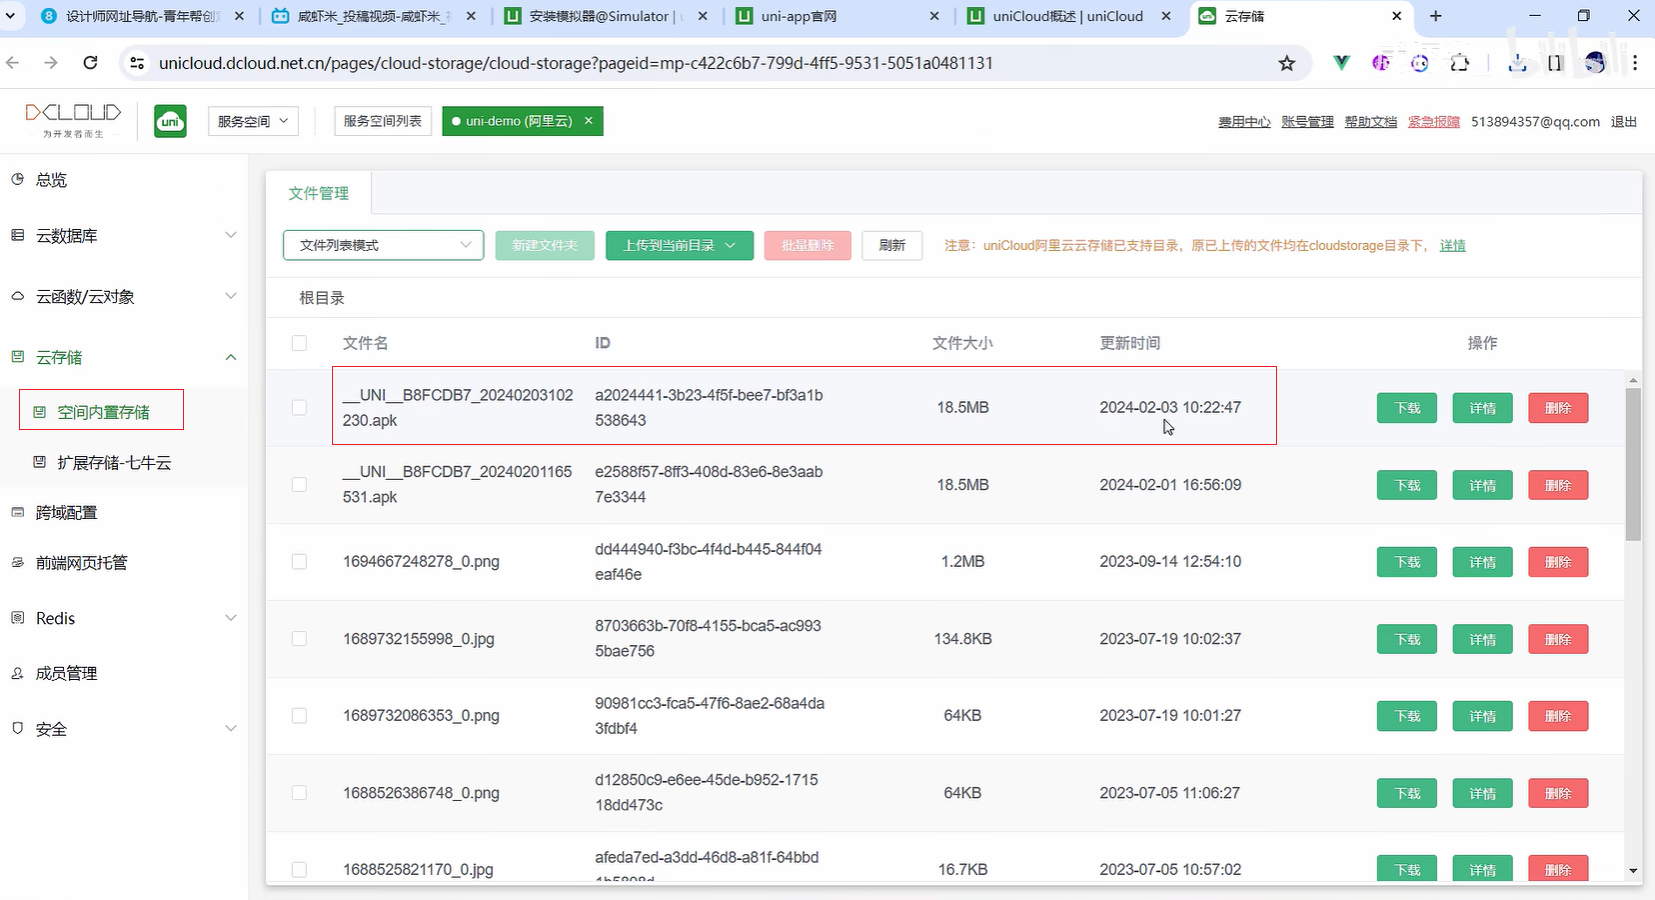
项目预览图


