文章目录
- [0. 引入问题](#0. 引入问题)
- [1. 父子组件传值](#1. 父子组件传值)
-
- [1.1 父传子:props](#1.1 父传子:props)
- [1.2 子传父:emit](#1.2 子传父:emit)
- [1.3 双向绑定:v-model](#1.3 双向绑定:v-model)
- [2. 多个参数传递](#2. 多个参数传递)
- [3. 父组件监听方法传递其他值](#3. 父组件监听方法传递其他值)
-
- [3.1 event](#3.1 event)
- [3.2 箭头方法](#3.2 箭头方法)
- [4. 子组件传递多个参数,父组件传递本地参数](#4. 子组件传递多个参数,父组件传递本地参数)
-
- [4.1 箭头函数 + ... 扩展运算符](#4.1 箭头函数 + … 扩展运算符)
- [4.2 箭头方法](#4.2 箭头方法)
- [5. 应用](#5. 应用)
0. 引入问题
使用组件 el-switch 时,需要监控按钮的点击,触发自定义方法。通过查看API,找到组件事件 change。
- change:switch 状态发生变化时的回调函数,回调参数是新状态的值
html
<template>
  <el-switch v-model="value" @change="changeOpen"> </el-switch>
</template>

<script>
export default {
  data() {
    return {
      value: true
    }
  },
  methods: {
    changeOpen(val) {
      console.log(val)
    }
  }
};
</script>
问题1 :自定义方法 changeOpen(val) 中 val 的值从何而来?
问题2 :如果需要给自定义方法 changeOpen 传其他值 怎么办?解决这些问题之前,先介绍下 Vue 组件间传值,更能理解。
1. 父子组件传值
1.1 父传子:props
父组件通过 props 传递数据,子组件接收并使用。
html
<!-- 父组件 -->
<ChildComponent :message="parentMessage" />

<script>
export default {
  components: {ChildComponent},
  data() {
    return { parentMessage: 'Hello from Parent!' }
  }
}
</script>

<!-- 子组件 -->
<template>
  <div>{{ message }}</div>
</template>

<script>
export default {
  props: ['message'] // 接收父组件传递的值
}
</script>
1.2 子传父:$emit
子组件通过 $emit 触发事件,父组件监听事件并处理。
html
<!-- 子组件 -->
<button @click="sendData">传递数据</button>

<script>
export default {
  methods: {
    sendData() {
      this.$emit('child-event', { data: 'Data from child' })
    }
  }
}
</script>

<!-- 父组件 -->
<ChildComponent @child-event="handleChildData" />

<script>
export default {
  components: {ChildComponent},
  methods: {
    handleChildData(payload) {
      console.log(payload.data) // Data from child
    }
  }
}
</script>
1.3 双向绑定:v-model
利用 v-model 简化父子组件的双向数据绑定。
html
<!-- 父组件 -->
<ChildComponent v-model="inputValue" />

<script>
export default {
  data() {
    return { inputValue: '默认值' }
  }
}
</script>

<!-- 子组件 -->
<template>
  <input :value="modelValue" @input="$emit('update:modelValue', $event.target.value)">
</template>

<script>
export default {
  props: ['modelValue']
}
</script>
v-model 本质上是 :value 和 @input 的 语法糖 。子组件需要接收 value 属性,并在数据变化时触发 input 事件传值给父组件。
学习了父子组件传值,我们再看 问题1 :自定义方法 changeOpen(val) 中 val 的值从何而来?
change 是组件 el-switch 状态发生变化时的回调函数,内部通过 $emit 将新状态的值传递给父组件。
父组件声明自定义方法 changeOpen 监听事件并处理。changeOpen(val) 中 val 的值即是子组件 $emit 传递的新状态的值。
2. 多个参数传递
通过对象或数组一次性传递多个值。
html
<!-- 子组件 Child.vue -->
<button @click="sendData">发送多个参数</button>

<script>
export default {
  methods: {
    sendData() {
      this.$emit('multi-data', '张三', 25, { city: '北京' });
    }
  }
}
</script>

<!-- 父组件 Parent.vue -->
<Child @multi-data="handleMultiData" />

<script>
export default {
  components: {Child},
  methods: {
    handleMultiData(name, age, info) {
      console.log(name, age, info.city); // 张三 25 北京
    }
  }
}
</script>
3. 父组件监听方法传递其他值
如果 changeOpen 方法需要传递其他参数呢?
html
<template>
  <el-switch v-model="value" @change="changeOpen(param)"> </el-switch>
</template>

<script>
export default {
  data() {
    return {
      value: true,
      param: '父组件参数'
    }
  },
  methods: {
    changeOpen(val) {
      console.log(val)
    }
  }
};
</script>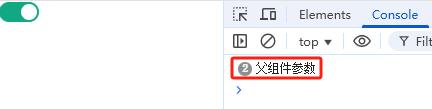
或者:
js
changeOpen(val, val2) {
  console.log(val)
  console.log(val2)
}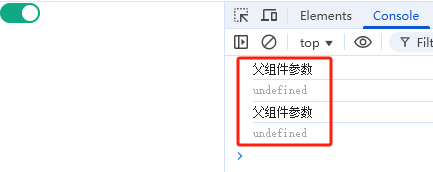
结果发现,@change="changeOpen(param)" 这种方式,参数 param 会覆盖子组件 $emit 传递的新状态的值。解决方案:
- $event
- 箭头方法:(形参1,形参2, ...) => 方法名(实参1,实参2, ...)
3.1 $event
$event 是 Vue 中一个特殊的对象,用于在组件之间传递事件信息。它包含有关触发事件的信息,例如:
- target:触发事件的元素
- type:事件的类型(例如,"click"、"input")
- preventDefault():阻止默认浏览器行为(例如,提交表单)
html
<template>
  <el-switch v-model="value" @change="changeOpen($event, param)"> </el-switch>
</template>

<script>
export default {
  data() {
    return {
      value: true,
      param: '父组件参数'
    }
  },
  methods: {
    changeOpen(val, val2) {
      console.log(val)
      console.log(val2)
    }
  }
};
</script>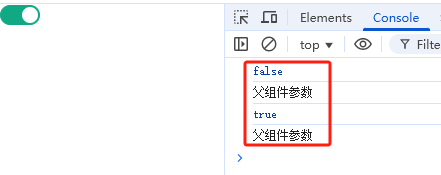
3.2 箭头方法
html
<template>
  <el-switch v-model="value" @change="(transParam, localParam) => changeOpen(transParam, param)"> </el-switch>
</template>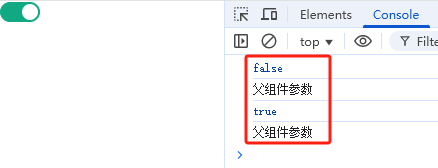
@change="(transParam, localParam) => changeOpen(transParam, param)" 中 transParam 代表子组件传递的参数,localParam 代表父组件自身传参,而且,父组件自身传参一定要放在子组件传递参数的后面。
⚠️注1:箭头方法中形参列表可以不声明本地参数。
html
<template>
  <el-switch v-model="value" @change="(transParam) => changeOpen(transParam, param)"> </el-switch>
</template>
上述写法也可以,形参 localParam 并不是必须的。
4. 子组件传递多个参数,父组件传递本地参数
如果子组件传递多个参数,父组件也需要传递本地参数,怎么操作?
4.1 箭头函数 + ... 扩展运算符
箭头函数 + ... 扩展运算符
html
<!-- 子组件 Child.vue -->
<button @click="sendData">发送多个参数</button>

<script>
export default {
  methods: {
    sendData() {
      this.$emit('multi-data', '张三', 25, { city: '北京' });
    }
  }
}
</script>

<!-- 父组件 Parent.vue -->
<Child @multi-data="(...event) => handleMultiData(event, param)" />

<script>
export default {
  components: {Child},
  data() {
    return {
      param: '父组件参数'
    }
  },
  methods: {
    handleMultiData(event, customParam) {
      console.log("event[0]=", event[0])
      console.log("event[1]=", event[1])
      console.log("event[2]=", event[2])
      console.log("customParam=", customParam)
    }
  }
}
</script>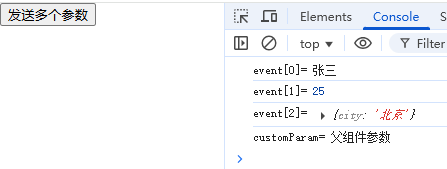
4.2 箭头方法
html
<!-- 子组件 Child.vue -->
<button @click="sendData">发送多个参数</button>

<script>
export default {
  methods: {
    sendData() {
      this.$emit('multi-data', '张三', 25, { city: '北京' });
    }
  }
}
</script>

<!-- 父组件 Parent.vue -->
<Child @multi-data="(transParam1, transParam2, transParam3, localParam) => handleMultiData(transParam1, transParam2, transParam3, param)" />

<script>
export default {
  components: {Child},
  data() {
    return {
      param: '父组件参数'
    }
  },
  methods: {
    handleMultiData(val1, val2, val3, val4) {
      console.log("val1=", val1)
      console.log("val2=", val2)
      console.log("val3=", val3)
      console.log("val4=", val4)
    }
  }
}
</script>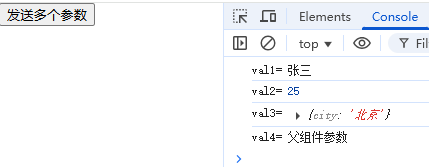
⚠️注1:箭头方法中形参列表可以不声明本地参数。
html
<Child @multi-data="(transParam1, transParam2, transParam3) => handleMultiData(transParam1, transParam2, transParam3, param)" />5. 应用
使用其他组件时,回调方法需要传递本地参数时。
示例 :点击组件 el-switch 按钮,触发自定义方法,并传递本地参数。
html
<el-table :data="tableData" stripe :header-cell-style="{ backgroundColor: 'aliceblue', color: '#666' }">
  ...
  <el-table-column label="是否公开">
    <template v-slot="scope">
      <el-switch v-model="scope.row.open" @change="(p1) => changeOpen(p1, scope.row)"></el-switch>
    </template>
  </el-table-column>
</el-table>

<script>
export default {
  data() {
    return {
      form: ''
    }
  },
  methods: {
    changeOpen(p1, row) {
      // 调用更新的接口  更新数据到数据库
      console.log(p1)
      console.log(row)
      this.form = JSON.parse(JSON.stringify(row))
      this.sendSaveRequest()   // 直接发请求就可以了
    }
  }
}
</script>