一、ansible的安装配置
1.规划
|------------|-------------------|---------------|
| ansible服务器 | ip:192.168.60.100 | 主机名:ansible-1 |
| 客户端1 | ip:192.168.60.110 | 主机名:ansible-2 |
| 客户端2 | ip:192.168.60.120 | 主机名:ansible-3 |
2.配置ssh互信
root@ansible-1 \~# ssh-keygen -t rsa
root@ansible-1 \~# mv /root/.ssh/id_rsa.pub /root/.ssh/authorized_keys
root@ansible-1 \~# scp -r /root/.ssh/ root@192.168.60.110:/root/
root@ansible-1 \~# scp -r /root/.ssh/ root@192.168.60.120:/root/
3.安装ansible
root@ansible-1 \~# yum install ansible -y
4.配置ansible
root@ansible-1 \~# vim /etc/ansible/hosts

(两种方法可以同时写)
Ex 1: Ungrouped hosts, specify before any group headers.
green.example.com
blue.example.com
192.168.100.1
192.168.100.10
192.168.60.110
192.168.60.120Ex 2: A collection of hosts belonging to the 'webservers' group
webservers
alpha.example.org
beta.example.org
192.168.1.100
192.168.1.110
webservers
192.168.60.110
192.168.60.120

二、ansible的模块测试
1.语法介绍
ansible HOST-PATTERN -f FORKS -M MOD_NAME -a MOD_ARGS
-f:表示一批处理几台主机,也就是当被管控主机很多时,ansible不是对所有主机同时发起管理操作,而是一批处理几台,然后再换一批,直到所有主机被处理完成,如果不指定,则默认是5台
-m:指明调用哪个模块执行操作,各个模块所能实现的功能不同,如果不指定,默认是用-m command模块
-a:指明使用该模块的执行操作时的参数
2.常用模块
支持的所有模块:
root@ansible-1 \~# ansible-doc -l #获取支持的模块
获取帮助(查看模块如何使用):
root@master \~\]# ansible-doc \[模块名
modules(模块)具有"幂等"性,意思是如果你再一次地执行moudle(补充:比如遇到远端系统被意外改动,需要恢复原状),moudle只会执行必要的改动,只会改变需要改变的地方.所以重复多次执行playbook(剧本)也很安全
(1)ping模块
作用:探测目标主机是否在线
root@ansible-1 \~# ansible 192.168.60.110 -m ping #单台主机管理,查看远程主机是否ping通
root@ansible-1 \~# ansible 192.168.60.120 -m ping

root@ansible-1 \~# ansible webservers -m ping #组管理,查看组内的主机是否能够ping通

(2)command模块
作用:在远程主机执行命令,但不支持管道,重定向等shell特性
常用参数:
chdir= 表示指明命令在远程主机上哪个目录下运行,也就是在命令执行前切换到哪个目录下
creates= 在命令运行时创建一个文件,如果文件已存在,则不会执行创建任务
removes= 在命令运行时移除一个文件,如果文件不存在,则不会执行移除任务
executeble= 指明运行命令的shell程序
root@ansible-1 \~# ansible webservers -m command -a 'date' #执行date命令查看时间

root@ansible-1 \~# ansible webservers -m command -a 'ls /root' #查看root目录下的文件

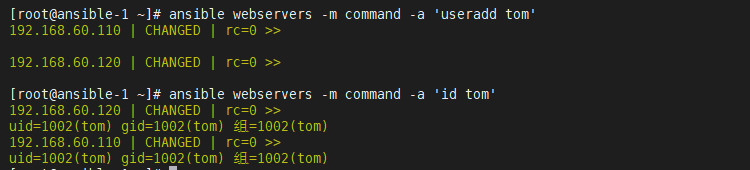
root@ansible-1 \~# ansible webservers -m command -a 'useradd tom' #创建用户tom
root@ansible-1 \~# ansible webservers -m command -a 'id tom' #查看用户tom的信息
注意:不支持管道
root@ansible-1 \~# ansible webservers -m command -a 'cat /etc/passwd | grep tom'

(他会把管道符给当成一条命令去执行)
(3)shell模块
作用:在远程主机执行命令,相当于调用远程主机的shell进程,支持shell特性,如管道,重定向等(shell模块的功能其实和command模块一模一样,但是它支持管道和重定向)
常见参数:
chdir= 表示指明命令在远程主机上哪个目录下运行
creates= 在命令运行时创建一个文件,如果文件已存在,则不会执行创建任务
removes= 在命令运行时移除一个文件,如果文件不存在,则不会执行移除任务
executeble= 指明运行命令的shell程序
root@ansible-1 \~# ansible webservers -m shell -a 'cat /etc/passwd | grep tom' #支持管道

root@ansible-1 \~# ansible webservers -m shell -a 'echo 123 | passwd --stdin tom'
#为tom用户设置密码

(4)copy模块
作用:拷贝ansible管理端的文件到远程主机的指定位置
常见参数:
dest= 指明拷贝文件的目标目录位置,使用绝对路径,如果源是目录,则目标也要是目录,如果目标文件已存在,会覆盖原有内容
src= 指明本地路径下的某个文件,可以使用相对路径和绝对路径,支持直接指定目录,如果源是目录,则目标也要是目录
mode= 指明复制时,目标文件的权限
owner= 指明复制时,目标文件的属主
group= 指明复制时,目标文件的属组
content= 指明复制到目标主机上的内容,不能与src一起使用,相当于复制content指明的数据,到目标文件中
root@ansible-1 \~# echo hello > /hello.txt #创建一个/hello.txt文件
root@ansible-1 \~# cat /hello.txt
hello
root@ansible-1 \~# ansible webservers -m copy -a 'src=/hello.txt dest=/hello1.txt mode=644 owner=root group=root'
#将文件hello.txt拷贝到webservers组下的两台主机并且重命名为hello1.txt,而且设置权限为644,设置拥有者为root,设置组为root


root@ansible-1 \~# ansible webservers -m copy -a 'content="hello world!" dest=/tmp/aa.txt mode=400'
#content是将内容写入并且在远程主机创建文件(使用了content就不能使用src了),这里是将hello world!写入aa.txt文件并且创建在组中远程主机的/tmp目录下,权限设置为400

(5)cron模块
作用:管理计划任务的模块
常见参数:
minute= 指明计划任务的分钟,支持格式:0-59,*,*/2等,与正常cron任务定义的一样的语法,省略时,默认为*,也就是每分钟都执行
hour= 指明计划任务的小时,支持的语法:0-23,*,*/2等,省略时,默认为*,也就是每小时都执行
day= 指明计划任务的天,支持的语法:1-31,*,*/2等,省略时,默认为*,也就是每天都执行
month= 指明计划任务的月,支持的语法为:1-12,*,*/2等,省略时,默认为*,也就是每月都执行
weekday= 指明计划任务的星期几,支持的语法为:0-6,*等,省略时,默认为*,也就是每星期几都执行
reboot 指明计划任务执行的时间为每次重启之后
name= 给该计划任务取个名称,必须要给明。每个任务的名称不能一样。删除任务时,只需要给明任务的名称即可
job= 执行的任务是什么,当state=present时才有意义
state=present|absent 表示这个任务是创建还是删除,present表示创建,absent表示删除,默认是present
root@ansible-1 \~# ansible webservers -m cron -a "minute=10 hour=10 day=10 month=10 weekday=6 name=test job='ntpdate ntp.aliyun.com' state=present"
#为组内的主机设置计划任务:在每年的10月的第10天,且当天是星期六,在10点10分执行ntpdate ntp.aliyun.com的命令完成时间同步

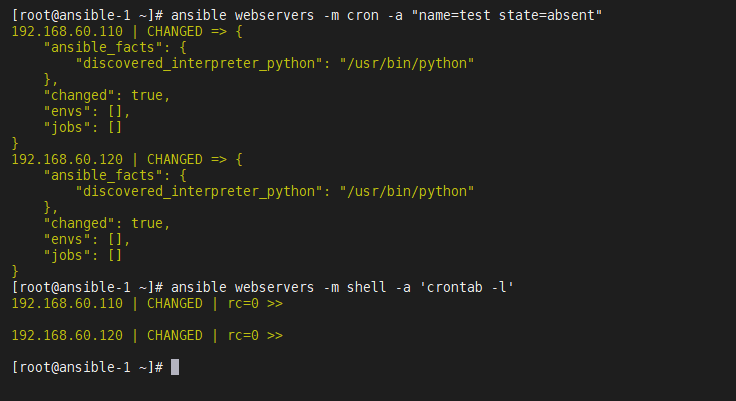
root@ansible-1 \~# ansible webservers -m shell -a 'crontab -l' #查看计划任务

root@ansible-1 \~# ansible webservers -m cron -a "minute=9 hour=9 day=9 month=9 weekday=1 name=test job='ntpdate ntp.aliyun.com' state=present"
#修改计划任务

root@ansible-1 \~# ansible webservers -m cron -a "name=test state=absent"
#删除计划任务
(6)fetch模块
作用:从远程主机拉取文件到本地(一般情况下,只会从一个远程节点拉取数据)
常见参数:
dest= 从远程主机上拉取的文件存放在本地的位置,一般只能是目录
src= 指明远程主机上要拉取的文件,只能是文件,不能是目录
root@ansible-1 \~# ansible webservers -m fetch -a "src=/etc/passwd dest=/tmp"
#将远程主机上的passwd文件拷贝到本机的/tmp目录下


(7)file模块
作用:用于设定远程主机上的文件属性
常见参数:
path= 指明对哪个文件修改其属性
src= 指明path=指明的文件是软链接文件,其对应的源文件是谁,必须要在state=link时才有用
state=directory|link|absent 表示创建的文件是目录还是软链接
owner= 指明文件的属主
group= 指明文件的属组
mode= 指明文件的权限
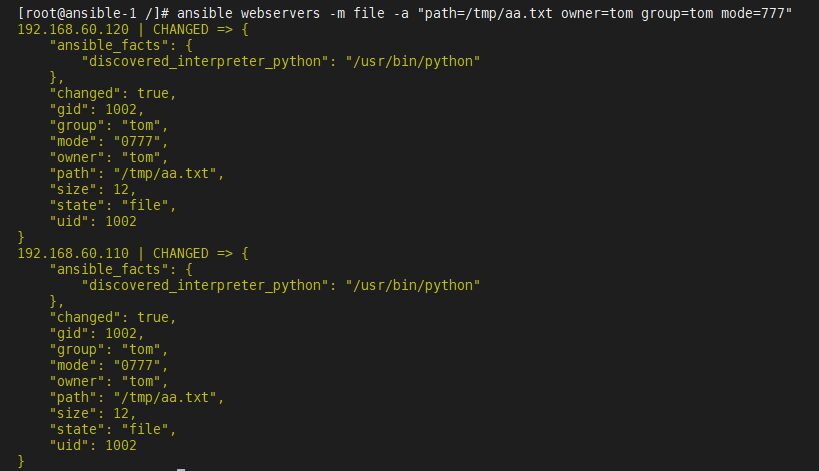
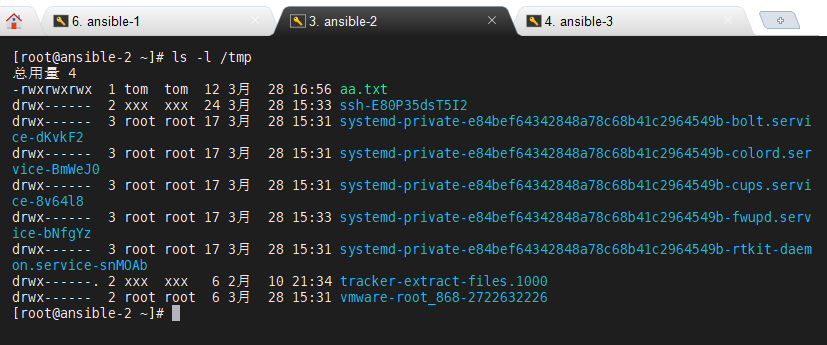
root@ansible-1 /# ansible webservers -m file -a "path=/tmp/aa.txt owner=tom group=tom mode=777"
#修改远程主机/tmp目录下的文件aa.txt的拥有者所属组为tom,权限为777

root@ansible-1 /# ansible webservers -m file -a "src=/tmp/aa.txt path=/tmp/new.txt state=link"
#为远程主机配置一条软链接


root@ansible-1 /# ansible webservers -m file -a "path=/tmp/new.txt state=absent"
#删除远程主机的符号链接文件/软链接文件new.txt


root@ansible-1 /# ansible webservers -m file -a 'path=/hello state=directory'
#在远程主机上创建目录/hello


root@ansible-1 /# ansible webservers -m file -a 'path=/hello state=absent'
#删除远程主机上的目录/hello


(8)hostname模块
作用:管理远程主机上的主机名
常用参数:
name= 指明主机名
(这个就不能指定组了,只能指定单个ip地址了)

root@ansible-1 /# ansible 192.168.60.110 -m hostname -a "name=client110.com"
#修改192.168.60.110远程主机的主机名为client110.com
(当然如果在实际生产中还要修改本机配置文件。再给同步到其他的主机)
(下面演示过程)
root@ansible-1 /# cat /etc/hosts
127.0.0.1 localhost localhost.localdomain localhost4 localhost4.localdomain4
::1 localhost localhost.localdomain localhost6 localhost6.localdomain6
192.168.60.100 ansible-1.com
192.168.60.110 client110.com192.168.60.120 ansible-3.com
root@ansible-1 /# ansible webservers -m copy -a "src=/etc/hosts dest=/etc/hosts"
#同步配置


(9)yum模块
作用:基于yum机制,对远程主机管理程序包
常用参数:
name= 指明程序包的名称,可以带上版本号,不指明版本,就是默认最新版本
state=present|latest|absent 指明对程序包执行的操作,present表示安装程序包,latest表示安装最新版本的程序包,absent表示卸载程序包
disablerepo= 在用yum安装时,临时禁用某个仓库,仓库的ID
enablerepo= 在用yum安装时,临时启用某个仓库,仓库的ID
conf_file= 指明yum运行时采用哪个配置文件,而不是使用默认的配置文件
disable_gpg_check=yes|no 是否启用gpg-check
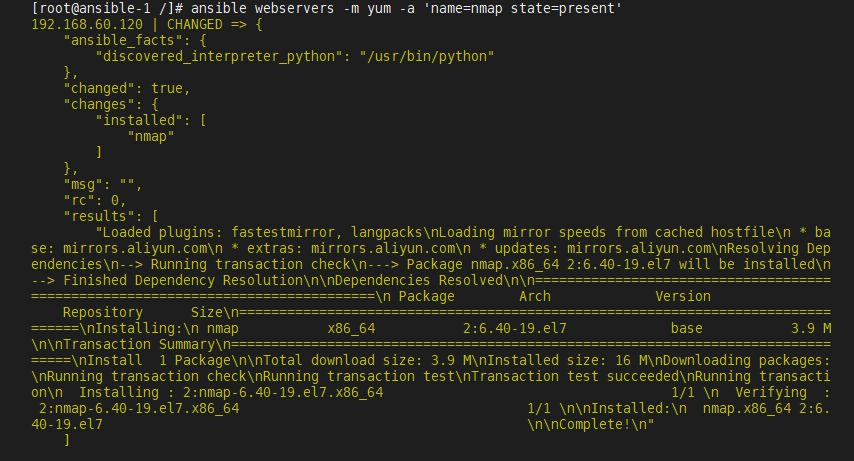
root@ansible-1 /# ansible webservers -m yum -a 'name=nmap state=present'
#安装nmap软件包

root@ansible-1 /# ansible webservers -m yum -a 'name=nmap state=absent'
#卸载nmap软件包


(10)service模块
作用:用来管理远程主机上的服务的模块
常见参数:
name= 被管理的服务名称
state=started|stopped|restarted 表示启动或关闭或重启
enabled=yes|no 表示要不要设定该服务开机自启动
runlevel= 如果设定了enabled开机自动启动,则要定义在哪些运行级别下自动启动
root@ansible-1 /# ansible webservers -m service -a 'name=httpd state=started'
#启动远程主机的httpd服务


root@ansible-1 /# ansible webservers -m service -a 'name=httpd state=stopped'
#停止远程主机的httpd服务


root@ansible-1 /# ansible webservers -m service -a 'name=httpd state=started enabled=yes'
#设置远程主机的httpd服务器启动并设置为开机自启

(11)uri模块
作用:如果远端是web服务器,可以利用ansible直接请求某个网页
常见参数:
url= 指明请求的url的路径,如:http://10.1.32.68/test.jpg
user= 如果请求的url需要认nstall.lo证,则认证的用户名是什么
password= 如果请求的url需要认证,则认证的密码是什么
method= 指明请求的方法,如GET、POST...
body= 指明报文中实体部分的内容,一般是POST方法或PUT方法时用到
HEADER_ 自定义请求报文中的添加的首部
root@ansible-1 /# ansible webservers -m uri -a 'url=http://192.168.60.100/index.html'
#利用Ansible的uri模块,在webservers主机组里的主机向`http://192.168.60.100/index.html\`发请求

(12)group模块
作用:用来添加或删除远端主机的用户组
常见参数:
name= 被管理的组名
state=present|absent 是添加还是删除,不指名默认为添加
gid= 指明GID
system=yes|no 是否为系统组
root@ansible-1 /# ansible webservers -m group -a "name=jerry gid=2000 state=present"
#创建组id为2000的jerry组(把state改成absent就是删除组id为2000的jerry组)


(13)user模块
作用:管理远程主机上的用户的账号
常见参数:
name= 指明要管理的账号名称
state=present|absent 指明是创建账号还是删除账号,present表示创建,absent表示删除
system=yes|no 指明是否为系统账号
uid= 指明用户UID
group= 指明用户的基本组
groups= 指明用户的附加组
shell= 指明默认的shell
home= 指明用户的家目录
move_home=yes|no 当home设定了家目录,如果要创建的家目录已存在,是否将已存在的家目录进行移动
password= 指明用户的密码,最好使用加密好的字符串
comment= 指明用户的注释信息
remove=yes|no 当state=absent时,也就是删除用户时,是否要删除用户的而家目录
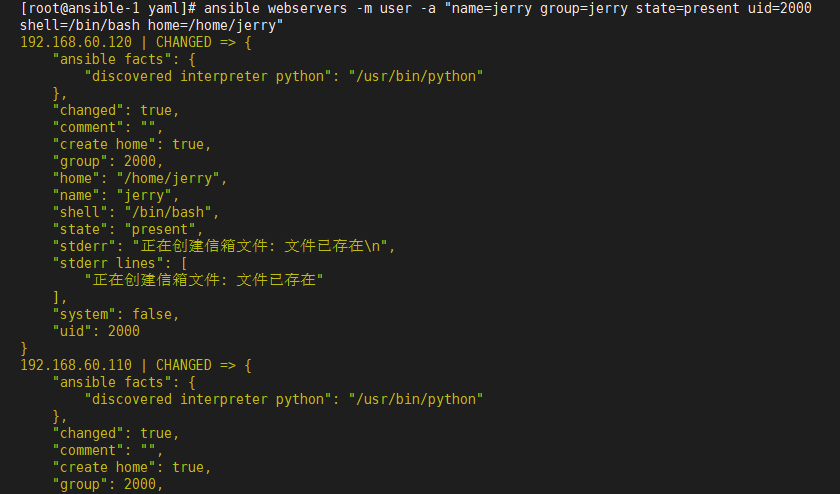
root@ansible-1 /# ansible webservers -m user -a "name=jerry group=jerry state=present uid=2000 shell=/bin/bash home=/home/jerry"
#在远程主机上创建名为jerry的用户,指定组为jerry,uid为2000,shell为/bin/bash,家目录为/home/jerry

root@ansible-1 /# ansible webservers -m user -a "name=jerry state=absent"
#删除用户

(14)script模块
作用:将管理端的某个脚本,移动到远端主机(不需要指明传递到远端主机的哪个路径下,系统会自动移动,然后执行),一般是自动移动到远端主机的/root/.ansible/tmp目录下,然后自动给予其权限,然后再开个子shell然后运行脚本,运行完成后删除脚本。
root@ansible-1 /# cat test.sh #准备一个测试脚本
#!/bin/bash
echo "hello world" >> /tmp/test.txt
root@ansible-1 /# ansible webservers -m script -a '/test.sh'
#通过Ansible在webservers组主机执行/root/test.sh脚本


(15)setup模块
作用:可收集远程主机的facts变量的信息,相当于收集了目标主机的相关信息(如内核版本、操作系统信息、cpu、...),保存在ansible的内置变量中,之后我们有需要用到时,直接调用变量即可。(通常是我们用来获取主机信息用的,很重要的一个模块,写剧本playbook的时候会用到)
root@ansible-1 /# ansible webservers -m setup
#使用Ansible的setup模块,在webservers主机组各主机上收集系统信息,如硬件、网络、操作系统等信息

(16)mount模块
作用:用来挂载、卸载文件系统,还能设置文件系统在系统启动时自动挂载。
常见参数:
path= 指定挂载点的路径
src= 指定要挂载的设备或资源,例如磁盘分区、NFS 共享等
fstype= 指定文件系统类型,像 ext4、xfs、nfs 等
state=mounted|unmounted|present|absent
mounted:挂载文件系统并确保在 /etc/fstab 中存在相应条目
unmounted:卸载文件系统
present:仅在 /etc/fstab 中添加条目但不挂载
absent:从 /etc/fstab 中移除条目并卸载文件系统
root@ansible-1 yaml# ansible 192.168.60.150 -m mount -a "path=/nfs1 src=/dev/sdb fstype=auto state=mounted" -b
用 mount 模块将 /dev/sdb 自动检测文件系统后挂载到 /nfs1 并写入 /etc/fstab

(17)template模块
作用: 基于模板方式,生成一个模板文件,复制到远程主机,让远程主机基于模板,生成符合远程主机自身的文件。
( 注意:此模块不能在命令行使用,只能用在playbook中)
(使用 template 模块时,不用在命令行里用 -m 指定模块,直接通过 ansible-playbook test.yaml 运行剧本即可)
常见参数:
src= 指明管理端本地的模板文件的目录
dest= 指明将模板文件拷贝到远程主机的哪个目录下
owner= 指明拷贝到远程主机的文件的属主
group= 指明拷贝到远程主机的文件的属组
mode= 指明拷贝到远程主机的文件的权限
root@ansible-1 yaml# ansible-playbook <剧本名> #执行剧本
(下面的playbook剧本会有对template模版详细使用的示例)
三、ansible的playbook(剧本)
1.YAML的介绍与扩展
YAML是一种可读性高的用来表示资料序列的格式。YAML参考了其他多种语言包括XML、C语言、Python、Perl以及电子邮件格式RFC2822等。Clark Evans(克拉克・埃文斯)在2001年在首次发表了这种语言,另外Ingy dtNet与Oren Ben-Kiki这两个人也是这语言的共同设计者,同时在YAML发布的同一年,JSON也发布了,这也是一种表示资料序列格式的标记语言,大部分情况下,JOSN多用于进程之间的数据传输。YAML Ain't Markup Language即YAML不是XML。不过在开发的这种语言时YAML的意思其实是"Yet Another Markup Language"仍是一种标记语言。
2.YAML标记语言的特征
YAML的可读性好
YAML和脚本语言的交互性好
YAML使用实现语言的数据类型
YAML有一个一致的信息模型
YAML易于实现
YAML可以基于流来处理
YAML表达能力强扩展性好
3.YAML的基本语法规则
- 大小写敏感
- 使用缩进表示层级关系
- 缩进时不允许使用Tab键,只允许使用空格。
- 缩进的空格数目不重要,只要相同层级的元素左侧对齐即可(一般使用两个空格)
表示注释,从这个字符一直到行尾,都会被解析器忽略
4.YAML支持的三种数据结构
对象:对象的一组键值对,使用冒号结构表示。
my_key: my_value
数组:数据结构的子成员是一个数组,则可以在该项下面缩进一个空格languages:
python
perl
ruby
python, perl, ruby
languages:
- python
perl
ruby
'python, perl, ruby'
#如果只有第一个有"-",就表示他们三个是同一个元素,这种语法格式和python差不多
纯量:纯量是最基本的、不可再分的值字符串
var: abc
布尔值
var: true
整数
var: 123
浮点数
var: 12.30
Null
var: ~
时间
time: 2001-12-14
日期
date 20:10:20
5.playbook(剧本)
当需要执行的任务有多个时,需要一条一条编辑ansible命令,然后执行,而且当需要重复执行时,又要重新编辑执行,这样效率不高,因此ansible就可以利用playbook来完成将任务写到一个YAML格式的文件中,然后利用ansible-playbook进行调用该文件,从而实现了多条语句,可重复执行的效果,类似shell脚本的效果,ansible的playbook要借助YAML文件来实现,YAML文件扩展名通常为.yaml或.yml
6.playbook的基础组件
hosts:运行指定任务的目标主机,多个主机用:冒号分隔
remote_user:在远程主机上执行任务的用户;可以全局指定,也可以单个任务指定
sudo_user:表示以sudo方式运行任务时,切换为哪个用户身份运行
tasks: 任务列表
7.playbook的写法示例
创建剧本------
root@ansible-1 \~# mkdir /yaml #创建一个存放剧本的目录(方便以后管理剧本的)
root@ansible-1 \~# cd /yaml/
root@ansible-1 yaml# vim test.yaml

- hosts: webservers
  remote_user: root
  tasks:
  - name: add group
    group: name='new' gid=3000 state=present
  - name: add user
    user: name='new' uid=3000 group='new' state=present
(hosts也可以写组,也可以写单台主机,也可以结合灵活使用)
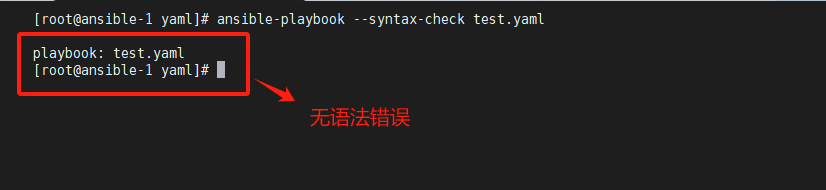
测试剧本的文件语法------
root@ansible-1 yaml# ansible-playbook --syntax-check test.yaml
#检查剧本是否有语法错误
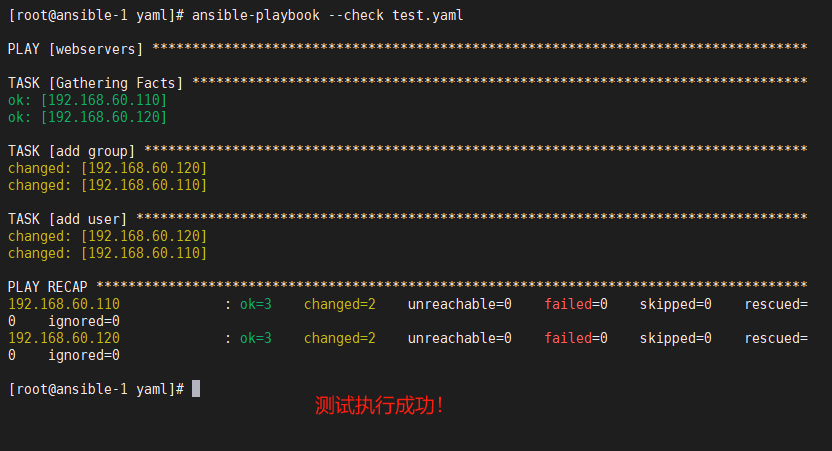
测试执行剧本------
root@ansible-1 yaml# ansible-playbook --check test.yaml #测试执行剧本
执行剧本------
root@ansible-1 yaml# ansible-playbook test.yaml #执行剧本

root@ansible-1 yaml# ansible webservers -m shell -a 'id new' #验证

(组和用户都存在且信息均正确)