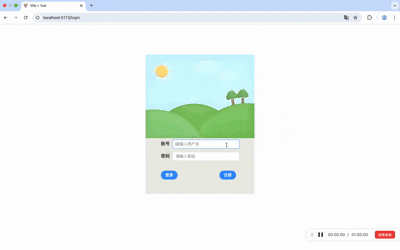
简易聊天室
说在前面
- 在学习计算机网络的时候,看到了
websocket这个网络通信协议,它提供了在单个 TCP 连接上进行全双工通信的能力,也就是说不需要客户端请求就可以自动向客户端发送响应,然后就发现可以用这个做一个聊天功能,于是就有了这篇博客。 - 下面的聊天室功能还用到了注册登录的相关知识,在我的另一篇博客中有写,链接:vue+nodejs实现登录注册功能
- 项目的源代码我也发到了github上面,大家可以去获取:github地址,点击跳转
效果展示
websocket
- 这里我先给大家介绍一下
websocket协议
websocket的由来
- 在 WebSocket 出现之前,Web 应用主要依赖于 HTTP 协议进行通信。然而,HTTP 是一种无状态的、请求-响应式的协议,每次通信都需要建立新的连接,这导致了较高的延迟和资源消耗。为了实现实时通信,开发者通常会使用一些变通的方法,如轮询(Polling)或长轮询(Long Polling),但这些方法效率较低。
- 于是
websocket应运而生,WebSocket 协议于 2011 年被正式标准化,旨在解决这些问题,提供一种更高效、更实时的通信方式。
websocket的特点
- 全双工通信:允许服务器和客户端同时发送和接收消息,而无需等待对方的响应
- 低延迟:一旦
websocket连接建立,数据就可以在客户端和服务器之间快速传输,无需每次都建立新的连接 - 轻量级:
websocket的数据帧格式简单,头部开销较小,适合传输小数据包
vue前端
- 首先我们需要明白搭建一个这样聊天室的步骤(以下是波煮自己写项目时候的顺序,可参考)
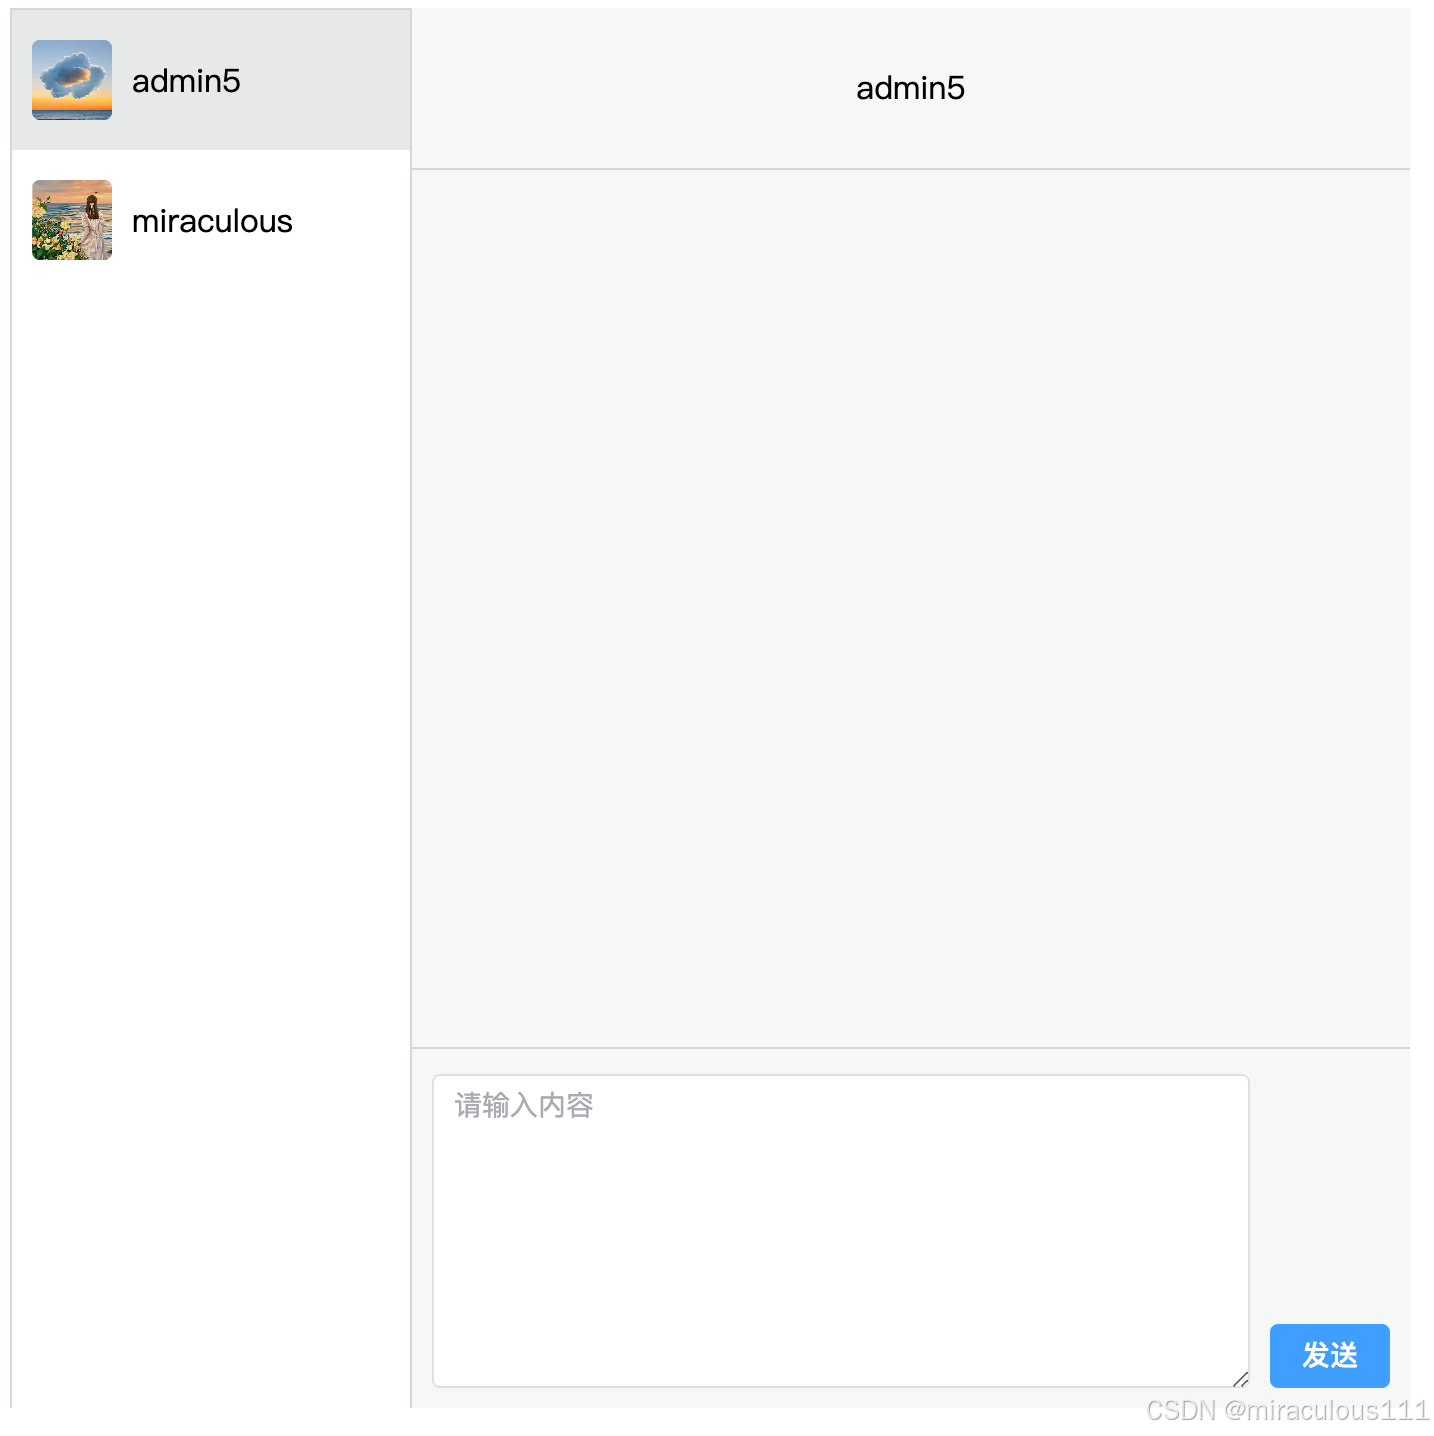
- 先写出聊天室的静态结构,这里波煮是照着微信的界面画的;
- 思考用什么存储消息并进行渲染 ,波煮的脑子想到的是对象数组,为什么要用对象数组 呢?因为我们只用一个数组那么就需要区分这个消息是对方发送的还是自己发送的,从而就行不同的渲染;
- 然后就是与服务器的链接了,以及一些用户点击事件的绑定。
静态结构
- 下面的静态结构代码其实已经不静态了,这是绑定事件后的代码了。不过大体还是一样的,这里用到了Element-plus的container组件,
效果
代码
html
<template>
<div class="common-layout">
<el-container>
<el-aside class="aside" width="200px">
<el-scrollbar :always="false">
<!-- 侧边栏用户栏 -->
<div
v-for="(item, index) in UserData"
:key="item.id"
class="userItem"
:class="isActive === index ? 'ItemActive' : 'ItemUsual'"
@click="onChangeUserItem(index)"
>
<el-avatar
style="margin-left: 10px; margin-right: 10px"
shape="square"
size="8px"
:src="item.avator"
/>
<span>{{ item.username }}</span>
</div>
</el-scrollbar>
</el-aside>
<el-container>
<el-header class="header">
{{ UserData[isActive].username }}
</el-header>
<el-main class="main">
<div
v-for="(item, index) in Allmessages"
:class="item.type === 'other' ? 'message_other ' : 'message_my'"
:key="item.id"
>
<div v-if="item.type === 'other'" class="main_message">
<el-avatar
:class="item.type === 'other' ? 'other_avatar ' : 'my_avatar'"
shape="square"
size="10px"
:src="item.type === 'other' ? UserData[isActive].avator : CurrentUserName.avator"
/>
<span :class="item.type === 'other' ? 'other_span ' : 'my_span'">{{ item.message }}</span>
</div>
<div v-else class="main_message">
<span :class="item.type === 'other' ? 'other_span ' : 'my_span'">{{ item.message }}</span>
<el-avatar
:class="item.type === 'other' ? 'other_avatar ' : 'my_avatar'"
shape="square"
size="10px"
:src="item.type === 'other' ? UserData[isActive].avator : CurrentUserName.avator"
/>
</div>
</div>
</el-main>
<el-footer class="footer">
<el-input
v-model="textarea"
:rows="7"
type="textarea"
placeholder="请输入内容"
class="InputArea"
@keydown.enter.exact.prevent="onSubmit"
/>
<el-button @click="onSubmit" type="primary">发送</el-button>
</el-footer>
</el-container>
</el-container>
</div>
</template>
<style scoped>
.common-layout {
width: 700px;
height: 700px;
background-color: aquamarine;
margin: 56px auto;
display: flex;
}
.aside {
background-color: white;
border-left: 1px solid rgb(218, 213, 213);
border-top: 1px solid rgb(218, 213, 213);
}
.header {
flex: 0.15;
background-color: rgb(246, 248, 248);
text-align: center;
align-content: center;
border-bottom: 1px solid rgb(218, 213, 213);
border-left: 1px solid rgb(218, 213, 213);
}
.main {
background-color: rgb(246, 248, 248);
flex: 0.75;
border-bottom: 1px solid rgb(218, 213, 213);
border-left: 1px solid rgb(218, 213, 213);
display: flex;
flex-direction: column;
}
.main_message{
display: flex;
flex-direction: row
}
.footer {
display: flex;
justify-content: space-between; /* 子元素水平分布 */
align-items: flex-end; /* 子元素垂直对齐到容器的底部 */
padding: 10px; /* 添加一些内边距 */
background-color: rgb(246, 248, 248);
border-left: 1px solid rgb(218, 213, 213);
flex: 0.3;
}
.footer div {
flex: 1; /* 让文本内容占据剩余空间 */
}
.footer .el-button {
margin-left: 10px; /* 添加一些左边距,使按钮与文本内容分开 */
}
.message_other {
background-color: rgb(246, 248, 248);
width: 200px;
display: flex;
justify-content: start;
align-items: center;
height: auto;
margin-bottom: 15px;
}
.message_my {
background-color: rgb(246, 248, 248);
width: 200px;
display: flex;
justify-content: end;
align-items: center;
margin-bottom: 15px;
margin-left: 250px;
}
.userItem {
height: 70px;
background-color: white;
display: flex;
align-items: center;
}
.ItemActive {
background-color: rgb(231, 233, 233);
}
.my_span{
padding: 5px;
background-color: greenyellow;
line-height: 30px;
}
.my_avatar{
margin-right: 10px;
margin-left: 10px
}
.other_span{
padding: 5px;
background-color: white;
line-height: 30px
}
.other_avatar{
margin-left: 10px;
margin-right: 10px
}
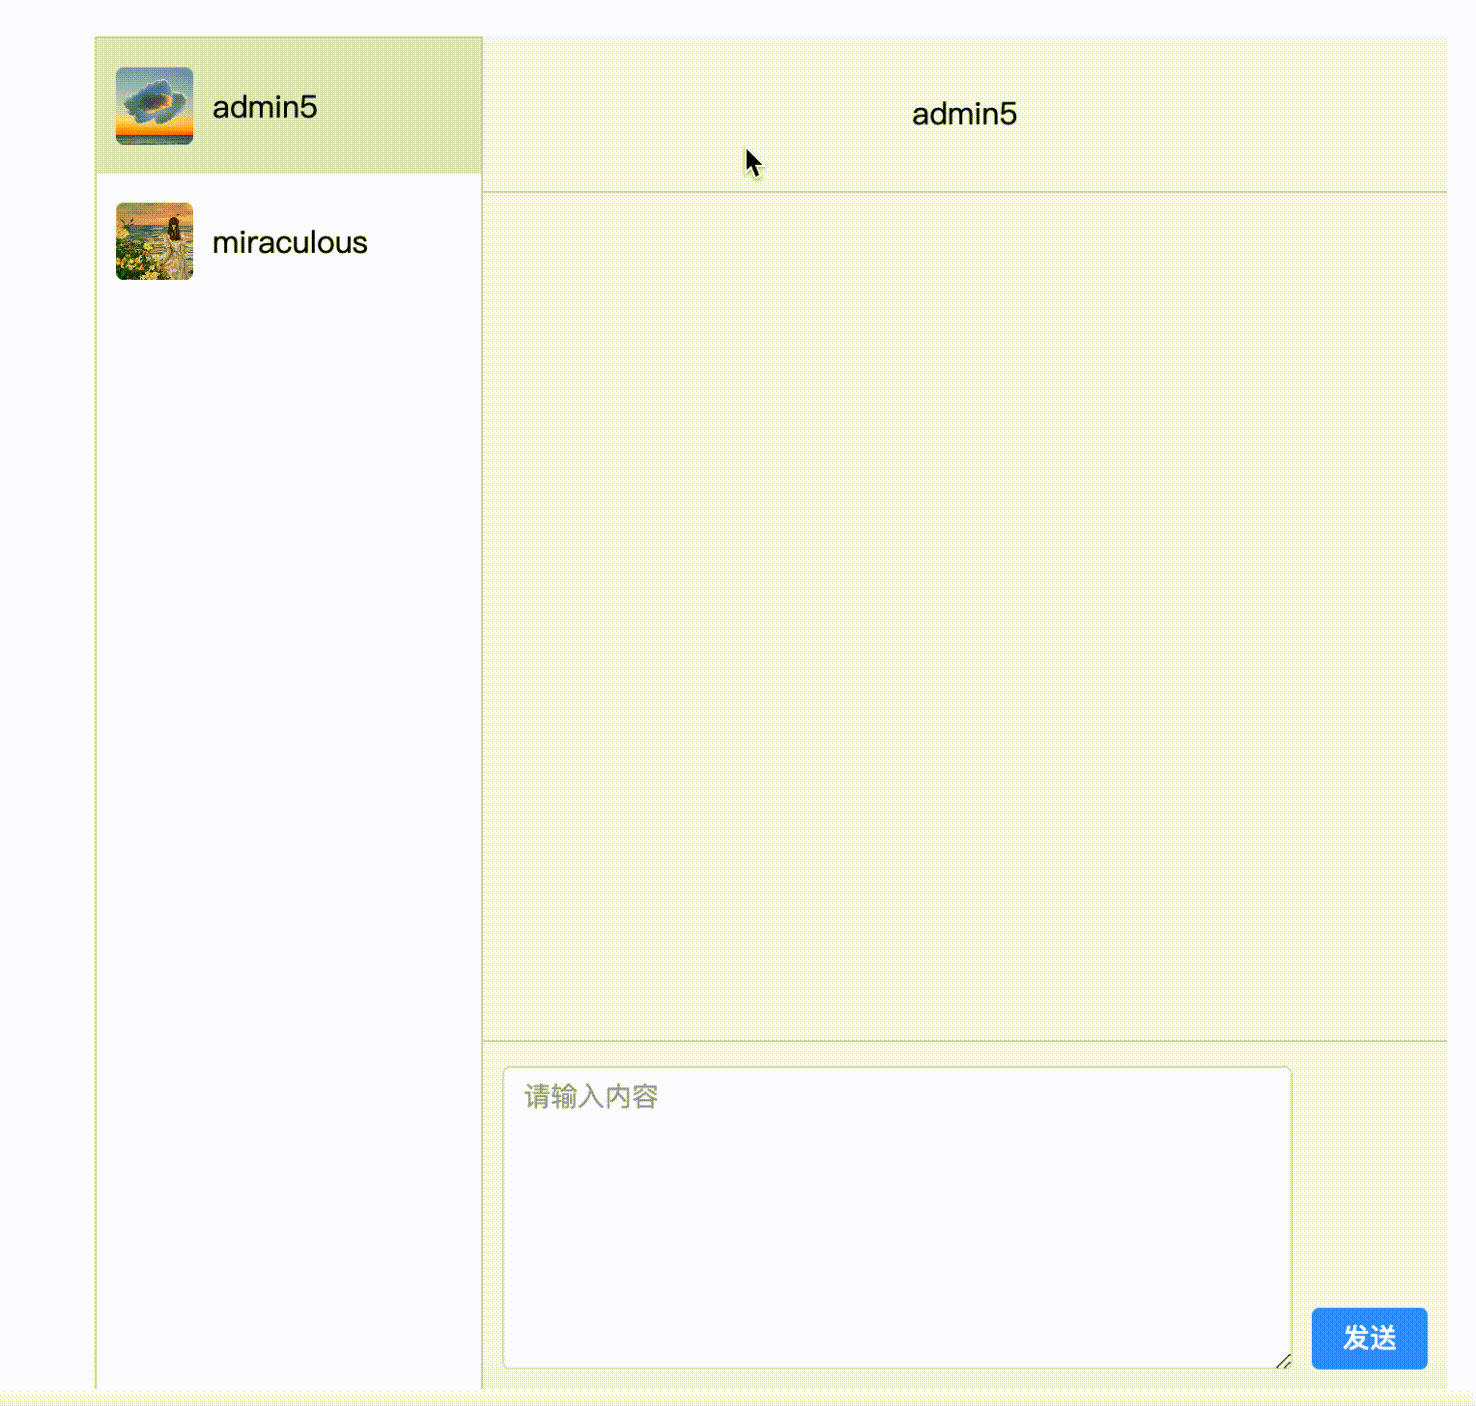
</style>点击切换用户以及该用户高亮
实现思路
- 定义一个响应式数据来记录当前在和哪个用户聊天
js
//当前用户
const isActive = ref(0);- 通过
isActive来进行动态绑定类名,从而实现不同的css样式,这个是vue的方便之处,可以直接使用:class来实现动态类名的绑定,这里高亮区分我是通过设置不同的背景颜色来区分的
js
:class="isActive === index ? 'ItemActive' : 'ItemUsual'"
css
.ItemActive {
  background-color: rgb(231, 233, 233);
}- 绑定点击事件,获取当前用户的
index,或修改isActive响应式数据为当前用户的index
js
//切换用户回调函数
const onChangeUserItem = (index) => {
  isActive.value = index;
};
效果展示
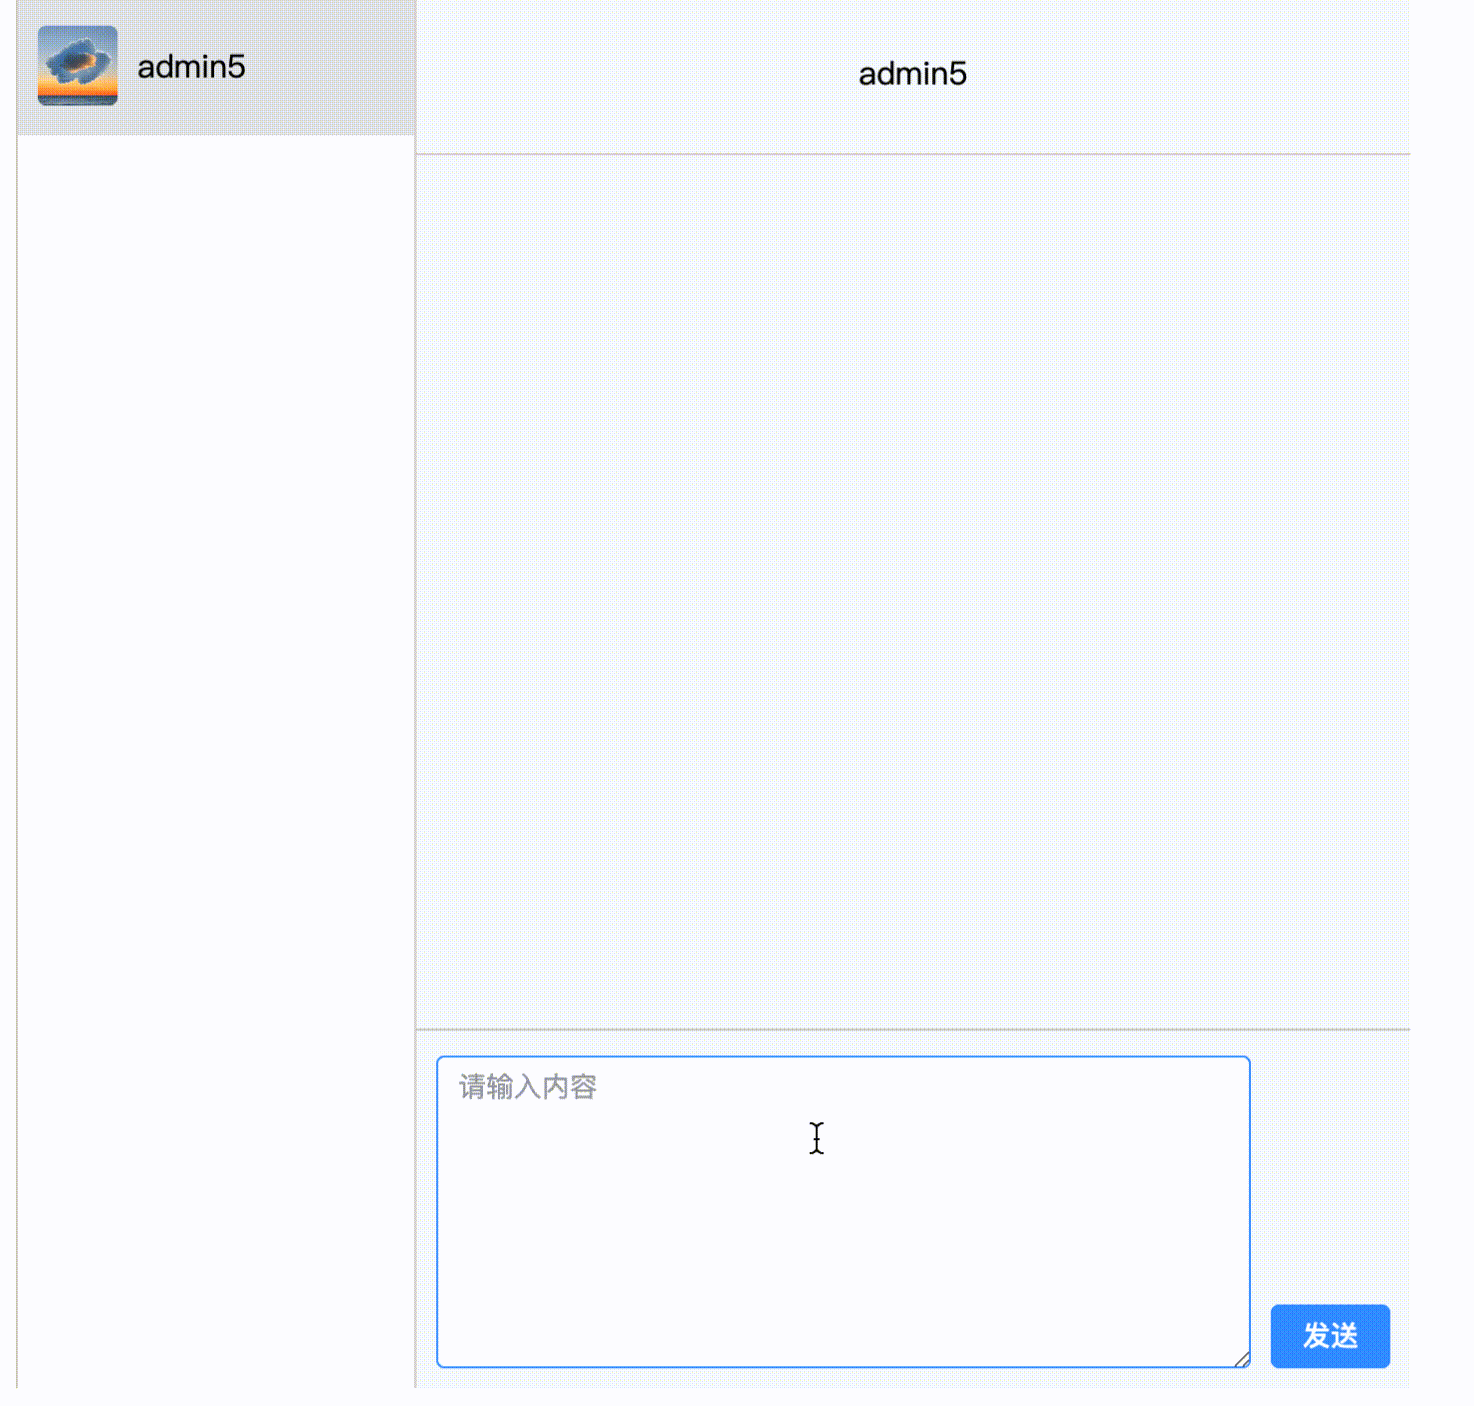
发送消息功能
- 我们先来理清整体思路:首先点击发送时需要获取文本框的内容,并把这个内容添加到消息数组中,接着把输入框中的内容清空。
- 点击发送时获取文本框内容,先定义一个响应式数据与输入框进行双向绑定:
js
//文本输入区域
const textarea = ref("");

//通过v-model双向绑定
<el-input
       v-model="textarea"
       :rows="7"
       type="textarea"
       placeholder="请输入内容"
       class="InputArea"
       @keydown.enter.exact.prevent="onSubmit"
/>- 为发送按钮添加点击事件,并将信息以对象的形式添加到消息数组中
js
//点击发送的回调函数
const onSubmit = () => {
  //获取当前用户用户名
  console.log(UserData.value[isActive.value].username);
  const toname = UserData.value[isActive.value].username;
  //将消息发送给服务端再由服务端推送给指定用户
  const json = {
    type: "message",
    toName: toname,
    message: textarea.value,
  };
  Allmessages.value.push({
    type:"my",
    id:id.value,
    message:textarea.value
  })
  id.value++
  //向服务端发送该消息
  socket.send(JSON.stringify(json));
  textarea.value = "";
};
效果展示
连接服务端
- 因为我们用的是
websocket协议,所以我们需要创建一个websocket连接,再监听连接以及websocket的错误
- 创建
websocket连接:
js
//创建websocket连接
const socket = new WebSocket("http://localhost:3000");- 监听连接,在这里面需要在刚开始连接上服务器的时候向服务器发送该用户的信息,以便服务器向别的用户广播该用户的上线状态。
- 监听服务器发来的消息,这里也就是别人向你发送过来的消息,别人先将要对你发送的消息发送给服务器,然后再由服务器根据一些条件发送给你。 服务器就像一个中介一样,链接这你们两个
- 拿到服务器发送给你的消息并插入到消息列表中进行渲染
js
//创建websocket连接
const socket = new WebSocket("http://localhost:3000");

//监听websocket链接
socket.onopen = async () => {
  //获取用户信息
  const token = localStorage.getItem("token");
  const res = await axios.get("http://0.0.0.0:8080/my/info", {
    headers: {
      Authorization: token,
    },
  });
  // console.log(res,"userinfo");
  CurrentUserName.value.username = res.data.data.username;
  CurrentUserName.value.isOnline = true;
  CurrentUserName.value.avator = res.data.data.user_pic;
  // console.log("连接到服务器");
  socket.send(
    JSON.stringify({ type: "userInfo", data: CurrentUserName.value })
  );
};
//监听服务器消息
socket.onmessage = (event) => {
  // const message = event.data;
  const message = JSON.parse(event.data);
  console.log(message, "message");

  // CurrentUserName.value = message.user
  if (message.type === "message") {
    // console.log(message,"jijiy");

    Allmessages.value.push({
      type:"other",
      id:id.value,
      message:message.message
    });
    id.value++;
    // console.log(message_other.value, "value");
  }

  if (message.type === "1") {
    UserData.value = message.users.filter((item) => {
      return item.username !== CurrentUserName.value.username;
    });
    //表示进入聊天室
    ElMessage({
      message: message.message,
      type: "success",
    });
    //将该用户加入
  }
  if (message.type === 0) {
    //表示退出聊天室
    ElMessage(message.message);
  }
};
//监听websocket错误
socket.onerror = (err) => {
  console.log("Websocket错误:", err);
};
Nodejs服务器端
实现步骤
- 下面是服务器端的
websocket实现步骤:
- 创建
WebSocket服务器
使用 WebSocket.Server 创建了一个 WebSocket 服务器,绑定到一个 HTTP 服务器(HttpServer)上。
js
//创建Websocket服务器
const wss = new WebSocket.Server({ server: HttpServer });- 存储连接的客户端
使用一个Map对象(clients)来存储当前连接的客户端及其用户信息。
Map 的键是WebSocket连接对象(ws),值是用户信息(userInfo)。
js
//存储连接的客户端
const clients = new Map();- 判断用户是否已存在
通过函数isSaveInClients,用于检查某个用户名是否已经存在于 clients 中。通过将 clients 的值转换为数组并检查是否包含指定的用户名来实现。
js
//判断用户是否存在于clients中
const isSaveInClients = (username)=>{
  const clientsArray = [...clients.values()];
  if(clientsArray.includes(`username:${username}`)){
    return true
  }
  return false
}- 客户端连接处理
当客户端通过WebSocket连接时,触发 connection 事件。
每个连接的客户端都会绑定以下事件监听器:-
接收消息
监听 message 事件,处理客户端发送的消息。
消息以 JSON 格式传输,包含 type 和 data 字段。
用户信息(type: "userInfo"):
如果客户端发送的是用户信息,服务器会检查该用户是否已经存在于 clients 中。
如果用户不存在,则将用户信息存储到 clients 中,并广播一条消息给所有客户端,通知新用户已进入聊天室。 -
聊天信息
(type: "message"):
如果客户端发送的是聊天信息 ,服务器会查找目标用户(data.toName)。如果找到目标用户且其 WebSocket 连接处于打开状态,则将聊天信息发送给目标用户。
-
js
wss.on("connection", (ws) => {
  var userInfo = {};
  //监听websocket连接
  ws.on("message", (message) => {
    const data = JSON.parse(message);
    //如果传入的是用户信息
    if (data.type == "userInfo") {
      //判断该用户是否已经在clients中
      if(isSaveInClients(data.data.username)){
        return
      }
      // console.log("进来了");
      //如果客户端发送来的是用户信息
      userInfo = data.data;
      clients.set(ws, userInfo);
      // console.log(clients.values(), "clients");
      //将map转为array
      const clientsArray = [...clients.values()];
      //广播消息给所有客户端
      for (const [clientWs, clientUserInfo] of clients) {
        //给其他用户广播有新用户登录
        if (clientWs.readyState === WebSocket.OPEN) {
          // console.log("进来了广播");
          clientWs.send(
            JSON.stringify({
              type: "1",
              user: {
                username: userInfo.username,
                isOnline: true,
              },
              message: `${userInfo.username}进入聊天室`,
              users: clientsArray,
            })
          );
        }
      }
    }
    //如果传入的是聊天信息
    if(data.type === "message"){
      // console.log("传入的是聊天信息");
      console.log(data,"聊天信息");
      for(const [clientWs,clientUserInfo] of clients){
        if(clientUserInfo.username === data.toName && clientWs.readyState === WebSocket.OPEN){
          clientWs.send(JSON.stringify({
            type:"message",
            message:data.message
          }))
        }
      }
    }
    //  console.log("收到消息", data);
});- 客户端断开连接
监听 close 事件,处理客户端断开连接的情况。
当客户端断开连接时,服务器会广播一条消息给所有客户端,通知该用户已退出聊天室。
然后从 clients 中删除该客户端的记录。
js
  //监听客户端断开连接
  ws.on("close", () => {
    // console.log(username +"退出聊天室");
    //退出聊天室广播
    for (const [clientWs,clientUserInfo] of clients) {
      if (clientWs.readyState === WebSocket.OPEN) {
        clientWs.send(
          JSON.stringify({
            type: "0",
            user: {
              username: userInfo.username,
              isOnline: true,
            },
            message: `${userInfo.username}退出聊天室`,
          })
        );
      }
    }
    clients.delete(ws);
  });
});- 启动服务器
定义了一个端口号 PORT(3000),并启动 HTTP 服务器。
服务器运行后,会监听指定端口,并在控制台输出服务器的地址。
js
//启动服务器
const PORT = 3000;
HttpServer.listen(PORT, () => {
  console.log(`服务器运行在 http://localhost:${PORT}`);
});
代码
js
//创建Websocket服务器
const wss = new WebSocket.Server({ server: HttpServer });
//存储连接的客户端
const clients = new Map();
//判断用户是否存在于clients中
const isSaveInClients = (username)=>{
  const clientsArray = [...clients.values()];
  if(clientsArray.includes(`username:${username}`)){
    return true
  }
  return false
}

//客户端连接
wss.on("connection", (ws) => {
  var userInfo = {};
  //监听websocket连接
  ws.on("message", (message) => {
    const data = JSON.parse(message);
    //如果传入的是用户信息
    if (data.type == "userInfo") {
      //判断该用户是否已经在clients中
      if(isSaveInClients(data.data.username)){
        return
      }
      // console.log("进来了");
      //如果客户端发送来的是用户信息
      userInfo = data.data;
      clients.set(ws, userInfo);
      // console.log(clients.values(), "clients");
      //将map转为array
      const clientsArray = [...clients.values()];
      //广播消息给所有客户端
      for (const [clientWs, clientUserInfo] of clients) {
        //给其他用户广播有新用户登录
        if (clientWs.readyState === WebSocket.OPEN) {
          // console.log("进来了广播");
          clientWs.send(
            JSON.stringify({
              type: "1",
              user: {
                username: userInfo.username,
                isOnline: true,
              },
              message: `${userInfo.username}进入聊天室`,
              users: clientsArray,
            })
          );
        }
      }
    }
    //如果传入的是聊天信息
    if(data.type === "message"){
      // console.log("传入的是聊天信息");
      console.log(data,"聊天信息");
      for(const [clientWs,clientUserInfo] of clients){
        if(clientUserInfo.username === data.toName && clientWs.readyState === WebSocket.OPEN){
          clientWs.send(JSON.stringify({
            type:"message",
            message:data.message
          }))
        }
      }
    }
    //  console.log("收到消息", data);
  });
  //监听客户端断开连接
  ws.on("close", () => {
    // console.log(username +"退出聊天室");
    //退出聊天室广播
    for (const [clientWs,clientUserInfo] of clients) {
      if (clientWs.readyState === WebSocket.OPEN) {
        clientWs.send(
          JSON.stringify({
            type: "0",
            user: {
              username: userInfo.username,
              isOnline: true,
            },
            message: `${userInfo.username}退出聊天室`,
          })
        );
      }
    }
    clients.delete(ws);
  });
});

//启动服务器
const PORT = 3000;
HttpServer.listen(PORT, () => {
  console.log(`服务器运行在 http://localhost:${PORT}`);
});