Eino 是Go语言实现的LLM开发框架,类似于Langchain等框架,它也提供了一系列组件、编排、工具来实现复杂的大模型功能开发。具体结构可以参考下面这个图 
这次,就从最简单的调用多模态大模型服务到实现较为复杂的大模型任务编排进行一步步实践。基础的大模型选择Qwen2.5-vl 3B这个多模态视觉模型,利用VLLM作为大模型推理服务框架。
1. 直接调用大模型服务
对于视觉任务而言,通过Eino的openai.NewChatModel可以很简单的创建一个类似于Langchain中ChatOpenAI的Openai接口请求组件,其中大部分参数都和Langchain定义相同,具体可以看看下面的结构体定义。
go
type ChatModelConfig struct {
// APIKey is your authentication key
// Use OpenAI API key or Azure API key depending on the service
// Required
APIKey string `json:"api_key"`
// Timeout specifies the maximum duration to wait for API responses
// If HTTPClient is set, Timeout will not be used.
// Optional. Default: no timeout
Timeout time.Duration `json:"timeout"`
// HTTPClient specifies the client to send HTTP requests.
// If HTTPClient is set, Timeout will not be used.
// Optional. Default &http.Client{Timeout: Timeout}
HTTPClient *http.Client `json:"http_client"`
// The following three fields are only required when using Azure OpenAI Service, otherwise they can be ignored.
// For more details, see: https://learn.microsoft.com/en-us/azure/ai-services/openai/
// ByAzure indicates whether to use Azure OpenAI Service
// Required for Azure
ByAzure bool `json:"by_azure"`
// BaseURL is the Azure OpenAI endpoint URL
// Format: https://{YOUR_RESOURCE_NAME}.openai.azure.com. YOUR_RESOURCE_NAME is the name of your resource that you have created on Azure.
// Required for Azure
BaseURL string `json:"base_url"`
// APIVersion specifies the Azure OpenAI API version
// Required for Azure
APIVersion string `json:"api_version"`
// The following fields correspond to OpenAI's chat completion API parameters
// Ref: https://platform.openai.com/docs/api-reference/chat/create
// Model specifies the ID of the model to use
// Required
Model string `json:"model"`
// MaxTokens limits the maximum number of tokens that can be generated in the chat completion
// Optional. Default: model's maximum
MaxTokens *int `json:"max_tokens,omitempty"`
// Temperature specifies what sampling temperature to use
// Generally recommend altering this or TopP but not both.
// Range: 0.0 to 2.0. Higher values make output more random
// Optional. Default: 1.0
Temperature *float32 `json:"temperature,omitempty"`
// TopP controls diversity via nucleus sampling
// Generally recommend altering this or Temperature but not both.
// Range: 0.0 to 1.0. Lower values make output more focused
// Optional. Default: 1.0
TopP *float32 `json:"top_p,omitempty"`
// Stop sequences where the API will stop generating further tokens
// Optional. Example: []string{"\n", "User:"}
Stop []string `json:"stop,omitempty"`
// PresencePenalty prevents repetition by penalizing tokens based on presence
// Range: -2.0 to 2.0. Positive values increase likelihood of new topics
// Optional. Default: 0
PresencePenalty *float32 `json:"presence_penalty,omitempty"`
// ResponseFormat specifies the format of the model's response
// Optional. Use for structured outputs
ResponseFormat *openai.ChatCompletionResponseFormat `json:"response_format,omitempty"`
// Seed enables deterministic sampling for consistent outputs
// Optional. Set for reproducible results
Seed *int `json:"seed,omitempty"`
// FrequencyPenalty prevents repetition by penalizing tokens based on frequency
// Range: -2.0 to 2.0. Positive values decrease likelihood of repetition
// Optional. Default: 0
FrequencyPenalty *float32 `json:"frequency_penalty,omitempty"`
// LogitBias modifies likelihood of specific tokens appearing in completion
// Optional. Map token IDs to bias values from -100 to 100
LogitBias map[string]int `json:"logit_bias,omitempty"`
// User unique identifier representing end-user
// Optional. Helps OpenAI monitor and detect abuse
User *string `json:"user,omitempty"`
}对于调用VLLM服务我们只需要指定BaseURL、Model,如果APIKey没有可以为空,还有温度、最大tokens等参数根据自己的需要配置。在初始化了chatModel后,我们就需要构建我们需要的Prompt。
Prompt部分构建可以先看看官网文档,我们最终需要结合Prompt、tool等构建最终的Message传递给大模型。对于这部分有些坑我先提一下,比如文档中ChatTemplate这个模板支持python的fstring、go的template以及jinja2,在创建模板后使用map[string]any作为填充参数并使用Format()方法得到最后的Message。但是需要注意的是,这个Format()方法只支持格式化Content的内容,同时String()方法也只支持打印Content中的内容。对于多模态输入,我们需要使用MultiContent来指定请求的数据以及文字描述,而这部分是没法使用Format()进行格式化的,这些都可以从源码中看到。
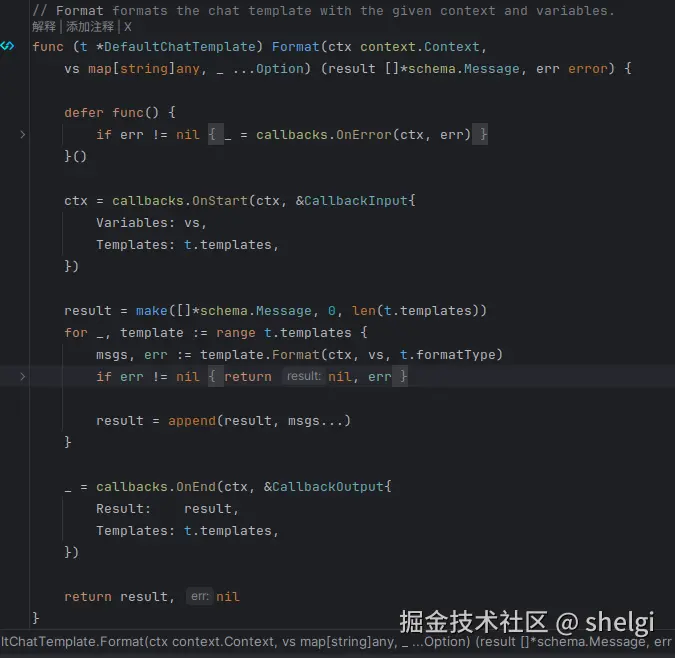
对于Format()方法会首先遍历模板中所有的MessageTemplate并调用对应的Format(),而MessageTemplate这个接口有两种实现,一个就是&Message{}另一个就是MessagesPlaceholder(),我们就来看看对于&Message{}的Format()方法
go
func (m *Message) Format(_ context.Context, vs map[string]any, formatType FormatType) ([]*Message, error) {
c, err := formatContent(m.Content, vs, formatType)
if err != nil {
return nil, err
}
copied := *m
copied.Content = c
return []*Message{&copied}, nil
}这里可以看出,只会针对Content字段进行格式化,所以多模态数据字段是没法进行格式化的。如果想利用模版来实现多模态部分,可能就需要自己重新自定义相关的结构,或者就老老实实用Message来构造。当然,因为Format()返回的也是*schema.Message,所以可以将多模态数据部分单独处理,其他纯文字部分利用模板来实现,这样也可以简单实现。
下面就直接上一个例子,看看利用Eino如何实现一个多模态请求
go
package main
import (
"context"
"fmt"
"github.com/cloudwego/eino-ext/components/model/openai"
"github.com/cloudwego/eino/components/prompt"
"github.com/cloudwego/eino/schema"
"os"
"time"
)
func main() {
ctx := context.Background()
maxTokens := 2048
var temperature float32 = 0.6
var base64Image string
content, err := os.ReadFile("base.txt")
if err != nil {
panic(err)
}
base64Image = string(content)
baseUrl := "http://xxx.xxx.xxx.xxx:port/v1"
model, err := openai.NewChatModel(ctx, &openai.ChatModelConfig{
APIKey: "",
BaseURL: baseUrl,
Timeout: 10 * time.Second,
Model: "Qwen2.5-VL-3B",
MaxTokens: &maxTokens,
Temperature: &temperature,
})
if err != nil {
panic(err)
}
messages := []*schema.Message{
{
Role: schema.User,
MultiContent: []schema.ChatMessagePart{
{
Type: schema.ChatMessagePartTypeImageURL,
ImageURL: &schema.ChatMessageImageURL{
URL: fmt.Sprintf("data:image/jpeg;base64,%s", base64Image),
},
},
{
Type: schema.ChatMessagePartTypeText,
Text: "请描述一下图片内容,如果有上吊情况返回true否则返回false,请用json格式返回 eg. {'content':'xxxx','result':true}",
},
},
},
}
// 演示一下模板结合多模态构造[]Message
template := prompt.FromMessages(schema.FString, schema.SystemMessage("{system}"))
variables := map[string]any{
"system": "你是一个图片行为分析器,请仔细观察图片,分析是否存在指定的异常行为",
}
systemMessage, err := template.Format(ctx, variables)
if err != nil {
panic(err)
}
messages = append(messages, systemMessage...)
for _, message := range messages {
fmt.Println(message.String())
}
response, err := model.Generate(ctx, messages)
if err != nil {
panic(err)
}
fmt.Println(response.Content)
}
输出如下
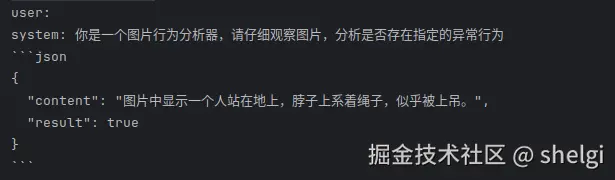
可以看到String()方法只打印了system的内容,而user的多模态数据部分没有打印,原因如下
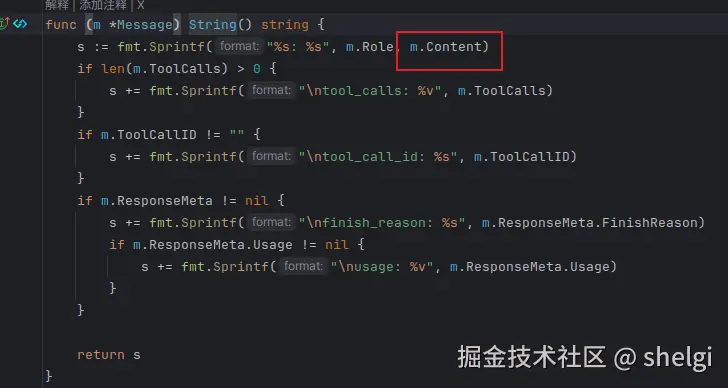
一样的问题,只会考虑Content字段而没有考虑MultiContent,我好像也没有看到字段转换的方法,所以我们可以自定义函数来打印
go
func toString(m *schema.Message) (string, error) {
content := m.Content
if m.MultiContent == nil {
return fmt.Sprintf("role:%s,content:%s,multiContent:%s", m.Role, content, ""), nil
}
res := ""
for _, multiContent := range m.MultiContent {
res += fmt.Sprintf("type:%s \t", multiContent.Type)
}
return fmt.Sprintf("role:%s,content:%s,multiContent:%s", m.Role, content, res), nil
}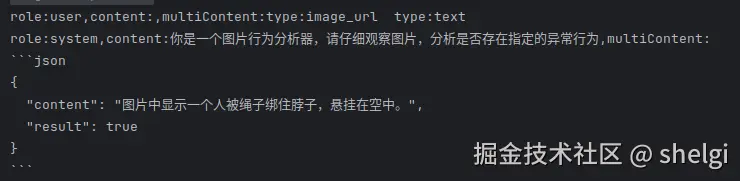
这个对于大模型请求而言并无任何影响,但是如果有日志记录等需求,为实现[]Message解析提供一个思路。
2. MCP为大模型加入新功能
MCP协议可以为我们的大模型提供一些额外的功能,因此这部分就结合MCP来拓展大模型的能力。
2.1 封装HTTP接口为MCP服务
首先就是搭建一个MCP的server来运行一些功能,这里我选择调用百度地图的api来实现GET请求的天气查询,然后封装为一个SSE server作为MCP服务。基于这套逻辑,就可以将很多现有的接口服务封装为MCP然后供大模型调用,不断丰富大模型能力。
关于百度地图天气查询接口可以参考百度天气查询接口文档,具体的请求参数只有district_id、data_type以及ak,这里默认已经申请好相关的ak,关于district_id其实就是根据给出的文件将城市名等转换为对应id,data_type为请求类型选择,这里我就选择all。
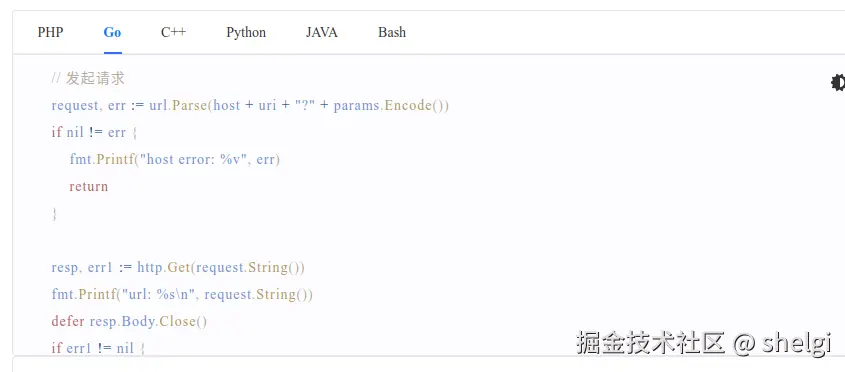
文档中也给出了http请求的demo,我就直接复制拿过来用。
go
func StartMCPServer() {
locationMap := getLocation("AMap_adcode_citycode.xlsx")
mcpServer := server.NewMCPServer("demo", mcp.LATEST_PROTOCOL_VERSION, server.WithToolCapabilities(true))
newTool := mcp.NewTool("detect",
mcp.WithDescription("根据城市名,查询天气"),
mcp.WithString("city", mcp.Required(), mcp.Description("城市名(xx市)")),
)
mcpServer.AddTool(newTool, func(ctx context.Context, request mcp.CallToolRequest) (*mcp.CallToolResult, error) {
cityName := request.Params.Arguments["city"].(string)
cityName = ensureCitySuffix(cityName)
id := locationMap[cityName]
log.Printf("city name :%s \t id: %s", cityName, id)
jsonResult, _ := temperature(id)
fmt.Println(jsonResult)
return mcp.NewToolResultText(fmt.Sprintf("%s", jsonResult)), nil
})
err := server.NewSSEServer(mcpServer, server.WithBaseURL("http://localhost:12345")).Start("localhost:12345")
if err != nil {
log.Fatal(err)
}
ch := make(chan struct{})
<-ch
}这里根据Eino官网给出的demo实现的MCP Server,首先将区域转换文件转为一个map,方便后面直接映射。然后创建一个MCPServer,同时生成一个Tool,为工具配置好功能描述和相关的输入参数,这里入参很简单就是一个城市名。最后就是将这个Tool添加到MCPServer,同时绑定一个handle来实现工具的功能。handle的逻辑就很简单了,解析传递的城市名转为对应id再发送请求,接收天气查询结果。
2.2 大模型实现MCP调用
同样根据Eino的文档,对于接入MCP Tool,我们需要首先创建一个client。通过client得到对应Server所提供的Tool
go
func GetMCPTool(ctx context.Context) []tool.BaseTool {
cli, err := client.NewSSEMCPClient("http://localhost:12345/sse")
if err != nil {
log.Fatal(err)
}
err = cli.Start(ctx)
if err != nil {
log.Fatal(err)
}
initRequest := mcp.InitializeRequest{}
initRequest.Params.ProtocolVersion = mcp.LATEST_PROTOCOL_VERSION
initRequest.Params.ClientInfo = mcp.Implementation{
Name: "example-client",
Version: "1.0.0",
}
_, err = cli.Initialize(ctx, initRequest)
if err != nil {
log.Fatal(err)
}
tools, err := mcpp.GetTools(ctx, &mcpp.Config{Cli: cli})
if err != nil {
log.Fatal(err)
}
return tools
}最后就是大模型调用Tool,这里的场景是多模态模型首先识别出图片中景区所在城市,然后查询该城市的天气情况。测试图片如下

go
func main() {
ctx := context.Background()
mcpTools := GetMCPTool(ctx)
for _, tool := range mcpTools {
info, _ := tool.Info(ctx)
fmt.Println(info.Name, info.Desc)
}
maxTokens := 8192
var temperature float32 = 0.6
var base64Image string
content, err := os.ReadFile("base.txt")
if err != nil {
panic(err)
}
base64Image = string(content)
if err != nil {
panic(err)
}
baseUrl := "http://127.0.0.1:8000/v1"
model, err := openai.NewChatModel(ctx, &openai.ChatModelConfig{
APIKey: "",
BaseURL: baseUrl,
Timeout: 30 * time.Second,
Model: "Qwen2.5-VL-3B",
MaxTokens: &maxTokens,
Temperature: &temperature,
})
if err != nil {
fmt.Println(err)
}
messages := []*schema.Message{
{
Role: schema.User,
MultiContent: []schema.ChatMessagePart{
{
Type: schema.ChatMessagePartTypeImageURL,
ImageURL: &schema.ChatMessageImageURL{
URL: fmt.Sprintf("data:image/jpeg;base64,%s", base64Image),
},
},
{
Type: schema.ChatMessagePartTypeText,
Text: "根据图片内容判断景区所在城市,查询该城市天气",
},
},
},
}
template := prompt.FromMessages(schema.FString, schema.SystemMessage("{system}"))
variables := map[string]any{
"system": "你是一个图片天气分析器,可以通过`detect`API来查询天气,对请求实现以下步骤" +
"1. 请观察图片,得到景区所在城市名" +
"2. 调用`detect`工具查询{'city':'xxx市'}所在城市天气,返回结果",
}
systemMessage, err := template.Format(ctx, variables)
if err != nil {
panic(err)
}
messages = append(messages, systemMessage...)
agent, err := react.NewAgent(ctx, &react.AgentConfig{
Model: model,
ToolsConfig: compose.ToolsNodeConfig{Tools: mcpTools},
})
result, err := agent.Generate(ctx, messages)
fmt.Println(result.Content)
}这里整体内容和第一部分类似,只是Prompt和使用react.Agent封装model以及Tools和之前有些许区别。
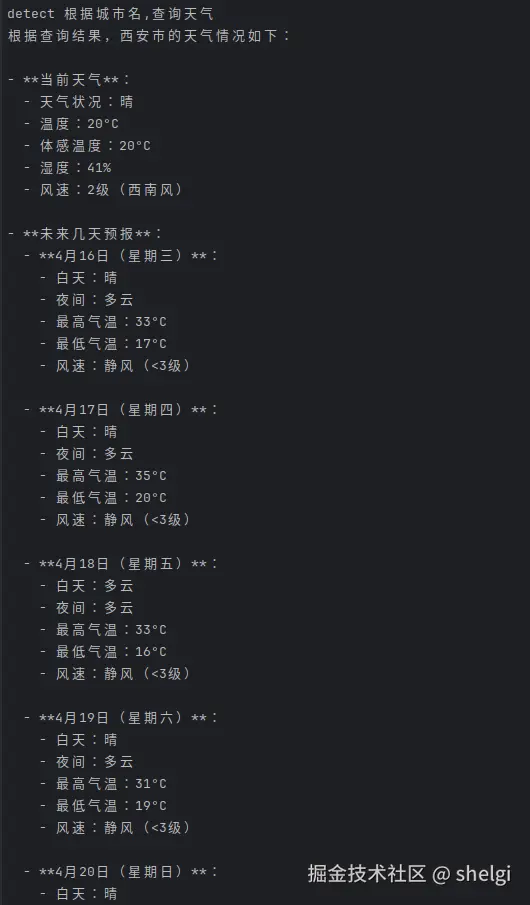
这里我们首先依旧是调用本地跑的Qwen2.5-VL-3B来测试一下。

出现了<tool_call>的字样,同时也能正确识别出景区以及所对应的城市,但是没办法主动去调用工具。因为使用的是没有经过指令微调的模型,可能功能有些局限。百炼平台开通的时候会送免费的token,正好白嫖一下千问的API,这里只需要修改一下openai接口中的APIKey、BaseURL以及Model参数就好,其他不变。我们换成千问提供的qwen2.5-vl-3b-instruct再来试试。
同时MCP Server这边的日志也确实发送了该请求

2.3 外部MCP Server直接供模型调用
上面我们完成了一个简单的多模态识别图像内容,并调用MCP服务得到景区天气的demo。随着MCP提出到现在各大厂家的逐渐适配,已经出现了很多MCP服务可以供人们调用。这次我就通过外部已有的MCP Server实现一些更复杂的功能。
这里的场景在上述场景上继续升级,需要大模型先识别出图片所在景区,然后依靠高德地图提供的MCP工具,帮我制定一个旅游计划。其中高德MCP服务部分可以查看高德MCP服务文档
接入外部MCP服务很简单,修改一下MCP client的url就好,其他部分不变

大模型部分我们选择qwen2.5-vl-32b-instruct这个稍微大点的模型,然后稍微改改Prompt
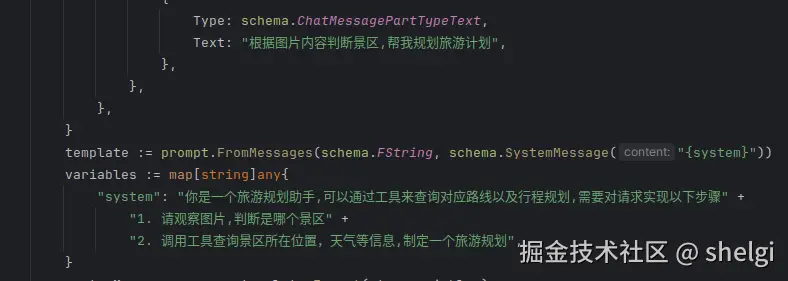
其他代码都不变,然后直接展示效果。老规矩,先打印请求到的Tool
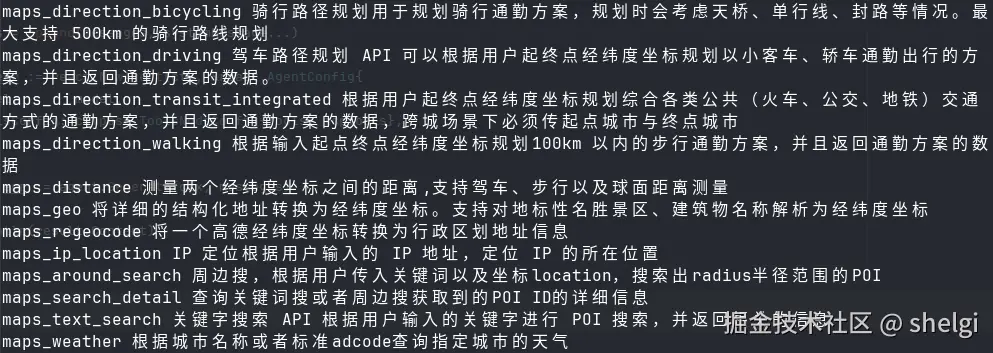
然后来看看模型的输出
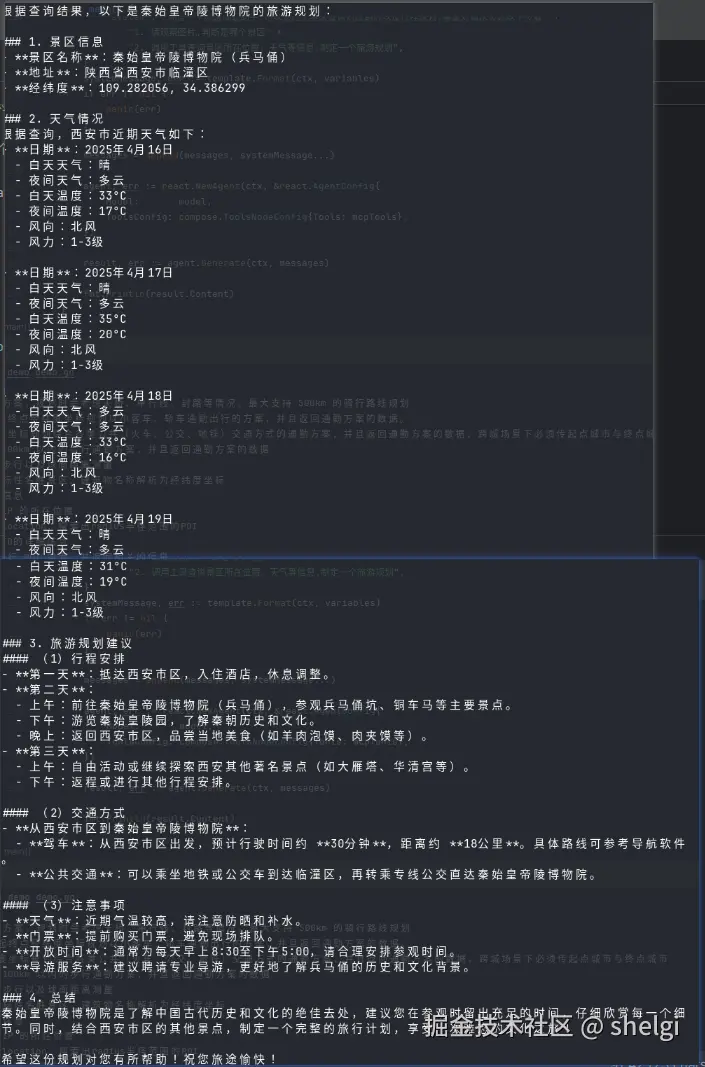
和我当初去西安的路线基本一致,看来AI制定的路线也还比较合理。