1、安装工具
bash
sudo apt update
sudo apt install gnupg -y
wget https://github.com/getsops/sops/releases/download/v3.10.2/sops-v3.10.2.linux.amd64
mv sops-v3.10.2.linux.amd64 /usr/local/bin/sops
chmod +x /usr/local/bin/sops
2、生成加密文件
bash
gpg --full-generate-key详情如下
Please select what kind of key you want:
(1) RSA and RSA (default)
(2) DSA and Elgamal
...
选择默认 (1),按回车。
接下来是设置密钥长度,推荐使用 4096:What keysize do you want? (2048)
4096
再设置有效期,比如:Key is valid for? (0)
0 # 0 表示永久
再输入你的身份信息:Name: 你的名字(比如 DevOps Admin)
Email: 用来识别密钥的邮箱地址(比如 devops@example.com)
Comment: 可以留空
然后确认并设置一个密钥密码。这个地方会要求输入两次,都是输完按回车键
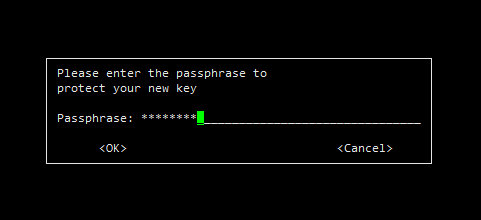
如下示例
bash
# gpg --full-generate-key
gpg (GnuPG) 2.2.19; Copyright (C) 2019 Free Software Foundation, Inc.
This is free software: you are free to change and redistribute it.
There is NO WARRANTY, to the extent permitted by law.

Please select what kind of key you want:
   (1) RSA and RSA (default)
   (2) DSA and Elgamal
   (3) DSA (sign only)
   (4) RSA (sign only)
  (14) Existing key from card
Your selection? 1
RSA keys may be between 1024 and 4096 bits long.
What keysize do you want? (3072) 4096
Requested keysize is 4096 bits
Please specify how long the key should be valid.
         0 = key does not expire
      <n>  = key expires in n days
      <n>w = key expires in n weeks
      <n>m = key expires in n months
      <n>y = key expires in n years
Key is valid for? (0) 0
Key does not expire at all
Is this correct? (y/N) y

GnuPG needs to construct a user ID to identify your key.

Real name: admin
Email address: admin@example.com
Comment:
You selected this USER-ID:
    "admin <admin@example.com>"

Change (N)ame, (C)omment, (E)mail or (O)kay/(Q)uit?
Change (N)ame, (C)omment, (E)mail or (O)kay/(Q)uit? O
We need to generate a lot of random bytes. It is a good idea to perform
some other action (type on the keyboard, move the mouse, utilize the
disks) during the prime generation; this gives the random number
generator a better chance to gain enough entropy.
We need to generate a lot of random bytes. It is a good idea to perform
some other action (type on the keyboard, move the mouse, utilize the
disks) during the prime generation; this gives the random number
generator a better chance to gain enough entropy.
gpg: key 80FD02B101FD87A9 marked as ultimately trusted
gpg: directory '/root/.gnupg/openpgp-revocs.d' created
gpg: revocation certificate stored as '/root/.gnupg/openpgp-revocs.d/2EBCED7EB8AAB81DFAD604CB80FD02B101FD87A9.rev'
public and secret key created and signed.

pub   rsa4096 2025-04-16 [SC]
      2EBCED7EB8AAB81DFAD604CB80FD02B101FD87A9
uid                      admin <admin@example.com>
sub   rsa4096 2025-04-16 [E]
3、查看你生成的密钥指纹(Fingerprint)
bash
# gpg --list-keys
gpg: checking the trustdb
gpg: marginals needed: 3  completes needed: 1  trust model: pgp
gpg: depth: 0  valid:   1  signed:   0  trust: 0-, 0q, 0n, 0m, 0f, 1u
/root/.gnupg/pubring.kbx
------------------------
pub   rsa4096 2025-04-16 [SC]
      2EBCED7EB8AAB81DFAD604CB80FD02B101FD87A9
uid           [ultimate] admin <admin@example.com>
sub   rsa4096 2025-04-16 [E]
上面那串 2EBC... 就是你用于后续 .sops.yaml 配置的 PGP key ID
4、配置 .sops.yaml
# cat .sops.yaml
yaml
creation_rules:
  - path_regex: secrets-.*\.yaml
    pgp: "2EBCED7EB8AAB81DFAD604CB80FD02B101FD87A9"
确保 pgp 后面的值与你上一步看到的 key fingerprint 一致
5、测试加密文件
1)创建明文加密文件
yaml
# cat secrets-dev.yaml
config_secret:
  db:
    use: admin
    passwd: "Aa123456"
2)加密操作
bash
# sops -e secrets-dev.yaml > secrets-dev.enc.yaml3)查看加密后文件内容
yaml
# cat secrets-dev.enc.yaml
config_secret:
    db:
        use: ENC[AES256_GCM,data:JKhLeJY=,iv:pTOXYAYGlEk0Ag7qUveaxJB9kUhdzrFM1X12qazlgb8=,tag:CLG0PygT5nX+QakMYX9ZbQ==,type:str]
        passwd: ENC[AES256_GCM,data:HGsPNph7LWk=,iv:Z20Z4MLw/AqpMsSFOCiwTuQ73pPj8OEp12NR5YmsAsg=,tag:tiRYys7lpcpe3N5levxvsQ==,type:str]
sops:
    lastmodified: "2025-04-16T07:57:12Z"
    mac: ENC[AES256_GCM,data:szEvsHuxR65dASr2SxVxgbZ+CJ9mPvROPy42KngFLnpASW7a6e8w6R1+SBOuPulJfEjHWX5Th1LEWhPVbwd5St5lgQD16jVBKEEbXDvlYQ5++0xZ2TG62HjaCAD2V9aKwt3MHC+wJr2xBDyVrkHqLvgN/wtleedTGNm5xQ35MVg=,iv:+APVv4kCbdf/tE1e3uFbUoBI1LParkoHU8dXHHAP42s=,tag:GznQUbGd4mj3yfyF3+GX8w==,type:str]
    pgp:
        - created_at: "2025-04-16T07:57:12Z"
          enc: |-
            -----BEGIN PGP MESSAGE-----

            hQIMA4AJcCK8KwnfAQ/8CzCfLAJHtCzS9RcyjNzUKZx86PR69B4iSMwpP7BfNKbo
            ggkTwsfeI/bfKtck653Xj4gnJFVbmxOzIhwtD7MIqCdrHvS95dMLB2f9LJu4YiNn
            fCUvIUEWsIJG6TYwqniW/rxC/9wRb0M9Nv3lKcA2ozwDDNElLVD3D5WsTMxf5O9X
            6k8w67ZBmmQ/tIEfTwZj3cop/WaO6uPaZf8fs93dixkjHqRLjpkjhZgKeCiu1b/9
            UgQNbzJPqV/+m8JgsjSq+HQUkdFHa9I/C8A7pTDCPPFqVY2uxMCUnc2yq9iechPX
            oHQxJgPxJH2t4/v5Z8js28GlGNAeOduUeNn1LyeA8o50BlznnmRcLDlHcaSdlPSa
            T6QbzKQbbWVADI1DAd8PclqdEWFIPiywdPs3WSUFGjGykUCpoGGNLngVR/71fRAJ
            1TLMd/Co5PQoNRfG8H+4COLWqNIg47XJWZrUcNZtNtY/VdBHBoZ/RrXNxhuBWNtL
            rkcFv0j0iJ5EpUPfLHnfdtA3rYjq9cr20wahA4m45ATMxSMn+A9Uqlf/C2xcBgYP
            YvT6xE+tpTqffV2ykEolMJrErVm7U+CbQgOK4s+FR6S70aCyWe3rHkummEc44S2U
            ML90A+rC6IF4bsZwyEnckWjVG8uDeOQ2BV3VbTiebTPSoWnxoH9cXA2D+oSA1wLS
            XgGOMFa4TiFLK4F7F8gSxNAvKVSIuz+1sqdTbUuwn+vSNYIhd4AHZuiSXLkY3QnS
            dfEX8ZvkaLRL+ZFNOuEfZ/xVLNruStpvzKwZ/ApZ8t4KLgBAtZtZ/t+Z0Nih8WI=
            =mz3B
            -----END PGP MESSAGE-----
          fp: 2EBCED7EB8AAB81DFAD604CB80FD02B101FD87A9
    unencrypted_suffix: _unencrypted
    version: 3.10.2
4)创建一个不加密的明文文件
yaml
# cat values.yaml
config:
  db:
    host: localhost
    port: "5432"
    name: observable
    sslmode: disable
5)创建需要创建secrent的yaml文件
yaml
# cat secrets.yaml
apiVersion: v1
kind: Secret
metadata:
  name: {{ include "project-api-server.fullname" . }}
  labels:
    {{- include "project-api-server.labels" . | nindent 4 }}
type: Opaque
stringData:
  service.conf: |
    title = "project-api-server"

    [project-api]
        listen = ":{{ .Values.app.port }}"
        dbobservable = "postgres://{{ .Values.config_secrets.db.user}}:{{ .Values.config_secrets.db.passwd }}@{{ .Values.config.db.host }}:{{ .Values.config.db.port }}/{{ .Values.config.db.name }}?sslmode={{ .Values.config.db.sslmode }}"
        schema = "rs"
6)我们可以直接解密
bash
helm secrets decrypt secrets-test.yaml或者
bash
#导入解密密钥
  ln -s /root/.gnupg $HOME && ln -s /root/.local $HOME
# helm更新的时候直接解密
  helm secrets $args upgrade $PROJECT $PROJECT --install \
       -n $ns \
       -f $PROJECT/secrets-$ENV.yaml