前言
前面我们已经通过软编码的一系列操作拿到我们需要用于绘制的YUV存储数据了,接下来我们还需要将这些数据展示在画面上,这里我们要借助WebGL的能力。
接下来我们按照流程一步一步来梳理他的实现。我们可能先入门一下WebGL的一些概念会有助于我们了解接下来讨论的内容。
WebGL其实来源于OpenGL的衍生,我们已经了解我们屏幕是各个RGB的排列组合出来的像素平面。我们显卡是输出数据到显示器的硬件,当前主流的显卡厂商有三家(inter, AMD,NVDIA), 底层C/C++会调用这个三个厂商显卡对外的API,如果没有规范,大家设计的相同功能的时候就会有可能有不同的函数命名,OpenGL 就是一个解决这样问题的规范,用于供三大显卡厂商保持统一的API的一个规范。是的,OpenGL其实是一个规范,他没有提供具体的技术实现,这些实现是各大显卡厂商的工作。我们只需要了解这些规范,我们就可以调用各大显卡的能力。
因为接近底层,我们使用OPENGL的能力可以让我们的数据高性能的绘制在屏幕上。但也因为WebGL是基于OpenGL衍生出来的JavaScript API,所以我们会在WebGL的MDN官网上看到一些和前端相对比较陌生的API, 我们这篇文章会尝试从简单的角度去看看他们如何使用。
OpenGL 渲染架构
WebGL出自OpenGL,我们了解OpenGL的架构便于我们理解这篇文章内容
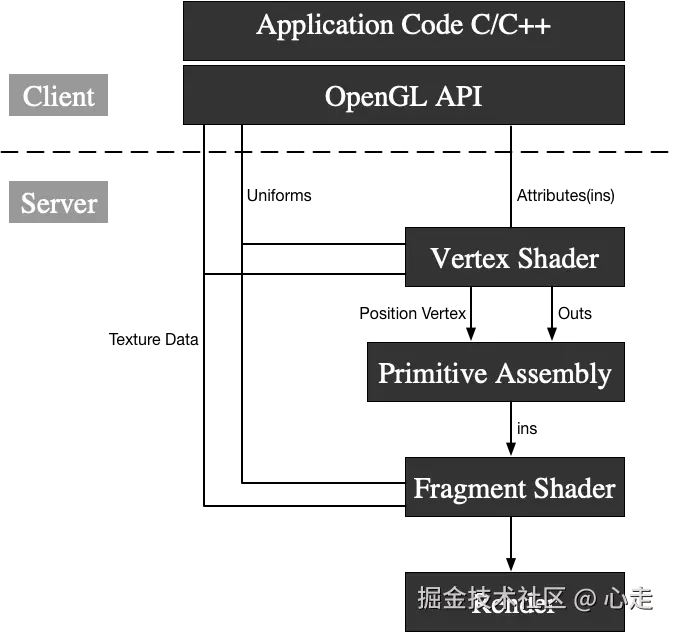
这里的Client层代表我们平时接触的各类函数和语法,他的指令调用层其实在CPU层,在CPU层执行后,数据和指令会传到显卡GPU,在这里Server层的实际调用都是GPU执行的过程。
我们要使用opengl绘制图形,实际流应该是这样
 这里可以类比成画画,通过顶点着色器去描述画面物体的轮廓,接着使用片元着色器去上色,然后通过显卡渲染展示画面,,我们了解到有三种类别的变量。TextureData变量、Uniforms变量、Atrribute变量,其中,Atrrbute变量只能作用在顶点着色器。TextureData\Uniform变量是可以同时作用两种着色器。
YUV数据预处理
我们从前面文章有说过,我们的YUV存储格式使用的是YUV420P, 他的存储格式参考图片
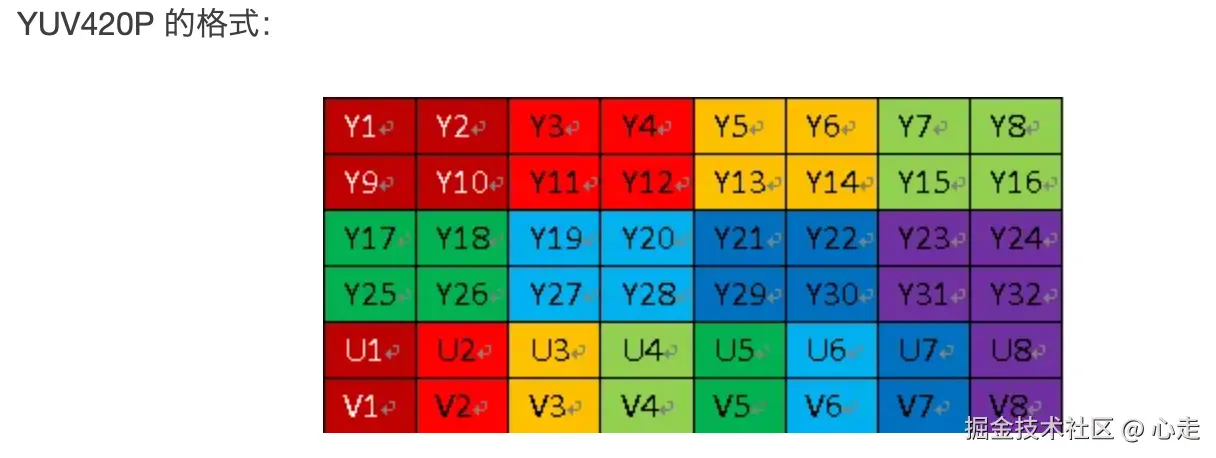
我们可以看到,他的Y、U、V数据是按照顺序来进行存储的,首先存储的是Y数据,然后是U数据,接着是V数据。
从前面我们也了解了,YUV420的采样规则,是Y分量按照逐行1:1采样的,U和V分量是隔行然后和Y分量按照1:2的格式进行采样。因为隔行,所以总的比例会是1:4
这样假设我们的图片分辨率是7201280,那么我们采集的Y分量的总数量将会是7201280个,U和V分量会是1280*720 / 4。
假设我们通过软解码之后拿到了分辨率width*height的数据,类型为无符号的8位数组data, 那么这个数组的data0 ~ datawidth* height 就是我们的Y分量范围数值,datawidth*height ~ datawidth* height/4就是我们的U分量范围数值, V分量的范围就是datawidth*height + width*height/4 ~ datadata.length
这样我们就会有下方的代码的产生
ts
    renderFrameByWebGL(frame: any) {
        const data = new Uint8Array(frame.data);
        const width = this.domInstance.width;
        const height = this.domInstance.height;
        const yLength = width * height;
        const uvLength = (width / 2) * (height / 2);
        if (!this.webglPlayer) {
            this.webglPlayer = new WebGLPlayer(this.domInstance as HTMLCanvasElement, {
                preserveDrawingBuffer: false
            });
        }
        this.webglPlayer.renderFrame(data, width, height, yLength, uvLength);
    }
webglPlay是我们写的一个用于WebGL渲染的类,下文我们会来讨论他,通过这个函数,我们对YUV各个分量的长度做出了计算,然后初始化了WebGL这个类,这个类接受一个canvas的dom元素,因为WebGL在网页中渲染依赖于canvas作为宿主容器。然后将其中的变量来作为入参传入给webglPlayer的函数renderFrame方法。
渲染主流程
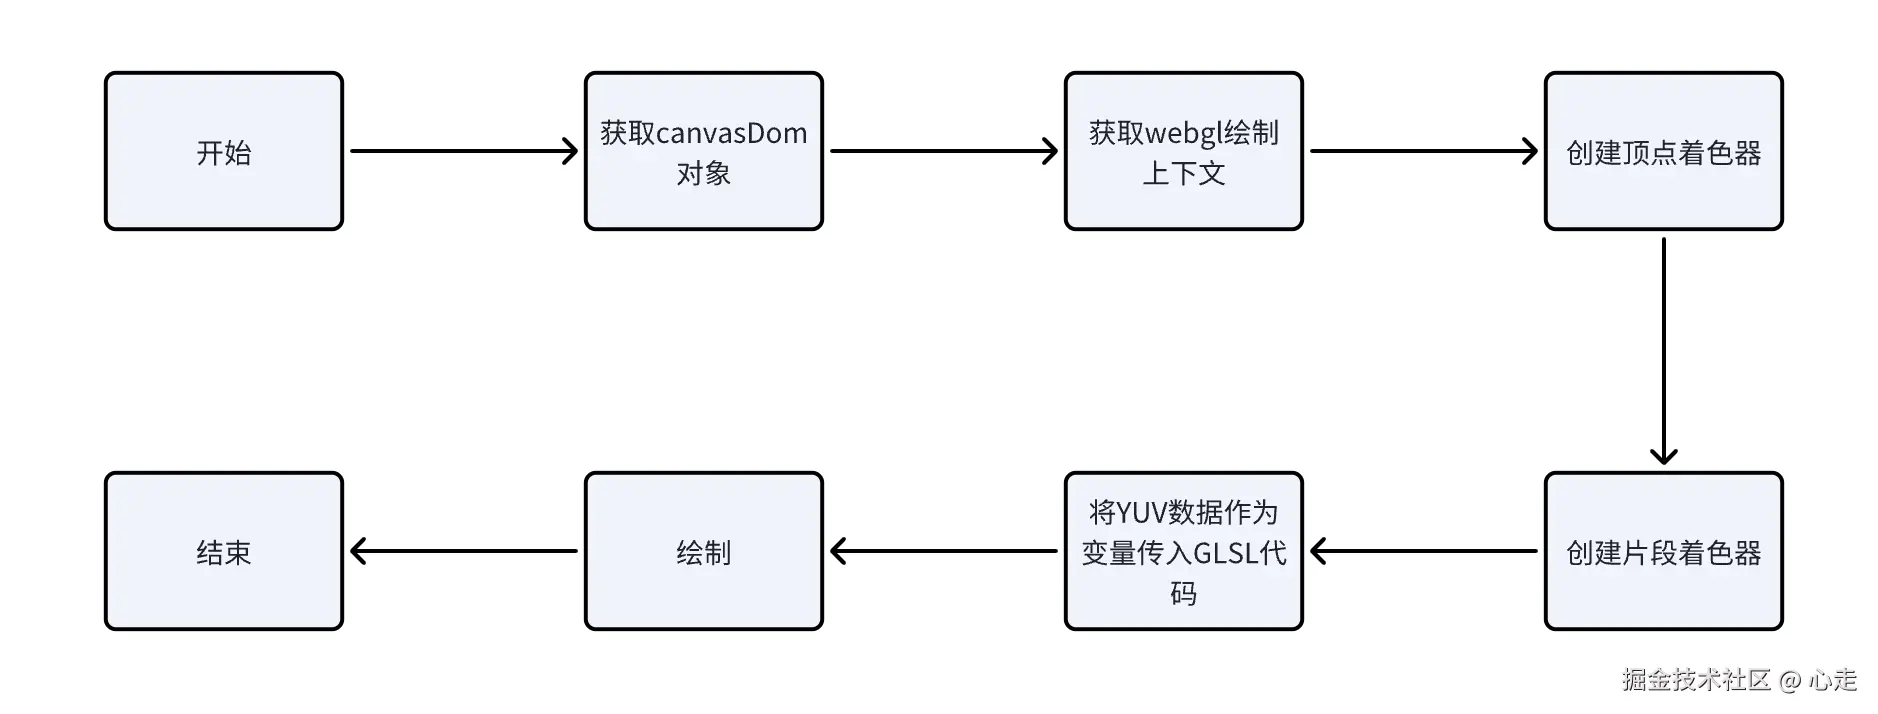
整体的逻辑要是将YUV的各个分量计算出相应的RGB数据,最后交付给WebGL渲染
整体代码
ts
/* eslint-disable class-methods-use-this */
/* eslint-disable */
interface ExtendedWebGLRenderingContext extends WebGLRenderingContext {
y?: Texture;
u?: Texture;
v?: Texture;
}
class Texture {
private gl: WebGLRenderingContext;
private texture: WebGLTexture | null;
constructor(gl: WebGLRenderingContext) {
this.gl = gl;
this.texture = gl.createTexture();
gl.bindTexture(gl.TEXTURE_2D, this.texture);
gl.texParameteri(gl.TEXTURE_2D, gl.TEXTURE_MAG_FILTER, gl.LINEAR);
gl.texParameteri(gl.TEXTURE_2D, gl.TEXTURE_MIN_FILTER, gl.LINEAR);
gl.texParameteri(gl.TEXTURE_2D, gl.TEXTURE_WRAP_S, gl.CLAMP_TO_EDGE);
gl.texParameteri(gl.TEXTURE_2D, gl.TEXTURE_WRAP_T, gl.CLAMP_TO_EDGE);
}
bind(n: number, program: WebGLProgram, name: string) {
const gl = this.gl;
gl.activeTexture([gl.TEXTURE0, gl.TEXTURE1, gl.TEXTURE2][n]);
gl.bindTexture(gl.TEXTURE_2D, this.texture);
gl.uniform1i(gl.getUniformLocation(program, name), n);
}
fill(width: number, height: number, data: Uint8Array) {
const gl = this.gl;
gl.bindTexture(gl.TEXTURE_2D, this.texture);
gl.texImage2D(gl.TEXTURE_2D, 0, gl.LUMINANCE, width, height, 0, gl.LUMINANCE, gl.UNSIGNED_BYTE, data);
}
}
class WebGLPlayer {
private canvas: HTMLCanvasElement;
private gl: ExtendedWebGLRenderingContext;
private program: WebGLProgram | null = null;
constructor(canvas: HTMLCanvasElement, options?: any) {
this.canvas = canvas;
this.gl = canvas.getContext("webgl") || canvas.getContext("experimental-webgl") as WebGLRenderingContext;
this.initGL(options);
}
private initGL(options?: any) {
if (!this.gl) {
console.log("[ER] WebGL not supported.");
return;
}
const gl = this.gl;
gl.pixelStorei(gl.UNPACK_ALIGNMENT, 1);
this.program = gl.createProgram();
const vertexShaderSource = `
attribute highp vec4 aVertexPosition;
attribute vec2 aTextureCoord;
varying highp vec2 vTextureCoord;
void main(void) {
gl_Position = aVertexPosition;
vTextureCoord = aTextureCoord;
}
`;
const vertexShader = this.createShader(gl, gl.VERTEX_SHADER, vertexShaderSource);
const fragmentShaderSource = `
precision highp float;
varying lowp vec2 vTextureCoord;
uniform sampler2D YTexture;
uniform sampler2D UTexture;
uniform sampler2D VTexture;
const mat4 YUV2RGB = mat4(
1.1643828125, 0, 1.59602734375, -.87078515625,
1.1643828125, -.39176171875, -.81296875, .52959375,
1.1643828125, 2.017234375, 0, -1.081390625,
0, 0, 0, 1
);
void main(void) {
gl_FragColor = vec4(
texture2D(YTexture, vTextureCoord).x,
texture2D(UTexture, vTextureCoord).x,
texture2D(VTexture, vTextureCoord).x,
1
) * YUV2RGB;
}
`;
const fragmentShader = this.createShader(gl, gl.FRAGMENT_SHADER, fragmentShaderSource);
gl.attachShader(this.program, vertexShader);
gl.attachShader(this.program, fragmentShader);
gl.linkProgram(this.program);
gl.useProgram(this.program);
if (!gl.getProgramParameter(this.program, gl.LINK_STATUS)) {
console.log("[ER] Shader link failed.");
}
const vertexPositionAttribute = gl.getAttribLocation(this.program, "aVertexPosition");
gl.enableVertexAttribArray(vertexPositionAttribute);
const textureCoordAttribute = gl.getAttribLocation(this.program, "aTextureCoord");
gl.enableVertexAttribArray(textureCoordAttribute);
const verticesBuffer = gl.createBuffer();
gl.bindBuffer(gl.ARRAY_BUFFER, verticesBuffer);
gl.bufferData(gl.ARRAY_BUFFER, new Float32Array([1.0, 1.0, 0.0, -1.0, 1.0, 0.0, 1.0, -1.0, 0.0, -1.0, -1.0, 0.0]), gl.STATIC_DRAW);
gl.vertexAttribPointer(vertexPositionAttribute, 3, gl.FLOAT, false, 0, 0);
const texCoordBuffer = gl.createBuffer();
gl.bindBuffer(gl.ARRAY_BUFFER, texCoordBuffer);
gl.bufferData(gl.ARRAY_BUFFER, new Float32Array([1.0, 0.0, 0.0, 0.0, 1.0, 1.0, 0.0, 1.0]), gl.STATIC_DRAW);
gl.vertexAttribPointer(textureCoordAttribute, 2, gl.FLOAT, false, 0, 0);
gl.y = new Texture(gl);
gl.u = new Texture(gl);
gl.v = new Texture(gl);
gl.y.bind(0, this.program, "YTexture");
gl.u.bind(1, this.program, "UTexture");
gl.v.bind(2, this.program, "VTexture");
}
private createShader(gl: any, type: number, source: string): WebGLShader {
const shader = gl.createShader(type);
gl.shaderSource(shader, source);
gl.compileShader(shader);
if (!gl.getShaderParameter(shader, gl.COMPILE_STATUS)) {
console.error("An error occurred compiling the shaders: " + gl.getShaderInfoLog(shader));
gl.deleteShader(shader);
throw new Error("Shader compilation failed");
}
return shader;
}
renderFrame(videoFrame: Uint8Array, width: number, height: number, yLength: number, uvLength: number) {
if (!this.gl) {
console.log("[ER] Render frame failed due to WebGL not supported.");
return;
}
const gl = this.gl;
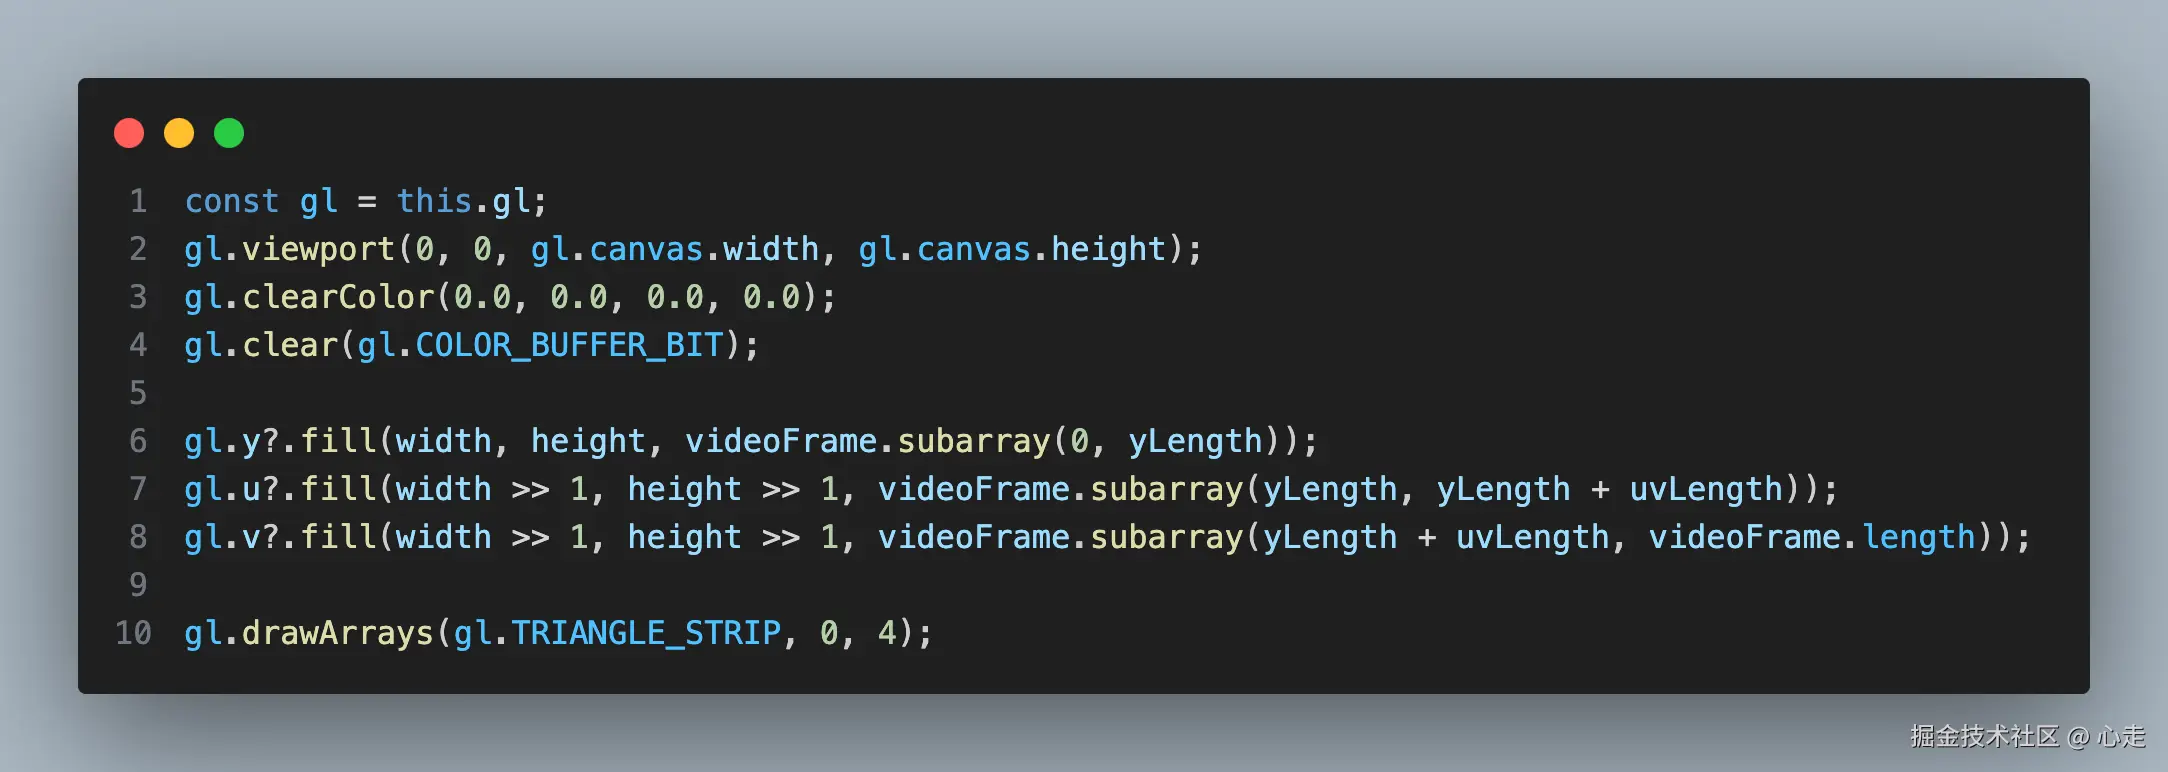
gl.viewport(0, 0, gl.canvas.width, gl.canvas.height);
gl.clearColor(0.0, 0.0, 0.0, 0.0);
gl.clear(gl.COLOR_BUFFER_BIT);
gl.y?.fill(width, height, videoFrame.subarray(0, yLength));
gl.u?.fill(width >> 1, height >> 1, videoFrame.subarray(yLength, yLength + uvLength));
gl.v?.fill(width >> 1, height >> 1, videoFrame.subarray(yLength + uvLength, videoFrame.length));
gl.drawArrays(gl.TRIANGLE_STRIP, 0, 4);
}
}
export { Texture, WebGLPlayer };整体分析
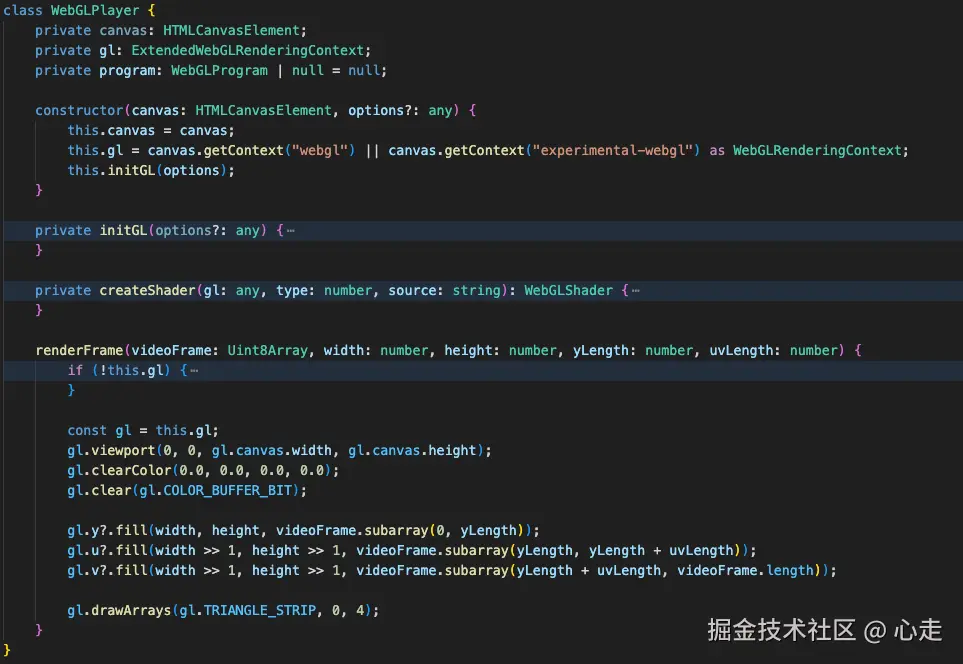
这个类由一个构造函数,两个私有函数,一个公共函数构成。其中renderFrame是供外部去频繁调用渲染的。其他的都是初始化必要环境的搭建函数
WebGLPlayer类详细分析
renderFrame
这个类对外只暴漏了一个renderFrame函数,这个是关键函数,我们先看一下,这个函数接受五个入参
-
videoFrame是TypeArray,类型为8位的无单位数组
-
Width: 帧宽度
-
Height: 帧高度
-
Ylength: Y分量的数量
-
uvLength: UV分量的数量
这里gl变量出现了很多处,我们看下他的赋值
ini
this.gl = canvas.getContext("webgl") || canvas.getContext("experimental-webgl") as WebGLRenderingContext;这里的类型是提供基于 OpenGL ES 2.0 的绘图上下文, 相关的MDN文档点击这里, 本文的功能基本都围绕这个上下文的功能去进行实现。
我们来对这里面的代码进行逐行去分析一下
arduino
gl.viewport(0, 0, gl.canvas.width, gl.canvas.height);viewport函数的作用是用来设置视口,即指定从标准设备到窗口坐标的 x、y 仿射变换。这里有一些背景知识需要了解一下,OpenGL相关坐标系, 坐标系统
我们要将绘图的空间比喻成一个3d空间,我们的canvas的dom所展示的画面只是一个2d平面,那么我们对于3d世界的取景,就比如一个摄影机从一个点位对应一个方向去取景。这个取景出来的画面就是我们的viewport。
ini
gl.clearColor(0.0, 0.0, 0.0, 0.0);The
WebGLRenderingContext.clearColor()method of the WebGL API specifies the color values used when clearing color buffers.
这个方法是用于清空颜色的缓冲区,相当于假设canvas的dom元素画布已经存在背景颜色,我们需要先对他进行一下清理。
ts
gl.clear(gl.COLOR_BUFFER_BIT);清空一下颜色深度缓冲
ts
     gl.y?.fill(width, height, videoFrame.subarray(0, yLength));
     gl.u?.fill(width >> 1, height >> 1, videoFrame.subarray(yLength, yLength + uvLength));
     gl.v?.fill(width >> 1, height >> 1, videoFrame.subarray(yLength + uvLength, videoFrame.length));
这里的是对yuv的数值进行赋值,这里的 y, u, v 是Texture类的实例。这里暂时先理解对绘制数据的填充,后面会对fill方法详细分析, 这里u, v分量的值右移一位是因为采样需要少一半,所以右移一位相当于除2了
ini
gl.drawArrays(gl.TRIANGLE_STRIP, 0, 4);The
WebGLRenderingContext.drawArrays()method of the WebGL API renders primitives from array data.
drawArrays是一个绘制图元的方法,MDN文档参考
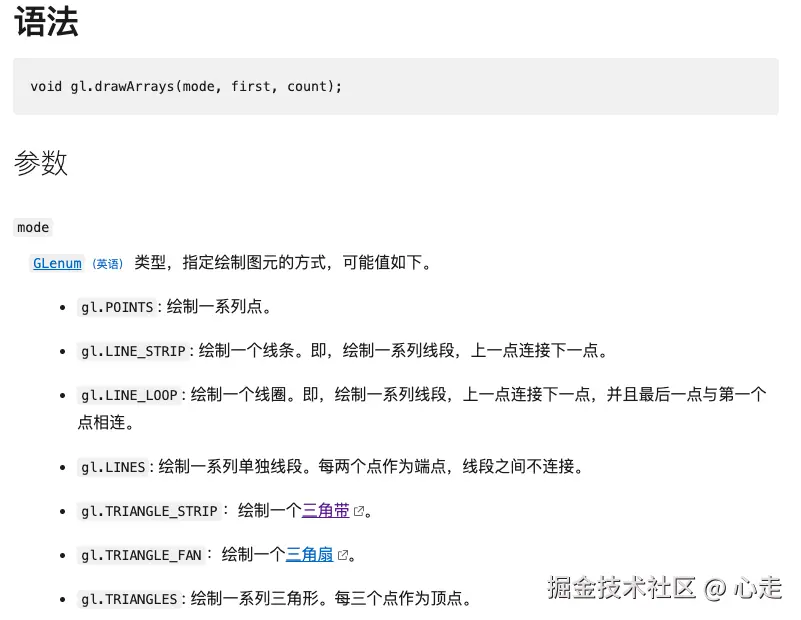
gl.TRIANGLE_STRIP是一个三角带的概念,计算机图形学里,很多3d的图案都是一个个三角形组成的,他们会共享一些顶点信息,他们之间拼接起来的图案我们叫做三角带。
我们在这里其实只会有两个三角形,需要N+2个点(N是三角形数量),用于拼接成矩阵。所以会有四个点。
initGL
ts
gl.pixelStorei(gl.UNPACK_ALIGNMENT, 1);这个参数用于设置在从缓冲区读取像素数据时,每行数据的字节对齐方式。默认值为 4。因为YUV的每行的字节数是不确定4的倍数,这里将对齐字节数设置为0。
ts
this.program = gl.createProgram();WebGLProgram 是 WebGL API 的一部分,它由两个WebGLShaders(webgl 着色器)组成,分别为顶点着色器和片元着色器(两种着色器都是采用 GLSL 语言编写的)。创建一个 WebGLProgram 需要调用 GL 上下文的createProgram() 方法,然后调用attachShader()方法附加上着色器,之后你才能将它们连接到一个可用的程序。这里接触了着色器的核心概念了,请详细理解上方的渲染架构。
所以要将下面代码作为一个整体来看
ts
        this.program = gl.createProgram();
        const vertexShaderSource = `xxx`; // 这里暂时忽略GLSL 语言的内容,下面会涉及
        const vertexShader = this.createShader(gl, gl.VERTEX_SHADER, vertexShaderSource);
        const fragmentShaderSource = `xxx`; // 这里暂时忽略GLSL 语言的内容
        const fragmentShader = this.createShader(gl, gl.FRAGMENT_SHADER, fragmentShaderSource);
        gl.attachShader(this.program, vertexShader);
        gl.attachShader(this.program, fragmentShader);
        gl.linkProgram(this.program);
        gl.useProgram(this.program);
这段代码是创建了一个程序program,然后创建(createShader)了一个顶点着色器和片元着色器,然后将着色器添加到程序program,然后将program和webgl的上下文链接起来(linkProgram), 最后使用webgl上下文使用(useProgram)这个程序。
createShader
创建着色器,参考文档
ts
    private createShader(gl: any, type: number, source: string): WebGLShader {
        const shader = gl.createShader(type);
        gl.shaderSource(shader, source);
        gl.compileShader(shader);
        if (!gl.getShaderParameter(shader, gl.COMPILE_STATUS)) {
            console.error("An error occurred compiling the shaders: " + gl.getShaderInfoLog(shader));
            gl.deleteShader(shader);
            throw new Error("Shader compilation failed");
        }
        return shader;
    }
这里的三个入参
1、gl, webgl的上下文
2、着色器的类型,着色器只有两种类型,顶点着色器和片元着色器
3、source: GLSL代码
使用 GLSL 的着色器(shader),GLSL 是一门特殊的有着类似于 C 语言的语法,在图形管道 (graphic pipeline) 中直接可执行的 OpenGL 着色语言。着色器有两种类型------顶点着色器 (Vertex Shader) 和片段着色器(Fragment Shader)。前者是将形状转换到真实的 3D 绘制坐标中,后者是计算最终渲染的颜色和其他属性用的。
我们这里有两个GLSL代码代表的着色器,一些参考查看GLSL中文手册。
顶点着色器GLSL
ts
            attribute highp vec4 aVertexPosition;
            attribute vec2 aTextureCoord;
            varying highp vec2 vTextureCoord;
            void main(void) {
                gl_Position = aVertexPosition;
                vTextureCoord = aTextureCoord;
            }
这里有四个变量,aVertexPosition 和 aTextureCoord 我们可以看到前面有attribute关键字,前面我们通过前面框架处有提到,这个类型的变量,只会作用在顶点着色器。所以等下我们会从外部将这个变量传入到此处赋值,变量vTextureCoord前面有标识符varying,这个类型的数据用于在顶点着色器和片元着色器之间传递数据。gl_position是opengl的内置变量,用于接收顶点着色器的数组信息,如果不给这个值赋值,我们将无法看到画面。
片元着色器GLSL
ts
            precision highp float; // 定义高精度
            varying lowp vec2 vTextureCoord; // 从顶点着色器传入进来的数据
            uniform sampler2D YTexture;
            uniform sampler2D UTexture;
            uniform sampler2D VTexture;
            const mat4 YUV2RGB = mat4(
                1.1643828125, 0, 1.59602734375, -.87078515625,
                1.1643828125, -.39176171875, -.81296875, .52959375,
                1.1643828125, 2.017234375, 0, -1.081390625,
                0, 0, 0, 1
            );
            void main(void) {
                gl_FragColor = vec4(
                    texture2D(YTexture, vTextureCoord).x,
                    texture2D(UTexture, vTextureCoord).x,
                    texture2D(VTexture, vTextureCoord).x,
                    1
                ) * YUV2RGB;
            }
YTexture, UTexture, VTexture是纹理对象,用于对片元着色器进行贴图,YUV我们理解他是三个图层,所以我们这里需要三个纹理对象。mat4是矩阵对象,在GPU计算操作里面,对这一类并行计算有很高的计算能力。这里的计算矩阵数值我也不懂,应该是根据YUV转RGB的公式推断出来的,参考文档
传参操作
ts
        const vertexPositionAttribute = gl.getAttribLocation(this.program, "aVertexPosition");
        gl.enableVertexAttribArray(vertexPositionAttribute);
        const textureCoordAttribute = gl.getAttribLocation(this.program, "aTextureCoord");
        gl.enableVertexAttribArray(textureCoordAttribute);

        const verticesBuffer = gl.createBuffer();
        gl.bindBuffer(gl.ARRAY_BUFFER, verticesBuffer);
        gl.bufferData(gl.ARRAY_BUFFER, new Float32Array([1.0, 1.0, 0.0, -1.0, 1.0, 0.0, 1.0, -1.0, 0.0, -1.0, -1.0, 0.0]), gl.STATIC_DRAW);
        gl.vertexAttribPointer(vertexPositionAttribute, 3, gl.FLOAT, false, 0, 0);
        const texCoordBuffer = gl.createBuffer();
        gl.bindBuffer(gl.ARRAY_BUFFER, texCoordBuffer);
        gl.bufferData(gl.ARRAY_BUFFER, new Float32Array([1.0, 0.0, 0.0, 0.0, 1.0, 1.0, 0.0, 1.0]), gl.STATIC_DRAW);
gl.vertexAttribPointer(textureCoordAttribute, 2, gl.FLOAT, false, 0, 0);webgl的顶点属性在很多平台都是预设的,我们需要先enableVertexAttribArray然后才可以对他进行激活他的使用。vertexAttribPointer方法是告诉显卡从bindbuffer里面取出缓冲区,传参相应的参数到最终GLSL定义的数据。
YUV纹理初始化
ts
        gl.y = new Texture(gl);
        gl.u = new Texture(gl);
        gl.v = new Texture(gl);
        gl.y.bind(0, this.program, "YTexture");
        gl.u.bind(1, this.program, "UTexture");
        gl.v.bind(2, this.program, "VTexture");
这里已经是 语义化的代码了,不多赘述,我们对Texture类进行详细分析一下Texture类详细分析
构造函数
ts
    constructor(gl: WebGLRenderingContext) {
        this.gl = gl;
        this.texture = gl.createTexture();
        gl.bindTexture(gl.TEXTURE_2D, this.texture);

        gl.texParameteri(gl.TEXTURE_2D, gl.TEXTURE_MAG_FILTER, gl.LINEAR); // 纹理放大滤镜
        gl.texParameteri(gl.TEXTURE_2D, gl.TEXTURE_MIN_FILTER, gl.LINEAR); // 纹理最小化过滤器
        gl.texParameteri(gl.TEXTURE_2D, gl.TEXTURE_WRAP_S, gl.CLAMP_TO_EDGE);// 纹理坐标S
        gl.texParameteri(gl.TEXTURE_2D, gl.TEXTURE_WRAP_T, gl.CLAMP_TO_EDGE); // 纹理坐标T
    }
Bind
ts
    bind(n: number, program: WebGLProgram, name: string) {
        const gl = this.gl;
        gl.activeTexture([gl.TEXTURE0, gl.TEXTURE1, gl.TEXTURE2][n]);
        gl.bindTexture(gl.TEXTURE_2D, this.texture);
        gl.uniform1i(gl.getUniformLocation(program, name), n);
    }
activeTexture用来激活指定的纹理单元。
uniform1i 这里是要拆开理解,uniform代表变量代指, 1代表的是序号,i代表的是整数
gl.getUniformLocation 是找到uniform变量在着色器中的位置
Fill
ts
    fill(width: number, height: number, data: Uint8Array) {
        const gl = this.gl;
        gl.bindTexture(gl.TEXTURE_2D, this.texture);
        gl.texImage2D(gl.TEXTURE_2D, 0, gl.LUMINANCE, width, height, 0, gl.LUMINANCE, gl.UNSIGNED_BYTE, data);
    }

    // texImage2D(target, level, internalformat, width, height, border, format, type, source)
textImage2D WebGLRenderingContext.texImage2D() 方法指定了二维纹理图像。