
说明:本文图片较多,耐心等待加载。(建议用电脑)
注意所有打开的文件都要记得保存。
第一步:准备工作
本文是在之前Hadoop搭建完集群环境后继续进行的,因此需要读者完成我之前教程的所有操作。
第二步:我们先将Hadoop集群启动(上篇都讲过)
1.将两台虚拟机都启动。
2.进去Master终端,(右键-》打开终端),启动,并用jps检查是否成功启动
bash
start-dfs.sh
start-yarn.sh
mr-jobhistory-daemon.sh start historyserver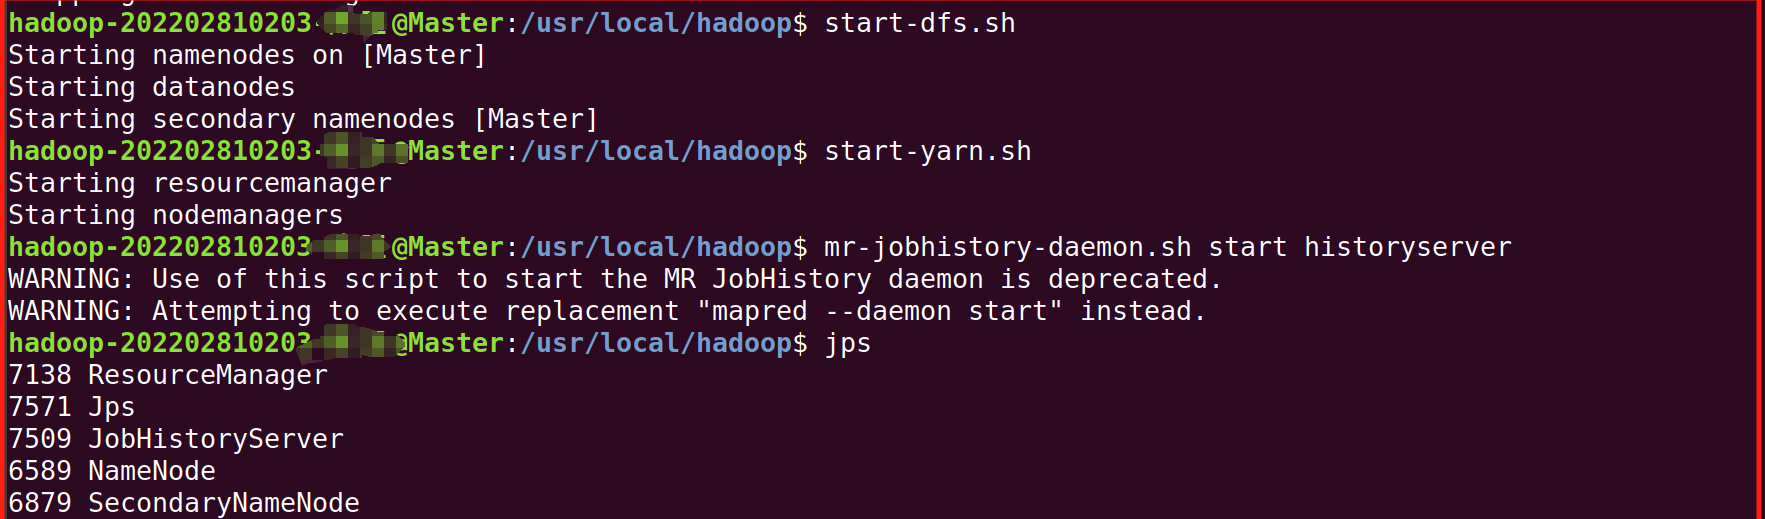
第三步:准备工作
首先,在Linux系统本地创建两个文件,即文件wordfile1.txt和wordfile2.txt。
bash
echo -e "I love Spark\nI love Hadoop" > wordfile1.txt
echo -e "Hadoop is good\nSpark is fast" > wordfile2.txt
可以用 cat 命令确认内容:
bash
cat wordfile1.txt
cat wordfile2.txt为了后续区分,我们之前有好多文件都弄到一个目录里了,这里我们新创建 HDFS 目标目录
创建 HDFS 目标目录(如果未创建)
bash
hdfs dfs -mkdir -p /user/hadoop/input将本地文件上传到 HDFS
bash
hdfs dfs -put wordfile1.txt /user/hadoop/input/
hdfs dfs -put wordfile2.txt /user/hadoop/input/
第四步:Eclipse编写代码
执行如下命令启动Eclipse:
bash
cd /usr/local/eclipse
./eclipse 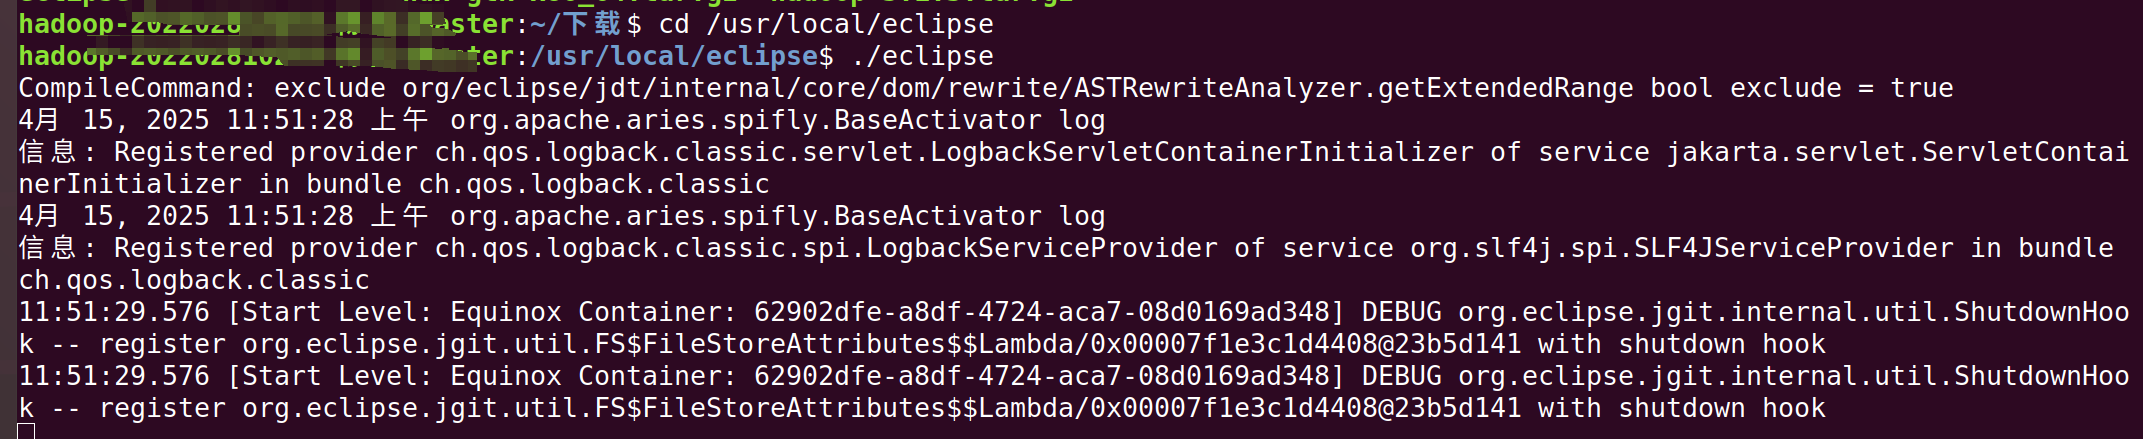
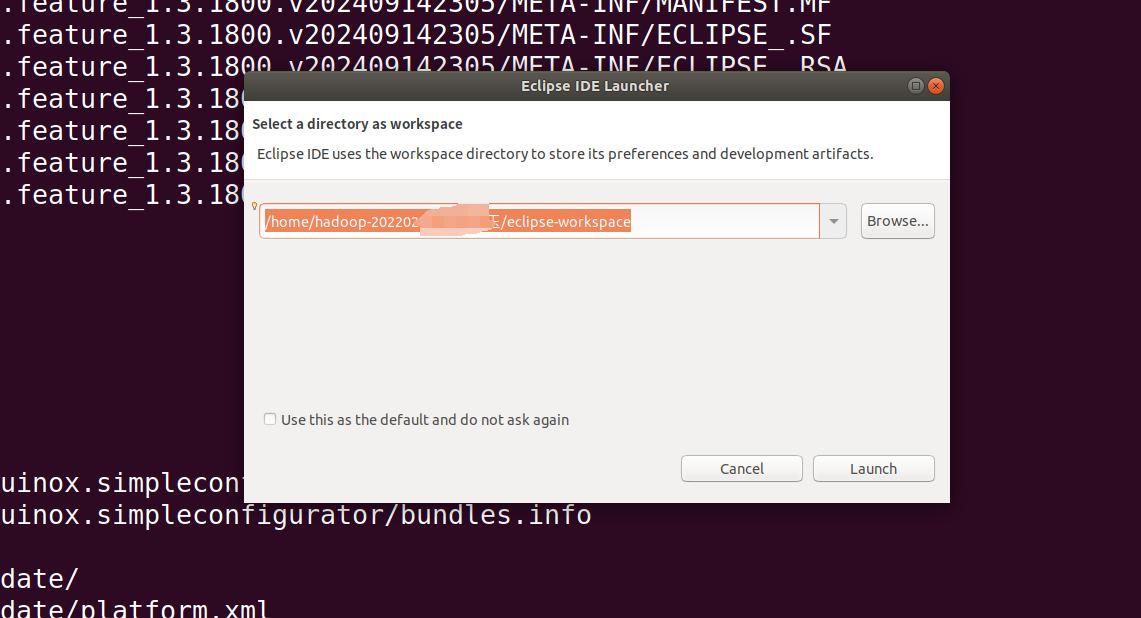
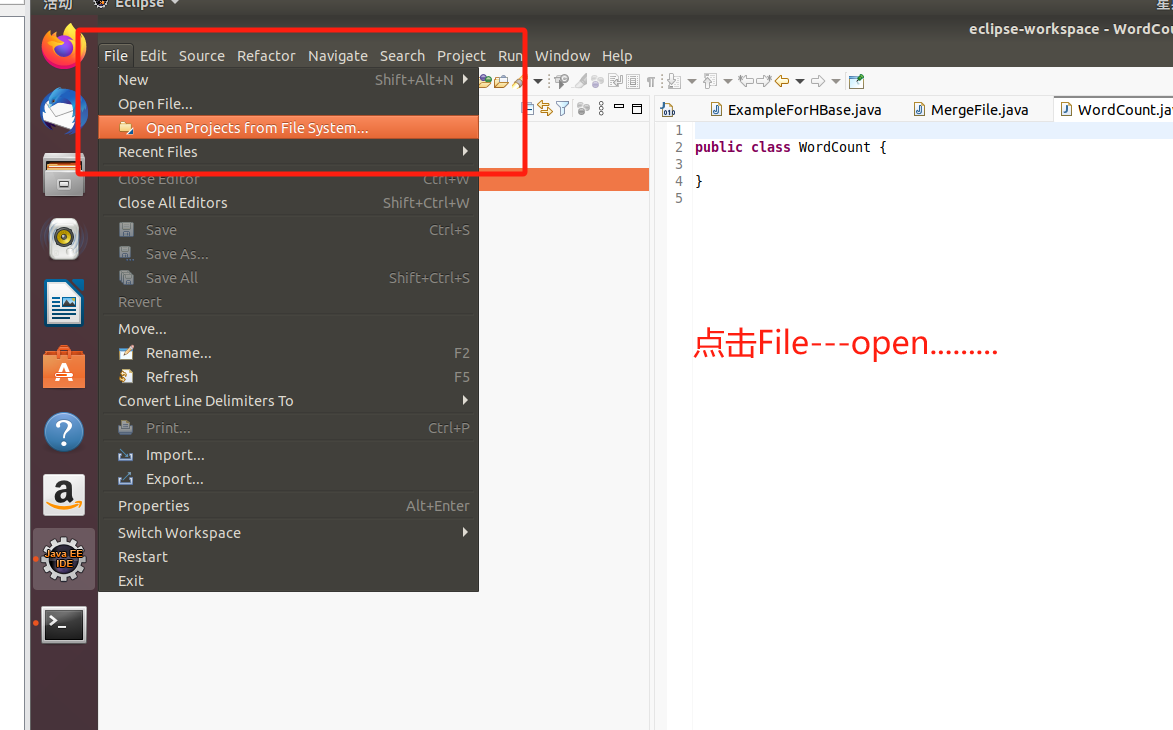
出现这个界面即为启动成功。我们直接点击launch。
补充知识点:
如果打开发现Eclipse左侧的目录文件夹消失了。可以这样解决
下面框住的这一部分消失了
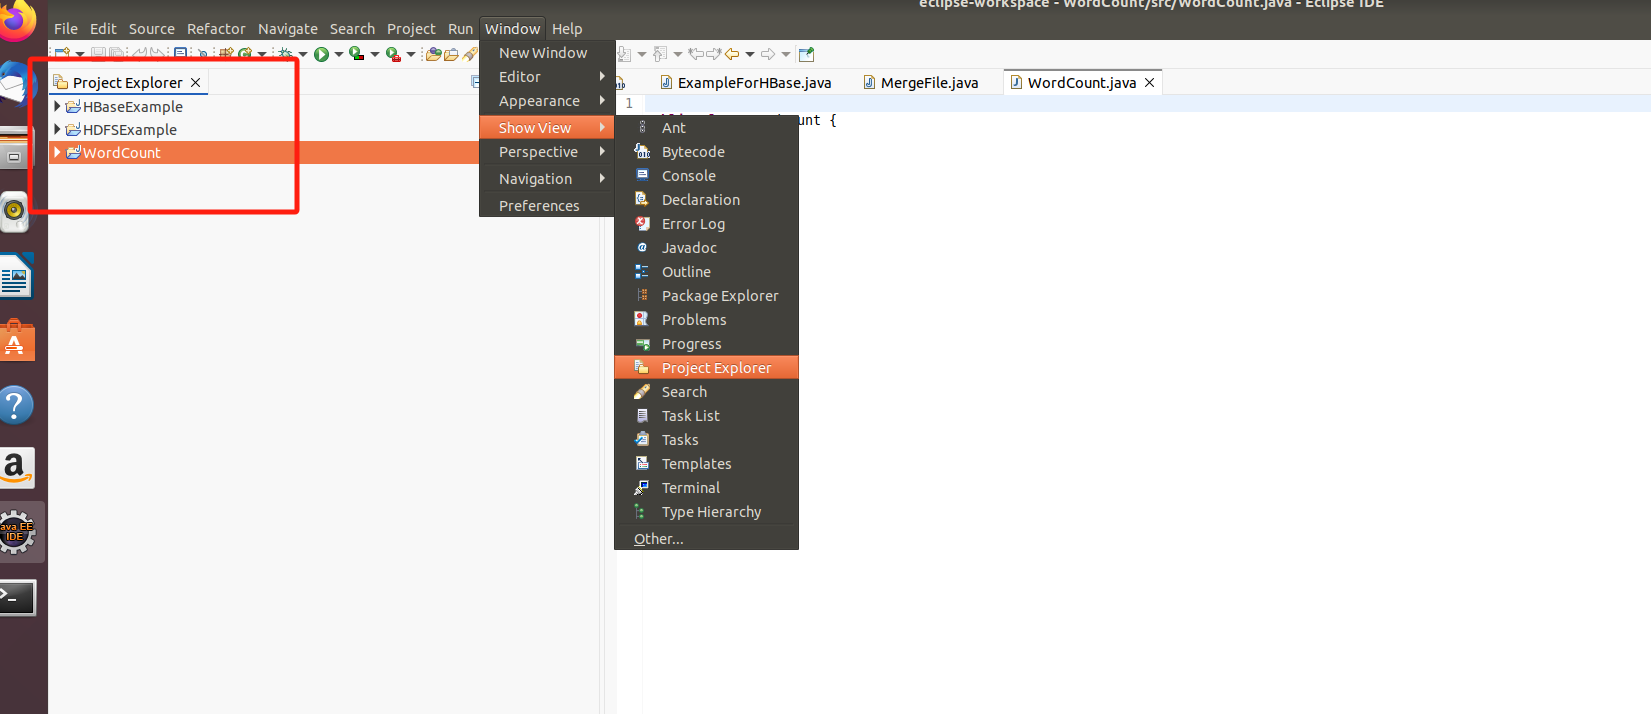
解决办法
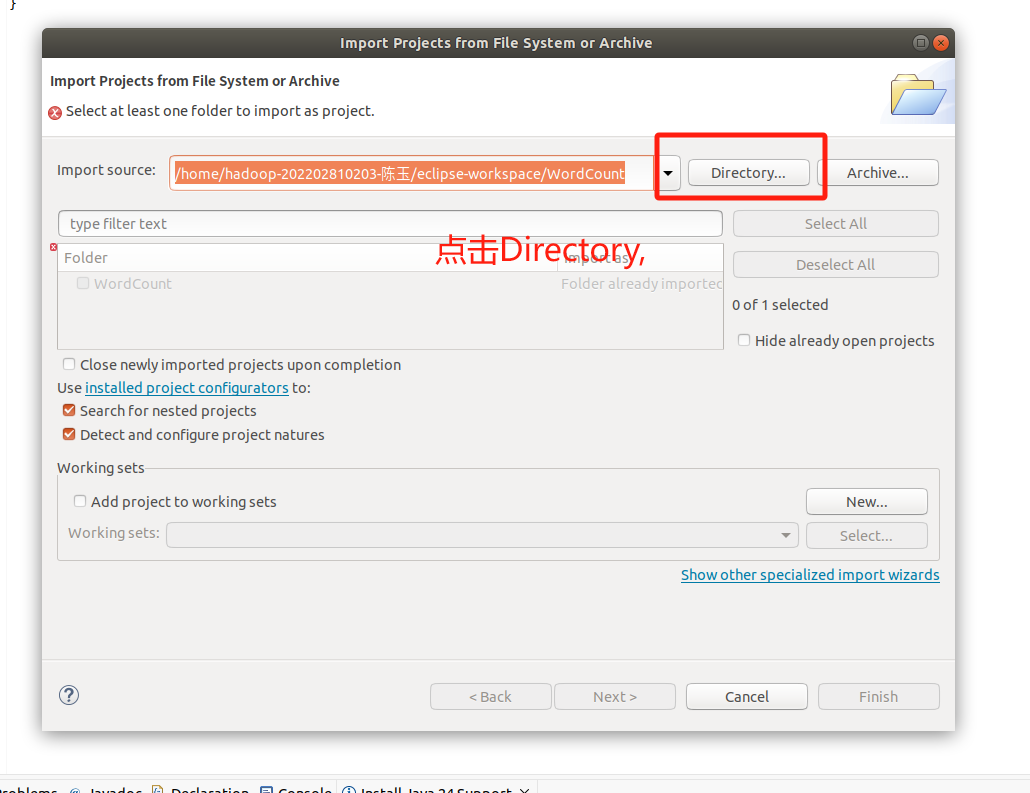
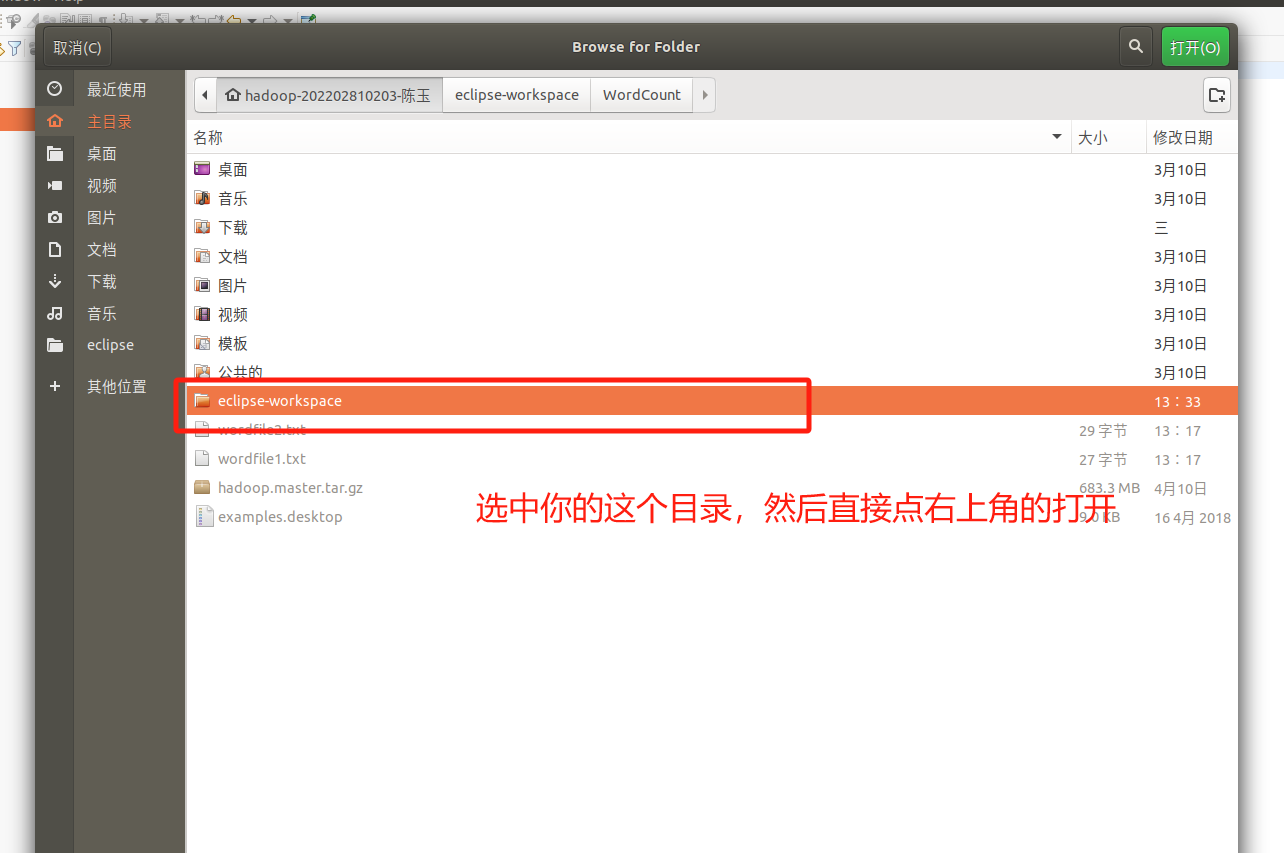 然后点击Finsh,就出现了。
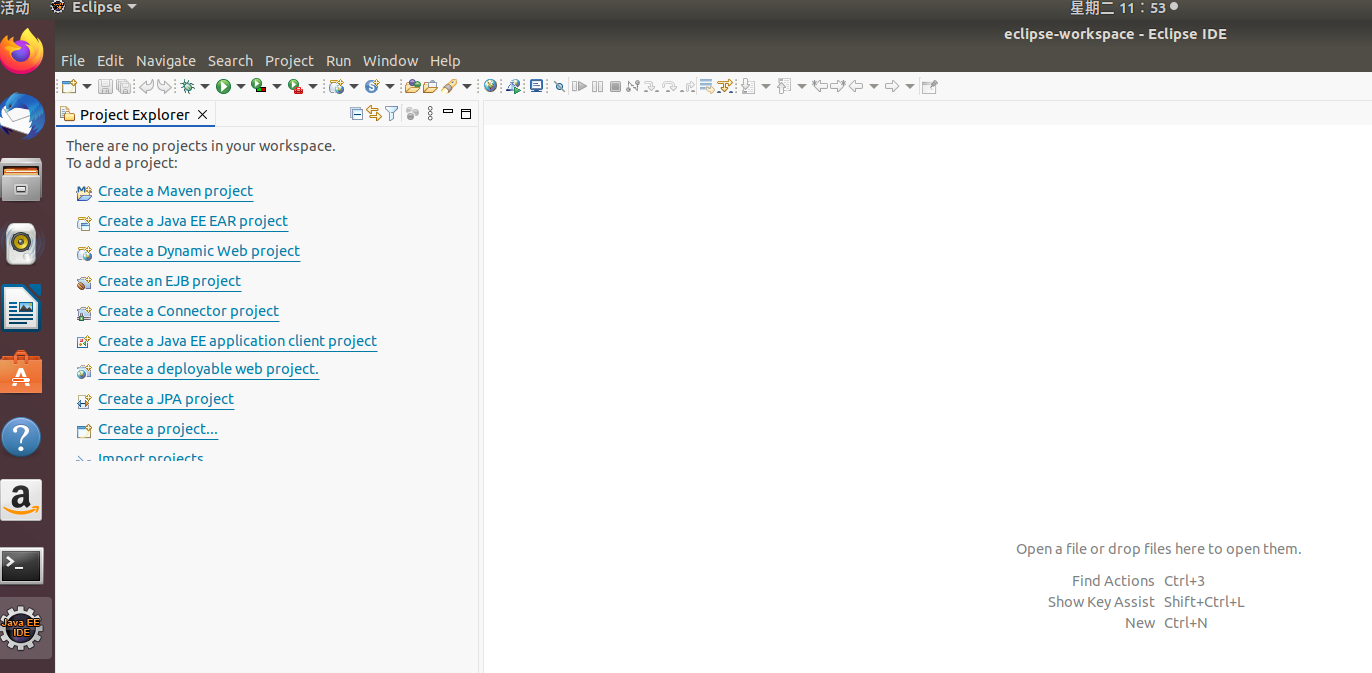
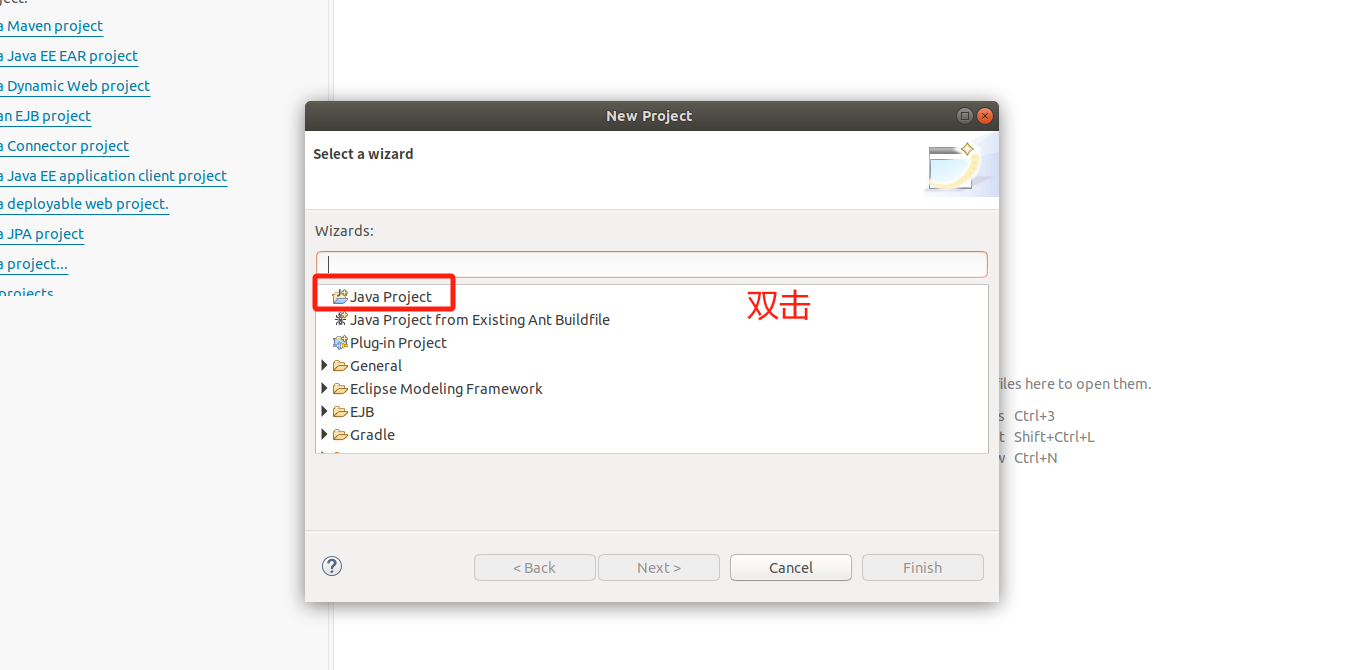
1.在 Eclipse中创建项目:
继续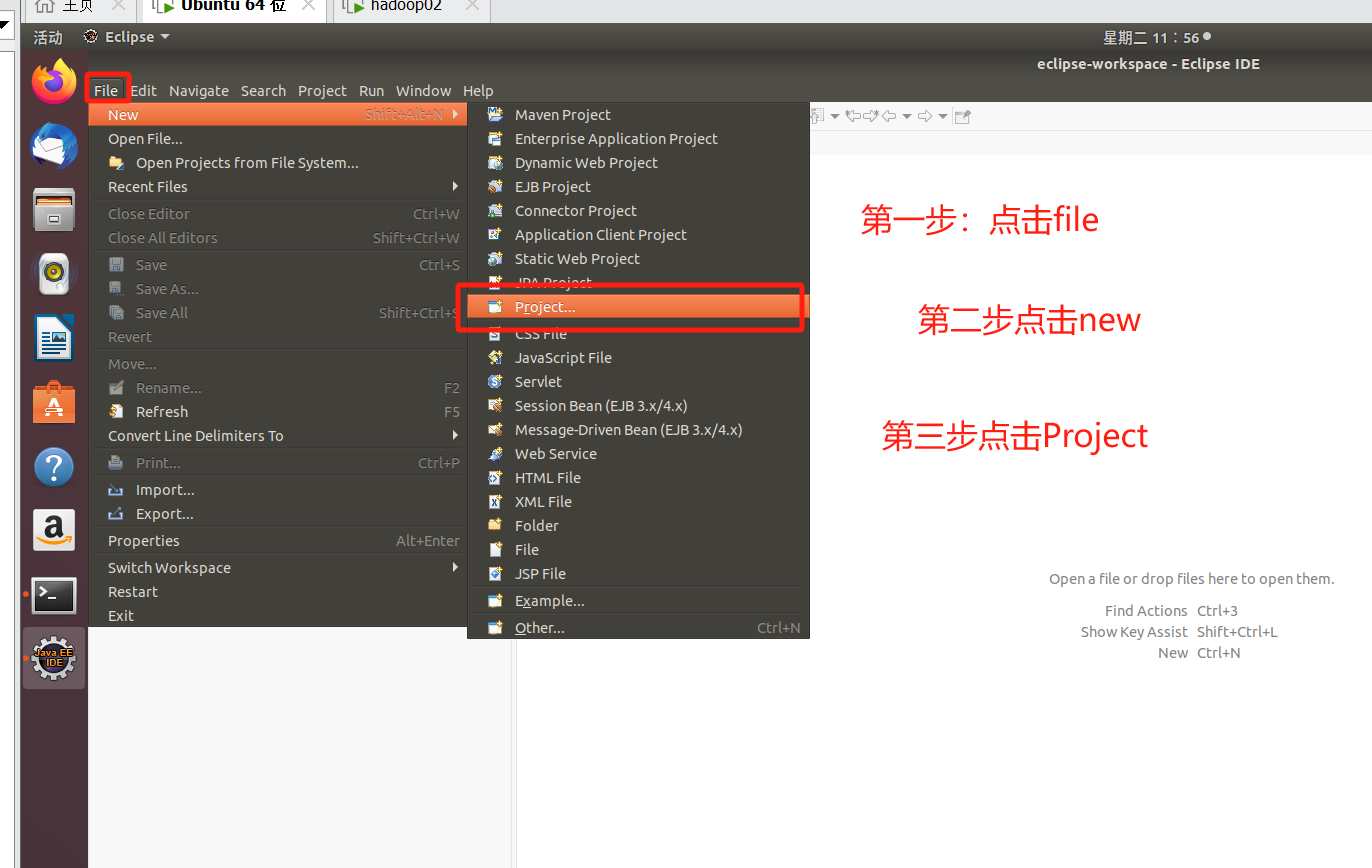
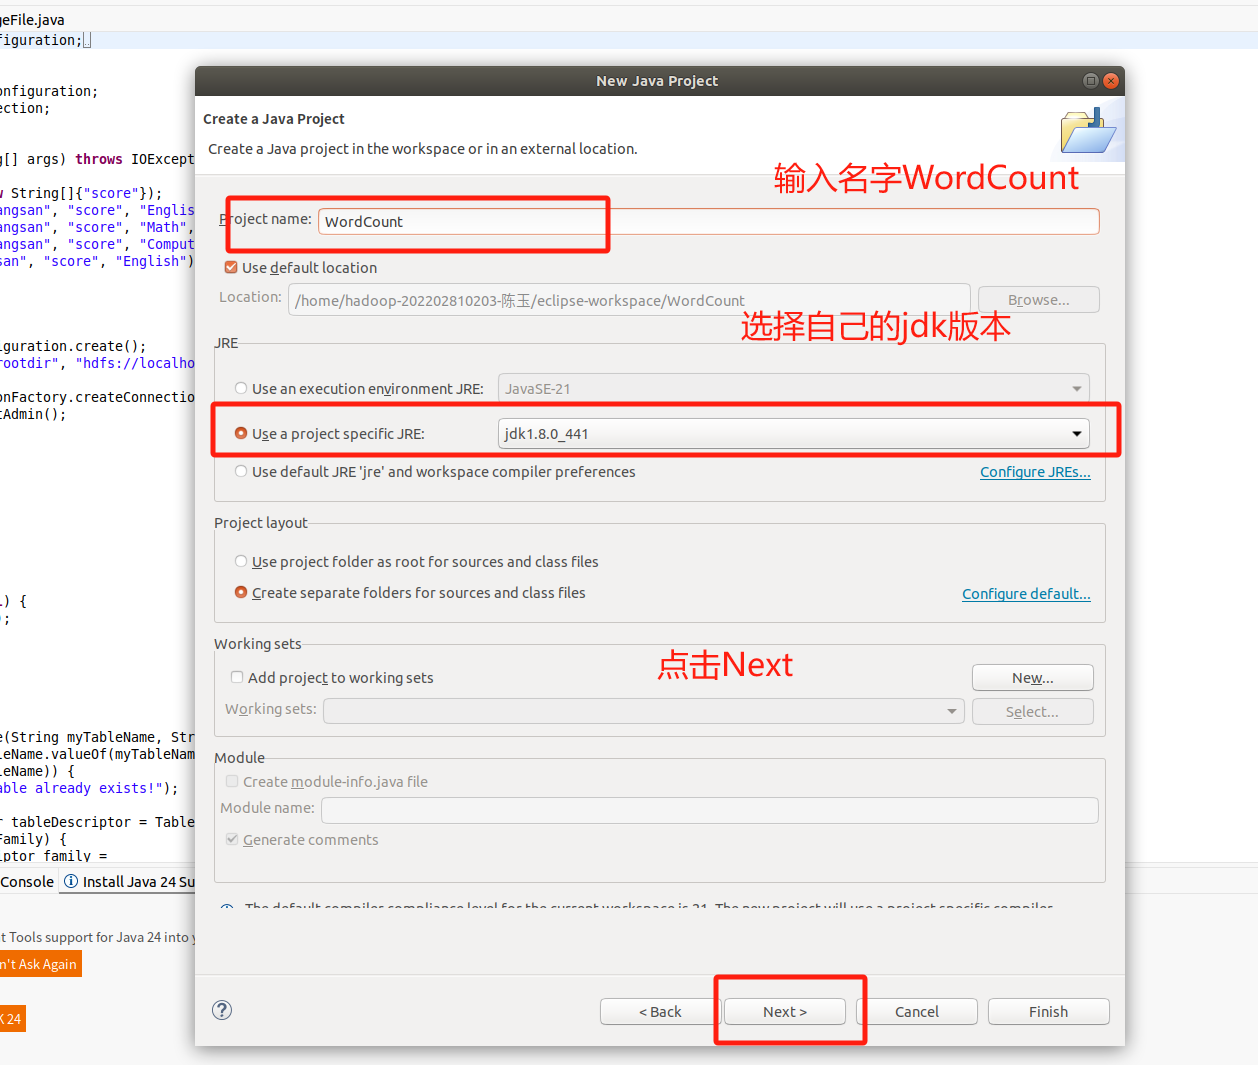
继续
 继续
继续
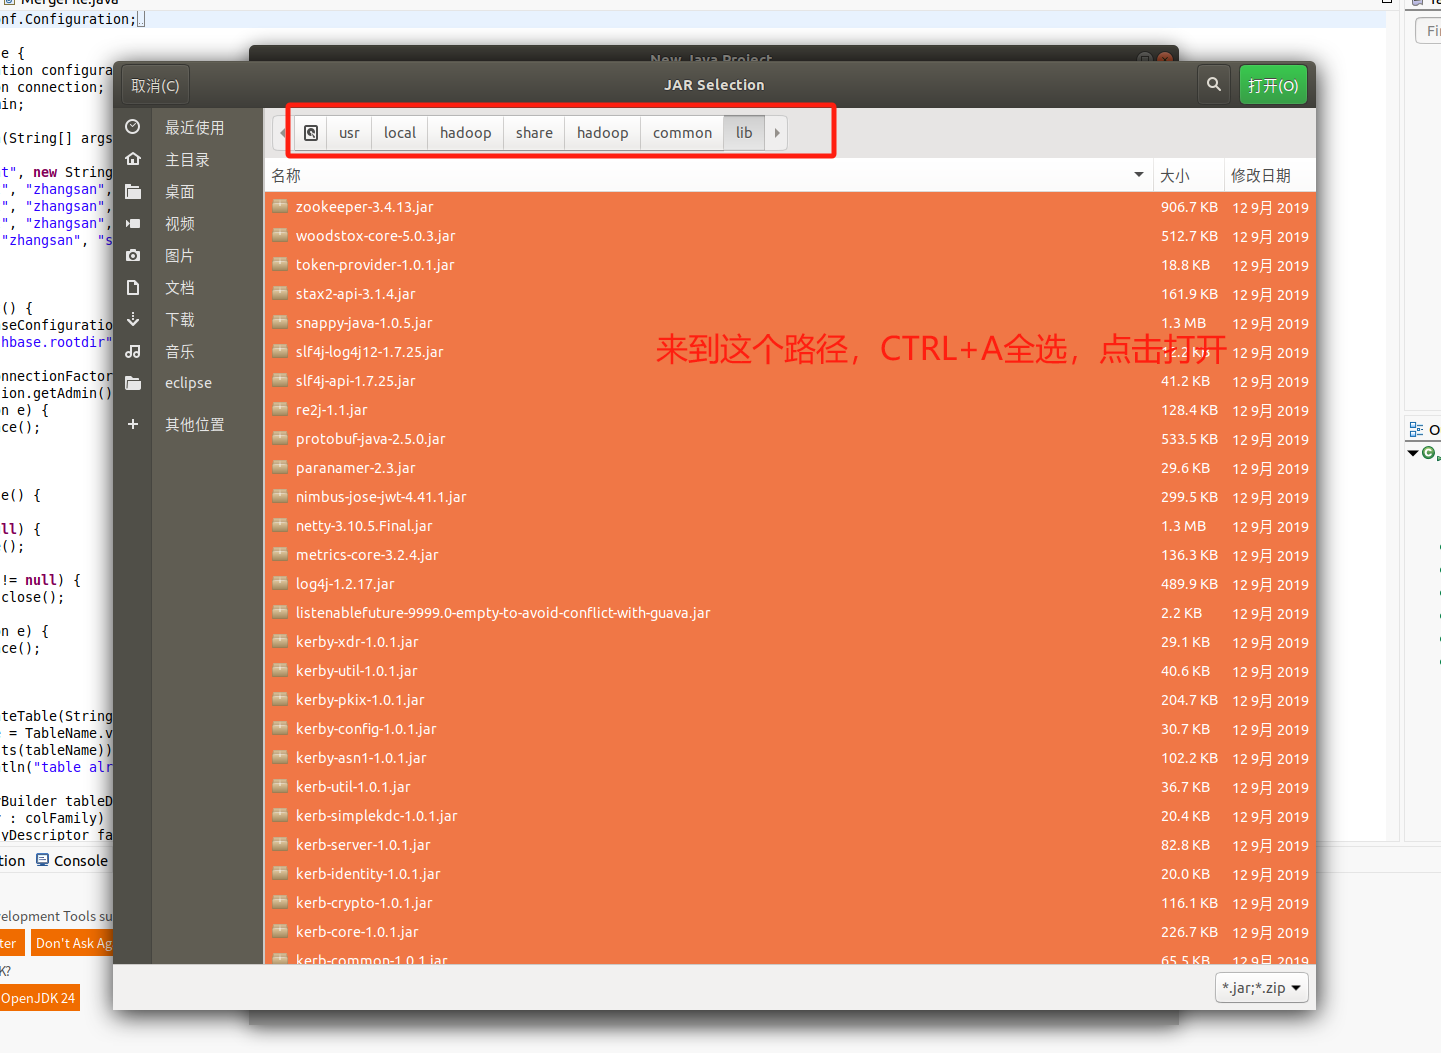
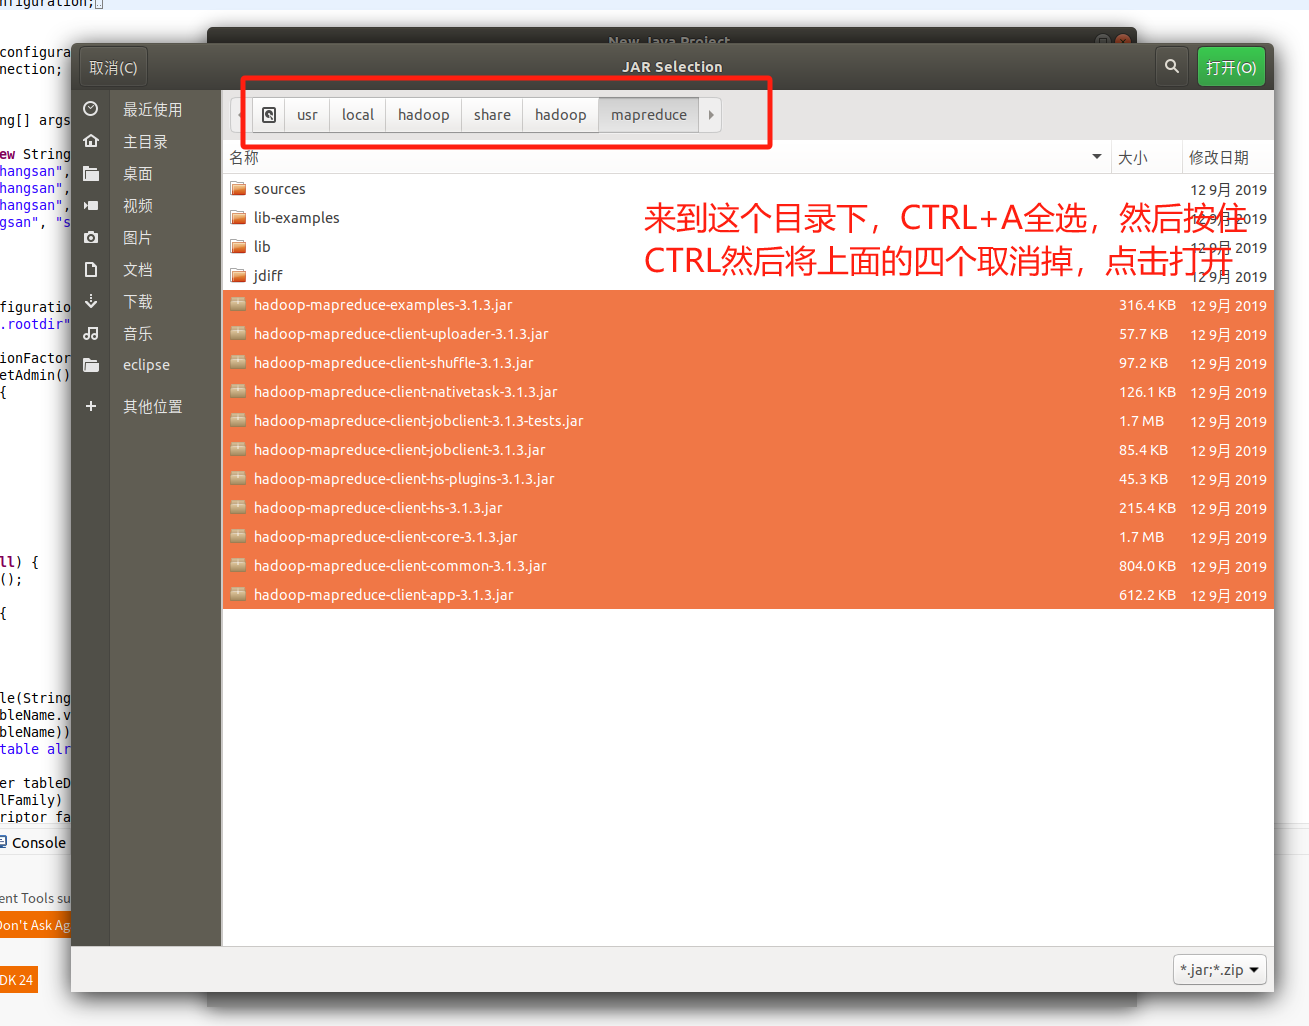
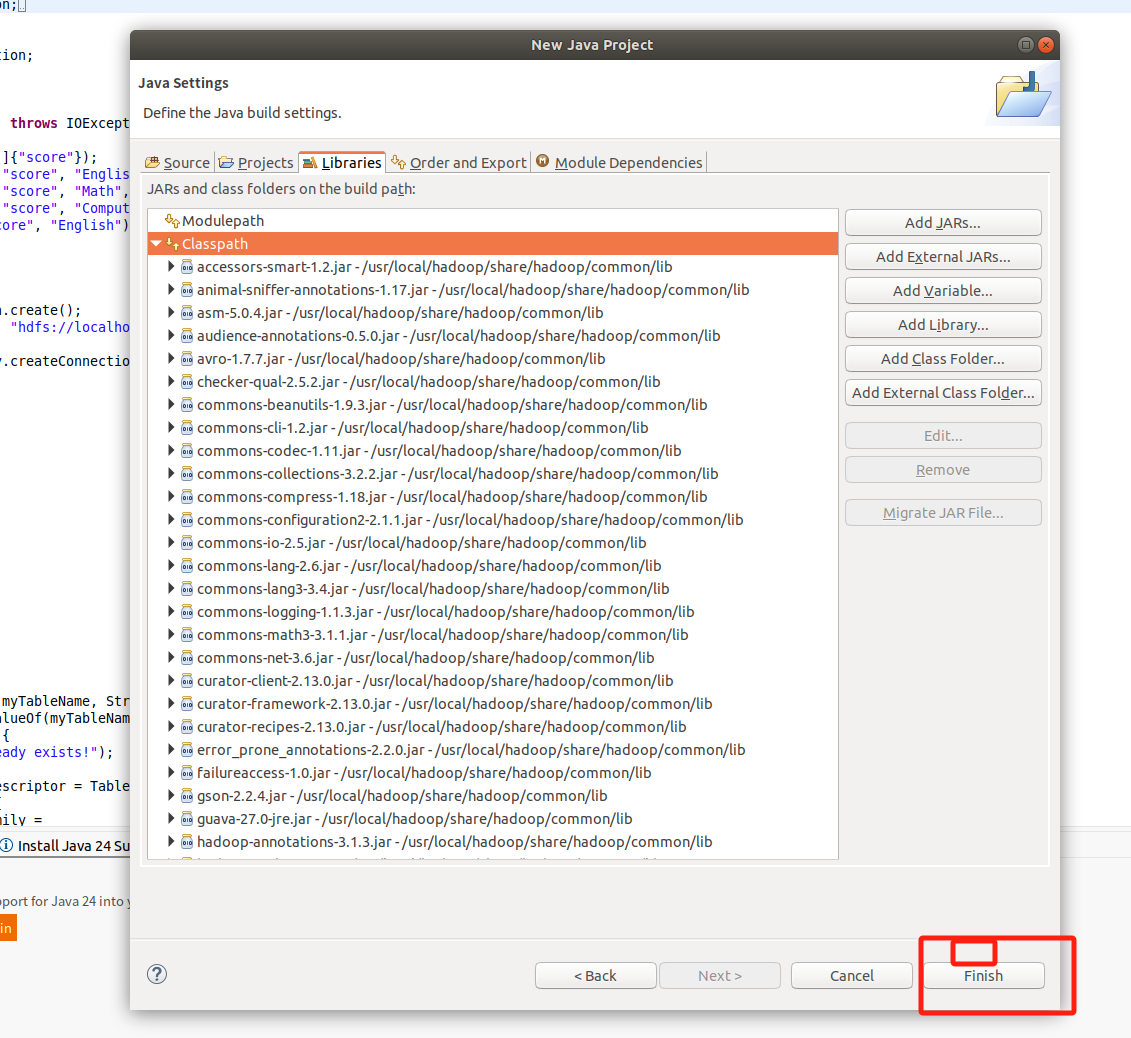
2. 为项目添加需要用到的JAR包
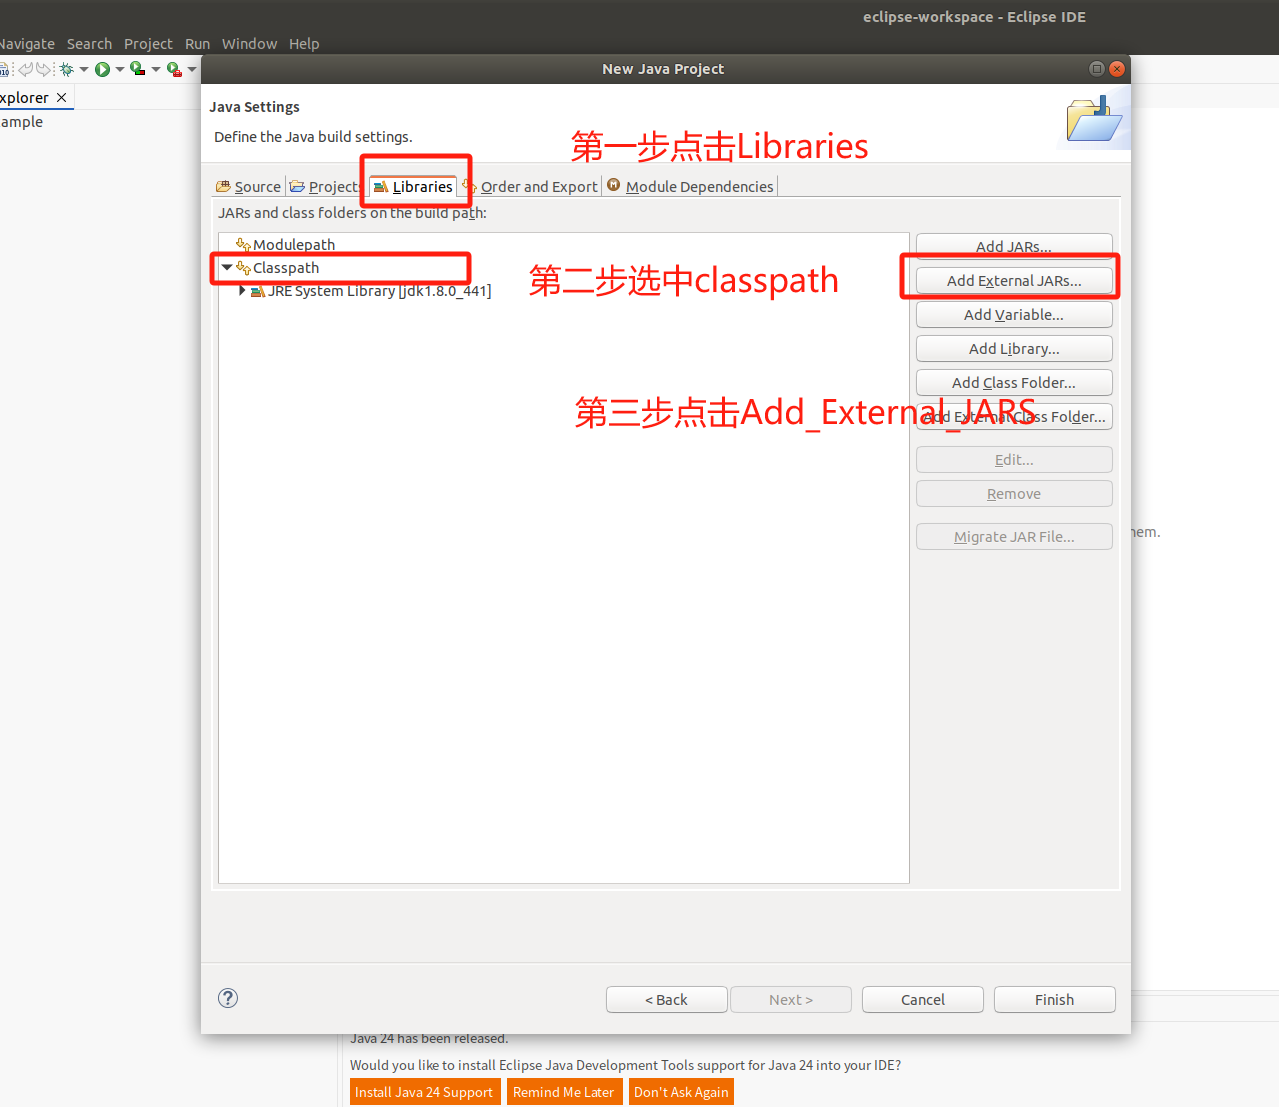
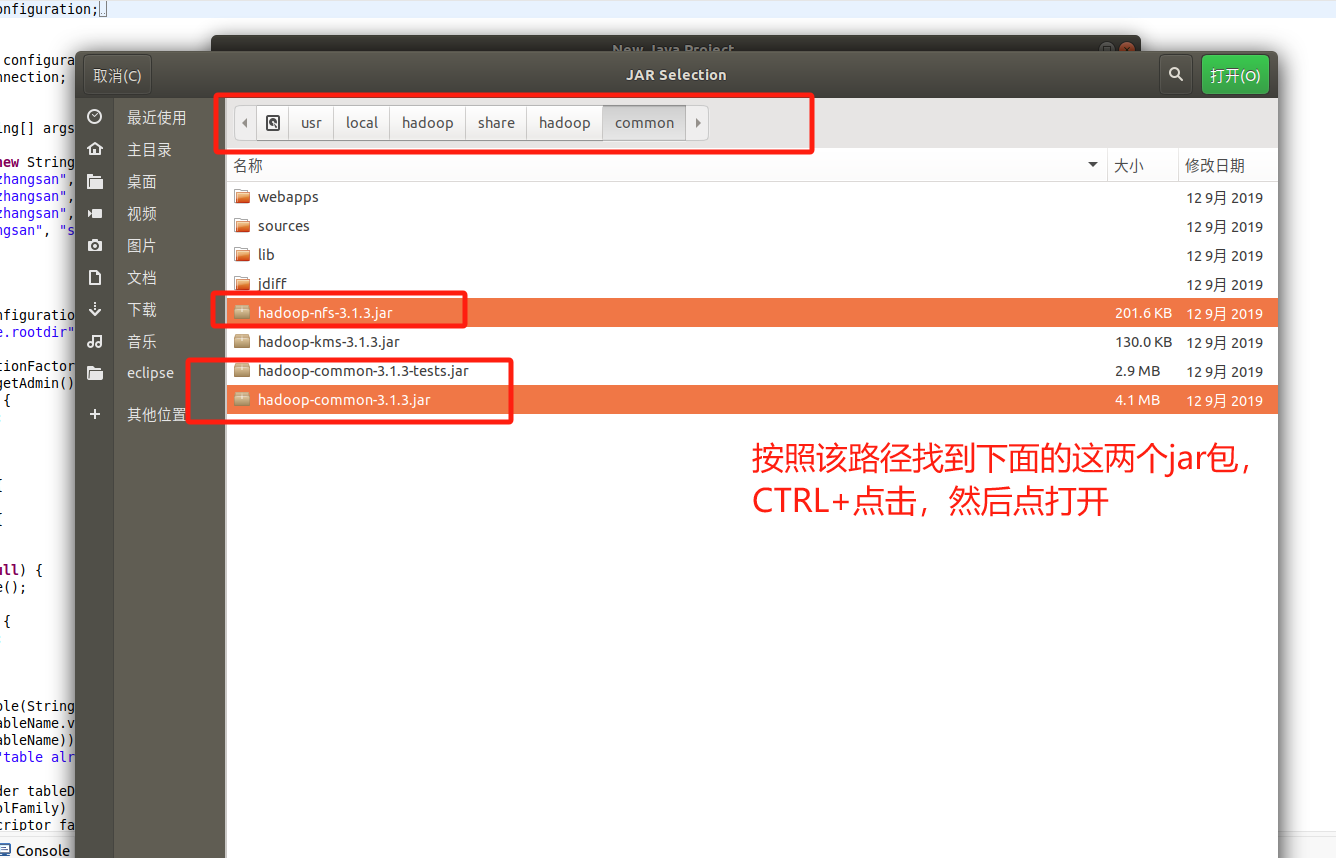
然后继续选中classpath,点击Add_External_JARS,下面的操作和上面的都是重复操作,就是选中jar包,然后引入。
然后继续选中classpath,点击Add_External_JARS,下面的操作和上面的都是重复操作,就是选中jar包,然后引入。
 然后继续选中classpath,点击Add_External_JARS,下面的操作和上面的都是重复操作,就是选中jar包,然后引入。
然后点击Finsh
 输入WordCount,点击Finsh
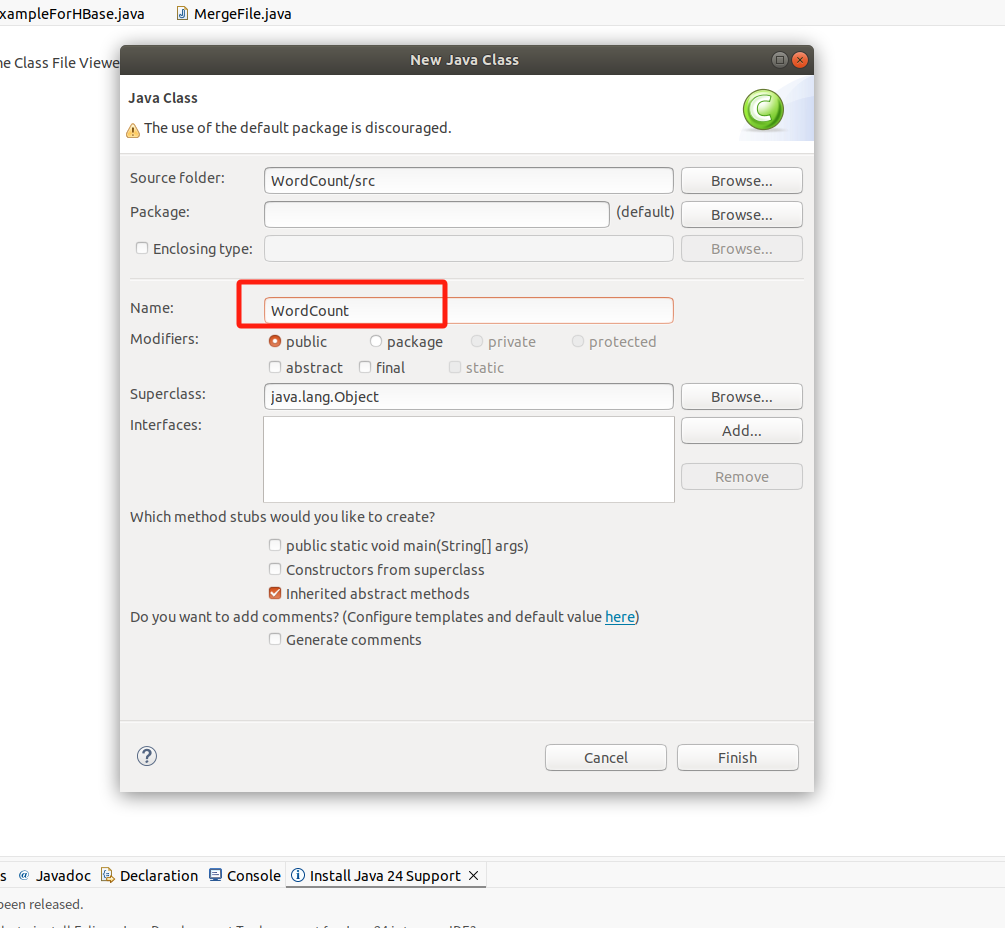
将内容改为下面的代码
java
import java.io.IOException;
import java.util.Iterator;
import java.util.StringTokenizer;
import org.apache.hadoop.conf.Configuration;
import org.apache.hadoop.fs.Path;
import org.apache.hadoop.io.IntWritable;
import org.apache.hadoop.io.Text;
import org.apache.hadoop.mapreduce.Job;
import org.apache.hadoop.mapreduce.Mapper;
import org.apache.hadoop.mapreduce.Reducer;
import org.apache.hadoop.mapreduce.lib.input.FileInputFormat;
import org.apache.hadoop.mapreduce.lib.output.FileOutputFormat;
import org.apache.hadoop.util.GenericOptionsParser;

public class WordCount {
    public WordCount() {
    }

    public static void main(String[] args) throws Exception {
        Configuration conf = new Configuration();
        String[] otherArgs = (new GenericOptionsParser(conf, args)).getRemainingArgs();
        if(otherArgs.length < 2) {
            System.err.println("Usage: wordcount <in> [<in>...] <out>");
            System.exit(2);
        }
        Job job = Job.getInstance(conf, "word count");
        job.setJarByClass(WordCount.class);
        job.setMapperClass(WordCount.TokenizerMapper.class);
        job.setCombinerClass(WordCount.IntSumReducer.class);
        job.setReducerClass(WordCount.IntSumReducer.class);
        job.setOutputKeyClass(Text.class);
        job.setOutputValueClass(IntWritable.class);
        for(int i = 0; i < otherArgs.length - 1; ++i) {
            FileInputFormat.addInputPath(job, new Path(otherArgs[i]));
        }
        FileOutputFormat.setOutputPath(job, new Path(otherArgs[otherArgs.length - 1]));
        System.exit(job.waitForCompletion(true)?0:1);
    }

    public static class TokenizerMapper extends Mapper<Object, Text, Text, IntWritable> {
        private static final IntWritable one = new IntWritable(1);
        private Text word = new Text();

        public TokenizerMapper() {
        }

        public void map(Object key, Text value, Mapper<Object, Text, Text, IntWritable>.Context context) throws IOException, InterruptedException {
            StringTokenizer itr = new StringTokenizer(value.toString());
            while(itr.hasMoreTokens()) {
                this.word.set(itr.nextToken());
                context.write(this.word, one);
            }
        }
    }

    public static class IntSumReducer extends Reducer<Text, IntWritable, Text, IntWritable> {
        private IntWritable result = new IntWritable();

        public IntSumReducer() {
        }

        public void reduce(Text key, Iterable<IntWritable> values, Reducer<Text, IntWritable, Text, IntWritable>.Context context) throws IOException, InterruptedException {
            int sum = 0;
            IntWritable val;
            for(Iterator i$ = values.iterator(); i$.hasNext(); sum += val.get()) {
                val = (IntWritable)i$.next();
            }
            this.result.set(sum);
            context.write(key, this.result);
        }
    }
}3.编译打包程序
我们直接点击运行按钮,然后点击ok
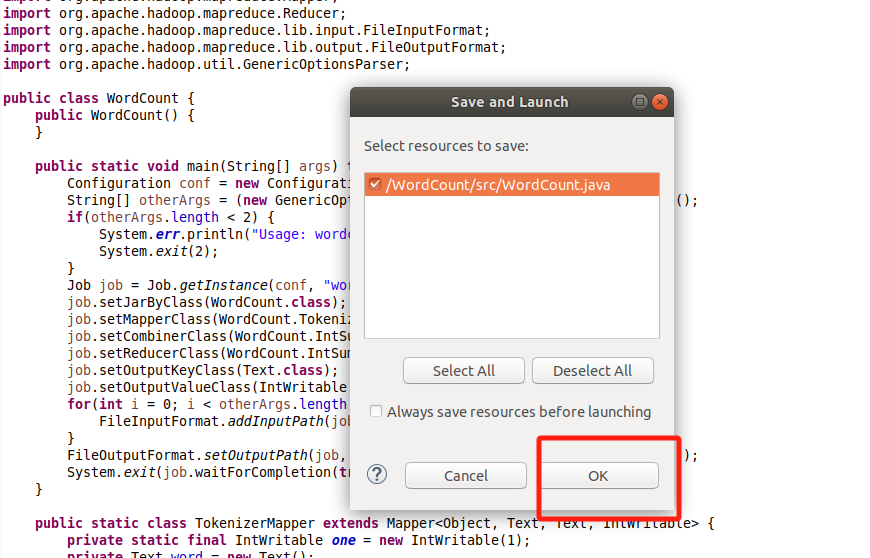
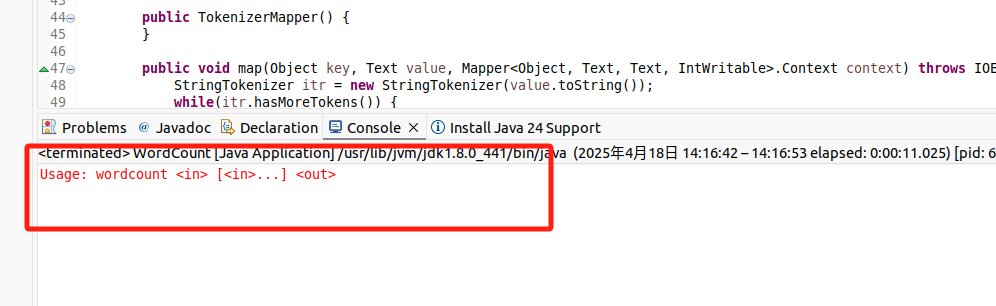
出现下面的内容极为成功
现在可以把词频统计程序放在"/usr/local/hadoop/myapp"目录下。如果该目录不存在,可以使用如下命令创建:(之前如果做过HDFS编程实践的话就不用了,)
这里需要在打开一个终端,把之前打开的都小化就行。
bash
cd /usr/local/hadoop
mkdir myapp
然后继续在Eclipse

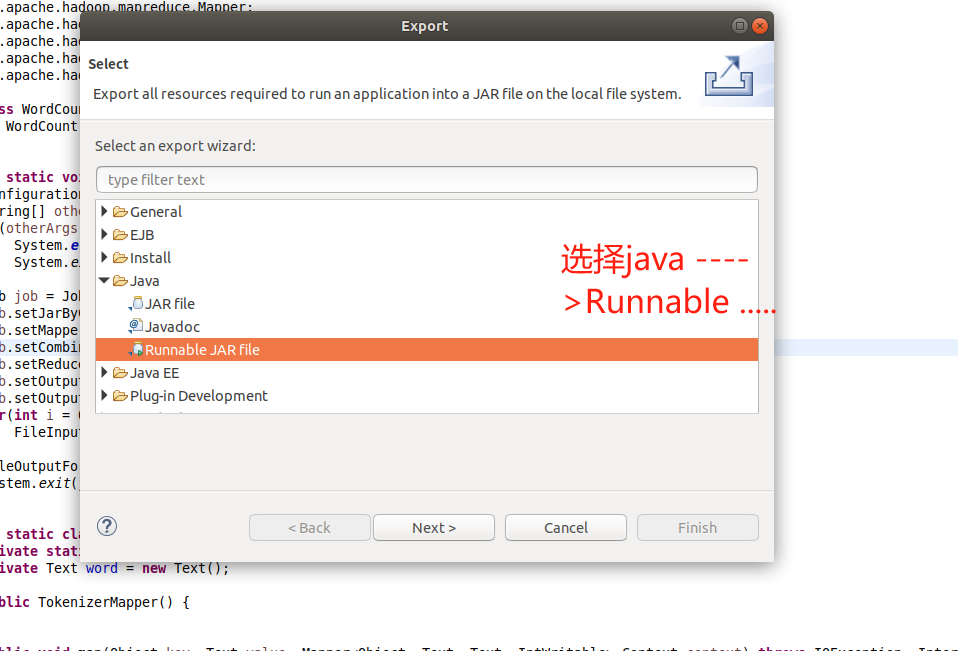 点击Next或者直接双击Runnable.....
目录
/usr/local/hadoop/myapp/WordCount.jar
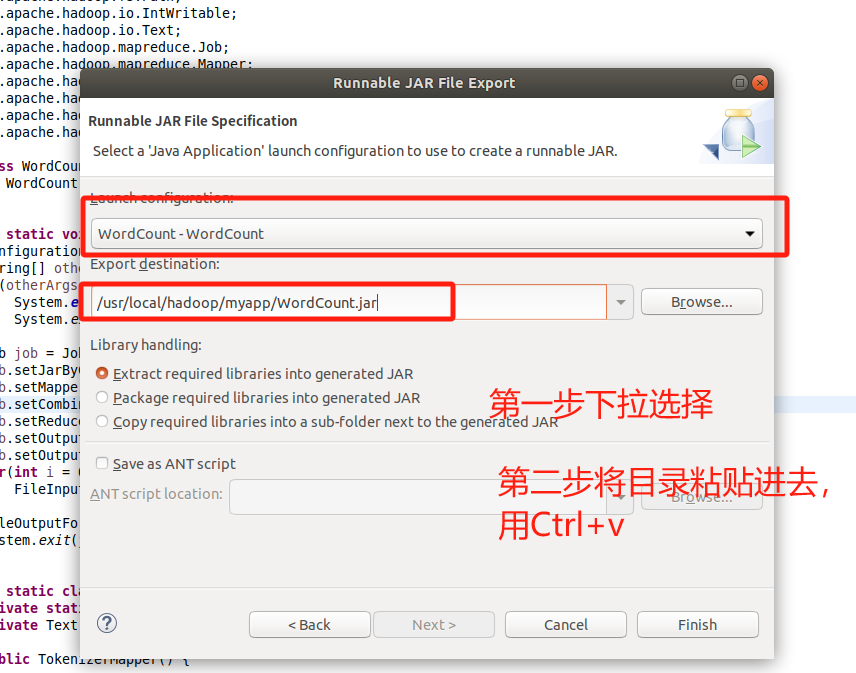
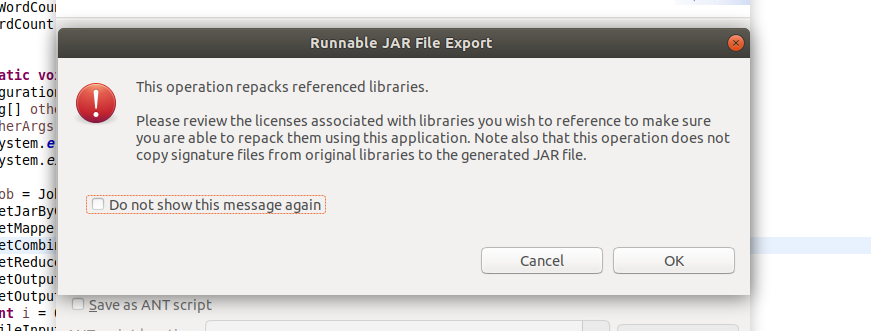
之后出现的两个界面全部点击ok

然后来到新建的终端
bash
cd /usr/local/hadoop/myapp
ls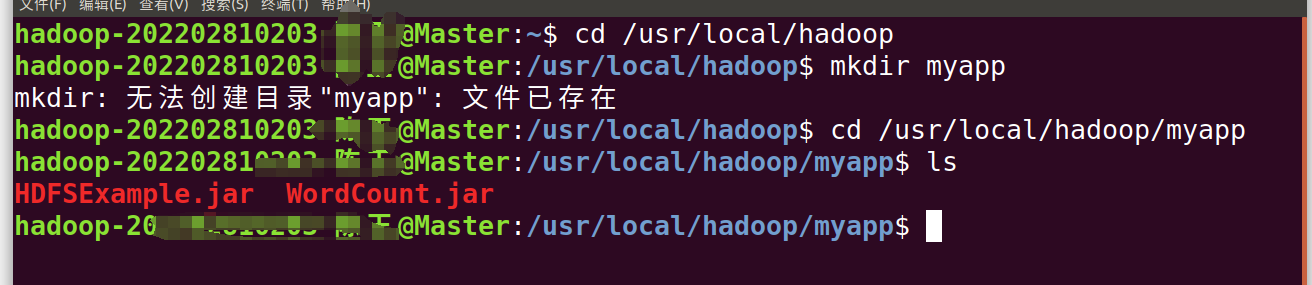
4.运行程序
在运行程序之前,需要启动Hadoop,(第二步我们提前已经做过了)
我们继续输入以下命令:
bash
cd /usr/local/hadoop
bash
./bin/hadoop jar ./myapp/WordCount.jar /user/hadoop/input /user/hadoop/output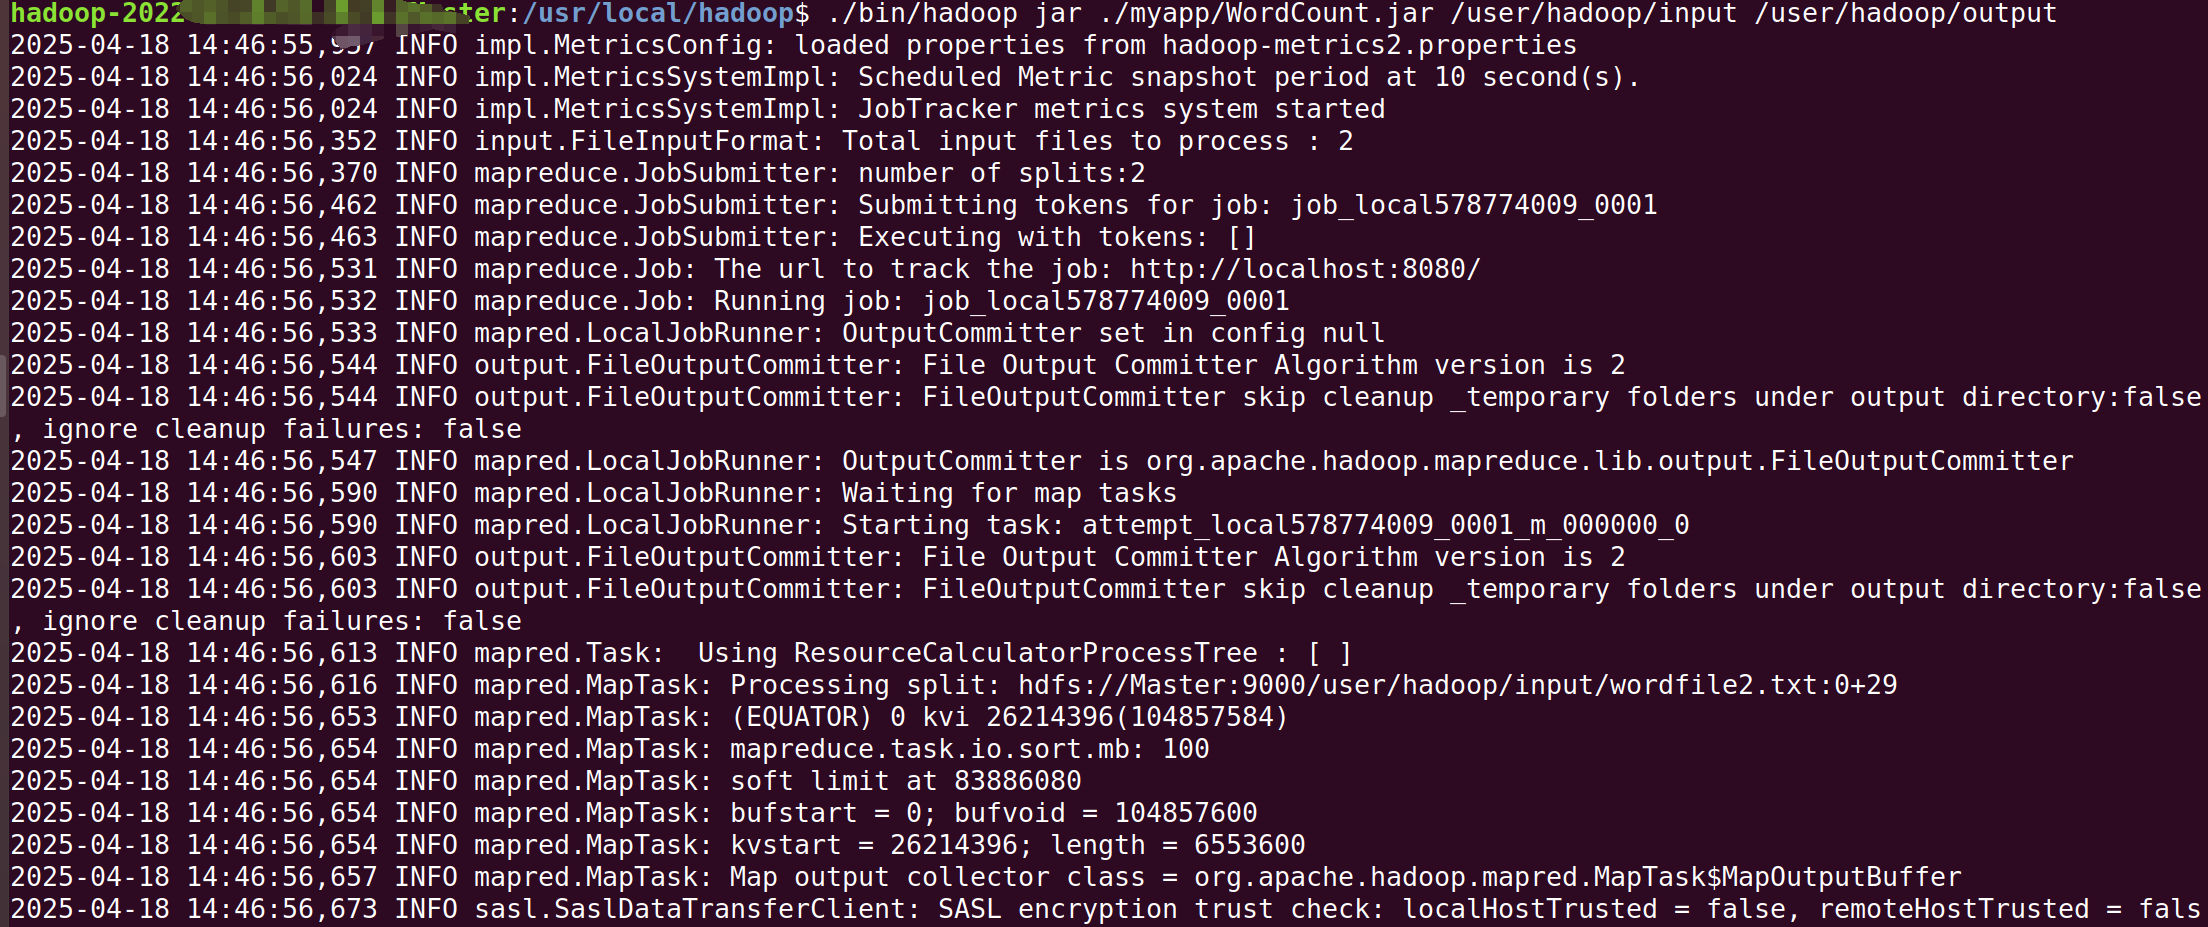
bash
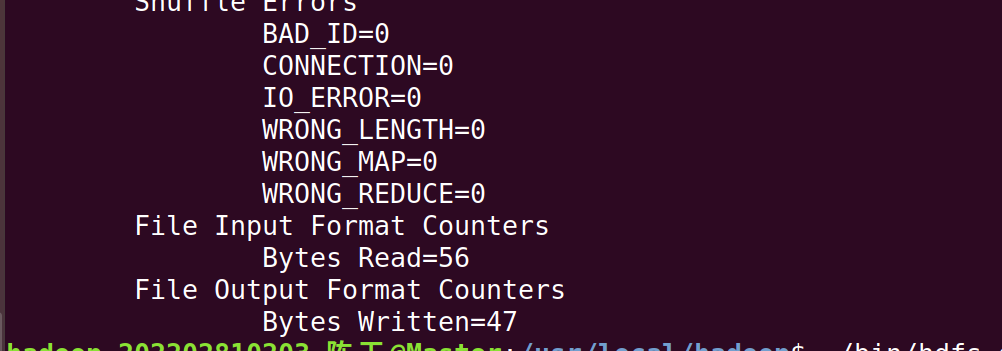
./bin/hdfs dfs -cat /user/hadoop/output/*
出现如上界面即为成功。