在Three.js中,Sprite(精灵)用于创建始终面向相机的2D元素,适用于标签、图标或粒子效果。本文将分析其源码及Shader实现。
1. sprite的基本使用方法
创建精灵材质:
精灵材质有个特殊的参数rotation,可以让其旋转一定的角度。
javascript
const material = new THREE.SpriteMaterial({
  color: 0xff0000,    // 颜色
  opacity: 0.8,       // 透明度
  transparent: true,   // 开启透明通道
  rotation: Math.PI/4  // 设置旋转角度
  map: texture // 设置精灵的贴图
});
创建Sprite对象
javascript
const sprite = new THREE.Sprite(material);
scene.add(sprite); // 添加到场景
调整位置和大小
注意通过sprite的rotation设置旋转无效,只能通过材料进行旋转。
javascript
sprite.position.set(0, 0, 0); // 位置
sprite.scale.set(2, 2, 0);    // 缩放(宽度、高度)
sprite源码分析
打开three.js源码中的Sprite.js文件,发现Sprite继承自Object3D,具有3D对象的通用特性:
javascript
class Sprite extends Object3D {
  // 没有传入材料会默认创建一个
	constructor( material = new SpriteMaterial() ) {

		super();

		this.isSprite = true;

		this.type = 'Sprite'; // 类型标记为精灵

        // 初始化几何
		if ( _geometry === undefined ) {

			_geometry = new BufferGeometry();

          // 两个三角形的顶点及uv坐标,放在一起可减少GPU调用次数
			const float32Array = new Float32Array( [
				- 0.5, - 0.5, 0, 0, 0,
				0.5, - 0.5, 0, 1, 0,
				0.5, 0.5, 0, 1, 1,
				- 0.5, 0.5, 0, 0, 1
			] );

			const interleavedBuffer = new InterleavedBuffer( float32Array, 5 );
           // 两个三角形的索引
			_geometry.setIndex( [ 0, 1, 2,	0, 2, 3 ] );
           // 设置坐标及uv属性
			_geometry.setAttribute( 'position', new InterleavedBufferAttribute( interleavedBuffer, 3, 0, false ) );
			_geometry.setAttribute( 'uv', new InterleavedBufferAttribute( interleavedBuffer, 2, 3, false ) );

		}

		this.geometry = _geometry;
		this.material = material;

    // 中心点,这个值会在Shader中使用
		this.center = new Vector2( 0.5, 0.5 );

	}
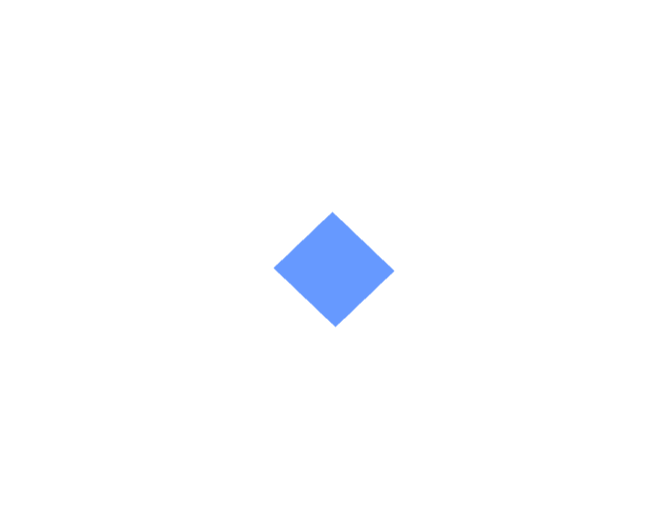
从其构造函数中可看出,用户使用Sprite的时候不用提供几何数据,构造函数会用两个三角形,组成一个大小为1的矩形作为其几何。也就意味着Sprite的大小默认为1。但其绘制出来是一个矩形。如下图:

为什么是矩形而不是正方形呢?因为视口有长宽比,要想得到一个正方形需按长宽比设置其scale。
SpriteMaterial源码分析
打开SpriteMaterial.js文件,这个类就是一个简单的参数容器,继承Material,有材料的基础参数,其代码本身没有太大需要说明的。其参数中sizeAttenuation可实现近大远小的效果,但只对透视相机有效。
javascript
class SpriteMaterial extends Material {

	constructor( parameters ) {

		super();

		this.isSpriteMaterial = true;

		this.type = 'SpriteMaterial';

		this.color = new Color( 0xffffff );

		this.map = null;

		this.alphaMap = null;

		this.rotation = 0;

		this.sizeAttenuation = true;

		this.transparent = true;

		this.fog = true;

		this.setValues( parameters );

	}
Shader实现
Sprite的之所以可以永远朝着摄像机,其核心原理在Shader代码中。Sprite的Shader在sprite.glsl.js文件中。其Vertex Shader代码如下:
glsl
export const vertex = /* glsl */`
uniform float rotation; // 材料中设置的旋转量
uniform vec2 center; // 永远是(0.5, 0.5)

#include <common>
#include <uv_pars_vertex>
#include <fog_pars_vertex>
#include <logdepthbuf_pars_vertex>
#include <clipping_planes_pars_vertex>

void main() {

	#include <uv_vertex>

  // 计算中心的坐标,modelViewMatrix中包含了设置的position
	vec4 mvPosition = modelViewMatrix * vec4( 0.0, 0.0, 0.0, 1.0 );

  // 获取设置的scale
	vec2 scale;
	scale.x = length( vec3( modelMatrix[ 0 ].x, modelMatrix[ 0 ].y, modelMatrix[ 0 ].z ) );
	scale.y = length( vec3( modelMatrix[ 1 ].x, modelMatrix[ 1 ].y, modelMatrix[ 1 ].z ) );

  // 透视相机可设置近大远小的效果
	#ifndef USE_SIZEATTENUATION

		bool isPerspective = isPerspectiveMatrix( projectionMatrix );

		if ( isPerspective ) scale *= - mvPosition.z;

	#endif

  // 缩放之后顶点的坐标
	vec2 alignedPosition = ( position.xy - ( center - vec2( 0.5 ) ) ) * scale;

  // 计算旋转之后的坐标
	vec2 rotatedPosition;
	rotatedPosition.x = cos( rotation ) * alignedPosition.x - sin( rotation ) * alignedPosition.y;
	rotatedPosition.y = sin( rotation ) * alignedPosition.x + cos( rotation ) * alignedPosition.y;

  // 对mvPosition进行一个偏移,计算出最终的顶点位置
	mvPosition.xy += rotatedPosition;

  // 进行投影变换
	gl_Position = projectionMatrix * mvPosition;

	#include <logdepthbuf_vertex>
	#include <clipping_planes_vertex>
	#include <fog_vertex>

}
`;
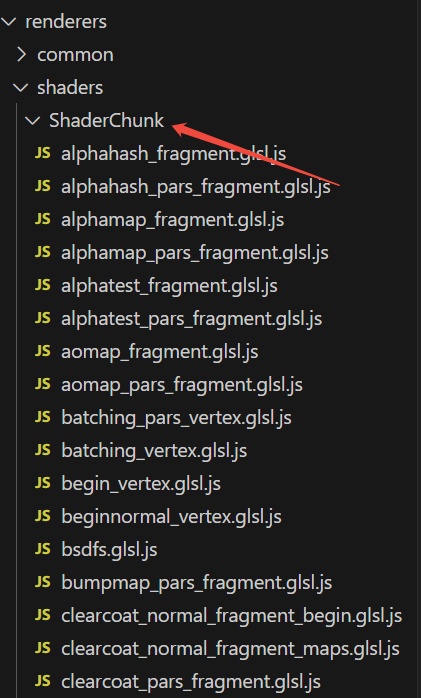
看其代码会发现有很多#include开头的代码,这种代码代表着一段通用的代码片段,three.js会在Shader编译之前替换为GLSL片段。替换之后代码量会边长很多。这些代码片段都在ShaderChunk目录下:

要想看到完整的代码可用Spector.js抓帧。言归正传,回到Sprite的Vertex Shader代码中。我们知道顶点着色器程序是每个顶点都会运行一遍,也就是输入是两个三角形的四个顶点。计算的时候先计算精灵的中心点,代码如下:
javascript
vec4 mvPosition = modelViewMatrix * vec4( 0.0, 0.0, 0.0, 1.0 );

这行代码对应于js中的位置设置:
sprite.position.set(1, 0, 0); 然后在摄像机坐标系下计算缩放及旋转,并累加到平移量中作为最终的坐标值。旋转的计算就是二维的转动公式。旋转的角度就是材料中设置的rotation。也就意味着Sprite的几何中的三角形坐标是摄像机坐标系下XY平面上的坐标,所以其始终对着摄像机。
javascript
// 计算缩放之后顶点的坐标
vec2 alignedPosition = ( position.xy - ( center - vec2( 0.5 ) ) ) * scale;
// 其代码对应于 sprite.scale.set(2, 2, 0);

// 计算旋转之后的坐标
// rotation对应材料中设置的rotation参数
vec2 rotatedPosition;
rotatedPosition.x = cos( rotation ) * alignedPosition.x - sin( rotation ) * alignedPosition.y;
rotatedPosition.y = sin( rotation ) * alignedPosition.x + cos( rotation ) * alignedPosition.y;

// 对mvPosition进行一个偏移,计算出最终的顶点位置
mvPosition.xy += rotatedPosition;
最后进行投影计算,输出gl_Position:
javascript
// 进行投影变换
gl_Position = projectionMatrix * mvPosition;
Fragment Shader代码如下:
javascript
uniform vec3 diffuse;
uniform float opacity;

#include <common>
#include <uv_pars_fragment>
#include <map_pars_fragment>
#include <alphamap_pars_fragment>
#include <alphatest_pars_fragment>
#include <alphahash_pars_fragment>
#include <fog_pars_fragment>
#include <logdepthbuf_pars_fragment>
#include <clipping_planes_pars_fragment>

void main() {

	vec4 diffuseColor = vec4( diffuse, opacity );
	#include <clipping_planes_fragment>

	vec3 outgoingLight = vec3( 0.0 );

	#include <logdepthbuf_fragment>
	#include <map_fragment>
	#include <alphamap_fragment>
	#include <alphatest_fragment>
	#include <alphahash_fragment>

  // outgoingLight会作为片元的颜色输出
  // diffuseColor的值来自材料的color
  // 如果有贴图,会影响diffuseColor的值
	outgoingLight = diffuseColor.rgb;

	#include <opaque_fragment>
	#include <tonemapping_fragment>
	#include <colorspace_fragment>
	#include <fog_fragment>

}
Fragment Shader是计算光栅化之后片元的颜色。对于精灵材质,其颜色来自diffuseColor,这个值来自材料参数color。如果材料设置了贴图,会在贴图进行材料,进而影响这个值。具体的计算本文不展开,这块属于通用原理。感兴趣可以Spector.js抓取这个shader代码进行研究。