在 VS Code 中,可以通过配置 用户代码片段(User Snippets) 或使用 文件模板扩展 来实现新建指定文件类型时自动添加指定内容。以下是具体方法:
方法 1:使用 VS Code 内置的「用户代码片段」
适用场景 :适用于特定文件类型(如 .js、.py、.html 等),在新建文件后通过快捷键插入预设内容。
步骤:
-
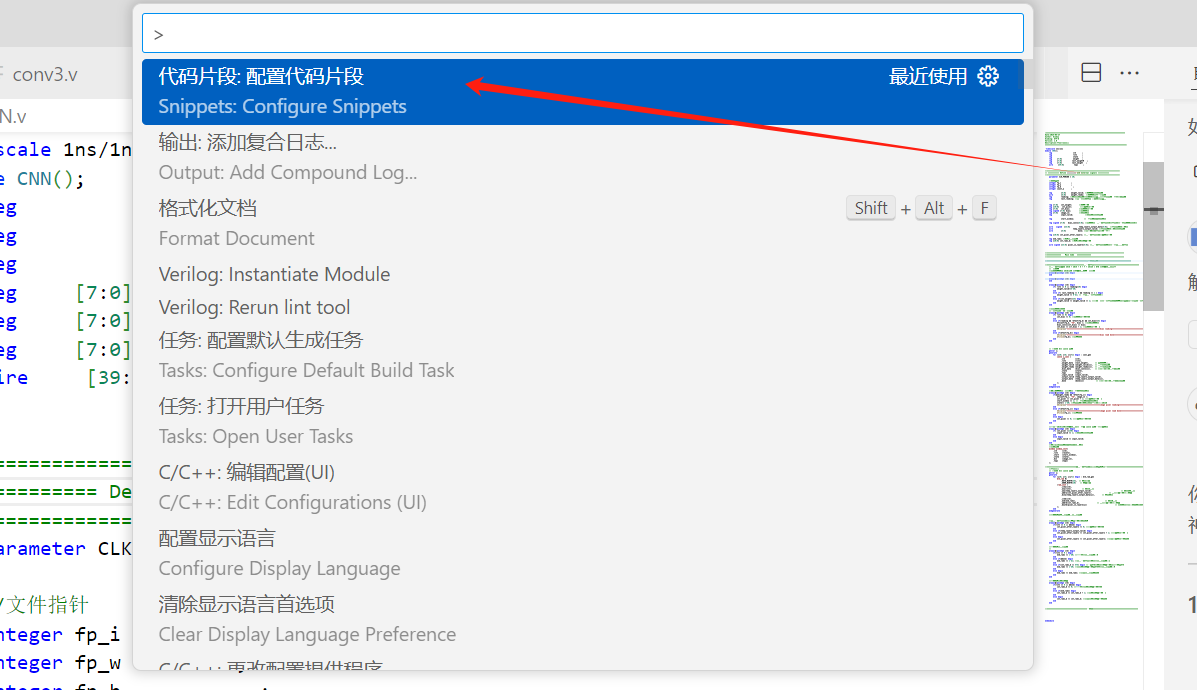
打开代码片段配置:
-
快捷键:
Ctrl + Shift + P(Windows/Linux)或Cmd + Shift + P(Mac),输入Configure User Snippets。
-
选择目标语言(例如
Python、JavaScript),或创建全局片段(New Global Snippets file)。 -
我需要配置Verilog的默认内容,要选择verilog.json文件配置
-
-
编辑代码片段:
- 例如为
.v文件添加默认内容,编辑verilog.json:
- 例如为
json
		{
	// Place your snippets for verilog here. Each snippet is defined under a snippet name and has a prefix, body and
	// description. The prefix is what is used to trigger the snippet and the body will be expanded and inserted. Possible variables are:
	// $1, $2 for tab stops, $0 for the final cursor position, and ${1:label}, ${2:another} for placeholders. Placeholders with the
	// same ids are connected.
	// Example:
	// "Print to console": {
	// 	"prefix": "log",
	// 	"body": [
	// 		"console.log('$1');",
	// 		"$2"
	// 	],
	// 	"description": "Log output to console"
	// }
	"File description": {
		"prefix": "file",
		"body": [
			"/*******************************************************************************",
			"Date:${CURRENT_YEAR}-${CURRENT_MONTH}-${CURRENT_DATE}",
			"Author: Ecoboy",
			"Ecoding: UTF-8",
			"Version: 1.0",
			"Description:",
			"*********************************************************************************/",
				],
		"description": "File description comment"
	},

	"block parameter description": {
		"prefix": "para",
		"body": [
				"//========================================================================\\",
				"// =========== Define Parameter and Internal signals ===========" ,
				"//========================================================================/",
				],
		"description": "Block description comment"
	},


	"block main code description": {
		"prefix": "maincode",
		"body": [
				"//=============================================================================",
				"//**************    Main Code   **************",
				"//============================================================================="
				],
		"description": "Block description comment"
	},

}- 变量说明 :
${1:占位文本}:光标跳转位置,按Tab切换。$CURRENT_YEAR等:VS Code 内置变量(自动填充日期/时间)。
- 使用代码片段 :
- 新建
.py文件,输入py_template后按Tab或Enter,即可插入模板。
- 新建
方法 2:使用扩展实现「新建文件时自动填充」
适用场景:希望在创建文件时(如右键新建)自动填充内容,无需手动触发代码片段。
推荐扩展:
-
File Templates (扩展ID:
brpaz.file-templates)- 安装后,通过命令面板(
Ctrl+Shift+P)运行File Templates: Create File from Template。 - 配置模板文件(支持变量如
${date}、${name})。
- 安装后,通过命令面板(
-
Template Generator (扩展ID:
krizzdewizz.template-generator)- 支持更复杂的模板逻辑,如根据目录生成不同内容。
配置示例(以 File Templates 为例):
-
安装扩展后,在项目根目录创建
.vscode/templates文件夹。 -
新建模板文件(如
template.py)并写入内容:python#!/usr/bin/env python3 # -*- coding: utf-8 -*- """ Description: ${1:Description} Author: ${2:Your Name} """ def main(): ${0:pass} if __name__ == "__main__": main() -
通过命令面板选择模板创建文件。
方法 3:自定义脚本(高级)
如果需要更复杂的逻辑(如根据项目类型动态生成内容),可以:
- 编写一个 Node.js/Python 脚本 生成文件。
- 通过 VS Code 的 Task 或 扩展 API 绑定到快捷键/右键菜单。
总结
| 方法 | 优点 | 缺点 |
|---|---|---|
| 用户代码片段 | 原生支持,无需扩展 | 需手动触发(输入前缀) |
| 文件模板扩展 | 自动化强,支持变量 | 需安装扩展 |
| 自定义脚本 | 灵活性最高 | 配置复杂 |
推荐:
- 简单场景 → 用户代码片段。
- 全自动填充 → File Templates 扩展。