前言
通知(Notification)是 Android 系统中一项核心且强大的与用户交互的功能。当某个应用不在前台运行,又希望给用户发送提示信息时,就可以通过通知来完成。
发出通知后,系统状态栏便会显示通知的图标,用户下拉状态栏后,即可查看通知的详细内容。
创建通知渠道 (Notification Channel)
然而,通知功能的设计初衷是好的,后来却被滥用了。
有太多的应用想方设法地给用户发送通知,导致用户的状态栏被各种营销、资讯信息占据。虽然我们可以将某个应用的所有通知屏蔽,但这些通知信息中,也可能会有我们关心的内容。
为此,Android 8.0 (API 26) 系统中引入了通知渠道 (Notification Channel)。
什么是通知渠道?简单来说,就是要求每一条通知都要归属一个渠道。我们可以根据通知的类型和重要性来创建多个渠道,例如:新消息提醒、系统更新等。
通知渠道的划分非常考究,因为通知渠道一旦通过代码创建后,无法再用代码修改其重要等级、声音等行为相关的配置。后续的控制权掌握在用户手中。用户可以在系统设置里独立地控制每个渠道的表现(如是否弹出、是否有提示音、是否振动等),从而实现对通知的精细化管理,用户可以只接收自己关心的信息。这样,用户就再也不用担心垃圾通知的打扰了。
以 Twitter 为例,其通知渠道的划分为:

可以看到划分非常详细和人性化。
如果要在我们的应用中发送通知,首先要创建通知渠道,我们来一步步完成。
首先,我们需要 NotificationManager 实例来对通知进行管理,通过调用 Context 的 getSystemService() 方法来获取。该方法接收代表系统服务的字符串,我们传入 Context.NOTIFICATION_SERVICE 常量即可。
代码如下:
kotlin
// 获取一个 NotificationManager 实例
private val notificationManager: NotificationManager by lazy {
    getSystemService(Context.NOTIFICATION_SERVICE) as NotificationManager
}
接着,使用 NotificationChannel 类来创建通知渠道,然后调用 NotificationManager 的 createNotificationChannel() 方法来注册通知渠道。并且由于 NotificationChannel 类和 createNotificationChannel() 方法都是在 Android 8.0 后新增的,所以使用之前需要进行版本判断。
代码如下:
kotlin
companion object {
    private const val CHANNEL_ID_NORMAL = "channel_normal"
    private const val CHANNEL_NAME_NORMAL = "常规通知"
}

private fun createNotificationChannel() {
    // 只在 API 26+ 的系统上创建渠道
    if (Build.VERSION.SDK_INT >= Build.VERSION_CODES.O) {
        val importance = NotificationManager.IMPORTANCE_DEFAULT
        val channel =
            NotificationChannel(CHANNEL_ID_NORMAL, CHANNEL_NAME_NORMAL, importance).apply {
                // 还可以进行其他配置,如呼吸灯、振动模式等
                description = "用于应用的常规功能通知"
            }
        // 向 NotificationManager 注册渠道
        notificationManager.createNotificationChannel(channel)
    }
}
构建 NotificationChannel 通知渠道时,需要传入三个核心参数:
-
渠道 id(
channelId):在应用内需要保证全局唯一。 -
渠道名称(
channelName):用于展示给用户的名称,可以描述渠道的用途 -
重要等级(
importance) :定义了通知的默认打扰级别,例如IMPORTANCE_HIGH(发出提示音并以横幅形式出现)、IMPORTANCE_DEFAULT(发出提示音)、IMPORTANCE_LOW(无提示音)等。当然这只是初始值,用户之后可以随时在设置中修改这个等级。
通知的基本用法
创建好渠道后,我们就可以发送通知了。
通知既可以在 Activity 中创建,也可以在 BroadcastReceiver 中创建,还可以在 Service 中创建。因为一般只有应用在后台时,才需要发送通知,所以在 BroadcastReceiver、Service 中的使用场景更多。
创建通知的核心是使用 NotificationCompat.Builder 构造器,它可以创建一个 Notification 对象。为了兼容所有 Android 版本,我们必须要使用 AndroidX 库中的 NotificationCompat 类。
代码如下:
kotlin
companion object {
    private const val CHANNEL_ID_NORMAL = "channel_normal"
    private const val CHANNEL_NAME_NORMAL = "常规通知"
    const val NOTIFICATION_ID_BASIC = 1
}


private fun sendNormalNotification() {
    val notification = NotificationCompat.Builder(this, CHANNEL_ID_NORMAL)
        .setSmallIcon(R.drawable.ic_launcher_foreground) // 只能用 alpha 图层
        .setLargeIcon(BitmapFactory.decodeResource(resources, R.mipmap.ic_launcher))
        .setContentTitle("这是通知标题")
        .setContentText("这是通知的详细内容")
        .setPriority(NotificationCompat.PRIORITY_DEFAULT) // 用于 Android 7.1 及以下版本
        .build()

    // 显示通知
    notificationManager.notify(NOTIFICATION_ID_BASIC, notification)
}
Builder 构造器接收两个参数,分别是 Context 上下文对象和渠道 id (channelId) 字符串。注意:如果系统根据该 channelId 找不到对应的通知渠道,,那么在 Android 8.0 及以上版本,系统会静默地丢弃这条通知,导致通知不会被显示。
Builder 的关键方法:
-
setContentTitle():用于指定通知的主标题。 -
setContentText():用于指定通知的正文内容。 -
setSmallIcon():用于设置通知的小图标,会在状态栏中显示。注意:该图标必须是只有 Alpha 通道的纯色图片,系统会自动为其着色。 -
setLargeIcon():用于设置通知的大图标,用户下拉通知栏后,可以在通知的右侧到。 -
setPriority():用于设置通知的优先级。主要用于没有通知渠道的 Android 7.1 及更低版本。
最后,调用 NotificationManager 的 notify() 方法,即可让通知显示出来。notify() 方法接收两个参数,分别是唯一的通知 id (notificationId) 和构建好的 Notification 对象。
注意:从 Android 13 (API 33) 开始,发送通知需要动态请求 POST_NOTIFICATIONS 权限。
示例:点击按钮发送通知
现在,我们来通过一个具体的例子来演示一下。
新建一个名为 NotificationTest 的 Empty Views Activity 项目,在布局中添加一个按钮用于触发通知,activity_main.xml 中的代码如下:
xml
<?xml version="1.0" encoding="utf-8"?>
<LinearLayout xmlns:android="http://schemas.android.com/apk/res/android"
    android:layout_width="match_parent"
    android:layout_height="match_parent"
    android:gravity="center"
    android:orientation="vertical">

    <Button
        android:id="@+id/sendNoticeButton"
        android:layout_width="wrap_content"
        android:layout_height="wrap_content"
        android:text="发送通知" />
</LinearLayout>
并且从 Android 13 开始,我们要在 AndroidManifest.xml 文件中声明通知权限。
xml
<?xml version="1.0" encoding="utf-8"?>
<manifest ...>
    <uses-permission android:name="android.permission.POST_NOTIFICATIONS" />

    <application ...>
        ...
    </application>
</manifest>
发送通知
现在,我们在 MainActivity 中完成点击按钮发送通知的逻辑。代码如下所示:
kotlin
class MainActivity : AppCompatActivity() {
    // 使用 ViewBinding 安全地访问视图
    private lateinit var binding: ActivityMainBinding

    companion object {
        private const val CHANNEL_ID_NORMAL = "channel_normal"
        private const val CHANNEL_NAME_NORMAL = "常规通知"
        const val NOTIFICATION_ID_BASIC = 1
    }

    private val notificationManager: NotificationManager by lazy {
        getSystemService(Context.NOTIFICATION_SERVICE) as NotificationManager
    }

    override fun onCreate(savedInstanceState: Bundle?) {
        super.onCreate(savedInstanceState)
        binding = ActivityMainBinding.inflate(layoutInflater)
        setContentView(binding.root)

        // 创建通知渠道
        createNotificationChannel()

        // 给按钮注册点击事件
        binding.sendNoticeButton.setOnClickListener {
            // 发送通知
            sendNormalNotification()
        }
    }


    private fun createNotificationChannel() {
        if (Build.VERSION.SDK_INT >= Build.VERSION_CODES.O) {
            val importance = NotificationManager.IMPORTANCE_DEFAULT
            val channel = NotificationChannel(CHANNEL_ID_NORMAL, CHANNEL_NAME_NORMAL, importance)
            notificationManager.createNotificationChannel(channel)
        }
    }

    private fun sendNormalNotification() {
        // 构建通知
        val notification = NotificationCompat.Builder(this, CHANNEL_ID_NORMAL)
            .setSmallIcon(R.drawable.ic_launcher_foreground)
            .setLargeIcon(BitmapFactory.decodeResource(resources, R.drawable.avatar)) // 使用我的头像
            .setContentTitle("新消息")
            .setContentText("点击查看详情")
            .build()

        // 显示通知
        notificationManager.notify(NOTIFICATION_ID_BASIC, notification)
    }

}
这段代码在旧版本中就已经可以正常工作了。但在 Android 13 及以上版本,你会发现点击按钮并没有任何反应。这是因为发送通知需要 POST_NOTIFICATIONS 权限,而这个权限是运行时权限,我们需要在应用运行时动态请求它。
我们使用 registerForActivityResult 来处理权限请求。在 MainActivity 中添加如下代码:
kotlin
// 处理权限请求的结果
private val requestPermissionLauncher =
    registerForActivityResult(ActivityResultContracts.RequestPermission()) { isGranted: Boolean ->
        if (isGranted) {
            // 权限被授予,执行发送通知的操作
            sendNormalNotification()
        } else {
            // 权限被拒绝,向用户解释
            Toast.makeText(this, "需要通知权限才能发送消息", Toast.LENGTH_SHORT).show()
        }
    }
然后在按钮的点击逻辑中,将 sendNormalNotification() 方法的调用换成权限检查方法:
kotlin
binding.sendNoticeButton.setOnClickListener {
    // 检查权限并发送通知
    checkPermissionAndSendNotification()
}
最后,在 MainActivity 中添加这个 checkPermissionAndSendNotification() 方法:
kotlin
private fun checkPermissionAndSendNotification() {
    if (Build.VERSION.SDK_INT >= Build.VERSION_CODES.TIRAMISU) {
        // Android 13+ 需要检查权限
        when {
            ContextCompat.checkSelfPermission(this, android.Manifest.permission.POST_NOTIFICATIONS) == PackageManager.PERMISSION_GRANTED -> {
                // 已有权限,直接发送
                sendNormalNotification()
            }
            shouldShowRequestPermissionRationale(android.Manifest.permission.POST_NOTIFICATIONS) -> {
                // 显示一个对话框向用户解释为何需要此权限
                requestPermissionLauncher.launch(android.Manifest.permission.POST_NOTIFICATIONS)
            }
            else -> {
                // 直接请求权限
                requestPermissionLauncher.launch(android.Manifest.permission.POST_NOTIFICATIONS)
            }
        }
    } else {
        // Android 13 以下版本,直接发送
        sendNormalNotification()
    }
}
注意:将创建通知渠道的操作放在 onCreate 方法中并不会导致通知渠道被重复创建,因为系统会先判断该渠道是否存在。如果存在,系统会忽略创建通知渠道的操作。
现在运行程序并点击按钮,会先弹出权限请求对话框来请求通知权限:

点击允许后,可以看到状态栏中有一个小图标,并且伴随着提示音效。

下拉系统状态栏即可看见通知。

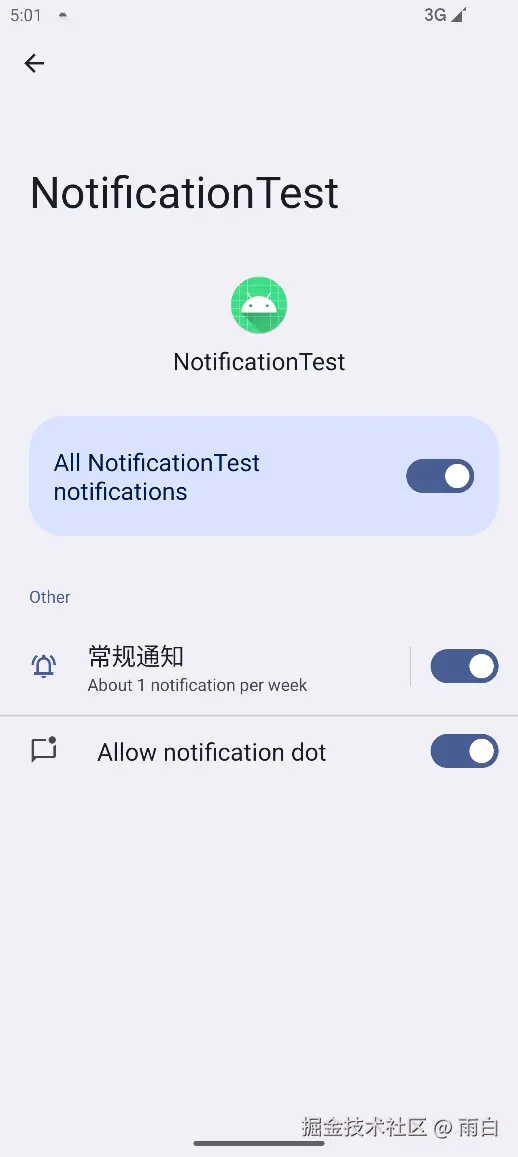
然后在设置中进入该应用的通知页面,可以看到存在了一个名称为"常规通知"的通知渠道:

让通知可被点击
当你看到这条通知时,你可能会下意识去点击它。但你会发现点击并没有任何效果,这是因为我们还没有为它指定点击的行为。
而要实现通知的点击效果,我们需要用到 PendingIntent。
PendingIntent 和 Intent 一样,都可以指定某个"意图"。但和 Intent 不同的是,Intent 的意图会由当前应用立即执行 ;而 PendingIntent 的"意图"会交给其他应用(如系统通知服务),在合适的时机执行。
我们可以使用 PendingIntent.getActivity()、getBroadcast() 或是 getService() 方法来获取 PendingIntent 的实例。这几个方法的参数都是一样的,以 getActivity() 为例,我们看看它的参数:
-
context: Context:Context上下文对象。 -
requestCode: Int:请求码,用于区分不同的PendingIntent,如果你要创建多个不同的通知,就要提供不同的请求码,否则系统会将相同请求码的PendingIntent认为是同一个,导致后续的PendingIntent覆盖前面的PendingIntent。 -
intent: Intent:Intent对象。 -
flags: Int:指定PendingIntent行为的标志位。从 Android 12 开始,必须指定为PendingIntent.FLAG_IMMUTABLE或PendingIntent.FLAG_MUTABLE。PendingIntent.FLAG_IMMUTABLE: 创建一个不可变的PendingIntent,能够防止恶意应用篡改你的Intent。PendingIntent.FLAG_MUTABLE: 创建一个可变的PendingIntent,很少会用到。
有了一个 PendingIntent 实例后,我们还需要将该实例通过 NotificationCompat.Builder 构造器的 setContentIntent() 方法,绑定到通知对象上才行。
现在,我们来给刚才的通知添加点击的逻辑,用于启动一个 Activity。
首先创建一个名称为 NotificationActivity 的 Empty Views Activity ,用于在点击通知后被显示。在其 activity_notification.xml 布局文件中放置一个文本,代码如下:
xml
<?xml version="1.0" encoding="utf-8"?>
<RelativeLayout xmlns:android="http://schemas.android.com/apk/res/android"
    android:id="@+id/main"
    android:layout_width="match_parent"
    android:layout_height="match_parent">

    <TextView
        android:layout_width="wrap_content"
        android:layout_height="wrap_content"
        android:layout_centerInParent="true"
        android:text="这里是通知详情页面"
        android:textSize="24sp" />
</RelativeLayout>
接着,在 MainActivity 中修改 sendNormalNotification() 方法。代码如下:
kotlin
private fun sendNormalNotification() {
    // 创建点击通知时要启动的 Intent
    val intent = Intent(this, NotificationActivity::class.java).apply {
        // 创建一个只包含新Activity的任务栈。
        flags = Intent.FLAG_ACTIVITY_NEW_TASK or Intent.FLAG_ACTIVITY_CLEAR_TASK
    }

    // 创建 PendingIntent
    val pendingIntent = PendingIntent.getActivity(
        this,
        NOTIFICATION_ID_BASIC, // 使用唯一的请求码
        intent,
        // 使用 FLAG_IMMUTABLE 来增强安全性
        PendingIntent.FLAG_IMMUTABLE
    )


    // 构建通知并绑定 PendingIntent
    val notification = NotificationCompat.Builder(this, CHANNEL_ID_NORMAL)
        .setSmallIcon(R.drawable.ic_launcher_foreground)
        .setLargeIcon(
            BitmapFactory.decodeResource(
                resources,
                R.drawable.avatar
            )
        )
        .setContentTitle("新消息")
        .setContentText("点击查看详情")
        .setContentIntent(pendingIntent) // 设置点击意图
        .build()

    // 显示通知
    notificationManager.notify(NOTIFICATION_ID_BASIC, notification)
}
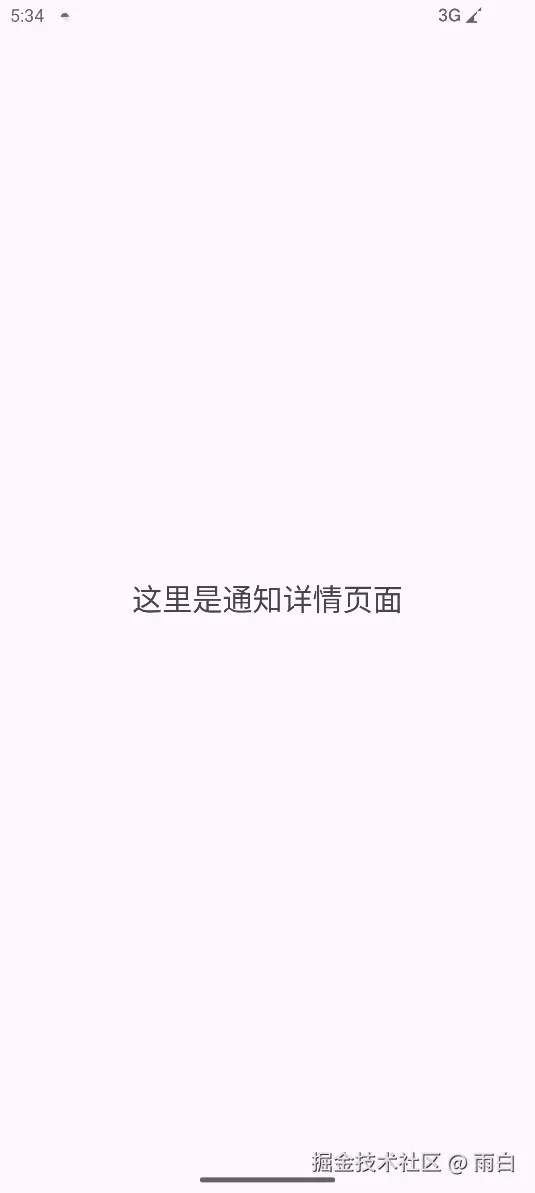
现在运行程序并点击按钮发送通知。这次,当你点击该通知时,会跳转到 NotificationActivity 页面,如图所示:

实现通知的取消
细心的你可能会发现一个问题:点击通知跳转到 NotificationActivity 页面后,状态栏中的通知图标并没有消失。这并不是我们想要的,因为这会让用户觉得任务还没完成。
取消通知有两种方式:一种是在 NotificationCompat.Builder 对象中调用 setAutoCancel() 方法来自动取消(最简单);另一种是在目标 Activity 的 onCreate 方法中,调用 NotificationManager 的 cancel() 方法来手动取消。
第一种写法:
kotlin
private fun sendNormalNotification() {
    //...

    val notification = NotificationCompat.Builder(this, CHANNEL_ID_NORMAL)
        // ...
        .setAutoCancel(true) // 用户点击后自动移除通知
        .build()

    notificationManager.notify(NOTIFICATION_ID_BASIC, notification)
}
第二种写法:
kotlin
class NotificationActivity : AppCompatActivity() {
    override fun onCreate(savedInstanceState: Bundle?) {
        super.onCreate(savedInstanceState)
        setContentView(R.layout.activity_notification)

        val manager = getSystemService(Context.NOTIFICATION_SERVICE) as
                NotificationManager
        manager.cancel(1)
    }
}
其中 cancel() 方法传入的是要取消的通知的 id。
进阶技巧:富文本通知
现在,我们的通知还只是简单的标题和短文本。实际上,NotificationCompat.Builder 中提供了 setStyle() 方法让我们来构建包含长文本、大图等元素的富文本通知。
长文本通知
在使用 setStyle() 方法之前,我们先看看如果使用 setContentText() 方法时,传入了一段很长的文字,通知效果是怎么样的。
代码如下:
kotlin
val longText = "Learn how to build notifications, send and sync data, and use voice actions. Get the official Android IDE and developer tools to build apps for Android. This text is intentionally made long to demonstrate the truncation."

// 构建通知
val notification = NotificationCompat.Builder(this, CHANNEL_ID_NORMAL)
    .setSmallIcon(R.drawable.ic_launcher_foreground)
    .setLargeIcon(
        BitmapFactory.decodeResource(
            resources,
            R.drawable.avatar
        )
    )
    .setContentTitle("学习 Android 开发")
    .setContentText(longText)
    .build()
效果如图:

可以看到通知内容无法完整显示,超出的部分会被省略号代替。因为通知的内容本就是要言简意赅,在通知内显示详细的内容是不合理的,最好是通过一个页面来展示。
如果你真的要在通知中显示很长的一段文字,你可以通过 AndroidX 库提供了 NotificationCompat.BigTextStyle 来完成,只需要将它的实例传给 setStyle() 方法即可。代码如下所示:
kotlin
val longText = """
Learn how to build notifications, send and sync data,
and use voice actions. Get the official Android IDE
and developer tools to build apps for Android.
""".trimIndent()

// 构建通知
val notification = NotificationCompat.Builder(this, CHANNEL_ID_NORMAL)
    .setSmallIcon(R.drawable.ic_launcher_foreground)
    .setLargeIcon(
        BitmapFactory.decodeResource(
            resources,
            R.drawable.avatar
        )
    )
    .setContentTitle("学习 Android 开发")
    .setStyle(
        NotificationCompat.BigTextStyle()
            .bigText(longText)
    )
    .build()
可以看到,我们使用了 setStyle 方法来替代 setContentText 方法。
重新运行程序并点击按钮,通知效果如图所示:

之前被隐藏的内容被展示出来了,当然文本内容过于长的话,通知也会对内容进行截断。
大图通知
除了显示长文本,通知里还可以显示大图片。依然是使用 setStyle 方法,只是样式换成了 NotificationCompat.BigPictureStyle。代码如下所示:
kotlin
// 将图片资源解码成一个 Bitmap 对象
val bigPicture = BitmapFactory.decodeResource(resources, R.drawable.big_image)

val bitmap: Bitmap? = null

// 构建通知
val notification = NotificationCompat.Builder(this, CHANNEL_ID_NORMAL)
    .setSmallIcon(R.drawable.ic_launcher_foreground)
    .setLargeIcon(BitmapFactory.decodeResource(resources, R.drawable.avatar))
    .setContentTitle("今日推荐")
    .setContentText("点击查看") // 折叠状态下显示的文本
    .setStyle(
        NotificationCompat.BigPictureStyle()
            .bigPicture(bigPicture) // 设置展开后的大图
            .bigLargeIcon(bitmap)   // 展开后,隐藏右侧的 LargeIcon,避免重复
            .setSummaryText("JK少女背影") // 展开后,标题下方的摘要文字
    )
.build()图片资源下载 密码:snow
现在重新运行程序并点击按钮,可以看到通知:
 展开后:
展开后: 
高优先级通知
有时我们还要实现"强提醒"效果,让重要、紧急的信息能够让用户注意到。这时,需要使用高优先级的通知渠道,因为在 Android 8.0 及以上版本,通知的打扰级别完全取决于其通知渠道。
当一条通知被发送到高优先级的渠道时,该通知会以横幅的形式来从屏幕顶部弹出。
我们创建一个 IMPORTANCE_HIGH 高优先级的通知渠道表示重要通知。
kotlin
private fun createHighPriorityChannel() {
    if (Build.VERSION.SDK_INT >= Build.VERSION_CODES.O) {
        val channelId = "channel_high"
        val channelName = "重要提醒"
        val importance = NotificationManager.IMPORTANCE_HIGH

        val channel = NotificationChannel(channelId, channelName, importance).apply {
            description = "用于紧急或重要的提醒"
        }
        notificationManager.createNotificationChannel(channel)
    }
}
然后使用这个渠道 id 来发送一个通知:
kotlin
// 发送高优先级通知
fun sendHighPriorityNotification() {
    val notification = NotificationCompat.Builder(this, "channel_high")
        .setSmallIcon(R.drawable.ic_launcher_foreground)
        .setLargeIcon(BitmapFactory.decodeResource(resources,R.drawable.avatar))
        .setContentTitle("重要通知")
        .setContentText("江南皮革厂倒闭了!")
        // 对于高优先级通知,设置其优先级,兼容旧版本安卓
        .setPriority(NotificationCompat.PRIORITY_HIGH)
        .build()

    notificationManager.notify(1, notification)
}
然后现在运行程序并点击按钮,可以看到:

可以看到它弹出了一条横幅,并且展示了通知的正文内容,表示这条通知很重要。
不过你要谨慎使用,因为横幅是一种强打扰的提醒方式,滥用会导致引起用户反感,从而导致关闭应用的通知权限。