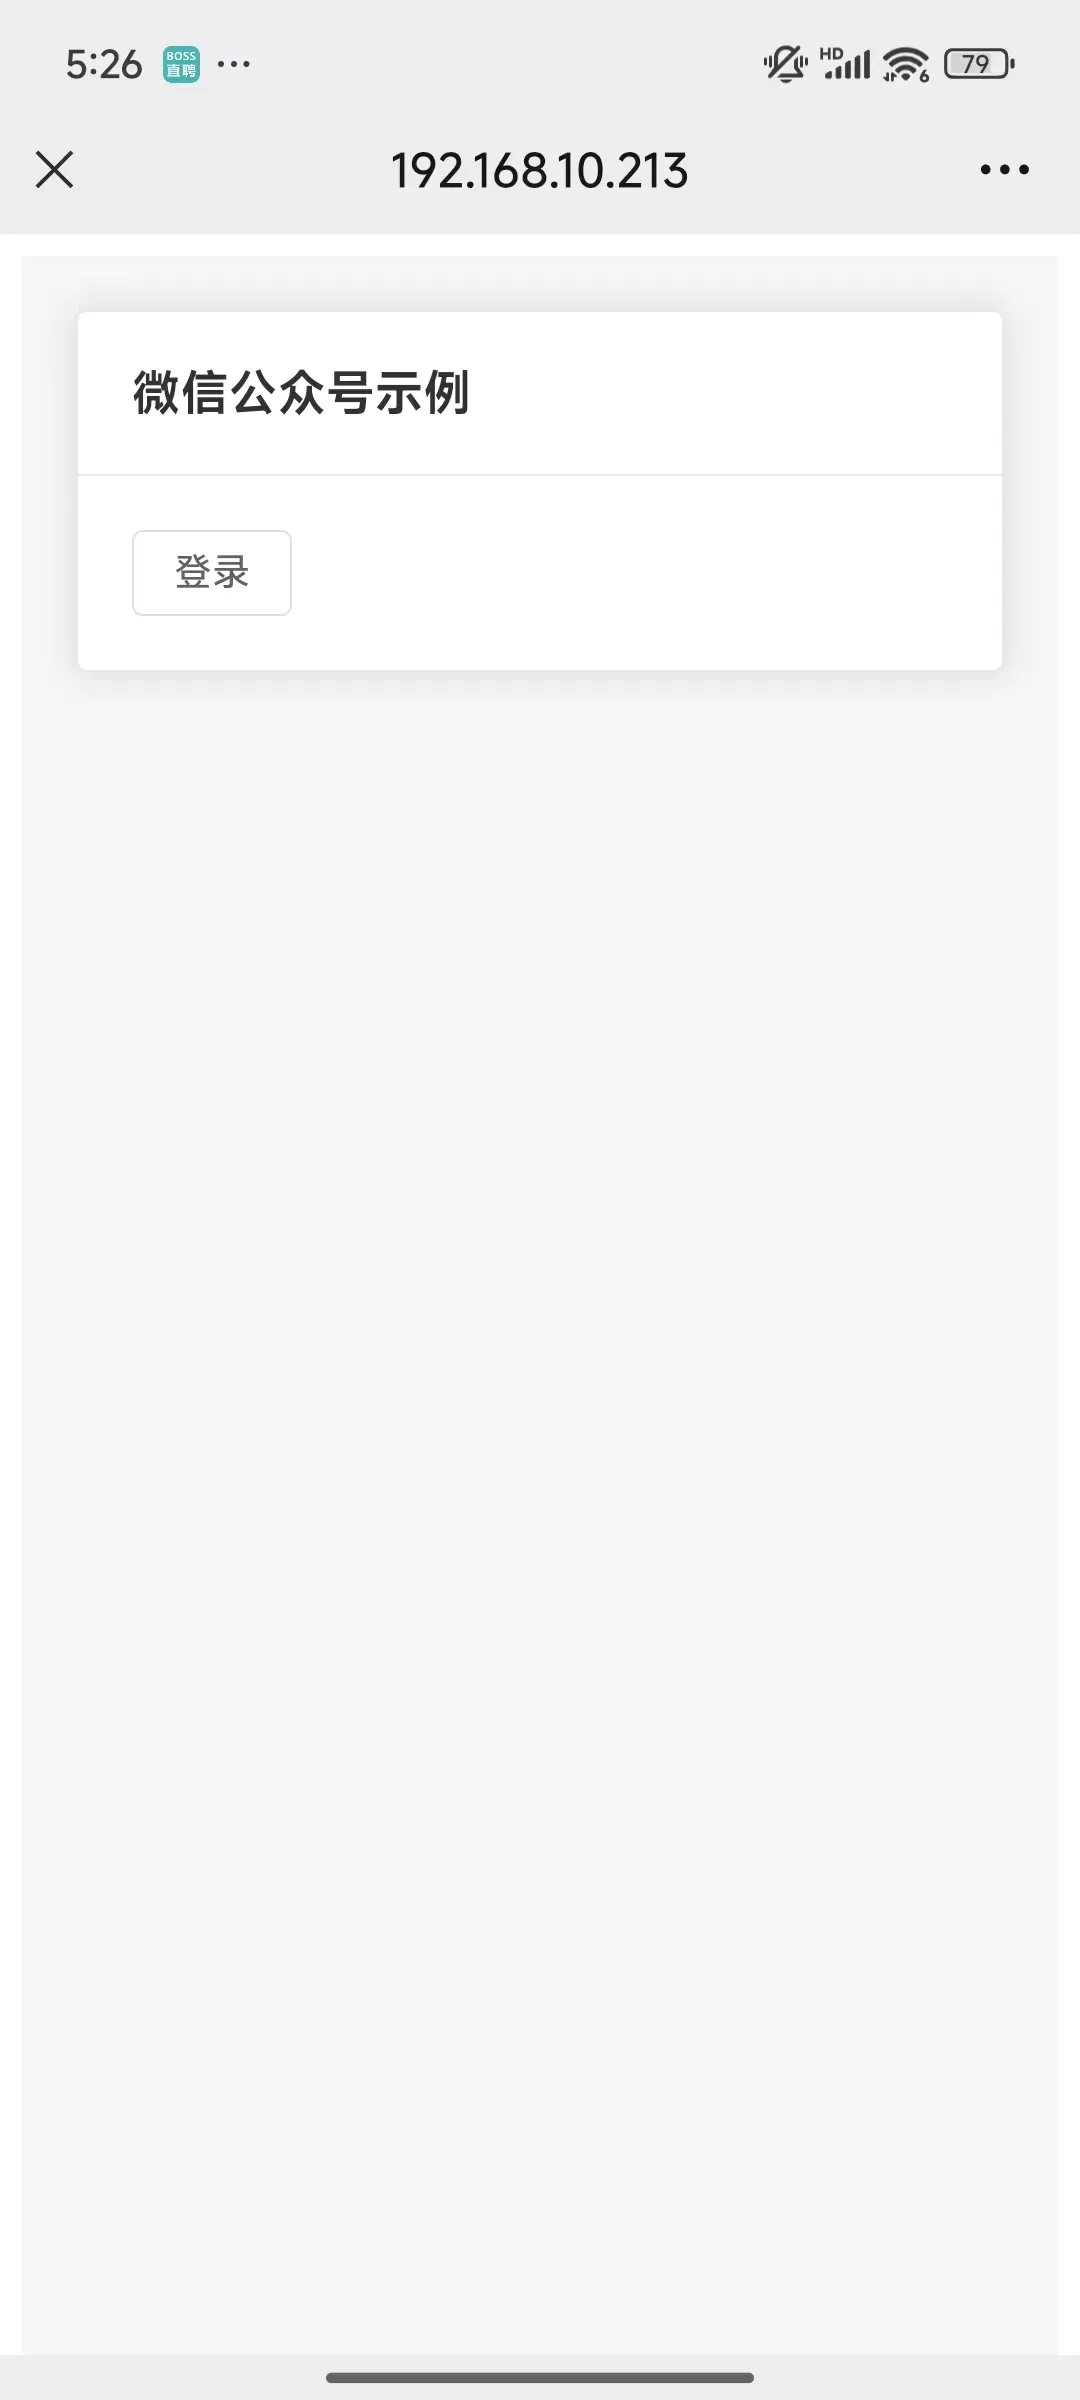
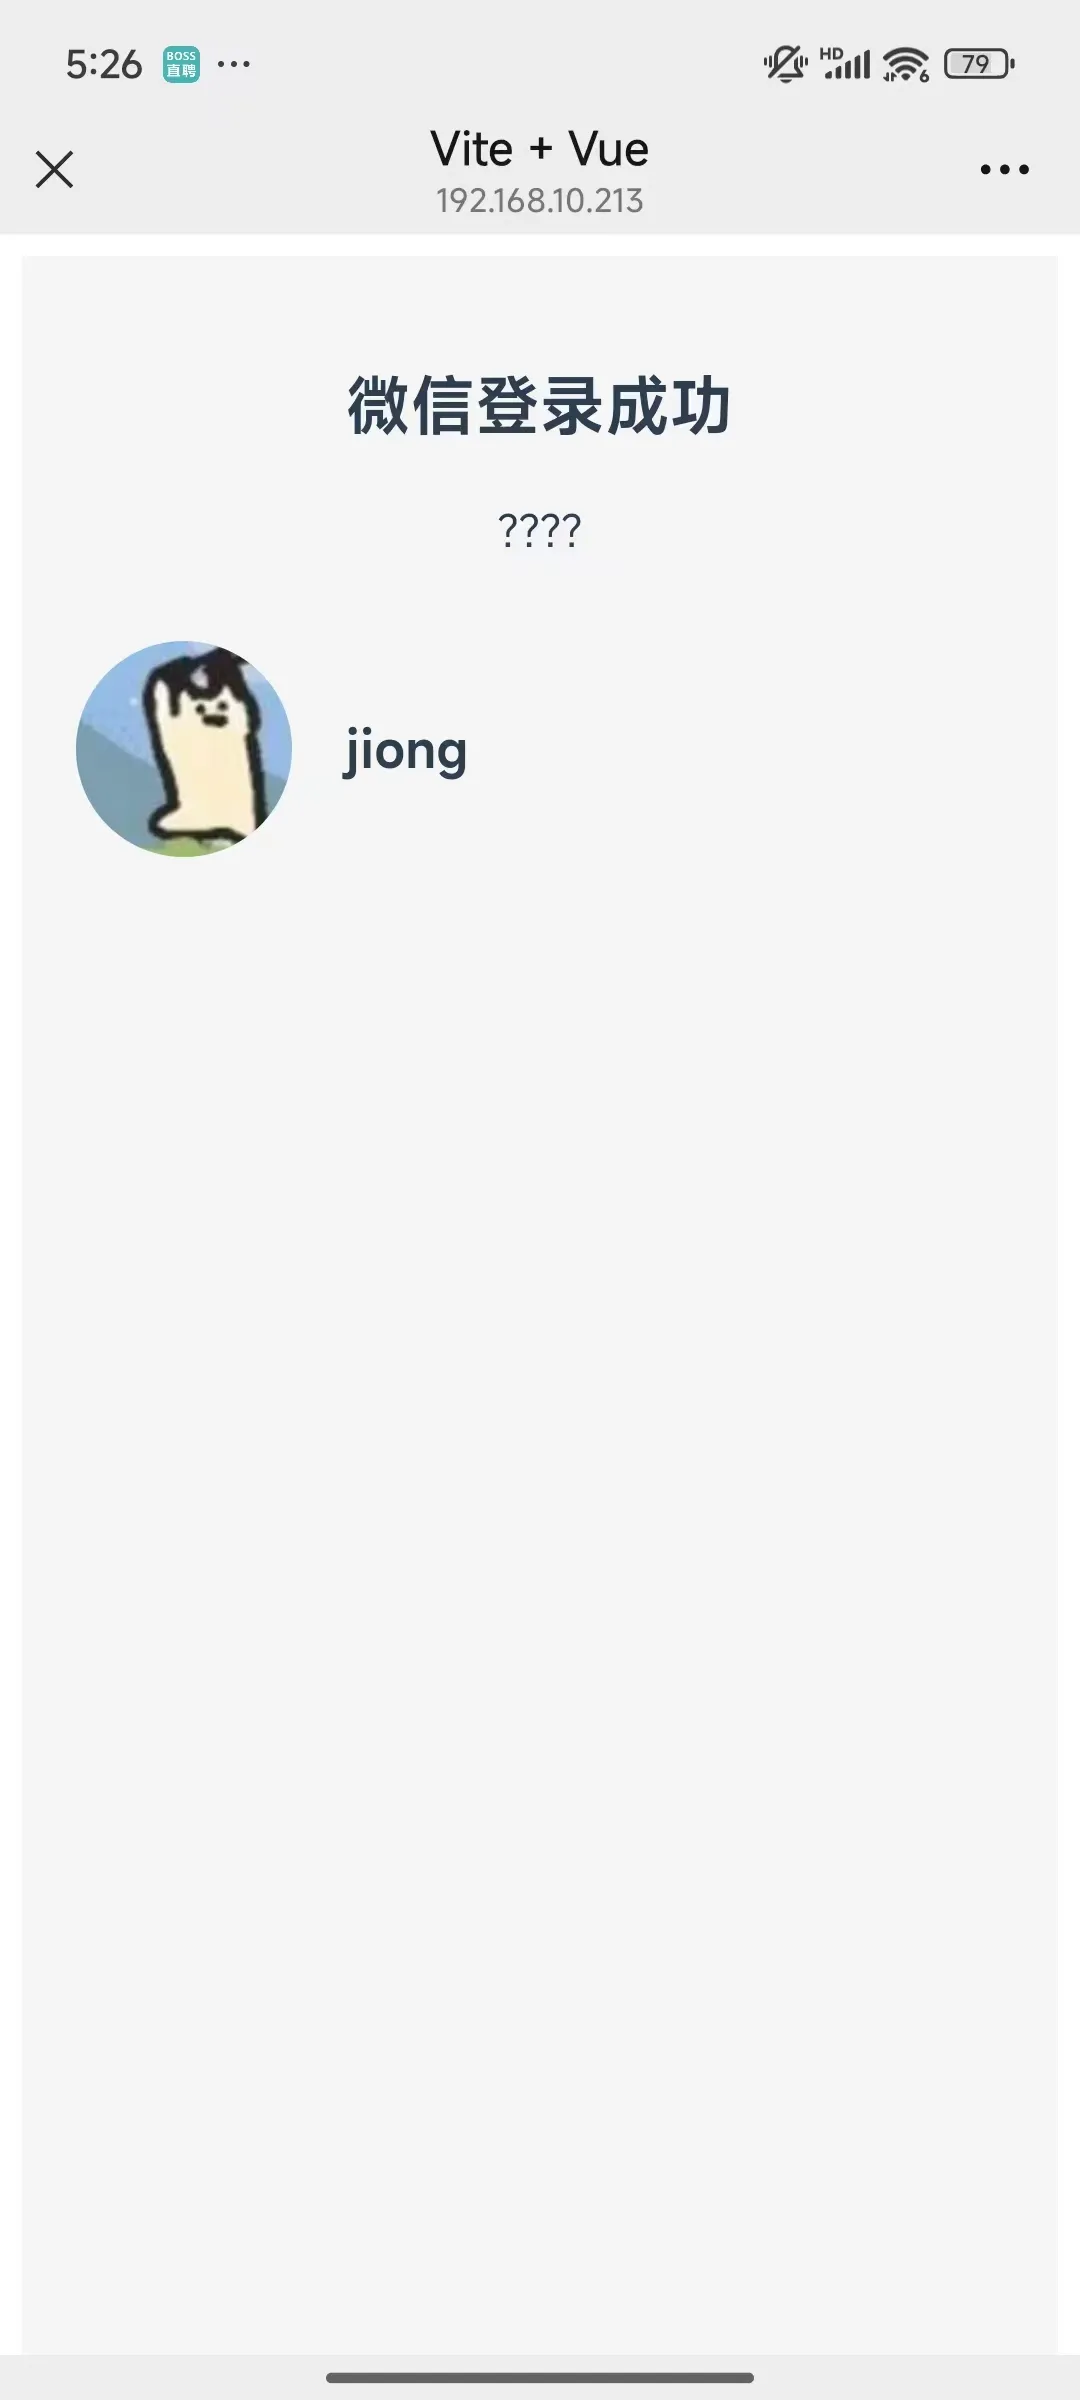
创建VUE3项目
创建初始文件
进入项目存放位置
右键用命令行打开(终端打开)
npm create vite@latest wechat-report --template vuenpm:包管理需要安装node.js
Vite:用于热部署和生成、打包项目
--template vue:模板指定为vue
可能报错: 因为在此系统上禁止运行脚本。有关详细信息
会提示是否继续:
Ok to proceed? (y)
输入y回车
会让选择版本和类型:
如:◆ Select a framework:
│ ○ Vanilla
│ ● Vue
│ ○ React
用方向键移动到VUE,回车
用方向键移动到JavaScript ,回车
移动到创建好的项目中初始化
cd wechat-report
npm install
安装Element Plus
# 安装Element Plus
npm install element-plus @element-plus/icons-vue

# 安装自动导入插件(可选但推荐)
npm install -D unplugin-vue-components unplugin-auto-import
第一行安装elementPlus 和图标库
第二行是自动导入插件:自动按需导入 Vue 组件(如 Element Plus 的 <el-button>),无需手动 import
- unplugin-auto-import:自动导入 Vue 相关的 API(如 ref、reactive、onMounted 等),减少手动导入的代码。
- 减少代码量 :不用手动写 import { ElButton } from 'element-plus'。
- 优化打包体积 :只打包实际用到的组件,避免全量引入。
配置项目
进入项目,找到
修改vite.config.js:
设置elementui,@/路径功能,后台地址映射
import { defineConfig } from 'vite'
import vue from '@vitejs/plugin-vue'
import { fileURLToPath, URL } from 'node:url'
import AutoImport from 'unplugin-auto-import/vite'
import Components from 'unplugin-vue-components/vite'
import { ElementPlusResolver } from 'unplugin-vue-components/resolvers'

// https://vitejs.dev/config/
export default defineConfig({
  plugins: [
    vue(),
    AutoImport({
      resolvers: [ElementPlusResolver()],
    }),
    Components({
      resolvers: [ElementPlusResolver()],
    }),
  ],
  resolve: {
    alias: {
      '@': fileURLToPath(new URL('./src', import.meta.url)) // 使用现代ESM方式
    }
  },
  server: {
    proxy: {
      '/api': {
        target: 'http://your-backend-api.com', // 替换为实际后端地址
        changeOrigin: true,
        rewrite: path => path.replace(/^\/api/, '')
      }
    }
  }
})
安装微信JSSDK
npm install weixin-js-sdk创建API服务
在src/api目录下创建wechat.js:
import axios from 'axios'

const service = axios.create({
  baseURL: '/api', // 根据实际后端API地址配置
  timeout: 5000
})

// 获取校验url,用于登录
export function getAuthorizationUrl(url) {
    return service({
        method: 'post',
        url: '/api/emergency/wxLoginReport/getAuthorizationUrl',
        data: { url }
    })
}

// 其他API...
修改App.vue
清空内容
<template>
  <router-view />
</template>

<script>
export default {
  name: 'App',
  setup() {
    return {}
  }
}
</script>

<style>
/* 全局样式 */
#app {
  font-family: Avenir, Helvetica, Arial, sans-serif;
  -webkit-font-smoothing: antialiased;
  -moz-osx-font-smoothing: grayscale;
  color: #2c3e50;
  max-width: 100vw;
  min-height: 100vh;
  background-color: #f5f5f5;
}
</style>
配置路由
安装Vue Router:
npm install vue-router@4创建src/router/index.js:
创建登录页面和结果页面
import { createRouter, createWebHashHistory } from 'vue-router'

const routes = [
    //登录页面
    {
        path: '/',
        name: 'Home',
        component: () => import('@/views/Home.vue')
    },
    //登录结果
    {
        path: '/Home2',
        name: 'Home2',
        component: () => import('@/views/Home2.vue')
    },
    // 其他路由...
]

const router = createRouter({
    history: createWebHashHistory(), // 使用hash模式,兼容微信公众号
    routes
})

export default router
创建示例页面
创建src/views/Home.vue:
用于测试微信功能登录
<template>
  <div class="home">
    <el-card class="box-card">
      <template #header>
        <div class="card-header">
          <span>微信公众号示例</span>
        </div>
      </template>
      <el-button @click="loginAuth">登录</el-button>
    </el-card>
  </div>
</template>

<script>
import {getAuthorizationUrl} from '@/api/wechat'

export default {
  name: 'Home',
  setup() {

    const loginAuth = () => {
      // let url = window.location.href;
      let url = 'http://192.168.10.213:5173/#/Home2';
      // console.log(url)
      getAuthorizationUrl(url).then(res => {
        console.log(res.data.msg)
        window.location.href = res.data.msg;
      })
    };
    return {
      loginAuth
    }
  }
}
</script>

<style scoped>
.home {
  padding: 20px;
}

.box-card {
  max-width: 500px;
  margin: 0 auto;
}

.card-header {
  font-size: 18px;
  font-weight: bold;
}

</style>
创建src/views/Home2.vue:
登录结果页面
<template>
  <div class="wechat-auth-result">
    <!-- 加载状态 -->
    <div v-if="loading" class="loading">加载中...</div>

    <!-- 成功状态 -->
    <div v-if="userInfo && !error" class="success">
      <div class="header">
        <h2>微信登录成功</h2>
        <p>{{ userInfo.message }}</p>
      </div>

      <div class="profile">
        <img :src="userInfo.headimgurl" alt="用户头像" class="avatar">
        <div class="details">
          <h3>{{ userInfo.nickname }}</h3>
<!--          <button @click="goToDashboard" class="btn btn-primary">进入首页</button>-->
        </div>
      </div>
    </div>

    <!-- 错误状态 -->
    <div v-if="error" class="error">
      <h2>登录失败</h2>
      <p>{{ error }}</p>
      <button @click="retryLogin" class="btn btn-secondary">重新登录</button>
    </div>
  </div>
</template>

<script>
import {ref, onMounted} from 'vue';
import {useRoute, useRouter} from 'vue-router';

export default {
  setup() {
    const route = useRoute();
    const router = useRouter();
    const userInfo = ref(null);
    const loading = ref(true);
    const error = ref(null);

    // 获取并处理URL参数
    const parseUserInfo = () => {
      try {
        if (route.query.openid) {
          userInfo.value = {
            openid: route.query.openid,
            nickname: decodeURIComponent(route.query.nickname || '未知用户'),
            headimgurl: decodeURIComponent(route.query.headimgurl || ''),
            message: decodeURIComponent(route.query.msg || '登录成功')
          };

          // 清理URL
          window.history.replaceState({}, '', window.location.pathname);

          // 这里可以添加将用户信息存储到Vuex/Pinia或发送到后端验证的逻辑
        } else {
          error.value = '未获取到用户信息';
        }
      } catch (e) {
        error.value = '解析用户信息失败: ' + e.message;
      } finally {
        loading.value = false;
      }
    };

    // const goToDashboard = () => {
    //   router.push('/dashboard');
    // };

    const retryLogin = () => {
      router.push('/');
    };

    onMounted(() => {
      parseUserInfo();
    });

    return {userInfo, loading, error,  retryLogin};
  }
};
</script>

<style scoped>
.wechat-auth-result {
  max-width: 500px;
  margin: 0 auto;
  padding: 20px;
}

.loading {
  text-align: center;
  padding: 40px 0;
}

.success .header {
  text-align: center;
  margin-bottom: 30px;
}

.profile {
  display: flex;
  align-items: center;
  gap: 20px;
  margin-top: 20px;
}

.avatar {
  width: 80px;
  height: 80px;
  border-radius: 50%;
  object-fit: cover;
}

.details {
  flex: 1;
}

.error {
  color: #dc3545;
  text-align: center;
  padding: 40px 0;
}

.btn {
  margin-top: 15px;
  padding: 8px 16px;
  border-radius: 4px;
  cursor: pointer;
}

.btn-primary {
  background-color: #007bff;
  color: white;
  border: none;
}

.btn-secondary {
  background-color: #6c757d;
  color: white;
  border: none;
}
</style>
修改main.js
import { createApp } from 'vue'
import App from './App.vue'
import router from './router'

// 引入Element Plus样式
import 'element-plus/dist/index.css'

const app = createApp(App)

app.use(router)
app.mount('#app')
package.json
加上--host,用与显示内容
"scripts": {
  "dev": "vite --host"
}
npm run dev 启动
springboot后台
controller层
用于拼接微信调用地址与处理回调信息
package yunline.controller;

import yunline.entity.TdSspUserEntity;
import io.swagger.annotations.Api;
import io.swagger.annotations.ApiOperation;
import org.springframework.beans.factory.annotation.Autowired;
import org.springframework.web.bind.annotation.*;
import yunline.base.ActionResult;
import yunline.service.TdSspUserService;
import yunline.utils.WxReportUtils;
import javax.servlet.http.HttpServletRequest;
import javax.servlet.http.HttpServletResponse;
import java.net.URLDecoder;
import java.net.URLEncoder;
import java.nio.charset.StandardCharsets;
import java.util.*;

@Api(tags = "应急排班系统", value = "emergency")
@RestController
@RequestMapping("/api/emergency/wxLoginReport")
public class WxReportController {
    @Autowired
    private TdSspUserService tdSspUserService;

    @ApiOperation("获取微信授权地址")
    @PostMapping("/getAuthorizationUrl")
    public ActionResult getAuthorizationUrl(@RequestBody Map<String, String> params) throws Exception {
        System.out.println("进入");
        String url = params.get("url");
        url = URLEncoder.encode(url, StandardCharsets.UTF_8.toString());
        return ActionResult.success(WxReportUtils.getAuthorizationUrl(url));
    }


    /**
     * 当用户授权后,微信会重定向到你指定的URI,并携带一个code参数。你需要捕获这个请求并提取code。
     */
    @ApiOperation("捕获微信授权回执")
    @GetMapping("/handleAuthorizationCallback")
    public void handleAuthorizationCallback(HttpServletRequest request, HttpServletResponse response) throws Exception {
        String code = request.getParameter("code");
        String state = request.getParameter("state");
        Map<String, String[]> c = request.getParameterMap();

        if (code == null) {
            // 处理错误情况
//            response.getWriter().println("授权失败,请重试!");
//            return ActionResult.fail("授权失败,请重试!");

            String frontendUrl = URLDecoder.decode(state, "UTF-8")
                    +"?openid="
                    +"&msg=授权失败!";
            response.sendRedirect(frontendUrl);
            return ;
        }
        // 获取access_token和openid
        Map<String, String> tokenInfo = WxReportUtils.getTokenInfo(code);

        if (tokenInfo == null || !tokenInfo.containsKey("access_token") || !tokenInfo.containsKey("openid")) {
//            response.getWriter().println("获取access_token失败,请重试!");
//            return ActionResult.fail("获取access_token失败,请重试!");

            String frontendUrl = URLDecoder.decode(state, "UTF-8")
                    +"?openid="
                    +"&msg=获取access_token失败!";
            response.sendRedirect(frontendUrl);
            return ;
        }

        String accessToken = tokenInfo.get("access_token");
        String openid = tokenInfo.get("openid");

        // 获取用户信息
        Map<String, Object> userInfo = WxReportUtils.getUserInfo(accessToken, openid);

        if (userInfo == null || !userInfo.containsKey("nickname") || !userInfo.containsKey("headimgurl")) {
//            response.getWriter().println("获取用户信息失败,请重试!");
//            return ActionResult.fail("获取用户信息失败,请重试!");

            String frontendUrl = URLDecoder.decode(state, "UTF-8")
                    +"?openid="
                    +"&msg=获取用户信息失败!";
            response.sendRedirect(frontendUrl);
            return ;
        }

        // 完成本地用户认证
        String nickname = (String) userInfo.get("nickname");
        String headimgurl = (String) userInfo.get("headimgurl");
//        String sex = (String) userInfo.get("sex");
        Map<String, Object> map = new HashMap<>();
        int has = tdSspUserService.lambdaQuery().eq(TdSspUserEntity::getRemark, openid).count();
        if (has > 0) {
            //修改
            tdSspUserService.lambdaUpdate().eq(TdSspUserEntity::getRemark, openid)
                    .set(TdSspUserEntity::getPhotopath,headimgurl)
                    .set(TdSspUserEntity::getUserId,nickname).update();
        }else{
            //创建
            TdSspUserEntity entity = new TdSspUserEntity();
            entity.setUserId(nickname);
            entity.setPhotopath(headimgurl);
            entity.setRemark(openid);
            entity.setNickName(nickname);
            entity.setUserRegdate(new Date());
            tdSspUserService.create(entity);
        }
        map.put("userInfo", userInfo);
        map.put("openid", openid);
//        return ActionResult.success(map);
        //重定向
        String frontendUrl = URLDecoder.decode(state, "UTF-8")
                +"?openid=" + openid
                +"&msg=登录成功"
                +"&nickname="+nickname
                +"&headimgurl="+headimgurl
                ;
        response.sendRedirect(frontendUrl);

//        return null;
    }

}
创建WxReportUtils,用于对接微信
package yunline.utils;

import cn.hutool.json.JSONUtil;

import java.io.BufferedReader;
import java.io.InputStreamReader;
import java.net.*;
import java.nio.charset.StandardCharsets;
import java.util.Map;

public class WxReportUtils {
    private static final String IP = getIP();
    private static final String APPID = "你的appid";
    private static final String APPSECRET = "你的APPSECRET";
//    private static final String SCOPE = "snsapi_base";
//    private static final String SCOPE = "snsapi_login";
    private static final String SCOPE = "snsapi_userinfo";
    private static final String PORT = "28888";
    private static final String STATE = "STATE";

    private static final String REDIRECT_URI = "后台调用地址,就是controller层的callback";

    private static String getIP() {
        try {
            InetAddress localhost = InetAddress.getLocalHost();
//            IP=localhost.getHostAddress();
            return localhost.getHostAddress();
        } catch (UnknownHostException e) {
            e.printStackTrace();
        }
        return "";
    }

    public static String getAuthorizationUrl() throws Exception {
        return getAuthorizationUrl(STATE);
    }
    public static String getAuthorizationUrl(String url) throws Exception {
        return "https://open.weixin.qq.com/connect/oauth2/authorize?"
                + "appid=" + APPID
                + "&redirect_uri=" + URLEncoder.encode(REDIRECT_URI, StandardCharsets.UTF_8.toString())
                + "&response_type=code"
                + "&scope=" + SCOPE
//                + "&state=" + STATE
                + "&state=" + url
                + "#wechat_redirect";
    }


    /**
     * 获取token和openid
     *
     * @param code
     * @return
     * @throws Exception
     */
    public static Map<String, String> getTokenInfo(String code) throws Exception {
        String url = "https://api.weixin.qq.com/sns/oauth2/access_token?"
                + "appid=" + APPID
                + "&secret=" + APPSECRET
                + "&code=" + code
                + "&grant_type=authorization_code";

        HttpURLConnection connection = (HttpURLConnection) new URL(url).openConnection();
        connection.setRequestMethod("GET");

        int responseCode = connection.getResponseCode();
        if (responseCode == 200) {
            BufferedReader in = new BufferedReader(new InputStreamReader(connection.getInputStream()));
            String inputLine;
            StringBuilder content = new StringBuilder();
            while ((inputLine = in.readLine()) != null) {
                content.append(inputLine);
            }
            in.close();
            connection.disconnect();
            return JSONUtil.toBean(content.toString(), Map.class, false);
        } else {
            throw new RuntimeException("请求失败:" + responseCode);
        }
    }

    /**
     * 获取用户信息
     *
     * @param accessToken
     * @param openId
     * @return
     * @throws Exception
     */
    public static Map<String, Object> getUserInfo(String accessToken, String openId) throws Exception {
        String url = "https://api.weixin.qq.com/sns/userinfo?"
                + "access_token=" + accessToken
                + "&openid=" + openId
                + "&lang=zh_CN";

        HttpURLConnection connection = (HttpURLConnection) new URL(url).openConnection();
        connection.setRequestMethod("GET");

        int responseCode = connection.getResponseCode();
        if (responseCode == 200) {
            BufferedReader in = new BufferedReader(new InputStreamReader(connection.getInputStream()));
            String inputLine;
            StringBuilder content = new StringBuilder();
            while ((inputLine = in.readLine()) != null) {
                content.append(inputLine);
            }
            in.close();
            connection.disconnect();

            return JSONUtil.toBean(content.toString(), Map.class, false);
        } else {
            throw new RuntimeException("请求失败:" + responseCode);
        }
    }
}
微信配置
进入微信测试地址:
https://mp.weixin.qq.com/debug/cgi-bin/sandboxinfo
注册后进行配置
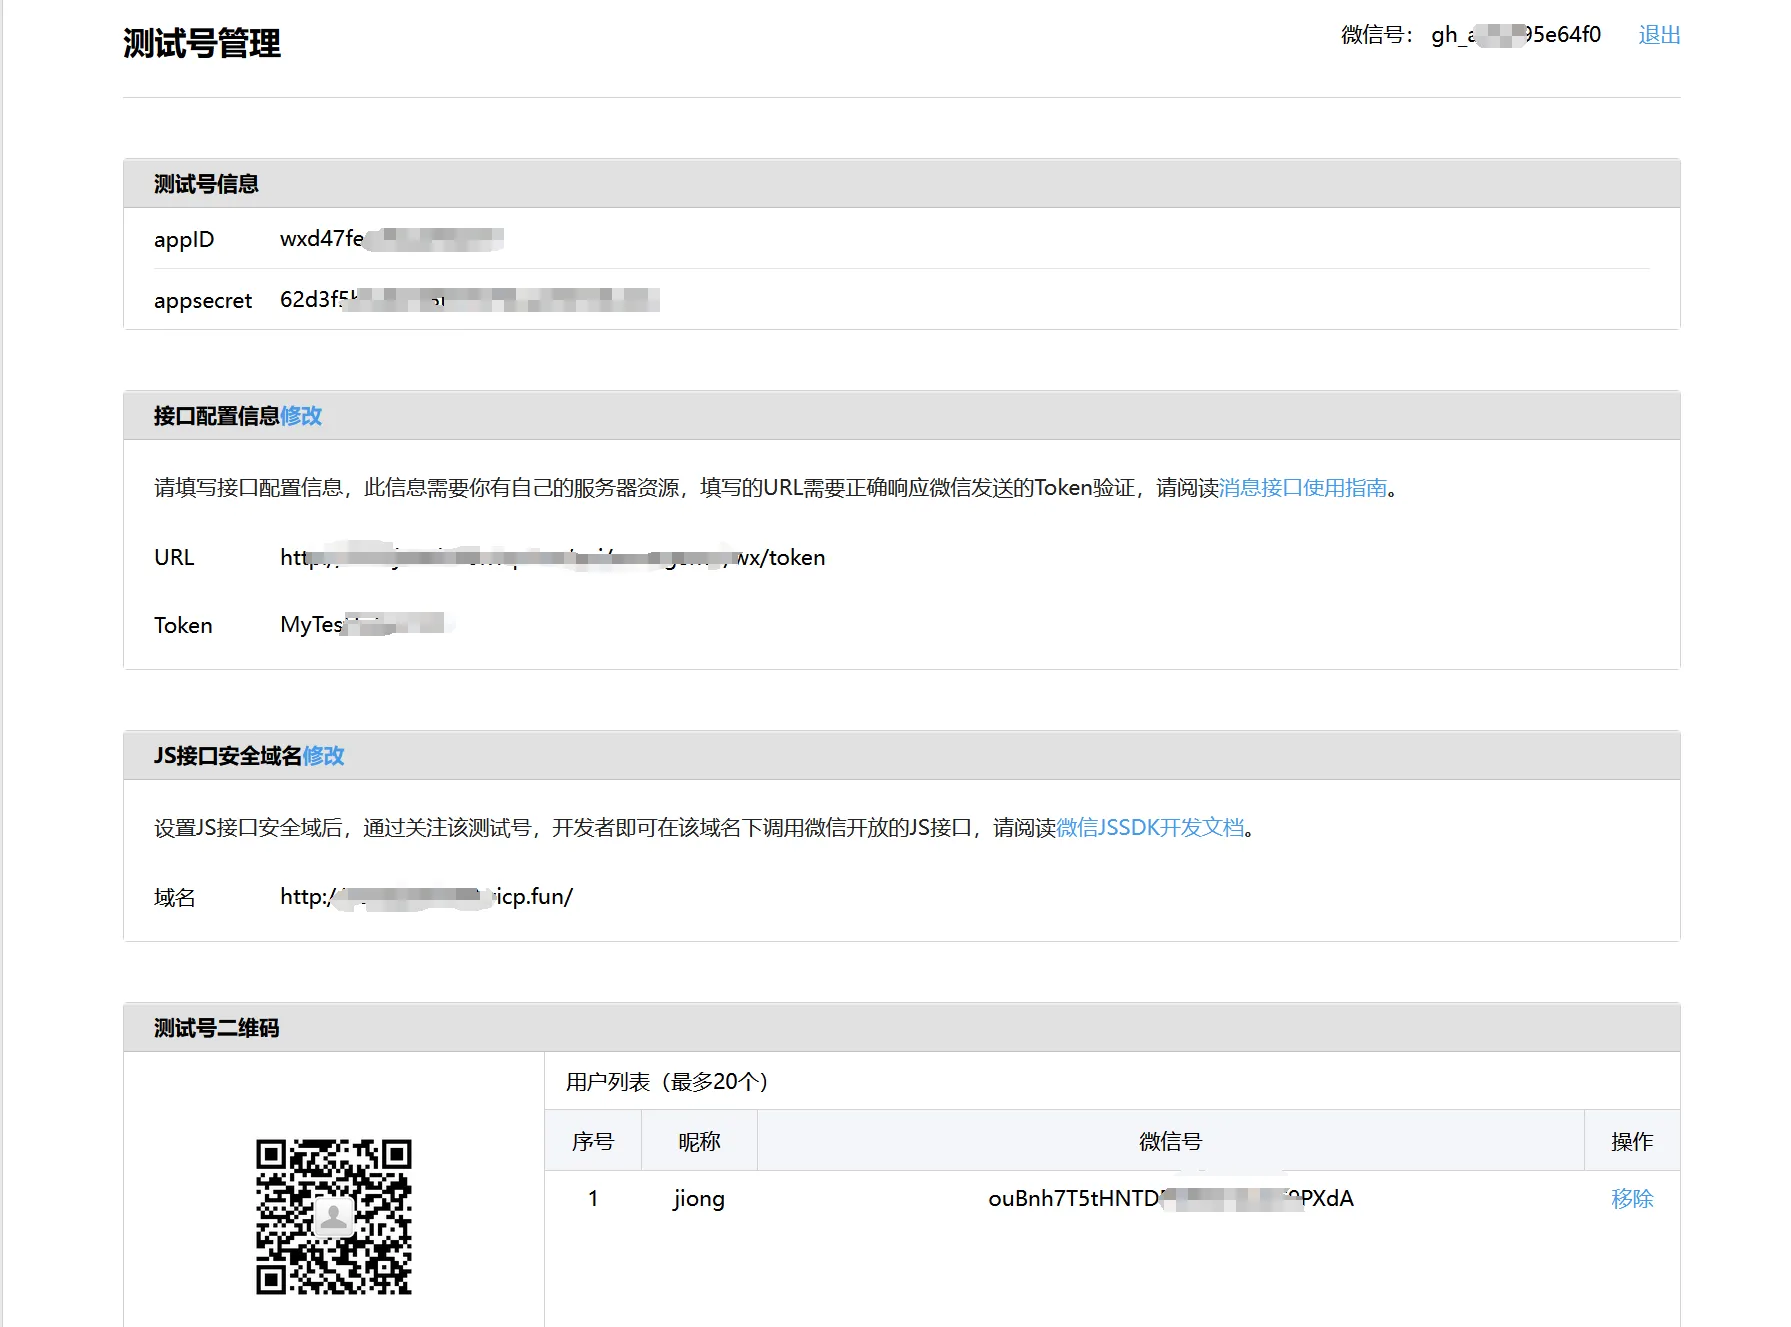
配置获取用户信息的权限,配置一下域名
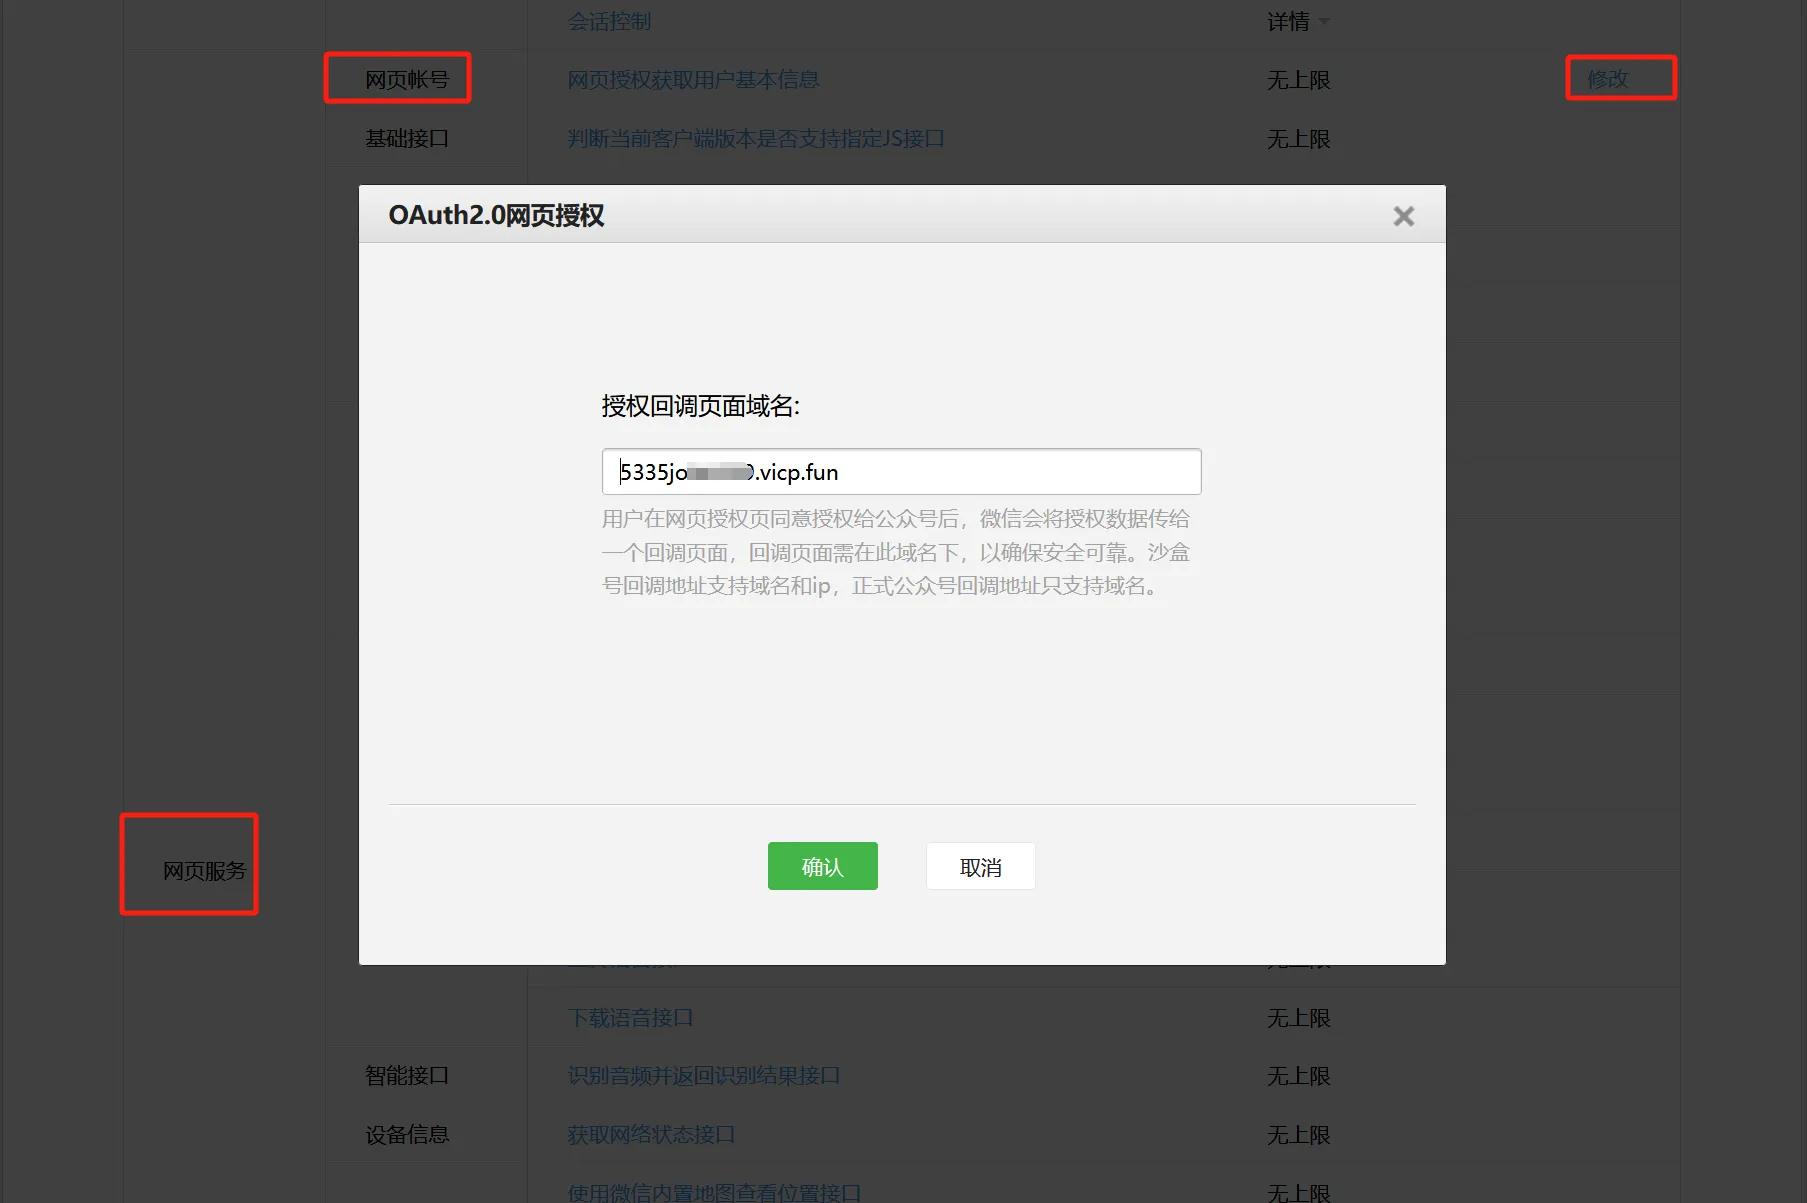
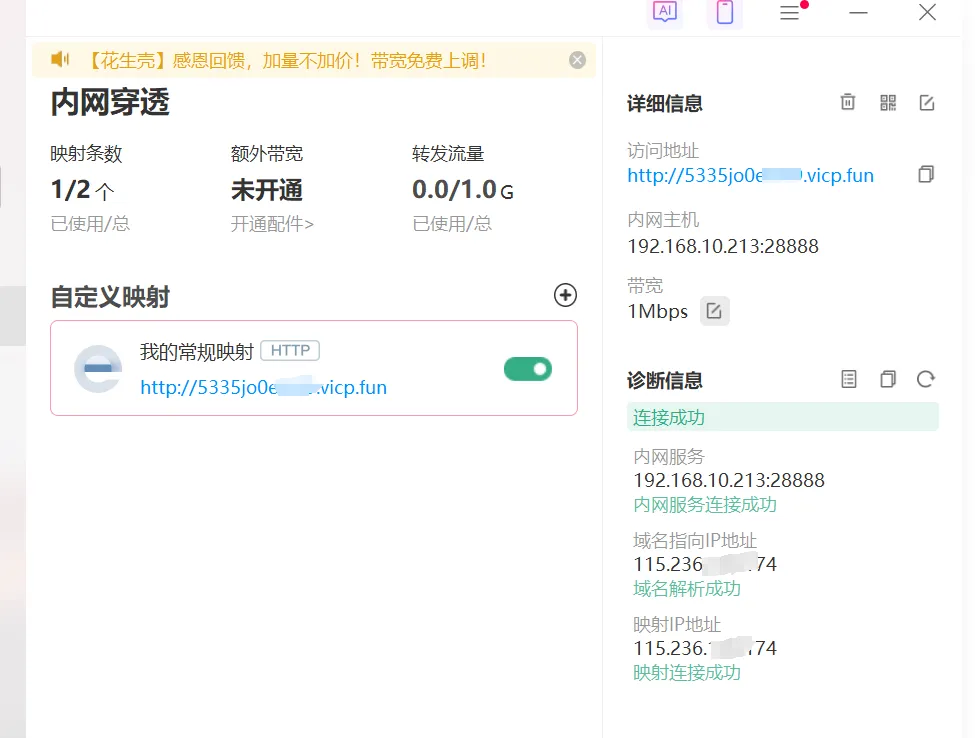
内网穿透(可选
这里我使用的是花生壳网穿透获得的外网地址,用了10块钱巨款
结果演示
