项目环境:
JDK:1.8+
maven:3.9.6
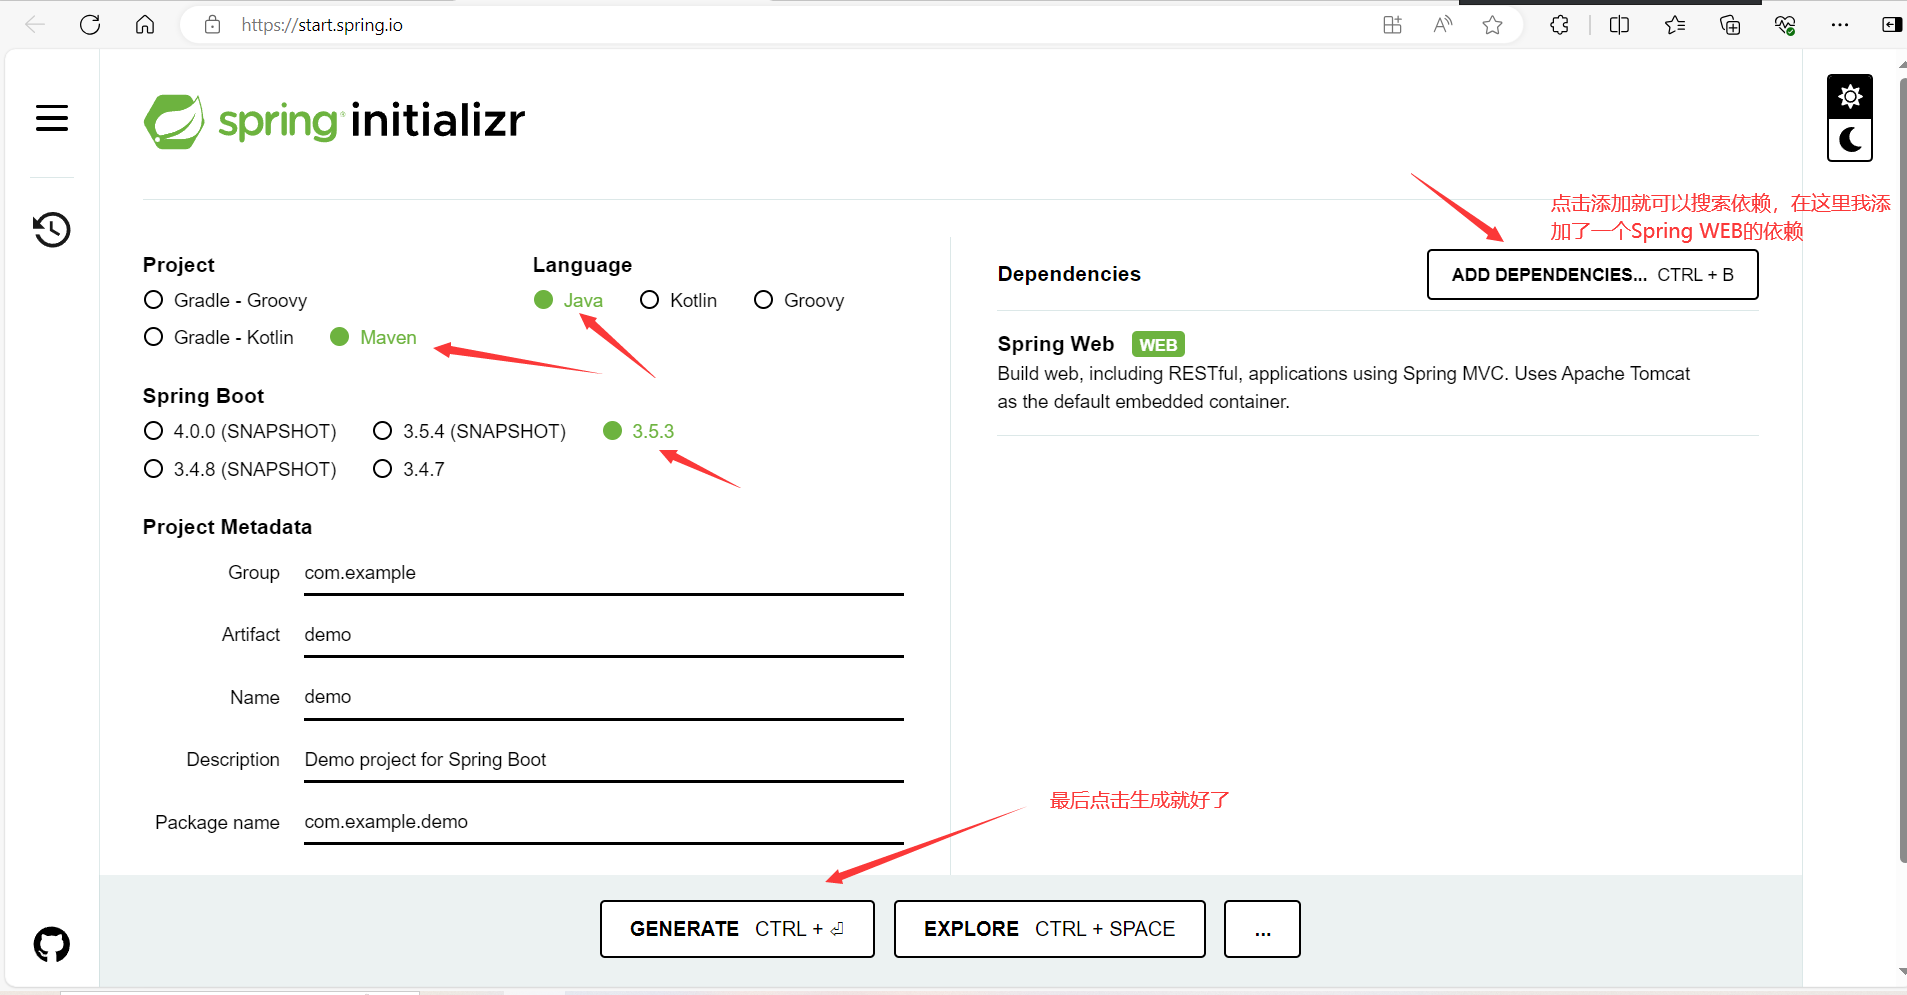
第一种:使用IDEA+官网
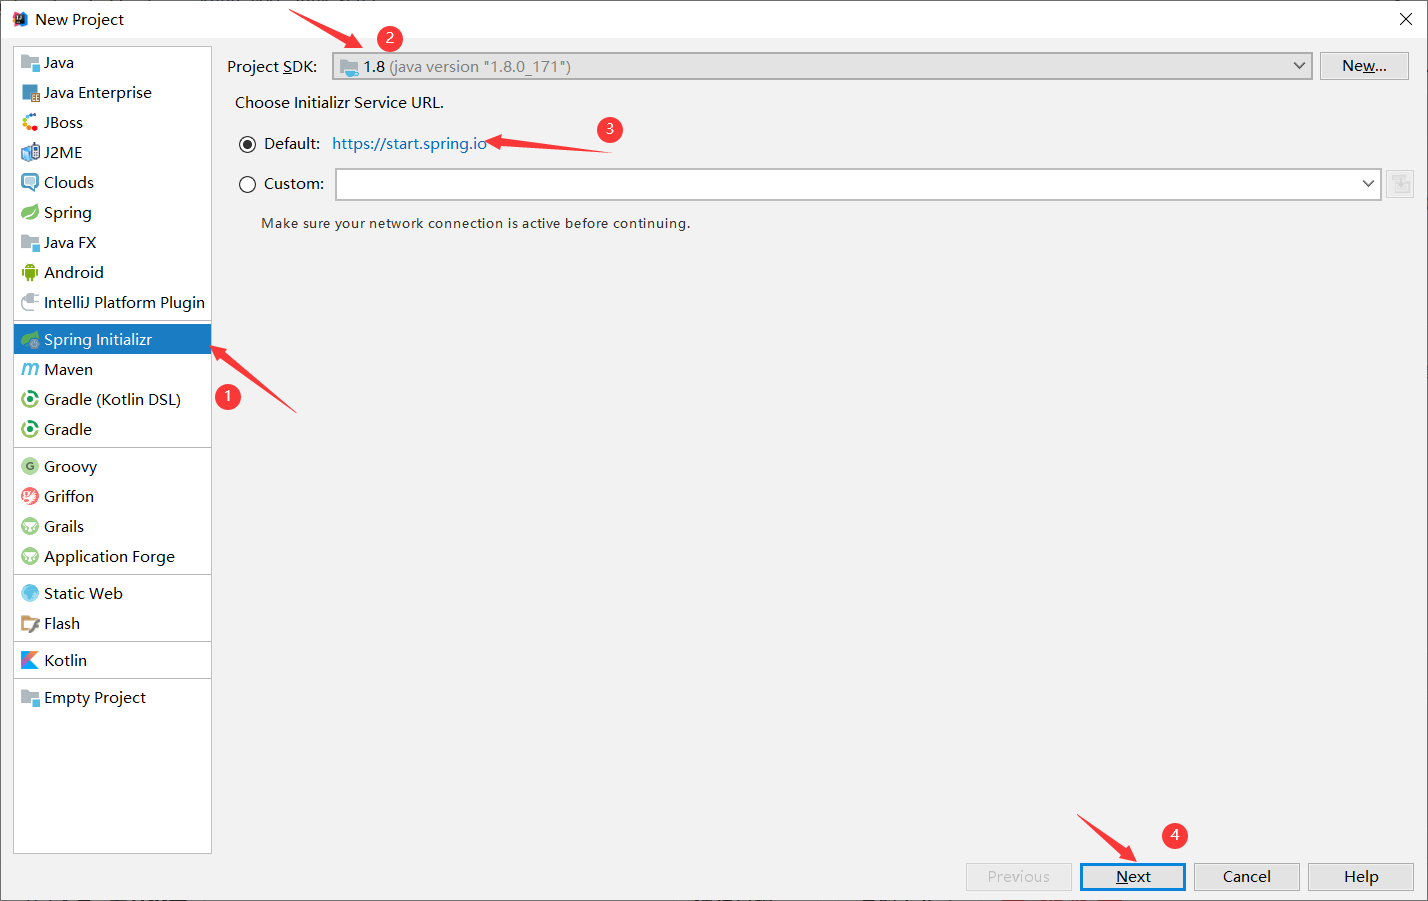
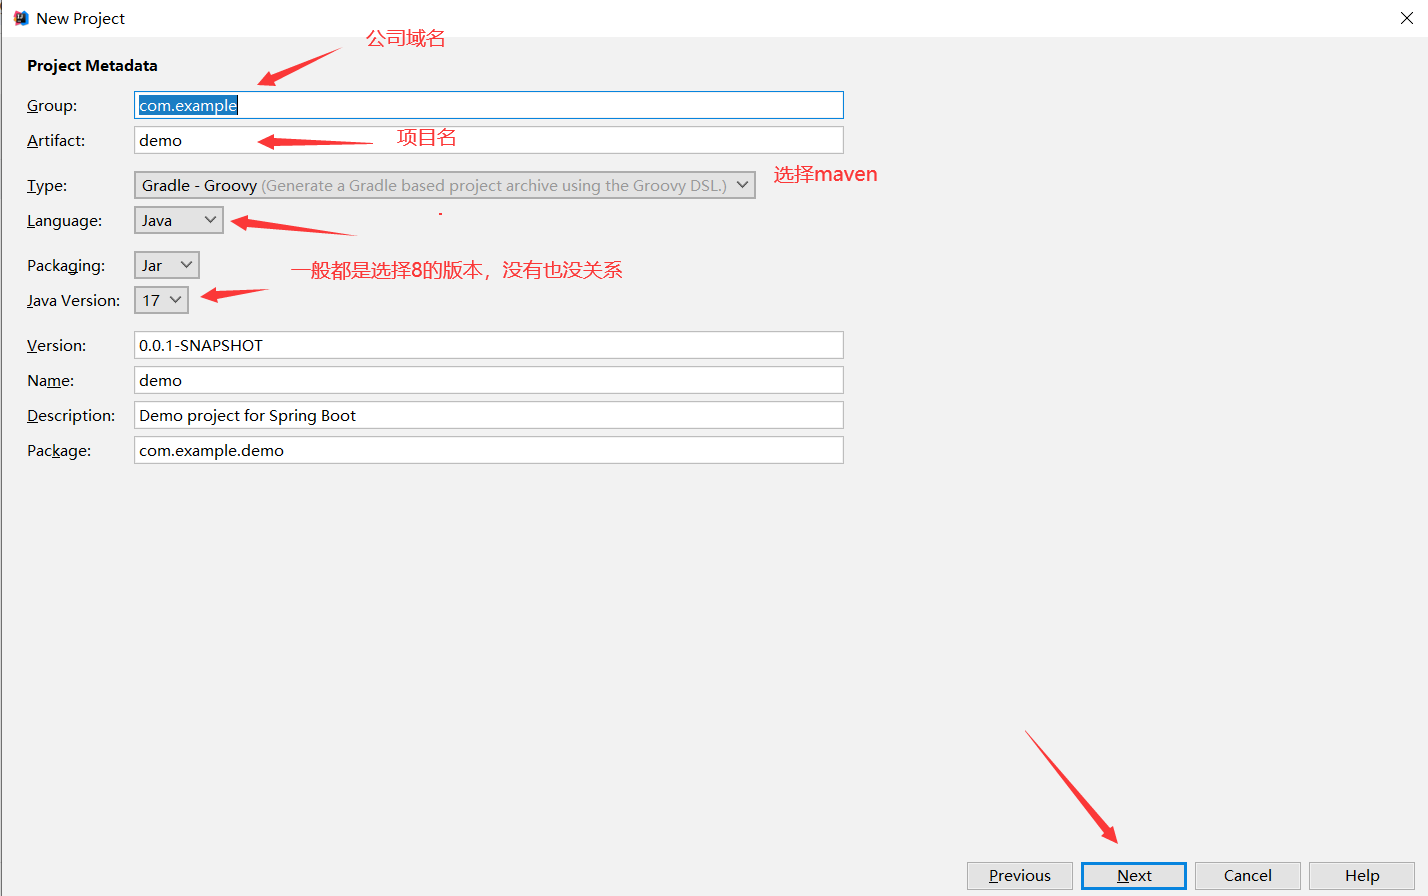
然后选择自己需要的依赖然后NEXT(选择WEB)
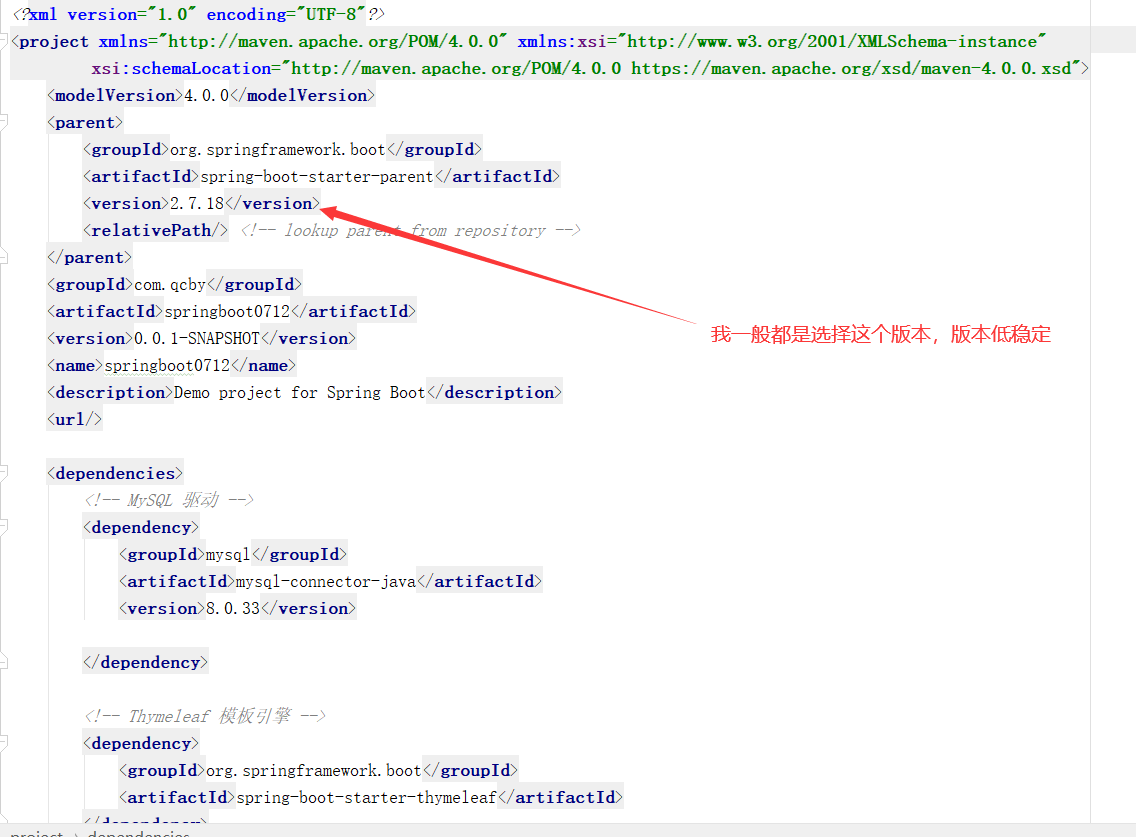
在POM.xml文件中直接将版本17的java删除掉即可
XML
<?xml version="1.0" encoding="UTF-8"?>
<project xmlns="http://maven.apache.org/POM/4.0.0" xmlns:xsi="http://www.w3.org/2001/XMLSchema-instance"
		 xsi:schemaLocation="http://maven.apache.org/POM/4.0.0 https://maven.apache.org/xsd/maven-4.0.0.xsd">
	<modelVersion>4.0.0</modelVersion>
	<parent>
		<groupId>org.springframework.boot</groupId>
		<artifactId>spring-boot-starter-parent</artifactId>
		<version>2.7.18</version>
		<relativePath/> <!-- lookup parent from repository -->
	</parent>
	<groupId>com.qcby</groupId>
	<artifactId>springboot0712</artifactId>
	<version>0.0.1-SNAPSHOT</version>
	<name>springboot0712</name>
	<description>Demo project for Spring Boot</description>
	<url/>

	<dependencies>
		<!-- MySQL 驱动 -->
		<dependency>
			<groupId>mysql</groupId>
			<artifactId>mysql-connector-java</artifactId>
			<version>8.0.33</version>

		</dependency>

		<!-- Thymeleaf 模板引擎 -->
		<dependency>
			<groupId>org.springframework.boot</groupId>
			<artifactId>spring-boot-starter-thymeleaf</artifactId>
		</dependency>

		<!-- Spring Boot Web 支持 -->
		<dependency>
			<groupId>org.springframework.boot</groupId>
			<artifactId>spring-boot-starter-web</artifactId>
		</dependency>

		<!-- 关键修复:MyBatis 官方启动器 -->
		<dependency>
			<groupId>org.mybatis.spring.boot</groupId>
			<artifactId>mybatis-spring-boot-starter</artifactId>
			<version>2.3.1</version> <!-- 专为 Spring Boot 2.7.x 设计 -->
		</dependency>

		<!-- Spring Boot 测试 -->
		<dependency>
			<groupId>org.springframework.boot</groupId>
			<artifactId>spring-boot-starter-test</artifactId>
			<scope>test</scope>
		</dependency>

		<!-- NekoHTML (用于 Thymeleaf 宽松解析) -->
		<dependency>
			<groupId>net.sourceforge.nekohtml</groupId>
			<artifactId>nekohtml</artifactId>
			<version>1.9.22</version>
		</dependency>
		<!--  图像化依赖 -->
		<dependency>
			<groupId>io.springfox</groupId>
			<artifactId>springfox-swagger-ui</artifactId>
			<version>2.9.2</version>
		</dependency>
		<!--引入swagger2依赖 -->
		<dependency>
			<groupId>io.springfox</groupId>
			<artifactId>springfox-swagger2</artifactId>
			<version>2.9.2</version>
		</dependency>
	</dependencies>
</project>
第二种方式 直接从spring 官网下载
然后在解压 使用IDEA import进入就可以了
第三种方式:在阿里云官网上下载
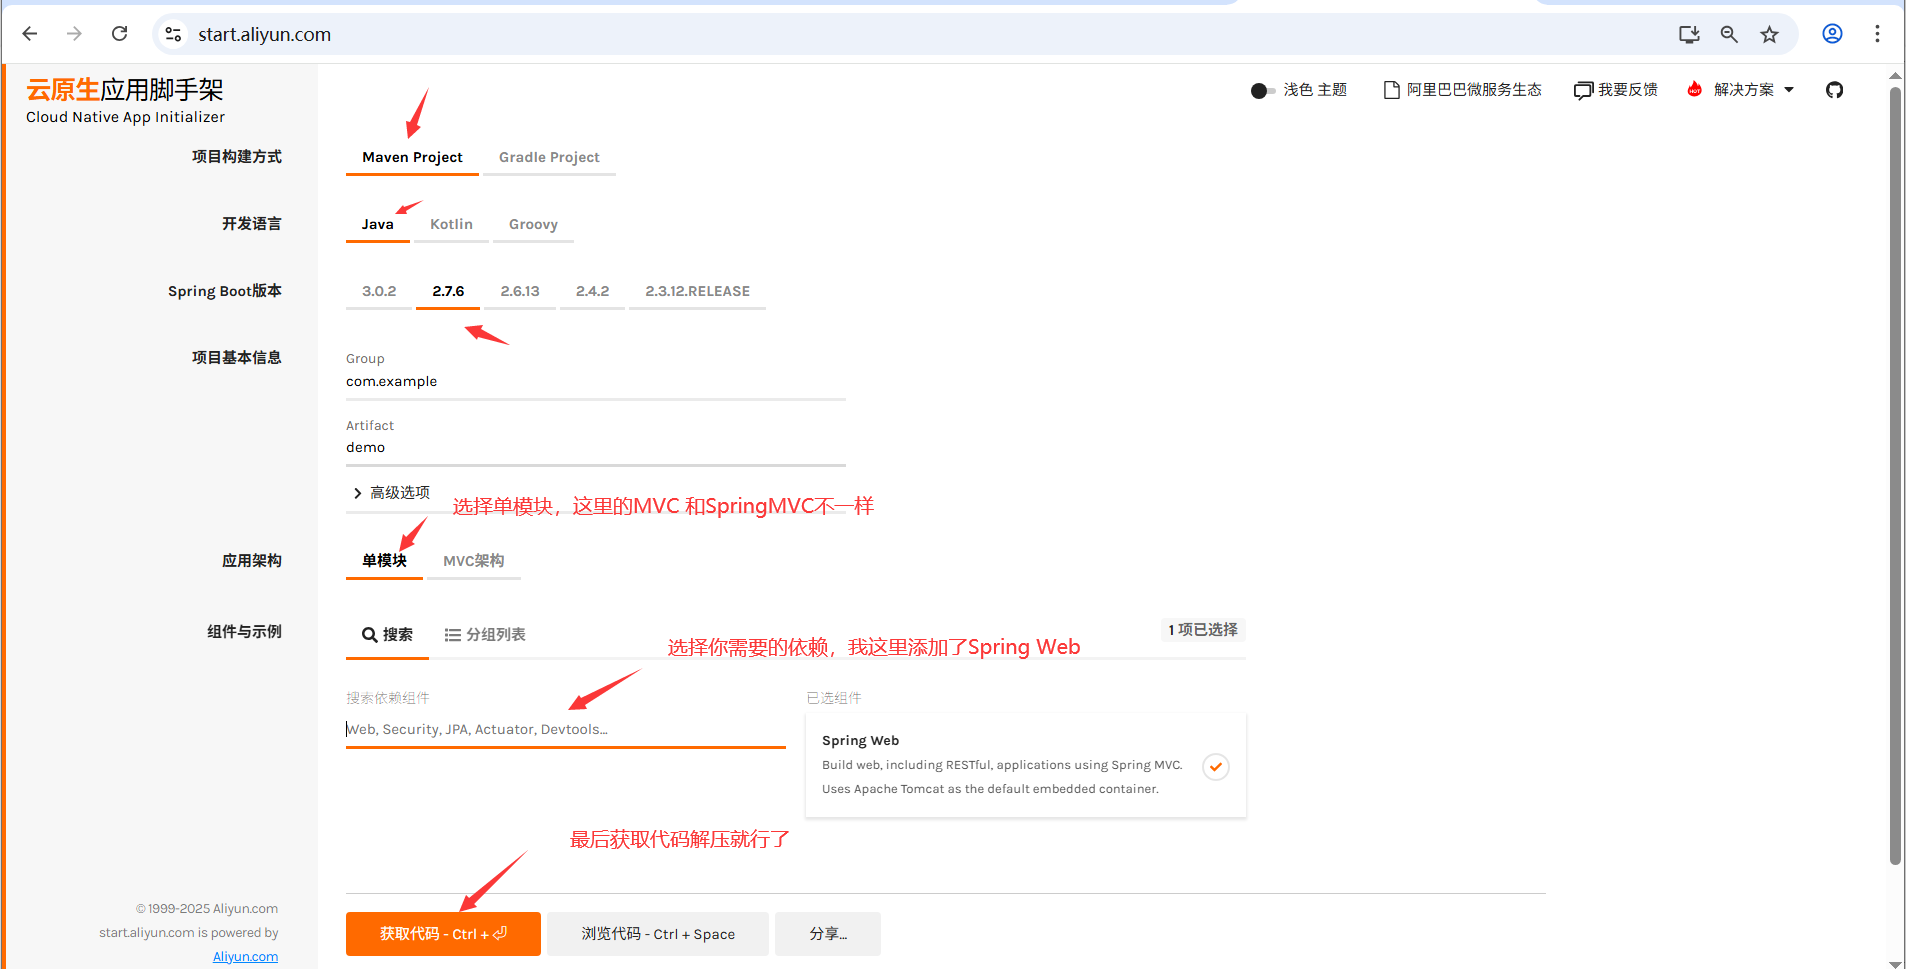
重复上述操作
第四种使用maven java 项目自打造一个spring-boot项目
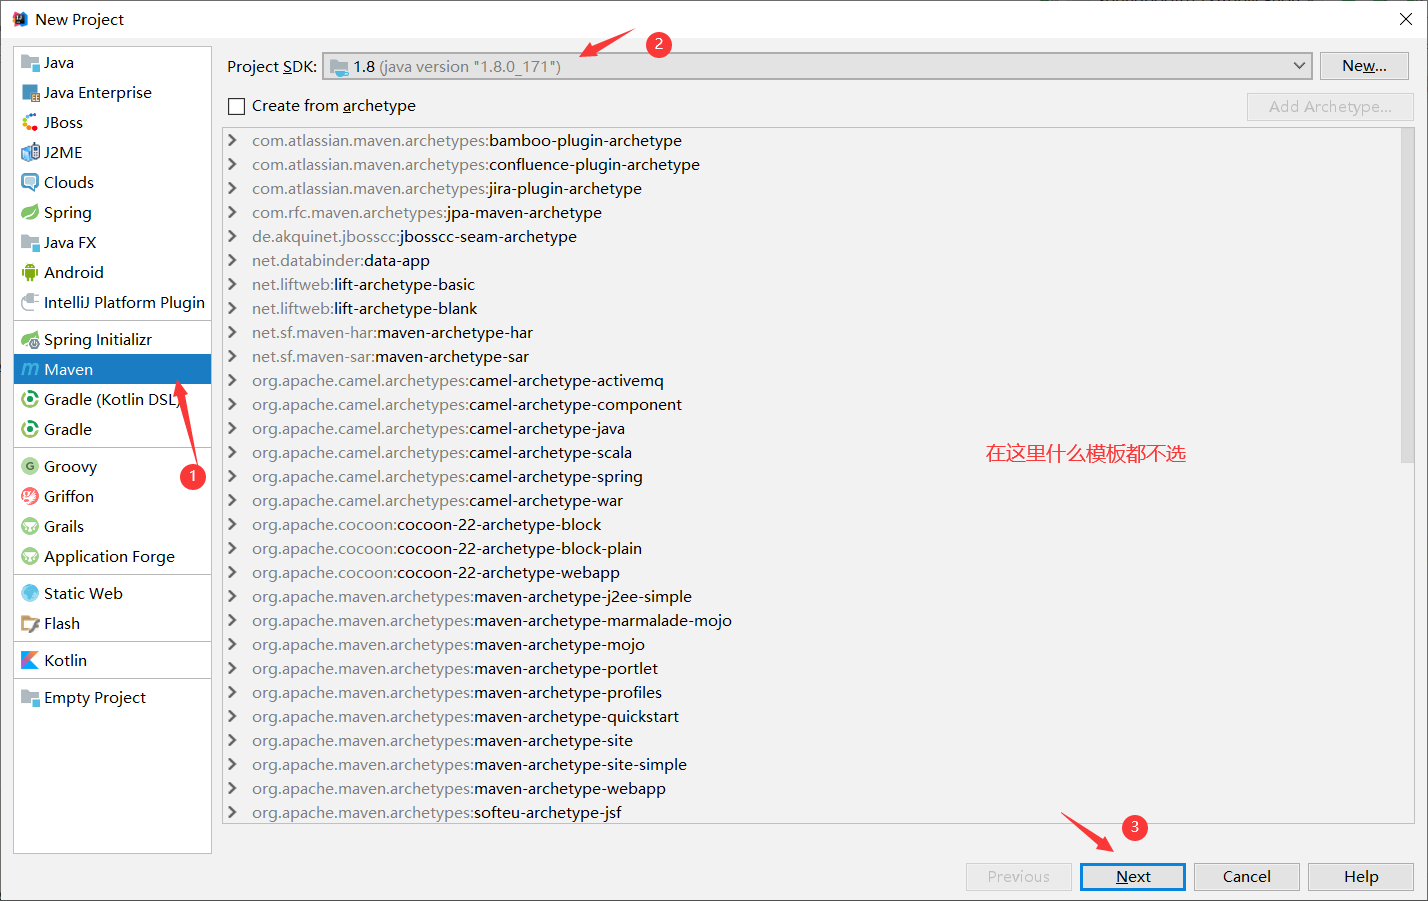
选择适合自己的公司域名或者随便写都行
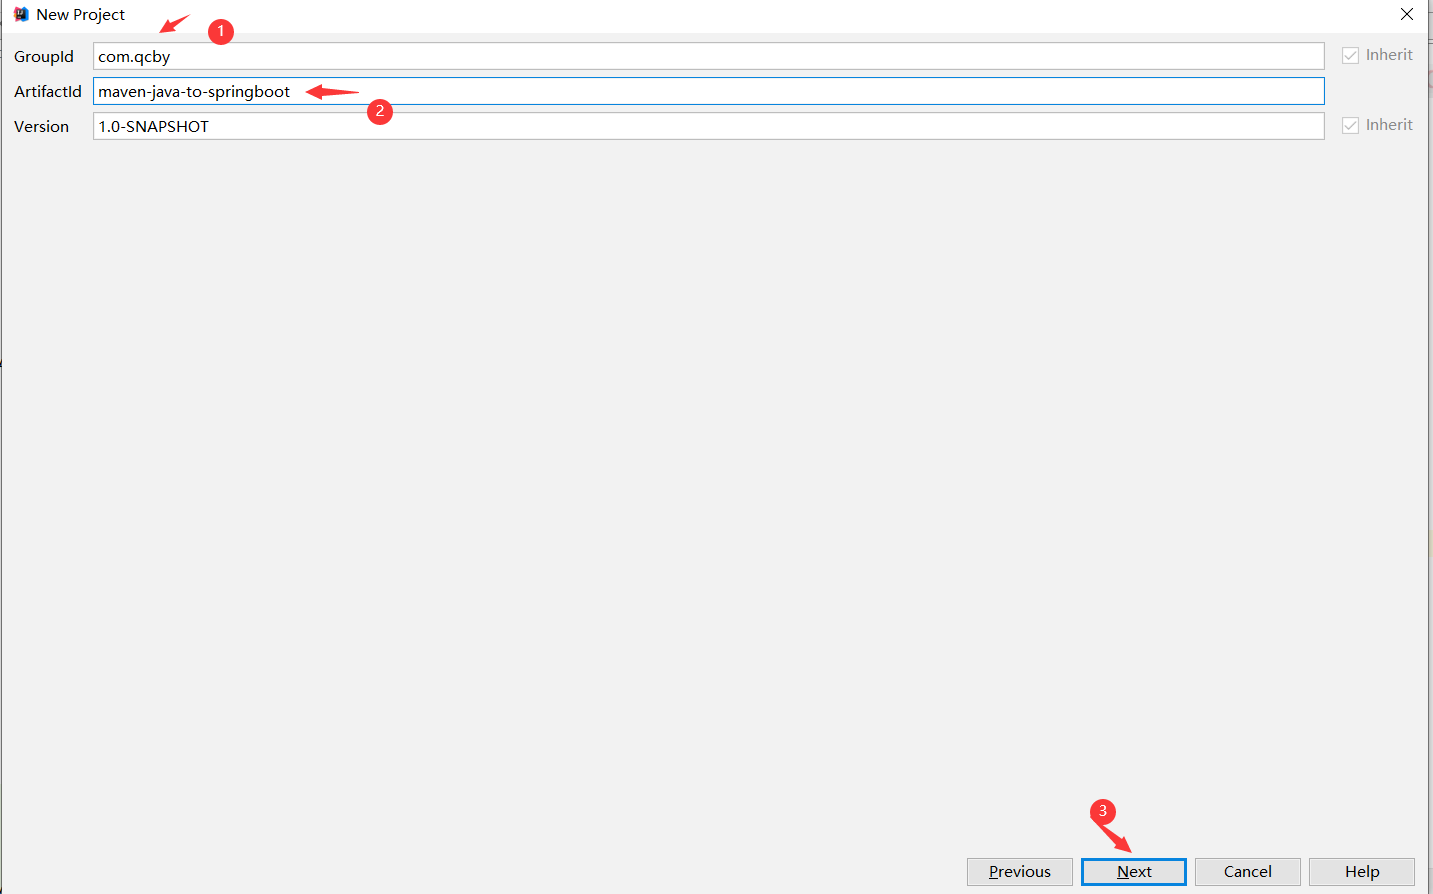
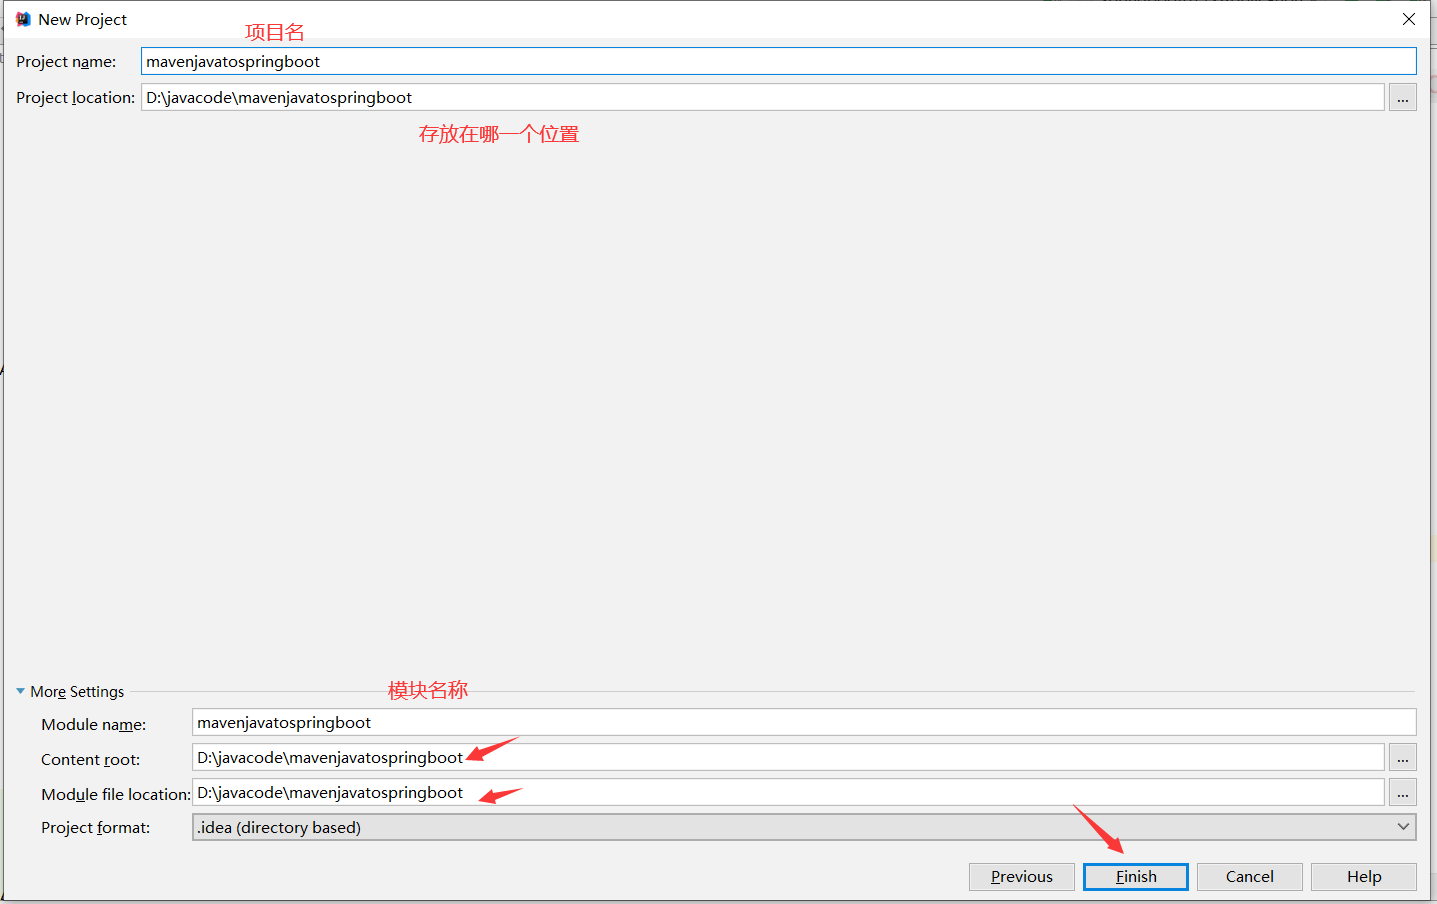
接下来开始创建了非常的简单
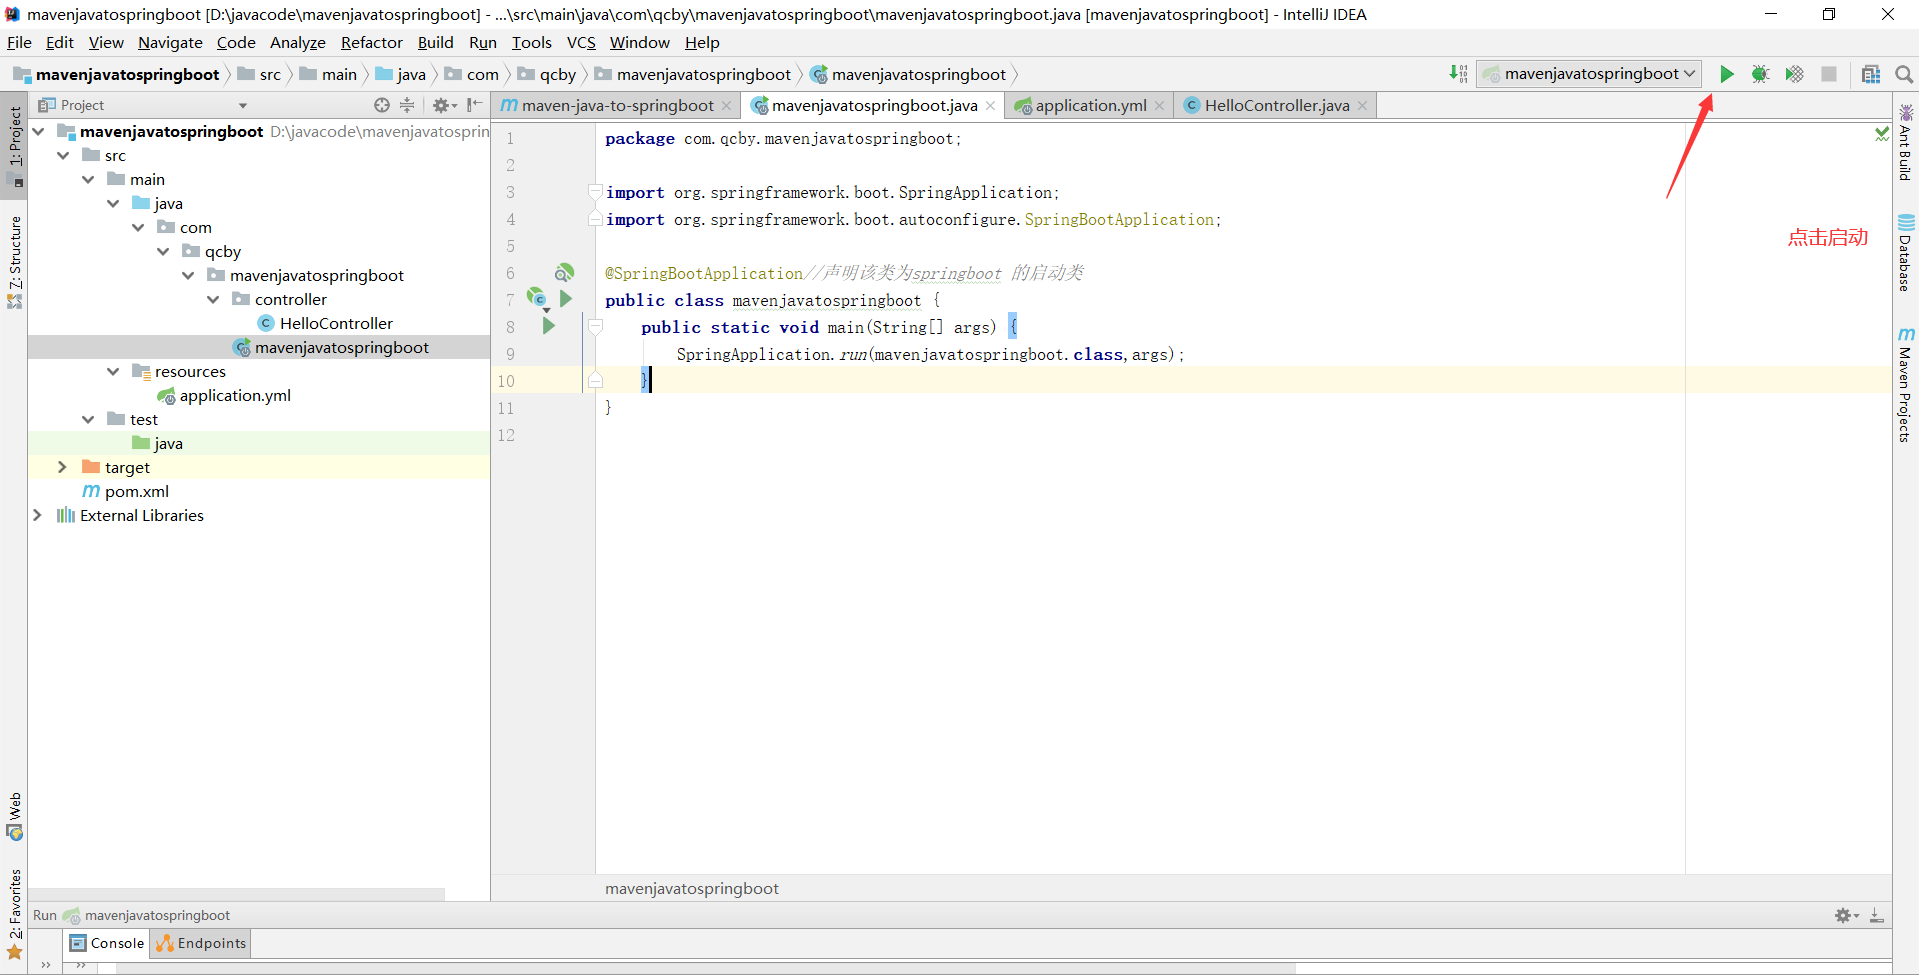
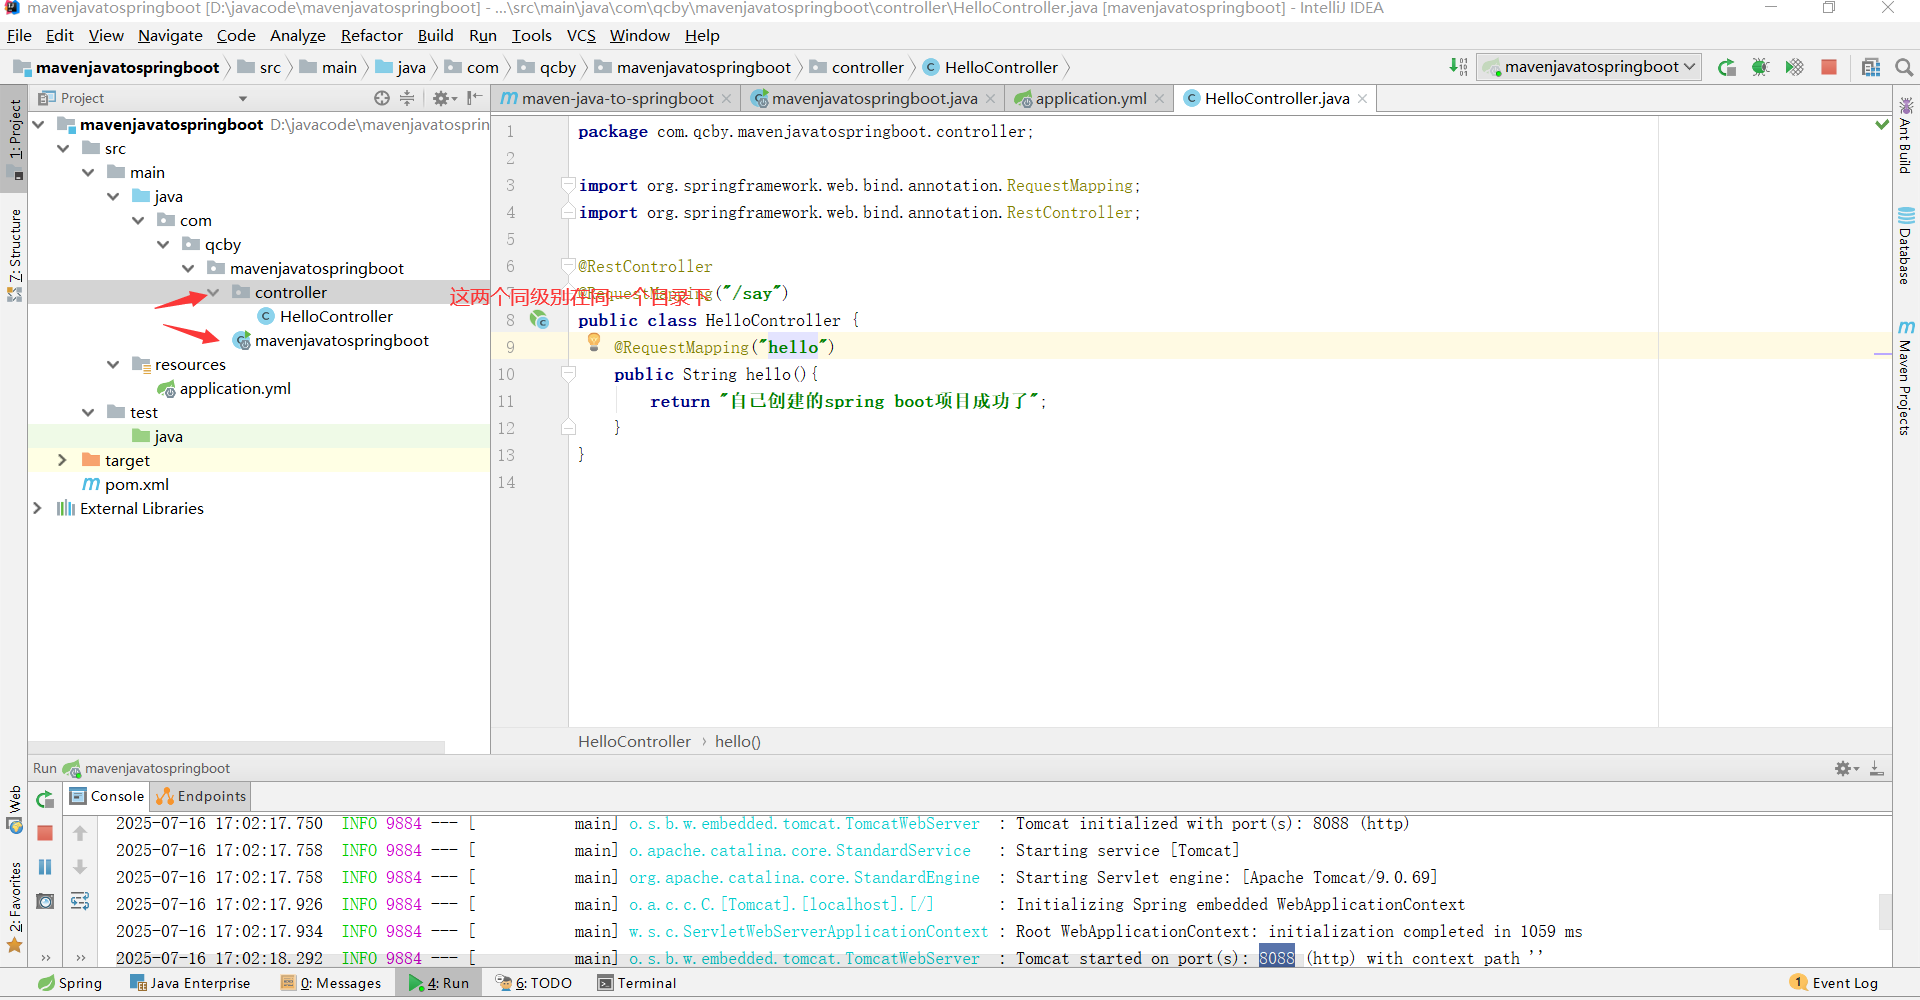
目录结构如下图
直接上代码
pom.xml
XML
<?xml version="1.0" encoding="UTF-8"?>
<project xmlns="http://maven.apache.org/POM/4.0.0"
         xmlns:xsi="http://www.w3.org/2001/XMLSchema-instance"
         xsi:schemaLocation="http://maven.apache.org/POM/4.0.0 http://maven.apache.org/xsd/maven-4.0.0.xsd">
    <modelVersion>4.0.0</modelVersion>


    <!--父工程模板 springboot模板-->
    <parent>
        <groupId>org.springframework.boot</groupId>
        <artifactId>spring-boot-starter-parent</artifactId>
        <version>2.7.6</version>
    </parent>

    <groupId>com.qcby</groupId>
    <artifactId>maven-java-to-springboot</artifactId>
    <version>1.0-SNAPSHOT</version>
    <!--所需依赖-->
    <dependencies>
        <!--web-->
        <dependency>
            <groupId>org.springframework.boot</groupId>
            <artifactId>spring-boot-starter-web</artifactId>
        </dependency>
    </dependencies>

</project>mavenjavatospringboot
java
package com.qcby.mavenjavatospringboot;

import org.springframework.boot.SpringApplication;
import org.springframework.boot.autoconfigure.SpringBootApplication;

@SpringBootApplication//声明该类为springboot 的启动类
public class mavenjavatospringboot {
    public static void main(String[] args) {
        SpringApplication.run(mavenjavatospringboot.class,args);
    }
}HelloController
java
package com.qcby.mavenjavatospringboot.controller;
import org.springframework.web.bind.annotation.RequestMapping;
import org.springframework.web.bind.annotation.RestController;
@RestController
@RequestMapping("/say")
public class HelloController {
@RequestMapping("hello")
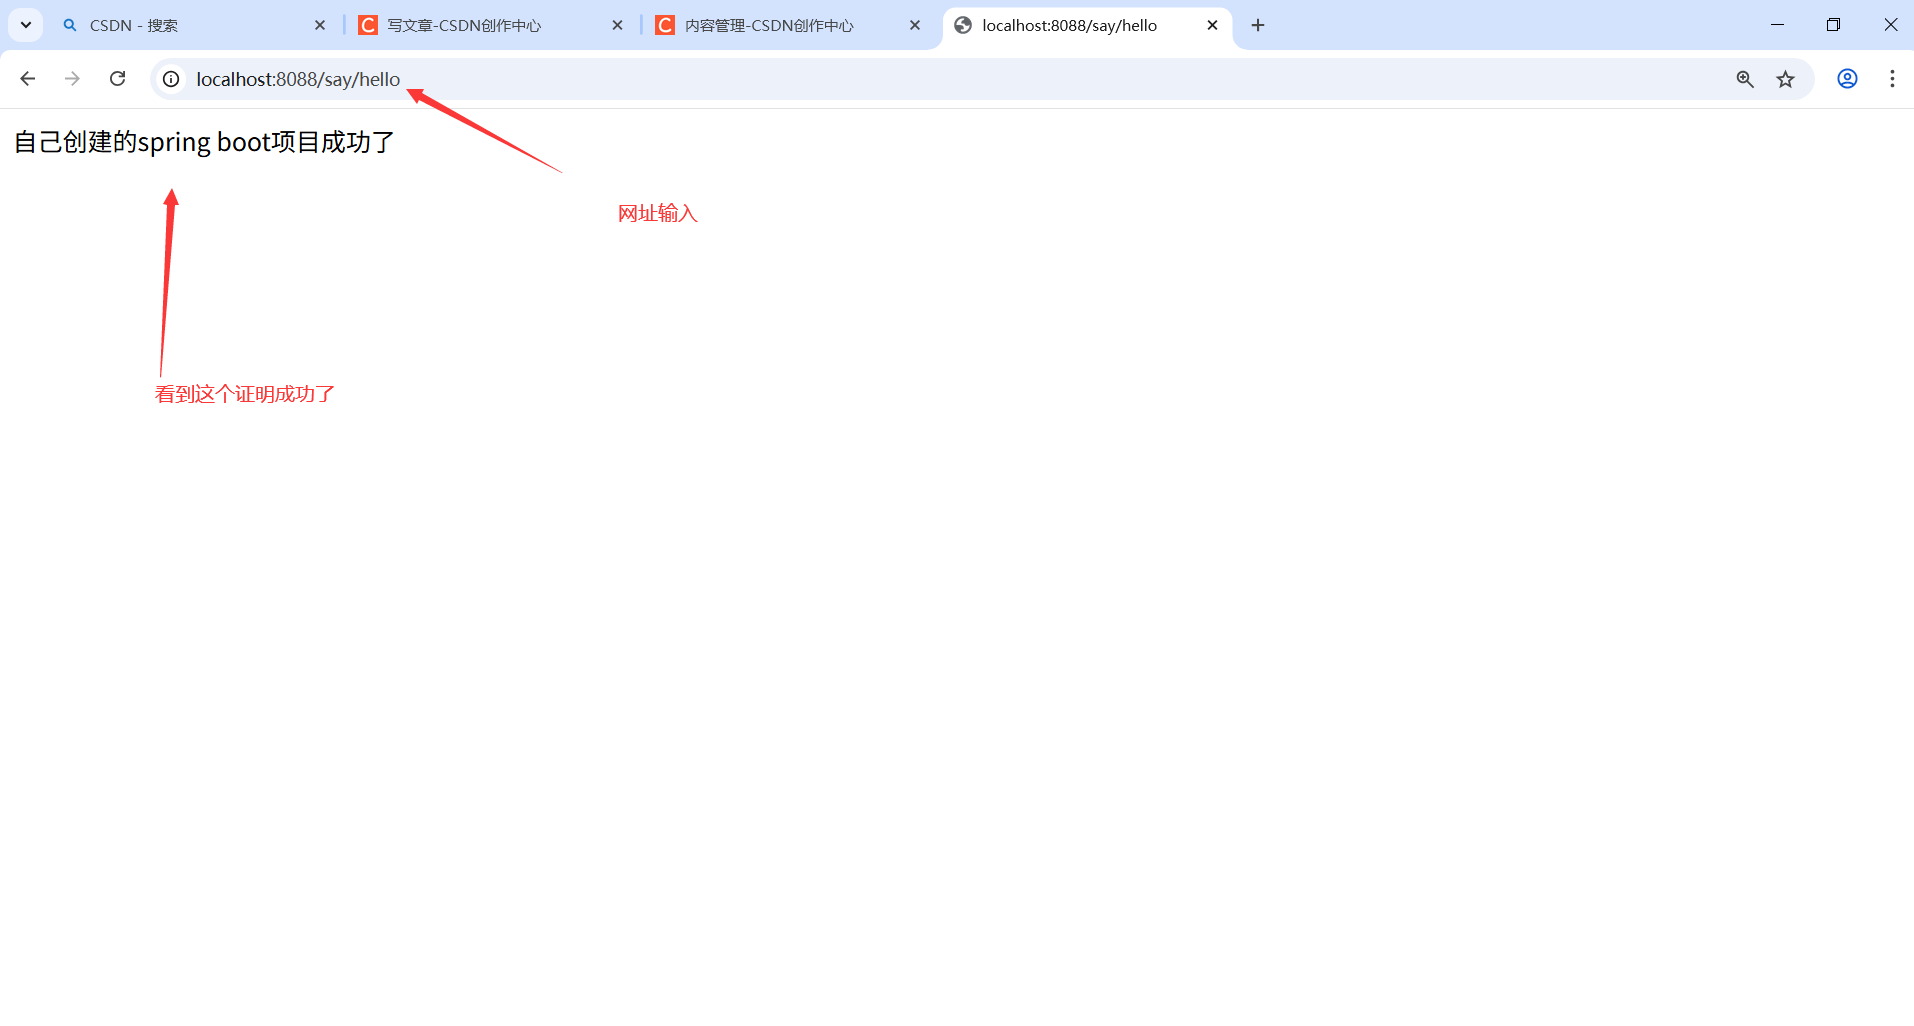
public String hello(){
return "自己创建的spring boot项目成功了";
}
}application.yml
java
server:
  port: 8088