介绍 prettier eslint husky
- prettier: 用于代码保存时候,自动根据规则,格式化代码,主要依赖IDE工具如vscode。
- eslint : 代码检查,检查代码的格式,对js语法检测、限制和修复,并且给出建议,依赖于命令执行
- husky : git提交前的钩子,用于拦截代码并针对不符合规范做提示,生成git提交备注的规范格式。
1.prettier 代码格式
1. 创建vite项目
sh
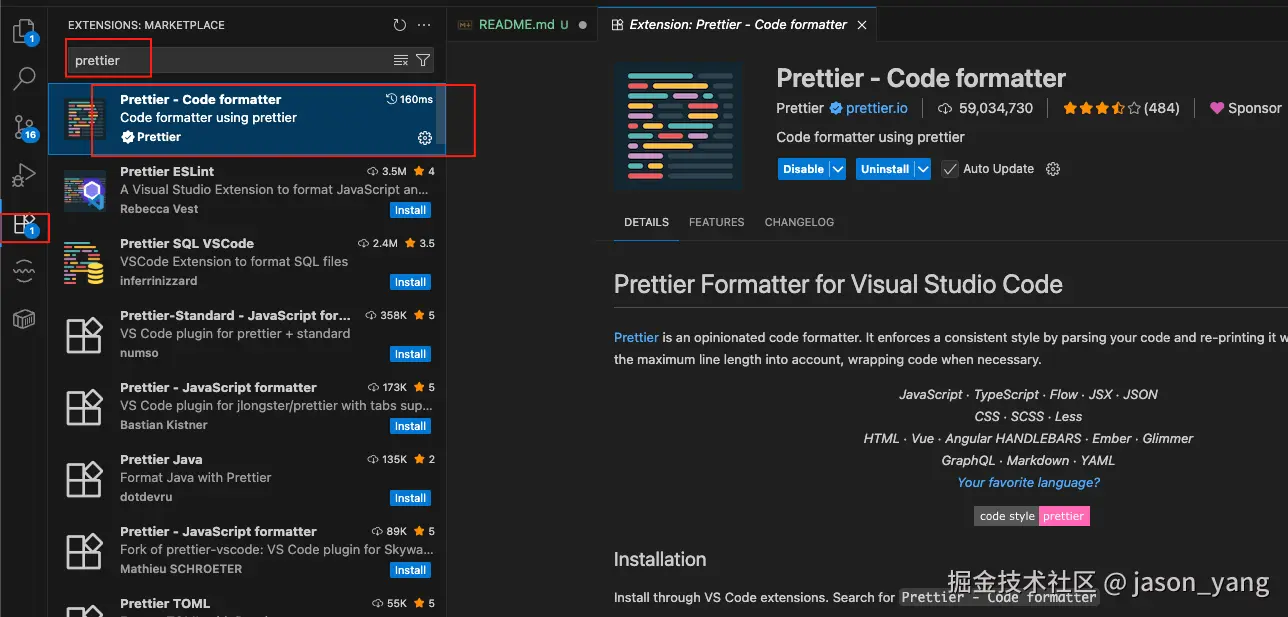
npm create vite@latest2. 首先安装vscode的prettier 插件
3. 测试
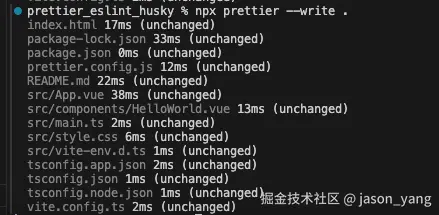
sh
npx prettier --write .这时候会把整个项目都格式化一遍
同时我们也把命令加入的package.json 执行命令里
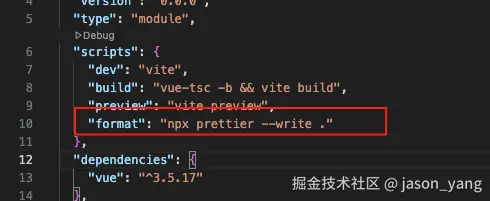
json
  "scripts": {
    "dev": "vite",
    "build": "vue-tsc -b && vite build",
    "preview": "vite preview",
    "format": "npx prettier --write ."
  },
4. 创建个性prettier.config.js配置
一般prettier 有默认的配置,当然我们可以自己定制一个,再根目录创建prettier.config.js
js
// prettier.config.js
/**
 * @type {import('prettier').Config}
 * @see https://www.prettier.cn/docs/options.html
 */
export default {
  printWidth: 400, // 最大行长规则通常设置为 100 或 120。
  tabWidth: 2, // 指定每个标签缩进级别的空格数。
  useTabs: false, // 使用制表符而不是空格缩进行。
  semi: false, // true(默认): 在每条语句的末尾添加一个分号。false:仅在可能导致 ASI 失败的行的开头添加分号。
  vueIndentScriptAndStyle: true, // Vue 文件脚本和样式标签缩进
  singleQuote: true, // 使用单引号而不是双引号
  quoteProps: "consistent", // 引用对象中的属性时,仅在需要时在对象属性周围添加引号。
  bracketSpacing: true, // 在对象文字中的括号之间打印空格。
  trailingComma: "none", // "none":没有尾随逗号。"es5": 在 ES5 中有效的尾随逗号(对象、数组等),TypeScript 中的类型参数中没有尾随逗号。"all"- 尽可能使用尾随逗号。
  bracketSameLine: false, // 将>多行 HTML(HTML、JSX、Vue、Angular)元素放在最后一行的末尾,而不是单独放在下一行(不适用于自闭合元素)。
  jsxSingleQuote: false, // 在 JSX 中使用单引号而不是双引号。
  arrowParens: "always", // 在唯一的箭头函数参数周围始终包含括号。
  insertPragma: false, // 插入编译指示
  requirePragma: false, // 需要编译指示
  proseWrap: "never", // 如果散文超过打印宽度,则换行
  htmlWhitespaceSensitivity: "strict", // 所有标签周围的空格(或缺少空格)被认为是重要的。
  endOfLine: "lf", // 确保在文本文件中仅使用 ( \n)换行,常见于 Linux 和 macOS 以及 git repos 内部。
  rangeStart: 0, // 格式化文件时,回到包含所选语句的第一行的开头。
};
5. vscode保存时候自动格式化
- 优化体验,配置保存时候自动格式化
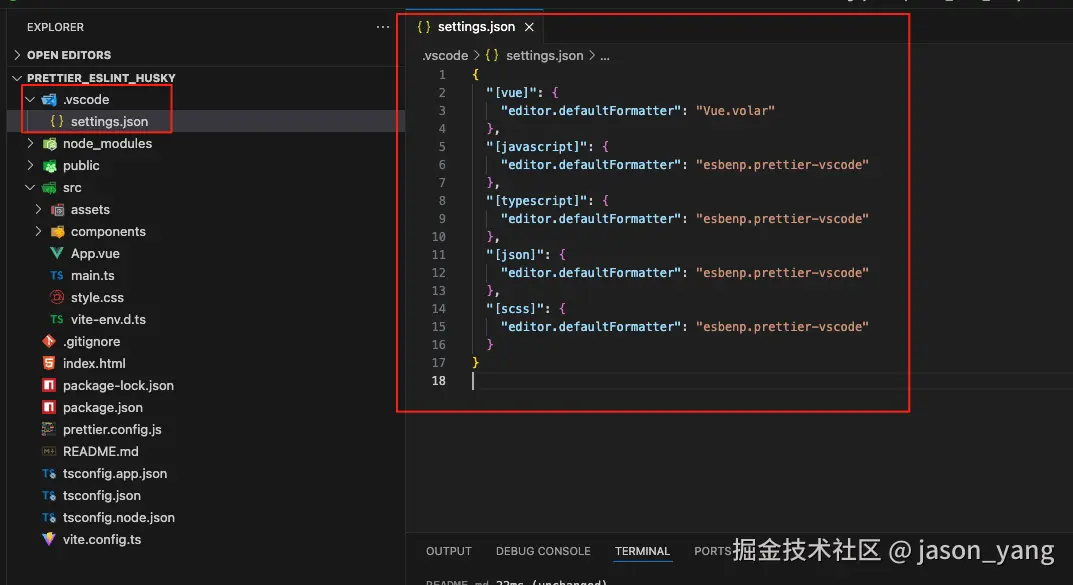
- 先添加vscode 需要的配置 .vscode/settings.json
json
{
  "editor.formatOnSave": true,
  "[vue]": {
    "editor.defaultFormatter": "esbenp.prettier-vscode"
  },
  "[javascript]": {
    "editor.defaultFormatter": "esbenp.prettier-vscode"
  },
  "[typescript]": {
    "editor.defaultFormatter": "esbenp.prettier-vscode"
  },
  "[json]": {
    "editor.defaultFormatter": "esbenp.prettier-vscode"
  },
  "[scss]": {
    "editor.defaultFormatter": "esbenp.prettier-vscode"
  }
}
然后 每次修改完代码就可以自动格式化
6.安装依赖
注意:这一步非必需,如果只用prettier一般不需要安装,但是后面的eslint-plugin-prettier 会依赖到,还是老老实实按安装。
sh
npm i prettier@3.5.3 --save-dev注意事项
有时候配置完也不生效,就需要整个vscode退出再打开才生效
2.eslint 语法与格式
1.快速构建版 eslint --init
npx eslint --init 创建所有配置
sh
npx eslint --init依次输入下面选项 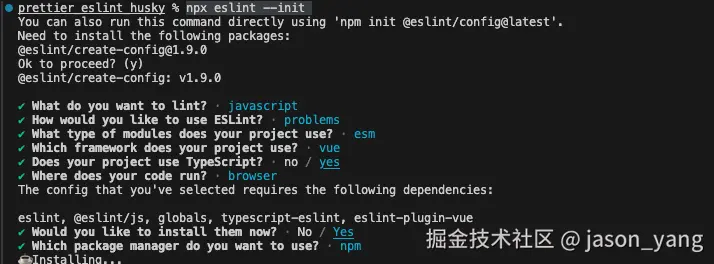
在根目录自动创建了eslint.config.js
js
import js from "@eslint/js";
import globals from "globals";
import tseslint from "typescript-eslint";
import pluginVue from "eslint-plugin-vue";
import { defineConfig } from "eslint/config";


export default defineConfig([
  { files: ["**/*.{js,mjs,cjs,ts,mts,cts,vue}"], plugins: { js }, extends: ["js/recommended"] },
  { files: ["**/*.{js,mjs,cjs,ts,mts,cts,vue}"], languageOptions: { globals: globals.browser } },
  tseslint.configs.recommended,
  pluginVue.configs["flat/essential"],
  { files: ["**/*.vue"], languageOptions: { parserOptions: { parser: tseslint.parser } } },
]);
配置pakaage.json
同时我们也把命令加入的package.json 执行命令里
json
"scripts": {
"dev": "vite",
"build": "vue-tsc -b && vite build",
"preview": "vite preview",
"format": "npx prettier --write .",
"lint": "eslint",
"lint:fix": "eslint --fix ."
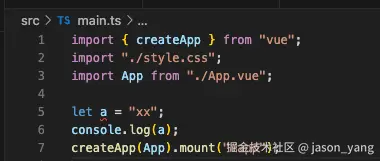
},测试
我们在main.ts里面加入 let a = "xx";
js
import { createApp } from "vue";
import "./style.css";
import App from "./App.vue";

let a = "xx";
console.log(a);
createApp(App).mount("#app");
运行检查
sh
npm run lint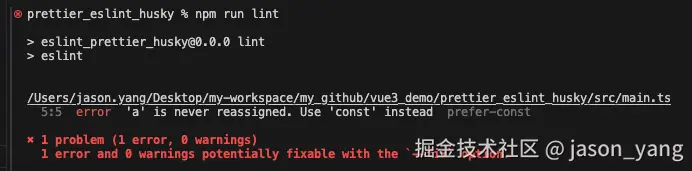
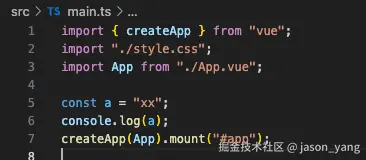
这时候就会提示,一些错误建议, 'a' is never reassigned. Use 'const' instead, 我们尝试用fix修复 运行下面命令
sh
npm run lint:fix执行后 let 编程了 const
安装eslint 插件
搜索安装eslint 的vscode插件 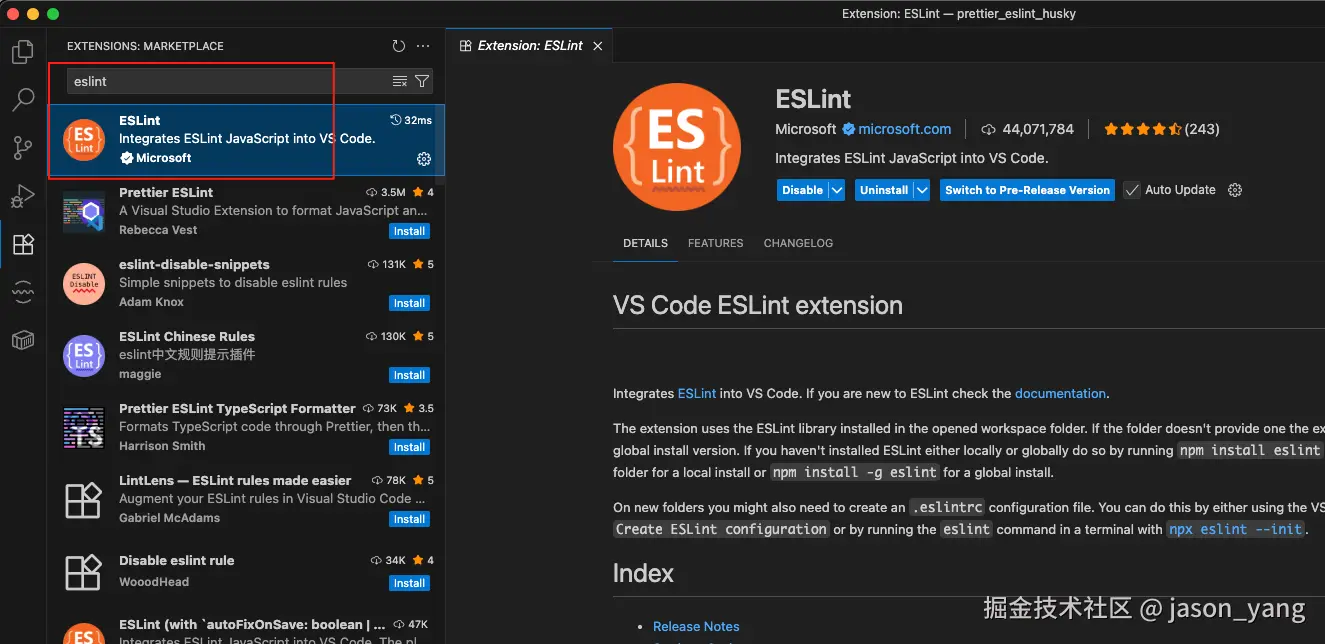
配置 .vscode/settings.json
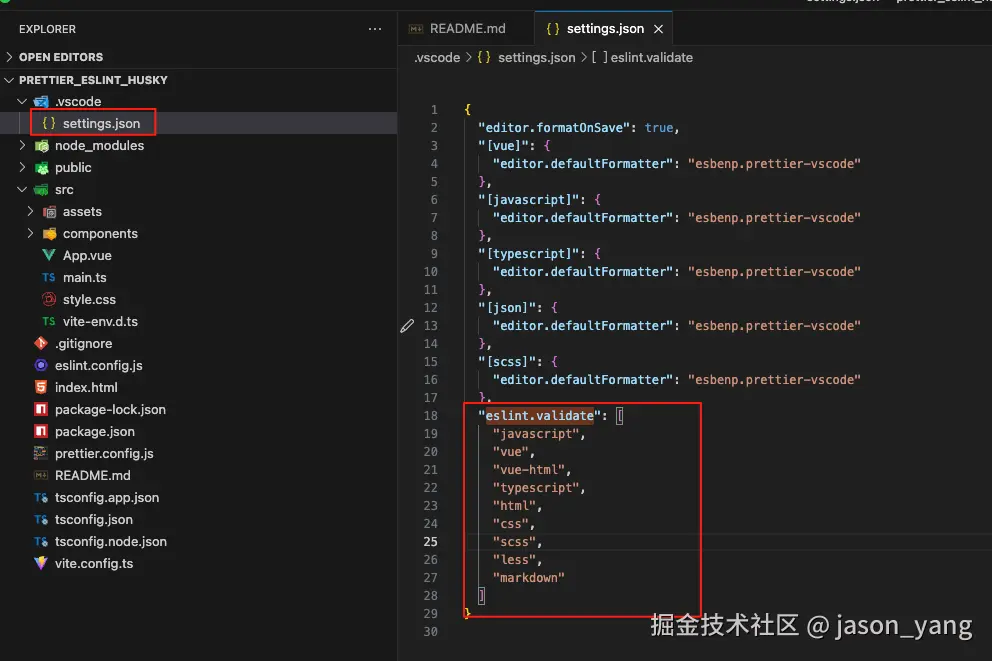
这样在编辑的时候就可以实时看到eslint对应的效果
json
{
  "editor.formatOnSave": true,
  "[vue]": {
    "editor.defaultFormatter": "esbenp.prettier-vscode"
  },
  "[javascript]": {
    "editor.defaultFormatter": "esbenp.prettier-vscode"
  },
  "[typescript]": {
    "editor.defaultFormatter": "esbenp.prettier-vscode"
  },
  "[json]": {
    "editor.defaultFormatter": "esbenp.prettier-vscode"
  },
  "[scss]": {
    "editor.defaultFormatter": "esbenp.prettier-vscode"
  },
  "eslint.validate": ["javascript", "vue", "vue-html", "typescript", "html", "css", "scss", "less", "markdown"]
}
注意事项
- 有时候配置完也不生效,就需要整个vscode退出再打开才生效
- 有些ts文件打开后并不能实时提示,可以把文件关闭后再打开,或者等待一会
2.快速构建 antfu eslint
安装
sh
npm i @antfu/eslint-config@4.17.0 --save-deveslint.config.js
js
import antfu from '@antfu/eslint-config'
export default antfu()
常用的定制配置
js
import antfu from '@antfu/eslint-config'

export default antfu(
  {
    type: 'app', // 项目类型为 app/lib

    stylistic: {
      indent: 2, // 缩进风格
      quotes: 'single', // 单引号
    },

    typescript: true,
    vue: {
      overrides: {
        // enforce order of component top-level elements 自定义 Vue 文件中标签的顺序,模板 -> 脚本 -> 样式
        'vue/block-order': [
          'error',
          {
            order: ['template', 'script', 'style'],
          },
        ],
      },
    },
    jsonc: false,
    yaml: false,
    ignores: [
      '**/fixtures', // 忽略特定路径下的文件(如 fixtures 目录)
    ],
  },

  // TypeScript 文件的规则配置
  {
    files: ['**/*.ts'], // 仅匹配 TypeScript 文件
    rules: {},
  },
  {
    rules: {},
  },
)
配置.vscode/settings.json
json
 "eslint.codeActionsOnSave.rules": null,
  "editor.codeActionsOnSave": {
    "source.fixAll.eslint": "explicit",
    "source.organizeImports": "never"
  }
测试
还是使用eslint 触发
js
   "scripts": {
    "lint": "eslint",
    "lint:fix": "eslint --fix ."
  },
运行
sh
npm run lint检查当前使用的eslint 规则
sh
npx @eslint/config-inspector@latest访问 http://localhost:7777/configs 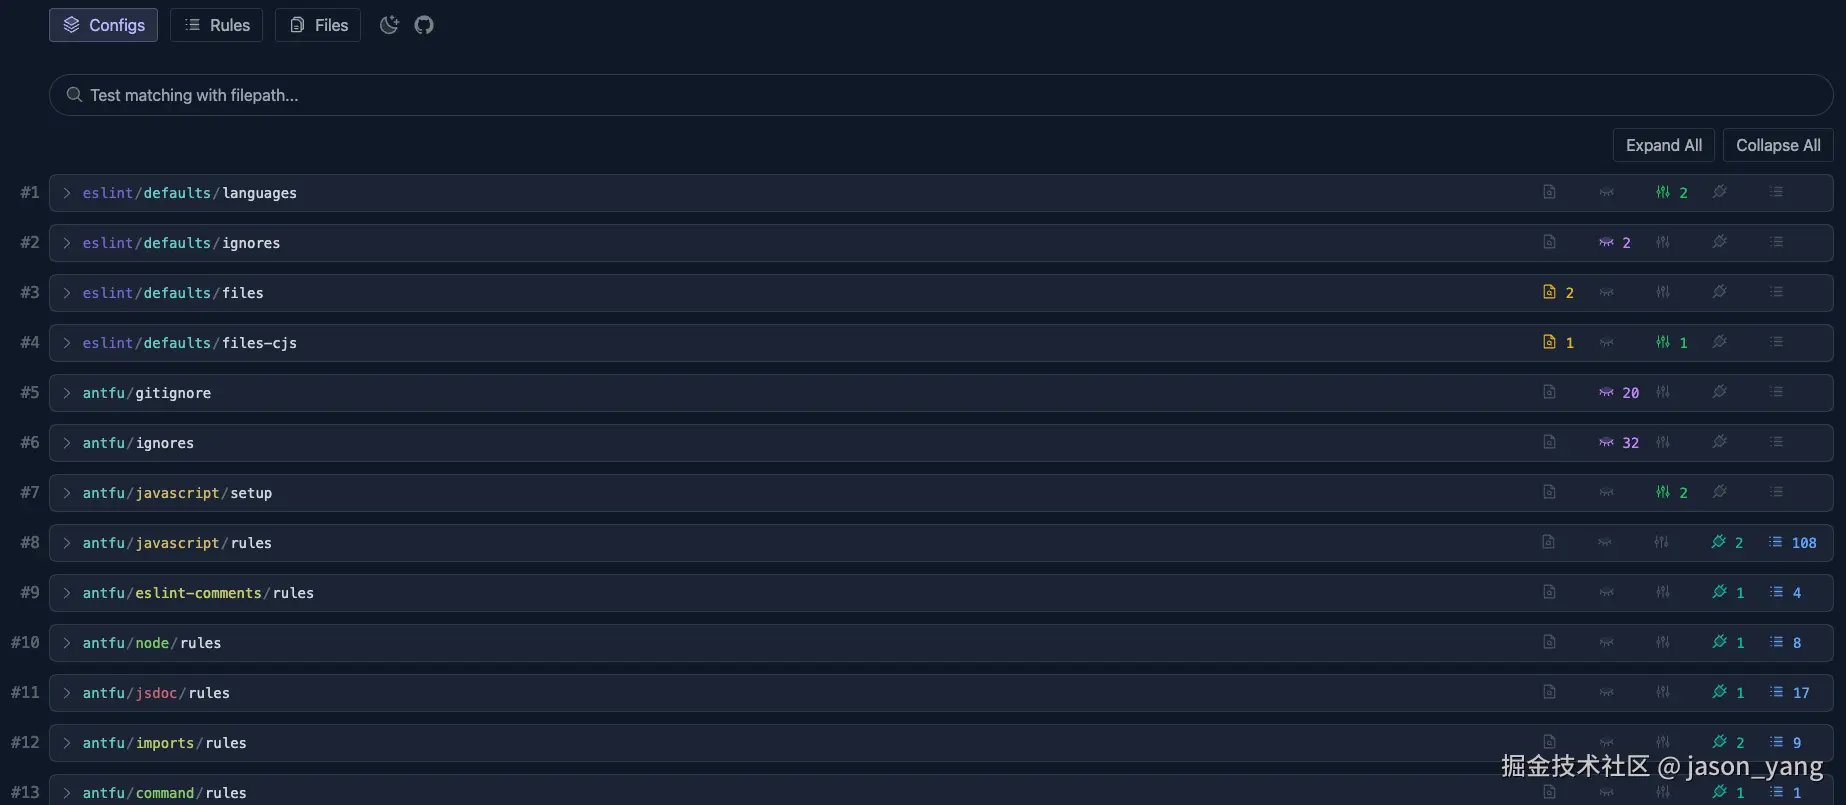
3.按部就班版
一步步配置
安装eslint
sh
npm i eslint@9.23.0 --save-dev手工创建eslint.config.js
js
eslint.config.js安装依赖库
@eslint/js 官方提供的规则
sh
npm i @eslint/js@9.23.0 --save-deveslint.config.js
js
import eslint from '@eslint/js'

export default [
  {
    ignores: [
      'public',
      'dist',
      'node_modules',
      "package.json",
      "README.md",
      "src/assets",
    ],
  },
  eslint.configs.recommended,
]
添加js规则
加入自己定制逻辑rules
js
import eslint from '@eslint/js'
export default [
  {
    ignores: [
      'public',
      'dist',
      'node_modules',
      "package.json",
      "README.md",
      "src/assets",
    ],
  },

  eslint.configs.recommended,
   {
    rules: {
      'no-console': 'off', // : 'warn', // 生产环境中警告 console 使用,开发环境中关闭规则
      'no-debugger': 'off', // import.meta.env.NODE_ENV === 'production' ? 'warn' : 'warn', // 生产环境中警告 debugger 使用,开发环境中关闭规则
      '@typescript-eslint/no-explicit-any': 'off',
      'vue/multi-word-component-names': 'off',
      'no-unused-vars': 'off', // 关闭未使用变量警告
      '@typescript-eslint/no-unused-vars': 'off', // 关闭未使用变量警告
      'linebreak-style': ['warn', 'windows'], // 使用 Unix 风格的换行符
      'quotes': ['warn', 'single'], // 使用单引号
      'semi': ['warn', 'never'] // 语句末尾不加分号
    }
  }
]
添加全局设置
sh
npm i globals@16.0.0 -D使用浏览器的console 会提示错误
js
import eslint from '@eslint/js'
export default [
  {
    ignores: [
      'public',
      'dist',
      'node_modules',
      "package.json",
      "README.md",
      "src/assets",
    ],
  },

  eslint.configs.recommended,
   {
    rules: {
      'no-console': 'off', // : 'warn', // 生产环境中警告 console 使用,开发环境中关闭规则
      'no-debugger': 'off', // import.meta.env.NODE_ENV === 'production' ? 'warn' : 'warn', // 生产环境中警告 debugger 使用,开发环境中关闭规则
      '@typescript-eslint/no-explicit-any': 'off',
      'vue/multi-word-component-names': 'off',
      'no-unused-vars': 'off', // 关闭未使用变量警告
      '@typescript-eslint/no-unused-vars': 'off', // 关闭未使用变量警告
      'linebreak-style': ['warn', 'windows'], // 使用 Unix 风格的换行符
      'quotes': ['warn', 'single'], // 使用单引号
      'semi': ['warn', 'never'] // 语句末尾不加分号
    }
  },
    {
    languageOptions: {
      globals: {
        ...globals.browser,
      },
    },
  }
]
添加 ts 与 vue支持
sh
npm i eslint-plugin-vue@10.0.0 typescript-eslint@8.37.0 -D
js
import eslint from "@eslint/js";
import globals from "globals";
import tseslint from "typescript-eslint";
import eslintPluginVue from "eslint-plugin-vue";

export default [
  {
    ignores: [
      "public",
      "dist",
      "node_modules",
      "package.json",
      "README.md",
      "src/assets",
    ],
  },

  eslint.configs.recommended,
  ...eslintPluginVue.configs["flat/recommended"],
  {
    rules: {
      "no-console": "off", // : 'warn', // 生产环境中警告 console 使用,开发环境中关闭规则
      "no-debugger": "off", // import.meta.env.NODE_ENV === 'production' ? 'warn' : 'warn', // 生产环境中警告 debugger 使用,开发环境中关闭规则
      "@typescript-eslint/no-explicit-any": "off",
      "vue/multi-word-component-names": "off",
      "no-unused-vars": "off", // 关闭未使用变量警告
      "@typescript-eslint/no-unused-vars": "off", // 关闭未使用变量警告
      "linebreak-style": ["warn", "windows"], // 使用 Unix 风格的换行符
      quotes: ["warn", "single"], // 使用单引号
      semi: ["warn", "never"], // 语句末尾不加分号
    },
  },
  {
    languageOptions: {
      globals: {
        ...globals.browser,
      },
    },
  },

  /**
   * vue 规则
   */
  {
    files: ["**/*.vue"],
    languageOptions: {
      parserOptions: {
        /** typescript项目需要用到这个 */
        parser: tseslint.parser,
        ecmaVersion: "latest",
        /** 允许在.vue 文件中使用 JSX */
        ecmaFeatures: {
          jsx: true,
        },
      },
    },
    rules: {
      // 在这里追加 vue 规则
      "vue/no-mutating-props": [
        "error",
        {
          shallowOnly: true,
        },
      ],
    },
  },
];
调整 ts 规则
加入 tseslint.config() 和 ...tseslint.configs.recommended,
js
import eslint from "@eslint/js";
import globals from "globals";
import tseslint from "typescript-eslint";
import eslintPluginVue from "eslint-plugin-vue";

export default tseslint.config (
  {
    ignores: [
      "public",
      "dist",
      "node_modules",
      "package.json",
      "README.md",
      "src/assets",
    ],
  },

  eslint.configs.recommended,
  ...tseslint.configs.recommended, // 添加ts配置
  ...eslintPluginVue.configs["flat/recommended"],
  {
    rules: {
      "no-console": "off", // : 'warn', // 生产环境中警告 console 使用,开发环境中关闭规则
      "no-debugger": "off", // import.meta.env.NODE_ENV === 'production' ? 'warn' : 'warn', // 生产环境中警告 debugger 使用,开发环境中关闭规则
      "@typescript-eslint/no-explicit-any": "off",
      "vue/multi-word-component-names": "off",
      "no-unused-vars": "off", // 关闭未使用变量警告
      "@typescript-eslint/no-unused-vars": "off", // 关闭未使用变量警告
      "linebreak-style": ["warn", "windows"], // 使用 Unix 风格的换行符
      quotes: ["warn", "single"], // 使用单引号
      semi: ["warn", "never"], // 语句末尾不加分号
    },
  },
  {
    languageOptions: {
      globals: {
        ...globals.browser,
      },
    },
  },

  /**
   * vue 规则
   */
  {
    files: ["**/*.vue"],
    languageOptions: {
      parserOptions: {
        /** typescript项目需要用到这个 */
        parser: tseslint.parser,
        ecmaVersion: "latest",
        /** 允许在.vue 文件中使用 JSX */
        ecmaFeatures: {
          jsx: true,
        },
      },
    },
    rules: {
      // 在这里追加 vue 规则
      "vue/no-mutating-props": [
        "error",
        {
          shallowOnly: true,
        },
      ],
    },
  },
)
加入样式处理
sh
npm i @stylistic/eslint-plugin@4.2.0 -D
js
import stylistic from '@stylistic/eslint-plugin'
import eslint from "@eslint/js";
import globals from "globals";
import tseslint from "typescript-eslint";
import eslintPluginVue from "eslint-plugin-vue";

export default tseslint.config (
  {
    ignores: [
      "public",
      "dist",
      "node_modules",
      "package.json",
      "README.md",
      "src/assets",
    ],
  },

  eslint.configs.recommended,
  ...tseslint.configs.recommended, // 添加ts配置
  ...eslintPluginVue.configs["flat/recommended"],

  stylistic.configs.customize({
    indent: 2,
    quotes: 'single',
    semi: false,
    jsx: true,
    braceStyle: '1tbs',
    arrowParens: 'always',
  }),
  {
    rules: {
      "no-console": "off", // : 'warn', // 生产环境中警告 console 使用,开发环境中关闭规则
      "no-debugger": "off", // import.meta.env.NODE_ENV === 'production' ? 'warn' : 'warn', // 生产环境中警告 debugger 使用,开发环境中关闭规则
      "@typescript-eslint/no-explicit-any": "off",
      "vue/multi-word-component-names": "off",
      "no-unused-vars": "off", // 关闭未使用变量警告
      "@typescript-eslint/no-unused-vars": "off", // 关闭未使用变量警告
      "linebreak-style": ["warn", "windows"], // 使用 Unix 风格的换行符
      quotes: ["warn", "single"], // 使用单引号
      semi: ["warn", "never"], // 语句末尾不加分号
    },
  },
  {
    languageOptions: {
      globals: {
        ...globals.browser,
      },
    },
  },

  /**
   * vue 规则
   */
  {
    files: ["**/*.vue"],
    languageOptions: {
      parserOptions: {
        /** typescript项目需要用到这个 */
        parser: tseslint.parser,
        ecmaVersion: "latest",
        /** 允许在.vue 文件中使用 JSX */
        ecmaFeatures: {
          jsx: true,
        },
      },
    },
    rules: {
      // 在这里追加 vue 规则
      "vue/no-mutating-props": [
        "error",
        {
          shallowOnly: true,
        },
      ],
    },
  },
)
eslint 兼容 Prettier
由于存在eslint 和 Prettier 两个格式化规则,为了避免冲突 在eslint.config.js 要配置上 prettier的格式化信息
sh
npm i eslint-plugin-prettier@5.2.5 -D
js
...
import eslintPluginPrettierRecommended from 'eslint-plugin-prettier/recommended'

export default tseslint.config (
  {
    ignores: [
      "public",
      "dist",
      "node_modules",
      "package.json",
      "README.md",
      "src/assets",
    ],
  },

  eslint.configs.recommended,
  ...tseslint.configs.recommended, // 添加ts配置
  ...eslintPluginVue.configs["flat/recommended"],

 ...
  eslintPluginPrettierRecommended // 最后加上 prettier的规则
)
部分会提示找不到 Error: Cannot find module 'eslint-config-prettier'
运行eslint 会提示:node_modules/eslint-plugin-prettier/recommended.js 找不到 Error: Cannot find module 'eslint-config-prettier'
方法1: 安装prettier
sh
npm i prettier@3.5.3 --save-dev方法2: 安装eslint-config-prettier
sh
npm i eslint-config-prettier@10.1.5 --save-dev注意事项
有时候配置完也不生效,就需要整个vscode退出再打开才生效
3.husky 提交钩子
新版husky
安装
sh
npm i husky # git提交的钩子初始化
sh
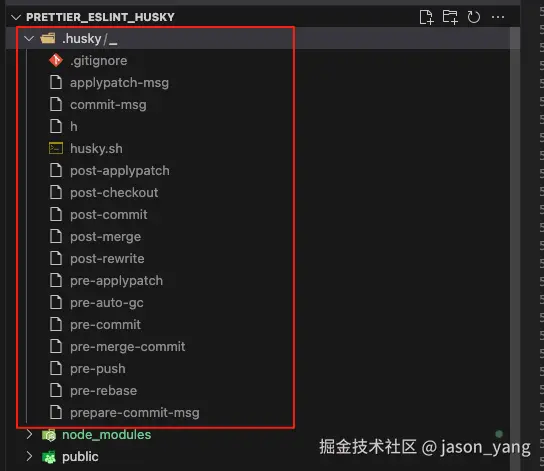
npx husky install生成文件夹
或者手工在 package.json 加入
js
{
  "scripts": {
    "prepare": "husky install"
  }
}
调整husky 配置
修改.husky/_/pre-commit 文件 加入npm run lint
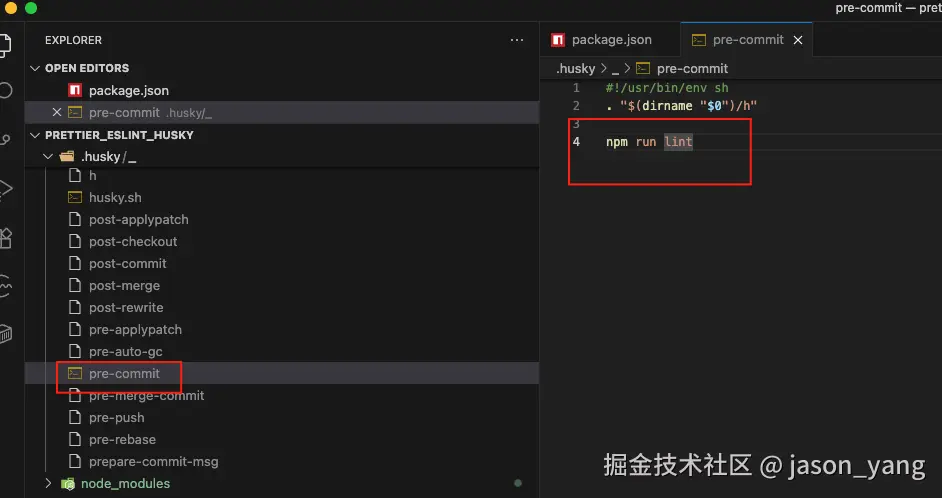
本地暂存git add .并且提交代码时候,git commit -m 'feat: init' 控制台可以看出,先执行打印了lint的逻辑,没有问题 后面再出发git commit的逻辑 
优化 只在本地缓存区处理
安装
sh
npm i lint-staged # 处理git缓存区的拦截处理调整packge.json
加入 lint-staged 的命令处理
js
{
  "lint-staged": {
    "*.{js,ts,vue}": ["eslint --fix", "prettier --write"]
  }
}
修改 husky配置
sh
#!/usr/bin/env sh

# npm run lint:fix
npx lint-staged #  使用上面配置的lint-staged
测试
再次运行,会显示有两个要运行的命令包含 eslint --fix 和 perttier --write 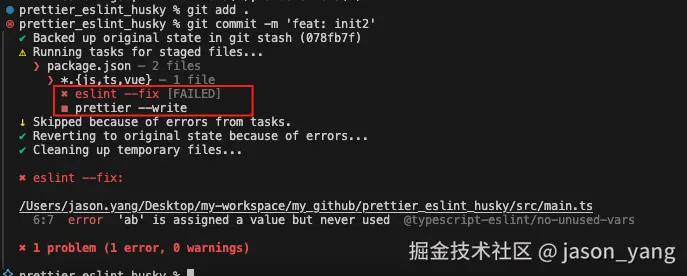
老版husky
安装husky
sh
#添加 husky 注意只安装4.0版本 , 5.0实现方式不一样
npm install husky@4.0 --save-dev
老版本通过修改package.json,来触发钩子
sh
#在package.json 根节点添加入口, npm test为自己定义的命令
#这样在每次git commit -am 'xx' 的时候会触发pre-commit 对应的命令
"husky": {
  "hooks": {
    "pre-commit": "npm test"
  }
},
扩展
commitizen 规范提交的内容
sh
#安装commitizen
npm install commitizen -g
#初始化 提交模版
commitizen init cz-conventional-changelog --save-dev --save-exact
#开始提交,根据提示框选择
git cz
conventional-changelog-cli 生成最新的提交记录文档
sh
#安装
npm install  conventional-changelog-cli --dev
修改 在package.json 根节点添加入口
sh
  "scripts": {
    "genlog": "conventional-changelog -p angular -i CHANGELOG.md -s"
  },
测试
sh
#执行 生成CHANGELOG.md
npm run genlog