一、概述
所谓starter指的就是SpringBoot当中的起步依赖。在SpringBoot当中已经给我们提供了很多的起步依赖了,但在实际的项目开发当中,我们可能会用到很多第三方的技术,并不是所有的第三方的技术官方都给我们提供了与SpringBoot整合的starter起步依赖,但是这些技术又非常的通用,在很多项目组当中都在使用。但是我们怎么自己来生成一个jar包放到本地仓库,让我们直接导入以来就能直接使用呢?接下来我们就用一个阿里云上传图片来介绍怎么自定义一个starter。
二、自定义starter
2.1、介绍
而在springboot中,官方提供的起步依赖 或 第三方提供的起步依赖,基本都会包含两个模块,如下所示:
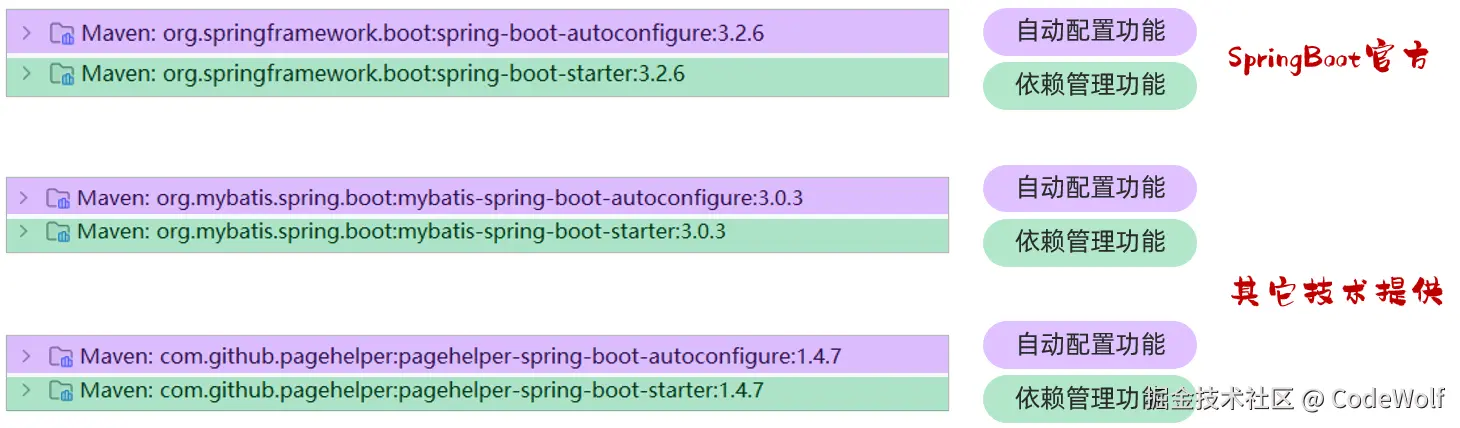
其中,spring-boot-starter 或 xxx-spring-boot-starter 这个模块主要是依赖管理的功能。 而 spring-boot-autoconfigure 或 xxxx-spring-boot-autoconfigure 主要是起到自动配置的作用,自动配置的核心代码就在这个模块中编写。
SpringBoot官方starter命名: spring-boot-starter-xxxx
第三组织提供的starter命名: xxxx-spring-boot-starter
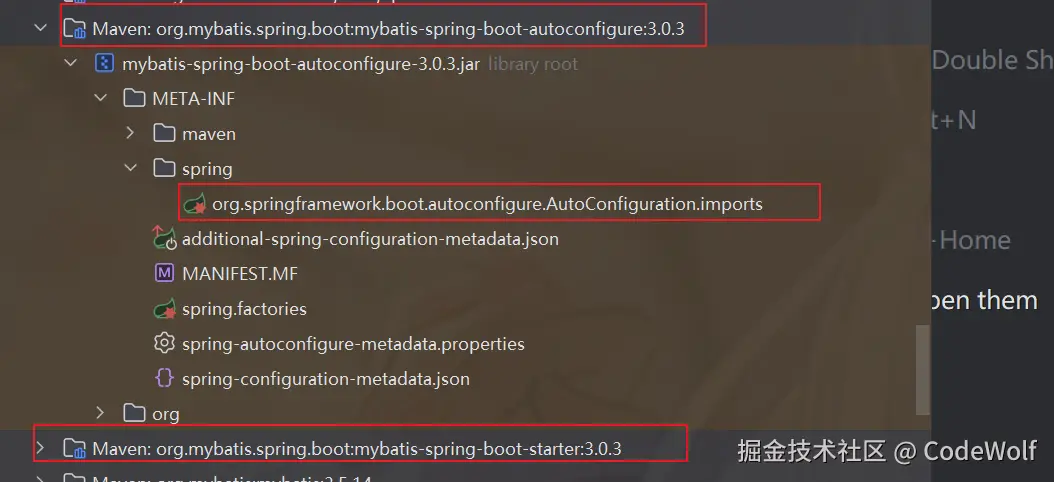
而自动配置模块的核心,就是编写自动配置的核心代码,然后将自动配置的核心类,配置在核心的配置文件 META-INF/spring/org.springframework.boot.autoconfigure.AutoConfiguration.imports 中。 配置如下:
 SpringBoot官方的自动配置依赖
 spring-boot-autoconfiure 中就提供了配置类,并且也提供了springboot会自动读取的配置文件。当SpringBoot项目启动时,会读取到META-INF/spring/org.springframework.boot.autoconfigure.AutoConfiguration.imports配置文件中的配置类并加载配置类,生成相关bean对象注册到IOC容器中。
结果:我们可以直接在SpringBoot程序中使用自动配置的bean对象。
在自定义一个起步依赖starter的时候,按照规范需要定义两个模块:
- starter模块(进行依赖管理把程序开发所需要的依赖都定义在starter起步依赖中)
- autoconfigure模块(自动配置)
将来在项目当中进行相关功能开发时,只需要引入一个起步依赖就可以了,因为它会将autoconfigure自动配置的依赖给传递下来。
2.2 需求
上面我们简单介绍了自定义starter的场景,以及自定义starter时涉及到的模块之后,接下来我们就来完成一个自定义starter的案例。
- 需求:自定义
aliyun-oss-spring-boot-starter,完成阿里云OSS操作工具类AliyunOSSOperator的自动配置。 - 目标:引入起步依赖引入之后,要想使用阿里云OSS,注入
AliyunOSSOperator直接使用即可。 我们在之前使用阿里云上传文件时需要 1). 在pom.xml中引入阿里云oss的所有依赖
xml
<!--阿里云OSS-->
<dependency>
    <groupId>com.aliyun.oss</groupId>
    <artifactId>aliyun-sdk-oss</artifactId>
    <version>3.17.4</version>
</dependency>
<dependency>
    <groupId>javax.xml.bind</groupId>
    <artifactId>jaxb-api</artifactId>
    <version>2.3.1</version>
</dependency>
<dependency>
    <groupId>javax.activation</groupId>
    <artifactId>activation</artifactId>
    <version>1.1.1</version>
</dependency>
<!-- no more than 2.3.3-->
<dependency>
    <groupId>org.glassfish.jaxb</groupId>
    <artifactId>jaxb-runtime</artifactId>
    <version>2.3.3</version>
</dependency>
2). application.yml 中配置阿里云OSS的配置信息
yaml
#阿里云oss配置
aliyun:
oss:
endpoint: https://oss-cn-hangzhou.aliyuncs.com
bucketName: zg666
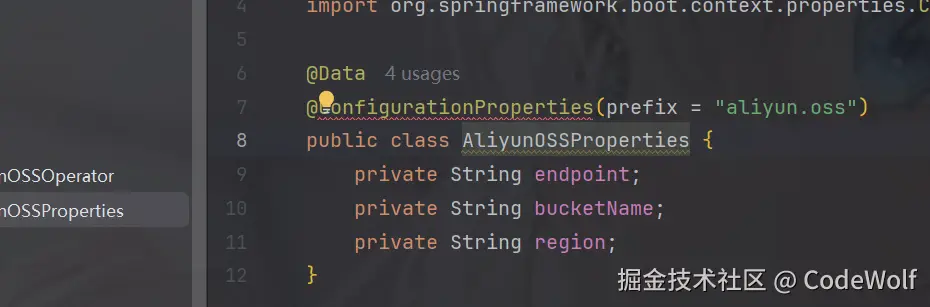
region: cn-hangzhou3). 定义实体类封装配置信息
typescript
import lombok.Data;
import org.springframework.boot.context.properties.ConfigurationProperties;
import org.springframework.stereotype.Component;
@Data
@Component
@ConfigurationProperties(prefix = "aliyun.oss")
public class AliyunOSSProperties {
private String endpoint;
private String bucketName;
private String region;
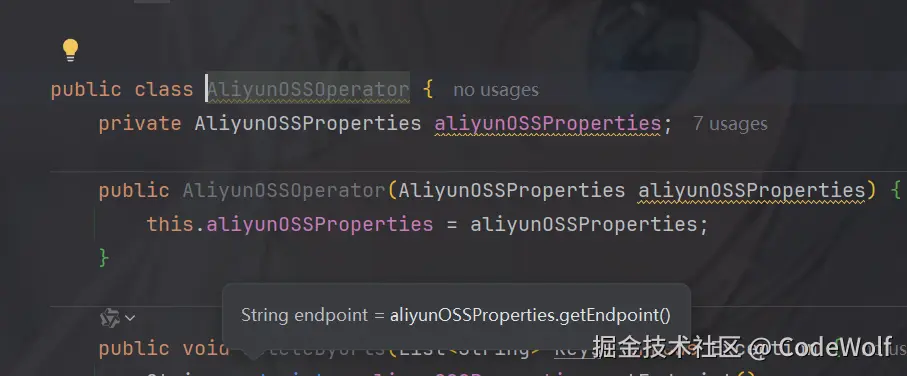
}4). 定义工具类AliyunOSSOperator
ini
@Component
public class AliyunOSSOperator {
    private AliyunOSSProperties aliyunOSSProperties;

    public AliyunOSSOperator(AliyunOSSProperties aliyunOSSProperties) {
        this.aliyunOSSProperties = aliyunOSSProperties;
    }

    public void deleteByUrls(List<String> keys) throws Exception {
        String endpoint = aliyunOSSProperties.getEndpoint();
        String bucketName = aliyunOSSProperties.getBucketName();
        String region = aliyunOSSProperties.getRegion();

        String urlPrefix = endpoint.split("//")[0] + "//" + bucketName + "." + endpoint.split("//")[1] + "/";
        keys = keys.stream()
                .map(item -> item.replaceAll(urlPrefix, ""))
                .toList();
        // 从环境变量中获取访问凭证。运行本代码示例之前,请确保已设置环境变量OSS_ACCESS_KEY_ID和OSS_ACCESS_KEY_SECRET。
        EnvironmentVariableCredentialsProvider credentialsProvider = CredentialsProviderFactory.newEnvironmentVariableCredentialsProvider();

        // 创建OSSClient实例。
        // 当OSSClient实例不再使用时,调用shutdown方法以释放资源。
        ClientBuilderConfiguration clientBuilderConfiguration = new ClientBuilderConfiguration();
        clientBuilderConfiguration.setSignatureVersion(SignVersion.V4);
        OSS ossClient = OSSClientBuilder.create()
                .endpoint(endpoint)
                .credentialsProvider(credentialsProvider)
                .clientConfiguration(clientBuilderConfiguration)
                .region(region)
                .build();

        try {
            //批量删除OSS文件
            DeleteObjectsResult deleteObjectsResult = ossClient.deleteObjects(new DeleteObjectsRequest(bucketName).withKeys(keys).withEncodingType("url"));
            List<String> deletedObjects = deleteObjectsResult.getDeletedObjects();
            for(String obj : deletedObjects) {
                String deleteObj =  URLDecoder.decode(obj, "UTF-8");
                System.out.println(deleteObj);
            }
        } catch (Exception oe) {
            System.out.println(oe.getMessage());
        } finally {
            if (ossClient != null) {
                ossClient.shutdown();
            }
        }
    }

    public String upload(byte[] content, String originalFilename) throws Exception {

        String endpoint = aliyunOSSProperties.getEndpoint();
        String bucketName = aliyunOSSProperties.getBucketName();
        String region = aliyunOSSProperties.getRegion();

        // 从环境变量中获取访问凭证。运行本代码示例之前,请确保已设置环境变量OSS_ACCESS_KEY_ID和OSS_ACCESS_KEY_SECRET。
        EnvironmentVariableCredentialsProvider credentialsProvider = CredentialsProviderFactory.newEnvironmentVariableCredentialsProvider();

        // 填写Object完整路径,例如202406/1.png。Object完整路径中不能包含Bucket名称。
        //获取当前系统日期的字符串,格式为 yyyy/MM
        String dir = LocalDate.now().format(DateTimeFormatter.ofPattern("yyyy/MM"));
        //生成一个新的不重复的文件名
        String newFileName = UUID.randomUUID() + originalFilename.substring(originalFilename.lastIndexOf("."));
        String objectName = dir + "/" + newFileName;

        // 创建OSSClient实例。
        ClientBuilderConfiguration clientBuilderConfiguration = new ClientBuilderConfiguration();
        clientBuilderConfiguration.setSignatureVersion(SignVersion.V4);
        OSS ossClient = OSSClientBuilder.create()
                .endpoint(endpoint)
                .credentialsProvider(credentialsProvider)
                .clientConfiguration(clientBuilderConfiguration)
                .region(region)
                .build();

        try {
            ossClient.putObject(bucketName, objectName, new ByteArrayInputStream(content));
        } catch (Exception oe) {
            System.out.println(oe.getMessage());
        } finally{
            ossClient.shutdown();
        }

        return endpoint.split("//")[0] + "//" + bucketName + "." + endpoint.split("//")[1] + "/" + objectName;
    }

}
5). 其他地方要使用阿里云OSS,注入工具类,再使用
less
@RestController
@Slf4j
public class FileController {

    @Autowired
    private AliyunOSSOperator aliyunOSSOperator;
    @RequestMapping("/upload")
    public Result uploadFile(MultipartFile file) throws Exception {
        log.info("{}", file);
        if (ObjUtil.isNull(file) || file.isEmpty()){
            return Result.error("上传文件为空或者不存在");
        }
        String path = aliyunOSSOperator.upload(file.getBytes(), file.getOriginalFilename());
        return Result.success(path);
    }
}
我们可以看到,在项目中使用阿里云OSS,需要这么五步操作,而阿里云OSS这个云服务还是非常常见的,很多项目中都要使用。那很多项目使用时都要引用太过于麻烦所以这个时候我们就可以制作一个公共组件(自定义starter)。starter定义好之后,将来要使用阿里云OSS进行文件上传,只需要将起步依赖引入进来之后,就可以直接注入 AliyunOSSOperator 使用了
2.3实现
需求明确了,接下来我们再来分析一下具体的实现步骤:
- 第1步:创建自定义starter模块
aliyun-oss-spring-boot-starter(进行依赖管理)- 把阿里云OSS所有的依赖统一管理起来
- 第2步:创建autoconfigure模块
aliyun-oss-spring-boot-autoconfigure- 在starter中引入autoconfigure (我们使用时只需要引入starter起步依赖即可)
- 第3步:在autoconfigure模块
aliyun-oss-spring-boot-autoconfigure中完成自动配置- 定义一个自动配置类,在自动配置类中将所要配置的bean都提前配置好
- 定义配置文件,把自动配置类的全类名定义在配置文件(
META-INF/spring/xxxx.imports)中
我们分析完自定义阿里云OSS自动配置的操作步骤了,下面我们就按照分析的步骤来实现自定义starter。 首先我们先来创建两个Maven模块:
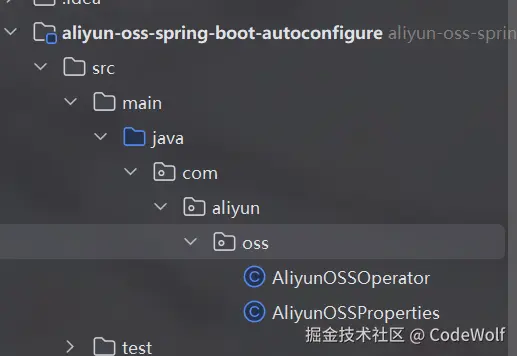
1). 创建 aliyun-oss-spring-boot-starter
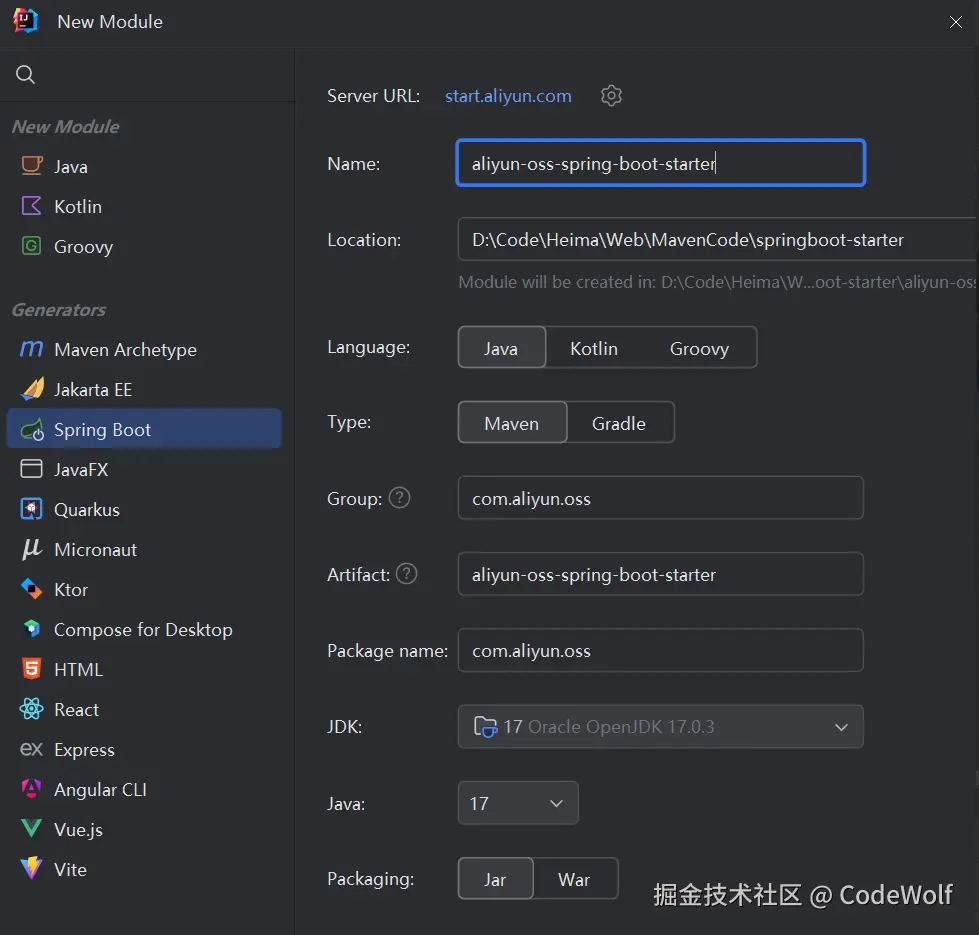 在如法炮制创建**
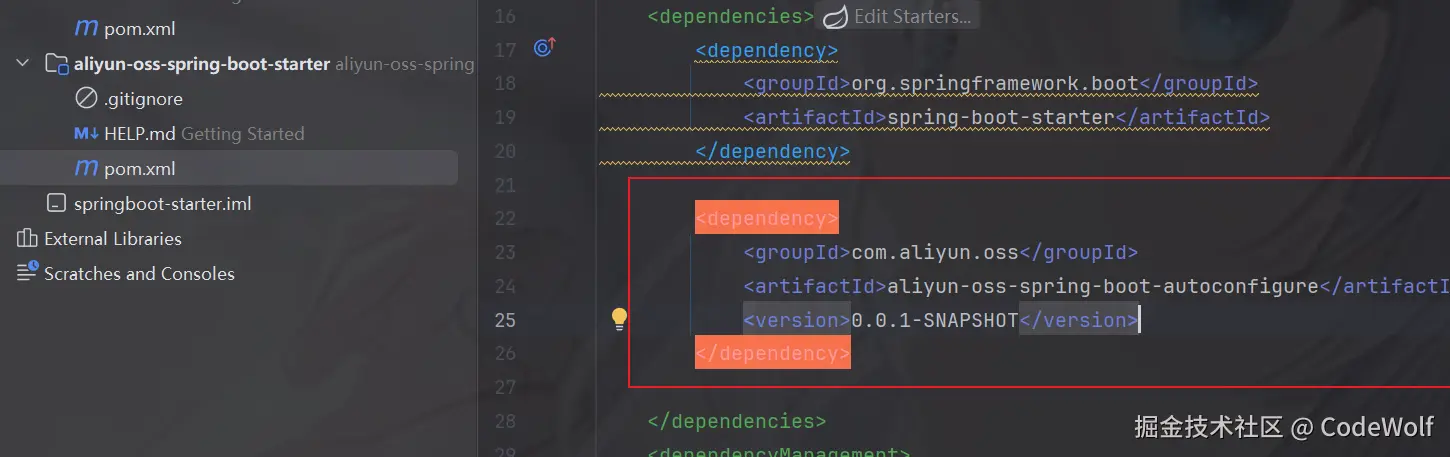
aliyun-oss-spring-boot-autoconfigure** 模块 创建之后再删掉一些不必要的东西  需要在starter模块中来引入autoconfigure这个模块的。打开starter模块中的pom文件:
 然后便在
然后便在aliyun-oss-spring-boot-autoconfigure这个模块中添入下面几个依赖
xml
<dependency>
<groupId>org.projectlombok</groupId>
<artifactId>lombok</artifactId>
</dependency>
<!--阿里云OSS-->
<dependency>
<groupId>com.aliyun.oss</groupId>
<artifactId>aliyun-sdk-oss</artifactId>
<version>3.17.4</version>
</dependency>

<dependency>
<groupId>javax.xml.bind</groupId>
<artifactId>jaxb-api</artifactId>
<version>2.3.1</version>
</dependency>

<dependency>
<groupId>javax.activation</groupId>
<artifactId>activation</artifactId>
<version>1.1.1</version>
</dependency>

<!-- no more than 2.3.3-->
<dependency>
<groupId>org.glassfish.jaxb</groupId>
<artifactId>jaxb-runtime</artifactId>
<version>2.3.3</version>
</dependency>
再将上述的阿里云代码粘贴到configure模块中
 这时在SpringBoot项目中,并不会去扫描com.aliyun.oss这个包,不扫描这个包那类上的注解也就失去了作用。 1). 删除 AliyunOSSOperator 工具类上的 @Component 注解 和 @Autowired 注解。
 2). 删除 AliyunOSSProperties 实体类上的 @Component 注解。
 3). 既然不能用
 @Component 注解声明bean,那就需要按照 starter 的定义规范,定义一个自动配置类,在自动配置类中声明bean。 下面我们就要定义一个自动配置类 AliOSSAutoConfiguration 了,在自动配置类当中来声明 AliOSSOperator 的bean对象。
java
@EnableConfigurationProperties(AliyunOSSProperties.class)
public class AliyunOssAutoConfiguration {

    @Bean
    public AliyunOSSOperator aliyunOSSOperator(AliyunOSSProperties aliyunOSSProperties) {
        return new AliyunOSSOperator(aliyunOSSProperties);
    }
}
4). 在
4). 在 aliyun-oss-spring-boot-autoconfigure 模块中的resources下,新建自动配置文件 META-INF/spring/org.springframework.boot.autoconfigure.AutoConfiguration.imports
将自动配置类的全类名,配置在文件中,这样在springboot启动的时候,就会加载到这份文件,并加载到其中的配置类了。
配置内容如下:
com.aliyun.oss.AliyunOSSAutoConfiguration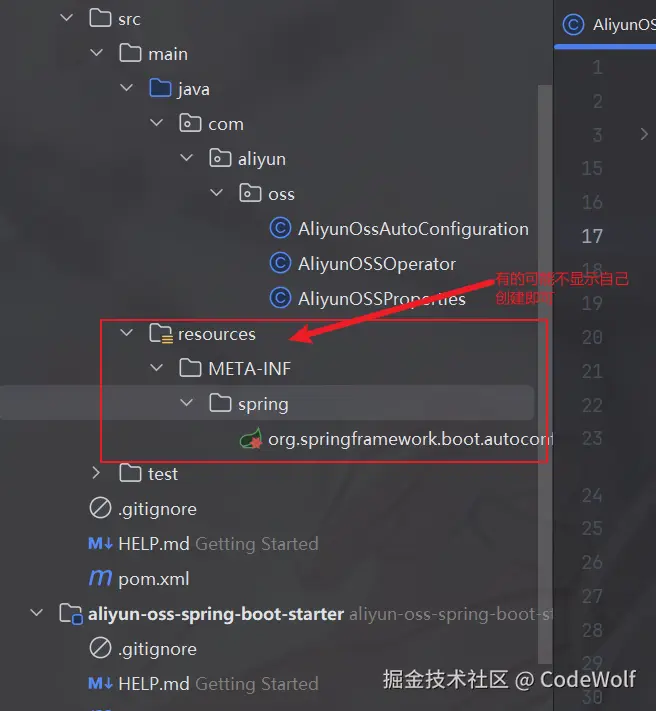 至此我们就配置好了剩下就是打包之后引入这相关依赖看看成功不 先打包configure包并看看本地仓库是否有相关包
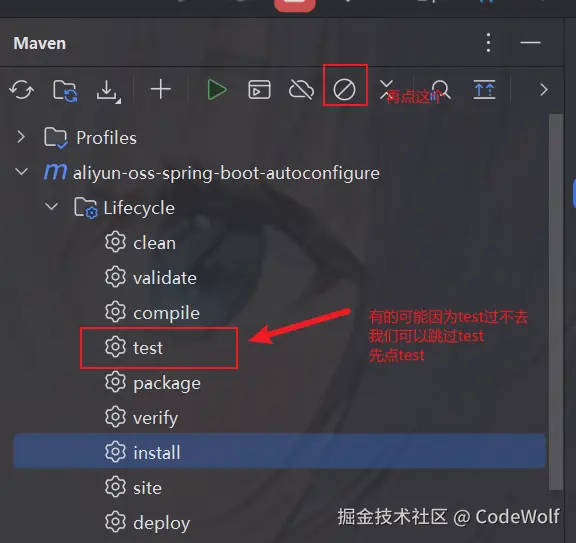
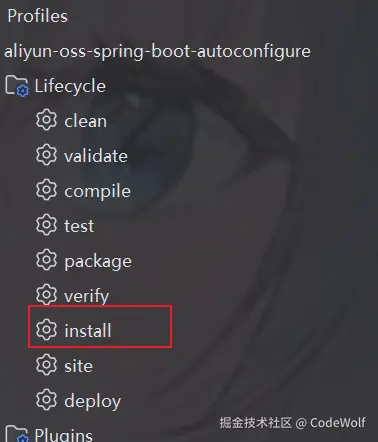 本地仓库中出现即可成功
 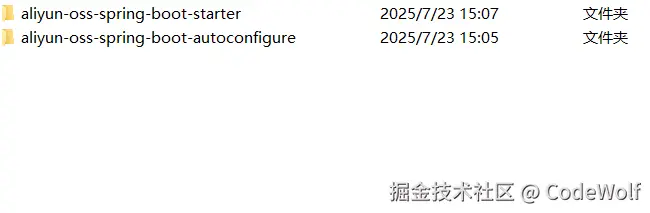 我们即可在一个项目中直接引入依赖 依赖为starter的GAV坐标如
xml
<dependency>
<groupId>com.aliyun.oss</groupId>
<artifactId>aliyun-oss-spring-boot-starter</artifactId>
<version>0.0.1-SNAPSHOT</version>
</dependency>
这就是全过程了,这里面要注意名字不能有错误。欢迎指正!!!