前言
本章讲解 Paging,依然是从基础使用和原理两个方向;
是什么?
Paging 是 Jetpack 提供的一个分页组件,可以更轻松地在应用程序中的RecyclerView逐步和优雅地加载数据;数据请求消耗的网络带宽更少,系统资源更少;即使在数据更新和刷新期间,应用程序仍会继续快速响应用户输入;不过多浪费,显示多少就用多少;
使用篇
Paging 的使用主要区分在 DataSource 的使用,定义 DataSource 一共有三种:
继承 PositionalDataSource
继承 PageKeyedDataSource
继承 ItemKeyedDataSource
使用起来相对来说一般,需要提供四个类:
- DataSource(是数据源,包含了多种形式,例如:Room 来源,PositionalDataSource 来源,PageKeyedDataSource 来源,ItemKeyedDataSource 来源)
- PagedList(是 UIModel 数据层,通过 Factory 的方式拿到数据源)
- PagedAdapter(这里不再是之前使用 RecycleView 的那种适配器了,而是和 Paging 配套的 PagedListAdapter)
- RecycleView(是之前用的 RecycleView,只不过 setAdapter 的时候,绑定的适配器是 PagedAdapter)
依赖
arduino
// Paging库依赖
implementation 'androidx.paging:paging-runtime:xxx'
数据源 PositionalDataSource 的基础使用
数据bean
用来展示列表数据,那么我们就先来定义一个数据 bean
typescript
public class Student {

    private String id;
    private String name;
    private String sex;

    public String getId() {
        return id;
    }

    public void setId(String id) {
        this.id = id;
    }

    public String getName() {
        return name;
    }

    public void setName(String name) {
        this.name = name;
    }

    public String getSex() {
        return sex;
    }

    public void setSex(String sex) {
        this.sex = sex;
    }

    // 比较的函数
    @Override
    public boolean equals(Object o) {
        if (this == o) return true;
        if (o == null || getClass() != o.getClass()) return false;
        Student student = (Student) o;
        return id.equals(student.id) &&
                name.equals(student.name) &&
                sex.equals(student.sex);
    }

    // 比较的函数
    @RequiresApi(api = Build.VERSION_CODES.KITKAT)
    @Override
    public int hashCode() {
        return Objects.hash(id, name, sex);
    }
}
一定要重写 equals 方法,Paging 用来判断是否相等,从而决定要不要刷新;
数据源 DataSource
接下来我们来定义数据源,需要继承 Paging 中的 PositionalDataSource 来定义数据源
less
/**
 * 数据的来源(room,网络,...)
 *
 * 这里是数据源,获取数据目前是在这里完成的
 *
 * 官方文档上,继承的是 ItemKeyedDataSource, 而这里实现的是 PositionalDataSource
 *
 * PositionalDataSource<Student>: 适用于目标数据总数的固定,通过特别的位置加载数据(0-10)
 *  比如从数据库中的1200条开始加在20条数据。
 */
public class StudentDataSource extends PositionalDataSource<Student> {

    /**
     * 可以理解是加载第一页数据的时候,会执行此函数来完成
     * 加载初始化数据,可以这么来理解,加载的是第一页的数据。
     * 形象的说,当我们第一次打开页面,需要回调此方法来获取数据。
     * @param params
     * @param callback
     */
    @Override
    public void loadInitial(@NonNull LoadInitialParams params, @NonNull LoadInitialCallback<Student> callback) {
        // @1:数据源 @2:位置 @3:总大小
        new Thread(){
            public void run() {
                callback.onResult(getStudents(0, 20), 0, 1000);
            }
        }.start()
    }

    /**
     * 当有了初始化数据之后,滑动的时候如果需要加载数据的话,会调用此方法。
     * @param params
     * @param callback
     */
    @Override
    public void loadRange(@NonNull LoadRangeParams params, @NonNull LoadRangeCallback<Student> callback) {
        // @1:从哪里开始加载(位置内部算的)  @2:size(size 内部算的)
        callback.onResult(getStudents(params.startPosition, params.loadSize));
    }

    /**
     * 可以理解这里是数据源,数据的来源(数据库,文件,网络服务器响应等等)
     * @param startPosition
     * @param pageSize
     * @return
     */
    private List<Student> getStudents(int startPosition, int pageSize) {
        List<Student> list = new ArrayList<>();
        for (int i = startPosition; i < startPosition + pageSize; i++) {
            Student student = new Student();
            student.setId("ID号是:" + i);
            student.setName("我名称:" + i);
            student.setSex("我性别:" + i);
            list.add(student);
        }
        return list;
    }
}
这个 loadInitial 方法可以理解为:加载第一页数据的时候,会执行此函数来完成;
这个 loadRange 方法可以理解为:加载更多数据的时候,会执行此函数来完成;
常规业务开发,我们就是使用这个
数据工厂 DataSource.Factory
数据工厂需要继承 DataSource.Factory 来实现;
scala
/**
 * 数据的工厂
 */
public class StudentDataSourceFactory extends DataSource.Factory<Integer, Student> {

    @NonNull
    @Override
    public DataSource<Integer, Student> create() {
        StudentDataSource studentDataSource = new StudentDataSource();
        return studentDataSource;
    }
}
主要用来创建我们的 DataSource,也就是 StudentDataSource
适配器 PagedListAdapter
接下来我们来定义 Adapter,使用 Paging 需要继承 PagedListAdapter,而不是继承 RecyclerView.Adapter
less
public class RecyclerPagingAdapter extends PagedListAdapter<Student, RecyclerPagingAdapter.MyRecyclerViewHolder> {

    // TODO 比较的行为
    private static DiffUtil.ItemCallback<Student> DIFF_STUDENT = new
            DiffUtil.ItemCallback<Student>() {

                @Override
                public boolean areItemsTheSame(@NonNull Student oldItem, @NonNull Student newItem) {
                    return oldItem.getId().equals(newItem.getId());
                }

                // 对象本身的比较
                @Override
                public boolean areContentsTheSame(@NonNull Student oldItem, @NonNull Student newItem) {
                    return oldItem.equals(newItem);
                }
            };

    protected RecyclerPagingAdapter() {
        // Remind
        super(DIFF_STUDENT);
    }

    @NonNull
    @Override
    public MyRecyclerViewHolder onCreateViewHolder(@NonNull ViewGroup parent, int viewType) {
        View view = LayoutInflater.from(parent.getContext()).inflate(R.layout.item, null);
        return new MyRecyclerViewHolder(view);
    }

    @Override
    public void onBindViewHolder(@NonNull MyRecyclerViewHolder holder, int position) {
        Student student = getItem(position);

        // itemView 出来了, 分页库还在加载数据中,就显示Id加载中
        if (null == student) {
            holder.tvId.setText("Id加载中");
            holder.tvName.setText("Name加载中");
            holder.tvSex.setText("Sex加载中");
        } else {
            holder.tvId.setText(student.getId());
            holder.tvName.setText(student.getName());
            holder.tvSex.setText(student.getSex());
        }
    }

    // Item 优化的 ViewHolder
    public static class MyRecyclerViewHolder extends RecyclerView.ViewHolder {

        TextView tvId;
        TextView tvName;
        TextView tvSex;

        public MyRecyclerViewHolder(View itemView) {
            super(itemView);
            tvId = itemView.findViewById(R.id.tv_id); // ID
            tvName = itemView.findViewById(R.id.tv_name); // 名称
            tvSex = itemView.findViewById(R.id.tv_sex); // 性别
        }
    }
}
需要注意的地方就是构造方法中,需要传入 DiffUtil.ItemCallback 从而让 PagedListAdapter 来判断变化的 item,从而只刷新需要改变的 item;
组合使用
接下来,我们来定义承载 RecyclerView 的 Activity,以及在 Activity 中使用 Factory,官方文档是建议我们放在 ViewModel 中来使用,我们来定一个 ViewModel;
ViewModel
scala
/**
 * PagedList: 数据源获取的数据最终靠 PagedList 来承载。
 * 对于 PagedList, 我们可以这样来理解,它就是一页数据的集合。
 * 每请求一页,就是新的一个 PagedList 对象。
 */
public class StudentViewModel extends ViewModel {

    private final LiveData<PagedList<Student>> listLiveData;

    public StudentViewModel() {
        StudentDataSourceFactory factory = new StudentDataSourceFactory();
        // 初始化 ViewModel
        this.listLiveData = new LivePagedListBuilder<Integer, Student>(factory, 20).build();
    }

    // 暴露数据出去
    public LiveData<PagedList<Student>> getListLiveData() {
        return listLiveData;
    }
}
构造方法中,直接创建 StudentDataSourceFactory 并交给 LivePagedListBuilder 来构建 LiveData
不想用 ViewModel 的可以直接拿 new LivePagedListBuilder<Integer, Student>(factory, 20).build();
RecyclerView
scala
public class MainActivity extends AppCompatActivity {

    private RecyclerView recyclerView;
    RecyclerPagingAdapter recyclerPagingAdapter;
    StudentViewModel viewModel;

    @Override
    protected void onCreate(Bundle savedInstanceState) {
        super.onCreate(savedInstanceState);
        setContentView(R.layout.activity_main);

        recyclerView =  findViewById(R.id.recycle_view);
        recyclerPagingAdapter = new RecyclerPagingAdapter();

        // 初始化 ViewModel
        viewModel = new ViewModelProvider(this, new ViewModelProvider.NewInstanceFactory())
                .get(StudentViewModel.class);

        // LiveData 观察者感应更新
        viewModel.getListLiveData().observe(this, new Observer<PagedList<Student>>() {
            @Override
            public void onChanged(PagedList<Student> students) {
                // 再这里更新适配器数据
                recyclerPagingAdapter.submitList(students);
            }
        });

        recyclerView.setAdapter(recyclerPagingAdapter);
        recyclerView.setLayoutManager(new LinearLayoutManager(this));
    }
}
Activity 中就是很基础的使用方式,adapter 设置数据不再是自定义 setData 而是通过 submitList 方法来实现;
数据源 ItemKeyedDataSource 的基础使用
需要我们继承 ItemKeyedDataSource 类;
less
/**
 * ItemKeyedDataSource<Key, Value>:适用于目标数据的加载依赖特定 item 的信息,
 * 即 Key 字段包含的是 Item 中的信息,比如需要根据第 N 项的信息加载第 N+1 项的数据,传参中需要传入第N 项的 ID,
 * 该场景多出现于论坛类应用评论信息的请求。
 */
public class CustomItemDataSource extends ItemKeyedDataSource<Integer, Person> {

    private DataRepository dataRepository;

    CustomItemDataSource(DataRepository dataRepository) {
        this.dataRepository = dataRepository;
    }

    // loadInitial 初始加载数据
    @Override
    public void loadInitial(@NonNull LoadInitialParams<Integer> params, @NonNull LoadInitialCallback<Person> callback) {
        List<Person> dataList = dataRepository.initData(params.requestedLoadSize);
        callback.onResult(dataList);
    }

    @NonNull
    @Override
    public Integer getKey(@NonNull Person item) {
        return (int) System.currentTimeMillis();
    }

    // loadBefore 向前分页加载数据
    @Override
    public void loadBefore(@NonNull LoadParams<Integer> params, @NonNull LoadCallback<Person> callback) {
        List<Person> dataList = dataRepository.loadPageData(params.key, params.requestedLoadSize);
        if (dataList != null) {
            callback.onResult(dataList);
        }
    }

    // loadAfter 向后分页加载数据
    @Override
    public void loadAfter(@NonNull LoadParams<Integer> params, @NonNull LoadCallback<Person> callback) {
        List<Person> dataList = dataRepository.loadPageData(params.key, params.requestedLoadSize);
        if (dataList != null) {
            callback.onResult(dataList);
        }
    }
}
这里主要的区别是 loadBefore 和 loadAfter 方法,向前分页加载数据和向后分页加载数据;
params.key 以及 params.requestedLoadSize 是由 Paging 框架帮我们算好并返回的;
这个通常是 一次加一条数据
就像下面这样,每次都加载一条数据进来;
数据源 PageKeyedDataSource 的基础使用
需要我们继承 PageKeyedDataSource 类
less
/**
 * PageKeyedDataSource<Key, Value>:适用于目标数据根据页信息请求数据的场景,
 * 即 Key 字段是页相关的信息。比如请求的数据的参数中包含类似next / pervious页数的信息。
 */
public class CustomPageDataSource extends PageKeyedDataSource<Integer, Person> {

    private DataRepository dataRepository;

    CustomPageDataSource(DataRepository dataRepository) {
        this.dataRepository = dataRepository;
    }

    // loadInitial 初始加载数据
    @Override
    public void loadInitial(@NonNull LoadInitialParams<Integer> params, @NonNull LoadInitialCallback<Integer, Person> callback) {
        List<Person> dataList = dataRepository.initData(params.requestedLoadSize);
        callback.onResult(dataList, 0, 2);
    }

    // loadBefore 向前分页加载数据
    @Override
    public void loadBefore(@NonNull LoadParams<Integer> params, @NonNull LoadCallback<Integer, Person> callback) {
        List<Person> dataList = dataRepository.loadPageData(params.key, params.requestedLoadSize);
        if (dataList != null) {
            callback.onResult(dataList, params.key - 1);
        }
    }

    // loadAfter 向后分页加载数据
    @Override
    public void loadAfter(@NonNull LoadParams<Integer> params, @NonNull LoadCallback<Integer, Person> callback) {
        List<Person> dataList = dataRepository.loadPageData(params.key, params.requestedLoadSize);
        if (dataList != null) {
            callback.onResult(dataList, params.key + 1);
        }
    }
}
区别在于 onResult 传递的参数不一样了,每个方法的 onResult 中都额外添加了参数,用来表示要加载的目标页面数据;
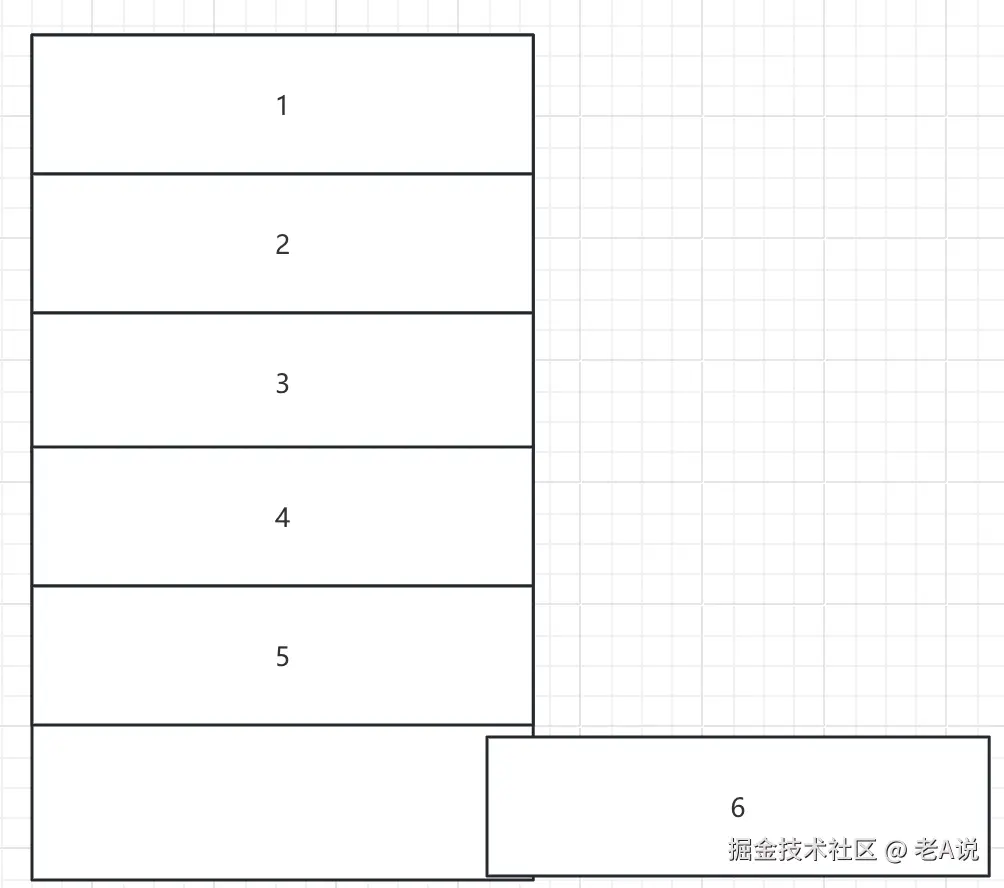
这个通常是 一次加一页数据
一次加载一页,这个有点类似下面这样,点击1 加载1页面内容,点击2 加载2页面内容

结合 Room 使用
Room 天然的支持了 Paging,也就是 Dao 中支持了返回 DataSource.Factory
java
@Dao
public interface StudentDao {
    @Insert
    void insertStudents(Student... students);

    @Query("DELETE FROM student_table")
    void deleteAllStudents();

    @Query("SELECT * FROM student_table ORDER BY id")
    DataSource.Factory<Integer, Student> getAllStudents();
}
所以,我们在构建 LivePagedListBuilder 的时候,可以直接传入
ini
studentsDatabase = StudentsDatabase.getInstance(this);
studentDao = studentsDatabase.getStudentDao();
// 直接通过 Room 获取返回的 Factory 然后传给 LivePagedListBuilder
allStudentsLivePaged = new LivePagedListBuilder<>(studentDao.getAllStudents(), 2)
        .build();
allStudentsLivePaged.observe(this, new Observer<PagedList<Student>>() {
    @Override
    public void onChanged(final PagedList<Student> students) {
        pagedAdapter.submitList(students);
    }
});
直接通过 Room 获取返回的 Factory 然后传给 LivePagedListBuilder;
原理篇
我们就从数据的初始化作为入口来分析,我们进入 new LivePagedListBuilder<>(studentDao.getAllStudents(), 2).build() 的 build 方法看下:
less
private static <Key, Value> LiveData<PagedList<Value>> create(
        @Nullable final Key initialLoadKey,
        @NonNull final PagedList.Config config,
        @Nullable final PagedList.BoundaryCallback boundaryCallback,
        @NonNull final DataSource.Factory<Key, Value> dataSourceFactory,
        @NonNull final Executor notifyExecutor,
        @NonNull final Executor fetchExecutor) {
    return new ComputableLiveData<PagedList<Value>>(fetchExecutor) {
        @Nullable
        private PagedList<Value> mList;
        @Nullable
        private DataSource<Key, Value> mDataSource;

        private final DataSource.InvalidatedCallback mCallback =
                new DataSource.InvalidatedCallback() {
                    @Override
                    public void onInvalidated() {
                        invalidate();
                    }
                };

        @SuppressWarnings("unchecked") // for casting getLastKey to Key
        @Override
        protected PagedList<Value> compute() {
            @Nullable Key initializeKey = initialLoadKey;
            if (mList != null) {
                initializeKey = (Key) mList.getLastKey();
            }

            do {
                if (mDataSource != null) {
                    mDataSource.removeInvalidatedCallback(mCallback);
                }

                mDataSource = dataSourceFactory.create();
                mDataSource.addInvalidatedCallback(mCallback);

                mList = new PagedList.Builder<>(mDataSource, config)
                        .setNotifyExecutor(notifyExecutor)
                        .setFetchExecutor(fetchExecutor)
                        .setBoundaryCallback(boundaryCallback)
                        .setInitialKey(initializeKey)
                        .build();
            } while (mList.isDetached());
            return mList;
        }
    }.getLiveData();
}
这里直接 new 了一个 ComputableLiveData 我们进入这个 ComputableLiveData 的构造方法看下:
less
public ComputableLiveData(@NonNull Executor executor) {
    mExecutor = executor;
    mLiveData = new LiveData<T>() {
        @Override
        protected void onActive() {
            mExecutor.execute(mRefreshRunnable);
        }
    };
}
这里直接创建了 LiveData 通过前面我们学习 LiveData 可以知道,当有观察者订阅的时候,这个 onActive 会执行,我们进入这个 mRefreshRunnable 看下:
java
final Runnable mRefreshRunnable = new Runnable() {
    @WorkerThread
    @Override
    public void run() {
        boolean computed;
        do {
            computed = false;
            if (mComputing.compareAndSet(false, true)) {
                try {
                    T value = null;
                    while (mInvalid.compareAndSet(true, false)) {
                        computed = true;
                        value = compute();
                    }
                    if (computed) {
                        mLiveData.postValue(value);
                    }
                } finally {
                    mComputing.set(false);
                }
            }
        } while (computed && mInvalid.get());
    }
};
最终会通过 mLiveData.postValue(value) 将我们的数据发送出去,这样我们就在 observe 回调方法中接收到这个数据了,那么这个数据是怎么构建的呢?通过上面的 value = compute() 可以知道,最终是调用的我们重写的 compute 方法,也就是我们创建 ComputableLiveData 的时候重写的 compute 方法;
我们进入这个方法看下:
scss
protected PagedList<Value> compute() {
    @Nullable Key initializeKey = initialLoadKey;
    .... 省略部分代码

    do {
        .... 省略部分代码
        // 核心逻辑1 创建 DataSource
        mDataSource = dataSourceFactory.create();

        .... 省略部分代码

        // 核心逻辑2 构建 PagedList
        mList = new PagedList.Builder<>(mDataSource, config)
                .setNotifyExecutor(notifyExecutor)
                .setFetchExecutor(fetchExecutor)
                .setBoundaryCallback(boundaryCallback)
                .setInitialKey(initializeKey)
                .build();
    } while (mList.isDetached());
    return mList;
}
核心逻辑1,最终调用的是我们自己创建的 DataSource 的 create 方法,也就是 StudentDataSourceFactory 中的 create 方法,获取 StudentDataSource;
核心逻辑2:构建 PagedList,我们进入这个 build 方法看下:
csharp
public PagedList<Value> build() {
    return PagedList.create(
            mDataSource,
            mNotifyExecutor,
            mFetchExecutor,
            mBoundaryCallback,
            mConfig,
            mInitialKey);
}
这里直接调用了 PagedList 的 create 方法,我们进入这个方法看下:
less
static <K, T> PagedList<T> create(@NonNull DataSource<K, T> dataSource,
        @NonNull Executor notifyExecutor,
        @NonNull Executor fetchExecutor,
        @Nullable BoundaryCallback<T> boundaryCallback,
        @NonNull Config config,
        @Nullable K key) {
    if (dataSource.isContiguous() || !config.enablePlaceholders) {

        .... 省略部分代码

        ContiguousDataSource<K, T> contigDataSource = (ContiguousDataSource<K, T>) dataSource;
        return new ContiguousPagedList<>(contigDataSource,
                notifyExecutor,
                fetchExecutor,
                boundaryCallback,
                config,
                key,
                lastLoad);
    } else {
        return new TiledPagedList<>((PositionalDataSource<T>) dataSource,
                notifyExecutor,
                fetchExecutor,
                boundaryCallback,
                config,
                (key != null) ? (Integer) key : 0);
    }
}
这个方法返回了两种 PagedList,一种是 ContiguousPagedList 一种是 TiledPagedList
我们通过查看 PagedList 的子类,其实可以看到

通过复写 isContiguous 这方法,可以知道 ContiguousPagedList 直接返回了 true ,TiledPagedList 直接返回了 false;
我们进入 ContiguousPagedList 的构造方法看下:
less
ContiguousPagedList(
        @NonNull ContiguousDataSource<K, V> dataSource,
        @NonNull Executor mainThreadExecutor,
        @NonNull Executor backgroundThreadExecutor,
        @Nullable BoundaryCallback<V> boundaryCallback,
        @NonNull Config config,
        final @Nullable K key,
        int lastLoad) {
    super(new PagedStorage<V>(), mainThreadExecutor, backgroundThreadExecutor,
            boundaryCallback, config);
    mDataSource = dataSource;
    mLastLoad = lastLoad;

    if (mDataSource.isInvalid()) {
        detach();
    } else {
        // 核心逻辑
        mDataSource.dispatchLoadInitial(key,
                mConfig.initialLoadSizeHint,
                mConfig.pageSize,
                mConfig.enablePlaceholders,
                mMainThreadExecutor,
                mReceiver);
    }
    mShouldTrim = mDataSource.supportsPageDropping()
            && mConfig.maxSize != Config.MAX_SIZE_UNBOUNDED;
}
这里调用了 dispatchLoadInitial 方法,我们进入这个方法看下:

这个方法也是提供了三个实现,我们需要进入的是 ContiguousWithoutPlaceholdersWrapper 进入之后,可以看到,它其实是 PositionalDataSource 的一个内部类,而 PositionalDataSource 又是我们前面使用的 DataSource 之一;
我们进入这个 PositionalDataSource 的 dispatchLoadInitial 方法看下:
less
void dispatchLoadInitial(@Nullable Integer position, int initialLoadSize, int pageSize,
        boolean enablePlaceholders, @NonNull Executor mainThreadExecutor,
        @NonNull PageResult.Receiver<Value> receiver) {
    final int convertPosition = position == null ? 0 : position;
    // 核心逻辑
    mSource.dispatchLoadInitial(false, convertPosition, initialLoadSize,
            pageSize, mainThreadExecutor, receiver);
}
这里也是直接调用了 dispatchLoadInitial 方法,我们进入看下:
less
final void dispatchLoadInitial(boolean acceptCount,
        int requestedStartPosition, int requestedLoadSize, int pageSize,
        @NonNull Executor mainThreadExecutor, @NonNull PageResult.Receiver<T> receiver) {
    // 核心逻辑
    LoadInitialCallbackImpl<T> callback =
            new LoadInitialCallbackImpl<>(this, acceptCount, pageSize, receiver);
    LoadInitialParams params = new LoadInitialParams(
            requestedStartPosition, requestedLoadSize, pageSize, acceptCount);
    // 核心逻辑
    loadInitial(params, callback);
    callback.mCallbackHelper.setPostExecutor(mainThreadExecutor);
}
可以看到,这个 loadInitial 是一个抽象方法,由我们具体实现的 DataSource 来实现,也就是我们的 StudentDataSource 来实现;
最终,我们的初始化数据,通过 onResult 回传回去;
less
@Override
public void loadInitial(@NonNull LoadInitialParams params, @NonNull LoadInitialCallback<Student> callback) {
    // @1:数据源 @2:位置 @3:总大小
    callback.onResult(getStudents(0, Flag.SIZE), 0, 1000);
}
我们接下来看下,这个 callback 是如何将数据回调回去的,由 dispatchLoadInitial 方法可以知道,LoadInitialCallback 有一个实现类 LoadInitialCallbackImpl
ini
LoadInitialCallbackImpl<T> callback =
            new LoadInitialCallbackImpl<>(this, acceptCount, pageSize, receiver);
我们进入实现类的 onResult 方法看下:
arduino
public void onResult(@NonNull List<T> data, int position, int totalCount) {
    if (!mCallbackHelper.dispatchInvalidResultIfInvalid()) {
        LoadCallbackHelper.validateInitialLoadParams(data, position, totalCount);
        // 核心逻辑,if else 中最终都是调用的 dispatchResultToReceiver
        if (mCountingEnabled) {
            int trailingUnloadedCount = totalCount - position - data.size();
            mCallbackHelper.dispatchResultToReceiver(
                    new PageResult<>(data, position, trailingUnloadedCount, 0));
        } else {
            mCallbackHelper.dispatchResultToReceiver(new PageResult<>(data, position));
        }
    }
}
if else 中最终都是调用的 dispatchResultToReceiver 方法,我们进入这个方法看下:
java
void dispatchResultToReceiver(final @NonNull PageResult<T> result) {
    Executor executor;
    synchronized (mSignalLock) {
        mHasSignalled = true;
        executor = mPostExecutor;
    }

    if (executor != null) {
        executor.execute(new Runnable() {
            @Override
            public void run() {
                mReceiver.onPageResult(mResultType, result);
            }
        });
    } else {
        mReceiver.onPageResult(mResultType, result);
    }
}
最终都是调用的 onPageResult 方法,只不过一个是子线程,一个是主线程,我们进入这个方法看下:
kotlin
PageResult.Receiver<V> mReceiver = new PageResult.Receiver<V>() {
    @AnyThread
    public void onPageResult(int resultType, @NonNull PageResult<V> pageResult) {
        if (pageResult.isInvalid()) {
            ContiguousPagedList.this.detach();
        } else if (!ContiguousPagedList.this.isDetached()) {
            List<V> page = pageResult.page;
            if (resultType == 0) {
                // 核心逻辑1
                ContiguousPagedList.this.mStorage.init(pageResult.leadingNulls, page, pageResult.trailingNulls, pageResult.positionOffset, ContiguousPagedList.this);
                .... 省略部分代码
            } else {
                .... 省略部分代码
                if (resultType == 1) {
                    if (skipNewPage && !trimFromFront) {
                        .... 省略部分代码
                    } else {
                        // 核心逻辑2
                        ContiguousPagedList.this.mStorage.appendPage(page, ContiguousPagedList.this);
                    }
                } else {
                    .... 省略部分代码
                    if (skipNewPage && trimFromFront) {
                        .... 省略部分代码
                    } else {
                        // 核心逻辑3
                        ContiguousPagedList.this.mStorage.prependPage(page, ContiguousPagedList.this);
                    }
                }
                .... 省略部分代码
            }
            .... 省略部分代码
        }
    }
};
三个比较核心的调用 初始化数据:this.mStorage.init ,向下翻页:this.mStorage.appendPage ,向上翻页:this.mStorage.prependPage
我们主要来看下 init 方法
less
void init(int leadingNulls, @NonNull List<T> page, int trailingNulls, int positionOffset,
        @NonNull Callback callback) {
    init(leadingNulls, page, trailingNulls, positionOffset);
    // 核心逻辑
    callback.onInitialized(size());
}
我们接着看下 onInitialized 的具体实现:
scss
public void onInitialized(int count) {
    // 核心逻辑
    notifyInserted(0, count);
    mReplacePagesWithNulls =
            mStorage.getLeadingNullCount() > 0 || mStorage.getTrailingNullCount() > 0;
}
这里调用了 notifyInserted 方法,我们进入看下:
arduino
void notifyInserted(int position, int count) {
    if (count != 0) {
        for (int i = mCallbacks.size() - 1; i >= 0; i--) {
            final Callback callback = mCallbacks.get(i).get();
            if (callback != null) {
                // 核心逻辑
                callback.onInserted(position, count);
            }
        }
    }
}
最终调用的是 onInserted 方法,我们进入这个方法看下:
less
public AsyncPagedListDiffer(@NonNull ListUpdateCallback listUpdateCallback, @NonNull AsyncDifferConfig<T> config) {
    class NamelessClass_1 extends PagedList.Callback {
        public void onInserted(int position, int count) {
            // 核心逻辑
            AsyncPagedListDiffer.this.mUpdateCallback.onInserted(position, count);
        }
        .... 省略部分代码
    }
    .... 省略部分代码
}
我们继续进入这个 onInserted 方法看下
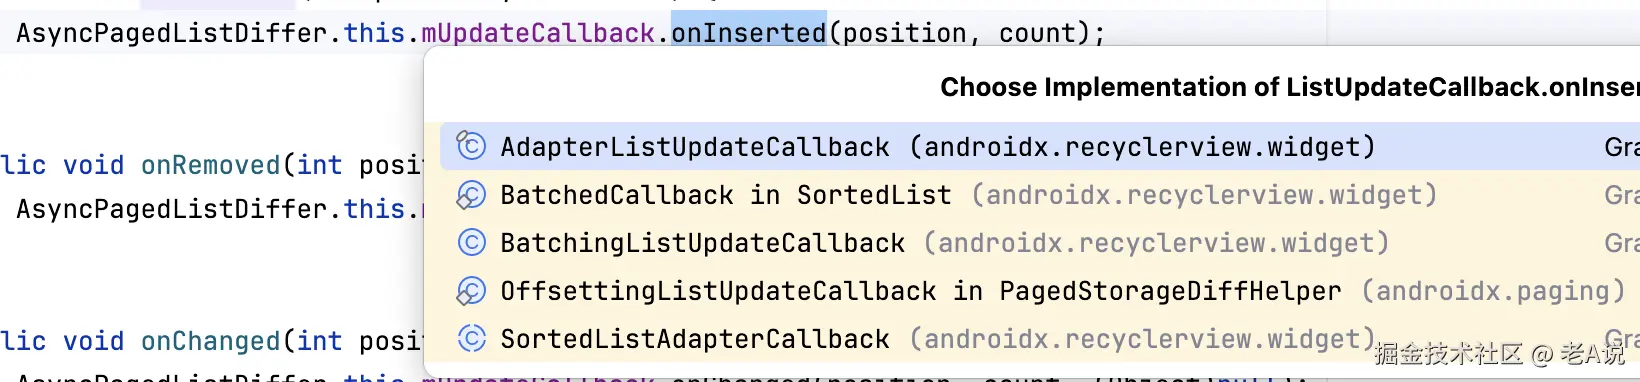
可以看到,这个 onInserted 方法有多个实现,最终指向的是 AdapterListUpdateCallback 中的 onInserted 方法;
arduino
public void onInserted(int position, int count) {
    mAdapter.notifyItemRangeInserted(position, count);
}
最终调用到了 RecyclerView 的 Adapter 的 notifyItemRangeInserted 插入数据的方法,来将初始化数据插入到对应的位置;
这是使用 Paging 来完成数据到 RecyclerView 的填充,当我们结合 Room 使用的时候,是通过
ini
studentsDatabase = StudentsDatabase.getInstance(this);
studentDao = studentsDatabase.getStudentDao();
allStudentsLivePaged = new LivePagedListBuilder<>(studentDao.getAllStudents(), 2)
        .build();
allStudentsLivePaged.observe(this, new Observer<PagedList<Student>>() {
    @Override
    public void onChanged(final PagedList<Student> students) {
        pagedAdapter.submitList(students);
    }
});
我们直接构建的 LivePagedListBuilder ,然后在 onChanged 中调用 submitList 来实现数据到 RecyclerView 的填充;
submitList 最终也是会调用到 onInserted 方法;
ini
mUpdateCallback.onInserted(0, pagedList.size());总结 :本质上就是用 DataSource 来对接开发者的不同需求,然后用不同的 PagedList 来封装不同的数据,不管封装的是哪一种数据,最终通过 AsyncPagedListDiffer (这个同步机制) 来和 RecyclerView 的 API 对接;
好了,Paging 就讲到这里吧~
欢迎三连
来都来了,点个关注,点个赞吧,你的支持是我最大的动力~