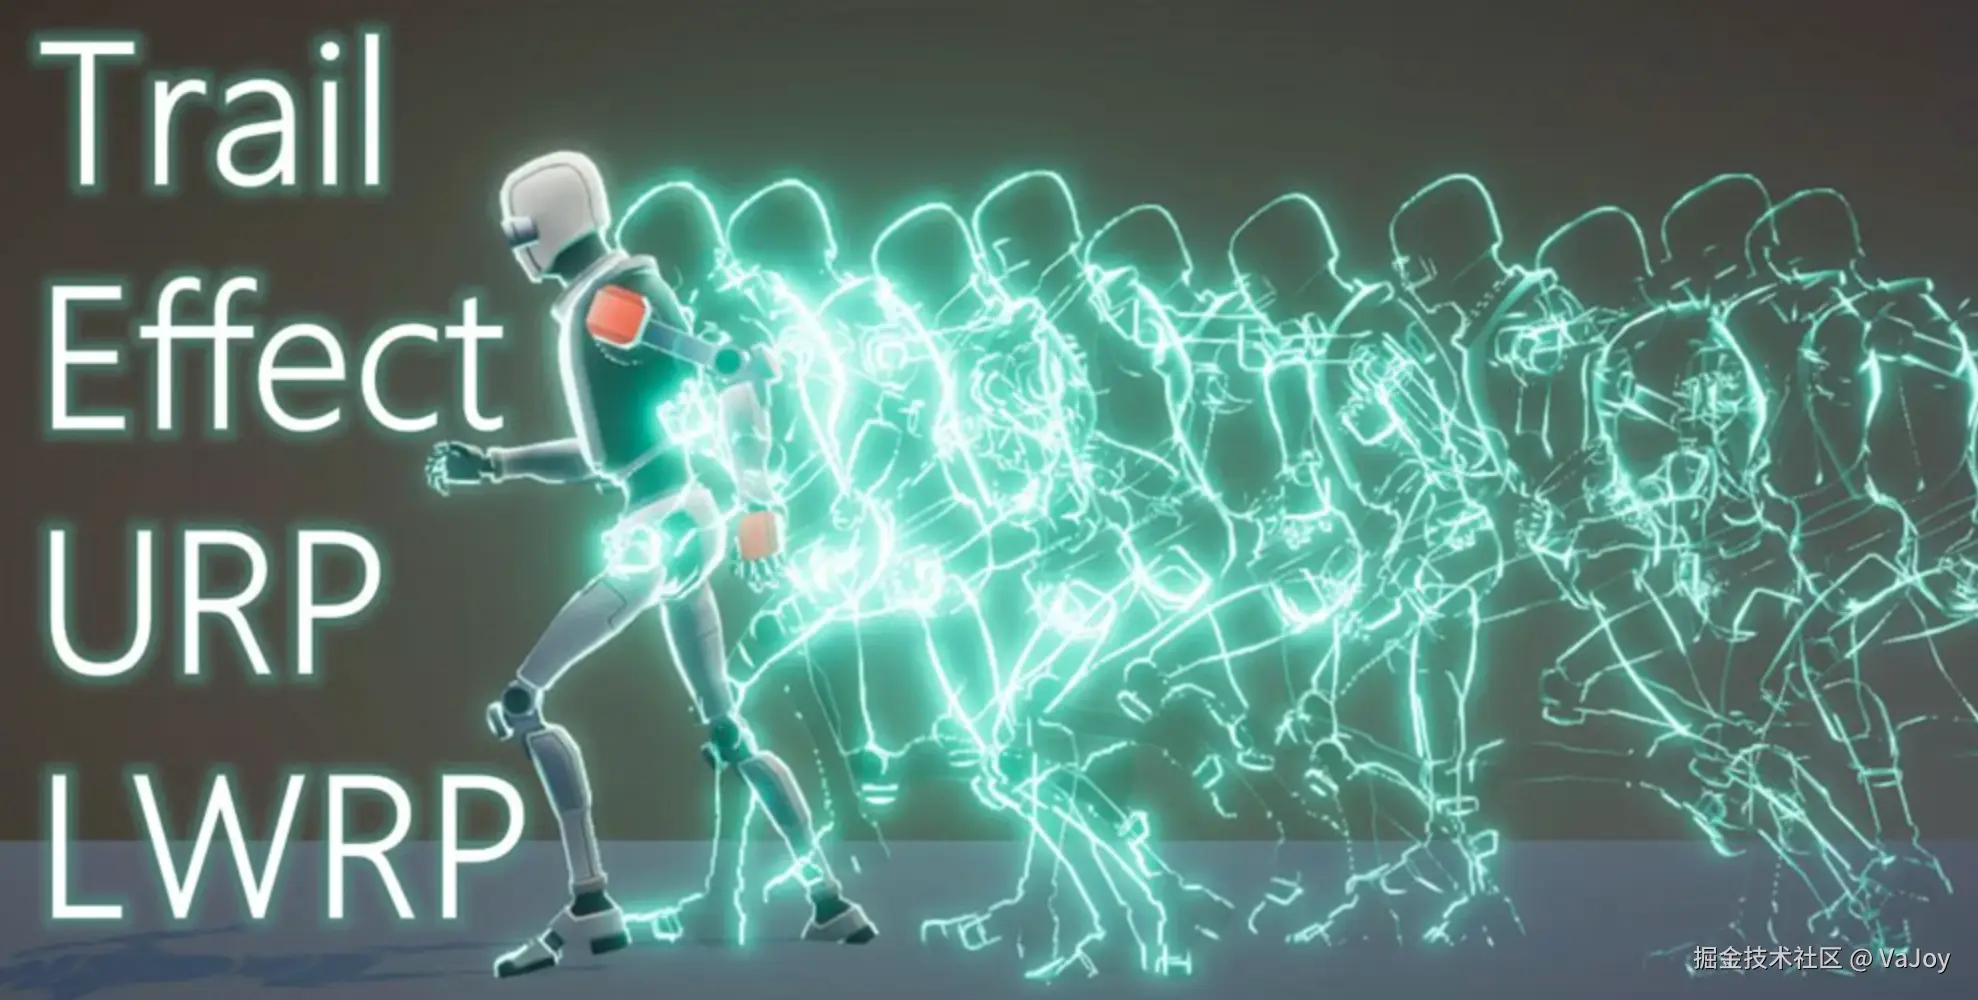
一、拖尾效果及原理
在游戏中,拖尾效果是一种常见的视觉表现手法。它表现为运动物体(如角色、子弹或特效)在移动路径上留下逐渐消散的痕迹,从而增强运动的速度感和动态视觉冲击力。
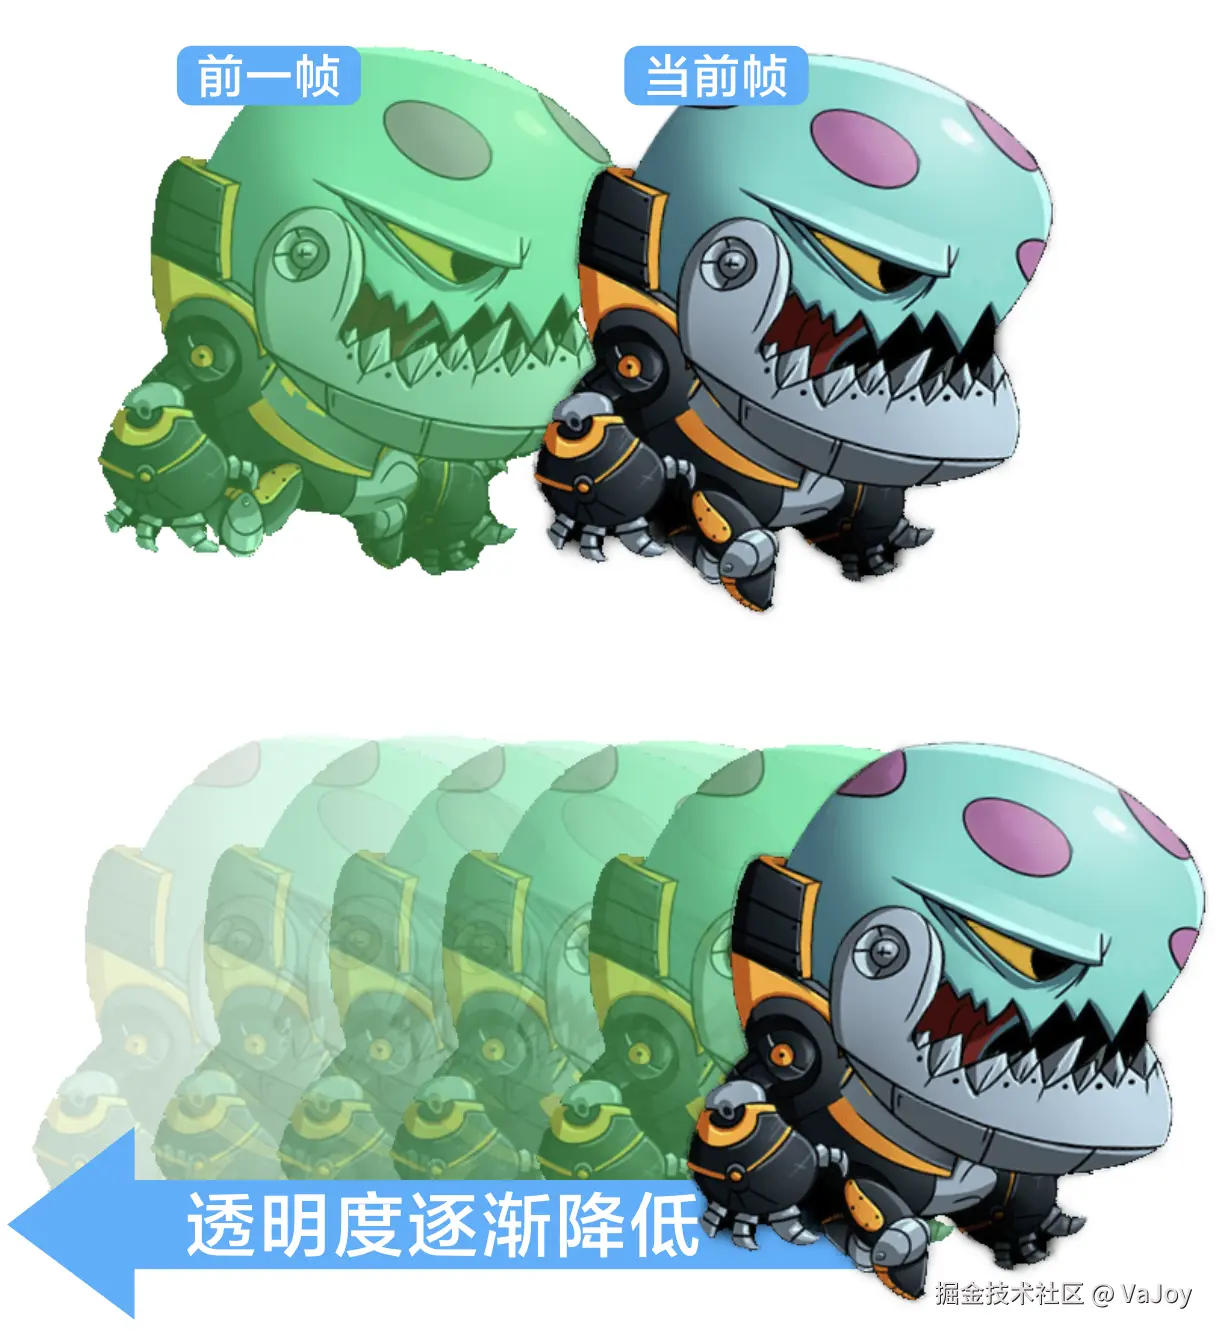
拖尾效果最简单的实现,就是保留运动物体每一帧的渲染像素,并随着时间的流逝降低每帧像素的透明度(直到完全透明):
本文会介绍如何使用着色器来实现拖尾效果。
二、尝试捕获各帧像素
我们可以创建一个摄像头(命名为 CameraRaw)并绑定 Render Texture 对象(命名为 rt-raw.rt 文件)来捕获运动物体的渲染纹理。
然而此时捕获的纹理,仅对应运动物体当前帧的像素。然而要实现拖尾效果,就必须获取到每一帧的纹理,并动态修改它们的透明度。
通过组件脚本来缓存每一帧像素,再作为参数传递给着色器去加工,是一种实现方案:
js
import { _decorator, Component, RenderTexture,  Sprite } from 'cc';
import { Texture2D } from 'cc';
const { ccclass, property } = _decorator;

@ccclass('EntryComp')
export class EntryComp extends Component {
    @property(RenderTexture)
    rawRT: RenderTexture = null;  // 对应新创建的 rt-raw.rt 文件

    private textureWidth = 1280;
    private textureHeight = 720;

    private curTexture: Texture2D = null;      // spine 动画当前帧的捕获纹理
    private lastTexture: Texture2D = null;     // spine 动画上一帧的捕获纹理

    nodeSprite: Sprite = null;

    start() {
        this.nodeSprite = this.node.getChildByName('NodeDemo').getComponent(Sprite);
    }

    update(_deltaTime: number) {
        this.updateTexture();  // 更新材质

        if (this.lastTexture) {
            // 把前一帧的像素纹理作为参数传入着色器中
            this.nodeSprite.material.setProperty('trailTexture', this.lastTexture);
        }
    }

    private createTexture(rt: RenderTexture) {
        const width = this.textureWidth;
        const height = this.textureHeight;

        // 从 RenderTexture 读取像素数据
        const texPixels = new Uint8Array(width * height * 4);  // 4个字节来分别存储 RGBA 信息
        rt.readPixels(0, 0, width, height, texPixels);

        const texture = new Texture2D();
        texture.reset({
            width: width,
            height: height,
        });

        texture.uploadData(texPixels, 0);  // 更新纹理像素,同步到 GPU
        return texture;
    }

    private updateTexture() {
        this.lastTexture = this.curTexture;      // 存储上一帧的捕获纹理

        // 创建 Texture2D 并设置图像数据
        this.curTexture = this.createTexture(this.rawRT);
    }
}
第 51 行的 updateTexture 方法会先缓存前一帧的像素纹理到 this.lastTexture 中,接着再更新当前帧的数据到 this.curTexture。
因此可以在第 29 行把前一帧的像素纹理传递到某个 Sprite 节点使用的着色器中去进一步加工处理。
如果需要"前一帧的前一帧纹理",可以多创建一个内部属性(例如 secLastTexture)来缓存:
js
    // 略...
    private lastTexture: Texture2D = null;
    private secLastTexture: Texture2D = null;  // spine 动画上上一帧的捕获纹理
    // 略...

    private updateTexture() {
        this.secLastTexture = this.lastTexture;  // 存储上上一帧的捕获纹理
        this.lastTexture = this.curTexture;

        this.curTexture = this.createTexture(this.rawRT);
    }
但这种拖尾方案存在几个弊端:
- 需要创建多个内部属性来缓存每帧的纹理;
- 调用
readPixels时需要 GPU 往 CPU 传输数据;调用uploadData时又从 CPU 往 GPU 传输数据。此类大数据的传输非常低效。 - 频繁执行
new Uint8Array非常占用内存,且存在内存泄漏风险。
从性能层面考量,下文将介绍完全在 GPU 中处理纹理的方案。
三、Render Texture 双缓冲互绘
如果存在两个 Render Texture 渲染纹理 A 和 B,它们按顺序依次互绘彼此的纹理,且每次绘制都会新增移动物体当前帧的纹理,就可以绕过 CPU 来达成高效的拖尾效果。
💡 绑定了
Target Texture的摄像头会将渲染结果离屏输出到一个 GPU 内存(显存)中的纹理对象,并绑定到 Framebuffer 中,整个过程完全在 GPU 中进行,非常高效。💡 留意虽然我们会创建
.rt文件与摄像头绑定,但该文件仅用于存储 Render Texture 的元数据(尺寸、格式、设置等),不包含任何像素数据,因此摄像头在离屏输出纹理到 GPU 时,不涉及任何硬盘读写操作。
就着上述的思路,我们在原有 CameraRaw 摄像头及 rt-raw.rt 的基础上,额外创建两个新的摄像头 CameraA、CameraB,且 Target Texture 属性分别绑定 rt-a.rt 和 rt-b.rt 两个新建的 Render Texture 文件。
接着创建 NodeA 和 NodeB 两个 Sprite 组件节点,分别绑定 material-a.mtl 和 material-b.mtl 材质文件。
留意
NodeA和NodeB需要设置好独立的Layer属性,并同步修改对应摄像头的Visibility:
且
NodeA的Layer属性需要被场景的主摄像头的Visibility涵盖(NodeB的则不需要),它们的互绘过程才会被渲染到屏幕上。
此时只要让 NodeA 和 NodeB 依次互绘彼此(衰减了透明度后)的帧缓冲数据,且每次绘制都叠加上移动物体当前帧的纹理(rt-raw.rt)即可:

我们创建着色器文件 trail.effect,来完成 A、B 纹理互绘,以及叠加上移动物体纹理的功能:
js
// 对应解析文章

CCEffect %{
  techniques:
  - name: trail
    passes:
    - vert: vs:vert
      frag: fs:frag
      # 略...
      properties:
        rawRT: { value: white }
        trailTexture: { value: white }
}%

CCProgram vs %{
  #include "../../resources/chunk/render-texture-vert.chunk"
}%

CCProgram fs %{
  precision highp float;
  #include <sprite-texture>

  in vec2 uv;

  uniform sampler2D rawRT;         // 当前帧 spine 动画的 RenderTexture
  uniform sampler2D trailTexture;  // 上一帧合成的拖尾纹理

  vec4 frag () {
    vec4 rawRTColor = texture(rawRT, uv);
    vec4 trailColor = texture(trailTexture, uv);

    // 透明度衰减(每次衰减 2%)
    trailColor.a *= 0.98;

    vec4 color = trailColor;

    if (rawRTColor.a > 0.0) {
      // 叠加上移动物体当前帧的纹理
      color = mix(trailColor, rawRTColor, rawRTColor.a);
    }

    return color;
  }
}%
将着色器绑定到 material-a.mtl 和 material-b.mtl 材质文件上,并绑定对应的两个纹理参数:
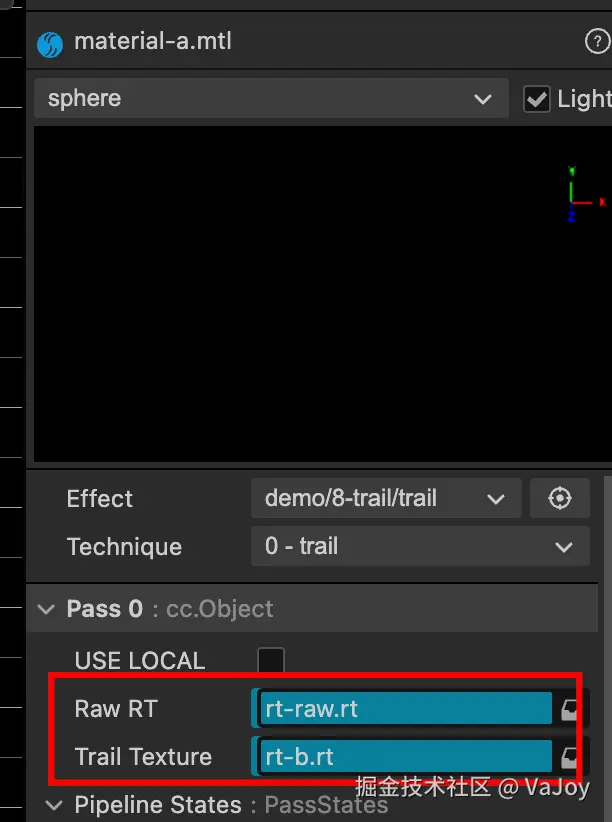
留意材质 A 的
Trail Texture需要绑定NodeB节点的纹理,材质 B 需要绑定NodeA节点的纹理,才能实现互绘纹理的功能。
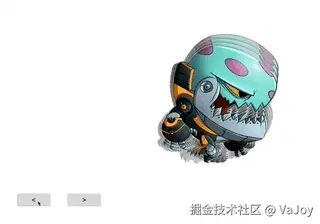
此时执行效果如下:
四、清理残影
虽然上文实现了 GPU 层面的拖尾效果,但会发现拖尾像素会在降低到某个较低的透明度时,就无法再被淡化,导致残影一直遗留在画面上(等多久都不会消失):
我们先不深究原因,试着在片元着色器中剔除 Alpha 通道分量低于 0.1 的拖尾像素:
js
  vec4 frag () {
    vec4 rawRTColor = texture(rawRT, uv);
    vec4 trailColor = texture(trailTexture, uv);

    trailColor.a *= 0.98;

    vec4 color = trailColor;

    if (rawRTColor.a > 0.0) {
      color = mix(trailColor, rawRTColor, rawRTColor.a);
    } else if (trailColor.a <= 0.1) {  // 剔除透明度低于 10% 的拖尾像素
        discard;
    }

    return color;
  }
此时问题解决了,但是 0.1 的 A 通道分量值还是偏高,导致拖影消失的有些突兀:

但是当我们把 0.1 修改为 0.01 来解决拖影消失突兀的新问题时,会发现之前残影不消失的旧问题又出现了。
其实上述两个问题的原因,本质都是 GPU 浮点精度限制导致低 Alpha 值计算失真 ------------ 大多数 GPU 纹理使用 8 位存储,其最小可表示的非零值约为 1/255 ≈ 0.0039。每次拖影像素的透明度的衰减处理(trailColor.a *= 0.98),都会让精度的损失被放大(最终导致理论上应该小于 0.01 的值实际上却在 [0.02, 0.1] 范围内)。
对此有如下两种可选方案。
4.1 加速透明度衰减
慢衰减会让 Alpha 值在临界区域停留更长时间,累积更多的精度误差,因此加速透明度衰减可以解决此问题:
js
  vec4 frag () {
    vec4 rawRTColor = texture(rawRT, uv);
    vec4 trailColor = texture(trailTexture, uv);

    trailColor.a *= 0.8;  // 加大衰减值,每次大幅衰减 20%

    vec4 color = trailColor;

    if (rawRTColor.a > 0.0) {
      color = mix(trailColor, rawRTColor, rawRTColor.a);
    } else if (trailColor.a <= 0.01) {
        discard;
    }

    return color;
  }
或者
js
  vec4 frag () {
    vec4 rawRTColor = texture(rawRT, uv);
    vec4 trailColor = texture(trailTexture, uv);

    trailColor.a *= 0.9;  // 加大衰减值,每次衰减 10%

    vec4 color = trailColor;

    if (rawRTColor.a > 0.0) {
      color = mix(trailColor, rawRTColor, rawRTColor.a);
    } else if (trailColor.a <= 0.02) {   // 同时加快移除残影像素的过程
        discard;
    }

    return color;
  }
执行效果:

4.2 分段衰减
让 trailColor.a 在 (0.1, 1.0]、(0.02, 0.1]、[0.0, 0.02] 这三段区间做不同的衰减处理:
js
  vec4 frag () {
    vec4 rawRTColor = texture(rawRT, uv);
    vec4 trailColor = texture(trailTexture, uv);

    // 分段衰减:高 alpha 时慢衰减,低 alpha 时快衰减
    if (trailColor.a > 0.1) {
      trailColor.a *= 0.98;  // 慢衰减保持拖尾效果
    } else if (trailColor.a > 0.02) {
      trailColor.a *= 0.91;  // 加速衰减
    } else {
      trailColor.a = 0.0;  // 直接清零
    }

    vec4 color = trailColor;

    if (rawRTColor.a > 0.0) {
      color = mix(trailColor, rawRTColor, rawRTColor.a);
    } else if (trailColor.a <= 0.0) {
        discard;
    }

    return color;
  }
这种处理可以让拖影显得更长和丝滑,执行效果: