目录
操作前准备
准备一台主机配置zabbix server(IP为192.168.58.170),四台测试客户端(IP分别为192.168.58.171、192.168.58.172、192.168.58.173、192.168.58.174)
一、自动发现及自动注册
五台主机关闭防火墙SELinux
[root@bogon ~]# systemctl disable --now firewalld.service
Removed "/etc/systemd/system/multi-user.target.wants/firewalld.service".
Removed "/etc/systemd/system/dbus-org.fedoraproject.FirewallD1.service".
[root@bogon ~]# setenforce 0
192.168.58.172配置
[root@bogon ~]# rpm -Uvh https://repo.zabbix.com/zabbix/7.0/rocky/9/x86_64/zabbix-release-7.0-5.el9.noarch.rpm
[root@bogon ~]# yum install -y zabbix-agent
[root@bogon ~]# vim /etc/zabbix/zabbix_agentd.conf
Server=127.0.0.1改为:
Server=192.168.58.170
[root@bogon ~]# systemctl start zabbix-agent.service 192.168.58.173配置
[root@bogon ~]# rpm -Uvh https://repo.zabbix.com/zabbix/7.0/rocky/9/x86_64/zabbix-release-7.0-5.el9.noarch.rpm
[root@bogon ~]# yum install -y zabbix-agent
[root@bogon ~]# vim /etc/zabbix/zabbix_agentd.conf
Server=127.0.0.1改为:
Server=192.168.58.170
Hostname=Zabbix server改为:
Hostname=host2
[root@bogon ~]# systemctl start zabbix-agent.service 1、自动发现
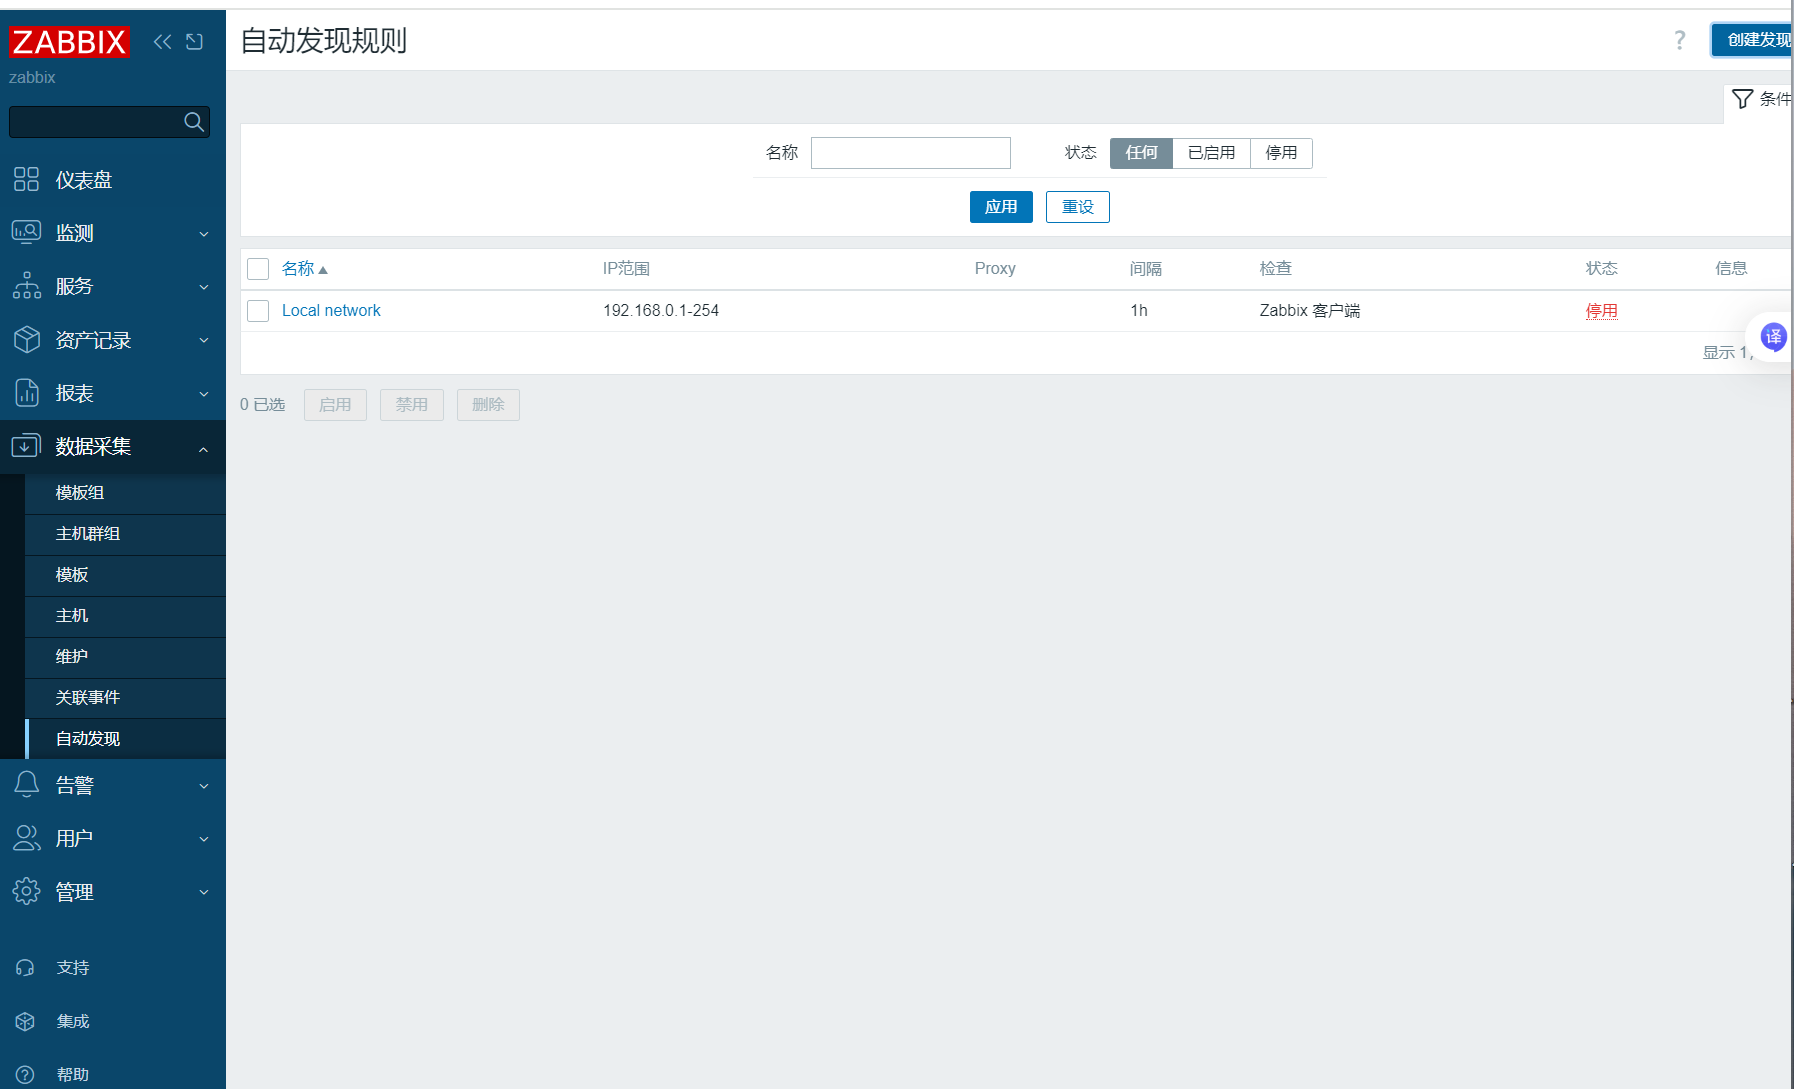
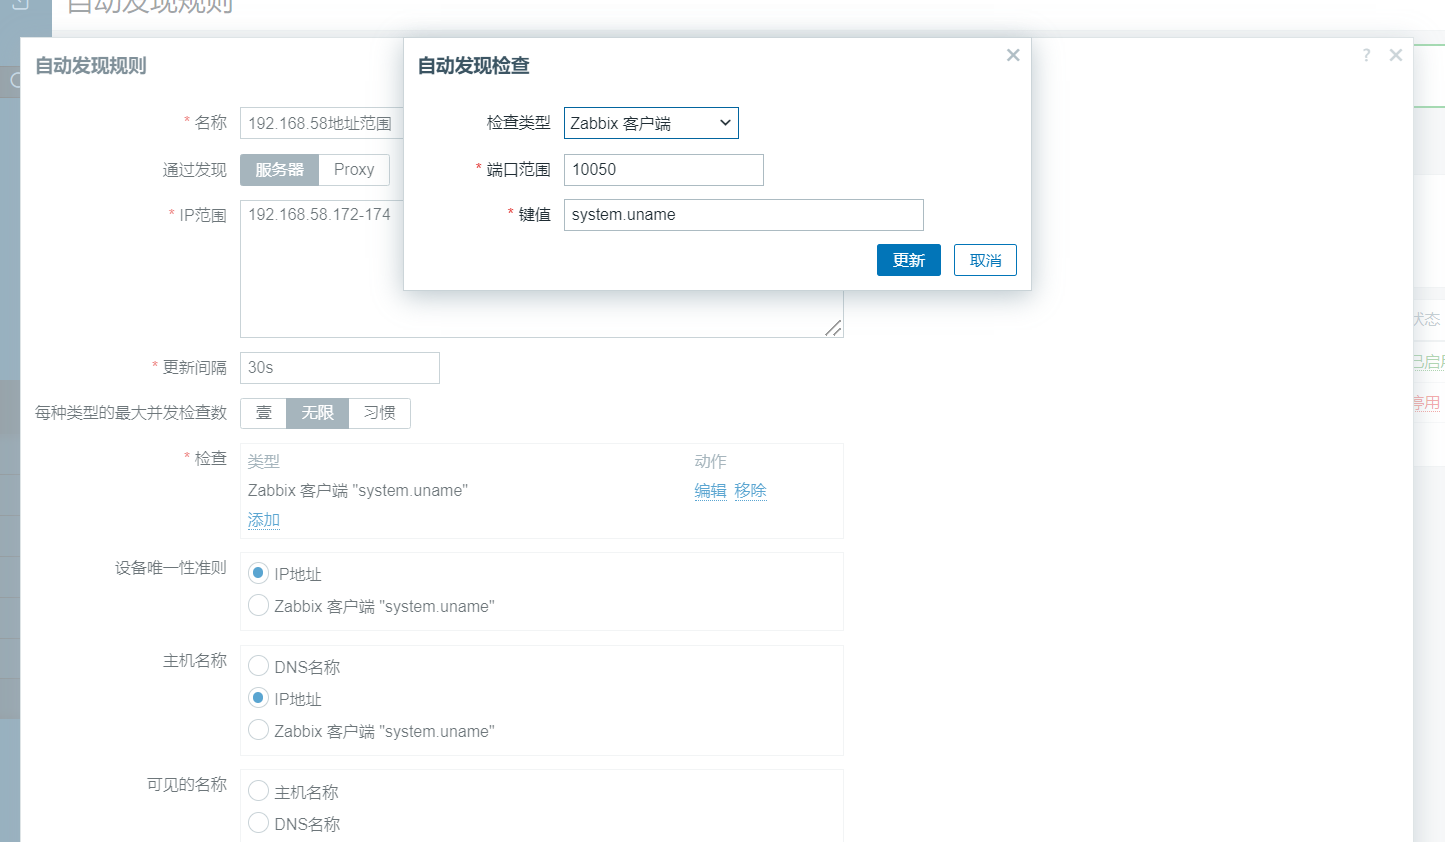
1.数据采集------自动发现------创建自动发现规则

2.告警------动作------发现动作------创建动作------动作------操作
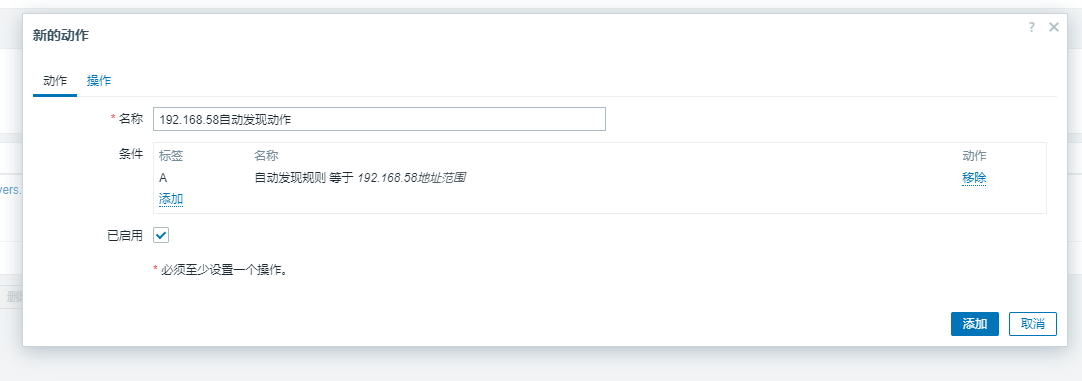

就可以看到符合网段的用户自动加入设定好的主机群组和运用的模板
2、自动注册规则
192.168.58.174配置
[root@bogon ~]# rpm -Uvh https://repo.zabbix.com/zabbix/7.0/rocky/9/x86_64/zabbix-release-7.0-5.el9.noarch.rpm
[root@bogon ~]# yum install -y zabbix-agent
[root@bogon ~]# vim /etc/zabbix/zabbix_agentd.conf
Server=127.0.0.1改为:
Server=192.168.58.170
Hostname=Zabbix server改为:
Hostname=host2
[root@bogon ~]# systemctl start zabbix-agent.service 告警------动作------发现动作------自动注册动作------创建动作------动作------操作
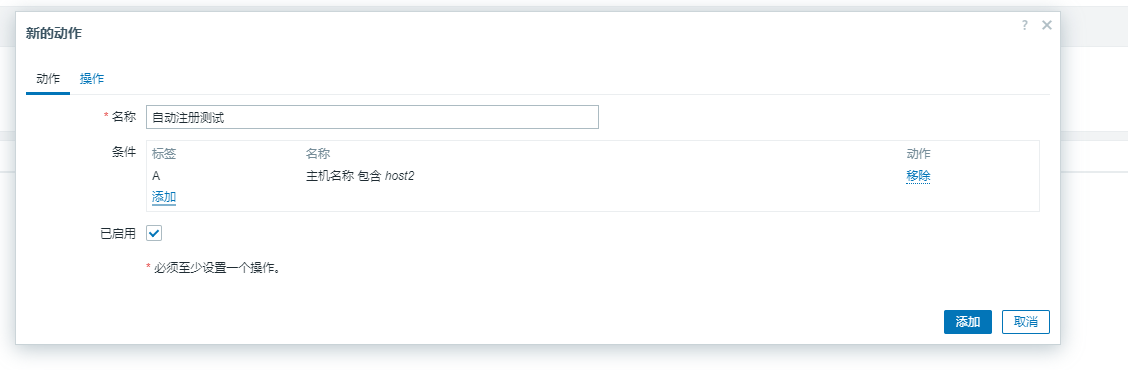
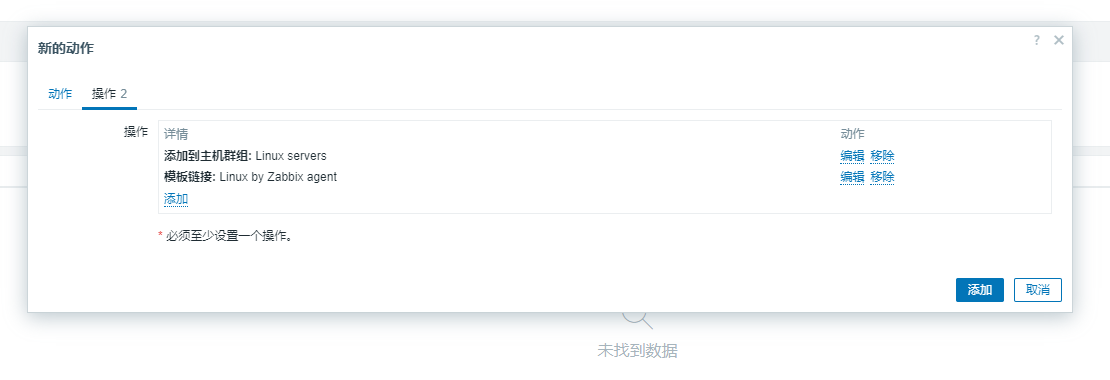
就可以看到符合该主机名条件的自动注册设定好的主机群组和运用的模板
二、监控告警并发送电子邮件
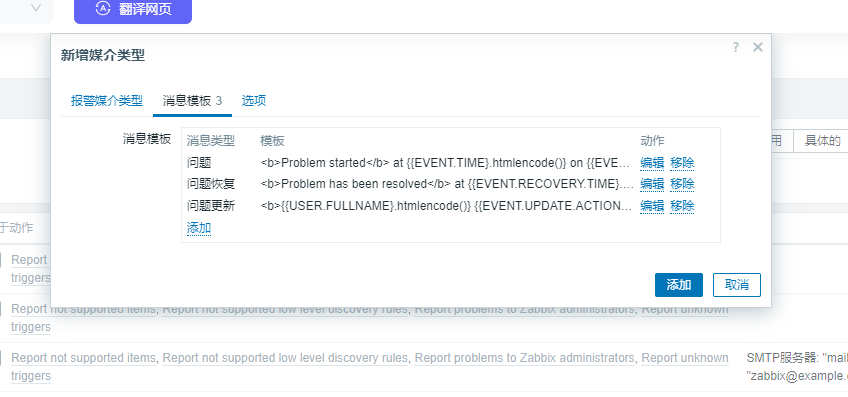
1、设定发邮件的地址
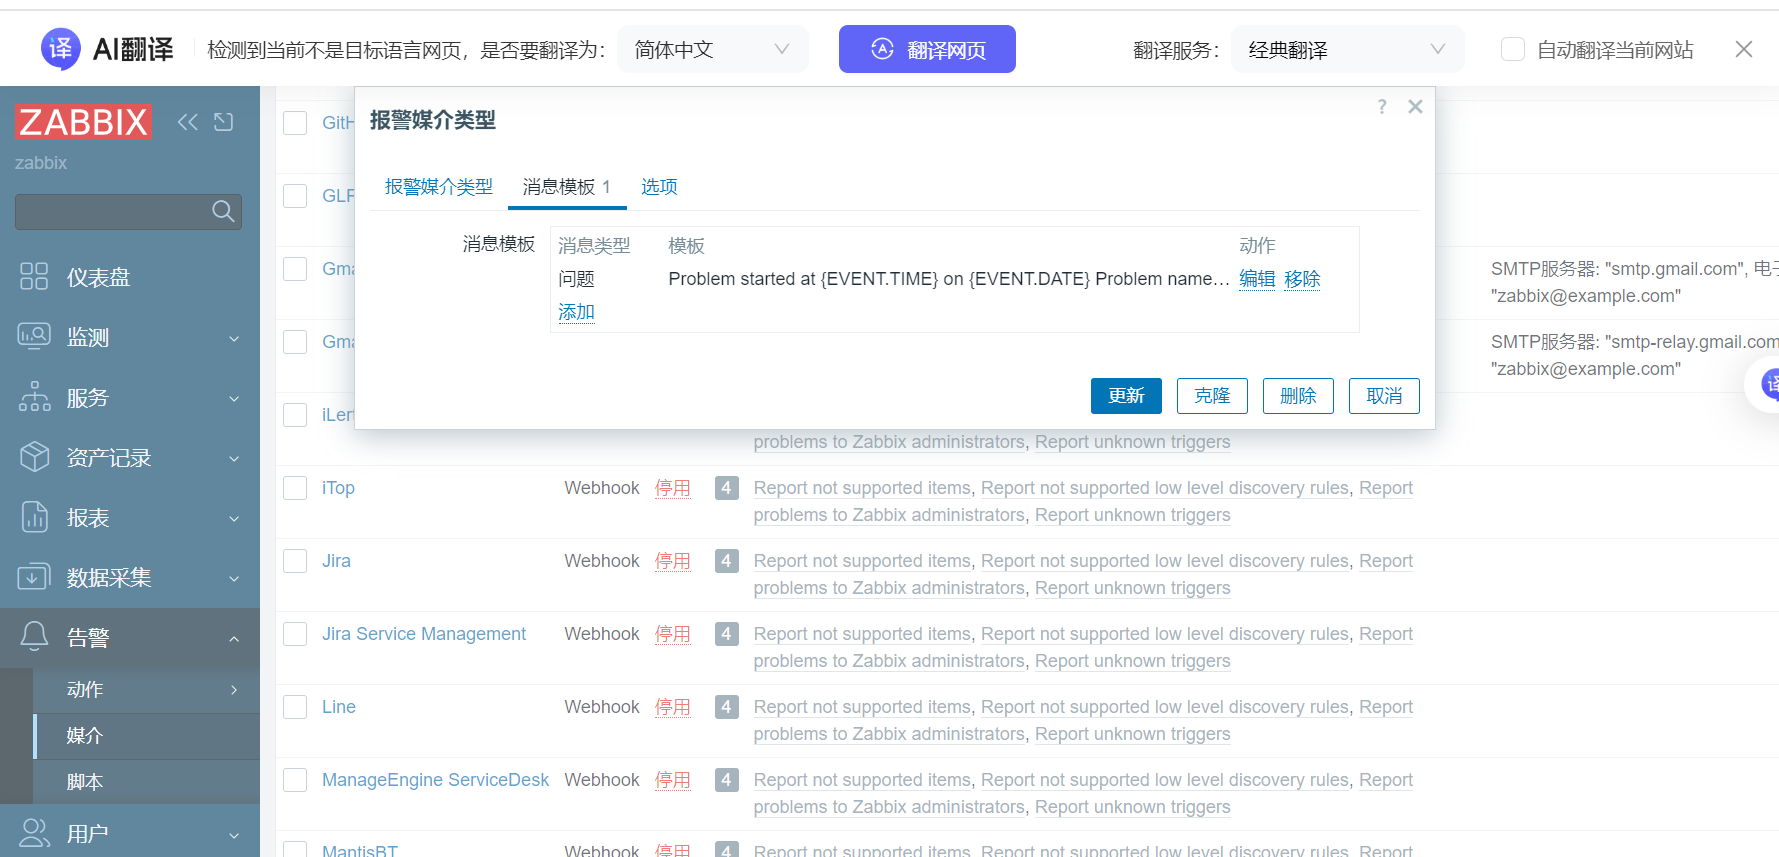
告警------媒介------创建媒介类型------报警媒介类型------消息模板
密码为网易邮件中开启IMAP/SMTP服务的授权密码

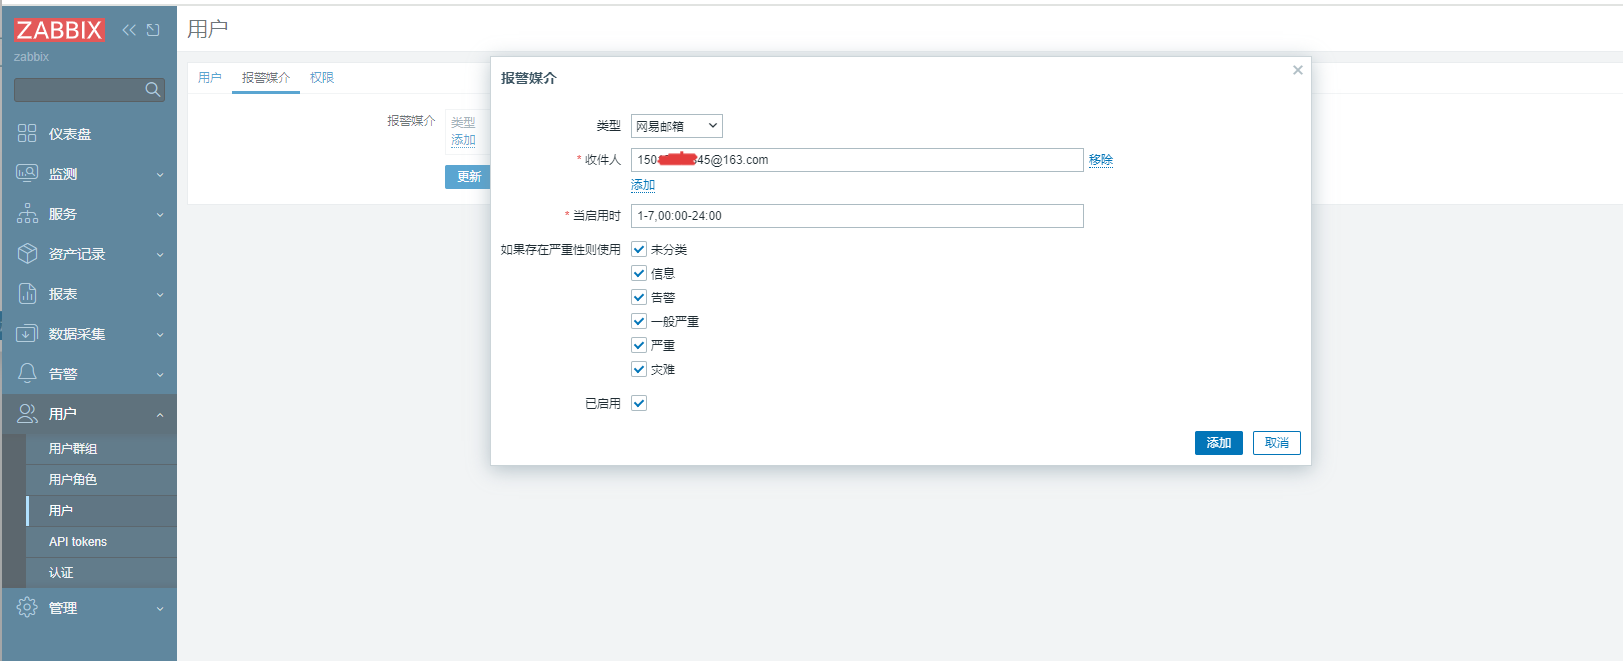
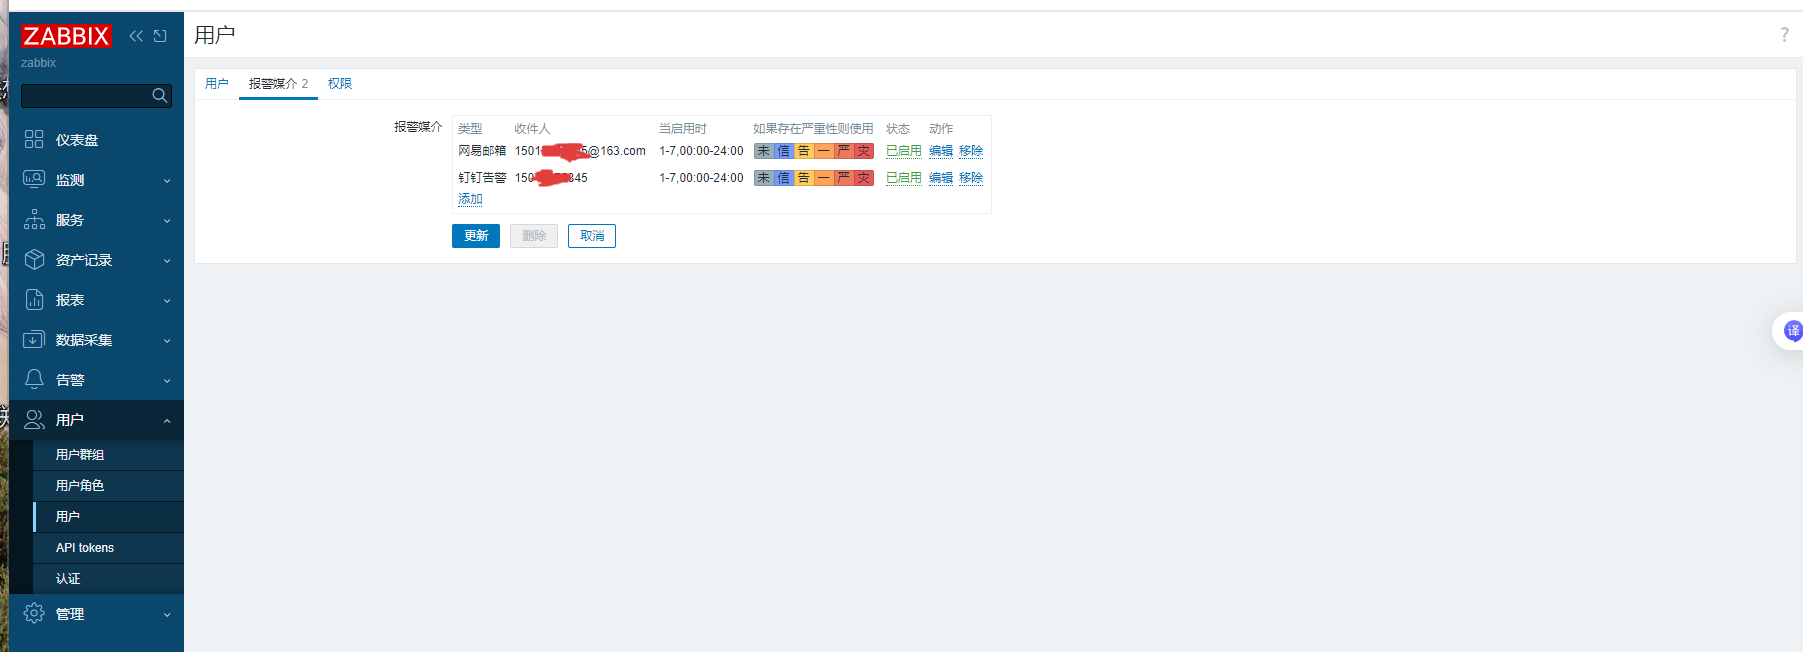
2、设定发邮件的用户
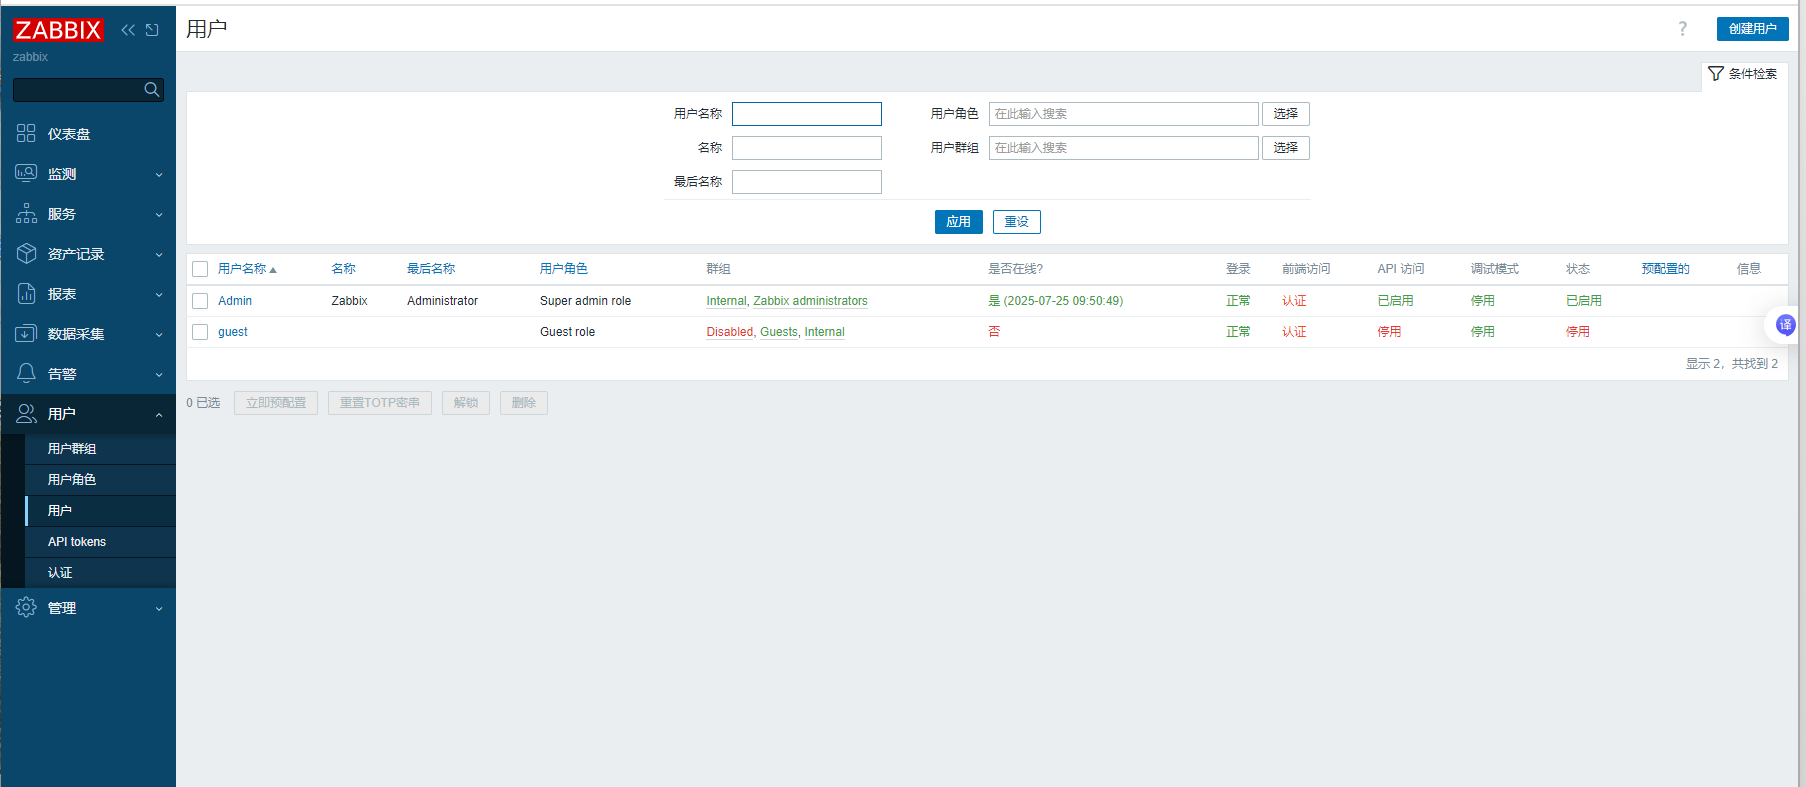
用户------用户------admin------报警媒介
3、设定监控及触发的条件
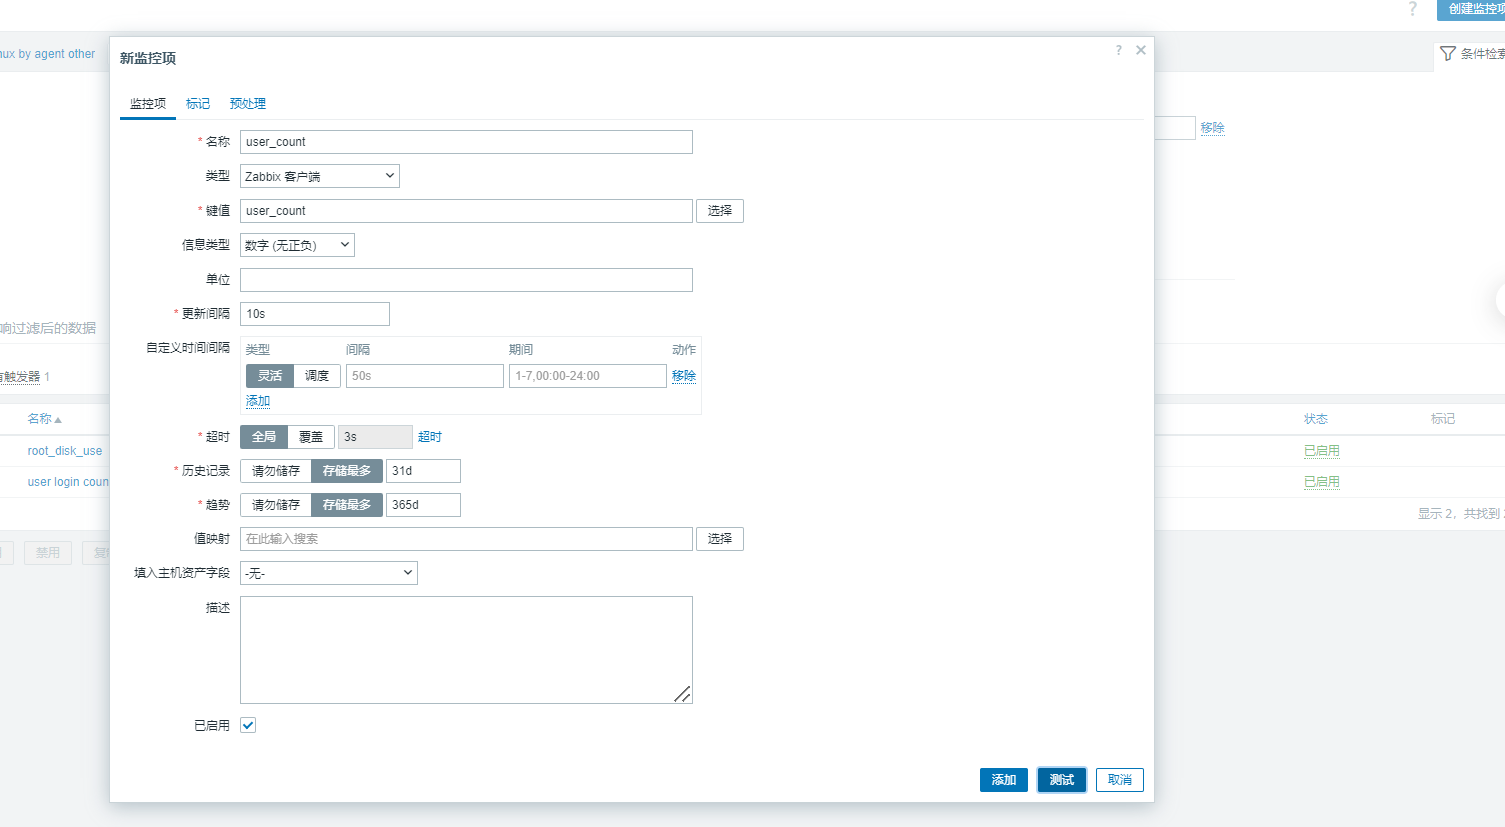
在监控主机192.168.58.172上设好监控文件
[root@bogon ~]# cd /etc/zabbix/zabbix_agentd.d/
[root@bogon zabbix_agentd.d]# ls
[root@bogon zabbix_agentd.d]# vim test.conf
UserParameter=user_count,w | awk 'NR>=3{print|"wc -l"}'
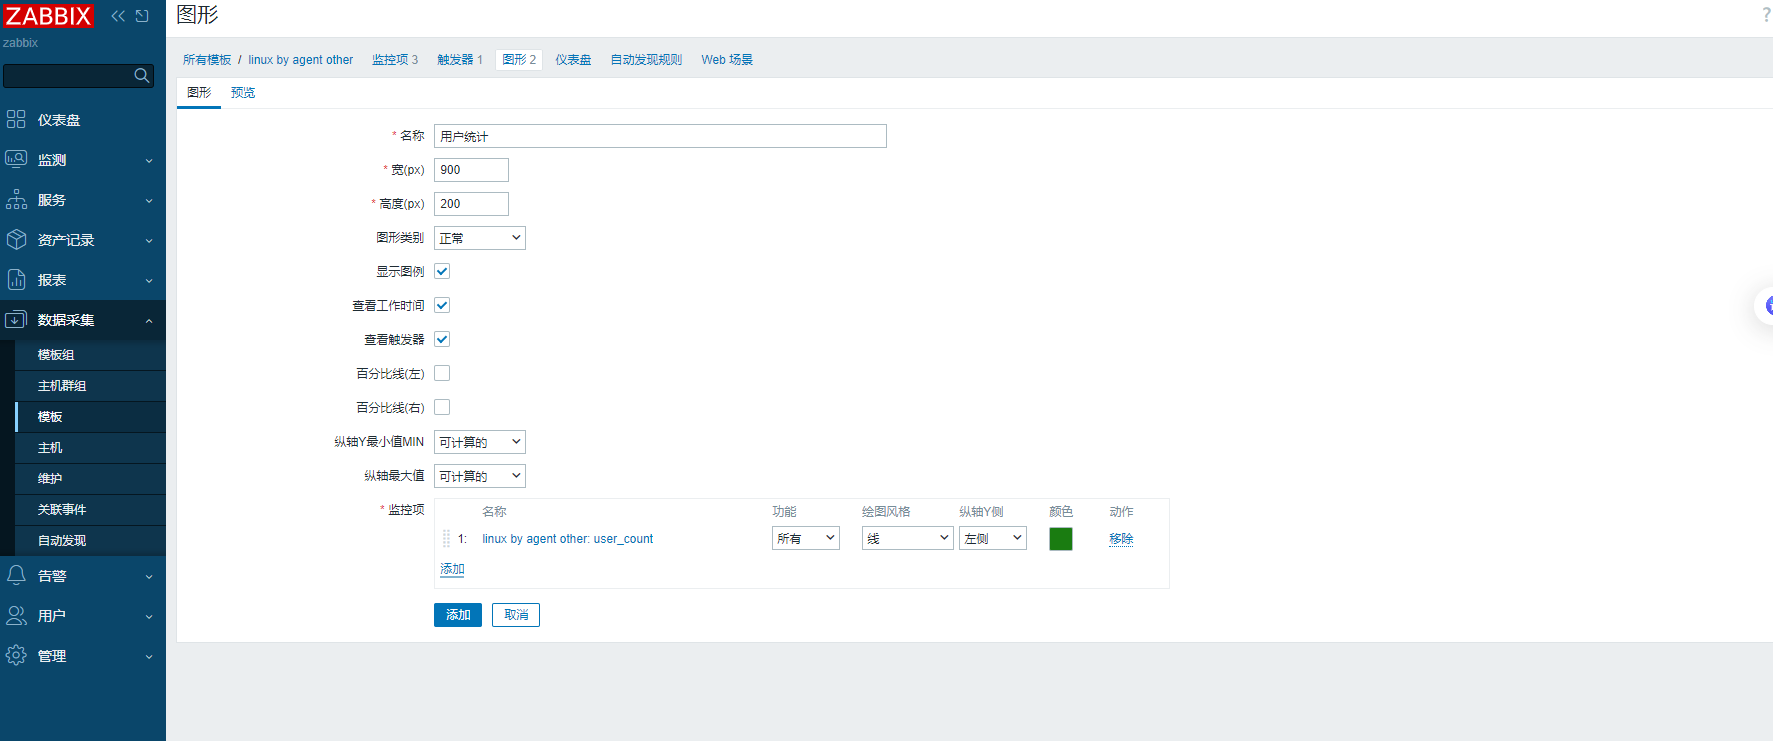
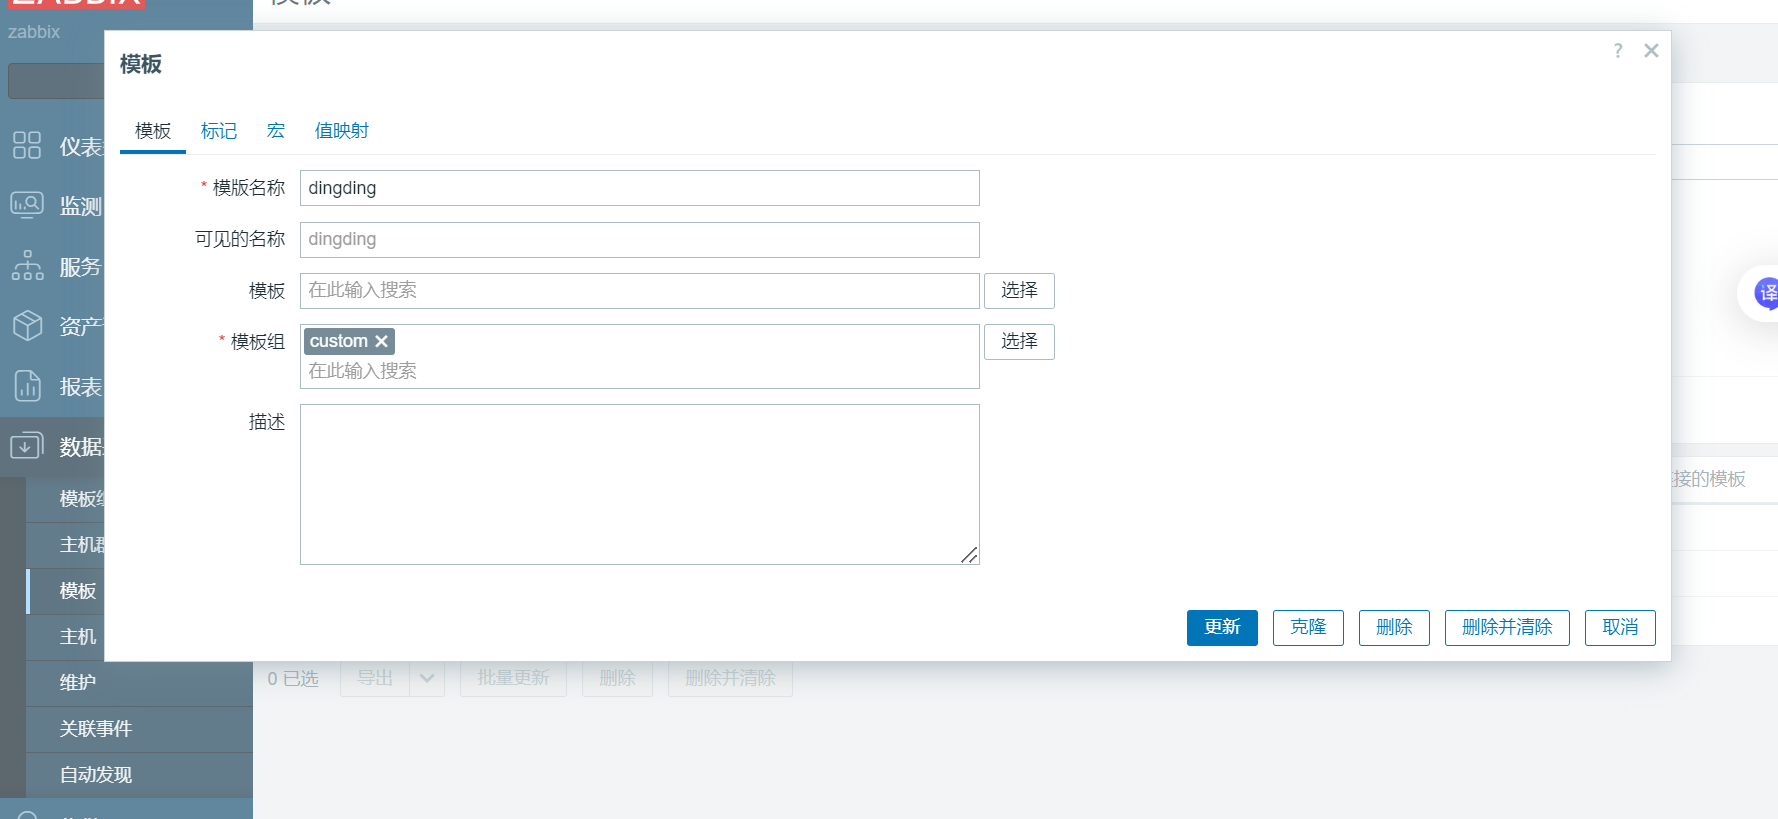
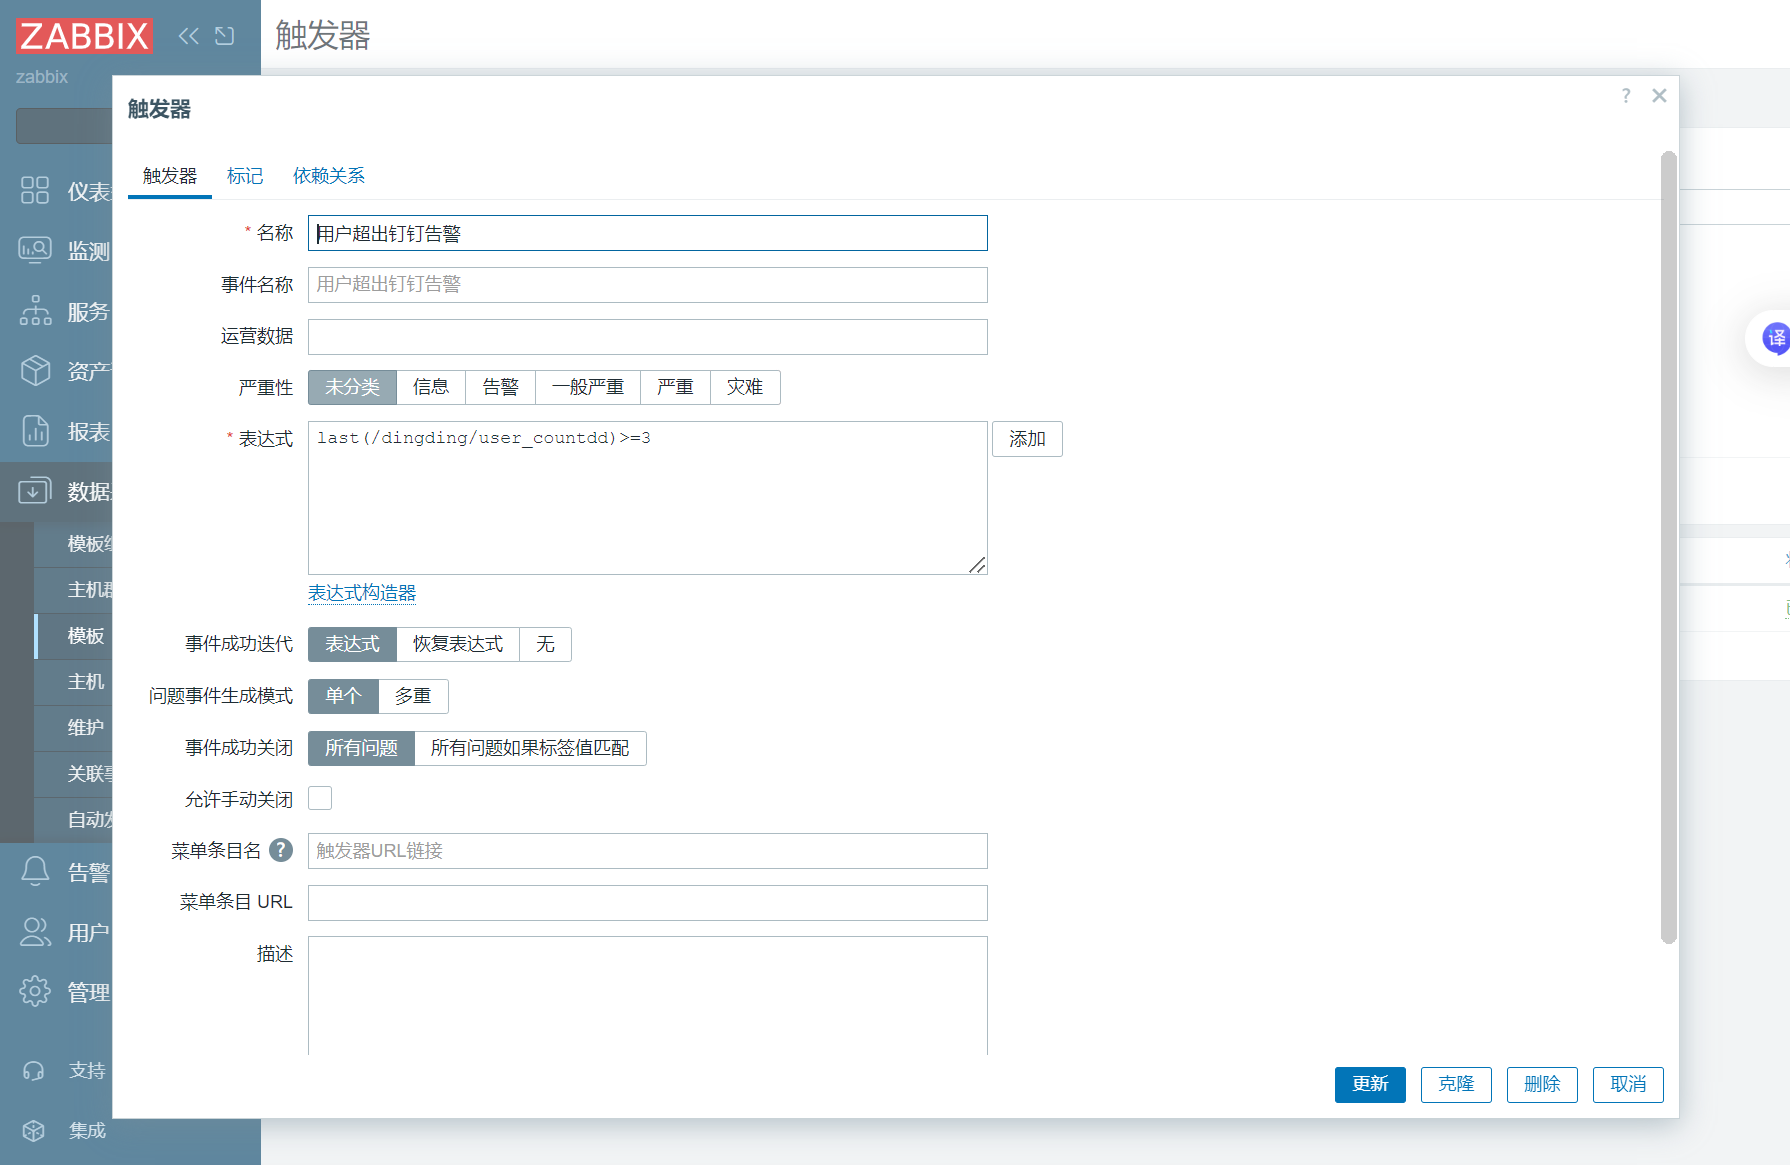
[root@bogon zabbix_agentd.d]# systemctl restart zabbix-agent.service 数据采集------模板------监控项------创建监控项------创建图形------创建触发器
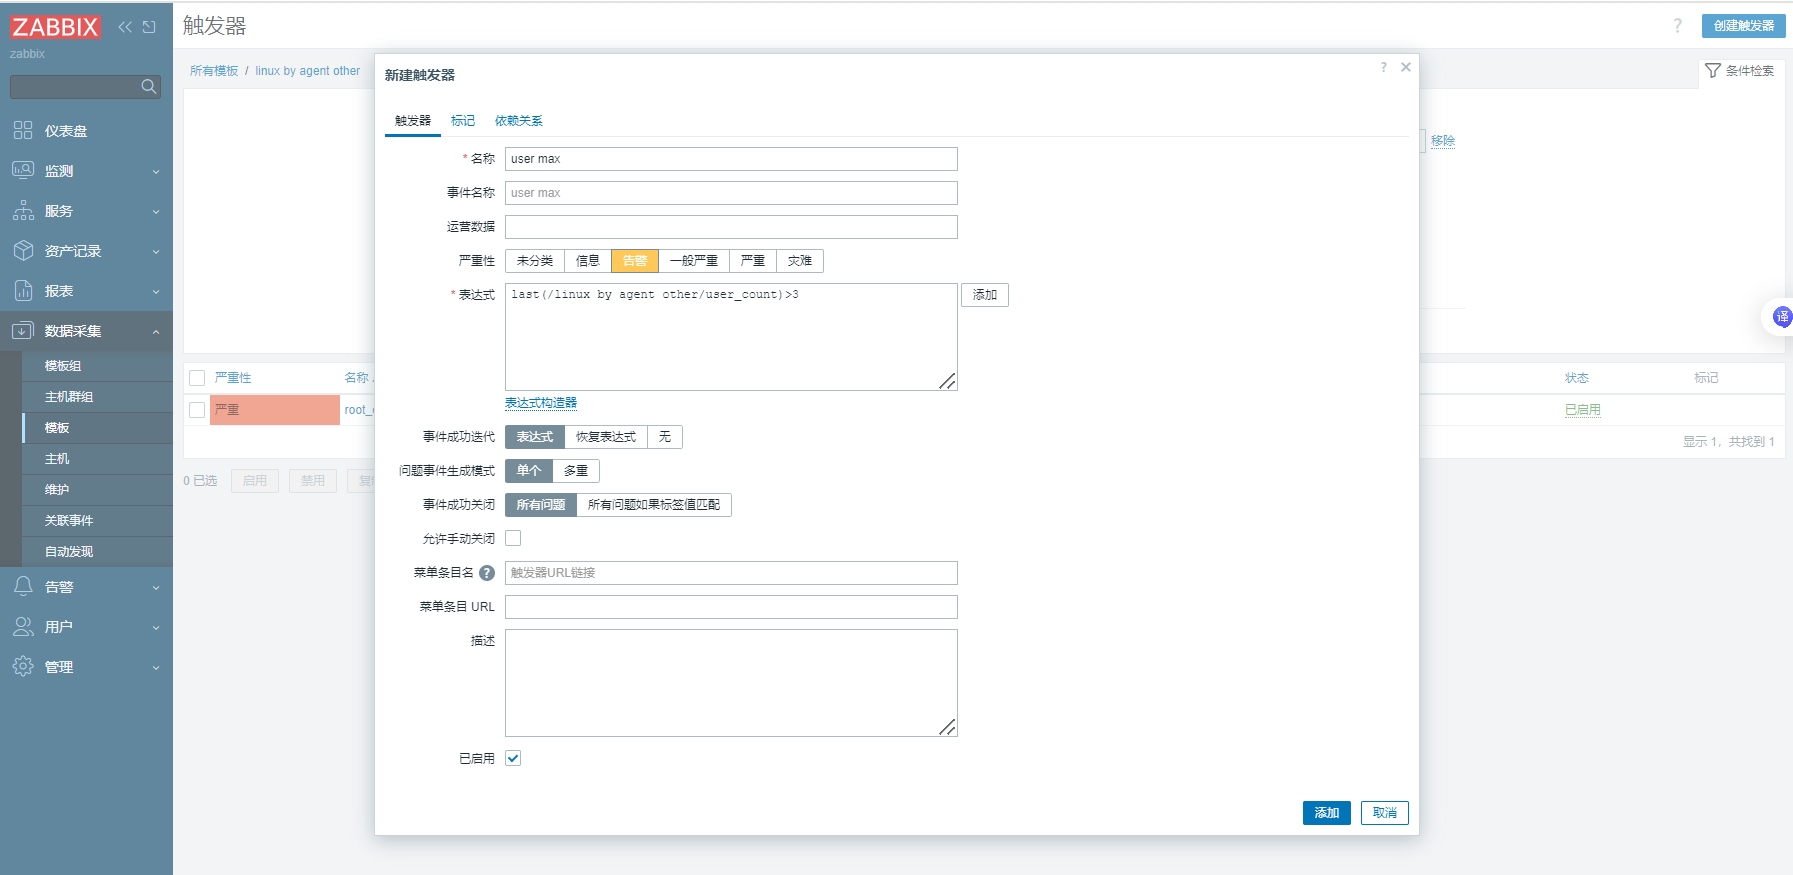
4、开始告警并设置触发发邮件
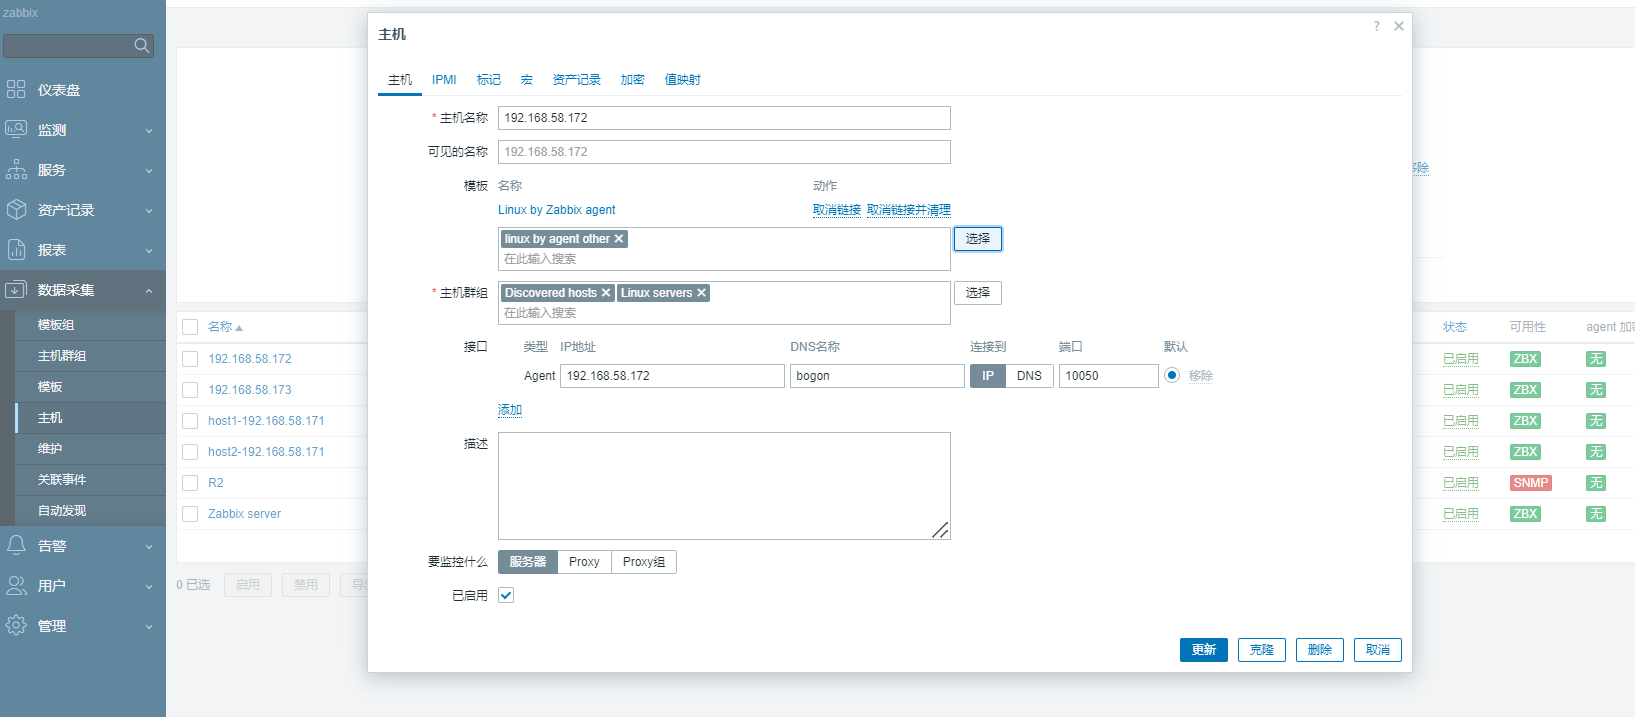
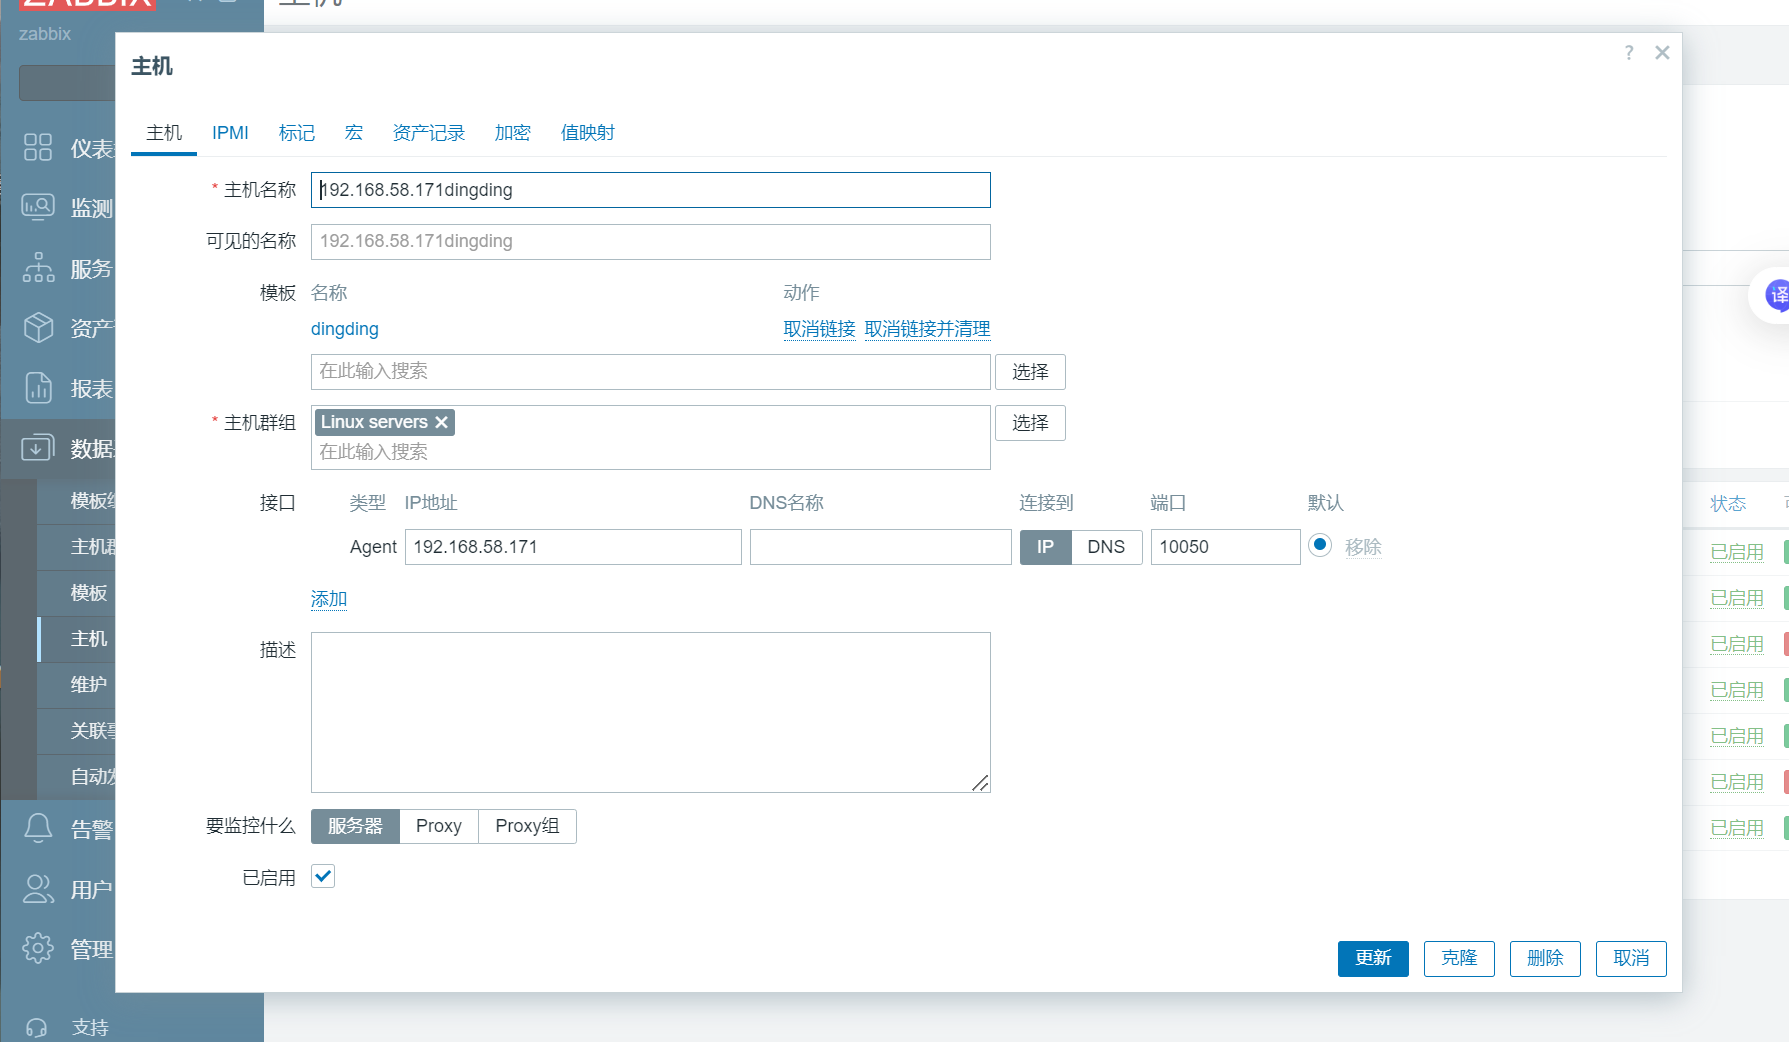
主机------监控的主机------加入之前设定好的模板(里面提前设好监控内容及触发器,也可以自己从新设定监控和触发器)
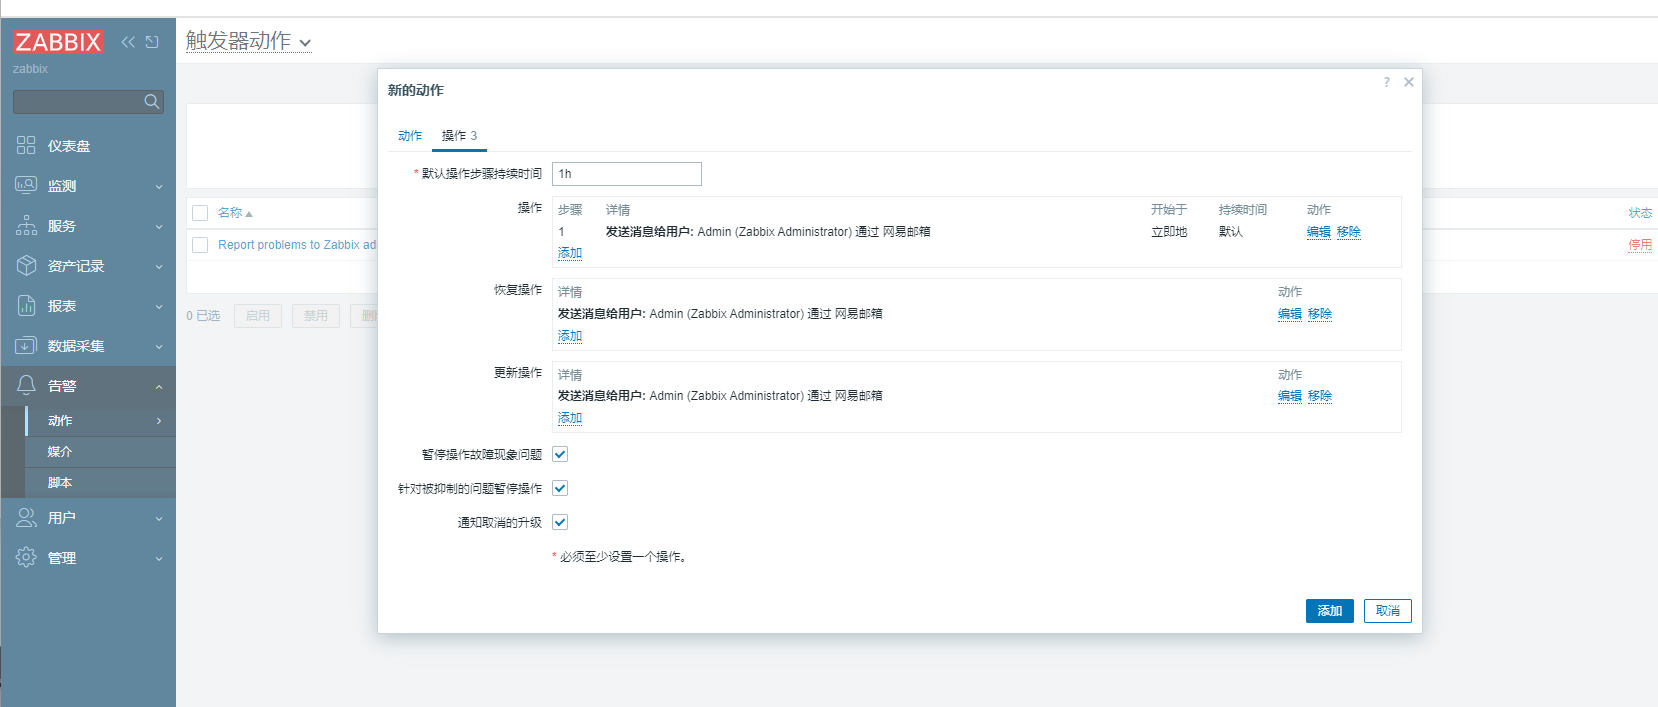
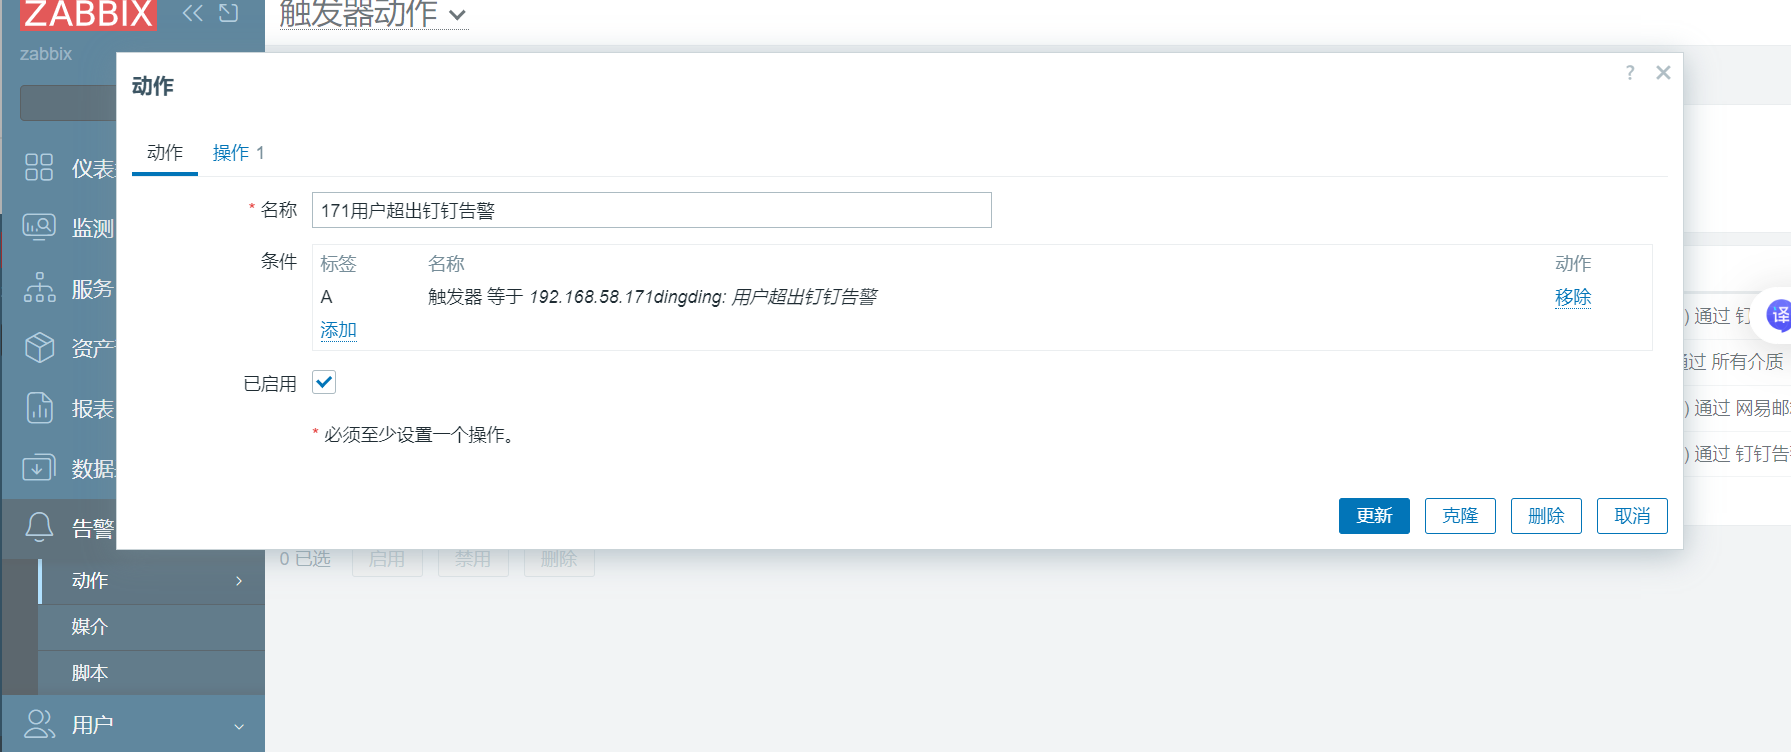
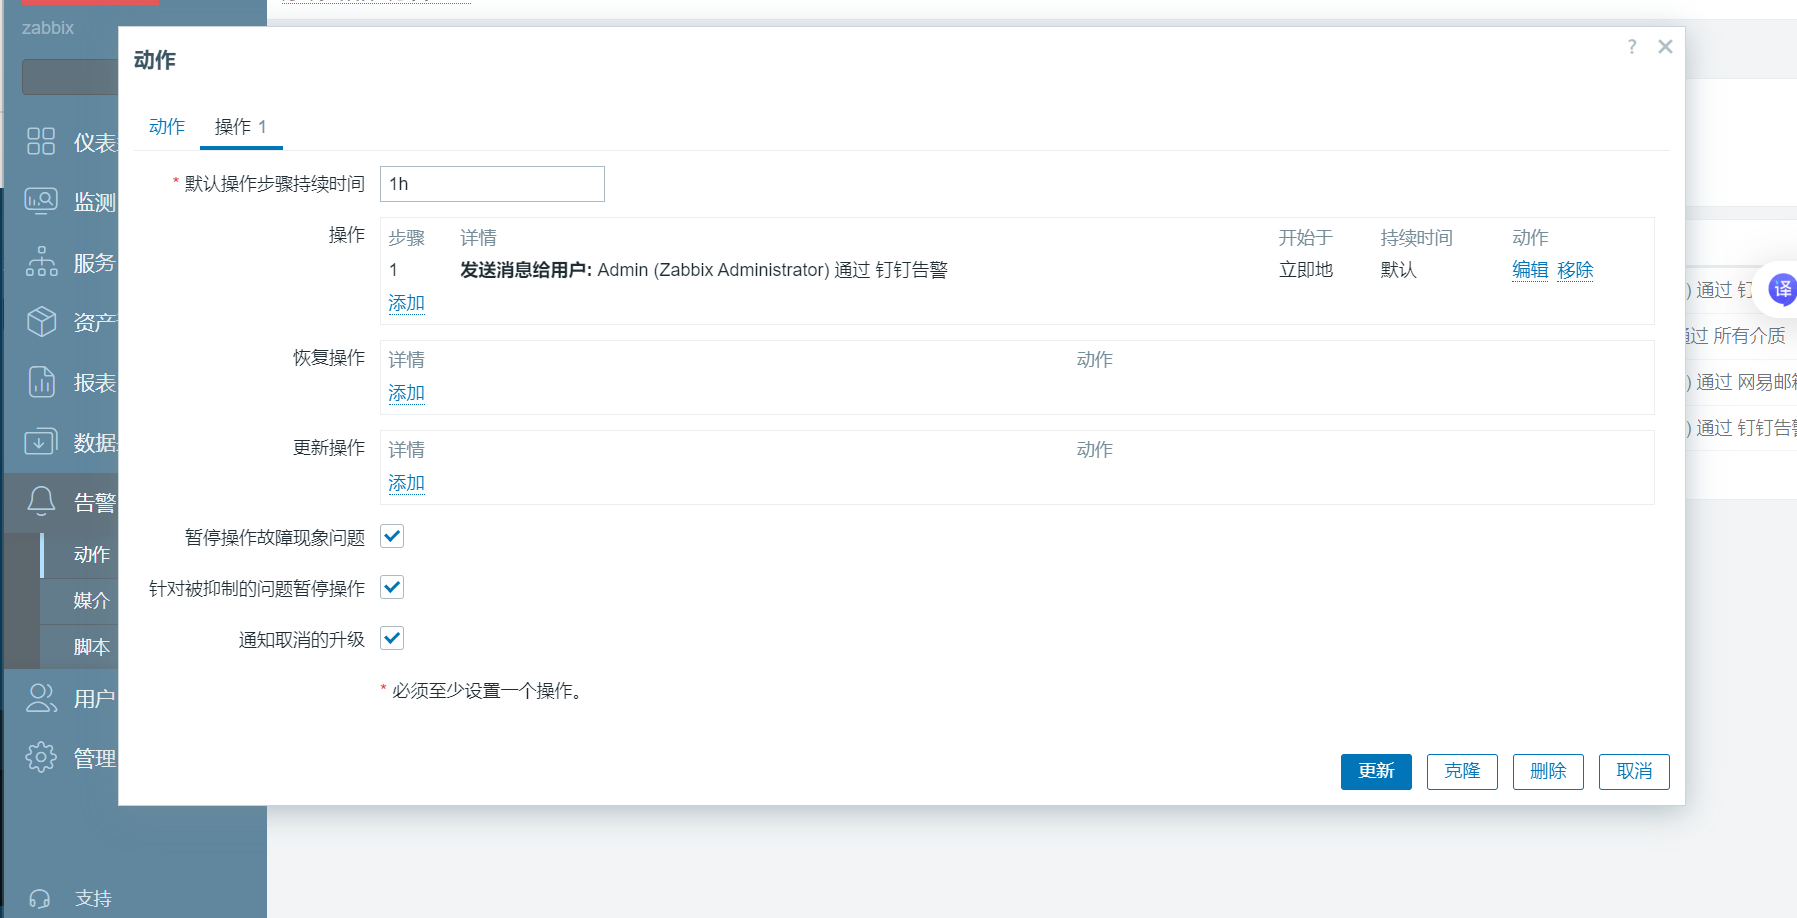
告警------动作------触发器动作------创建动作------操作
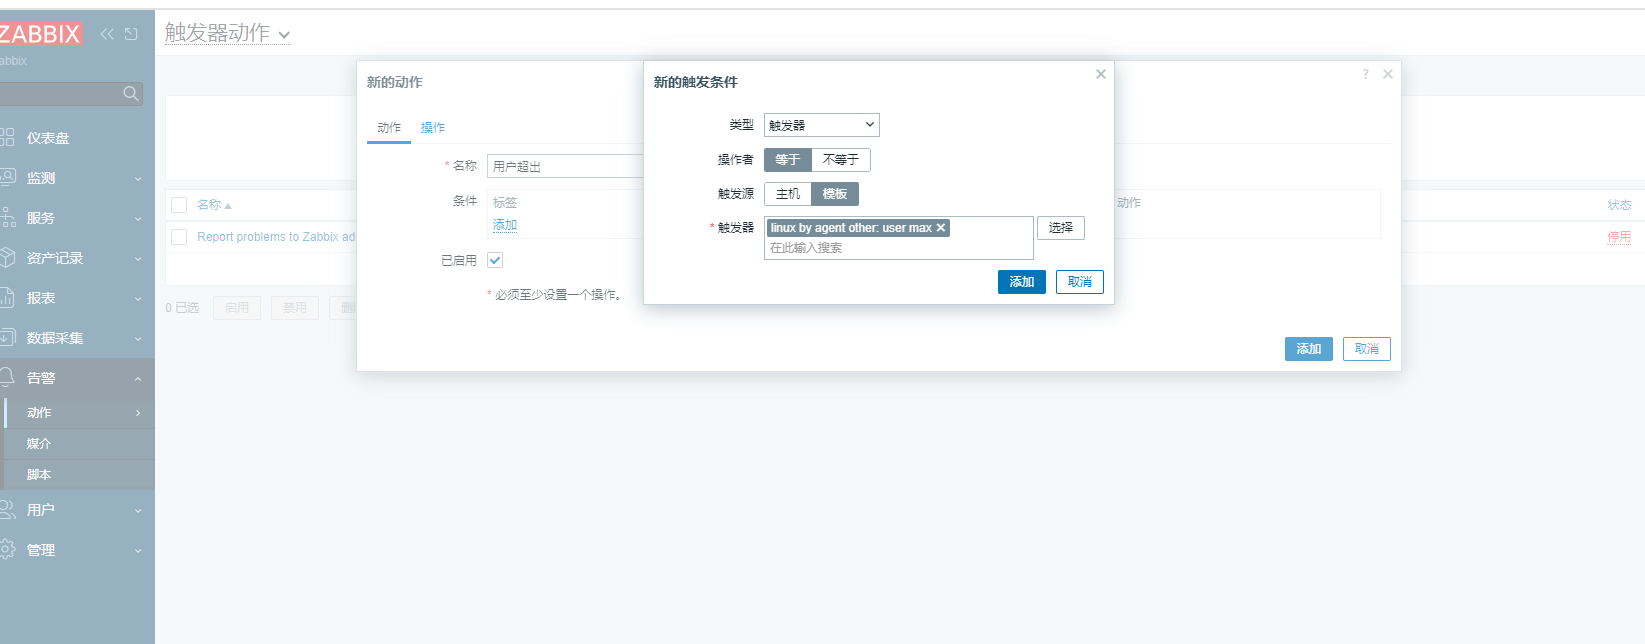
当条件触发就可以看到设置好的邮箱里发来一封邮件
三、钉钉告警
1、配置zabbix-server
192.168.58.170
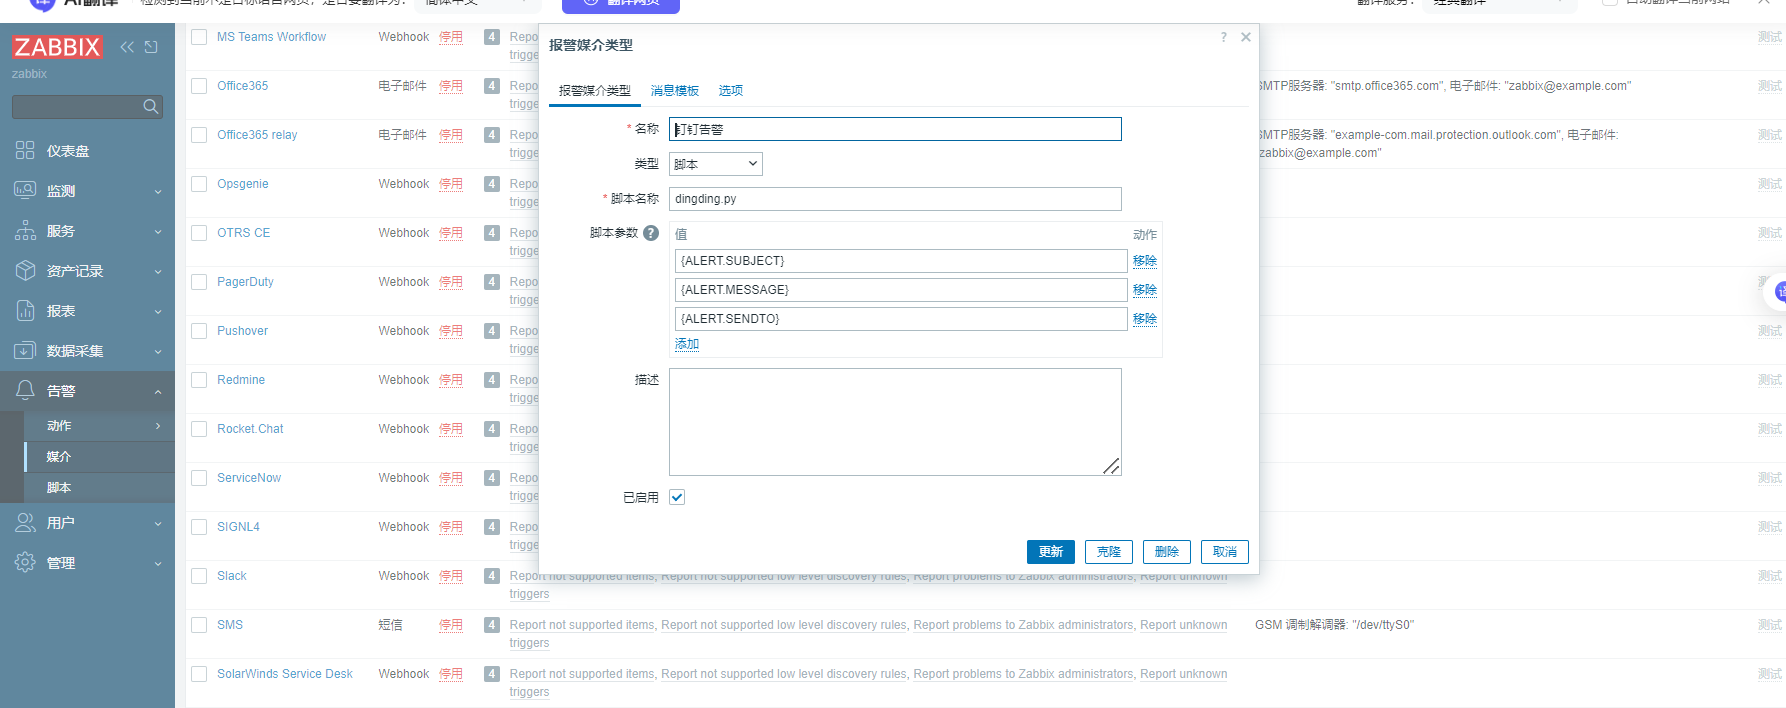
1.配置钉钉脚本
#将脚本写在/usr/lib/zabbix/alertscripts/目录下
[root@zabbix zabbix_agentd.d]# cd /usr/lib/zabbix/
[root@zabbix zabbix]# ls
alertscripts  externalscripts
[root@zabbix zabbix]# cd alertscripts/
[root@zabbix alertscripts]# ls
[root@zabbix alertscripts]# vim dingding.py
#!/usr/bin/env python
# -*- coding: utf-8 -*-
import requests
import json
import sys
import os
import datetime
webhook = "https://oapi.dingtalk.com/robot/send?access_token=382cec5bbd171e65780867f926cfdea2ad8faf92d4b7216e48bee4c8a60601d6"  #修改为自己的webhook
user=sys.argv[1]
subject=sys.argv[2]
text=sys.argv[3]
data={
        "msgtype": "text",
        "text": {
                "content": "%s%s"%(subject,text)
        },
        "at": {
                "atMobiles": [
                        user
                        ],
                        "isAtAll": False
        }
}
headers = {'Content-Type': 'application/json'}
x=requests.post(url=webhook,data=json.dumps(data),headers=headers)
if os.path.exists("/usr/lib/zabbix/alertscripts/log/dingding.log"):
        f=open("/usr/lib/zabbix/alertscripts/log/dingding.log","a+")
else:
        f=open("/usr/lib/zabbix/alertscripts/log/dingding.log","w+")
f.write("\n"+"--"*30)
if x.json()["errcode"] == 0:
        f.write("\n"+str(datetime.datetime.now())+"    "+str(user)+"    "+"发送成功"+"\n"+str(text))
        f.close()
else:
        f.write("\n"+str(datetime.datetime.now())+"    "+str(user)+"    "+"发送失败"+"\n"+str(text))
        f.close()
2.为脚本添加执行权限
[root@zabbix alertscripts]# chmod +x dingding.py3.修改脚本的属主和属组:
[root@zabbix alertscripts]# chown zabbix.zabbix dingding.py4.创建日志文件:
[root@zabbix alertscripts]# mkdir -p  /usr/lib/zabbix/alertscripts/log/
[root@zabbix alertscripts]# ls
dingding.py  log
[root@zabbix alertscripts]# touch /usr/lib/zabbix/alertscripts/log/dingding.log
[root@zabbix alertscripts]# chown zabbix.zabbix -R /usr/lib/zabbix/alertscripts/log/
[root@zabbix alertscripts]# ./dingding.py 15013075845 警告 test
5.测试脚本是否能运行成功:
注意关键词
#py脚本 手机号 关键词 告警信息
./dingding.py 12312312312 告警 test
[root@zabbix alertscripts]# ./dingding.py 12312312312 警告 test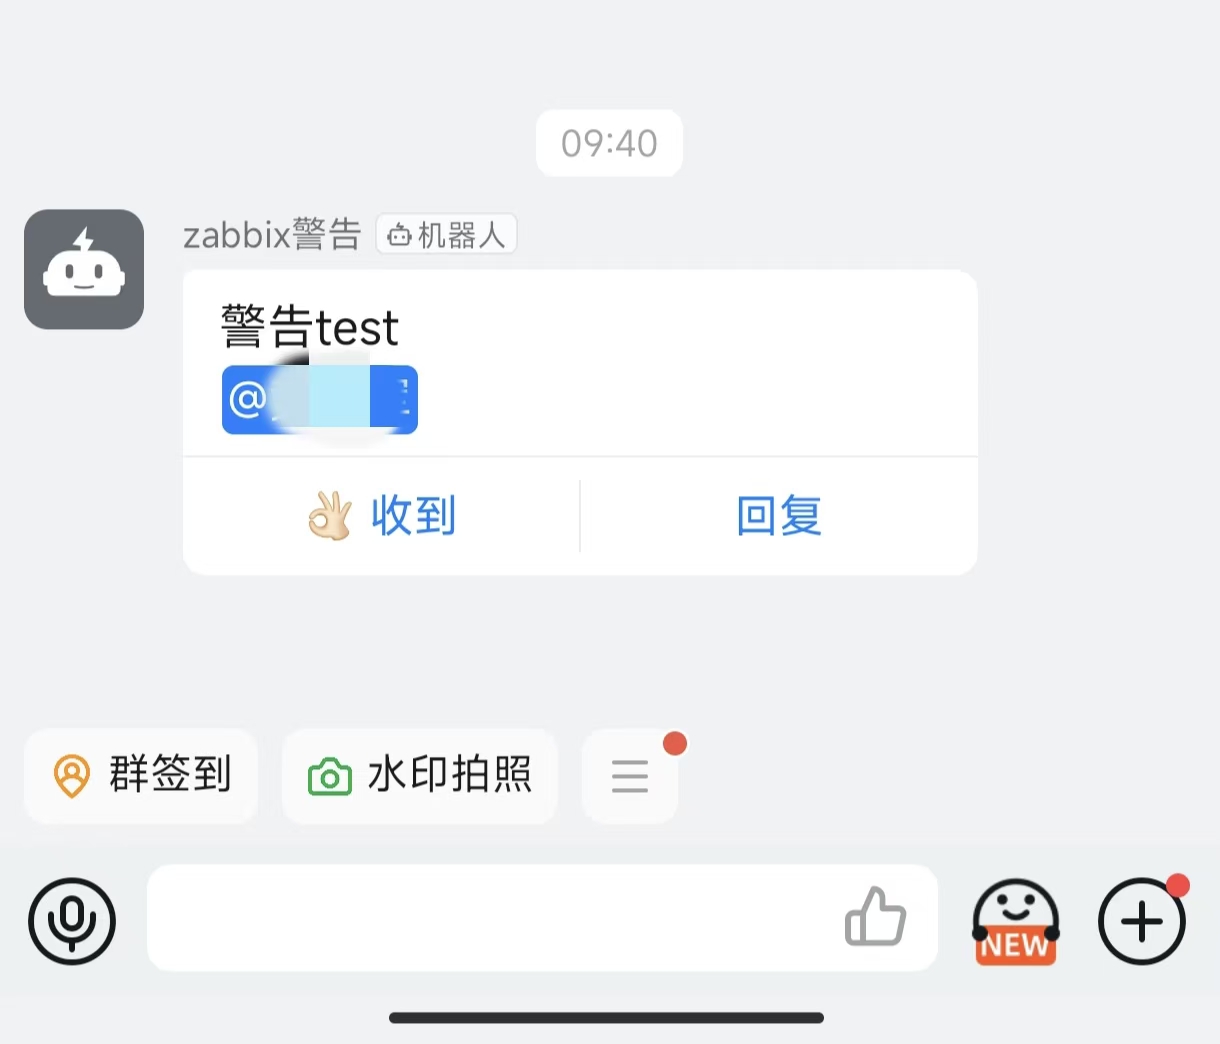
2、配置监控及触发
192.168.58.171配置
[root@bogon ~]# rpm -Uvh https://repo.zabbix.com/zabbix/7.0/rocky/9/x86_64/zabbix-release-7.0-5.el9.noarch.rpm
[root@bogon ~]# yum install -y zabbix-agent
[root@bogon ~]# vim /etc/zabbix/zabbix_agentd.conf
Server=127.0.0.1改为:
Server=192.168.58.170
[root@bogon ~]# systemctl start zabbix-agent.service 在受监控的主机上设好监控文件
##192.168.58.171
[root@bogon zabbix_agentd.d]# vim userparameter_dingding.conf
UserParameter=user_countdd,w | awk 'NR>=3{print|"wc -l"}'
[root@bogon zabbix_agentd.d]# systemctl restart zabbix-agent.service
3、web页面操作
告警-->媒介-->创建媒体类型 --> 报警媒介类型--> 消息模板
告警-->触发器动作-->创建动作--->动作--->操作
用户 --> admin -->报警媒介
采集数据-->模板-->创建模板-->主机-->-->监控项-->触发器

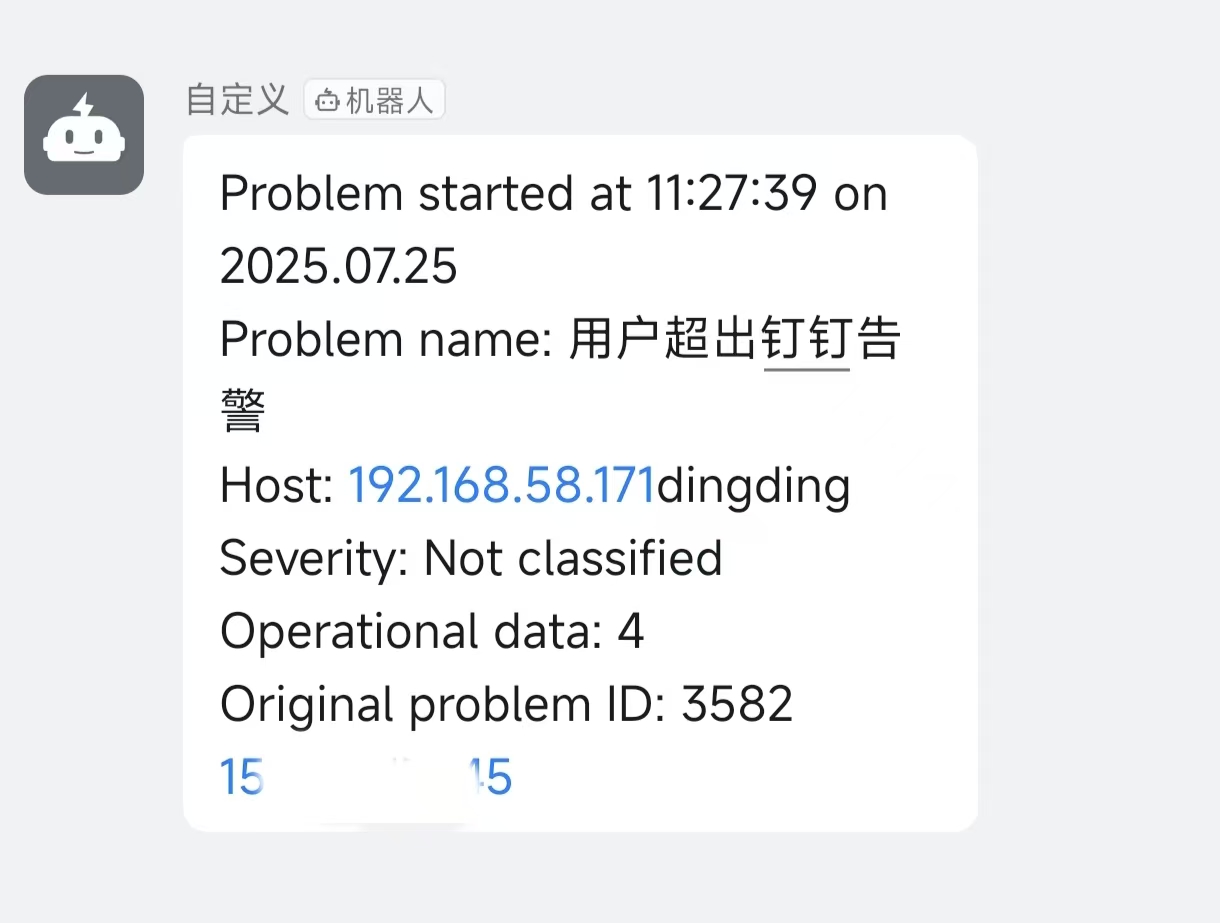
4、测试
当条件触发
在钉钉上可以看到