前言
前面我们了解了Hugging Face Space空间 和 DataSets数据集 的基本使用方式,今天我们继续探索Hugging Face Models的基本使用方式。对往期内容感兴趣的小伙伴也可以看往期:
- 【Hugging Face】初识Hugging Face
- 【Hugging Face】Hugging Face Hub与Hugging Face CLI
- 【Hugging Face】Hugging Face Space空间的基本使用方式
- 【Hugging Face】Hugging Face数据集的基本使用
模型使用方式
使用Hugging Face模型有两种方式,一种是通过 Hugging Face提供的 huggingface_hub,一种是通过Hugging Face提供的 transformers 和 diffusers
- huggingface_hub:由Hugging Face统一封装调用,需要提供Hugging Face API Key
- transformers 和 diffusers:
- transformers:Hugging Face提供的专注自然语言处理(NLP)及多模态任务,如文本生成、翻译、分类、问答等,无需提供Hugging Face API Key
- diffusers:Hugging Face提供的专注扩散模型(Diffusion Models),用于图像、音频、视频、3D 等生成任务,无需提供Hugging Face API Key
通过huggingface_hub使用
由于个人电脑配置有限,我这里在Google的Colab上使用,在本地使用步骤也是类似的,对Google Colab还不了解的小伙伴可以看往期:
初识Google Colab
Qwen3-0.6B文本生成
以Qwen3-0.6B模型为例,进入模型详情
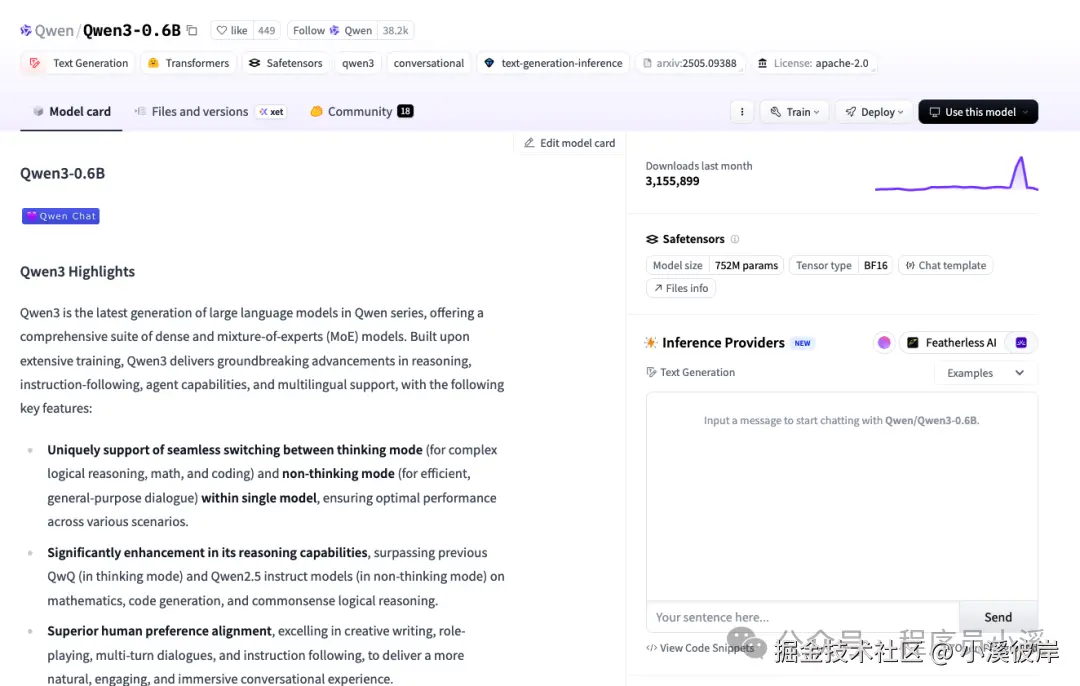
点击【View Code Snippets】查看接入代码

在Colab上新建Colab Notebooks,输入代码
ini
import os
from huggingface_hub import InferenceClient
# Set the environment variable for the current process
os.environ['HF_TOKEN'] = "your hugging face api key"
client = InferenceClient(
    provider="featherless-ai",
    api_key=os.environ["HF_TOKEN"],
)
completion = client.chat.completions.create(
    model="Qwen/Qwen3-0.6B",
    messages=[
        {
            "role": "user",
            "content": "What is the capital of France?"
        }
    ],
)
print(completion.choices[0].message.content)
点击左侧运行,输出结果如下
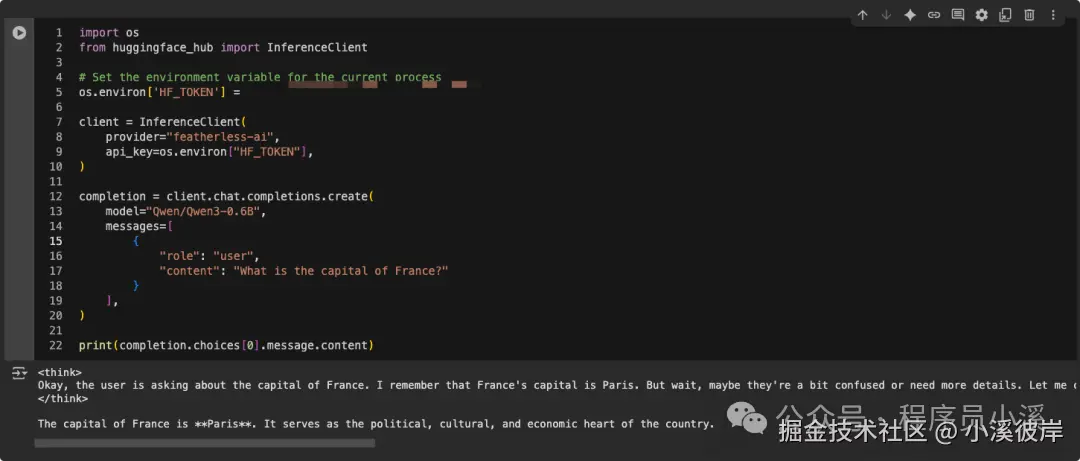
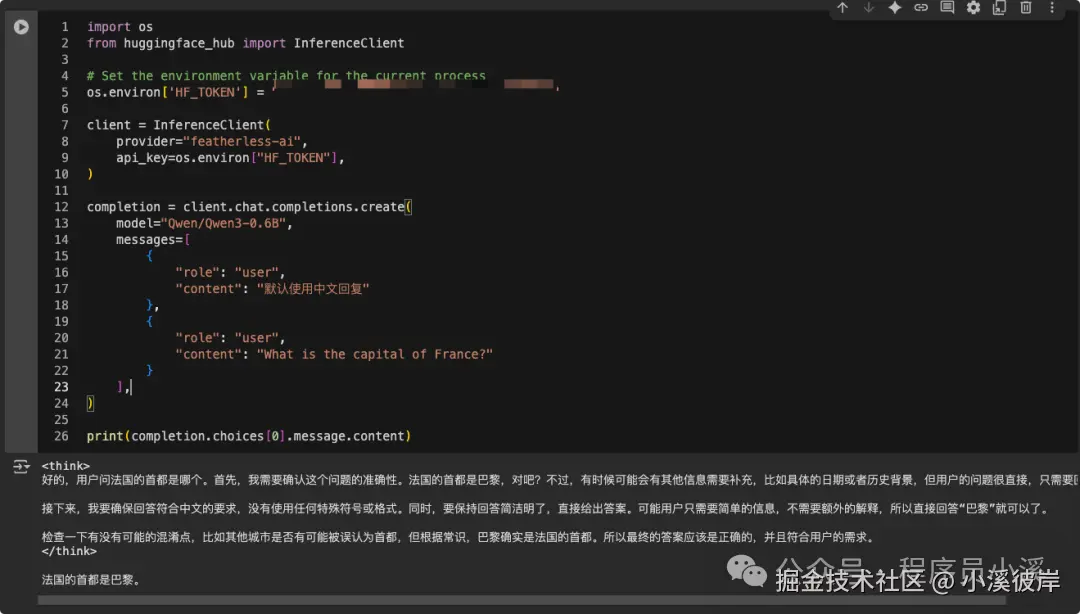
这里是英文的,我们也可以AI输出中文结果,稍微改动一下提示词
ini
import os
from huggingface_hub import InferenceClient
# Set the environment variable for the current process
os.environ['HF_TOKEN'] = "your hugging face api key"
client = InferenceClient(
    provider="featherless-ai",
    api_key=os.environ["HF_TOKEN"],
)
completion = client.chat.completions.create(
    model="Qwen/Qwen3-0.6B",
    messages=[
        {
            "role": "user",
            "content": "默认使用中文回复"
        },
        {
            "role": "user",
            "content": "What is the capital of France?"
        }
    ],
)
print(completion.choices[0].message.content)
此时AI就会以中文回复了
FLUX.1-dev绘图
进入FLUX.1-dev模型详情
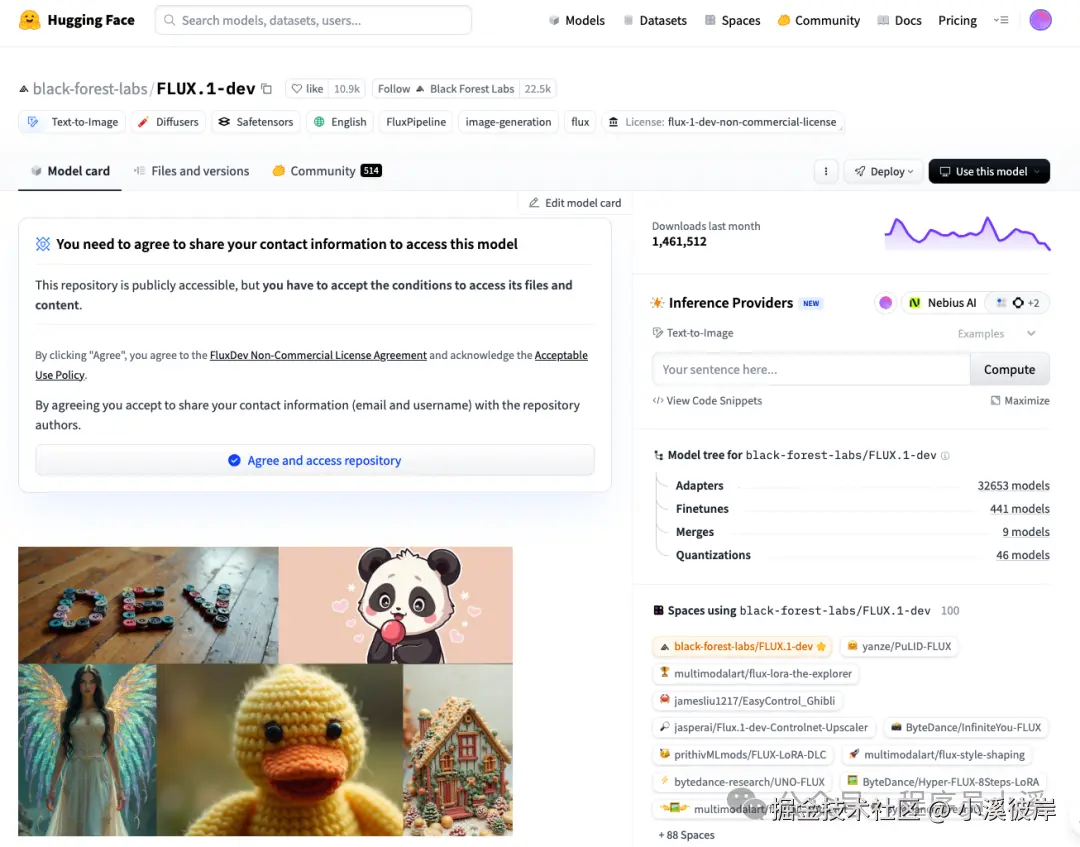
点击【View Code Snippets】查看接入代码
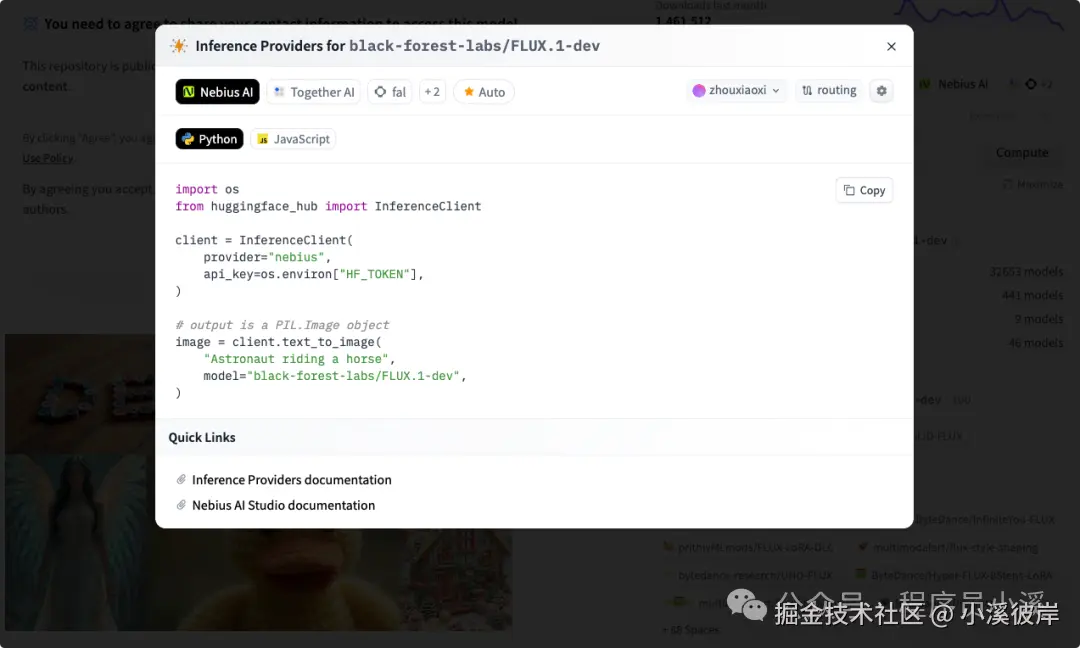
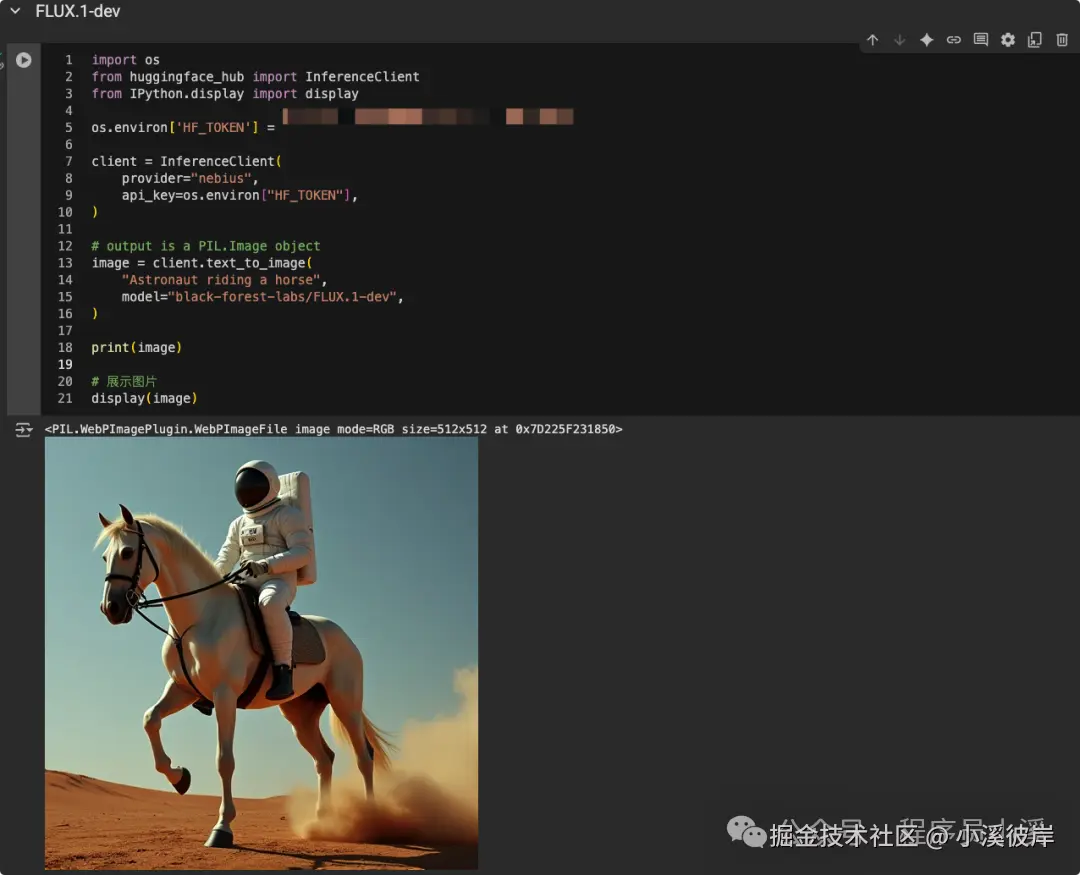
在Colab文档上新建一个代码块,输入以下代码
ini
import os
from huggingface_hub import InferenceClient
from IPython.display import display
os.environ['HF_TOKEN'] = "your api key"
client = InferenceClient(
    provider="nebius",
    api_key=os.environ["HF_TOKEN"],
)
# output is a PIL.Image object
image = client.text_to_image(
    "Astronaut riding a horse",
    model="black-forest-labs/FLUX.1-dev",
)
# 展示图片
display(image)
点击运行,执行结束后,我们将得到一张图片
通过transformers和diffusers使用
transformers 和 diffusers 是Hugging Face提供的两个重要Python库,使用较为复杂,这里只做模型的简单使用,不深入了解。
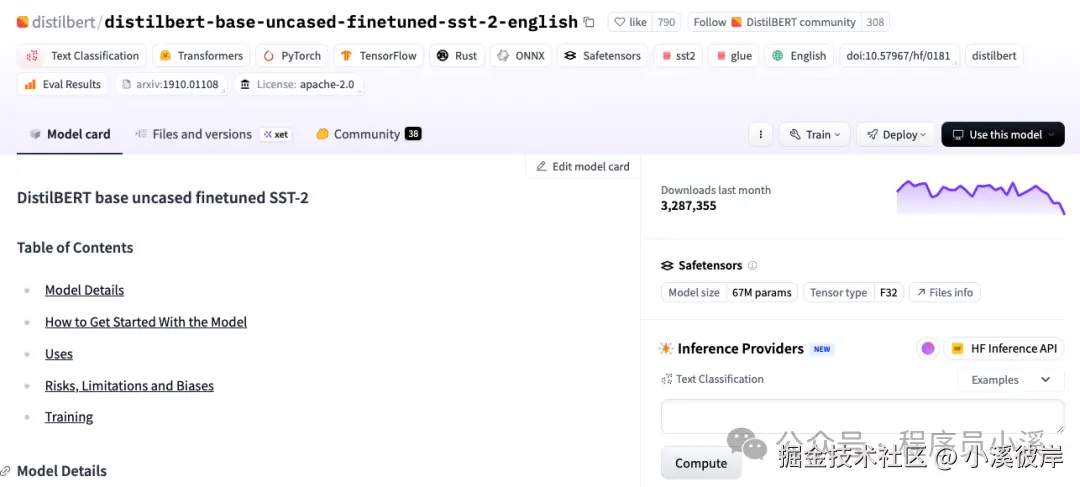
情感分析
以distilbert-base-uncased-finetuned-sst-2-english模型为例,进入distilbert-base-uncased-finetuned-sst-2-english模型详情,复制模型名称
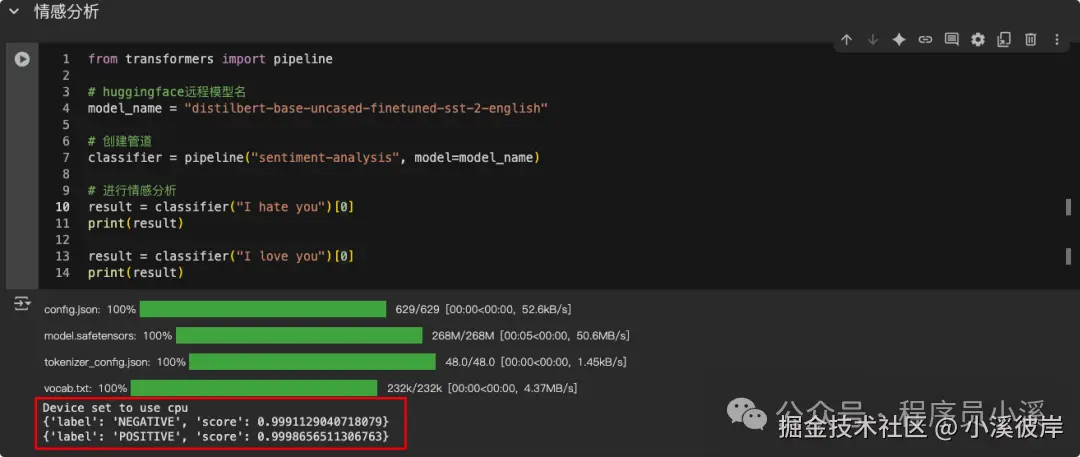
在Colab中创建代码块,添加如下代码
ini
from transformers import pipeline

# huggingface远程模型名
model_name = "distilbert-base-uncased-finetuned-sst-2-english"
# 创建管道
classifier = pipeline("sentiment-analysis", model=model_name)
# 进行情感分析
result = classifier("I hate you")[0]
print(result)
result = classifier("I love you")[0]
print(result)
点击左侧运行,输出结果如下
sdxl-turbo绘图
Diffusers库,这里以stabilityai/sdxl-turbo模型为例,进入stabilityai/sdxl-turbo模型详情,复制模型名称
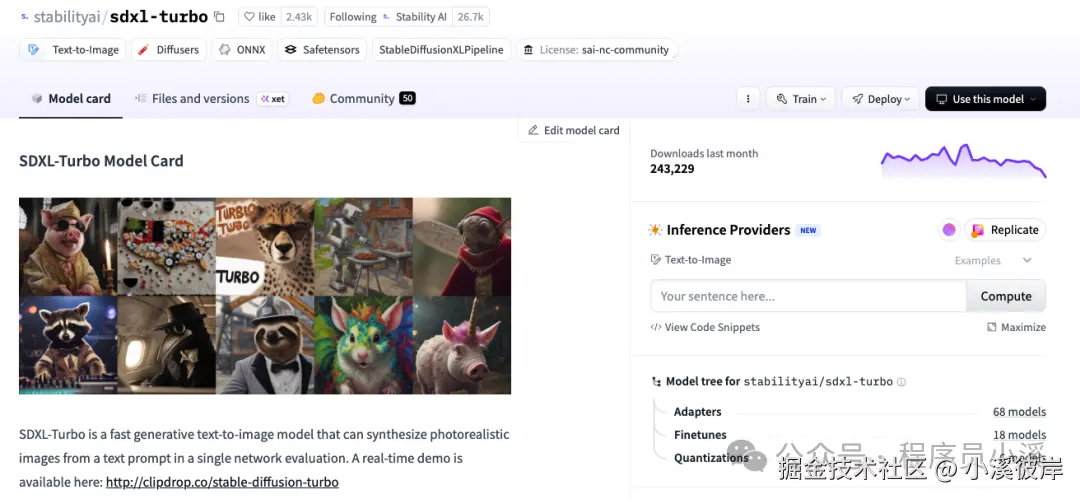
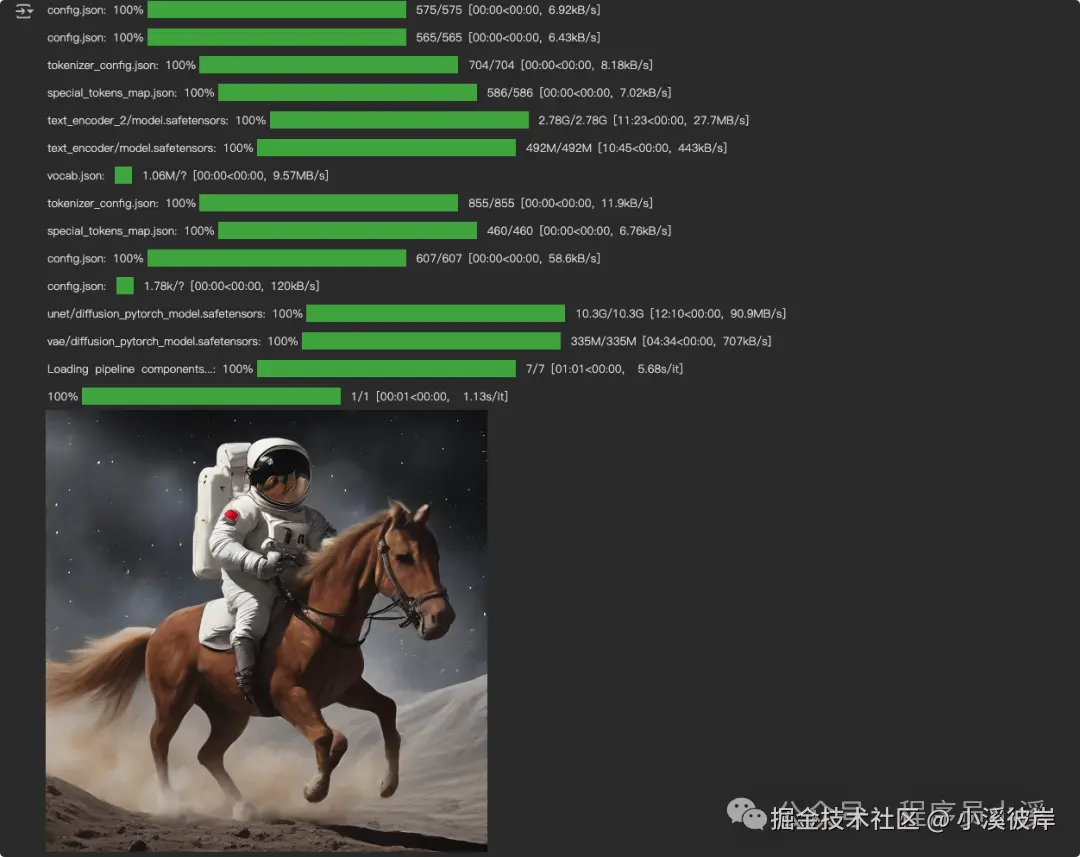
在Colab中创建代码块,添加如下代码
ini
from diffusers import DiffusionPipeline
import torch
if torch.cuda.is_available():
    device = "cuda"
    torch_dtype = torch.float16
else:
    device = "cpu"
    torch_dtype = torch.float32
pipe = DiffusionPipeline.from_pretrained("stabilityai/sdxl-turbo", torch_dtype=torch_dtype)
pipe.to(device)
image = pipe(
    prompt="Astronaut riding a horse",
    negative_prompt="low quality, bad quality, loss body", # 反向提示词
    num_inference_steps=1, # 步长
    guidance_scale=0.0, # 引导系数
    width=512,
    height=512
).images[0]
display(image)
等待执行,执行完成后,可以看到生成图片的效果如下:
参考
友情提示
见原文:【Hugging Face】Hugging Face模型的基本使用
本文同步自微信公众号 "程序员小溪" ,这里只是同步,想看及时消息请移步我的公众号,不定时更新我的学习经验。