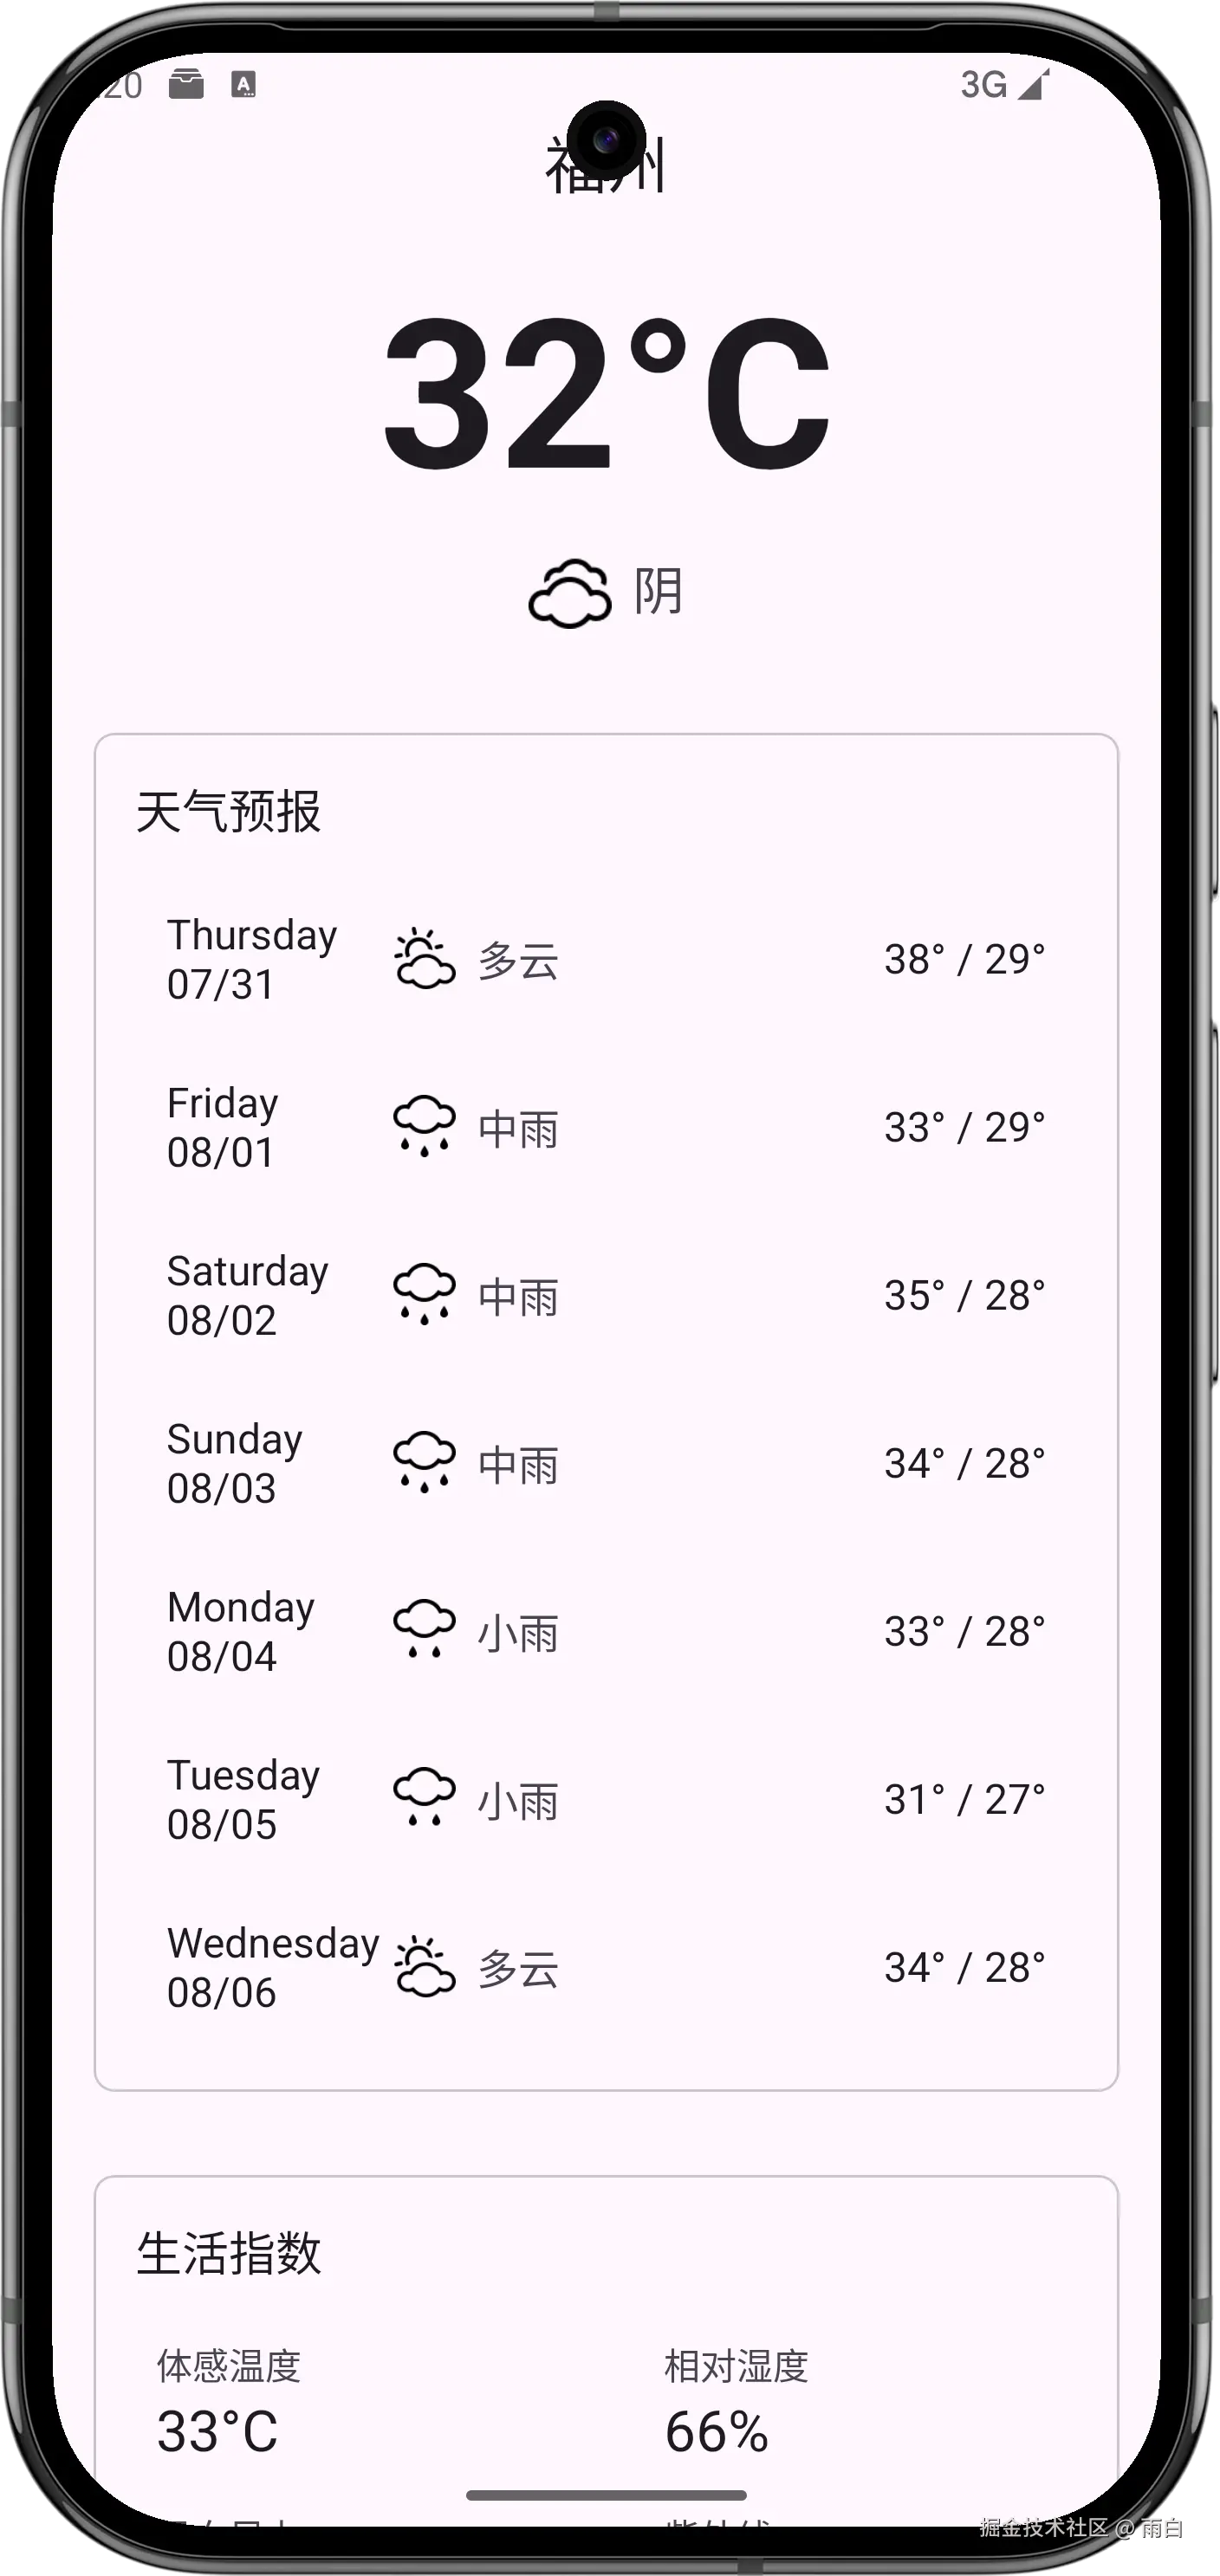
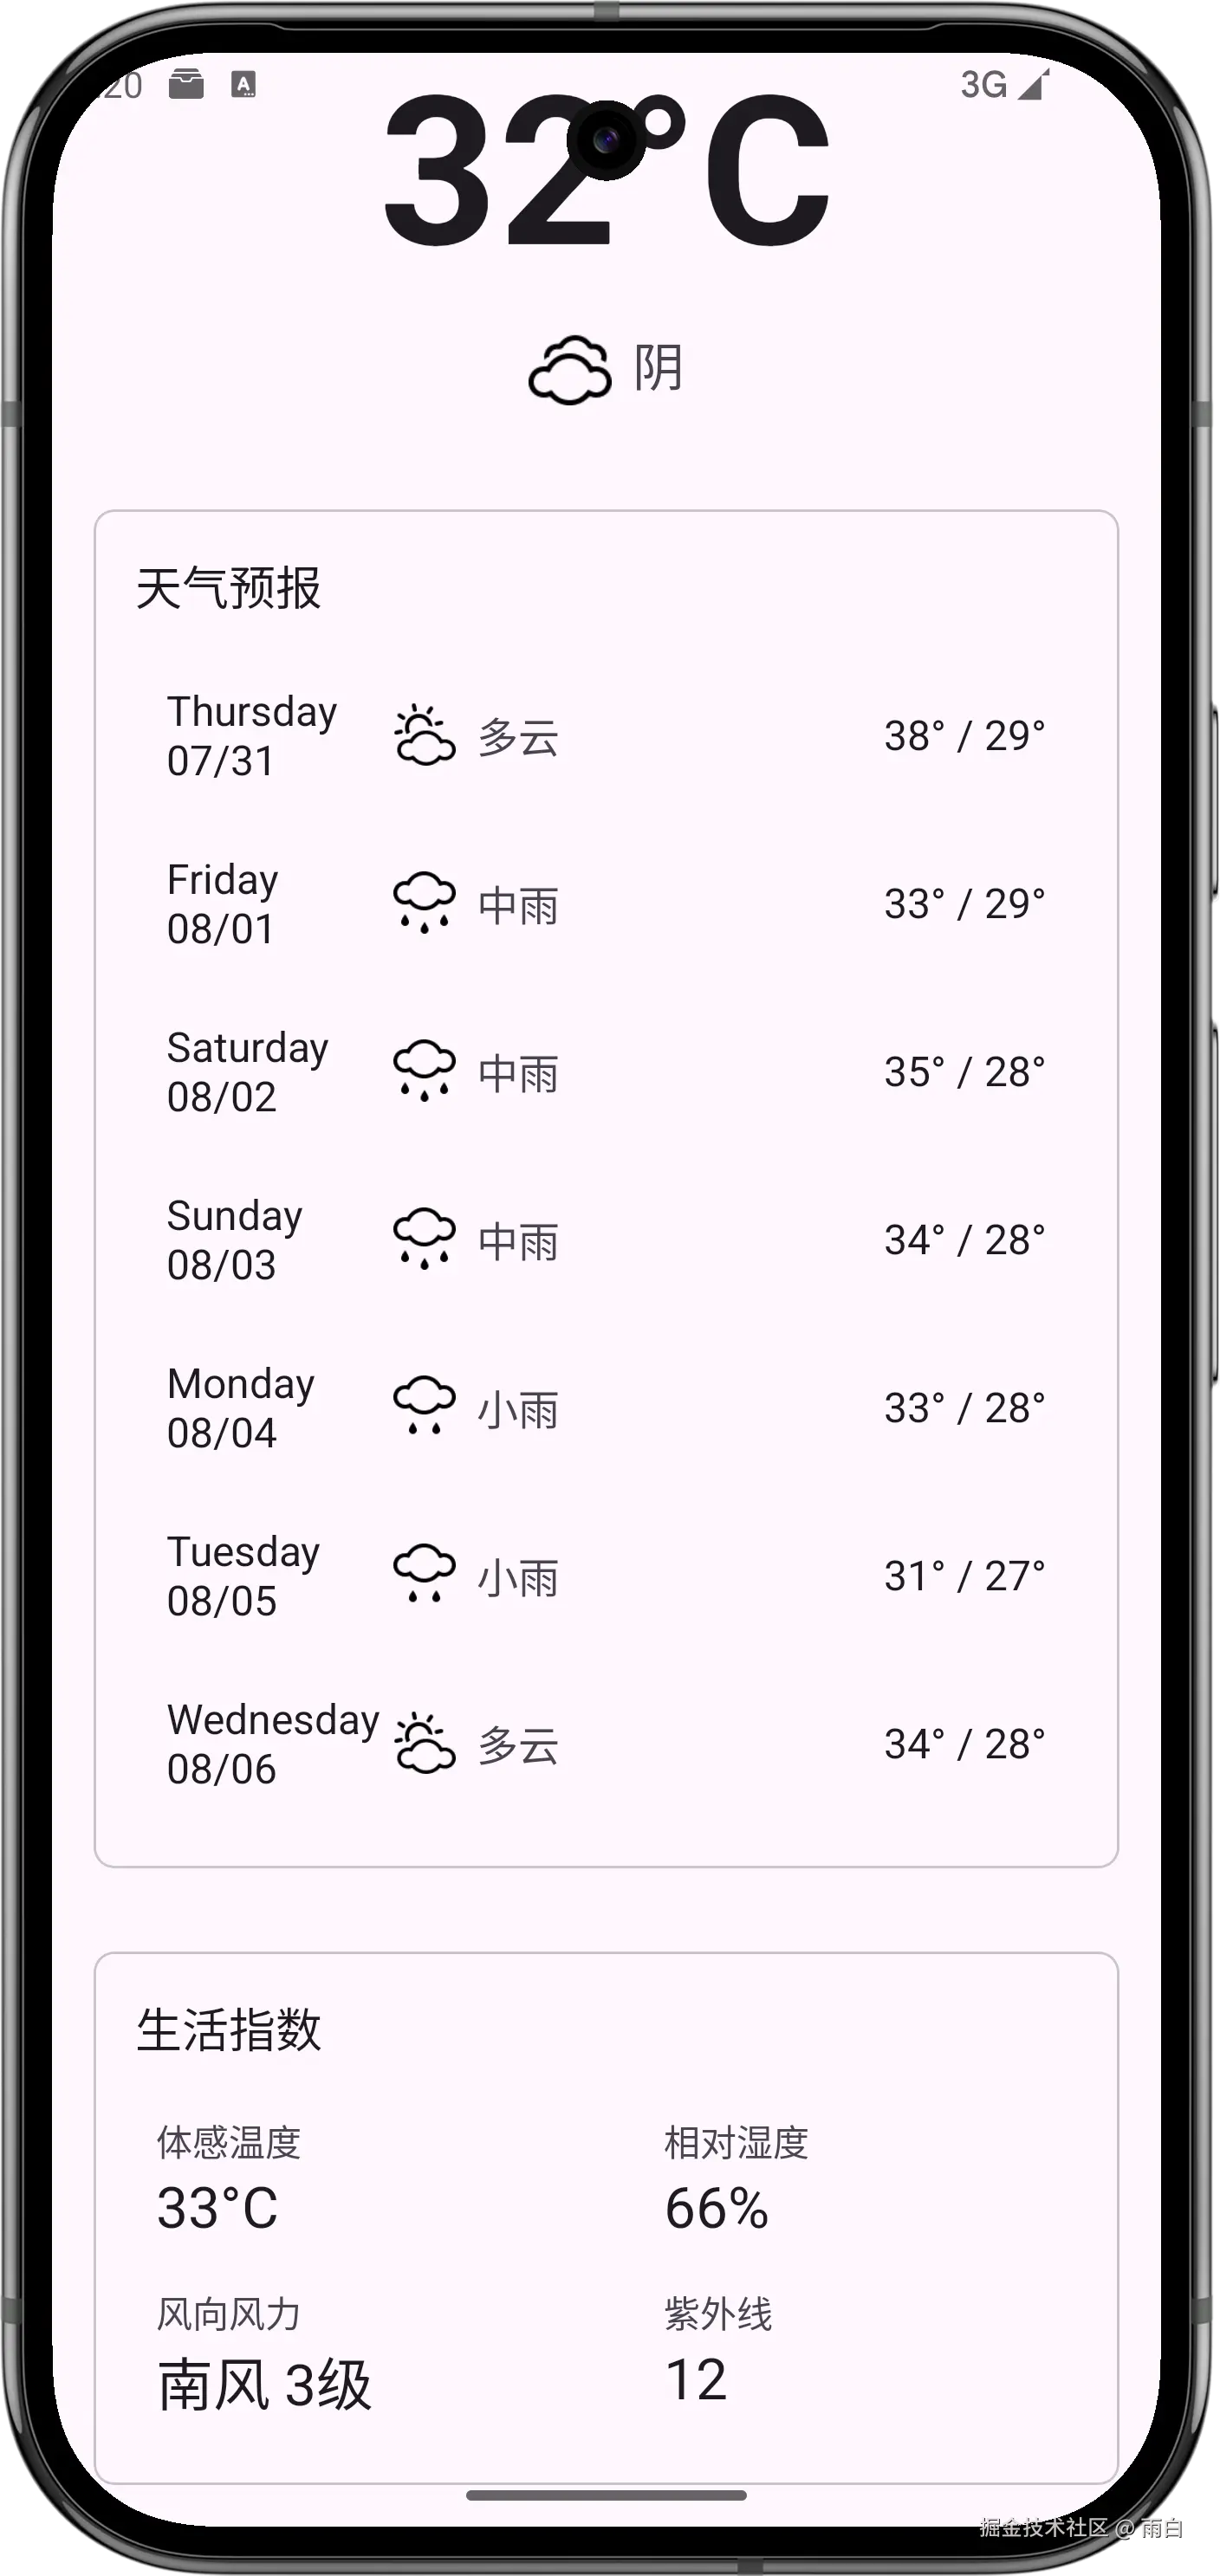
现在,我们就来完成一个天气预报 App,给它起名为 SunnyWeather。
功能需求及技术可行性分析
在开始写代码之前,我们先对程序进行需求分析。我们认为 SunnyWeather 至少应该具备以下功能:
-
可以搜索全球大多数国家的各个城市数据。
-
可以查看全球大多数城市的天气信息。
-
可以自由切换城市,查看其他城市的天气。
-
可以手动刷新实时天气。
分析完需求后,接下来进行技术可行性分析。
毋庸置疑,目前最大的难题是,我们如何才能获取到全球大多数国家的城市数据?以及如何才能得到每个城市的天气信息?对此,我们的解决方案是:使用和风天气提供的服务器接口。
和风天气的介绍以及用法,我就不详细解释了。官方文档很详尽,你可以查看官方文档,也可以看视频教程。
确定技术可行后,我们就可以开始了。
搭建 MVVM 项目架构
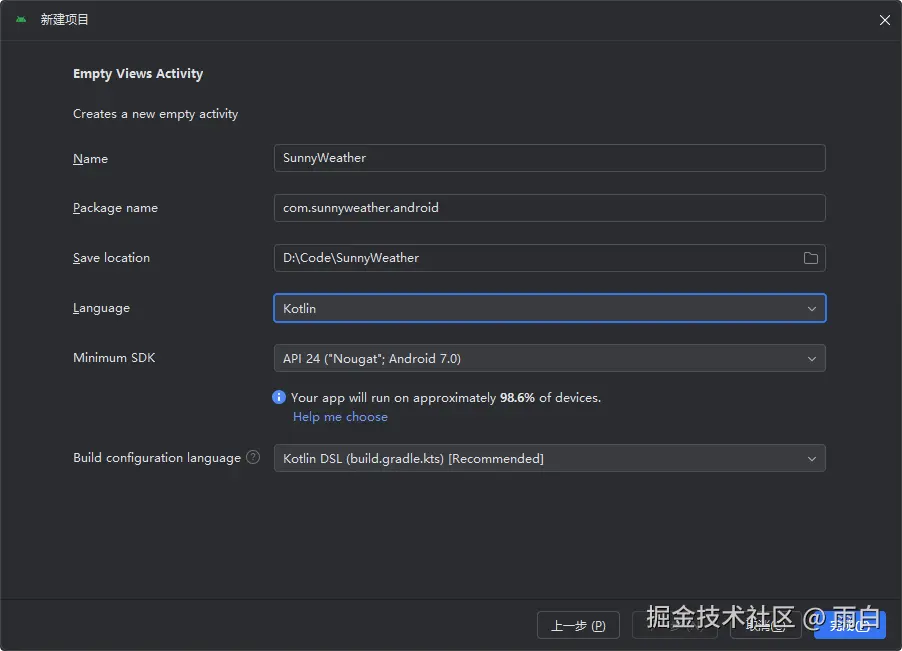
创建 Empty Views Activity 项目,项目命名为 SunnyWeather,包名命名为 com.sunnyweather.android。
项目创建好后,我们来搭建 MVVM 架构。
Jetpack的架构组件很多都是专门为了MVVM架构设计的。
那什么是 MVVM 架构呢?
MVVM(Model-View-ViewModel)是一种高级项目架构模式,目前被广泛应用于 Android 程序设计领域,与之类似的架构还有 MVP、MVC、MVI 等。
简单来说,MVVM 架构可以将程序结构主要分为三部分:
-
Model: 数据模型部分。 -
View: 界面展示部分。 -
ViewModel: 数据模型和界面展示连接的桥梁。有了它,即可实现业务逻辑和界面展示分离的程序结构设计。
当然,优秀的项目架构还会包含仓库、数据源。
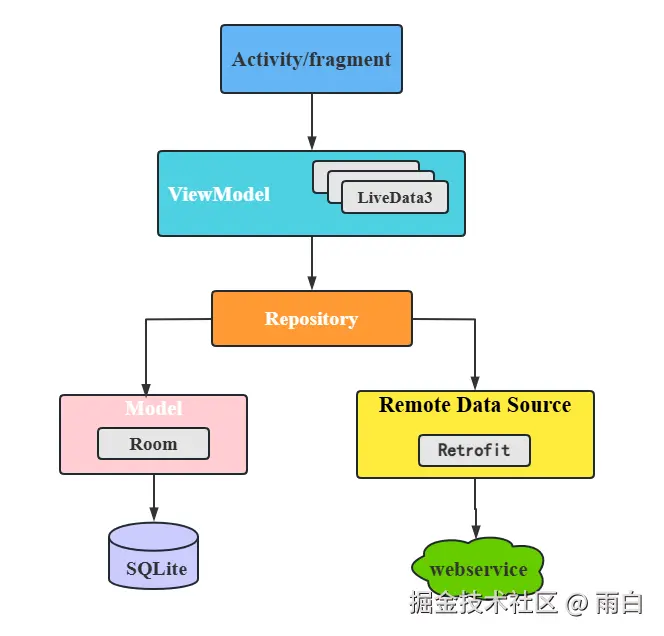
其中,Activity/Fragment 是与界面相关的,ViewModel 用于持有与界面相关的数据,并提供接口给界面调用、和 Repository 通信,Repository 会判断请求的数据是从本地数据源还是网络数据源中获取,返回获取到的数据。
本地数据源使用 Room、SharedPreferences 等持久化技术实现,而网络数据源通常使用 Retrofit 访问 WebService 接口来实现。
注意,图中的箭头都是"单向"的。也就是说 Activity/Fragment 可以持有 ViewModel 的引用,但 ViewModel 却不能持有 Fragment/Activity 的引用。另外,引用不能跨层持有,比如 Activity/Fragment 不能持有 Repository 的引用。
现在,我们就创建项目的包结构:
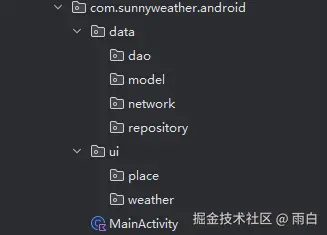
data 包用于存放数据源相关的代码,ui 包用于存放用户界面层相关的代码。
data 包下的 dao、model、network 以及 repository 子包,分别用于存放数据访问对象、对象模型、网络层代码以及仓库。而 ui 包下的 place 和 weather 子包,分别对应了两个页面。
接着,我们引入将会用到的依赖库,开启视图绑定以便安全访问视图,以及启用序列化插件,这样能通过 Intent 传递对象。在 build.gradle.kts (:app) 文件中添加如下内容:
kotlin
// app/build.gradle.kts

plugins {
    // 序列化插件,用于 @Parcelize 注解
    id("kotlin-parcelize")
}

android {
    buildFeatures {
        // 启用视图绑定 (ViewBinding)
        viewBinding = true
    }
    // ...
}

dependencies {
    // RecyclerView 列表控件
    implementation("androidx.recyclerview:recyclerview:1.4.0")

    // LiveData 以及 ViewModel KTX 扩展库
    implementation("androidx.lifecycle:lifecycle-livedata-ktx:2.9.2")
    implementation("androidx.lifecycle:lifecycle-viewmodel-ktx:2.9.2")

    // 下拉刷新控件
    implementation("androidx.swiperefreshlayout:swiperefreshlayout:1.1.0")

    // Retrofit 和 Gson 转换器
    implementation("com.squareup.retrofit2:retrofit:2.11.0")
    implementation("com.squareup.retrofit2:converter-gson:2.11.0")

    // Kotlin 协程核心库和 Android 扩展
    implementation("org.jetbrains.kotlinx:kotlinx-coroutines-core:1.8.1")
    implementation("org.jetbrains.kotlinx:kotlinx-coroutines-android:1.9.0")

    // OkHttp 日志拦截器,方便调试
    implementation("com.squareup.okhttp3:logging-interceptor:4.9.3")

    // JWT 签名库 (EdDSA)
    implementation("net.i2p.crypto:eddsa:0.3.0")
}最后,将会用到的图标资源,导入到 res/drawable-xxhdpi 目录中。
你也可以从和风天气图标官网获取。
这些准备工作完成后,就正式进入到 SunnyWeather 的开发中。
搜索全球城市数据
我们想要查看天气信息,我们先得获取到一个地区的经纬度坐标。所以,我们先来实现全球城市数据信息的搜索功能。先从逻辑层开始实现。
实现逻辑层代码
Application 类
在 MVVM 这种分层架构中,一般从 ViewModel 开始就不会直接持有 Context。为了方便地获取 Context,我们可以通过自定义 Application 类来实现。
在 com.sunnyweather.android 包下创建 SunnyWeatherApplication 类。
kotlin
class SunnyWeatherApplication : Application() {

    companion object {
        // 使用 @SuppressLint 忽略静态Context可能引起的内存泄漏警告
        // 因为我们存储的是 applicationContext,它的生命周期和应用一致
        @SuppressLint("StaticFieldLeak")
        lateinit var context: Context
            private set
    }

    override fun onCreate() {
        super.onCreate()
        // 获取全局的 applicationContext
        context = applicationContext
    }
}
注意:在大型项目中通常不会直接暴露一个静态
Context,因为这样会破坏封装和代码可测试性,而是会使用依赖注入(Dependency Injection)框架(如Hilt)来管理Context等依赖。当前项目为了便捷、简洁,所以就直接这样了。
然后在 AndroidManifest.xml 文件中指定它。
xml
<?xml version="1.0" encoding="utf-8"?>
<manifest xmlns:android="http://schemas.android.com/apk/res/android"
    xmlns:tools="http://schemas.android.com/tools">

    <application
        android:name=".SunnyWeatherApplication" ... >

    </application>

</manifest>
数据模型
然后按照架构示意图,自底向上一步步实现。先根据城市搜索接口返回的 JSON 格式数据定义数据模型,在 data/model 包下新建 Place.kt 文件。
kotlin
import kotlinx.parcelize.Parcelize

/**
 * 城市搜索API的返回体数据模型
 * @param code 状态码
 * @param places 包含的地点列表
 */
data class PlaceResponse(
    @SerializedName("code") val code: String,
    @SerializedName("location") val places: List<Place>,
)

/**
 * 单个地点的数据模型
 */
@Parcelize
data class Place(
    @SerializedName("name") val name: String,
    @SerializedName("id") val id: String,
    @SerializedName("lat") val lat: String,
    @SerializedName("lon") val lon: String,
    @SerializedName("adm2") val district: String,
    @SerializedName("adm1") val province: String,
    @SerializedName("country") val country: String,
    @SerializedName("tz") val timezone: String,
    @SerializedName("utcOffset") val utcOffset: String,
    @SerializedName("isDst") val isDst: String,
    @SerializedName("type") val type: String,
    @SerializedName("rank") val rank: String,
    @SerializedName("fxLink") val fxLink: String,
) : Parcelable
在上述数据模型中,我们使用了 @Parcelize 注解,让 Place 对象实现了 Parcelable 接口,使其能够通过 Intent 进行传递。
使用了 @SerializedName 注解,建立了 JSON 字段名与 Kotlin 属性名的映射关系。这样解决了 JSON 字段名不符合 Kotlin 命名规范的问题,并且让我们可以在代码中使用更具有描述性的属性名(如 adm2 映射为 district),增强代码可读性。
网络层
首先,定义一个用于访问城市搜索接口的 Retrofit 接口,在 data/network 包下创建 PlaceService 接口。
kotlin
interface PlaceService {

    /**
     * 搜索城市数据
     * @param query 搜索关键字
     * @param number 返回结果的数量
     * @return 返回地点列表的响应体
     */
    @GET("geo/v2/city/lookup")
    suspend fun searchPlaces(
        @Query("location") query: String,
        @Query("number") number: Int = 20
    ): PlaceResponse

}
每当我们调用 searchPlaces 方法时,Retrofit 会自动发起 GET 请求,去访问 @GET 注解配置的地址。其中,location 参数值是需要动态指定的,我们通过 @Query 注解来完成。当请求成功后,Retrofit 会将服务器返回的 JSON 数据自动解析成 PlaceResponse 对象。
为了能够使用 PlaceService 接口,我们需要创建一个 Retrofit 构建器。在 data/network 包下创建 ServiceCreator 单例类。
kotlin
import java.util.concurrent.TimeUnit

object ServiceCreator {
    // 基础请求路径
    private const val BASE_URL = "YOUR_API_HOST"

    // 创建 OkHttpClient 实例
    private val httpClient = OkHttpClient.Builder().apply {
        // 设置连接和读取超时时间
        connectTimeout(6, TimeUnit.SECONDS)
        readTimeout(6, TimeUnit.SECONDS)

        // 添加日志拦截器
        val loggingInterceptor = HttpLoggingInterceptor().apply {
            level = HttpLoggingInterceptor.Level.BODY
        }
        addInterceptor(loggingInterceptor)

    }.build()

    // 构建 Retrofit 实例
    private val retrofit = Retrofit.Builder()
        .baseUrl(BASE_URL)
        .client(httpClient) // 设置自定义的 OkHttpClient
        .addConverterFactory(GsonConverterFactory.create()) // 设置JSON解析库
        .build()

    /**
     * 创建 Service 接口的实例
     */
    fun <T> create(serviceClass: Class<T>): T = retrofit.create(serviceClass)

    /**
     * 内联泛型实化方法,简化 create 方法的调用
     */
    inline fun <reified T> create(): T = create(T::class.java)
}另外,关于身份认证,我们选择 JWT(JSON Web Token) 这种方式。为此,我们需要在每一次 Retrofit 请求的请求头中加上 Authorization: Bearer your_token。
首先,在 com.sunnyweather.android/utils 包下创建 JwtGenerator 工具类,用于获取 Token 值。
kotlin
import android.util.Base64

/**
 * JWT 生成器
 * 使用 EdDSA (Ed25519) 算法进行签名。
 */
object JwtGenerator {

    private val PRIVATE_KEY_STRING = """
        YOUR_PRIVATE_KEY
    """.trim()

    private const val KEY_ID = "YOU_KEY_ID"
    private const val PROJECT_ID = "YOUR_PROJECT_ID"

    // JWT 有效期,单位:秒
    private const val TOKEN_VALIDITY_SECONDS = 900L

    // 时钟偏差容忍期,用于兼容客户端与服务器之间微小的时间差
    private const val TOKEN_GRACE_PERIOD_SECONDS = 30L

    private data class JwtHeader(val alg: String = "EdDSA", val kid: String)
    private data class JwtPayload(val sub: String, val iat: Long, val exp: Long)

    /**
     * 生成最终的JWT字符串
     */
    suspend fun generateJwt(): String = withContext(Dispatchers.IO) {
        val privateKey = parsePrivateKey(PRIVATE_KEY_STRING)
        val gson = Gson()

        val headerJson = gson.toJson(JwtHeader(kid = KEY_ID))

        val currentTimeSeconds = System.currentTimeMillis() / 1000
        // 签发时间
        val iat = currentTimeSeconds - TOKEN_GRACE_PERIOD_SECONDS
        // 过期时间
        val exp = iat + TOKEN_VALIDITY_SECONDS
        val payloadJson = gson.toJson(JwtPayload(sub = PROJECT_ID, iat = iat, exp = exp))

        val headerEncoded = base64UrlEncode(headerJson)
        val payloadEncoded = base64UrlEncode(payloadJson)
        val dataToSign = "$headerEncoded.$payloadEncoded"

        // 使用 EdDSA 算法对数据进行签名
        val spec = EdDSANamedCurveTable.getByName(EdDSANamedCurveTable.ED_25519)
        val signer = EdDSAEngine(MessageDigest.getInstance(spec.hashAlgorithm))
        signer.initSign(privateKey)
        signer.update(dataToSign.toByteArray(StandardCharsets.UTF_8))
        val signatureBytes = signer.sign()

        val signatureEncoded = base64UrlEncode(signatureBytes)

        "$dataToSign.$signatureEncoded"
    }

    /**
     * 解析 PEM 格式的私钥字符串。
     */
    private fun parsePrivateKey(pem: String): PrivateKey {
        val cleanKey = pem
            .replace("-----BEGIN PRIVATE KEY-----", "")
            .replace("-----END PRIVATE KEY-----", "")
            .replace("\\s".toRegex(), "")

        val privateKeyBytes = Base64.decode(cleanKey, Base64.DEFAULT)
        val keySpec = PKCS8EncodedKeySpec(privateKeyBytes)
        return EdDSAPrivateKey(keySpec)
    }

    /**
     * 执行 Base64Url 编码
     */
    private fun base64UrlEncode(data: String): String {
        return base64UrlEncode(data.toByteArray(StandardCharsets.UTF_8))
    }

    /**
     * 执行 Base64Url 编码
     */
    private fun base64UrlEncode(data: ByteArray): String {
        // 使用 URL_SAFE, NO_PADDING, NO_WRAP 标志
        return Base64.encodeToString(data, Base64.URL_SAFE or Base64.NO_PADDING or Base64.NO_WRAP)
    }
}
其次,在 data/network 包下创建 OkHttp 拦截器,完成在请求头中加上 Token。
kotlin
import okhttp3.Response

class AuthInterceptor : Interceptor {
    override fun intercept(chain: Interceptor.Chain): Response {
        // 使用 runBlocking 桥接同步的 intercept 方法和异步的 generateJwt 方法
        // 它会阻塞当前线程直到 token 生成完毕
        val token = runBlocking {
            JwtGenerator.generateJwt()
        }

        // 获取原始的请求
        val originalRequest = chain.request()

        // 构建新的请求,并添加 Authorization 请求头
        val newRequest = originalRequest.newBuilder()
            .header("Authorization", "Bearer $token")
            .build()

        // 继续执行请求链
        return chain.proceed(newRequest)
    }
}
最后,我们需要在创建 OkHttpClient 实例时,加上这个 AuthInterceptor 拦截器,这样发出的每个网络请求才会自动携带认证信息。
kotlin
// 在 ServiceCreator.kt 中
private val httpClient = OkHttpClient.Builder().apply {
    // 添加认证拦截器
    addInterceptor(AuthInterceptor())
    // 添加日志拦截器
    // ...
}.build()
网络数据源访问入口
再定义一个统一的网络数据源访问入口,对所有网络请求的 API 进行封装。在 data/network 包下新建一个 SunnyWeatherNetwork 单例类。
kotlin
object SunnyWeatherNetwork {

    // 创建 PlaceService 接口的动态代理对象
    private val placeService = ServiceCreator.create<PlaceService>()

    /**
     * 统一的搜索城市数据入口
     */
    suspend fun searchPlaces(query: String) = placeService.searchPlaces(query)

}
仓库层
仓库层有点像数据获取与缓存的中间层,在本地没有缓冲数据的情况下,就去网络层获取,否则,直接将缓存数据返回。不过,对于搜索城市的请求,我们每次都发起网络请求去获取即可。
在 data/repository 包下创建 Repository 单例类。
kotlin
object Repository {

    // 搜索地点信息
    fun searchPlaces(query: String): LiveData<Result<List<Place>>> =
        // liveData 是一个协程构建器,可以创建 LiveData 对象
        liveData(Dispatchers.IO) { // 运行在 IO 线程
            val result = try {
                val placeResponse = SunnyWeatherNetwork.searchPlaces(query)
                if (placeResponse.code == "200") {
                    // 如果请求成功,使用 Result.success 包装数据
                    val places = placeResponse.places
                    Result.success(places)
                } else {
                    // 如果返回错误,使用 Result.failure 包装异常
                    Result.failure(RuntimeException("response status is ${placeResponse.code}"))
                }
            } catch (e: Exception) {
                // 包装异常
                Result.failure(e)
            }
            // emit() 用于发射最终结果,通知 LiveData 更新数据
            emit(result)
        }

}
为了将仓库层获取的数据以响应式的方式传递给 ViewModel,我们选择返回一个 LiveData 对象。
这里我们用到了 liveData() 函数,它能帮我们自动创建并返回一个 LiveData 对象。并且它的代码块中还提供了挂起函数的上下文,让我们可以在其中调用挂起函数,就比如 SunnyWeatherNetwork.searchPlaces()。
在 liveData() 的代码块中,我们使用了 try-catch 捕获异常,并判断网络请求是否成功。最后将成功的数据或是失败的异常包装到 Kotlin 内置的 Result 对象中,通过 emit() 方法将这个 Result 对象发射出去。
emit 方法是 liveData 中专门提供、用于发射数据的挂起函数。它的作用是设定 LiveData 的值,并通知该
LiveData对象的观察者数据发生了变化。
ViewModel 层
最后,来定义 ViewModel 层。它通常和 Activity 或 Fragment 一一对应,在 ui/place 包下创建 PlaceViewModel。
kotlin
class PlaceViewModel : ViewModel() {

    // 触发器
    private val searchLiveData = MutableLiveData<String>()

    // 当 searchLiveData 的值变化时,会自动调用 Repository.searchPlaces 并将返回的 LiveData 切换给 placeLiveData
    val placeLiveData = searchLiveData.switchMap { query ->
        Repository.searchPlaces(query)
    }

    /**
     * 搜索方法,通过调用此方法来触发搜索
     */
    fun searchPlaces(query: String) {
        searchLiveData.value = query
    }
}
现在,我们就具有搜索全球城市数据的能力,接下来实现 UI 层。
实现 UI 层代码
城市搜索页布局
在 res/layout 目录下创建 fragment_place.xml 布局文件。
xml
<?xml version="1.0" encoding="utf-8"?>
<androidx.constraintlayout.widget.ConstraintLayout xmlns:android="http://schemas.android.com/apk/res/android"
    xmlns:app="http://schemas.android.com/apk/res-auto"
    xmlns:tools="http://schemas.android.com/tools"
    android:layout_width="match_parent"
    android:layout_height="match_parent"
    android:background="?attr/colorSurface">

    <com.google.android.material.textfield.TextInputLayout
        android:id="@+id/searchPlaceLayout"
        style="@style/Widget.Material3.TextInputLayout.FilledBox"
        android:layout_width="0dp"
        android:layout_height="wrap_content"
        android:layout_marginStart="16dp"
        android:layout_marginTop="16dp"
        android:layout_marginEnd="16dp"
        android:hint="输入城市名称"
        app:boxBackgroundColor="?attr/colorSurfaceContainerHighest"
        app:boxCornerRadiusBottomEnd="28dp"
        app:boxCornerRadiusBottomStart="28dp"
        app:boxCornerRadiusTopEnd="28dp"
        app:boxCornerRadiusTopStart="28dp"
        app:boxStrokeWidth="0dp"
        app:boxStrokeWidthFocused="0dp"
        app:endIconMode="clear_text"
        app:layout_constraintEnd_toEndOf="parent"
        app:layout_constraintStart_toStartOf="parent"
        app:layout_constraintTop_toTopOf="parent"
        app:startIconDrawable="@drawable/ic_search">

        <com.google.android.material.textfield.TextInputEditText
            android:id="@+id/searchPlaceEdit"
            android:layout_width="match_parent"
            android:layout_height="wrap_content"
            android:imeOptions="actionSearch"
            android:inputType="text"
            android:singleLine="true" />

    </com.google.android.material.textfield.TextInputLayout>

    <androidx.recyclerview.widget.RecyclerView
        android:id="@+id/recyclerView"
        android:layout_width="match_parent"
        android:layout_height="0dp"
        android:layout_marginTop="8dp"
        android:clipToPadding="false"
        android:paddingBottom="16dp"
        android:visibility="gone"
        app:layout_constraintBottom_toBottomOf="parent"
        app:layout_constraintTop_toBottomOf="@id/searchPlaceLayout"
        tools:visibility="visible" />

    <LinearLayout
        android:id="@+id/emptyStateLayout"
        android:layout_width="wrap_content"
        android:layout_height="wrap_content"
        android:gravity="center"
        android:orientation="vertical"
        android:visibility="visible"
        app:layout_constraintBottom_toBottomOf="parent"
        app:layout_constraintEnd_toEndOf="parent"
        app:layout_constraintStart_toStartOf="parent"
        app:layout_constraintTop_toBottomOf="@id/searchPlaceLayout"
        app:layout_constraintVertical_bias="0.4">

        <ImageView
            android:layout_width="100dp"
            android:layout_height="100dp"
            android:alpha="0.5"
            android:src="@drawable/ic_search_empty"
            app:tint="?attr/colorOnSurfaceVariant" />

        <TextView
            android:layout_width="wrap_content"
            android:layout_height="wrap_content"
            android:layout_marginTop="16dp"
            android:text="开始搜索城市"
            android:textColor="?attr/colorOnSurfaceVariant"
            android:textSize="16sp" />

    </LinearLayout>

</androidx.constraintlayout.widget.ConstraintLayout>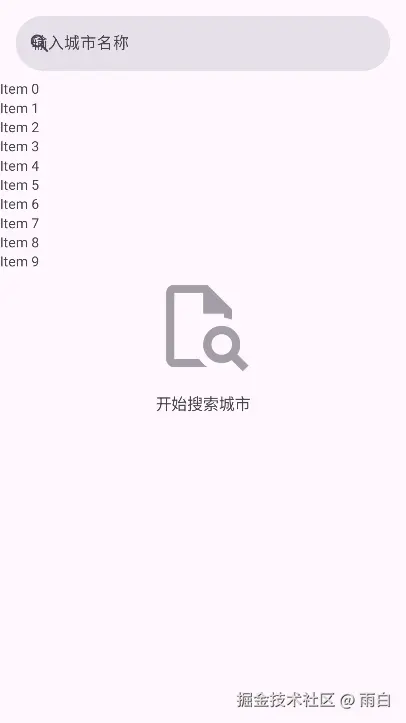
城市列表子项布局
创建一个 item_place.xml 布局文件。
xml
<?xml version="1.0" encoding="utf-8"?>
<LinearLayout xmlns:android="http://schemas.android.com/apk/res/android"
    xmlns:tools="http://schemas.android.com/tools"
    android:layout_width="match_parent"
    android:layout_height="wrap_content"
    android:background="?attr/selectableItemBackground"
    android:orientation="vertical"
    android:paddingStart="16dp"
    android:paddingTop="12dp"
    android:paddingEnd="16dp"
    android:paddingBottom="12dp">

    <TextView
        android:id="@+id/tv_place_name"
        android:layout_width="wrap_content"
        android:layout_height="wrap_content"
        android:textColor="?android:attr/textColorPrimary"
        android:textSize="18sp"
        tools:text="福州" />

    <TextView
        android:id="@+id/tv_place_address"
        android:layout_width="wrap_content"
        android:layout_height="wrap_content"
        android:layout_marginTop="4dp"
        android:textColor="?android:attr/textColorSecondary"
        android:textSize="14sp"
        tools:text="福州, 福建省, 中国" />

</LinearLayout>
列表适配器
在 ui/place 包下为 RecyclerView 创建 PlaceAdapter。
kotlin
import androidx.recyclerview.widget.ListAdapter

class PlaceAdapter(
    private val onItemClick: (Place) -> Unit,
) : ListAdapter<Place, PlaceAdapter.ViewHolder>(PlaceDiffCallback()) {

    // ViewHolder 负责持有和管理单个列表项的视图
    inner class ViewHolder(private val binding: ItemPlaceBinding) :
        RecyclerView.ViewHolder(binding.root) {

        @SuppressLint("SetTextI18n")
        fun bind(place: Place) {
            // 绑定地名和详细地址
            binding.tvPlaceName.text = place.name
            binding.tvPlaceAddress.text = "${place.province}, ${place.country}"

            // 设置点击事件
            itemView.setOnClickListener {
                onItemClick(place)
            }
        }
    }

    // 创建 ViewHolder
    override fun onCreateViewHolder(parent: ViewGroup, viewType: Int): ViewHolder {
        val binding =
            ItemPlaceBinding.inflate(LayoutInflater.from(parent.context), parent, false)
        return ViewHolder(binding)
    }

    // 绑定数据到 ViewHolder
    override fun onBindViewHolder(holder: ViewHolder, position: Int) {
        holder.bind(getItem(position))
    }
}

/**
 * DiffUtil.ItemCallback 用于计算列表差异
 */
class PlaceDiffCallback : DiffUtil.ItemCallback<Place>() {
    // 判断是否是同一个Item
    override fun areItemsTheSame(oldItem: Place, newItem: Place): Boolean {
        return oldItem.id == newItem.id
    }

    // 判断Item的内容是否相同
    override fun areContentsTheSame(oldItem: Place, newItem: Place): Boolean {
        return oldItem == newItem
    }
}
Fragment
在 ui/place 包下创建 PlaceFragment,并继承自 Fragment。
kotlin
class PlaceFragment : Fragment() {

    private val viewModel by lazy { ViewModelProvider(this)[PlaceViewModel::class.java] }

    private var _binding: FragmentPlaceBinding? = null
    private val binding get() = _binding!!

    private lateinit var adapter: PlaceAdapter

    override fun onCreateView(
        inflater: LayoutInflater, container: ViewGroup?, savedInstanceState: Bundle?,
    ): View {
        _binding = FragmentPlaceBinding.inflate(inflater, container, false)
        return binding.root
    }

    override fun onViewCreated(view: View, savedInstanceState: Bundle?) {
        super.onViewCreated(view, savedInstanceState)

        // 设置 RecyclerView
        binding.recyclerView.layoutManager = LinearLayoutManager(activity)
        adapter = PlaceAdapter {}
        binding.recyclerView.adapter = adapter

        // 监听搜索框的文本变化
        binding.searchPlaceEdit.addTextChangedListener { editable ->
            val content = editable.toString()
            if (content.isNotEmpty()) {
                viewModel.searchPlaces(content)
            } else {
                // 如果输入框为空,则清空列表并显示空状态
                binding.recyclerView.visibility = View.GONE
                binding.emptyStateLayout.visibility = View.VISIBLE
                adapter.submitList(emptyList()) // 使用 submitList 清空列表
            }
        }

        // 观察 ViewModel 中的数据变化
        viewModel.placeLiveData.observe(viewLifecycleOwner) { result ->
            val places = result.getOrNull()
            if (places != null) {
                // 如果有数据,显示列表,隐藏空状态
                binding.recyclerView.visibility = View.VISIBLE
                binding.emptyStateLayout.visibility = View.GONE
                adapter.submitList(places) // 使用 submitList 提交新数据
            } else {
                // 如果返回错误,显示Toast
                Toast.makeText(activity, "未能查询到任何地点", Toast.LENGTH_SHORT).show()
                result.exceptionOrNull()?.printStackTrace()
            }
        }
    }


    override fun onDestroyView() {
        super.onDestroyView()
        _binding = null
    }
}
最后,将当前 Fragment 添加到 Activity,使其显示在界面中。
activity_main.xml 文件中的代码:
xml
<?xml version="1.0" encoding="utf-8"?>
<FrameLayout xmlns:android="http://schemas.android.com/apk/res/android"
    android:id="@+id/main"
    android:layout_width="match_parent"
    android:layout_height="match_parent">

    <androidx.fragment.app.FragmentContainerView
        android:id="@+id/placeFragment"
        android:name="com.sunnyweather.android.ui.place.PlaceFragment"
        android:layout_width="match_parent"
        android:layout_height="match_parent" />

</FrameLayout>
别忘了在 AndroidManifest.xml 文件中加上网络权限声明:
xml
<?xml version="1.0" encoding="utf-8"?>
<manifest xmlns:android="http://schemas.android.com/apk/res/android"
    xmlns:tools="http://schemas.android.com/tools">

    <uses-permission android:name="android.permission.INTERNET" />

    ...

</manifest>
至此,城市搜索功能就完成了。
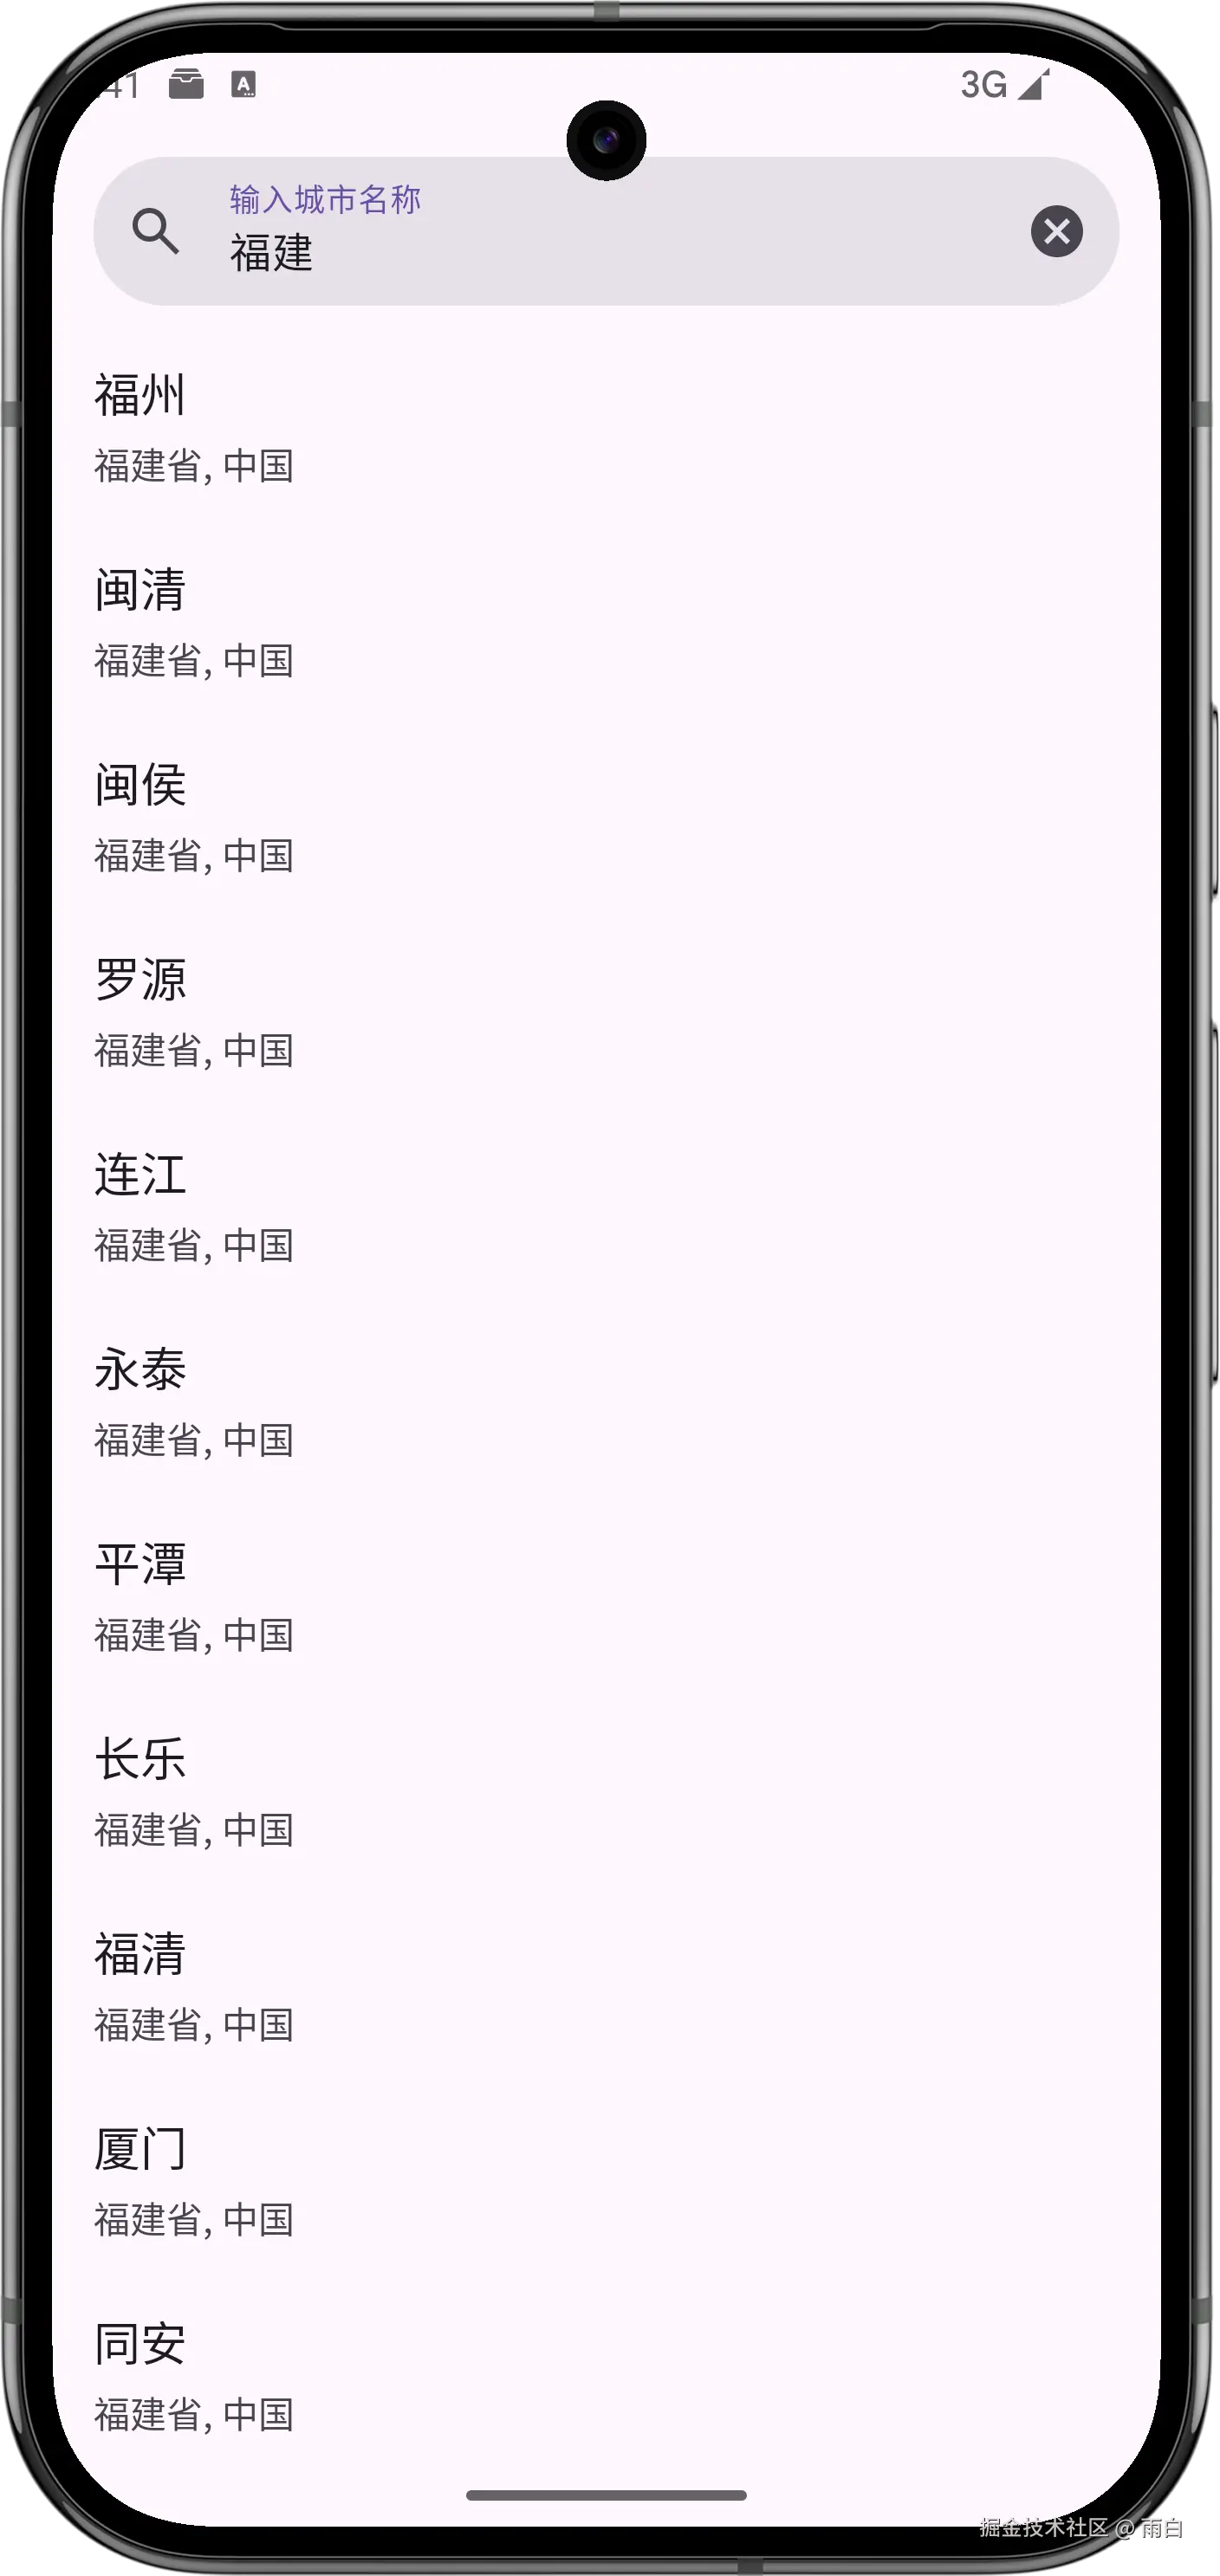
虽然现在我们只在界面中显示了相关城市的名称、行政区、国家,但其实我们也拿到了请求天气所需的城市经纬度信息。待会我们就会利用这些信息,来完成查询并显示天气的功能。
显示天气信息
现在,我们来完成显示详细天气信息的功能。
实现逻辑层代码
数据模型
根据实时天气接口返回的数据和每日天气预报接口返回的数据,我们需要定义相应的数据模型。
在 data/model 包下创建 Weather.kt 文件。
kotlin
/**
 * 实时天气API返回的数据模型
 */
data class RealtimeResponse(
    @SerializedName("code") val code: String,
    @SerializedName("now") val now: Now,
) {
    data class Now(
        @SerializedName("temp") val temperature: String,
        @SerializedName("feelsLike") val feelsLike: String,
        @SerializedName("icon") val icon: String,
        @SerializedName("text") val weatherText: String,
        @SerializedName("windDir") val windDirection: String,
        @SerializedName("windScale") val windScale: String,
        @SerializedName("humidity") val humidity: String,
        @SerializedName("pressure") val pressure: String,
    )
}

/**
 * 每日天气API返回的数据模型
 */
data class DailyResponse(
    @SerializedName("code") val code: String,
    @SerializedName("daily") val dailyForecasts: List<DailyForecast>,
) {
    data class DailyForecast(
        @SerializedName("fxDate") val forecastDate: String,
        @SerializedName("sunrise") val sunrise: String?,
        @SerializedName("sunset") val sunset: String?,
        @SerializedName("tempMax") val maxTemperature: String,
        @SerializedName("tempMin") val minTemperature: String,
        @SerializedName("iconDay") val iconDay: String,
        @SerializedName("textDay") val textDay: String,
        @SerializedName("uvIndex") val uvIndex: String,
    )
}

/**
 * 封装实时天气和未来天气的数据
 */
data class Weather(
    val realtime: RealtimeResponse.Now,
    val daily: List<DailyResponse.DailyForecast>,
)
网络层
接下来,定义访问天气信息API的 Retrofit 接口,在 data/network 包下创建 WeatherService 接口。
kotlin
interface WeatherService {

    /**
     * 获取实时天气信息
     */
    @GET("v7/weather/now")
    suspend fun getRealtimeWeather(
        @Query("location") locationId: String, // 地点经纬度
    ): RealtimeResponse

    /**
     * 获取未来几天的天气信息
     */
    @GET("v7/weather/{days}")
    suspend fun getDailyWeather(
        @Path("days") days: String, // 预报的天数
        @Query("location") locationId: String,
    ): DailyResponse
}
其中,我们使用了 @Path 注解来动态向请求地址中传入预报天数。
然后,依旧在 SunnyWeatherNetwork 中对 WeatherService 接口进行封装。
kotlin
object SunnyWeatherNetwork {

    ...

    // 创建 WeatherService 接口的动态代理对象
    private val weatherService = ServiceCreator.create<WeatherService>()


    suspend fun getRealtimeWeather(locationId: String) =
        weatherService.getRealtimeWeather(locationId)


    suspend fun getDailyWeather(days: String, locationId: String) =
        weatherService.getDailyWeather(days, locationId)

}
仓库层
在 Repository 类中,添加刷新天气信息的方法 refreshWeather()。
kotlin
object Repository {

    ...

    // 刷新天气信息
    fun refreshWeather(locationId: String, days: String): LiveData<Result<Weather>> =
        liveData(Dispatchers.IO) {
            val result = try {
                // coroutineScope 函数用于创建协程作用域,因为 async 函数需要在协程作用域中才能调用
                coroutineScope {
                    // 启动子协程来获取实时天气
                    val deferredRealtime = async {
                        SunnyWeatherNetwork.getRealtimeWeather(locationId)
                    }
                    // 启动另一个子协程来获取每日天气
                    val deferredDaily = async {
                        SunnyWeatherNetwork.getDailyWeather(days, locationId)
                    }

                    // 使用 await() 方法等待两个请求的结果返回,总耗时取决于最慢的那个请求
                    val realtimeResponse = deferredRealtime.await()
                    val dailyResponse = deferredDaily.await()

                    if (realtimeResponse.code == "200" && dailyResponse.code == "200") {
                        val weather = Weather(realtimeResponse.now, dailyResponse.dailyForecasts)
                        Result.success(weather)
                    } else {
                        Result.failure(
                            RuntimeException(
                                "realtime response code is ${realtimeResponse.code}, " +
                                        "daily response code is ${dailyResponse.code}"
                            )
                        )
                    }
                }
            } catch (e: Exception) {
                Result.failure(e)
            }
            emit(result)
        }
}
对于实时天气和未来天气是两个独立的的网络请求,没有先后顺序。所以,我们使用了 coroutineScope 和 async 函数让它们并发执行,以提高执行效率。
定义 ViewModel 层
在 ui/weather 包下创建 WeatherViewModel。
kotlin
class WeatherViewModel : ViewModel() {
    companion object {
        // 默认请求天数
        const val DEFAULT_QUERY_DAYS = "7d"
    }

    // 用于触发天气刷新
    private val locationLiveData = MutableLiveData<Place>()

    val weatherLiveData = locationLiveData.switchMap { location ->
        Repository.refreshWeather(location.id, DEFAULT_QUERY_DAYS)
    }

    /**
     * 刷新天气
     */
    fun refreshWeather(place: Place) {
        if (locationLiveData.value == place) {
            return
        }
        locationLiveData.value = place
    }
}
实现 UI 层代码
创建用于显示天气信息的 WeatherActivity。在 ui/weather 包下创建 WeatherActivity,布局名默认为 activity_weather.xml。
天气主布局
activity_weather.xml 布局中的代码如下:
xml
<?xml version="1.0" encoding="utf-8"?>
<androidx.core.widget.NestedScrollView xmlns:android="http://schemas.android.com/apk/res/android"
    android:id="@+id/weatherLayout"
    android:layout_width="match_parent"
    android:layout_height="match_parent"
    android:overScrollMode="never"
    android:scrollbars="none"
    android:visibility="invisible">

    <LinearLayout
        android:layout_width="match_parent"
        android:layout_height="wrap_content"
        android:orientation="vertical">

        <include
            android:id="@+id/nowLayout"
            layout="@layout/now" />

        <include
            android:id="@+id/forecastLayout"
            layout="@layout/forecast" />

        <include
            android:id="@+id/lifeIndexLayout"
            layout="@layout/life_index" />

    </LinearLayout>
</androidx.core.widget.NestedScrollView>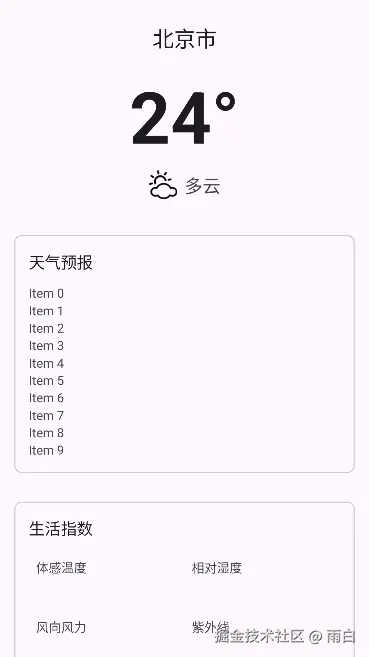
当前天气信息布局
创建 now.xml 作为当前天气信息的布局。
xml
<?xml version="1.0" encoding="utf-8"?>
<androidx.constraintlayout.widget.ConstraintLayout xmlns:android="http://schemas.android.com/apk/res/android"
    xmlns:app="http://schemas.android.com/apk/res-auto"
    xmlns:tools="http://schemas.android.com/tools"
    android:layout_width="match_parent"
    android:layout_height="wrap_content"
    android:padding="24dp">

    <TextView
        android:id="@+id/placeName"
        android:layout_width="wrap_content"
        android:layout_height="wrap_content"
        android:textColor="?android:attr/textColorPrimary"
        android:textSize="24sp"
        app:layout_constraintEnd_toEndOf="parent"
        app:layout_constraintStart_toStartOf="parent"
        app:layout_constraintTop_toTopOf="parent"
        tools:text="北京市" />

    <TextView
        android:id="@+id/currentTemp"
        android:layout_width="wrap_content"
        android:layout_height="wrap_content"
        android:layout_marginTop="16dp"
        android:textColor="?android:attr/textColorPrimary"
        android:textSize="80sp"
        android:textStyle="bold"
        app:layout_constraintEnd_toEndOf="parent"
        app:layout_constraintStart_toStartOf="parent"
        app:layout_constraintTop_toBottomOf="@id/placeName"
        tools:text="24°" />

    <LinearLayout
        android:id="@+id/skyLayout"
        android:layout_width="wrap_content"
        android:layout_height="wrap_content"
        android:layout_marginTop="8dp"
        android:gravity="center_vertical"
        android:orientation="horizontal"
        app:layout_constraintEnd_toEndOf="parent"
        app:layout_constraintStart_toStartOf="parent"
        app:layout_constraintTop_toBottomOf="@id/currentTemp">

        <ImageView
            android:id="@+id/nowIcon"
            android:layout_width="32dp"
            android:layout_height="32dp"
            android:layout_marginEnd="8dp"
            tools:src="@drawable/ic_weather_101" />

        <TextView
            android:id="@+id/currentSky"
            android:layout_width="wrap_content"
            android:layout_height="wrap_content"
            android:textColor="?android:attr/textColorSecondary"
            android:textSize="20sp"
            tools:text="多云" />

    </LinearLayout>

</androidx.constraintlayout.widget.ConstraintLayout>
未来天气信息布局
创建 forecast.xml 作为未来天气信息的布局。
xml
<?xml version="1.0" encoding="utf-8"?>
<com.google.android.material.card.MaterialCardView xmlns:android="http://schemas.android.com/apk/res/android"
    xmlns:app="http://schemas.android.com/apk/res-auto"
    android:layout_width="match_parent"
    android:layout_height="wrap_content"
    android:layout_margin="16dp"
    app:cardCornerRadius="8dp">

    <LinearLayout
        android:layout_width="match_parent"
        android:layout_height="wrap_content"
        android:orientation="vertical"
        android:padding="16dp">

        <TextView
            android:layout_width="wrap_content"
            android:layout_height="wrap_content"
            android:text="天气预报"
            android:textColor="?android:attr/textColorPrimary"
            android:textSize="18sp" />

        <androidx.recyclerview.widget.RecyclerView
            android:id="@+id/forecastRecyclerView"
            android:layout_width="match_parent"
            android:layout_height="wrap_content"
            android:layout_marginTop="12dp" />

    </LinearLayout>
</com.google.android.material.card.MaterialCardView>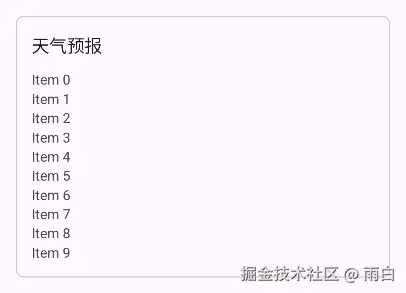
未来天气信息子项布局
创建 item_forecast.xml。
xml
<?xml version="1.0" encoding="utf-8"?>
<LinearLayout xmlns:android="http://schemas.android.com/apk/res/android"
    xmlns:tools="http://schemas.android.com/tools"
    android:layout_width="match_parent"
    android:layout_height="wrap_content"
    android:gravity="center_vertical"
    android:orientation="horizontal"
    android:padding="12dp">

    <TextView
        android:id="@+id/dateInfo"
        android:layout_width="0dp"
        android:layout_height="wrap_content"
        android:layout_weight="2"
        android:textColor="?android:attr/textColorPrimary"
        android:textSize="16sp"
        tools:text="周三 7/24" />

    <ImageView
        android:id="@+id/skyIcon"
        android:layout_width="24dp"
        android:layout_height="24dp"
        android:layout_marginEnd="8dp"
        tools:src="@drawable/ic_weather_100" />

    <TextView
        android:id="@+id/skyInfo"
        android:layout_width="0dp"
        android:layout_height="wrap_content"
        android:layout_weight="3"
        android:textColor="?android:attr/textColorSecondary"
        android:textSize="16sp"
        tools:text="晴" />

    <TextView
        android:id="@+id/temperatureInfo"
        android:layout_width="0dp"
        android:layout_height="wrap_content"
        android:layout_weight="2"
        android:gravity="end"
        android:textColor="?android:attr/textColorPrimary"
        android:textSize="16sp"
        tools:text="26° / 18°" />

</LinearLayout>
适配器
在 ui/weather 包下创建 ForecastAdapter。
kotlin
import android.icu.text.SimpleDateFormat
import androidx.recyclerview.widget.ListAdapter

class ForecastAdapter :
    ListAdapter<DailyResponse.DailyForecast, ForecastAdapter.ViewHolder>(ForecastDiffCallback()) {

    inner class ViewHolder(private val binding: ItemForecastBinding) :
        RecyclerView.ViewHolder(binding.root) {
        @SuppressLint("SetTextI18n")
        fun bind(forecast: DailyResponse.DailyForecast) {
            // 绑定数据到视图
            binding.apply {
                dateInfo.text = formatForecastDate(forecast.forecastDate)
                skyInfo.text = forecast.textDay
                temperatureInfo.text = "${forecast.maxTemperature}° / ${forecast.minTemperature}°"

                // 动态加载天气图标
                val context = itemView.context
                val iconResourceId = context.resources.getIdentifier(
                    "ic_weather_${forecast.iconDay}",
                    "drawable",
                    context.packageName
                )
                if (iconResourceId != 0) {
                    skyIcon.setImageResource(iconResourceId)
                }
            }
        }
    }

    override fun onCreateViewHolder(parent: ViewGroup, viewType: Int): ViewHolder {
        val binding =
            ItemForecastBinding.inflate(LayoutInflater.from(parent.context), parent, false)
        return ViewHolder(binding)
    }

    override fun onBindViewHolder(holder: ViewHolder, position: Int) {
        holder.bind(getItem(position))
    }

    /**
     * 用于格式化日期
     */
    private fun formatForecastDate(inputDate: String): String {
        return try {
            val inputFormat = SimpleDateFormat("yyyy-MM-dd", Locale.getDefault())
            val date = inputFormat.parse(inputDate)
            val outputFormat = SimpleDateFormat("EEEE MM/dd", Locale.getDefault())
            outputFormat.format(date!!)
        } catch (e: Exception) {
            inputDate
        }
    }
}


class ForecastDiffCallback : DiffUtil.ItemCallback<DailyResponse.DailyForecast>() {
    override fun areItemsTheSame(
        oldItem: DailyResponse.DailyForecast,
        newItem: DailyResponse.DailyForecast,
    ): Boolean {
        return oldItem.forecastDate == newItem.forecastDate
    }

    override fun areContentsTheSame(
        oldItem: DailyResponse.DailyForecast,
        newItem: DailyResponse.DailyForecast,
    ): Boolean {
        return oldItem == newItem
    }
}
生活指数布局
创建 life_index.xml 生活指数布局。
xml
<?xml version="1.0" encoding="utf-8"?>
<com.google.android.material.card.MaterialCardView xmlns:android="http://schemas.android.com/apk/res/android"
    xmlns:app="http://schemas.android.com/apk/res-auto"
    android:layout_width="match_parent"
    android:layout_height="wrap_content"
    android:layout_margin="16dp"
    app:cardCornerRadius="8dp">

    <LinearLayout
        android:layout_width="match_parent"
        android:layout_height="wrap_content"
        android:orientation="vertical"
        android:padding="16dp">

        <TextView
            android:layout_width="wrap_content"
            android:layout_height="wrap_content"
            android:text="生活指数"
            android:textColor="?android:attr/textColorPrimary"
            android:textSize="18sp" />

        <GridLayout
            android:layout_width="match_parent"
            android:layout_height="wrap_content"
            android:layout_marginTop="12dp"
            android:columnCount="2">

            <LinearLayout
                android:layout_columnWeight="1"
                android:layout_margin="8dp"
                android:orientation="vertical">

                <TextView
                    android:layout_width="wrap_content"
                    android:layout_height="wrap_content"
                    android:text="体感温度"
                    android:textColor="?android:attr/textColorSecondary" />

                <TextView
                    android:id="@+id/feelsLikeText"
                    android:layout_width="wrap_content"
                    android:layout_height="wrap_content"
                    android:textColor="?android:attr/textColorPrimary"
                    android:textSize="22sp" />
            </LinearLayout>

            <LinearLayout
                android:layout_columnWeight="1"
                android:layout_margin="8dp"
                android:orientation="vertical">

                <TextView
                    android:layout_width="wrap_content"
                    android:layout_height="wrap_content"
                    android:text="相对湿度"
                    android:textColor="?android:attr/textColorSecondary" />

                <TextView
                    android:id="@+id/humidityText"
                    android:layout_width="wrap_content"
                    android:layout_height="wrap_content"
                    android:textColor="?android:attr/textColorPrimary"
                    android:textSize="22sp" />
            </LinearLayout>

            <LinearLayout
                android:layout_columnWeight="1"
                android:layout_margin="8dp"
                android:orientation="vertical">

                <TextView
                    android:layout_width="wrap_content"
                    android:layout_height="wrap_content"
                    android:text="风向风力"
                    android:textColor="?android:attr/textColorSecondary" />

                <TextView
                    android:id="@+id/windText"
                    android:layout_width="wrap_content"
                    android:layout_height="wrap_content"
                    android:textColor="?android:attr/textColorPrimary"
                    android:textSize="22sp" />
            </LinearLayout>

            <LinearLayout
                android:layout_columnWeight="1"
                android:layout_margin="8dp"
                android:orientation="vertical">

                <TextView
                    android:layout_width="wrap_content"
                    android:layout_height="wrap_content"
                    android:text="紫外线"
                    android:textColor="?android:attr/textColorSecondary" />

                <TextView
                    android:id="@+id/uvText"
                    android:layout_width="wrap_content"
                    android:layout_height="wrap_content"
                    android:textColor="?android:attr/textColorPrimary"
                    android:textSize="22sp" />
            </LinearLayout>

        </GridLayout>
    </LinearLayout>
</com.google.android.material.card.MaterialCardView>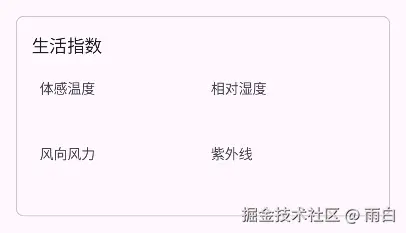
WeatherActivity
最后,来到 WeatherActivity 中请求天气数据并展示到界面中。
kotlin
class WeatherActivity : AppCompatActivity() {

    private val viewModel by lazy { ViewModelProvider(this)[WeatherViewModel::class.java] }

    private lateinit var binding: ActivityWeatherBinding

    private lateinit var forecastAdapter: ForecastAdapter

    // 从Intent传入的Place对象
    private var currentPlace: Place? = null

    override fun onCreate(savedInstanceState: Bundle?) {
        super.onCreate(savedInstanceState)
        binding = ActivityWeatherBinding.inflate(layoutInflater)
        enableEdgeToEdge()
        setContentView(binding.root)

        // 初始化 Adapter 和 RecyclerView
        forecastAdapter = ForecastAdapter()
        binding.forecastLayout.forecastRecyclerView.apply {
            layoutManager = LinearLayoutManager(this@WeatherActivity)
            adapter = forecastAdapter
        }

        // 从 Intent 中获取地点信息
        currentPlace = if (Build.VERSION.SDK_INT >= Build.VERSION_CODES.TIRAMISU) {
            intent.getParcelableExtra("key_place", Place::class.java)
        } else {
            @Suppress("DEPRECATION")
            intent.getParcelableExtra("key_place")
        }

        // 观察 LiveData 数据变化
        viewModel.weatherLiveData.observe(this) { result ->
            val weather = result.getOrNull()
            if (weather != null) {
                showWeatherInfo(weather) // 如果成功,则显示天气信息
            } else {
                Toast.makeText(this, "无法成功获取天气信息", Toast.LENGTH_SHORT).show()
                result.exceptionOrNull()?.printStackTrace()
            }

        }


        // 触发首次数据加载
        currentPlace?.let {
            viewModel.refreshWeather(it)
        } ?: run {
            Toast.makeText(this, "获取地点信息失败", Toast.LENGTH_SHORT).show()
            finish()
        }
    }

    /**
     * 将 Weather 对象的数据填充到界面上
     */
    @SuppressLint("SetTextI18n")
    private fun showWeatherInfo(weather: Weather) {
        // 填充 now.xml 布局
        binding.nowLayout.placeName.text = currentPlace?.name
        val realtime = weather.realtime
        binding.nowLayout.currentTemp.text = "${realtime.temperature}°C"
        binding.nowLayout.currentSky.text = realtime.weatherText
        // 动态加载当前天气图标
        val realtimeIconResId =
            resources.getIdentifier("ic_weather_${realtime.icon}", "drawable", packageName)
        if (realtimeIconResId != 0) {
            binding.nowLayout.nowIcon.setImageResource(realtimeIconResId)
        }

        // 填充 forecast.xml 布局,使用 submitList 更新 RecyclerView
        forecastAdapter.submitList(weather.daily)

        // 填充 life_index.xml 布局
        val lifeIndex = weather.daily[0] // 生活指数数据取自当天
        binding.lifeIndexLayout.feelsLikeText.text = "${realtime.feelsLike}°C"
        binding.lifeIndexLayout.humidityText.text = "${realtime.humidity}%"
        binding.lifeIndexLayout.windText.text = "${realtime.windDirection} ${realtime.windScale}级"
        binding.lifeIndexLayout.uvText.text = lifeIndex.uvIndex

        // 让天气信息主布局可见
        binding.weatherLayout.visibility = View.VISIBLE
    }
}
实现页面跳转
在 PlaceFragment 中添加列表项的点击回调逻辑,以便能够从城市搜索页跳转到天气页。
kotlin
class PlaceFragment : Fragment() {

    ...

    override fun onViewCreated(view: View, savedInstanceState: Bundle?) {
        super.onViewCreated(view, savedInstanceState)

        binding.recyclerView.layoutManager = LinearLayoutManager(activity)
        adapter = PlaceAdapter { place ->
            val intent = Intent(activity, WeatherActivity::class.java).apply {
                putExtra("key_place", place) // 将选中的 Place 对象传递给天气页面
            }
            startActivity(intent)
            activity?.finish()
        }
        binding.recyclerView.adapter = adapter

        ...

    }

    ...

}
现在运行程序,点击搜索结果后,就能跳转并显示天气信息了。