记录选中的城市
在上篇博文中,我们已经成功完成了展示天气的功能。但我们并没有对选中的城市进行保存,所以每当退出应用重进时,还需要重新搜索并选择城市。为此,我们现在就来实现记录选中城市的功能。
Dao 层
因为要存储的数据是单个的地点信息,不属于复杂的关系型数据,所以我们使用 SharedPreferences 来存储选中的城市即可。
在 data/dao 包下创建 PlaceDao 单例类。
kotlin
import androidx.core.content.edit

object PlaceDao {

    // 用于序列化和反序列化 Place 对象
    private val gson = Gson()

    // SharedPreferences 文件的名称
    private const val PREFERENCES_NAME = "sunny_weather"

    // 存储 Place 对象的键
    private const val KEY_PLACE = "place"


    /**
     * 将 Place 对象保存到 SharedPreferences
     */
    suspend fun savePlace(place: Place) = withContext(Dispatchers.IO) {
        sharedPreferences().edit {
            // 将 Place 对象转换为 JSON 字符串后存储
            putString(KEY_PLACE, gson.toJson(place))
        }
    }

    /**
     * 从 SharedPreferences 中读取已保存的 Place 对象
     */
    suspend fun getSavedPlace(): Place? = withContext(Dispatchers.IO) {
        val placeJson = sharedPreferences().getString(KEY_PLACE, null)
        placeJson?.let {
            try {
                // 将 JSON 字符串反序列化为 Place 对象
                gson.fromJson(it, Place::class.java)
            } catch (e: Exception) {
                e.printStackTrace()
                null
            }
        }
    }


    /**
     * 检查是否已有地点信息被保存
     */
    suspend fun isPlaceSaved() = withContext(Dispatchers.IO) {
        sharedPreferences().contains(KEY_PLACE)
    }

    /**
     * 获取 SharedPreferences 的实例
     */
    private fun sharedPreferences() =
        SunnyWeatherApplication.context.getSharedPreferences(PREFERENCES_NAME, Context.MODE_PRIVATE)

}
在 PlaceDao 中,我们封装了存储、读取数据的接口。由于 SharedPreferences 的读写是文件 IO 操作,可能会阻塞主线程(数据量大或系统繁忙时)。所以我们将这些方法声明为挂起函数,并通过使用 withContext(Dispatchers.IO) 函数,确保它们在 IO 线程池中执行。
仓库层
在 Repository 中封装上述接口,作为数据来源的统一入口。
kotlin
object Repository {

    ...

    /**
     * 保存地点信息
     */
    suspend fun savePlace(place: Place) = PlaceDao.savePlace(place)

    /**
     * 获取已保存的地点信息
     */
    suspend fun getSavedPlace() = PlaceDao.getSavedPlace()

    /**
     * 检查是否已保存地点信息
     */
    suspend fun isPlaceSaved() = PlaceDao.isPlaceSaved()
}
ViewModel
这几个接口的业务逻辑和 PlaceViewModel 相关,所以我们需要在 PlaceViewModel 再做一层封装。
kotlin
class PlaceViewModel : ViewModel() {

    ...

    private val _savedPlace = MutableLiveData<Place?>()
    val savedPlace: LiveData<Place?> = _savedPlace

    /**
     * 从仓库层获取已保存的地点信息
     */
    fun getSavedPlace() {
        viewModelScope.launch {
            val place = Repository.getSavedPlace()
            _savedPlace.value = place
        }
    }


    /**
     * 保存选中的地点信息
     */
    fun savePlace(place: Place) {
        viewModelScope.launch {
            Repository.savePlace(place)
            _savedPlace.value = place
        }
    }
}
实现功能
在 PlaceFragment 中增加列表项的点击逻辑,并在 Fragment 创建时检查是否已有记录。
kotlin
class PlaceFragment : Fragment() {

    // ...

    override fun onViewCreated(view: View, savedInstanceState: Bundle?) {
        super.onViewCreated(view, savedInstanceState)

        // 实现自动跳转
        checkSavedPlace()

        // 设置 RecyclerView 和 Adapter
        binding.recyclerView.layoutManager = LinearLayoutManager(activity)
        adapter = PlaceAdapter { place ->
            // 存储选中的城市
            viewModel.savePlace(place)
            // 跳转到天气详情页
            navigateToWeather(place)
        }
        binding.recyclerView.adapter = adapter

        // ...
    }

    /**
     * 检查是否有已保存的城市记录
     */
    private fun checkSavedPlace() {
        // 触发 ViewModel 加载已保存的地点数据
        viewModel.getSavedPlace()
        viewModel.savedPlace.observe(viewLifecycleOwner) { place ->
            // 如果有城市被保存过
            if (place != null) {
                // 直接跳转到天气详情页
                navigateToWeather(place)
            }
        }
    }

   /**
     * 跳转到 WeatherActivity
     */
    private fun navigateToWeather(place: Place) {
        val intent = Intent(requireActivity(), WeatherActivity::class.java).apply {
            putExtra("key_place", place)
        }
        startActivity(intent)
        // 结束当前 Activity,防止用户返回
        requireActivity().finish()
    }

    // ...
}
这里我们进行了几处修改:
-
在点击列表项跳转到
WeatherActivity之前,调用了PlaceViewModel的savePlace()方法存储了选中的城市。 -
封装了跳转到
WeatherActivity的逻辑到navigateToWeather方法中。 -
然后在
onViewCreated方法中,我们调用了checkSavedPlace()方法检查是否已有存储的城市数据,如果有,就会直接跳转到WeatherActivity,而无需用户每次都搜索并选择城市。
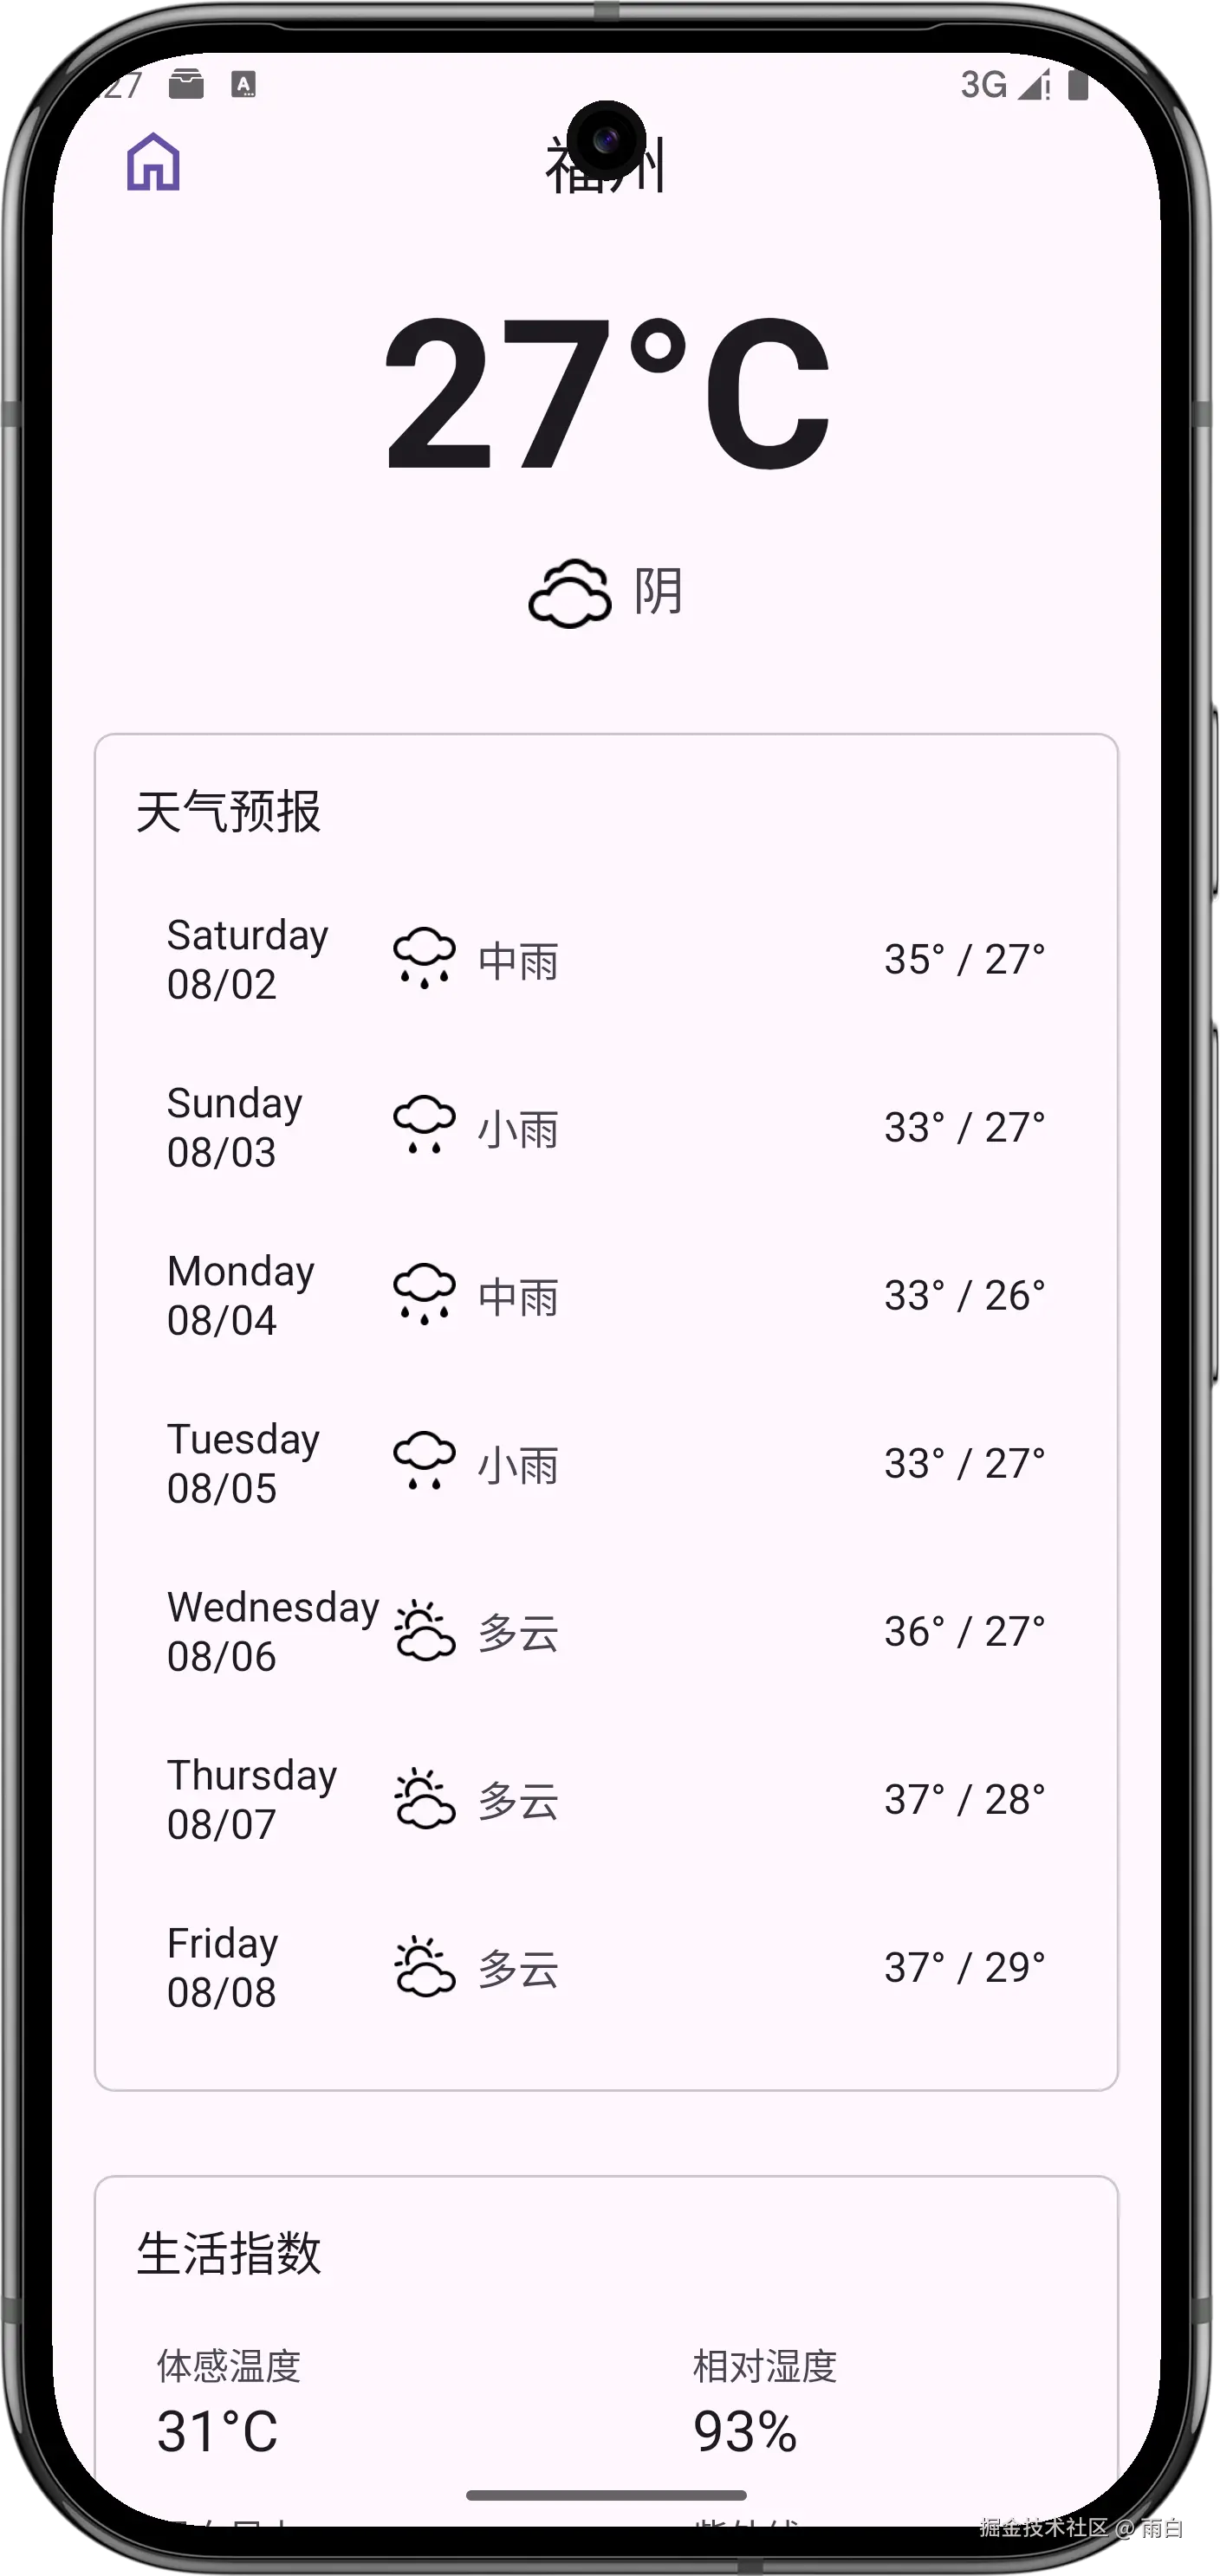
现在,当已选择某个城市后,下次再次进入应用时,会直接跳转到天气页,并展示该城市的天气信息。
手动刷新天气和切换城市
现在,你会发现有个很严重的bug。那就是当你选择一个城市后,就无法再回到搜索页搜索并查看其他城市的天气了。
所以,现在我们来完成切换城市以及手动刷新城市的功能。
手动刷新天气
我们通过下拉刷新来完成天气信息的刷新。
修改 activity_weather.xml 布局文件,在最外面套上一层 SwipeRefreshLayout,这样就可以进行下拉刷新了。
xml
<?xml version="1.0" encoding="utf-8"?>
<androidx.swiperefreshlayout.widget.SwipeRefreshLayout xmlns:android="http://schemas.android.com/apk/res/android"
    android:id="@+id/swipeRefreshLayout"
    android:layout_width="match_parent"
    android:layout_height="match_parent">

    <androidx.core.widget.NestedScrollView
        android:id="@+id/weatherLayout"
        android:layout_width="match_parent"
        android:layout_height="match_parent"
        android:overScrollMode="never"
        android:scrollbars="none"
        android:visibility="visible">

        <LinearLayout
            android:layout_width="match_parent"
            android:layout_height="wrap_content"
            android:orientation="vertical">

            <include
                android:id="@+id/nowLayout"
                layout="@layout/now" />

            <include
                android:id="@+id/forecastLayout"
                layout="@layout/forecast" />

            <include
                android:id="@+id/lifeIndexLayout"
                layout="@layout/life_index" />

        </LinearLayout>
    </androidx.core.widget.NestedScrollView>
</androidx.swiperefreshlayout.widget.SwipeRefreshLayout>
在 WeatherActivity 中添加下拉刷新的逻辑。
kotlin
class WeatherActivity : AppCompatActivity() {

    // ...

    override fun onCreate(savedInstanceState: Bundle?) {
        // ...

        // 观察 weatherLiveData 的数据变化
        viewModel.weatherLiveData.observe(this) { result ->
            val weather = result.getOrNull()
            if (weather != null) {
                // 如果成功获取到天气,则显示天气信息
                showWeatherInfo(weather)
            } else {
                Toast.makeText(this, "无法成功获取天气信息", Toast.LENGTH_SHORT).show()
                result.exceptionOrNull()?.printStackTrace()
            }
            // 结束下拉刷新动画
            binding.swipeRefreshLayout.isRefreshing = false
        }

        // 触发首次数据加载
        currentPlace?.let {
            refreshWeather()
        } ?: run {
            Toast.makeText(this, "获取地点信息失败", Toast.LENGTH_SHORT).show()
            finish()
        }

        // 设置下拉刷新监听器
        binding.swipeRefreshLayout.setOnRefreshListener {
            refreshWeather()
        }
    }

    /**
     * 刷新天气信息
     */
    private fun refreshWeather() {
        // 显示下拉刷新进度条
        binding.swipeRefreshLayout.isRefreshing = true
        currentPlace?.let {
            // 发起刷新
            viewModel.refreshWeather(it.copy())
        }
    }

    // ...
}
此次修改中,我们将首次数据的逻辑放到了 refreshWeather() 方法中,并添加了显示下拉进度条的逻辑。通过 setOnRefreshListener() 给 SwipeRefreshLayout 设置了监听器,每当用户下拉时,就会调用 refreshWeather() 方法。最后,我们在 weatherLiveData 的观察者中,无论请求成功或失败,都要隐藏刷新进度条。
现在,手动刷新天气的功能就完成了。
切换城市
切换城市功能需要搜索全球城市的数据,对此,我们可以复用之前的 PlaceFragment。只需在天气页的布局中引入即可。
为了不遮挡天气页,我们将其放入到滑动菜单(DrawerLayout)中。
首先在 now.xml 布局文件中添加一个用于打开滑动菜单的按钮。
xml
<?xml version="1.0" encoding="utf-8"?>
<androidx.constraintlayout.widget.ConstraintLayout ...>

    <Button
        android:id="@+id/navBtn"
        android:layout_width="30dp"
        android:layout_height="30dp"
        android:background="@drawable/ic_home"
        app:layout_constraintBottom_toBottomOf="@id/placeName"
        app:layout_constraintEnd_toStartOf="@id/placeName"
        app:layout_constraintHorizontal_bias="0"
        app:layout_constraintStart_toStartOf="parent"
        app:layout_constraintTop_toTopOf="@id/placeName" />

    ...

</androidx.constraintlayout.widget.ConstraintLayout>
其中的图标,你可以在 res/drawable-xxhdpi 下创建 ic_home.xml 文件。
xml
<vector xmlns:android="http://schemas.android.com/apk/res/android"
    android:width="24dp"
    android:height="24dp"
    android:viewportWidth="960"
    android:viewportHeight="960"
    android:tint="?attr/colorControlNormal">
  <path
      android:fillColor="@android:color/white"
      android:pathData="M240,760L360,760L360,520L600,520L600,760L720,760L720,400L480,220L240,400L240,760ZM160,840L160,360L480,120L800,360L800,840L520,840L520,600L440,600L440,840L160,840ZM480,490L480,490L480,490L480,490L480,490L480,490L480,490L480,490L480,490Z"/>
</vector>
或是从 Google Fonts 获取。
在 activity_weather.xml 布局中加入滑动菜单和承载 PlaceFragment 的容器。
xml
<?xml version="1.0" encoding="utf-8"?>
<androidx.drawerlayout.widget.DrawerLayout xmlns:android="http://schemas.android.com/apk/res/android"
    android:id="@+id/drawerLayout"
    android:layout_width="match_parent"
    android:layout_height="match_parent">

    <androidx.swiperefreshlayout.widget.SwipeRefreshLayout
        android:id="@+id/swipeRefreshLayout"
        android:layout_width="match_parent"
        android:layout_height="match_parent">

        <androidx.core.widget.NestedScrollView
            android:id="@+id/weatherLayout"
            android:layout_width="match_parent"
            android:layout_height="match_parent"
            android:overScrollMode="never"
            android:scrollbars="none"
            android:visibility="visible">

            <LinearLayout
                android:layout_width="match_parent"
                android:layout_height="wrap_content"
                android:orientation="vertical">

                <include
                    android:id="@+id/nowLayout"
                    layout="@layout/now" />

                <include
                    android:id="@+id/forecastLayout"
                    layout="@layout/forecast" />

                <include
                    android:id="@+id/lifeIndexLayout"
                    layout="@layout/life_index" />

            </LinearLayout>
        </androidx.core.widget.NestedScrollView>
    </androidx.swiperefreshlayout.widget.SwipeRefreshLayout>

    <FrameLayout
        android:layout_width="match_parent"
        android:layout_height="match_parent"
        android:layout_gravity="start"
        android:background="?attr/colorSurface"
        android:clickable="true"
        android:focusable="true">

        <androidx.fragment.app.FragmentContainerView
            android:id="@+id/placeFragment"
            android:name="com.sunnyweather.android.ui.place.PlaceFragment"
            android:layout_width="match_parent"
            android:layout_height="match_parent"
            android:layout_marginTop="25dp" />
    </FrameLayout>

</androidx.drawerlayout.widget.DrawerLayout>
接着,在 WeatherActivity 中增加滑动菜单的逻辑。
kotlin
// 在 WeatherActivity.kt 的 onCreate 方法中
override fun onCreate(savedInstanceState: Bundle?) {
    ...

    binding.nowLayout.navBtn.setOnClickListener {
        // 打开滑动菜单
        binding.drawerLayout.openDrawer(GravityCompat.START)
    }

    binding.drawerLayout.addDrawerListener(object : DrawerLayout.DrawerListener {
        override fun onDrawerStateChanged(newState: Int) {}
        override fun onDrawerSlide(drawerView: View, slideOffset: Float) {}
        override fun onDrawerOpened(drawerView: View) {}

        // 抽屉关闭时的回调
        override fun onDrawerClosed(drawerView: View) {
            val manager = getSystemService(Context.INPUT_METHOD_SERVICE)
                    as InputMethodManager
            // 隐藏软键盘
            manager.hideSoftInputFromWindow(
                drawerView.windowToken,
                InputMethodManager.HIDE_NOT_ALWAYS
            )
        }
    })
}
另外,之前我们在 PlaceFragment 进行了一个判断:如果当前已有选中的城市,就跳转到 WeatherActivity。但此时我们将 PlaceFragment 嵌入到了 WeatherActivity,这段逻辑会造成无限循环跳转。
为此,我们来对 PlaceFragment 进行修改。
kotlin
// PlaceFragment.kt
private fun checkSavedPlace() {
    viewModel.getSavedPlace()
    viewModel.savedPlace.observe(viewLifecycleOwner) { place ->
        // 新增条件:只有当前宿主是 MainActivity 时,才执行自动跳转
        if (place != null && activity is MainActivity) { // <-修改点
            navigateToWeather(place)
        }
    }
}
我们再来修改选中城市列表项的逻辑。之前是点击后直接跳转到 WeatherActivity,但现在如果 PlaceFragment 被嵌入到了 WeatherActivity 中,就无需跳转,只要请求城市的天气信息即可。
kotlin
// PlaceFragment.kt

// 获取与宿主 Activity 共享的 WeatherViewModel 实例
private val sharedWeatherViewModel: WeatherViewModel by activityViewModels()

override fun onViewCreated(view: View, savedInstanceState: Bundle?) {
    // ...
    adapter = PlaceAdapter { place ->
        // 存储选中的城市
        viewModel.savePlace(place)

        if (activity is WeatherActivity) {
            val activity = requireActivity() as WeatherActivity

            // 关闭抽屉
            activity.closeDrawer()

            // 刷新天气信息
            sharedWeatherViewModel.refreshWeather(place)
        } else {
            // 执行跳转逻辑
            navigateToWeather(place)
        }
    }
    // ...
}
使用
activityViewModels()方法委托需要添加依赖:
kotlin// app/build.gradle.kts implementation("androidx.fragment:fragment-ktx:1.8.8")
其中,我们需要在 WeatherActivity 中创建 closeDrawer() 公有方法,用于关闭抽屉。
kotlin
// 公共方法,用于让 Fragment 请求关闭抽屉
fun closeDrawer() {
    binding.drawerLayout.closeDrawers()
}
由于当前天气页地点的数据来源不止一种,可能由 Intent 传入,也可能是用户在抽屉中选择的。为此,我们让 WeatherViewModel 持有"当前地点"这个状态。
kotlin
class WeatherViewModel : ViewModel() {
    // ...

    // 用于触发天气刷新
    private val _currentPlace = MutableLiveData<Place>()
    val currentPlace: LiveData<Place> = _currentPlace

    val weatherLiveData = _currentPlace.switchMap { location ->
        Repository.refreshWeather(location.id, DEFAULT_QUERY_DAYS)
    }

    /**
     * 为指定地点加载天气
     */
    fun refreshWeather(place: Place) {
        _currentPlace.value = place
    }
}
删除 WeatherActivity 中的 currentPlace 变量。
kotlin
class WeatherActivity : AppCompatActivity() {
// ...
// 从Intent传入的Place对象
// private var currentPlace: Place? = null 不再需要了
override fun onCreate(savedInstanceState: Bundle?) {
// ...
// 从 Intent 中获取初始地点信息
val initialPlace = if (Build.VERSION.SDK_INT >= Build.VERSION_CODES.TIRAMISU) {
intent.getParcelableExtra("key_place", Place::class.java)
} else {
@Suppress("DEPRECATION")
intent.getParcelableExtra("key_place")
}
// 触发首次数据加载
if (initialPlace != null) {
viewModel.refreshWeather(initialPlace)
} else {
Toast.makeText(this, "获取地点信息失败", Toast.LENGTH_SHORT).show()
finish()
return
}
viewModel.currentPlace.observe(this) { place ->
//更新地点名称
binding.nowLayout.placeName.text = place.name
}
}
/**
* 将 Weather 对象的数据填充到界面上
*/
@SuppressLint("SetTextI18n")
private fun showWeatherInfo(weather: Weather) {
// binding.nowLayout.placeName.text = currentPlace?.name 删除这一行
// ...
}
/**
* 刷新天气信息
*/
private fun refreshWeather() {
binding.swipeRefreshLayout.isRefreshing = true
// 发起刷新
viewModel.currentPlace.value?.let { viewModel.refreshWeather(it) }
}
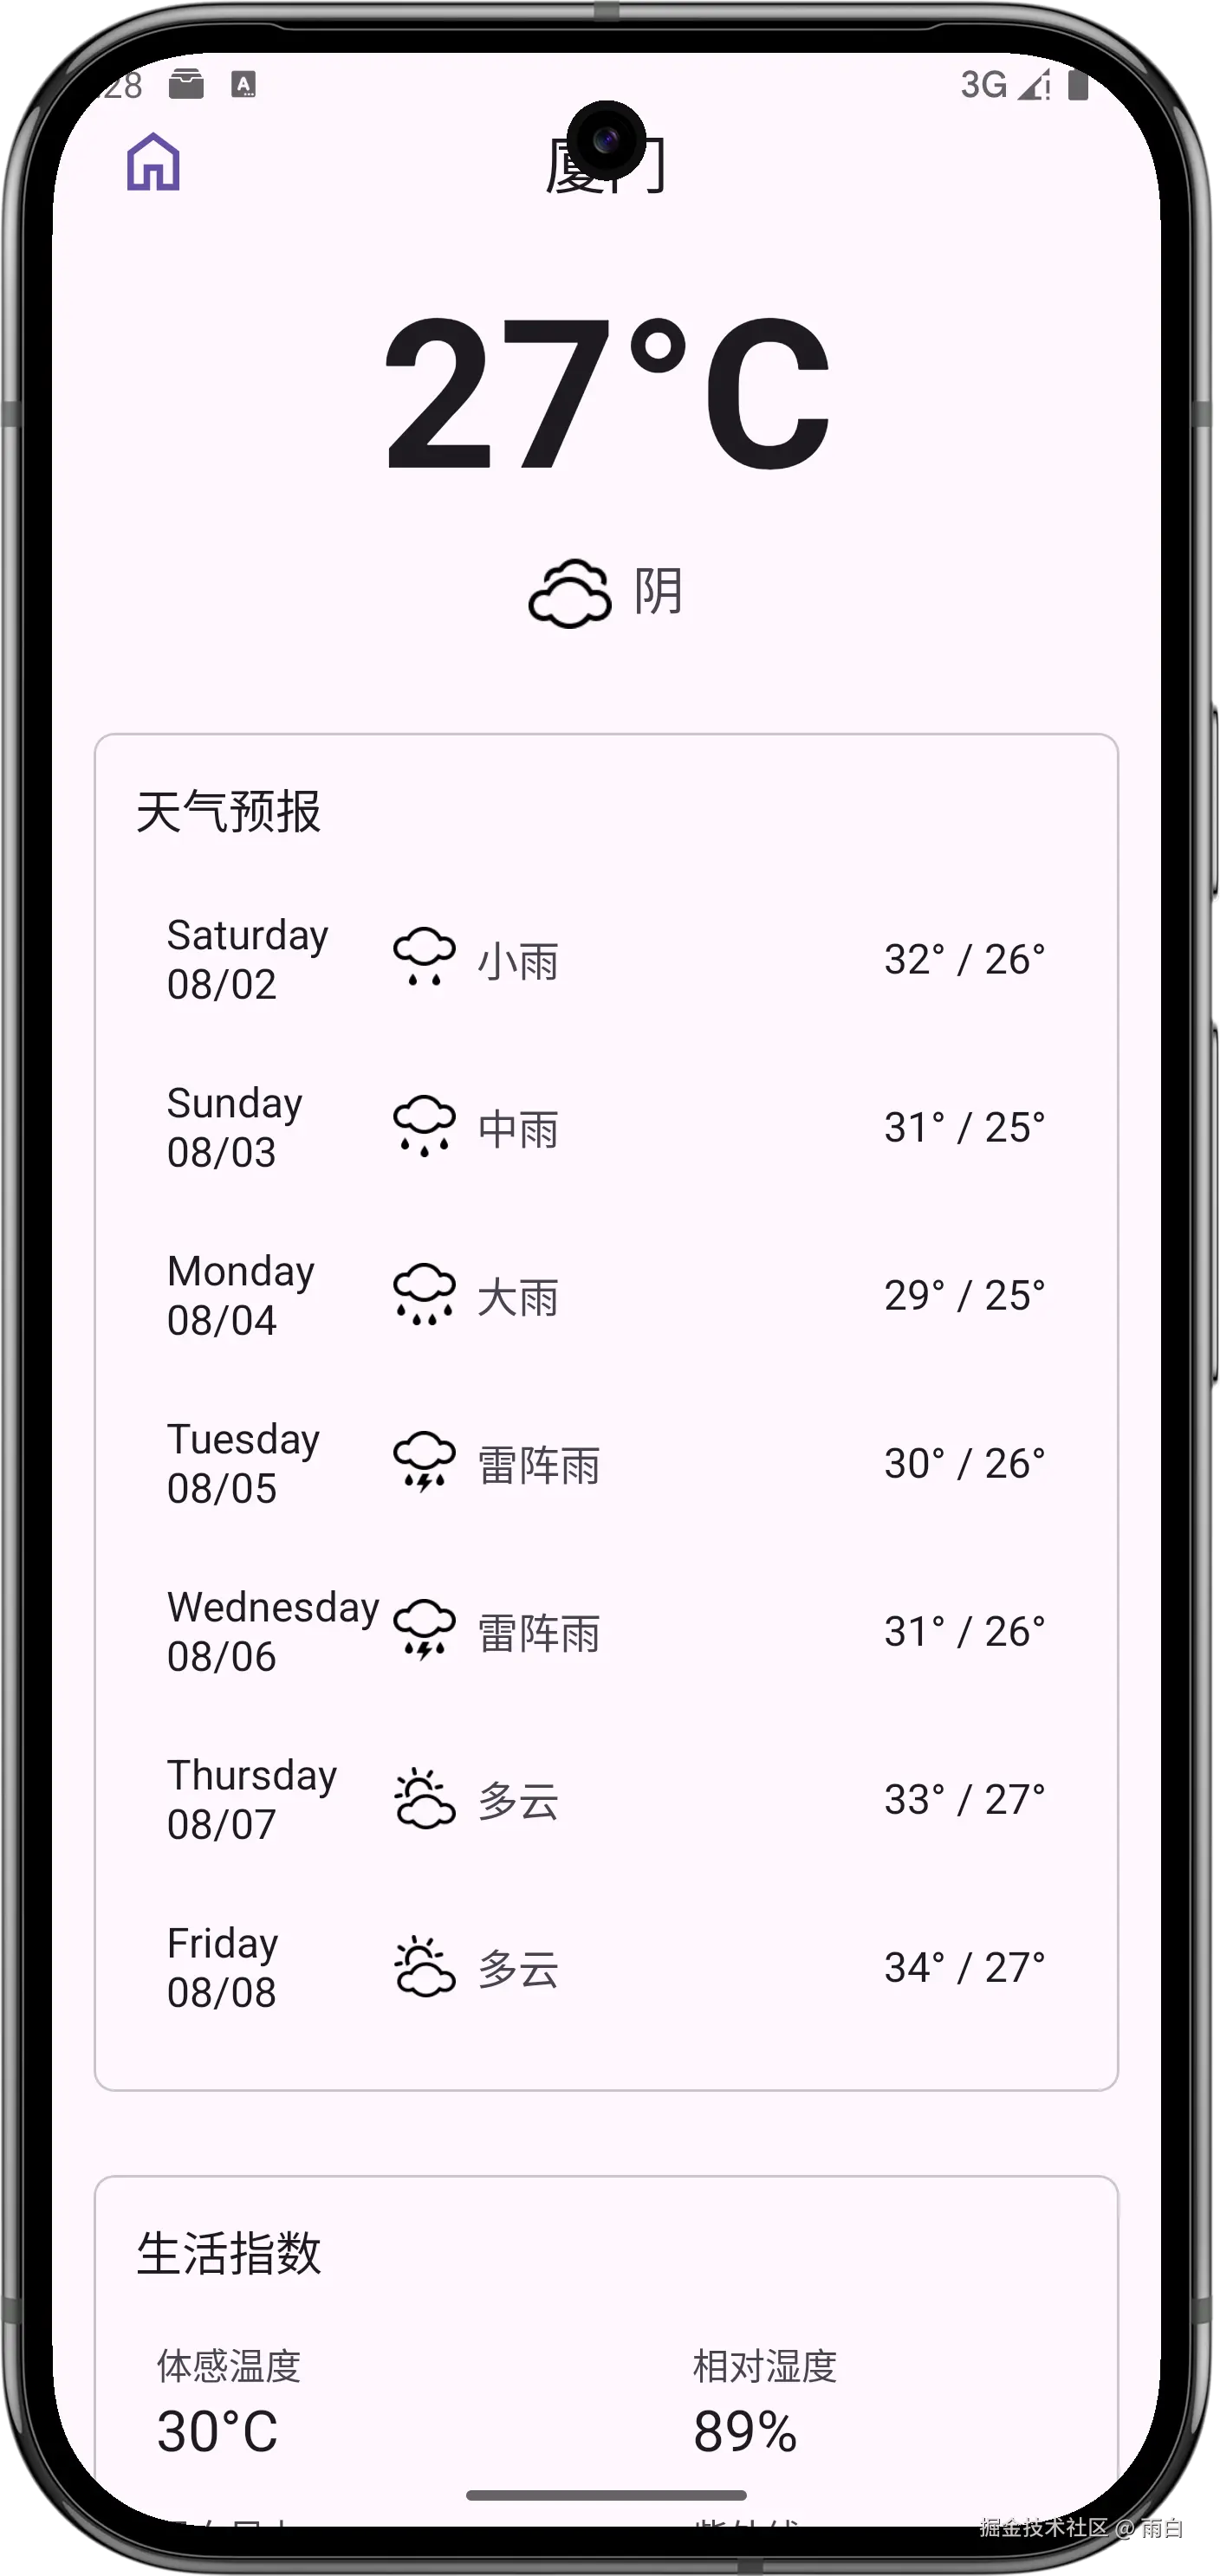
}现在切换城市的功能就完成了。

生成正式签名的APK文件
之前我们都是通过 Android Studio 来将应用安装到手机的。Android Studio 实际上会将代码打包成 APK 文件(应用程序的安装包),再将这个文件传到手机上进行安装。
但 Android 系统要求只有签名后的 APK 文件才能安装,而这一步 Android Studio 自动帮我们完成了:使用了默认的 keystore 文件帮我们签名。
不过在开发阶段这样做可以,要正式发布应用的话,就需要使用正式的 keystore 文件进行签名。我们来看看如何生成带有正式签名的 APK 文件。
使用 Android Studio 生成
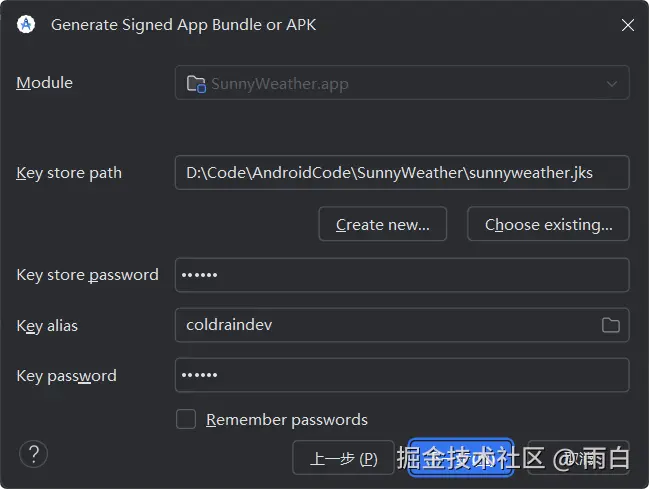
点击导航菜单中的 Build->Generate Signed Bundle/APK。
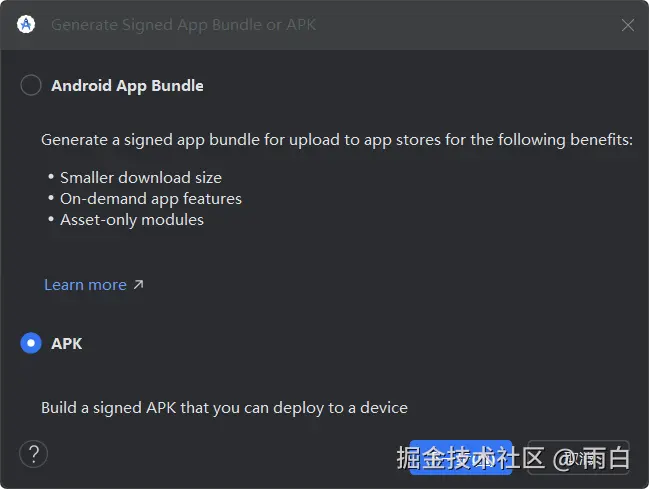
选择 APK 即可,因为 Android App Bundle 是用于上架 Google 商店的,虽说可以减少 App 安装包体积,但无法直接安装到手机上。
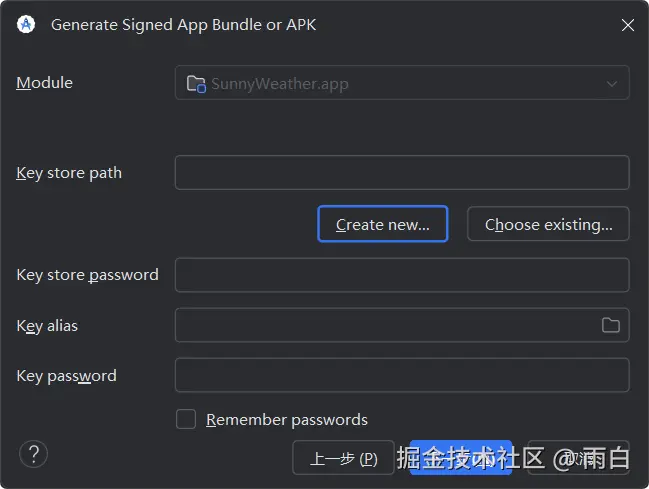
因为我们还没有 keyStore 文件,点击 Create New 按钮创建一个。
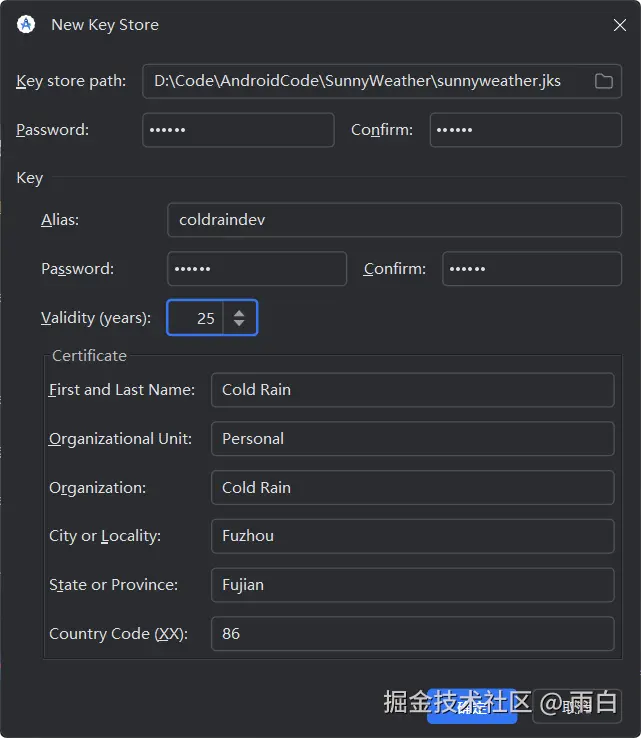
尽量填写即可,然后点击确定。
点击下一步,构建类型选择 release。
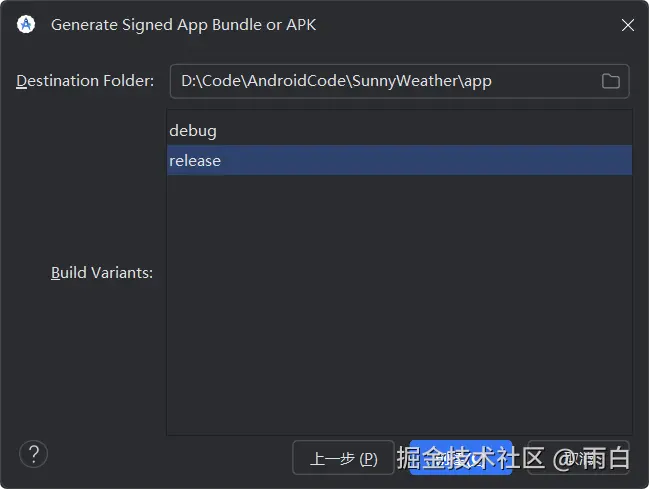
点击创建,过一会,APK 文件就会生成。你可以将这个文件发给别人,别人可以直接安装到手机上。
使用 Gradle 生成
我们还可以使用 Gradle 生成 APK 文件,在 app/build.gradle.kts 文件中添加如下内容:
kotlin
android {
    // 签名配置
    signingConfigs {
        // 创建签名配置
        create("config") {
            storeFile = file("D:\Code\AndroidCode\SunnyWeather\sunnyweather.jks")
            storePassword = "123456"
            keyAlias = "coldraindev"
            keyPassword = "123456"
        }
    }

    // 构建类型配置
    buildTypes {
        // 对 release 构建类型进行配置
        release {
            // 是否启用代码混淆和压缩
            isMinifyEnabled = false
            // 指定混淆规则文件
            proguardFiles(
                getDefaultProguardFile("proguard-android-optimize.txt"),
                "proguard-rules.pro"
            )
            // 使用上面创建的签名配置
            signingConfig = signingConfigs.getByName("config")
        }
    }
}
然后点击右侧的 Gradle,再点击执行 Gradle 任务按钮,输入 gradlew assembleRelease 命令即可。
当命令执行完成后,已签名的 APK 文件会自动生成在 app/build/outputs/apk/release/ 目录下。

最后注意:签名配置相关信息不要硬编码 在 build.gradle.kts 文件中,应该将这些敏感信息放在项目根路径的 local.properties 文件中,然后在 build.gradle.kts 中读取。
像这样:
Properties
# local.properties 这个文件通常不会上传到代码仓库
KEYSTORE_FILE=D:\Code\AndroidCode\SunnyWeather\sunnyweather.jks
KEY_ALIAS=coldraindev
KEY_PASSWORD=123456
STORE_PASSWORD=123456
kotlin
// app/build.gradle.kts

val localProperties = Properties().apply {
    val localPropertiesFile = rootProject.file("local.properties")
    if (localPropertiesFile.exists()) {
        load(FileInputStream(localPropertiesFile))
    }
}

// 签名配置
signingConfigs {
    create("config") {
        storeFile = file(localProperties.getProperty("KEYSTORE_FILE"))
        storePassword = localProperties.getProperty("STORE_PASSWORD")
        keyAlias = localProperties.getProperty("KEY_ALIAS")
        keyPassword = localProperties.getProperty("KEY_PASSWORD")
    }
}
这样一来,在 Git 中直接查看 build.gradle.kts 文件,是无法看到 keystore 文件的各种信息的,只有在本地的local.properties 文件中才能看到,也就避免了 keystore 文件信息泄露的问题。