说明
uniapp 鸿蒙是可以直接写原生页面的,直接使用原生api的,当然也有想直接使用har包的开发者,比如 我在使用地图导航的时候,这种高性能要求的页面,我还是偏向直接走原生的lib调用。
步骤
- 1.通过制作har包了解har
- 2.uniapp调用har包API
- 3.har包中加入页面组件
- 4.uniapp打开har包页面
- 5.har包集成高德导航SDK
- 6.uniapp使用高德导航功能
1.通过制作har包了解har
- 通过devstudio创建一个空的项目,名字自己随意,比如:ZjMap

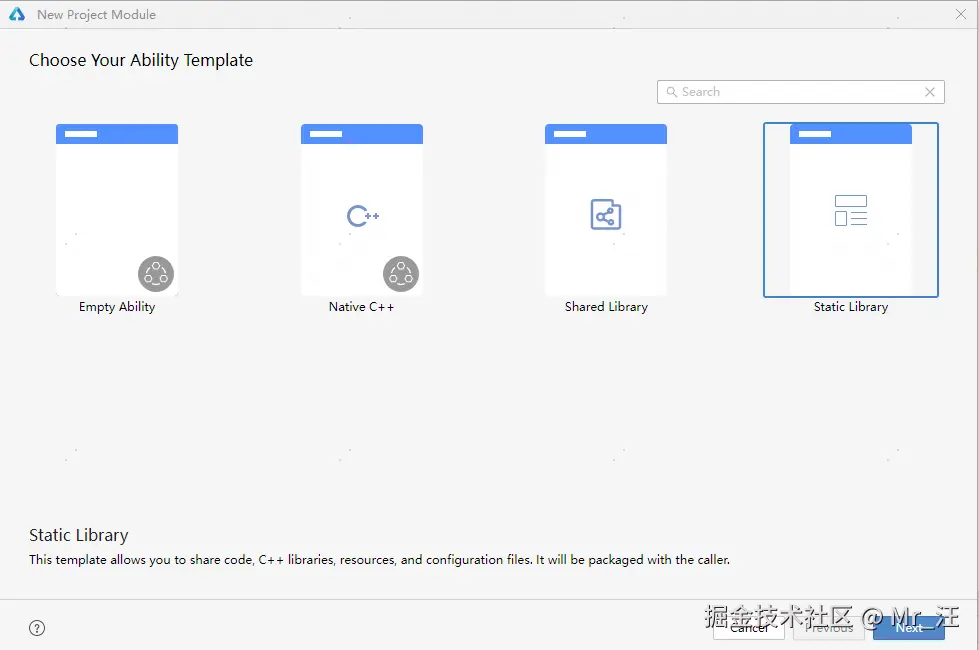
- 右键项目名字,创建一个module,就会出现选择你要类型

- 我们就选择static Library进行演示,名字自己随意,比如:anvilibrary
- 这样我们就有了一个可以生成har的module了,给这个module随便加个方法,等下给uni调用
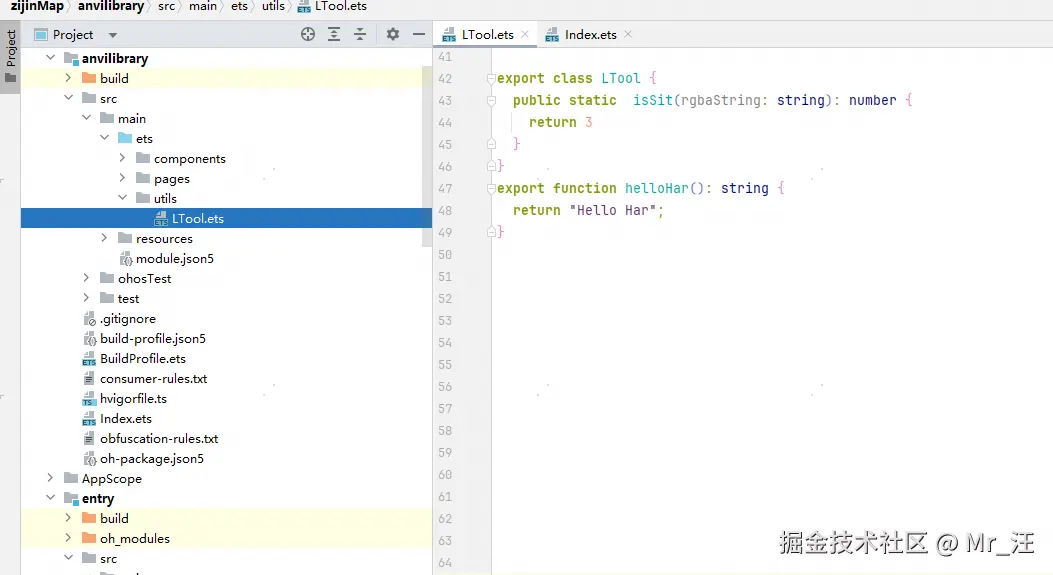
js
export class LTool {
  public static  isSit(rgbaString: string): number {
    return 3
  }
}
export function helloHar(): string {
  return "Hello Har";
}- 将这个方法导出,固定写法
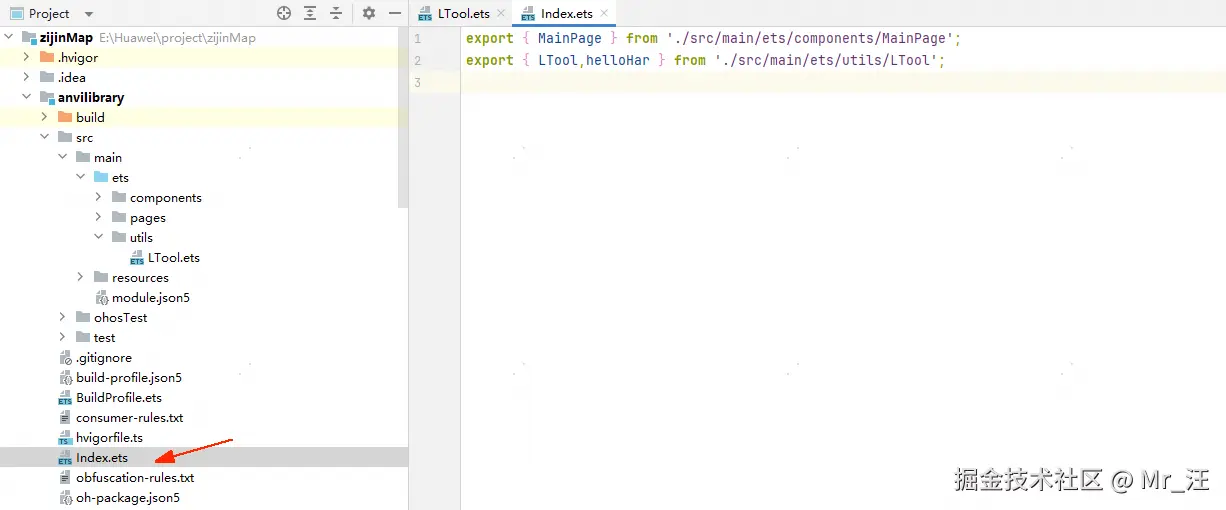
js
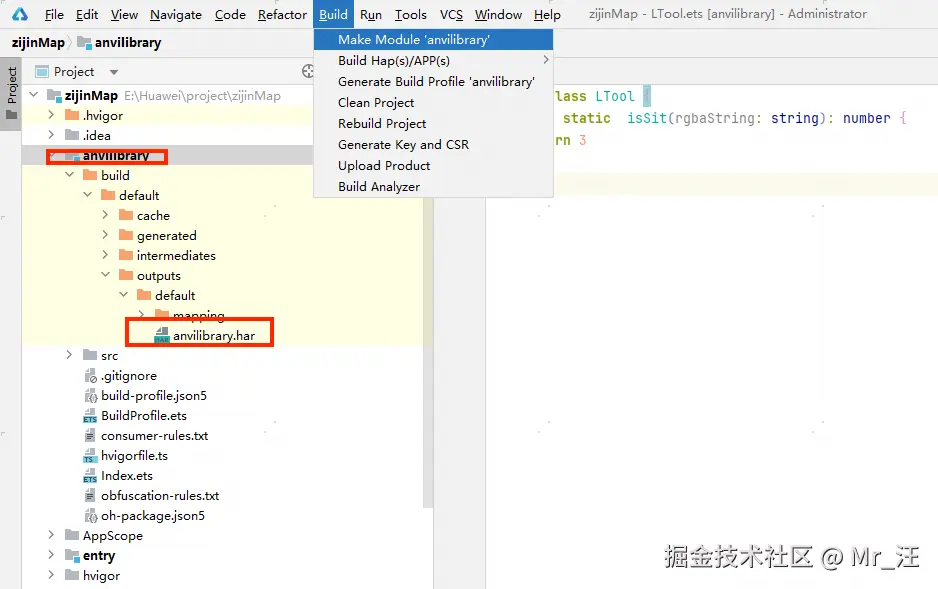
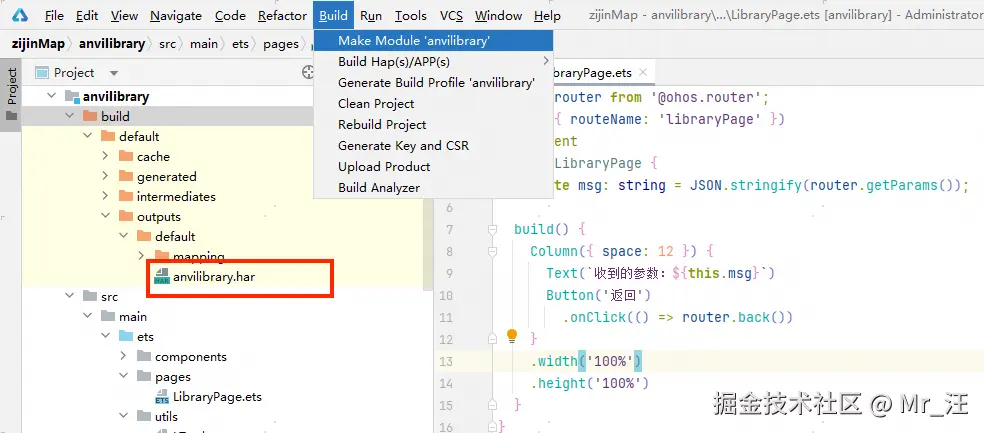
export { LTool,helloHar } from './src/main/ets/utils/LTool';- 生成一个har包,选中你的module 比如:anvilibrary,选择make菜单,点击执行,完成后就可以看到你的har包了
2.uniapp调用har包方法
- 在你的项目下创建一个uni的module,这样可以独立出来一个uniapp的插件 我找了个空工程,注意鸿蒙uniapp的项目需要vue3,然后给随便取了个名字,比如:ft-navi-amap
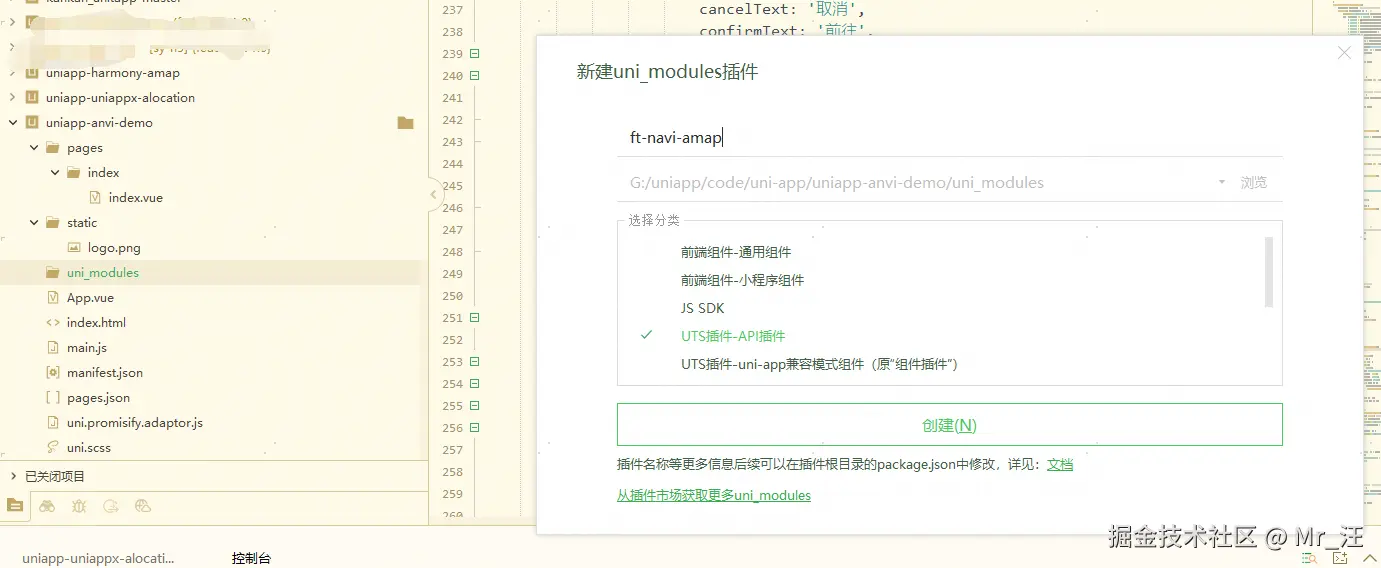
- 创建完后,打开ft-navi-amap,android ios都自动创建了,harmony的目录没有自动给我创建,手动创建个简单的吧,创建个index.uts文件,再搞个方法先放着 hbuilderx版本 4.75.2025070414-alpha
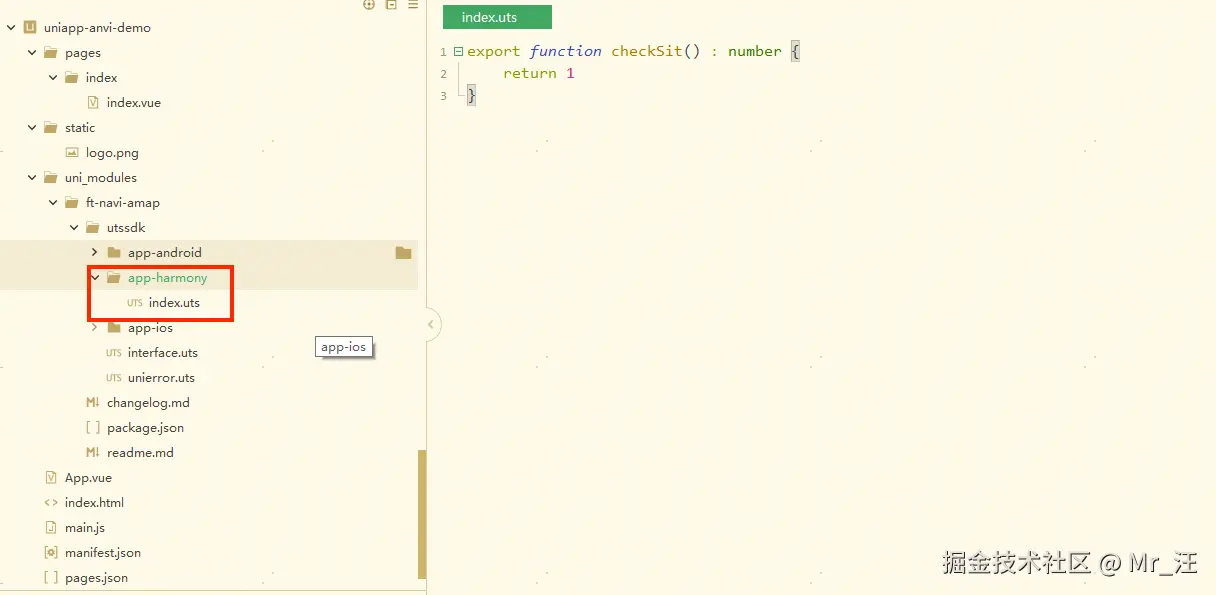
index.uts文件:
js
export function checkSit() : number {
return 1
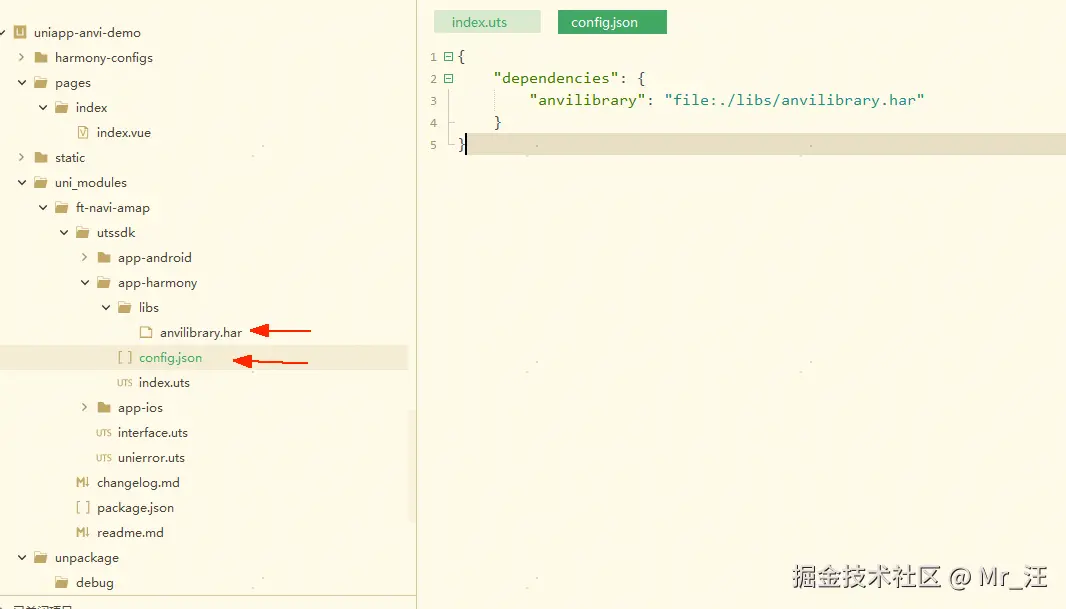
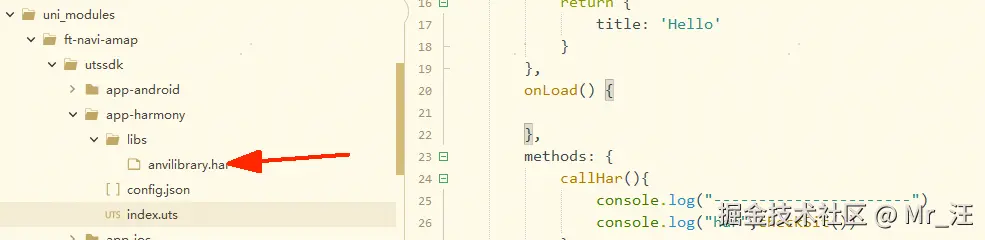
}- 放入我们生成的har包到uniapp项目中app-harmony的libs下,没有就手动建libs目录,并配置路径。没有config.json也手动建下,这2个我都是手动创建的,上面新建ft-navi-amap的时候没有。
js
{
	"dependencies": {
		"anvilibrary": "file:./libs/anvilibrary.har"
	}
}- uni调用har包里面的LTool.isSit方法。我们在checkSit这个方法里面调用har包里面的方法
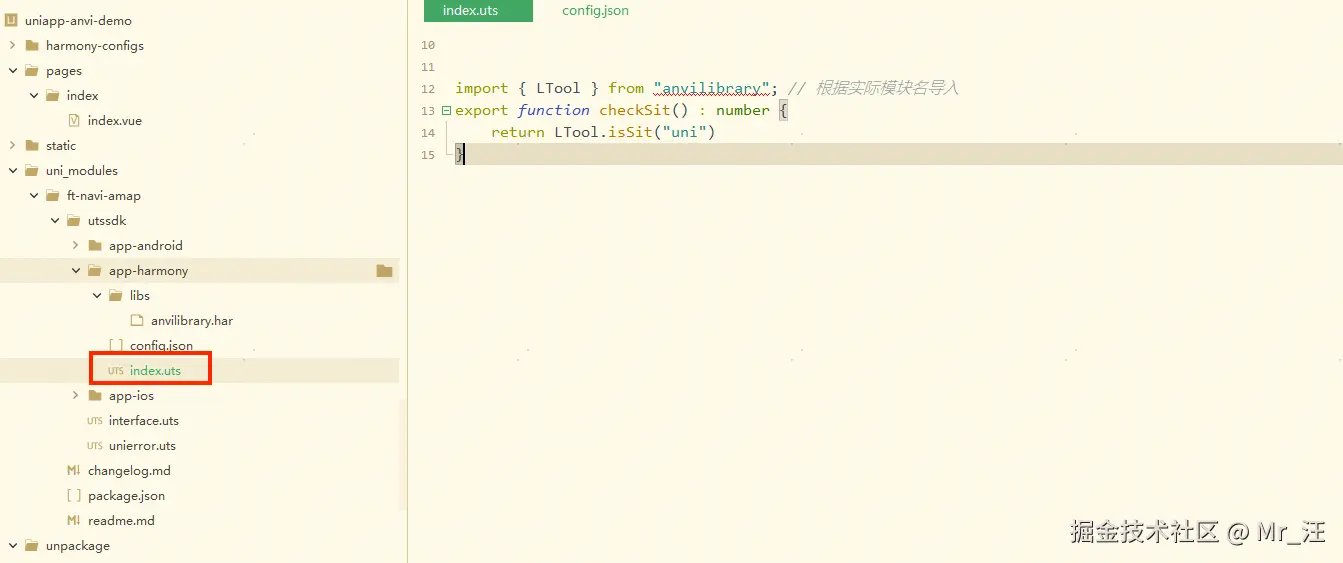
将之前的index.uts文件内容替换成调用har包的方法
js
import { LTool } from "anvilibrary"; // 根据实际模块名导入
export function checkSit() : number {
	return LTool.isSit("uni")
}- 在uniapp的vue页面调用,打印了har的number 3,说明已经调用成功,到这里简单的har制作调用就结束了
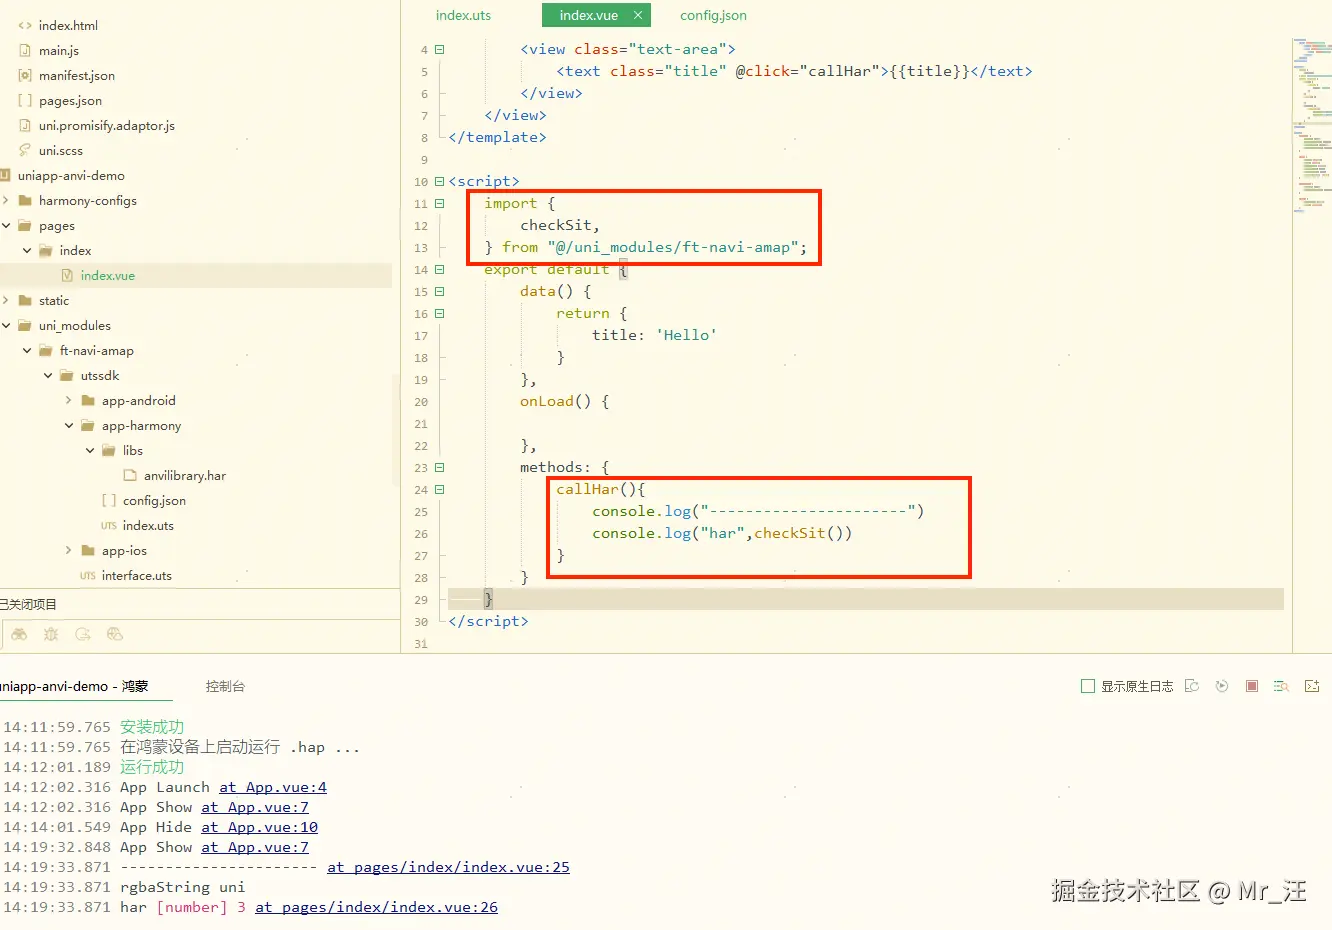
js
<script>
	import {
		checkSit,
	} from "@/uni_modules/ft-navi-amap";
	export default {
		data() {
			return {
				title: 'Hello'
			}
		},
		onLoad() {

		},
		methods: {
            callHar(){
				console.log("----------------------")
				console.log("har",checkSit())
			}
		}
	}
</script>
3.har包中加入页面组件
- har包中加入页面,都说static library的har包中加不了页面,今天就在里面加个,还是在devstudio中打开anvilibrary,并建一个页面 libraryPage
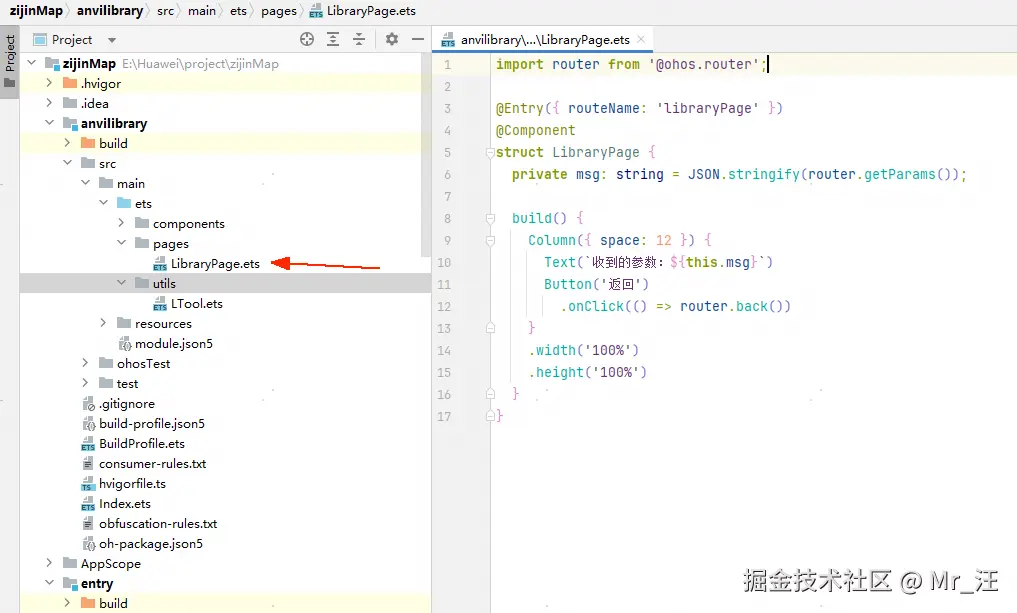 LibraryPage.ets 文件内容
js
import router from '@ohos.router';
@Entry({ routeName: 'libraryPage' })
@Component
struct LibraryPage {
  private msg: string = JSON.stringify(router.getParams());
  build() {
    Column({ space: 12 }) {
      Text(`收到的参数:${this.msg}`)
      Button('返回')
        .onClick(() => router.back())
    }
    .width('100%')
    .height('100%')
  }
}
将LTool.ets文件替换,用helloHar做跳转入口
js
import router from '@ohos.router';
export class LTool {
  public static  isSit(rgbaString: string): number {
    console.log("rgbaString",rgbaString)
    return 3
  }
}
export function helloHar(): string {
  import('../pages/LibraryPage');
  router.pushNamedRoute({ name: 'libraryPage' });
  return "Hello Har";
}- 重新打har包,按照上面说的方法make下,将har包替换到uni项目的libs下
4.uniapp打开har包页面
- uni页面中调用pageNavi方法即可
js
<template>
	<view class="content">
		<button type="default"  @click="callHar">调用har的方法</button>
		<button type="default"  @click="pageHar">调用har的页面</button>
	</view>
</template>
<script>
	import {
		checkSit,
		pageNavi
	} from "@/uni_modules/ft-navi-amap";
	export default {
		data() {

		},
		onLoad() {

		},
		methods: {
                        callHar(){
			        console.log("har",checkSit())
			},
			pageHar(){
				pageNavi()
			}
		}
	}
</script>
5.har包集成高德导航SDK
- 进入高德官网,鸿蒙导航SDK部分,打开devstudio,按照步骤给anvilibrary的module配置上

- 添加字符串
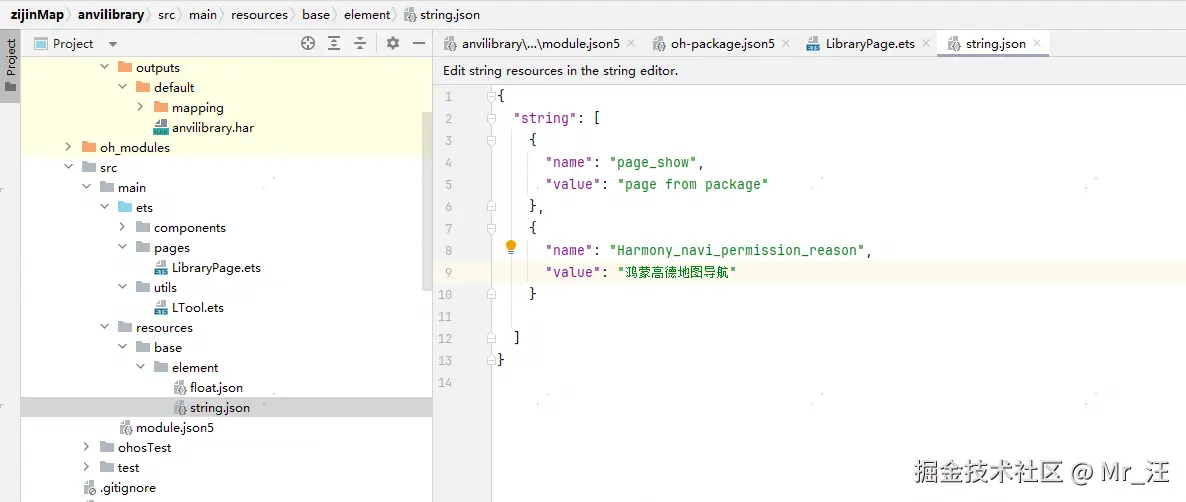
json
{
  "name": "Harmony_navi_permission_reason",
  "value": "鸿蒙高德地图导航"
}- 配置权限
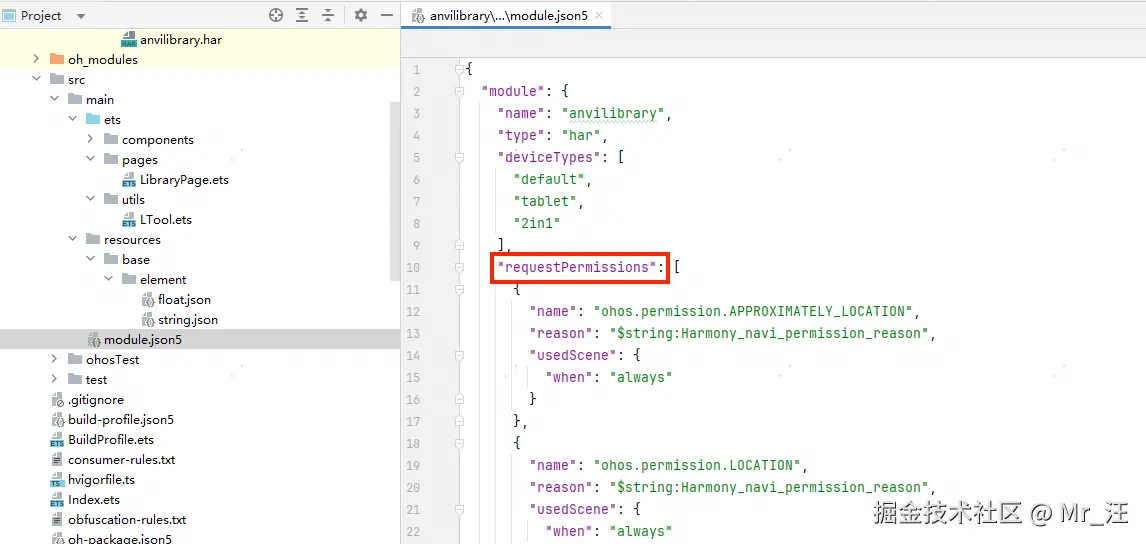
json
{
  "module": {
    "name": "anvilibrary",
    "type": "har",
    "deviceTypes": [
      "default",
      "tablet",
      "2in1"
    ],
    "requestPermissions": [
      {
        "name": "ohos.permission.APPROXIMATELY_LOCATION",
        "reason": "$string:Harmony_navi_permission_reason",
        "usedScene": {
          "when": "always"
        }
      },
      {
        "name": "ohos.permission.LOCATION",
        "reason": "$string:Harmony_navi_permission_reason",
        "usedScene": {
          "when": "always"
        }
      },
      {
        "name": "ohos.permission.LOCATION_IN_BACKGROUND",
        "reason": "$string:Harmony_navi_permission_reason",
        "usedScene": {
          "when": "always"
        }
      },
      {
        "name": "ohos.permission.INTERNET",
        "reason": "$string:Harmony_navi_permission_reason",
        "usedScene": {
          "when": "always"
        }
      },
      {
        "name": "ohos.permission.KEEP_BACKGROUND_RUNNING",
        "reason": "$string:Harmony_navi_permission_reason",
        "usedScene": {
          "when": "always"
        }
      }
    ]
  }
}- 依次添加导航依赖
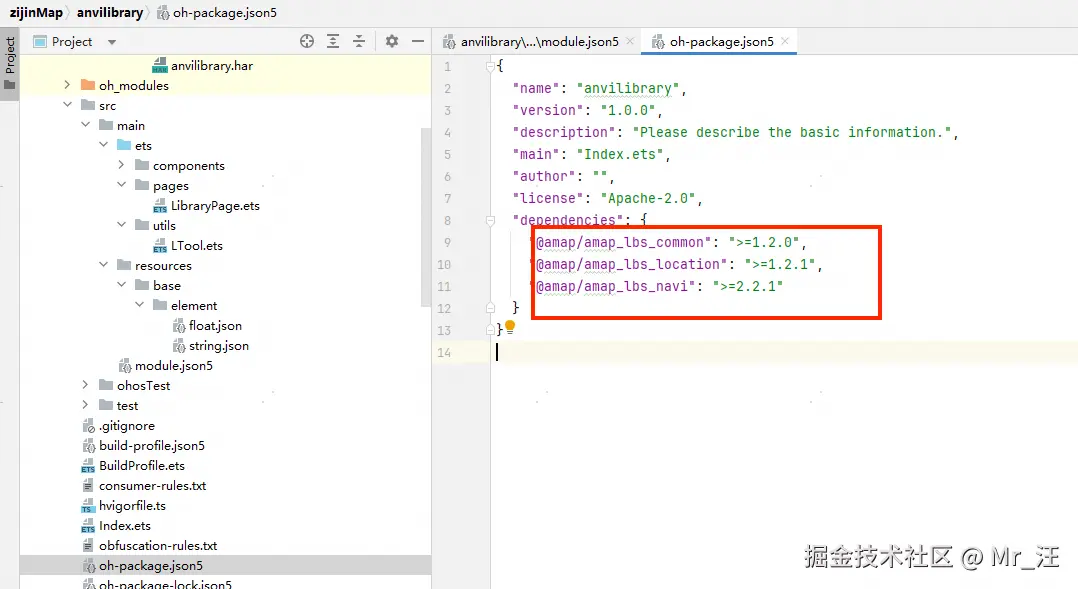
json
{
  "name": "anvilibrary",
  "version": "1.0.0",
  "description": "Please describe the basic information.",
  "main": "Index.ets",
  "author": "",
  "license": "Apache-2.0",
  "dependencies": {
    "@amap/amap_lbs_common": ">=1.2.0",
    "@amap/amap_lbs_location": ">=1.2.1",
    "@amap/amap_lbs_navi": ">=2.2.1"
  }
}- 将LibraryPage页面改造成导航界面例子
js
import { AMapPrivacyAgreeStatus, AMapPrivacyInfoStatus, AMapPrivacyShowStatus, LogUtil } from '@amap/amap_lbs_common';
import { AMapLocationManagerImpl } from '@amap/amap_lbs_location';
import {
  AMapNaviComponent,
  AmapNaviType,
  NaviType,
  INaviLatLng, AMapNaviFactory,
  IAMapNavi,
  NaviSetting,
} from '@amap/amap_lbs_navi'
import router from '@ohos.router';
@Entry({ routeName: 'libraryPage' })
@Component
struct LibraryPage {
  private msg: string = JSON.stringify(router.getParams());
  startLatLng: INaviLatLng = { latitude: 40.075248, longitude: 116.41289 }
  endLatLng: INaviLatLng = { latitude: 40.052987, longitude: 116.412316 }
  naviInstance?: IAMapNavi

  //生命周期方法
  aboutToAppear(): void {

    console.log("---------aboutToAppear-----------")
    NaviSetting.updatePrivacyShow(AMapPrivacyShowStatus.DidShow, AMapPrivacyInfoStatus.DidContain, getContext(this));
    NaviSetting.updatePrivacyAgree(AMapPrivacyAgreeStatus.DidAgree, getContext(this));
    console.log("---------aboutToAppear-----------")


    const appkey = '23f2adbe1ee8a1373f13afff4efa469a'
    this.naviInstance = AMapNaviFactory.getAMapNaviInstance(getContext().getApplicationContext(), appkey)

    LogUtil.i('Navi_Demo', 'naviListener', '获取版本号getVersion=========: ' + this.naviInstance.getVersion()) // 获取版本号
    this.naviInstance.setIsUseInnerVoice(true) // 是否开启内置语音,默认true
    //.....其他的导航参数,导航监听
  }

  build() {
    NavDestination() {
      AMapNaviComponent({
        appCustomerConfig: {
          mType: AmapNaviType.Driver, //引擎类型(驾车、骑行、步行)。当前支持驾车、货车、摩托车
          //默认模拟导航
          // mNaviType: NaviType.EMULATOR,
          //实时导航
          mNaviType: NaviType.GPS,
          start: {
            coordinate: this.startLatLng
          }, //起点
          end: {
            coordinate: this.endLatLng
          }, //终点
          // wayPoints: this.wayPoints, //途经点
          mRouteStrategy: 10, //设置默认规划路线策略
          serviceAreaDetailsEnable: true, //服务区信息
          goBack: () => {
            router.back()
          },
          isNeedCalculateRouteWhenPresent: true
        }
      })
    }.title('导航组件')
    .hideTitleBar(true)
    .onBackPressed(() => {
      router.back()
      return true
    })
  }
}
6.uniapp使用高德导航功能
- uniapp调用pageNavi进入再次进入页面,就是导航页面了
js
pageHar(){
  pageNavi()
 }

7.改造SDK,变成真正的导航插件,并发布市场
- 番外了,如果需要导航插件的,可以将参数暴露,回调暴露,形成稳定的插件,发布市场。少年,交给你了