从零用java实现 小红书 springboot vue uniapp(15) 评论和IM加图片开发过程详解
移动端演示 http://8.146.211.120:8081/#/
管理端演示 http://8.146.211.120:8088/#/
项目整体介绍及演示
前言
本章节详细介绍小红书项目中图片上传功能的开发过程,包括:
- 前端如何上传图片并保存到回复表
- 前端根据有无图片进行不同展示
- 聊天内容的组装和展示逻辑
- 消息列表中图片和视频的处理方式
我们将从实际开发角度,展示每个功能的实现思路和关键代码。
一、产品回复图片功能开发过程
1.1 需求分析
在产品详情页面,用户可以对产品进行文字回复或图片回复。需要实现:
- 用户点击评论框,弹出评论组件
- 支持选择图片并上传
- 图片上传成功后,将图片ID和URL保存到回复表
- 评论列表根据是否有图片进行不同展示
1.2 前端评论组件实现
评论提交组件 (gui-xhs-submit-comment.vue)
vue
<template>
<gui-popup ref="guipopupforsubcomment" position="bottom">
<view class="gui-comments gui-bg-white">
<!-- 工具栏:图片选择和提交按钮 -->
<view class="gui-flex gui-row gui-space-between gui-align-items-center">
<text class="gui-comments-btns gui-icons gui-color-gray"
@tap="selectImg" v-if="isImg"></text>
<view class="gui-comments-submit" hover-class="gui-tap">
<text class="gui-comments-btns gui-block gui-comments-submit gui-icons gui-primary-color"
@tap="submit">提交</text>
</view>
</view>
<!-- 内容区:图片预览和文本输入 -->
<view class="gui-flex gui-row gui-nowrap gui-space-between">
<!-- 图片预览区 -->
<view class="gui-comments-img gui-relative" v-if="comment.img != ''">
<image :src="comment.img" class="gui-comments-img-in" mode="widthFix"></image>
<text class="gui-comments-img-remove gui-icons" @tap.stop="removeImg"></text>
</view>
<!-- 文本输入区 -->
<textarea v-model="comment.content"
class="gui-comments-textarea"
:placeholder="comment.at == '' ? placeholder : '@'+comment.at" />
</view>
</view>
</gui-popup>
</template>图片选择和上传逻辑
javascript
selectImg: function(){
  uni.chooseImage({
    count: 1,
    sizeType: ['compressed'],
    sourceType: ['album', 'camera'],
    success: (res) => {
      var file = res.tempFiles[0]
      // 1. 文件大小验证
      if(file.size > 2 * (1024 * 1024)){
        uni.app.msg("图片尺寸过大,已忽略")
        return
      }

      // 2. 上传图片到服务器
      uni.uploadFile({
        url: this.$uploadUrl,
        filePath: file.path,
        name: file.fileName,
        formData: {fileSavePath:'/reply'}, // 指定保存路径
        success: (uploadRes) => {
          try{
            uploadRes = JSON.parse(uploadRes.data);
            if(uploadRes.status != 'ok'){
              uni.showToast({title:"上传失败 : "+uploadRes.data, icon:"none"});
            }else{
              // 3. 上传成功,保存图片信息到组件数据
              this.comment.img = uploadRes.data; // 临时显示用
              this.data.replayImgId = uploadRes.result.fileId; // 文件ID
              this.data.replayImgUrl = uploadRes.data; // 文件URL
            }
          }catch(e){
            uni.showToast({title:"上传失败,请重试", icon:"none"});
          }
        }
      });
    }
  });
}
1.3 产品详情页面评论处理
评论提交的数据组装过程
javascript
// detail.vue 中的评论提交处理
submit: function (e) {
  console.log(e)
  if(uni.app.isEmpty(e.content)){
    uni.app.msg('请输入评论内容~')
    return
  }

  // 关键:判断是否有图片需要上传
  if(e.img && e.img !== ''){
    // 有图片:先上传图片,再提交评论
    uni.uploadFile({
      url: this.$uploadUrl,
      filePath: e.img,
      name: 'file',
      formData: {'fileSavePath': 'reply'},
      header: {'Authorization': uni.getStorageSync('token')},
      success: (uploadRes) => {
        try{
          const uploadData = JSON.parse(uploadRes.data);
          if(uploadData.status === 'ok'){
            // 图片上传成功,提交评论
            this.submitReply(e, uploadData.result.fileId, uploadData.data);
          } else {
            uni.app.msg('图片上传失败: ' + uploadData.msg);
          }
        }catch(err){
          uni.app.msg('图片上传失败');
        }
      }
    });
  } else {
    // 没有图片:直接提交评论
    this.submitReply(e, '', '');
  }
},

// 实际提交回复数据到后端
submitReply: function(e, replayImgId, replayImgUrl) {
  const replyData = {
    noteId: e.noteId,
    replayContent: e.content
  }

  // 处理回复层级关系
  if(!uni.app.isEmpty(e.topParentId)){
    replyData.topParentId = e.topParentId
  }
  if(!uni.app.isEmpty(e.parentId)){
    replyData.parentId = e.parentId
  }

  // 关键:如果有图片,添加图片相关字段
  if(replayImgId && replayImgId !== ''){
    replyData.replayImgId = replayImgId;   // 图片文件ID
    replyData.replayImgUrl = replayImgUrl; // 图片访问URL
  }

  // 提交到后端API
  uni.app.post('/auth/replyNote', replyData, 'json', '', (res=>{
    console.log(res)
    this.getNoteReply(e.noteId) // 刷新评论列表
  }))
}
1.4 后端回复数据处理
回复接口的核心逻辑
java
@PostMapping("/api/auth/replyNote")
public ResultBean replyNote(@RequestBody ReplyDto replyDto) {
    String authorId = String.valueOf(request.getAttribute("authorId"));
    Author author = authorService.getById(authorId);
    Note note = noteService.getById(replyDto.getNoteId());

    // 设置回复基本信息
    replyDto.setNoteId(note.getNoteId());
    replyDto.setNoteTitle(note.getNoteTitle());
    replyDto.setAuthorId(authorId);
    replyDto.setAuthorName(author.getAuthorName());
    replyDto.setAvatarUrl(minioUrlUtil.refreshMinioUrl(author.getAvatarUrl()));

    // 关键:处理回复图片URL(MinIO地址转换)
    if(StringUtil.isNotEmpty(replyDto.getReplayImgUrl())){
        replyDto.setReplayImgUrl(minioUrlUtil.refreshMinioUrl(replyDto.getReplayImgUrl()));
    }

    // 保存到数据库
    Reply reply = BeanUtil.copyProperties(replyDto, Reply.class);
    replyService.save(reply);

    return ResultBean.success();
}
核心功能实现
1. 图片上传核心代码
后端上传接口
java
// FileUploadController.java
@RestController
@RequestMapping("/api/file")
public class FileUploadController {

    @PostMapping("/upload")
    public ResultBean<String> uploadFile(@RequestParam("file") MultipartFile file) {
        try {
            // 文件验证
            if (file.isEmpty()) {
                return ResultBean.error("文件不能为空");
            }

            // 生成文件名
            String fileName = UUID.randomUUID().toString() + "." +
                getFileExtension(file.getOriginalFilename());

            // 保存文件到服务器
            String uploadPath = "/upload/images/";
            File uploadDir = new File(uploadPath);
            if (!uploadDir.exists()) {
                uploadDir.mkdirs();
            }

            File destFile = new File(uploadDir, fileName);
            file.transferTo(destFile);

            // 返回文件访问URL
            String fileUrl = "/upload/images/" + fileName;
            return ResultBean.success(fileUrl);

        } catch (Exception e) {
            return ResultBean.error("上传失败: " + e.getMessage());
        }
    }

    private String getFileExtension(String filename) {
        return filename.substring(filename.lastIndexOf(".") + 1);
    }
}
2. 聊天图片发送
java
// AuthChatApi.java
@PostMapping("/sendMessage")
public ResultBean<String> sendMessage(@RequestBody ChatDto chatDto) {
try {
// 设置消息类型
if (StringUtils.isNotEmpty(chatDto.getResourceUrl())) {
chatDto.setMessageType(1); // 图片消息
} else {
chatDto.setMessageType(0); // 文本消息
}
chatService.sendMessage(chatDto);
return ResultBean.success("发送成功");
} catch (Exception e) {
return ResultBean.error("发送失败");
}
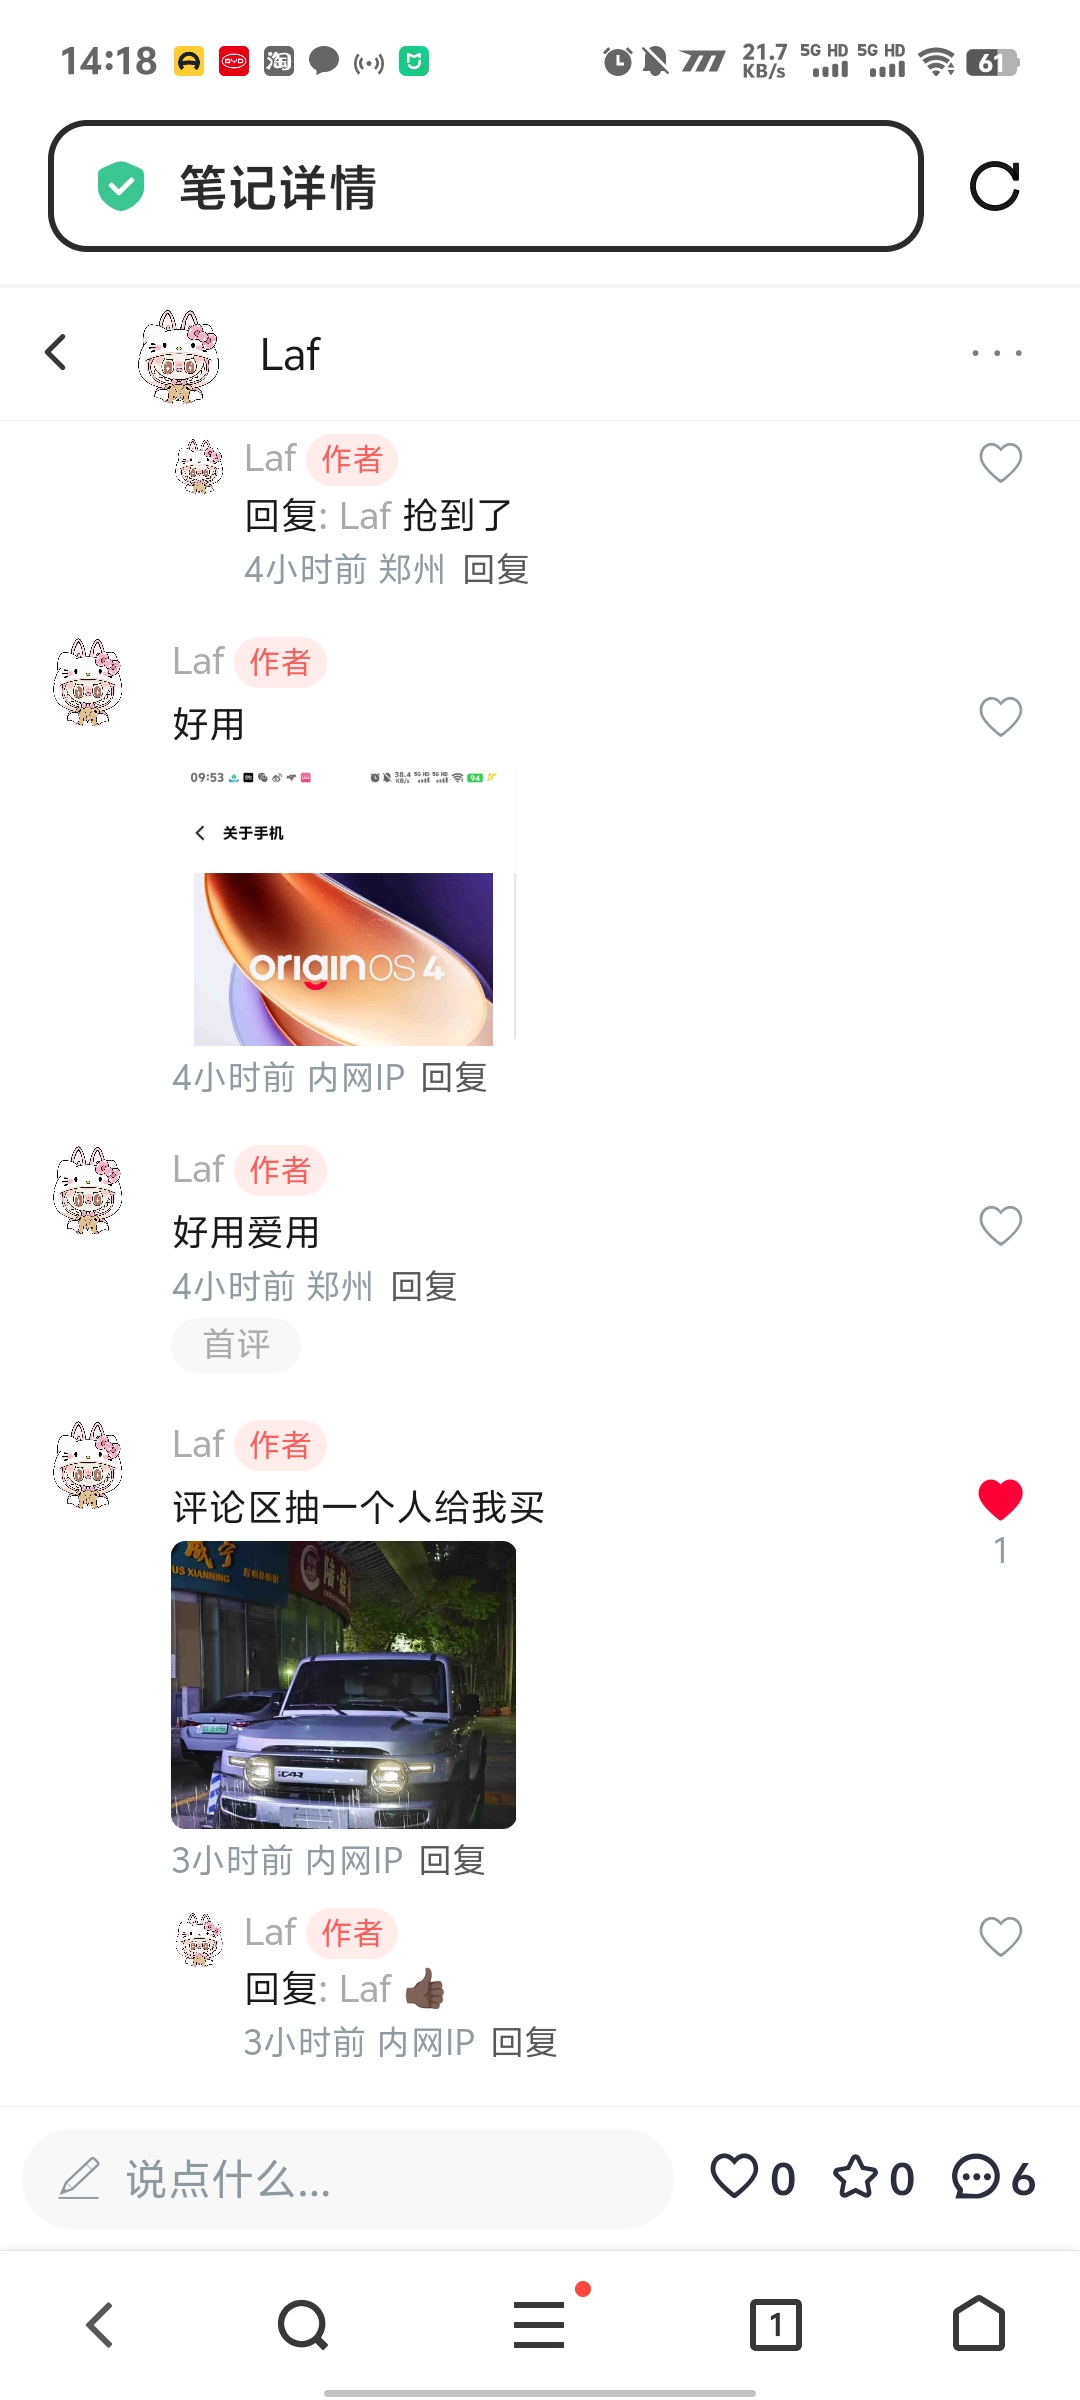
}1.5 前端评论列表展示逻辑
根据有无图片进行不同展示
vue
<!-- detail.vue 评论列表部分 -->
<view v-for="(item, index) in replys" :key="index" class="comment-item">
  <image :src="item.avatarUrl" class="user-avatar"></image>

  <view class="comment-content">
    <!-- 用户信息 -->
    <text class="user-name">{{item.authorName}}</text>

    <!-- 文字内容 -->
    <text class="comment-text">{{item.replayContent}}</text>

    <!-- 关键:根据是否有图片URL决定是否显示图片 -->
    <view class="comment-images"
          v-if="item.replayImgUrl && item.replayImgUrl.trim()">
      <view @click.stop="previewImage(item.replayImgUrl.trim())">
        <gui-image :src="item.replayImgUrl.trim()"
                   borderRadius="10rpx"
                   width="240"
                   height="200"
                   @error="imageError"></gui-image>
      </view>
    </view>

    <!-- 时间和操作 -->
    <view class="comment-meta">
      <text>{{formatDate(item.createTime)}} {{item.ipRealAddress}}</text>
      <text @tap="openComment(item.replyId)">回复</text>
    </view>
  </view>
</view>
图片预览功能实现
javascript
// 图片预览方法
previewImage(imageUrl) {
if(imageUrl) {
const cleanUrl = imageUrl.trim();
console.log('预览图片URL:', cleanUrl);
// 收集所有评论中的图片URL
const allImageUrls = [];
this.replys.forEach(reply => {
if(reply.replayImgUrl && reply.replayImgUrl.trim()) {
allImageUrls.push(reply.replayImgUrl.trim());
}
// 处理子回复中的图片
if(reply.reply && reply.reply.length > 0) {
reply.reply.forEach(subReply => {
if(subReply.replayImgUrl && subReply.replayImgUrl.trim()) {
allImageUrls.push(subReply.replayImgUrl.trim());
}
});
}
});
// 调用uni-app图片预览
uni.previewImage({
current: cleanUrl,
urls: allImageUrls,
fail: (err) => {
console.error('图片预览失败:', err);
uni.showToast({
title: '图片预览失败',
icon: 'none'
});
}
});
}
},
// 图片加载错误处理
imageError(e) {
console.error('图片加载失败:', e);
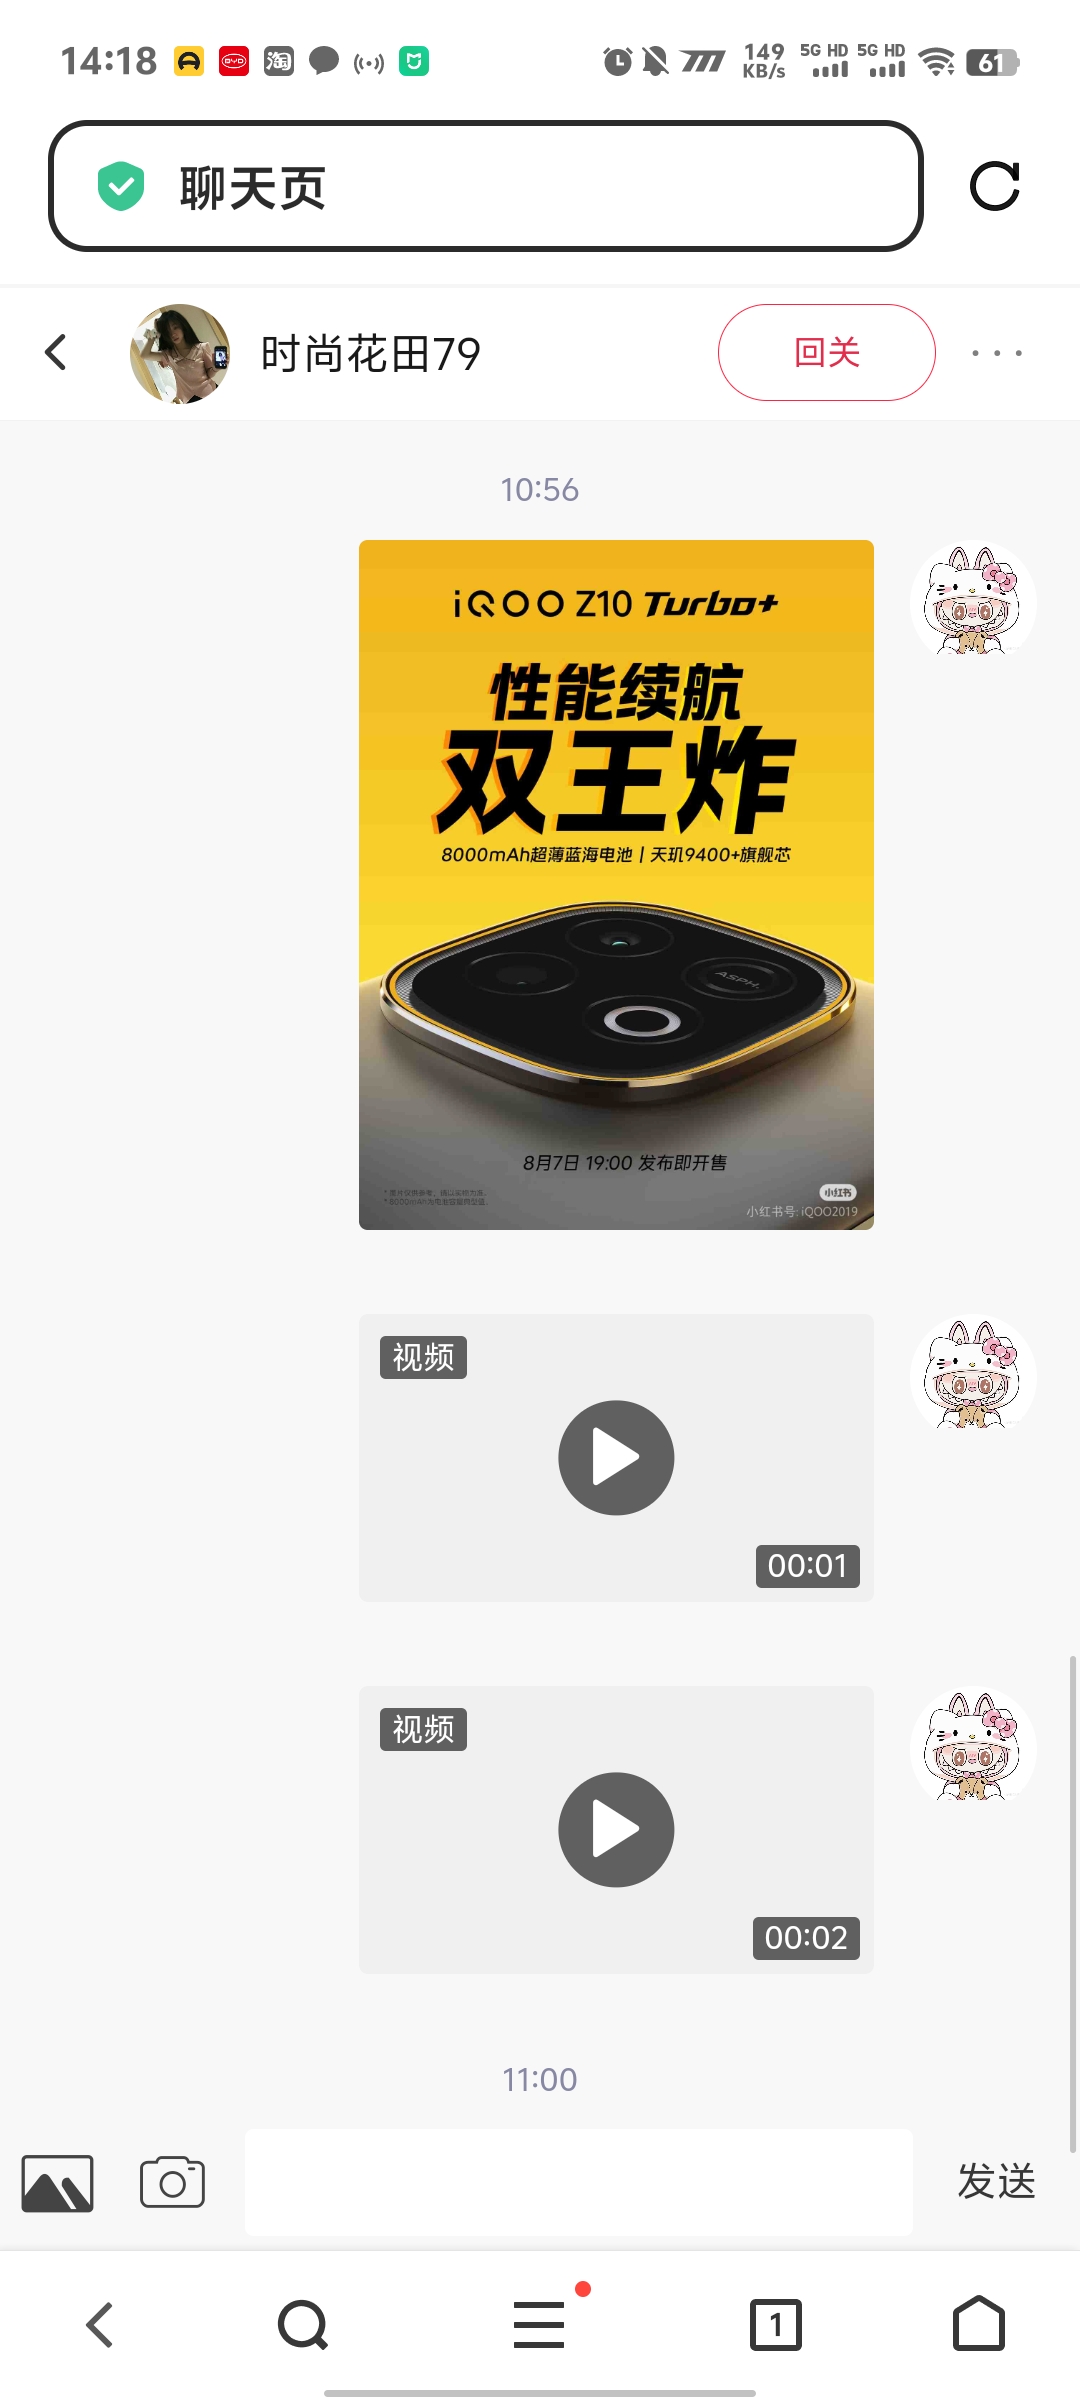
}二、聊天图片功能开发过程
2.1 聊天页面图片上传实现
图片选择和上传逻辑
javascript
// chat.vue 中的图片上传方法
chooseImage() {
  uni.chooseImage({
    count: 1,
    sizeType: ['compressed'],
    sourceType: ['album', 'camera'],
    success: (res) => {
      const file = res.tempFiles[0];

      // 文件大小检查
      if(file.size > 2 * 1024 * 1024) {
        uni.app.msg('图片尺寸过大,请选择小于2MB的图片');
        return;
      }

      // 设置上传状态
      this.imageUploading = true;
      uni.showLoading({title: '图片上传中...'});

      // 上传图片到服务器
      uni.uploadFile({
        url: this.$uploadUrl,
        filePath: file.path,
        name: 'file',
        formData: {fileSavePath: '/chat'},
        header: {'Authorization': uni.getStorageSync('token')},
        success: (uploadRes) => {
          try {
            const uploadData = JSON.parse(uploadRes.data);
            if(uploadData.status === 'ok') {
              // 构建图片消息对象
              const imageMessage = {
                toId: this.toAuthor.authorId,
                messageType: 1, // 1表示图片消息
                content: '[图片]',
                resourceUrl: uploadData.data,
                fileId: uploadData.result.fileId
              };

              // 通过WebSocket发送图片消息
              this.$wsClient.send(JSON.stringify({
                type: 'chat',
                data: imageMessage
              }));

              // 添加到本地消息列表
              this.messageList.push({
                ...imageMessage,
                fromId: this.user.authorId,
                createTime: new Date().toISOString()
              });

            } else {
              uni.app.msg('图片上传失败: ' + uploadData.msg);
            }
          } catch(err) {
            uni.app.msg('图片上传失败');
          }
        },
        complete: () => {
          this.imageUploading = false;
          uni.hideLoading();
        }
      });
    }
  });
}
2.2 聊天消息展示组件
消息类型判断和展示逻辑
vue
<!-- gui-xhs-im-message.vue 聊天消息展示组件 -->
<template>
  <view class="message-container">
    <view v-for="(message, index) in messageList" :key="index" class="message-item">

      <!-- 根据messageType显示不同类型的消息 -->
      <!-- 文本消息 (messageType = 0) -->
      <view v-if="message.messageType === 0" class="text-message">
        <rich-text :nodes="message.content"></rich-text>
      </view>

      <!-- 图片消息 (messageType = 1) -->
      <view v-else-if="message.messageType === 1" class="image-message">
        <image :src="message.resourceUrl"
               mode="aspectFit"
               class="chat-image"
               @tap="previewChatImage(message.resourceUrl)"
               @error="handleImageError"></image>
      </view>

      <!-- 视频消息 (messageType = 3) -->
      <view v-else-if="message.messageType === 3" class="video-message">
        <view class="video-preview" @tap="playVideo(message.resourceUrl)">
          <image :src="message.videoCover || '/static/video-placeholder.png'"
                 mode="aspectFit"
                 class="video-cover"></image>
          <view class="play-button">
            <text class="play-icon">▶</text>
          </view>
          <view class="video-duration" v-if="message.duration">
            <text>{{formatDuration(message.duration)}}</text>
          </view>
          <view class="video-label">
            <text>视频</text>
          </view>
        </view>
      </view>

    </view>
  </view>
</template>

<script>
export default {
  methods: {
    // 预览聊天图片
    previewChatImage(imageUrl) {
      uni.previewImage({
        current: imageUrl,
        urls: [imageUrl]
      });
    },

    // 播放视频
    playVideo(videoUrl) {
      uni.navigateTo({
        url: `/pages/video/player?url=${encodeURIComponent(videoUrl)}`
      });
    },

    // 格式化视频时长
    formatDuration(seconds) {
      const mins = Math.floor(seconds / 60);
      const secs = seconds % 60;
      return `${mins.toString().padStart(2, '0')}:${secs.toString().padStart(2, '0')}`;
    },

    // 图片加载错误处理
    handleImageError(e) {
      console.error('聊天图片加载失败:', e);
    }
  }
}
</script>
2.3 消息列表中图片和视频的处理
消息列表简化显示逻辑
javascript
// 在消息列表页面,根据messageType显示简化内容
formatMessageContent(message) {
  switch(message.messageType) {
    case 0: // 文本消息
      return message.content;
    case 1: // 图片消息
      return '[图片]';
    case 2: // 语音消息
      return '[语音]';
    case 3: // 视频消息
      return '[视频]';
    default:
      return message.content || '[未知消息]';
  }
},

// 获取消息列表时的数据处理
getChatList() {
  uni.app.get('/auth/getChatList', {}, '', (res => {
    this.chatList = res.data.map(chat => {
      return {
        ...chat,
        // 处理最后一条消息的显示内容
        lastMessageContent: this.formatMessageContent(chat),
        // 处理图片URL
        resourceUrl: chat.resourceUrl ? this.refreshMinioUrl(chat.resourceUrl) : null
      }
    });
  }));
}
2.4 后端聊天消息处理
WebSocket消息处理器
java
// P2PMessageHandler.java - 点对点消息处理
@Component
public class P2PMessageHandler {

    public void handleChatMessage(ChatDto chatDto, String fromId) {
        // 设置发送者ID
        chatDto.setFromId(fromId);

        // 根据文件ID设置消息类型和资源URL
        if(StringUtil.isNotEmpty(chatDto.getFileId())) {
            File file = fileService.getById(chatDto.getFileId());
            if(file != null) {
                String fileType = file.getFileType().toLowerCase();

                // 关键:根据文件类型设置消息类型
                if(fileType.contains("image")) {
                    chatDto.setMessageType(1); // 图片消息
                } else if(fileType.contains("video")) {
                    chatDto.setMessageType(3); // 视频消息
                } else if(fileType.contains("audio")) {
                    chatDto.setMessageType(2); // 语音消息
                }

                // 设置资源访问URL
                chatDto.setResourceUrl(minioUrlUtil.refreshMinioUrl(file.getFileUrl()));
            }
        } else {
            // 没有文件,默认为文本消息
            chatDto.setMessageType(0);
        }

        // 保存消息到数据库
        Chat chat = BeanUtil.copyProperties(chatDto, Chat.class);
        chatService.save(chat);

        // 通过WebSocket发送给接收方
        if("8".equals(chatDto.getToId())) {
            // 发送给客服
            TioUtil.sendChatMessageToUser(bootstrap.getServerGroupContext(),
                                        chatDto.getToId(), HANDLER_SERVICE, chat);
        } else {
            // 发送给普通用户
            TioUtil.sendChatMessageToUser(bootstrap.getServerGroupContext(),
                                        chatDto.getToId(), HANDLER_CHAT, chat);
        }
    }
}
三、开发过程总结
3.1 关键开发思路
数据流程设计
- 前端选择图片 → 上传到服务器 → 获取文件ID和URL → 保存到业务表
- 展示时判断 → 根据字段是否为空 → 决定显示内容类型
- 消息类型区分 → 根据文件类型 → 设置不同的messageType
核心技术要点
1. 图片上传的统一处理
javascript
// 统一的图片上传逻辑
const uploadImage = (filePath, savePath) => {
  return new Promise((resolve, reject) => {
    uni.uploadFile({
      url: this.$uploadUrl,
      filePath: filePath,
      name: 'file',
      formData: {fileSavePath: savePath},
      success: (res) => {
        const data = JSON.parse(res.data);
        if(data.status === 'ok') {
          resolve({
            fileId: data.result.fileId,
            fileUrl: data.data
          });
        } else {
          reject(data.msg);
        }
      },
      fail: reject
    });
  });
};
2. 条件渲染的最佳实践
vue
<!-- 根据数据是否存在决定显示内容 -->
<view v-if="item.replayImgUrl && item.replayImgUrl.trim()" class="image-container">
  <image :src="item.replayImgUrl.trim()" @tap="previewImage(item.replayImgUrl.trim())"></image>
</view>
3. 消息类型的标准化
javascript
// 消息类型常量
const MESSAGE_TYPES = {
  TEXT: 0,    // 文字
  IMAGE: 1,   // 图片
  VOICE: 2,   // 语音
  VIDEO: 3    // 视频
};

// 根据文件类型设置消息类型
const getMessageType = (fileType) => {
  if(fileType.includes('image')) return MESSAGE_TYPES.IMAGE;
  if(fileType.includes('video')) return MESSAGE_TYPES.VIDEO;
  if(fileType.includes('audio')) return MESSAGE_TYPES.VOICE;
  return MESSAGE_TYPES.TEXT;
};
3.2 开发中的关键问题解决
问题1:图片URL的处理
- 问题:MinIO存储的图片URL需要动态刷新
- 解决 :后端统一使用
minioUrlUtil.refreshMinioUrl()处理 - 代码 :
replyDto.setReplayImgUrl(minioUrlUtil.refreshMinioUrl(replyDto.getReplayImgUrl()));
问题2:消息列表的性能优化
- 问题:大量图片加载影响性能
- 解决:使用懒加载和错误处理
- 代码 :
@error="handleImageError"+ 占位图显示
问题3:数据一致性保证
- 问题:图片上传成功但业务数据保存失败
- 解决:先上传图片,成功后再保存业务数据
- 流程:选择图片 → 上传 → 获取ID → 保存业务数据
3.3 功能扩展建议
- 图片压缩:前端上传前进行图片压缩
- 多图上传:支持一次选择多张图片
- 图片编辑:添加滤镜、裁剪等功能
- 离线缓存:图片本地缓存机制
- 进度显示:上传进度的实时显示
3.4 总结
通过本章节的开发过程,我们实现了:
✅ 产品回复图片功能 - 用户可以在评论中添加图片
✅ 聊天图片发送功能 - 支持在聊天中发送图片和视频
✅ 智能内容展示 - 根据数据类型自动选择展示方式
✅ 消息类型区分 - 统一的消息类型管理机制
这套图片上传和展示系统为小红书项目提供了完整的多媒体交互能力,用户体验得到显著提升。关键在于理解数据流程、掌握条件渲染技巧,以及建立统一的文件处理机制。