基于electron-builder与electron-updater实现程序远程自动更新,附源码
-
- [1. electron-builder.yml中更新配置](#1. electron-builder.yml中更新配置)
- [2. 渲染进程交互逻辑](#2. 渲染进程交互逻辑)
- [3. 主进程更新逻辑](#3. 主进程更新逻辑)
- [4. 打包程序后上传到静态资源服务器](#4. 打包程序后上传到静态资源服务器)
本示例只对 Windows 打包进行了部分配置,更多配置可以查看官网。
下面是我项目使用的一些库版本:
- "vue": "^3.5.13"
- "vite": "^6.2.6"
- "electron": "^35.1.5"
- "electron-builder": "^25.1.8"
- "electron-updater": "^6.3.9"
- "element-plus": "^2.10.2"
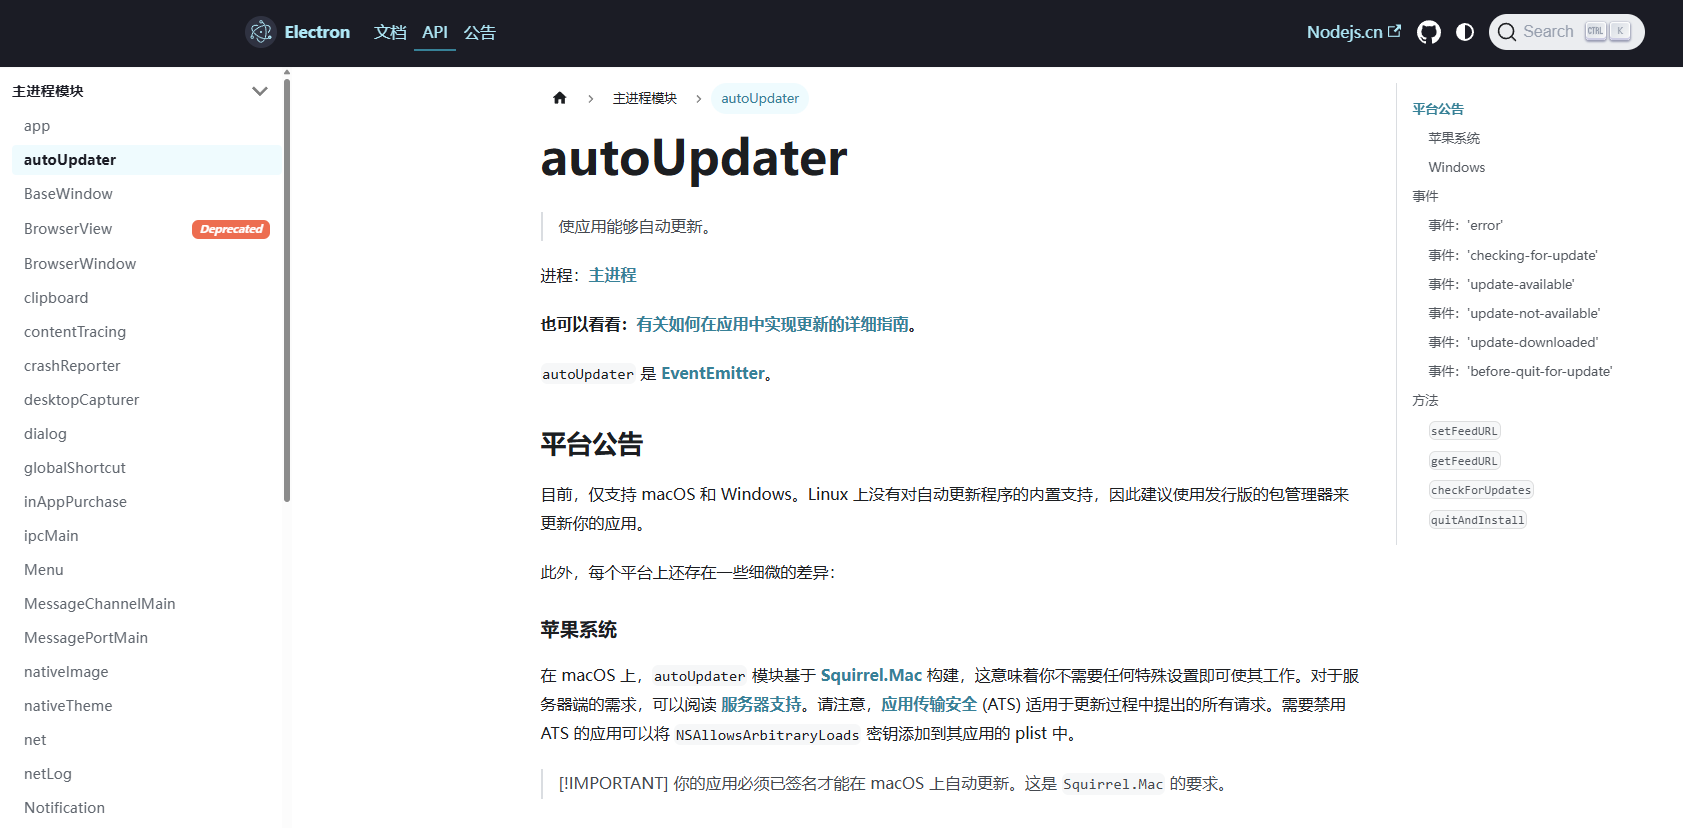
要实现electron程序的远程更新,有两个关键的库:electron-builder与electron-updater 。
electron-builder:构建工具,官网https://www.electron.build/electron-updater:更新工具,官网https://electron.nodejs.cn/docs/latest/api/auto-updater#windows
实现远程自动更新程序大致有以下几个步骤:
- electron-builder.yml中更新配置
- 渲染进程交互逻辑
- 主进程更新逻辑
- 打包程序后上传到静态资源服务器
1. electron-builder.yml中更新配置
electron-builder.yml中的主要配置就是publish部分:
(这里我用的是MINIO文件存储,你也可以换成任意的自定义的文件存储地址,要求就是能直接访问到静态资源)
bash
publish:
  provider: generic # generic表示私有通用HTTP服务,如果使用github做为更新载体这个地方的值就写github
url: https://test.com/minio/electron # 更新时候下载地址服务 url,(http/https + :// + 域名/ip + : + 端口号 (默认端口号为 80))完整的electron-builder.yml配置:(供参考)
bash
# electron-builder 是一个用于打包适用于 macOS、Windows 和 Linux 可分发 Electron 应用程序的完整解决方案
# 其中${name}、${version}对应的是package.json中的参数name、version
appId: com.electron.test # 应用程序ID
productName: test名称 # 安装后程序的名称,就是桌面图标下方的那个名称
directories:
  buildResources: build
files:
  - '!**/.vscode/*'
  - '!src/*'
  - '!electron.vite.config.{js,ts,mjs,cjs}'
  - '!{.eslintcache,eslint.config.mjs,.prettierignore,.prettierrc.yaml,dev-app-update.yml,CHANGELOG.md,README.md}'
  - '!{.env,.env.*,.npmrc,pnpm-lock.yaml}'
  - '!{tsconfig.json,tsconfig.node.json,tsconfig.web.json}'
asarUnpack:
  - resources/**
win:
  executableName: test名称
  icon: './resources/icon.ico' # 应用图标
nsis:
  oneClick: false  # 默认为true,安装的时候直接安装,不需要选择安装路径
  allowToChangeInstallationDirectory: true  # 允许用户选择自定义安装目录
  artifactName: ${name}-${version}-setup.${ext} # 安装包名称
  shortcutName: ${productName} # 快捷方式名称
  uninstallDisplayName: ${productName} # 卸载程序显示名称
  createDesktopShortcut: always # 是否添加桌面快捷方式
mac:
  entitlementsInherit: build/entitlements.mac.plist
  extendInfo:
    - NSCameraUsageDescription: Application requests access to the device's camera.
    - NSMicrophoneUsageDescription: Application requests access to the device's microphone.
    - NSDocumentsFolderUsageDescription: Application requests access to the user's Documents folder.
    - NSDownloadsFolderUsageDescription: Application requests access to the user's Downloads folder.
  notarize: false
dmg:
  artifactName: ${name}-${version}.${ext}
linux:
  target:
    - AppImage
    - snap
    - deb
  maintainer: electronjs.org
  category: Utility
appImage:
  artifactName: ${name}-${version}.${ext}
npmRebuild: false
publish:
  provider: generic # generic表示私有通用HTTP服务,如果使用github做为更新载体这个地方的值就写github
  url: https://test.com/minio/electron # 更新时候下载地址服务 url,(http/https + :// + 域名/ip + : + 端口号 (默认端口号为 80))
electronDownload:
  mirror: https://npmmirror.com/mirrors/electron/ # electron的镜像
2. 渲染进程交互逻辑
渲染进程与主进程的通信你可以按自己定义的来,这里的代码如果你是用的electron-vite就可以直接拿去用:(都差不多)
在渲染进程的界面中任意位置,如按钮点击后调用这个函数就行。
javascript
// 检查更新
const checkUpdate = () => {
  setTimeout(() => {
    // 检查是否有更新
    window.electron.ipcRenderer.send('updater:check-update');
    // 如果有新版本则提示是否下载更新
    window.electron.ipcRenderer.on('updater:update-available', (event, info) => {
      ElMessageBox.confirm(`检测到新版本:${info.version},当前版本为:${config.version},是否更新?`, '更新提示', {
        confirmButtonText: '确认更新',
        cancelButtonText: '取消',
        type: 'warning',
      }).then(() => {
        // 下载更新包
        window.electron.ipcRenderer.send('updater:download');
        // 下载进度
        window.electron.ipcRenderer.on('updater:download-progress', (event, info) => {
          console.log(info);
          // 可以与渲染进程做实时交互
        });
        // 下载完成
        window.electron.ipcRenderer.on('updater:update-downloaded', (event, info) => {
          ElMessageBox.confirm(`下载完成,是否立即安装?`, '安装提示', {
            confirmButtonText: '确认更新',
            cancelButtonText: '取消',
            type: 'warning',
          }).then(() => {
            window.electron.ipcRenderer.send('updater:quit-and-install');
          });
        });
      });
    });
    // 如果没有新版本则提示当前版本
    window.electron.ipcRenderer.on('updater:update-not-available', (event, info) => {
      ElNotification({
        title: '提示',
        message: `当前已是最新版本:${info.version}`,
        type: 'success',
      });
    });
    // 更新出错
    window.electron.ipcRenderer.on('updater:update-error', (event, info) => {
      ElNotification({
        title: '提示',
        message: `更新出错: ${info}`,
        type: 'error',
      });
    });
  }, 2000);
};
3. 主进程更新逻辑
主进程这里我封装成了一个updater.ts文件:
javascript
/*
 * @Description: 自动更新应用程序
 * @Date: 2025-08-01 10:21:24
 */
import { BrowserWindow, ipcMain } from 'electron';
import electronUpdater from 'electron-updater';

// autoUpdater模块从更新服务器源读取数据以检查是否有新版本可供下载
const { autoUpdater } = electronUpdater;

export function checkUpdate(win: BrowserWindow) {
  // 关闭自动更新
  autoUpdater.autoDownload = false;

  /**
   * @description: 主进程主动给渲染进程发送消息,渲染进程使用ipcRender.on('update-available',callback)
   */
  // 有新版本
  autoUpdater.on('update-available', (info) => {
    win.webContents.send('updater:update-available', info);
  });

  // 无新版本
  autoUpdater.on('update-not-available', (info) => {
    win.webContents.send('updater:update-not-available', info);
  });

  // 更新出错
  autoUpdater.on('error', (error) => {
    win.webContents.send('updater:update-error', error);
  });

  // 下载进度
  autoUpdater.on('download-progress', (info) => {
    win.webContents.send('updater:download-progress', {
      speed: info.bytesPerSecond, // 网速
      percent: info.percent, // 百分比
      transferred: info.transferred, // 已传大小
      total: info.total, // 总大小
    });
  });

  // 下载完成
  autoUpdater.on('update-downloaded', () => {
    win.webContents.send('updater:update-downloaded');
  });


  /**
   * @description: 主进程监听渲染进程发送的消息,ipcRender.send('check-update')
   */
  // 检测是否有新版本
  ipcMain.on('updater:check-update', () => {
    autoUpdater.checkForUpdates();
  });

  // 下载更新包
  ipcMain.on('updater:download', () => {
    autoUpdater.downloadUpdate();
  });

  // 关闭程序,安装更新包
  ipcMain.on('updater:quit-and-install', () => {
    autoUpdater.quitAndInstall();
  });
}
然后主进程中引入: (多余的代码我省略了)
javascript
import { checkUpdate } from './updater'; // 引入检查更新功能
...
function createWindow(): void {
// 创建浏览器窗口
mainWindow = new BrowserWindow({
width: 3840,
height: 2160,
frame: false, // 设置 frame 为 false 以隐藏头部边框
show: false, // 窗口创建完成后不会立即显示, 等到ready-to-show后显示,便于用户看到完整的界面
autoHideMenuBar: true, // 是否隐藏菜单
skipTaskbar: true, // 隐藏下方任务栏中的原生图标
...(process.platform === 'linux' ? { icon } : {}),
fullscreen: true, // 设置为全屏模式
webPreferences: {
preload: join(__dirname, '../preload/index.js'),
sandbox: false, // Electron启用esm后: 预加载脚本必须 非沙盒化(sandbox: false) 并且文件以 .mjs 扩展名结尾。同时如果要设置字节码加密,也必须禁用 sandbox ,即设置sandbox: false
},
});
mainWindow.on('ready-to-show', () => {
mainWindow?.show();
});
mainWindow.webContents.setWindowOpenHandler((details) => {
shell.openExternal(details.url);
return { action: 'deny' };
});
// HMR for renderer base on electron-vite cli.
// Load the remote URL for development or the local html file for production.
if (is.dev && process.env['ELECTRON_RENDERER_URL']) {
mainWindow.loadURL(process.env['ELECTRON_RENDERER_URL']);
} else {
mainWindow.loadFile(join(__dirname, '../renderer/index.html'));
}
// 创建托盘图标,传递窗口对象
createTray(mainWindow);
// 检查程序更新,传递窗口对象
checkUpdate(mainWindow);
// 注册快捷键: Alt+F12 打开控制台
const isDevToolsRegistered = globalShortcut.register('Alt+F12', () => {
if (mainWindow && !mainWindow.isDestroyed()) {
mainWindow.webContents.openDevTools();
}
});
// 注册快捷键: Alt+Q 退出应用
const isQuitRegistered = globalShortcut.register('Alt+Q', () => {
app.quit();
});
// 检查快捷键是否注册成功
if (!isDevToolsRegistered) {
console.error('注册快捷键失败: Alt+F12');
}
if (!isQuitRegistered) {
console.error('注册快捷键失败: Alt+Q');
}
}
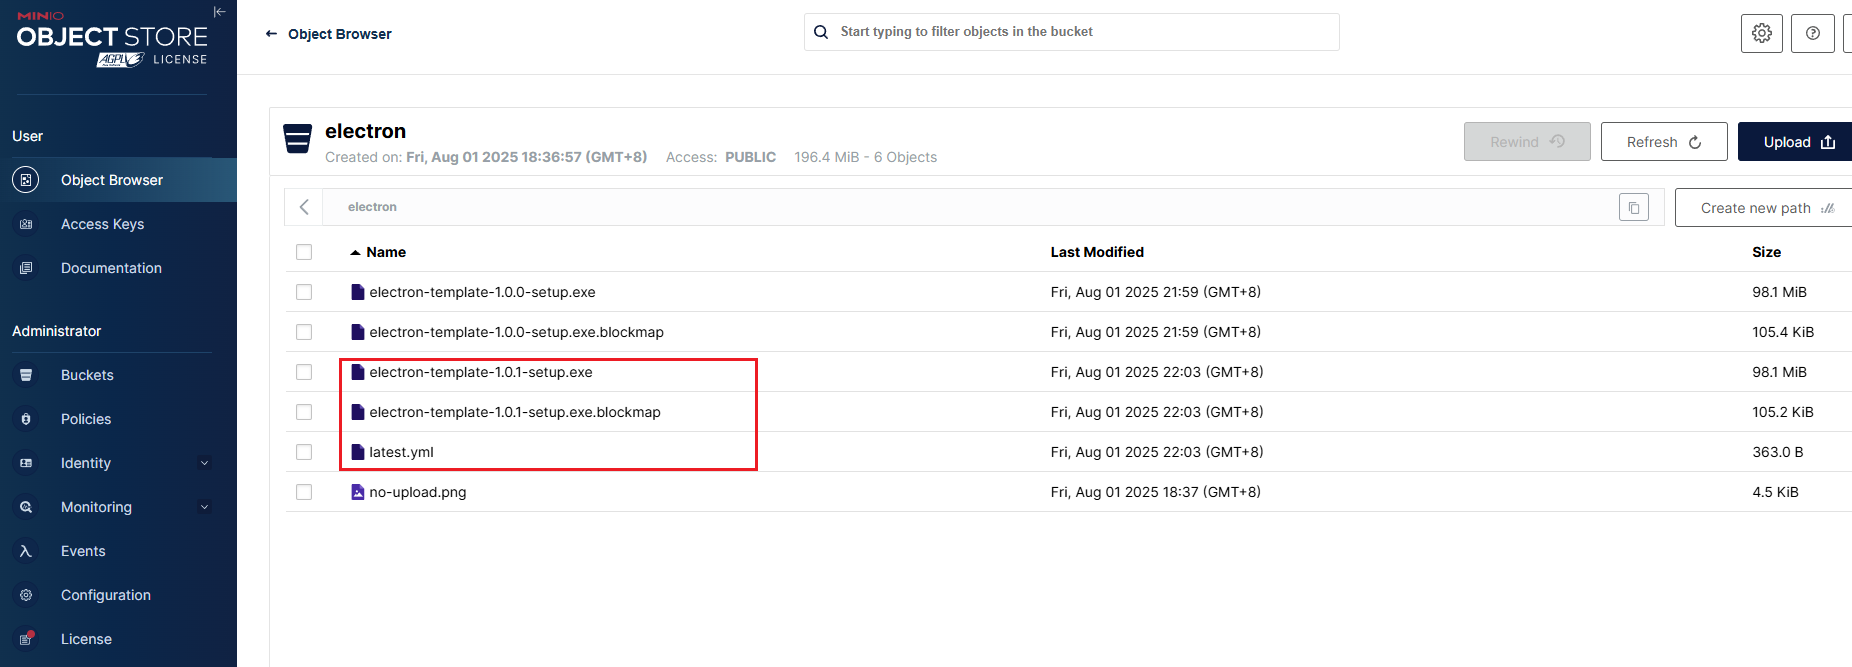
...4. 打包程序后上传到静态资源服务器
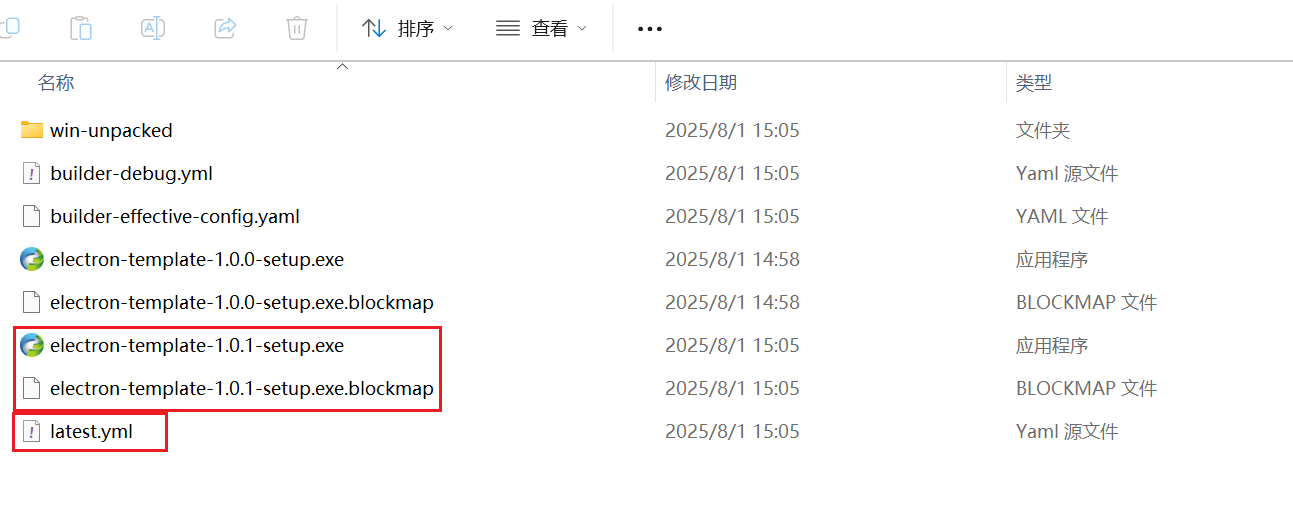
打包时修改 package.json 中的 version 字段,使其高于原来版本,
使用electron-builder打包出来exe文件之后,会生成下图中三个文件:
-
blockmap文件,记录着更新内容
-
exe文件,新的二进制文件
-
latest.yml ,记录最新版本信息
我这里用的文件存储,你可以根据自己的项目搞个文件存储,能通过地址访问到就行,上文代码中我已经写好了注释,可以回去看一下。
然后上传打包生成的三个文件,至此就大功告成了,前端界面中就可以通过UI交互,实现electron的远程更新!