作为前端开发者,npm包是我们日常开发中不可或缺的工具,我们的项目通常依赖了许多npm包,本文将介绍一个npm包从编写、测试到发布、更新的完整教程。
一、环境准备
- 安装Node.js
- 在npm官网注册账号,发布npm包要用
二、创建项目
1.创建项目(示例项目:hbr-utils)
powershell
mkdir hbr-utils #创建文件夹
cd hbr-utils #进入文件夹- npm项目初始化
powershell
npm init执行命令后,根据问题填入对应的值后,目录会生成一个package.json文件,也可以直接修改里面的值。
3.下载依赖,分别用于管理版本、打包、测试
powershell
npm i -D bumpp tsup typescript vitest- bumpp:用于自动管理项目版本号(遵循语义化版本规范)并生成 CHANGELOG 的工具,可简化版本发布流程。
- tsup:基于 esbuild 的快速 TS/JS 打包工具,支持零配置输出多种格式,以速度快、配置简单为特点。
- typescript:TypeScript 语言的核心包,为 JS 添加静态类型系统并将 TS 编译为可执行 JS,是 TS 开发的基础。
- vitest:基于 Vite 的极速单元测试框架,支持 Jest 风格 API,利用 HMR 特性提升测试效率,适配现代语法。
下载好后,我们分别创建配置文件
typescript
// bump.config.ts
import { defineConfig } from 'bumpp'

export default defineConfig({
  commit: true, // 是否自动提交
  tag: true, // 是否生成标签
  push: true, // 是否推送
  recursive: false, // 是否递归升级子包
  files: ['package.json'] // 指定需升级的文件
})
typescript
// tsup.config.ts
export default {
  entry: ['./src/index.ts'], // 入口文件
  format: ['cjs', 'esm'], // 输出格式
  outDir: 'dist', // 输出目录
  minify: true, // 压缩代码(生产环境推荐)
  sourcemap: true // 生成 sourcemap
}
typescript
// tsconfig.json
{
  "compilerOptions": {
    "target": "ESNext",
    "module": "ES2022",
    "moduleResolution": "node",
    "strict": true,
    "skipLibCheck": true,
    "forceConsistentCasingInFileNames": true,
    "esModuleInterop": true,
    "outDir": "dist",
    "resolveJsonModule": true
  },
  "include": ["*.ts"],
  "exclude": ["node_modules"]
}
typescript
// vitest.config.ts
import { defineConfig } from 'vitest/config'

export default defineConfig({
  test: {
    // 测试文件匹配模式
    include: ['**/*.{test,spec}.{js,ts}'],
    // 是否开启浏览器环境模拟(默认是 Node 环境)
    environment: 'node' // 可选 'jsdom'(浏览器模拟)
  }
})
三、编写代码并测试
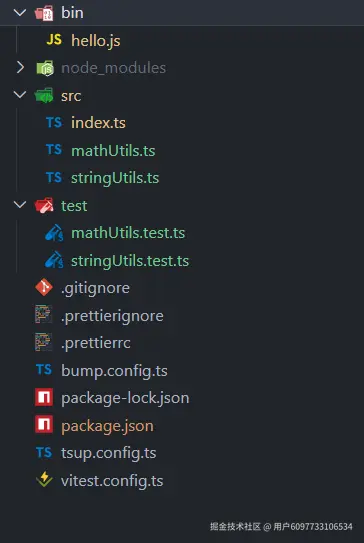
- 新增src目录和test目录,分别存放功能代码和测试代码,目录文件如下
- 编写功能代码,本文以两个工具函数为例
typescript
// /src/mathUtils.ts
export function add(a: number, b: number) {
  return a + b
}
typescript
// /src/stringUtils.ts
/**
 * 将下划线命名的字符串转换为驼峰命名法
 * @param str 下划线命名的字符串
 * @returns 驼峰命名的字符串
 * @example toCamelCase('user_name') => 'userName'
 */
export function toCamelCase(str: string) {
  return str.replace(/_([a-z])/g, (match, char) => char.toUpperCase())
}
typescript
// 在入口文件导出所有函数
// /src/index.ts
export * from './mathUtils'
export * from './stringUtils'- 编写测试代码
typescript
// /test/mathUtils.test.ts
import { test, expect } from 'vitest'
import { add } from '../src/mathUtils.ts'

test('add function', () => {
  expect(add(1, 2)).toBe(3)
  expect(add(5, -1)).toBe(4)
})
typescript
// /test/stringUtils.test.ts
import { test, expect } from 'vitest'
import { toCamelCase } from '../src/stringUtils.ts'

test('toCamelCase function', () => {
  expect(toCamelCase('hello_world')).toBe('helloWorld')
  expect(toCamelCase('my_user_name')).toBe('myUserName')
})- 在package.json中加入测试命令
json
  "scripts": {
    "test": "vitest",
    "test:run": "vitest run"
},- 运行测试命令
powershell
npm run test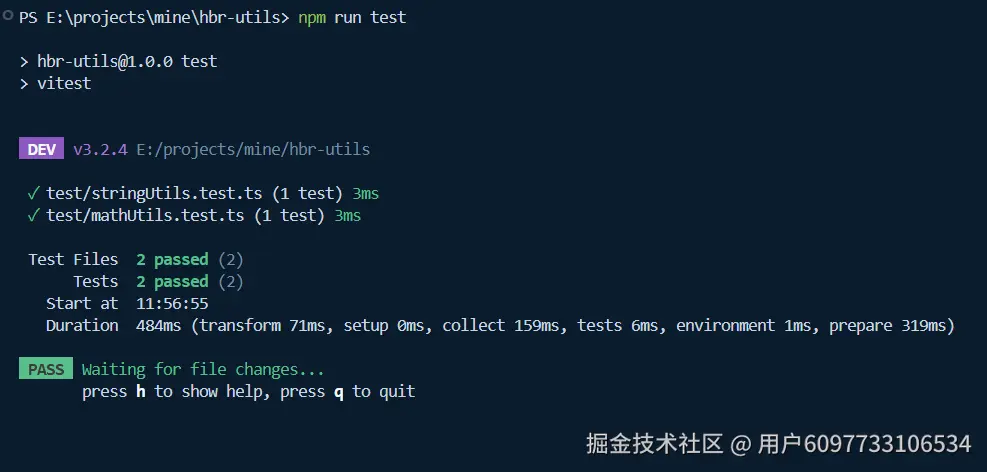
从图中可以看到,测试用例全部通过了。
四、项目打包、版本管理以及发布到npm
- 在package.json中加入bumpp和build相关命令,完整的文件如下
json
{
  "name": "hbr-utils",
  "version": "1.0.0",
  "description": "Utility functions",
  "main": "./dist/index.js",
  "bin": {
    "hello": "bin/hello.js"
  },
  "scripts": {
    "test": "vitest",
    "test:run": "vitest run",
    "bumpp": "bumpp",
    "build": "tsup",
    "test:build": "npm run test:run && npm run build",
    "build:bumpp": "npm run test:build && bumpp",
    "build:publish": "npm run build:bumpp && npm publish"
  },
  "files": [
    "bin",
    "dist"
  ],
  "exports": {
    ".": {
      "require": "./dist/index.js",
      "import": "./dist/index.mjs"
    }
  },
  "repository": {
    "type": "git",
    "url": "https://github.com/TianZongNanBei/hbr-utils.git"
  },
  "keywords": [
    "string",
    "array",
    "typescript",
    "utils"
  ],
  "author": "TianZongNanBei",
  "license": "ISC",
  "bugs": {
    "url": "https://github.com/TianZongNanBei/hbr-utils/issues"
  },
  "homepage": "https://github.com/TianZongNanBei/hbr-utils#readme",
  "devDependencies": {
    "bumpp": "^10.2.2",
    "tsup": "^8.5.0",
    "typescript": "^5.9.2",
    "vitest": "^3.2.4"
  }
}

}- main :包的默认入口文件,供
require/import引入时默认加载 - bin :定义包中的可执行脚本,用于将脚本注册为命令行工具。安装包后,这些脚本会被链接到系统的可执行目录(如
node_modules/.bin),允许用户直接通过命令名调用。"hello": "bin/hello.js"表示注册一个名为hello的命令,执行该命令时实际运行的是bin/hello.js脚本(需确保该脚本顶部有#!/usr/bin/env node声明)。 - files :指定发布到 npm 的文件或目录,这样发布到npm后只会保留
bin和dist目录,而不会上传其它源代码。 - exports :精细化控制入口,支持按
require/import方式返回不同文件(示例区分 CJS/ESM 入口)
我新建了bin目录并在目录中新增了hello.js,用于测试命令行的功能,我们所熟知的vue-cli、create-react-app也是通过这样的方式来的执行的。
javascript
// /bin/hello.js
#!/usr/bin/env node
console.log('Hello Bin!')
#!/usr/bin/env node 作用是告诉系统这个脚本需要用 Node.js 环境来执行
- 项目打包
powershell
npm run build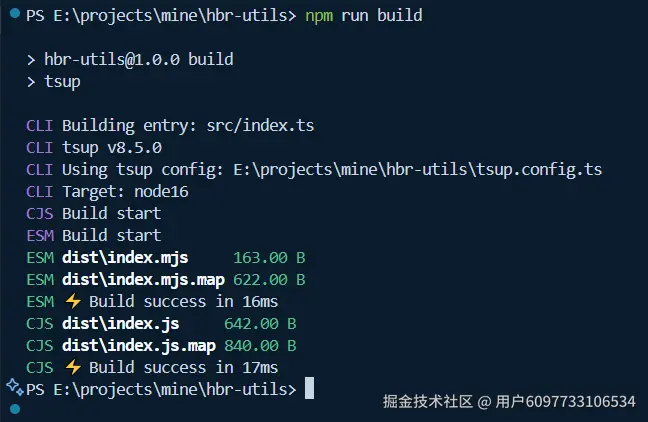
可以看到tsup已经打包成功了
- 管理版本并提交
powershell
npm run bumpp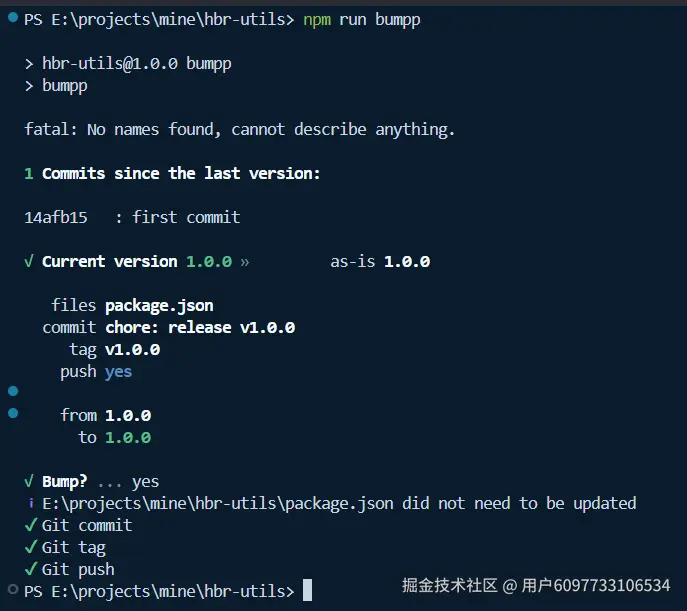
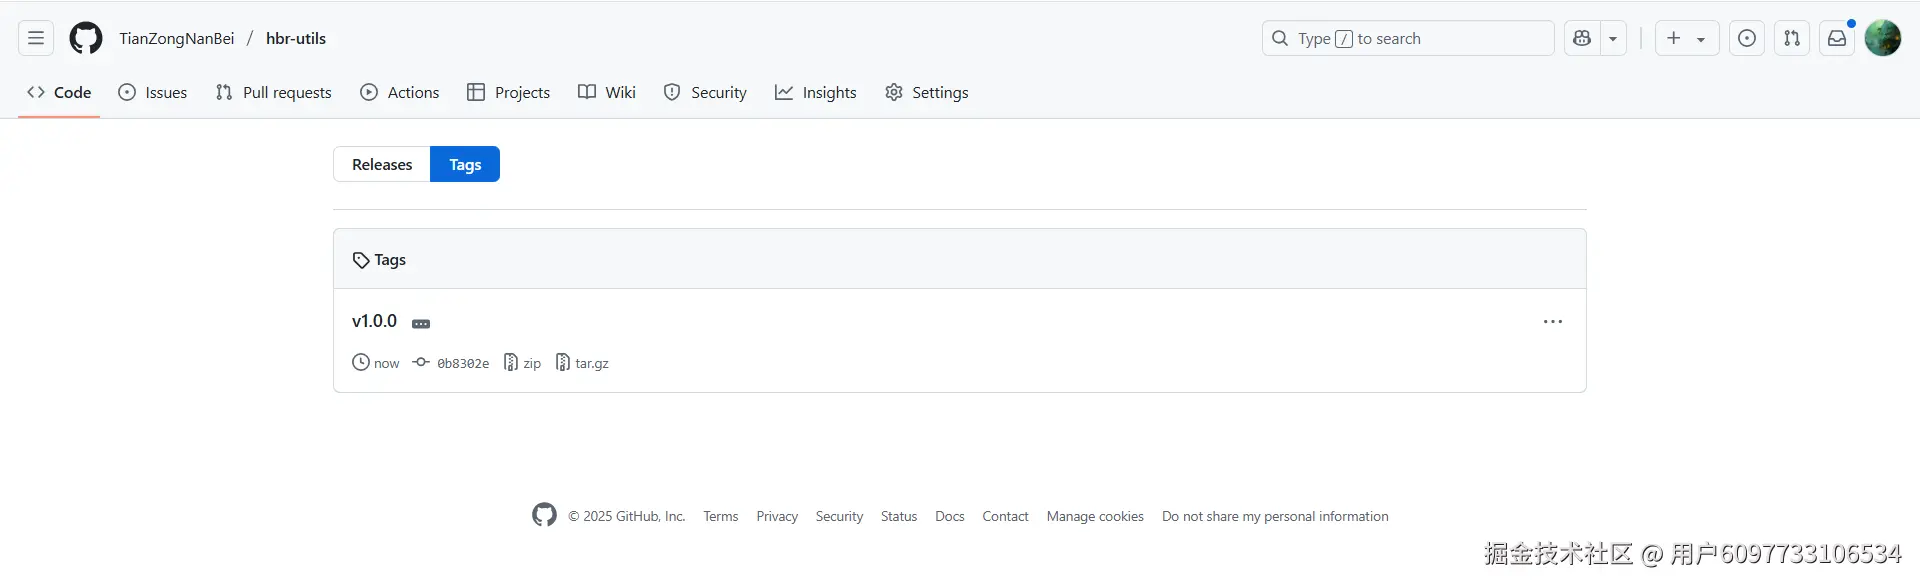
打开github可以看到已经打上了tag
- 发布到npm
powershell
npm publish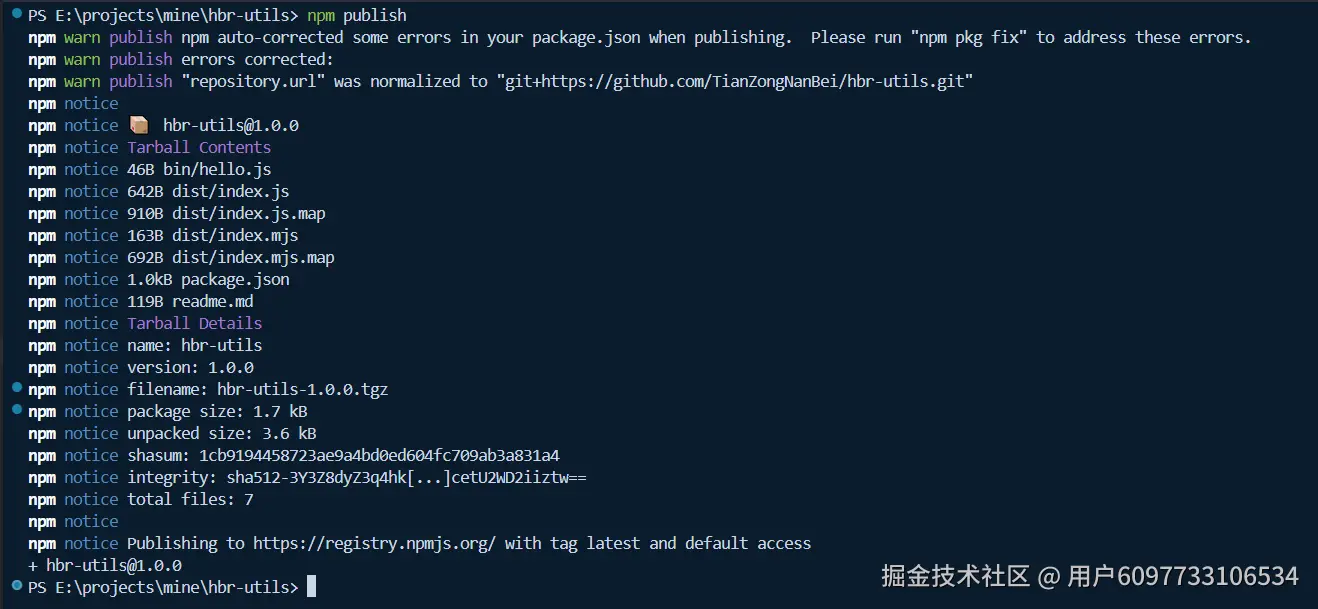
可以看到已经发布成功了,这一步需要先登录,如果之前没有登录过npm需要先执行npm login进行登录。如果之前npm设置了淘宝镜像源的小伙伴,需要把它改回npm官网,否则会发布不上去。
- 下载并测试npm包 新建一个新项目并下载包
powershell
npm i hbr-utils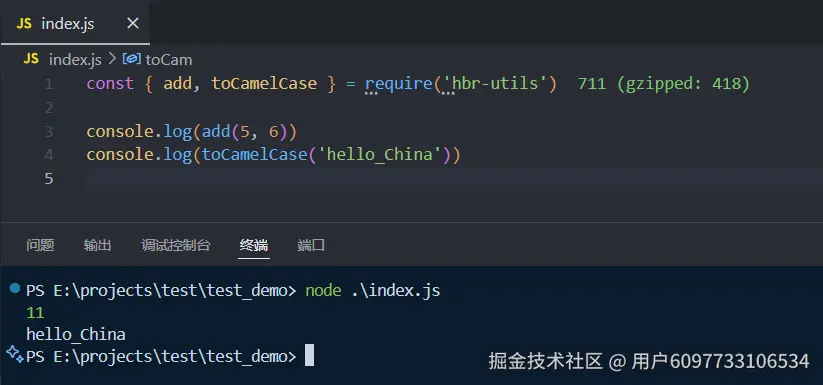
可以看到,无论是用require还是import导入都是可以兼容的,说明已经同时支持CommonJ和ESM。但是也发现一个问题,就是没有ts的类型提示。那我们就加入ts类型,更新为1.0.1版本。
修改:
typescript
// tsup.config.ts 加入dts配置
export default {
  entry: ['./src/index.ts'], // 入口文件
  format: ['cjs', 'esm'], // 输出格式
  outDir: 'dist', // 输出目录
  dts: true, // 生成 .d.ts 文件
  minify: true, // 压缩代码(生产环境推荐)
  sourcemap: true // 生成 sourcemap
}
json
// package.json修改exports配置
{
  "name": "hbr-utils",
  "version": "1.0.0",
  "description": "Utility functions",
  "main": "./dist/index.js",
  "bin": {
    "hello": "bin/hello.js"
  },
  "scripts": {
    "test": "vitest",
    "test:run": "vitest run",
    "bumpp": "bumpp",
    "build": "tsup",
    "test:build": "npm run test:run && npm run build",
    "build:bumpp": "npm run test:build && bumpp",
    "build:publish": "npm run build:bumpp && npm publish"
  },
  "files": [
    "bin",
    "dist"
  ],
  "exports": {
    ".": {
      "require": {
        "types": "./dist/index.d.ts",
        "default": "./dist/index.js"
      },
      "import": {
        "types": "./dist/index.d.mts",
        "default": "./dist/index.mjs"
      }
    }
  },
  "repository": {
    "type": "git",
    "url": "https://github.com/TianZongNanBei/hbr-utils.git"
  },
  "keywords": [
    "string",
    "array",
    "typescript",
    "utils"
  ],
  "author": "TianZongNanBei",
  "license": "ISC",
  "bugs": {
    "url": "https://github.com/TianZongNanBei/hbr-utils/issues"
  },
  "homepage": "https://github.com/TianZongNanBei/hbr-utils#readme",
  "devDependencies": {
    "bumpp": "^10.2.2",
    "tsup": "^8.5.0",
    "typescript": "^5.9.2",
    "vitest": "^3.2.4"
  }
}- 一键测试打包更新版本并发布到npm
powershell
npm run build:publish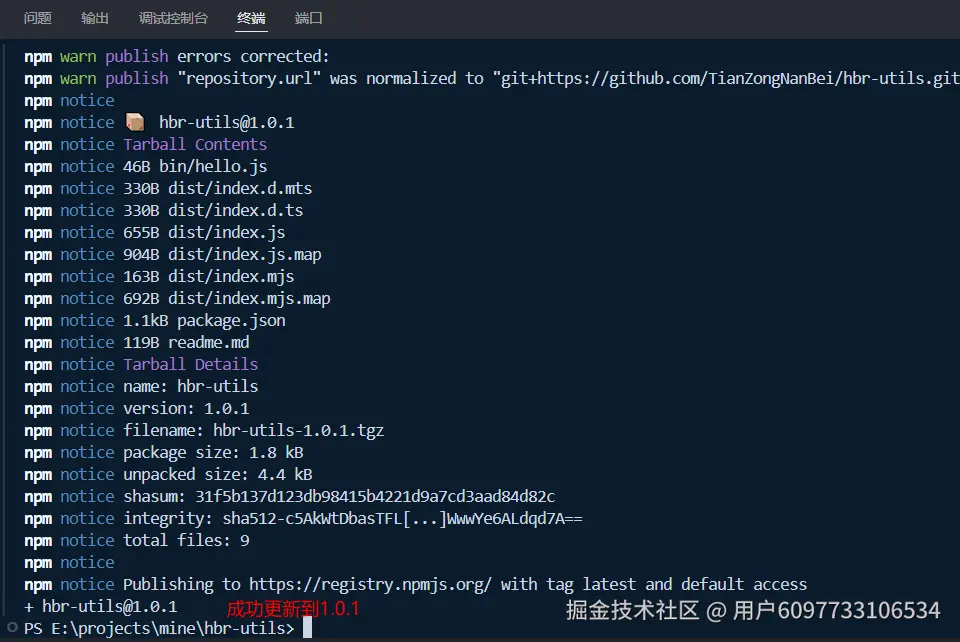
发布成功!
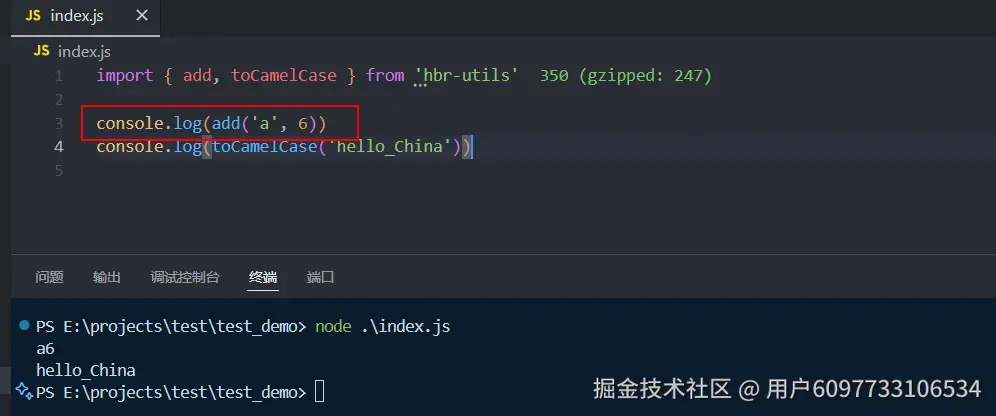
再次测试: 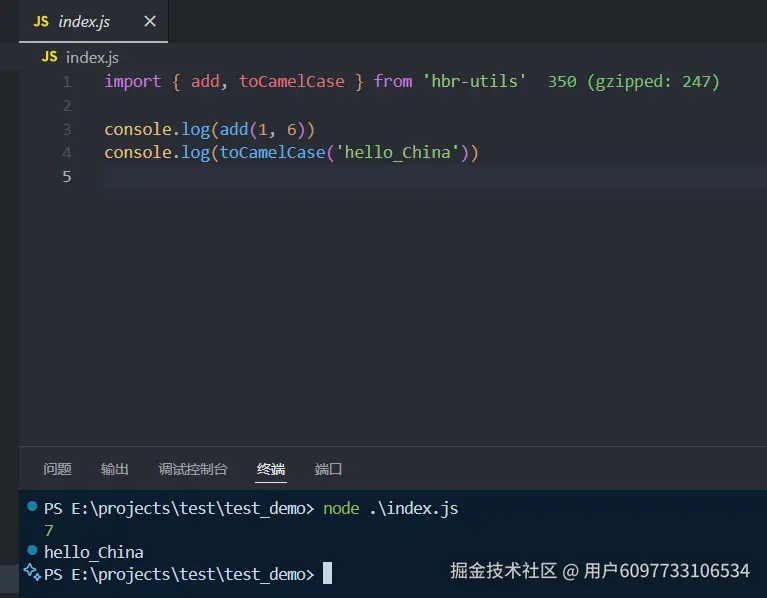
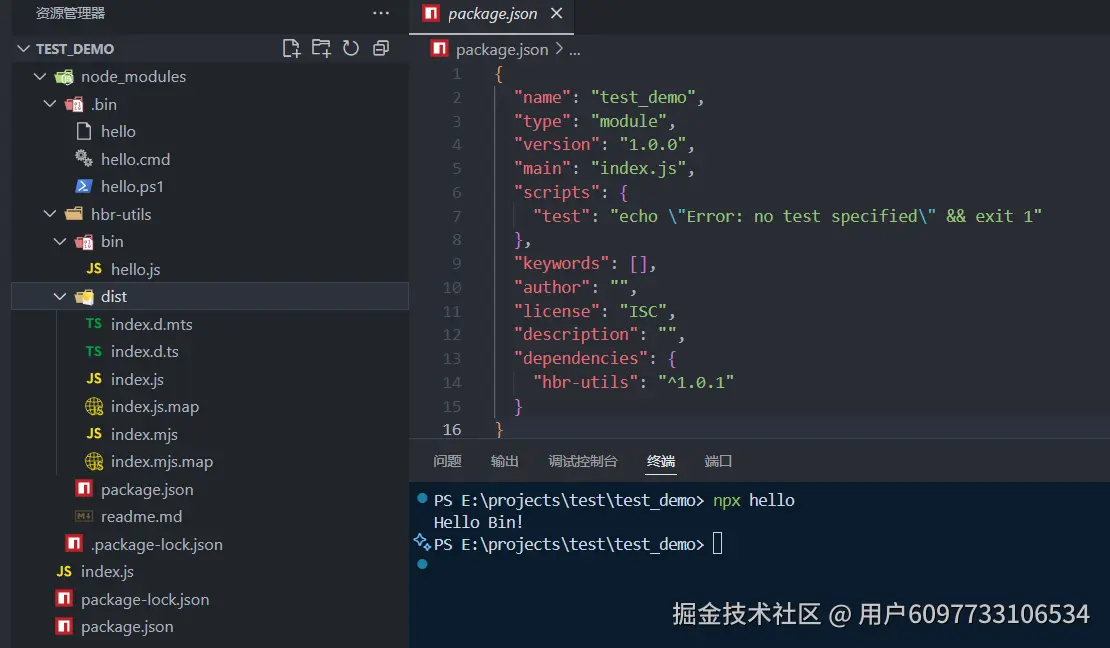
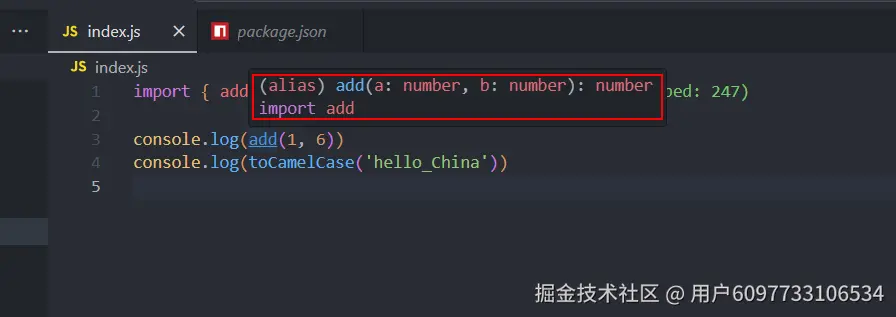
可以看到函数功能和bin命令都执行成功了,而且写代码时也有ts类型提示了,大功告成!