数据库软件下载地址:
openGauss-All-6.0.2-openEuler22.03-x86_64.tar.gz
openGauss安装前系统准备
路径规划
| 序号 | 目录说明 | 目录 | 子目录 | 说明 |
|---|---|---|---|---|
| 1 | openGauss安装目录 | /data/openGauss/install/app | bin | 存放数据库二进制文件的目录。 |
| etc | cgroup工具配置文件。 | |||
| include | 存放数据库运行所需要的头文件。 | |||
| lib | 存放数据库的库文件的目录。 | |||
| share | 存放数据库运行所需要的公共文件,如配置文件模板。 | |||
| 2 | openGauss数据目录 | /opt/huawei/install/data | DBnode实例的数据目录。 | |
| 3 | openGauss日志目录 | /data/openGauss/log/omm | bin | 二进制程序的日志目录。 |
| gs_profile | 数据库内核性能日志目录。 | |||
| om | OM的日志目录。例如: 部分local脚本产生的日志、增删数据库节点接口的日志、gs_om接口的日志、前置接口的日志、节点替换接口的日志等。 | |||
| pg_audit | 数据库审计日志目录。 | |||
| pg_log | 数据库节点实例的运行日志目录。 | |||
| 4 | openGauss系统工具目录 | /data/openGauss/install/om | script | 用于openGauss用户进行openGauss管理的脚本文件。 |
| lib | bin目录下的二进制文件依赖的库文件。 | |||
| 5 | openGauss临时文件目录 | /data/openGauss/tmp | 用于放置临时文件。 |
1.安装软件
bash
(1)创建软件目录并上传安装包
[root@openGauss01 ~]# mkdir -p /opt/software/openGauss
[root@openGauss01 ~]# cd /opt/software/openGauss
[root@openGauss01 openGauss]# ll
total 157964
-rw-r--r-- 1 root root 161752429 Aug  5 10:41 openGauss-All-6.0.2-openEuler22.03-x86_64.tar.gz

(2)解压安装包
[root@openGauss01 openGauss]# tar xf openGauss-All-6.0.2-openEuler22.03-x86_64.tar.gz
[root@openGauss01 openGauss]# tar xf openGauss-OM-6.0.2-openEuler22.03-x86_64.tar.gz
[root@openGauss01 openGauss]# chmod 755 -R /opt/software
2.生成配置文件
xml
[root@openGauss01 openGauss]# cat cluster_config.xml
<?xml version="1.0" encoding="UTF-8"?>
<ROOT>
    <!-- openGauss整体信息 -->
    <CLUSTER>
        <!-- 数据库名称 -->
        <PARAM name="clusterName" value="dbCluster" />
        <!-- 数据库节点名称(hostname) -->
        <PARAM name="nodeNames" value="openGauss01" />
        <!-- 数据库安装目录-->
        <PARAM name="gaussdbAppPath" value="/data/openGauss/install/app" />
        <!-- 数据库工具目录-->
        <PARAM name="gaussdbToolPath" value="/data/openGauss/install/om" />
        <!-- 日志目录-->
        <PARAM name="gaussdbLogPath" value="/data/openGauss/log" />
        <!-- 临时文件目录-->
        <PARAM name="tmpMppdbPath" value="/data/openGauss/tmp" />
        <!-- 数据库core文件目录-->
        <PARAM name="corePath" value="/data/openGauss/corefile" />
        <!-- 节点IP,与数据库节点名称列表一一对应 -->
        <!-- 如果用ipv6 替换ipv4地址即可 如:<PARAM name="backIp1s" value="2407:xxxx:xxxx:xxxx:xxxx:xxxx:caa:2335"/> -->
        <PARAM name="backIp1s" value="10.0.0.31"/>
    </CLUSTER>
    <!-- 每台服务器上的节点部署信息 -->
    <DEVICELIST>
        <!-- 节点1上的部署信息 -->
        <DEVICE sn="openGauss01">
            <!-- 节点1的主机名称 -->
            <PARAM name="name" value="openGauss01"/>
            <!-- 节点1所在的AZ及AZ优先级 -->
            <PARAM name="azName" value="AZ1"/>
            <PARAM name="azPriority" value="1"/>
            <!-- 节点1的IP,如果服务器只有一个网卡可用,将backIP1和sshIP1配置成同一个IP -->
            <!-- 用ipv6安装部署时 换上ipv6地址即可,后面xml文件示例也是同样操作 -->
            <PARAM name="backIp1" value="10.0.0.31"/>
            <PARAM name="sshIp1" value="10.0.0.31"/>

            <!--dbnode-->
            <PARAM name="dataNum" value="1"/>
            <PARAM name="dataPortBase" value="15400"/>
            <PARAM name="dataNode1" value="/data/openGauss/data"/>
            <PARAM name="dataNode1_syncNum" value="0"/>
        </DEVICE>
    </DEVICELIST>
</ROOT>
3.执行安装前置脚本
创建完openGauss配置文件后,在执行安装前,为了后续能以最小权限进行安装及openGauss管理操作,保证系统安全性,需要运行安装前置脚本gs_preinstall准备好安装用户及环境。
安装前置脚本gs_preinstall可以协助用户自动完成如下的安装环境准备工作:
- 自动设置Linux内核参数以达到提高服务器负载能力的目的。这些参数直接影响数据库系统的运行状态,请仅在确认必要时调整。openGauss所设置的Linux内核参数取值请参见配置操作系统参数。
- 自动将openGauss配置文件、安装包拷贝到openGauss主机的相同目录下。
- openGauss安装用户、用户组不存在时,自动创建安装用户以及用户组。
- 读取openGauss配置文件中的目录信息并创建,将目录权限授予安装用户。
- openGauss默认关闭使用transparent_hugepage服务,并将关闭命令写入操作系统启动文件。
bash
[root@openGauss01 openGauss]# cd /opt/software/openGauss/script
[root@openGauss01 script]# ./gs_preinstall -U omm -G dbgrp -X /opt/software/openGauss/cluster_config.xml
Parsing the configuration file.
Successfully parsed the configuration file.
Installing the tools on the local node.
Successfully installed the tools on the local node.
Setting host ip env
Successfully set host ip env.
Are you sure you want to create the user[omm] (yes/no)? yes
Preparing SSH service.
Successfully prepared SSH service.
Checking OS software.
Successfully check OS software.
Checking OS version.
Successfully checked OS version.
Checking cpu instructions.
Successfully checked cpu instructions.
Creating cluster's path.
Successfully created cluster's path.
Set and check OS parameter.
Setting OS parameters.
Successfully set OS parameters.
Warning: Installation environment contains some warning messages.
Please get more details by "/opt/software/openGauss/script/gs_checkos -i A -h openGauss01 -X /opt/software/openGauss/cluster_config.xml --detail".
Set and check OS parameter completed.
Preparing CRON service.
Successfully prepared CRON service.
Setting user environmental variables.
Successfully set user environmental variables.
Setting the dynamic link library.
Successfully set the dynamic link library.
Setting Core file
Successfully set core path.
Setting pssh path
Successfully set pssh path.
Setting Cgroup.
Successfully set Cgroup.
Set ARM Optimization.
No need to set ARM Optimization.
Fixing server package owner.
Setting finish flag.
Successfully set finish flag.
Preinstallation succeeded.
4.安装
- omm指的是前置脚本gs_preinstall中-U参数指定的用户。
- 安装脚本gs_install必须以前置脚本中指定的omm用户执行,否则,脚本执行会报错。
- openGauss在海思高版本芯片上编译的不能在海思低版本芯片的服务器上运行,比如Hi620编译的版本不能在Hi1616环境上运行。
bash
[root@openGauss01 script]# su - omm
[omm@openGauss01 ~]$ cd /data/openGauss/install/om/script/
[omm@openGauss01 script]$ gs_install -X /opt/software/openGauss/cluster_config.xml
# 安装日志可以在如下目录查看
/data/openGauss/log/omm/om/gs_install-2025-08-06_134937.log 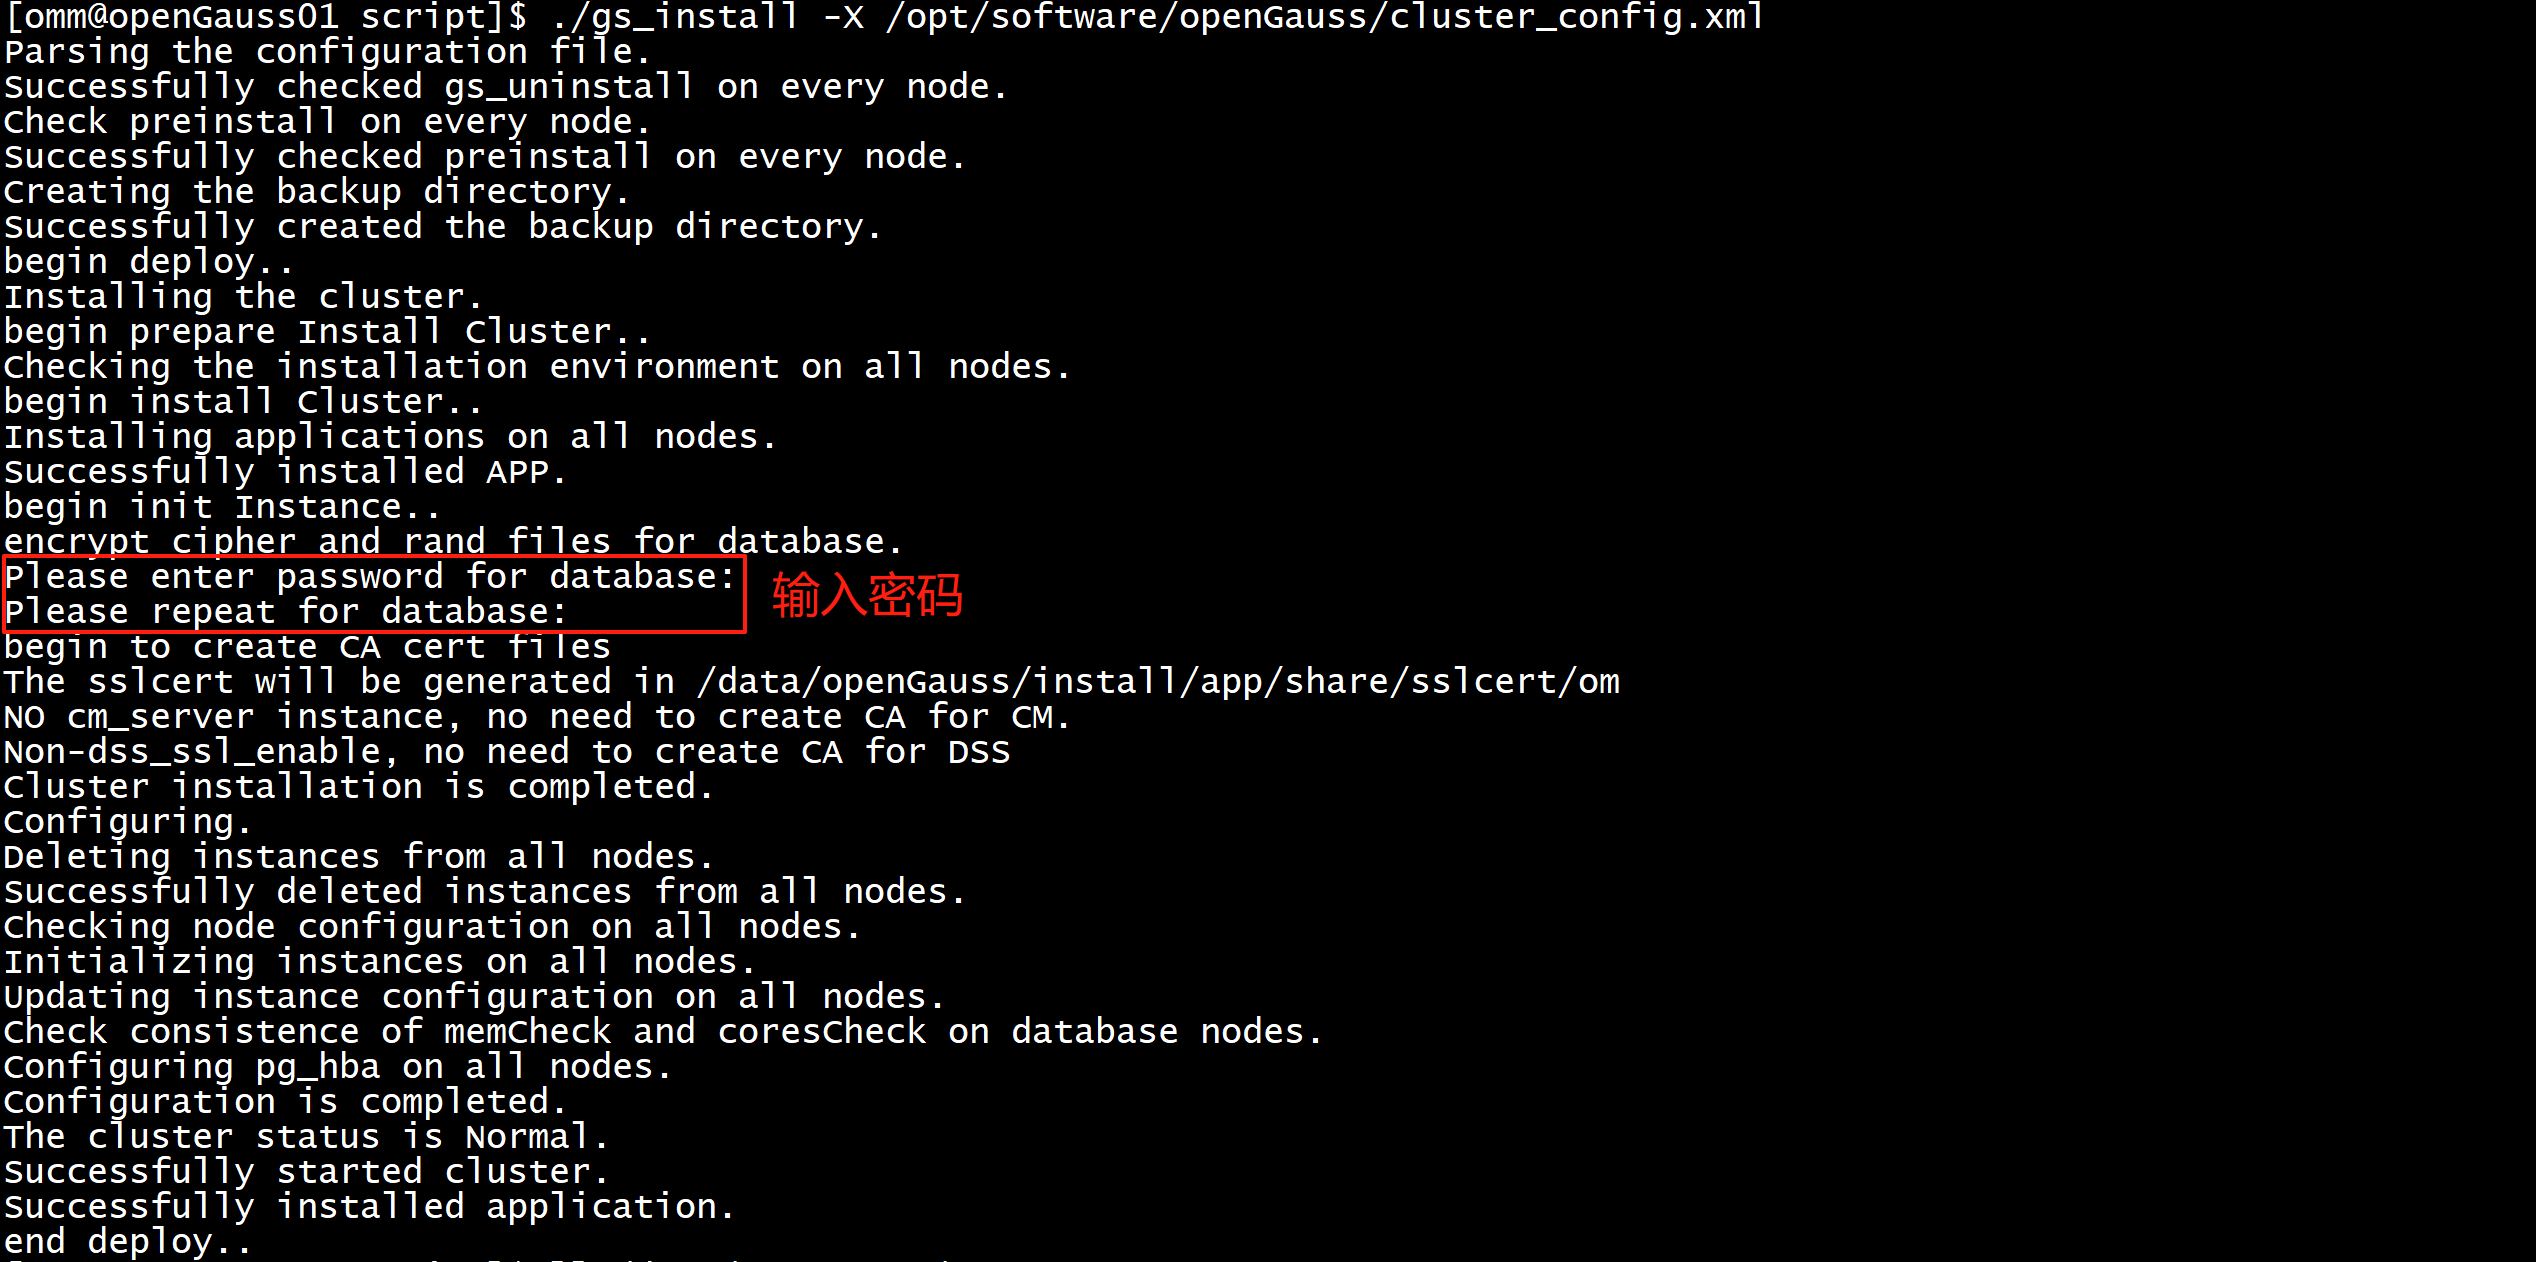
5.验证安装
bash
[omm@openGauss01 ~]$ gs_om -t status
bash
[omm@openGauss01 ~]$ gsql -d postgres -p 15400
6.配置rlwrap
bash
echo "alias gsql='rlwrap gsql'" >> ~/.bashrc
source ~/.bashrc