你好! 如果你想了解如何在Java上编写Telegram机器人,你来对地方了!
准备启动
机器人API基于HTTP请求,但在本书中我将使用Rubenlagus的Java库
安装库
你可以使用不同的方法安装TelegramBots库, 我这里使用Maven
<dependency>
        <groupId>org.telegram</groupId>
        <artifactId>telegrambots</artifactId>
        <version>Latest</version>
</dependency>
让我们开始编码吧
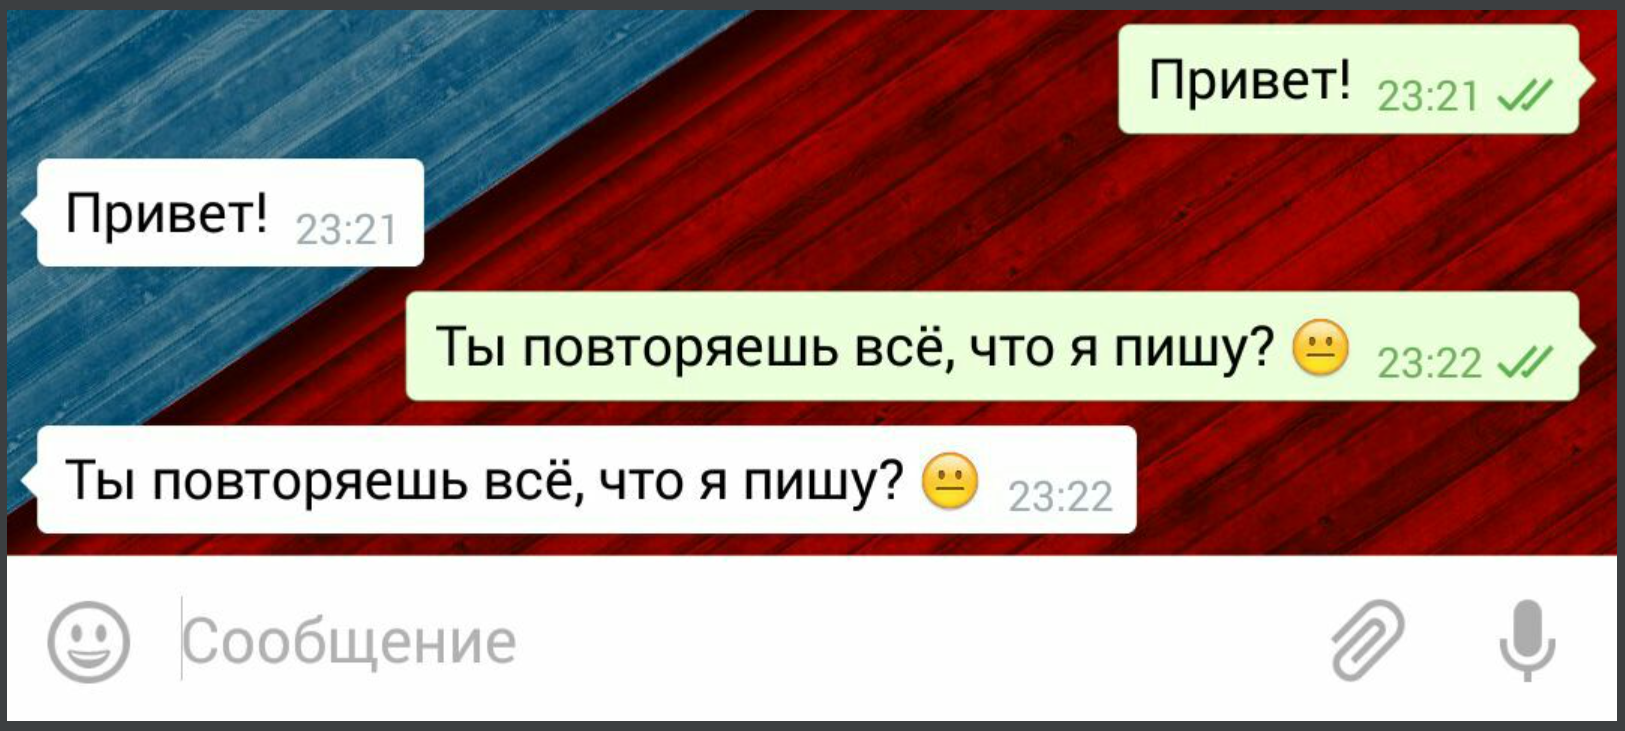
在本节课中,我们将编写一个简单的机器人,它会回显我们发送给它的所有内容。现在,打开inteliidea,创建一个新项目。你可以随意给它起个名字。
-
现在,当你在该项目中后,在src目录下创建文件MyAmazingBot.java和Main,java。打开MyAmazingBot.java,并开始编写我们的实际机器人!
-
记住! 类必须继承TelegramLongPollingBot并实现必要的方法。
import org.telegram.telegrambots.api.methods.send.SendMessage;
import org.telegram.telegrambots.api.objects.Update;
import org.telegram.telegrambots.bots.TelegramLongPollingBot;
import org.telegram.telegrambots.exceptions.TelegramApiException;public class MyAmazingBot extends TelegramLongPollingBot {
@Override
public void onUpdateReceived(Update update) {
// TODO
}@Override public String getBotUsername() { // TODO return null; } @Override public String getBotToken() { // TODO return null; }}
-
正如您所理解的,
`getBotUsername()'和`getBotToken ()`必须返回从 @BotFather获取的机器人的用户名和令牌。
import org.telegram.telegrambots.api.methods.send.SendMessage;
import org.telegram.telegrambots.api.objects.Update;
import org.telegram.telegrambots.bots.TelegramLongPollingBot;
import org.telegram.telegrambots.exceptions.TelegramApiException;

public class MyAmazingBot extends TelegramLongPollingBot {
    @Override
    public void onUpdateReceived(Update update) {
        // TODO
    }

    @Override
    public String getBotUsername() {
        // Return bot username
        // If bot username is @MyAmazingBot, it must return 'MyAmazingBot'
        return "MyAmazingBot";
    }

    @Override
    public String getBotToken() {
        // Return bot token from BotFather
        return "12345:qwertyuiopASDGFHKMK";
    }
}- 现在,让我们转到我们机器人的逻辑部分。
如前所述,我们希望它能够回复我们发送给它的每条文本。`onUpdateReceived(Updateupdate)`方法就是为此而设的。当接收到一条更新时,该方法会被调用。
@Override
public void onUpdateReceived(Update update) {

    // We check if the update has a message and the message has text
    if (update.hasMessage() && update.getMessage().hasText()) {
        // Set variables
        String message_text = update.getMessage().getText();
        long chat_id = update.getMessage().getChatId();

        SendMessage message = new SendMessage() // Create a message object object
                .setChatId(chat_id)
                .setText(message_text);
        try {
            execute(message); // Sending our message object to user
        } catch (TelegramApiException e) {
            e.printStackTrace();
        }
    }
}-
该如何运行这个机器人呢? 保存该文件并打开Mainjava。这个文件将实例化TelegramBotsApi并注册我们的新机器人。
import org.telegram.telegrambots.ApiContextInitializer;
import org.telegram.telegrambots.TelegramBotsApi;
import org.telegram.telegrambots.exceptions.TelegramApiException;
public class Main {
public static void main(String[] args) {// TODO Initialize Api Context // TODO Instantiate Telegram Bots API // TODO Register our bot }}
-
现在,让我们初始化API上下文
import org.telegram.telegrambots.ApiContextInitializer;
import org.telegram.telegrambots.TelegramBotsApi;
import org.telegram.telegrambots.exceptions.TelegramApiException;
public class Main {
public static void main(String[] args) {
// Initialize Api Context
ApiContextInitializer.init();// TODO Instantiate Telegram Bots API // TODO Register our bot }}
-
实例化Telegram机器人API:
import org.telegram.telegrambots.ApiContextInitializer;
import org.telegram.telegrambots.TelegramBotsApi;
import org.telegram.telegrambots.exceptions.TelegramApiException;
public class Main {
public static void main(String[] args) {
// Initialize Api Context
ApiContextInitializer.init();
// Instantiate Telegram Bots API
TelegramBotsApi botsApi = new TelegramBotsApi();// TODO Register our bot }}
-
并注册我们的机器人:
import org.telegram.telegrambots.ApiContextInitializer;
import org.telegram.telegrambots.TelegramBotsApi;
import org.telegram.telegrambots.exceptions.TelegramApiException;
public class Main {
public static void main(String[] args) {
// Initialize Api Context
ApiContextInitializer.init();// Instantiate Telegram Bots API TelegramBotsApi botsApi = new TelegramBotsApi(); // Register our bot try { botsApi.registerBot(new MyAmazingBot()); } catch (TelegramApiException e) { e.printStackTrace(); } }}
-
这是我们的所有文件:
import org.telegram.telegrambots.ApiContextInitializer;
import org.telegram.telegrambots.TelegramBotsApi;
import org.telegram.telegrambots.exceptions.TelegramApiException;
public class Main {
public static void main(String[] args) {
// Initialize Api Context
ApiContextInitializer.init();// Instantiate Telegram Bots API TelegramBotsApi botsApi = new TelegramBotsApi(); // Register our bot try { botsApi.registerBot(new MyAmazingBot()); } catch (TelegramApiException e) { e.printStackTrace(); } }}
import org.telegram.telegrambots.api.methods.send.SendMessage;
import org.telegram.telegrambots.api.objects.Update;
import org.telegram.telegrambots.bots.TelegramLongPollingBot;
import org.telegram.telegrambots.exceptions.TelegramApiException;public class MyAmazingBot extends TelegramLongPollingBot {
@Override
public void onUpdateReceived(Update update) {// We check if the update has a message and the message has text if (update.hasMessage() && update.getMessage().hasText()) { // Set variables String message_text = update.getMessage().getText(); long chat_id = update.getMessage().getChatId(); SendMessage message = new SendMessage() // Create a message object object .setChatId(chat_id) .setText(message_text); try { execute(message); // Sending our message object to user } catch (TelegramApiException e) { e.printStackTrace(); } } } @Override public String getBotUsername() { // Return bot username // If bot username is @MyAmazingBot, it must return 'MyAmazingBot' return "MyAmazingBot"; } @Override public String getBotToken() { // Return bot token from BotFather return "12345:qwertyuiopASDGFHKMK"; }}
-
现在我们可以将项目打包成可运行的jar文件,并在我们的计算机/服务器上运行它!
java -jar MyAmazingBot.jar