计数器
typescript
const Counter=({initialState)=>{
	const [count,setCount]=useState(initialState);
	const handleIncrement=()=>{
		setCount(preCount=>preCount+1);
	}
	return (
		<div>
			<div>当前计数:{count}</div>
			<button onClick={handleIncrement}</button>
		</div>
		)
}
setCount(count + 1)与setCount(preCount => preCount + 1)
状态更新的直接与函数式差异
setCount(count + 1)直接基于当前count值进行更新。若在短时间内连续调用多次,可能因闭包问题导致更新未按预期累积。例如:
javascript
// 连续调用三次,可能因闭包中的count未及时更新而只生效一次
setCount(count + 1);
setCount(count + 1);
setCount(count + 1);
函数式更新的可靠性
setCount(preCount => preCount + 1)通过函数参数接收最新的状态值,确保每次更新基于前一个状态。即使快速连续调用,也能正确累积:
javascript
// 连续调用三次,最终count会增加3
setCount(prev => prev + 1);
setCount(prev => prev + 1);
setCount(prev => prev + 1);
异步场景下的表现差异
在异步操作(如setTimeout或useEffect)中,直接更新可能因闭包捕获旧值而出错。函数式更新始终能获取最新状态:
javascript
useEffect(() => {
  setTimeout(() => {
    setCount(count + 1); // 可能使用过时的count
    setCount(prev => prev + 1); // 始终正确
  }, 1000);
}, []);
批量更新的处理
React的批量更新机制下,直接更新多次会被合并,函数式更新则按队列顺序执行:
javascript
// 直接更新:合并为一次+1
setCount(count + 1);
setCount(count + 1);

// 函数式更新:按顺序执行两次+1
setCount(prev => prev + 1);
setCount(prev => prev + 1);
依赖项的注意事项
当状态更新依赖前一个状态时,函数式更新可避免手动添加依赖项到useEffect或useCallback的依赖数组,减少不必要的重渲染风险。
总结场景选择
- 直接更新 :适用于不依赖前状态的
简单赋值或已知无并发风险的场景。 - 函数式更新 :必须用于
依赖前状态的逻辑、异步环境或可能存在批量更新的场景。
底层知识点useState
异步,React批量更新
在 setTimeout、原生事件 或 异步操作 中,setState 会立即触发更新:但在 React 18 中,所有更新(包括 Promise、setTimeout 等)默认启用自动批量更新,需使用
flushSync强制同步:
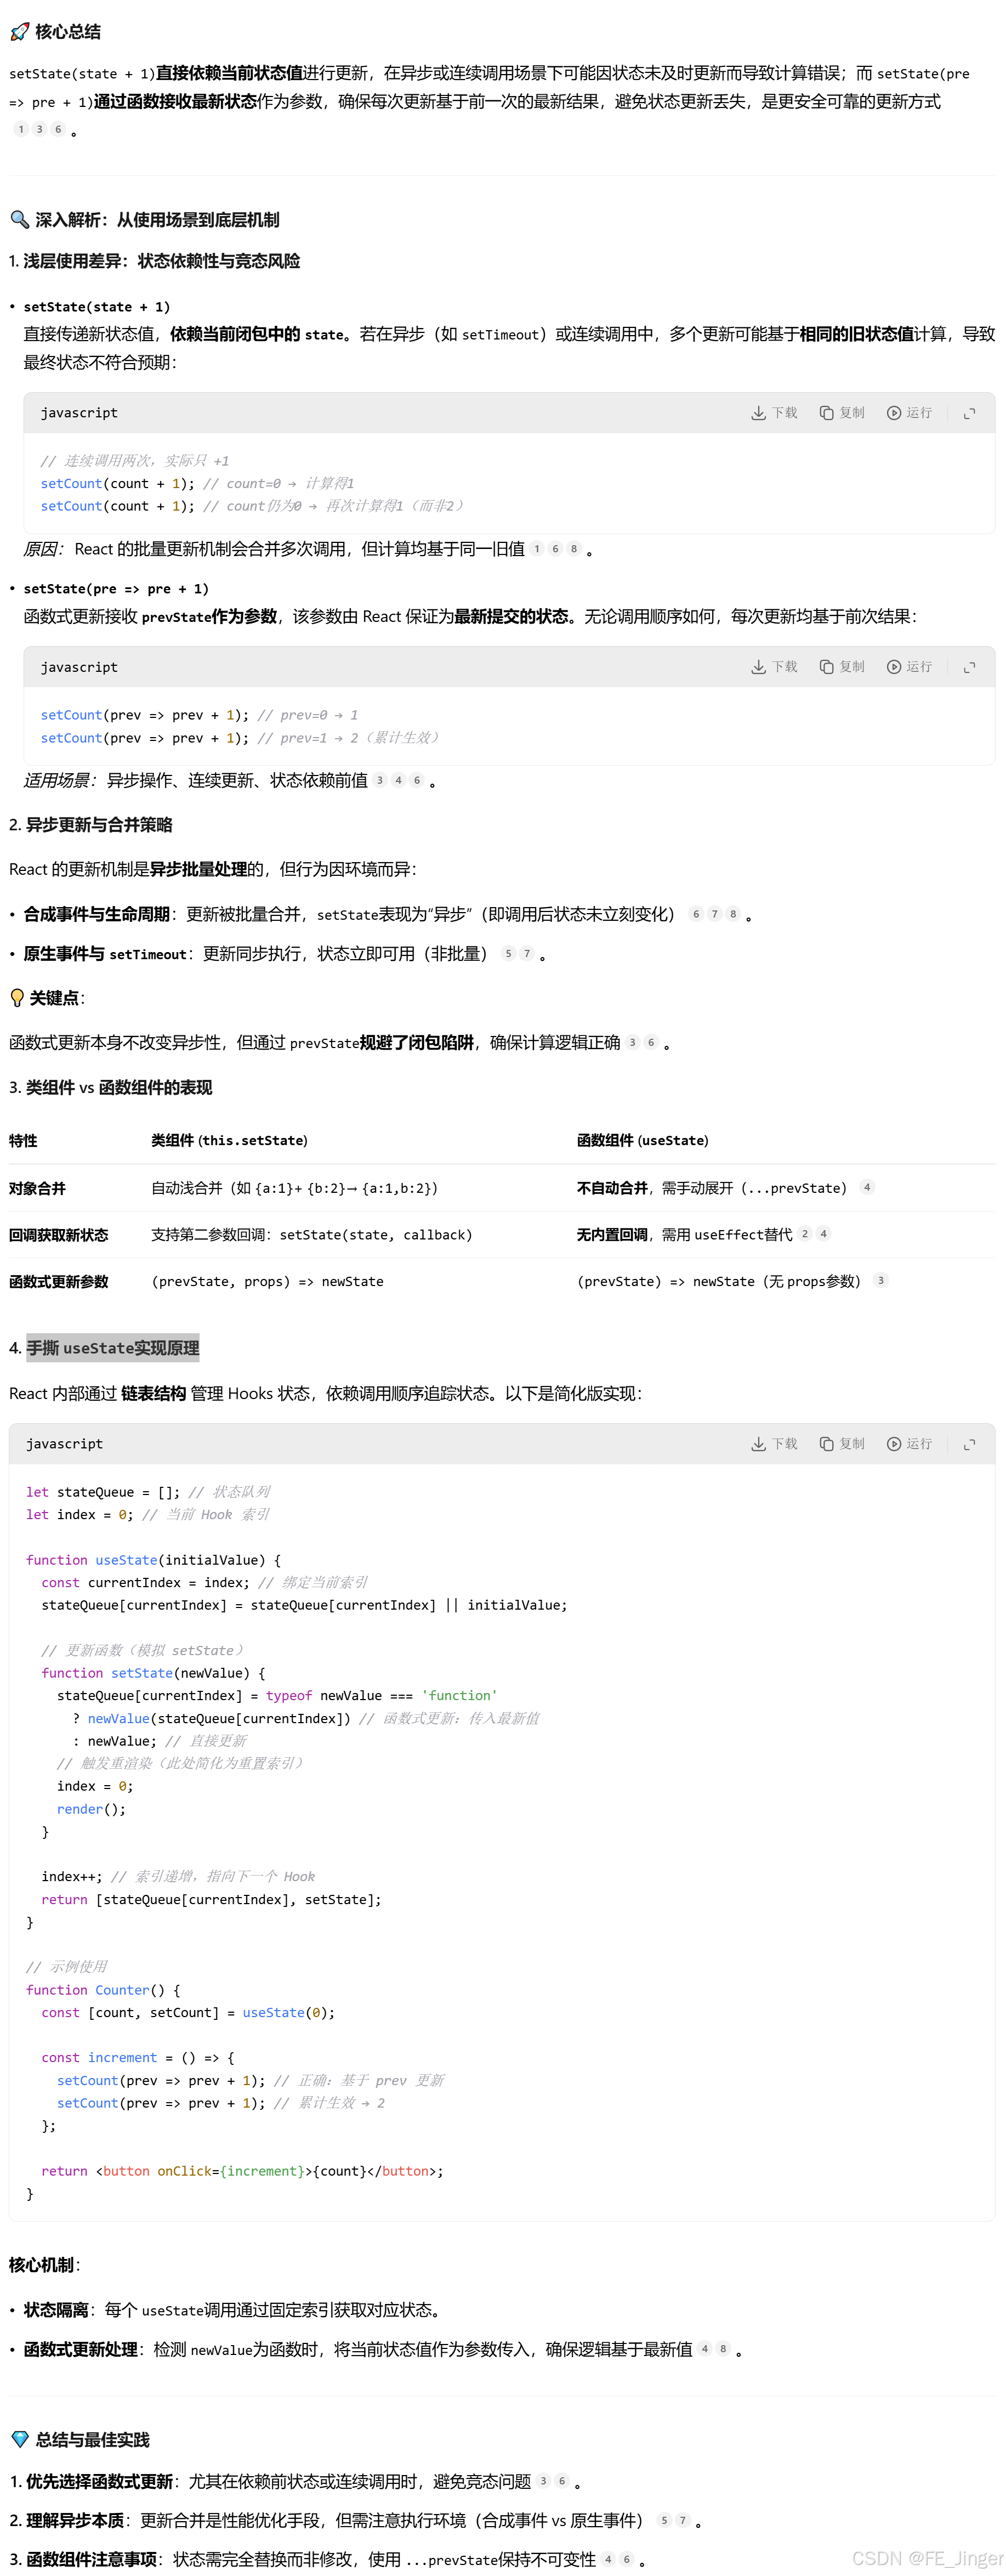
useState简单手撕实现
React 内部通过 链表结构 管理 Hooks 状态,依赖调用顺序追踪状态。以下是简化版实现(
闭包):
javascript
let stateQueue=[];
let setter=[];
let index=0;

function createSetter(index){
	return (newValue)=>{
		stateQueue[index]=typeof newValue==="function"?
				newValue(stateQueue[index]):newValue;
		//重新渲染
		index=0;
		render();
	}
}

function render(){
	ReactDom.render(<App/>,document.getElementById("root"))

function useState(initialState){
	if(stateQueue[index]===undefined){
		stateQueue[index]=initialState;
		setter[index]=createSetter(index);
	}
	const currentState=stateQueue[index];
	const currentSetter=setter[index];
	index++;//下一个Hook
	return [currentState,currentSetter]
}
受控输入框组件
- 如何添加输入验证功能?->验证函数,返回错误条件 err
- 如果想在用户停止输入 500ms 后才更新内容,应该如何实现?->防抖 debounceTimer
javascript
const ControllerInput=()=>{
const [inputValue,setInputValue]=useState("");
const [debounceTimer,setDebounceTimer]=useState(null);
const [err,setErr]=useState("");
const validateInput=()=>{
const regExp=/^[a-zA-Z0-9]*$/;
if(!regExp.test(value))return "输入数据只能为数字和字母"
return "";
}
const handleChange=(event)=>{
const value=event.target.value;
if(debounceTimer)clearTimeout(debounceTimer);
//验证数据
const validationErr=validateInput(value);
setErr(validationErr);
const timer=setTimeout(()=>{
setInputValue();
},500);
setDebounceTimer(timer);
}
return (
<div>
<input
type="text"
value={inputValue}
onChange={handleChange}
/>
</div>
)
}
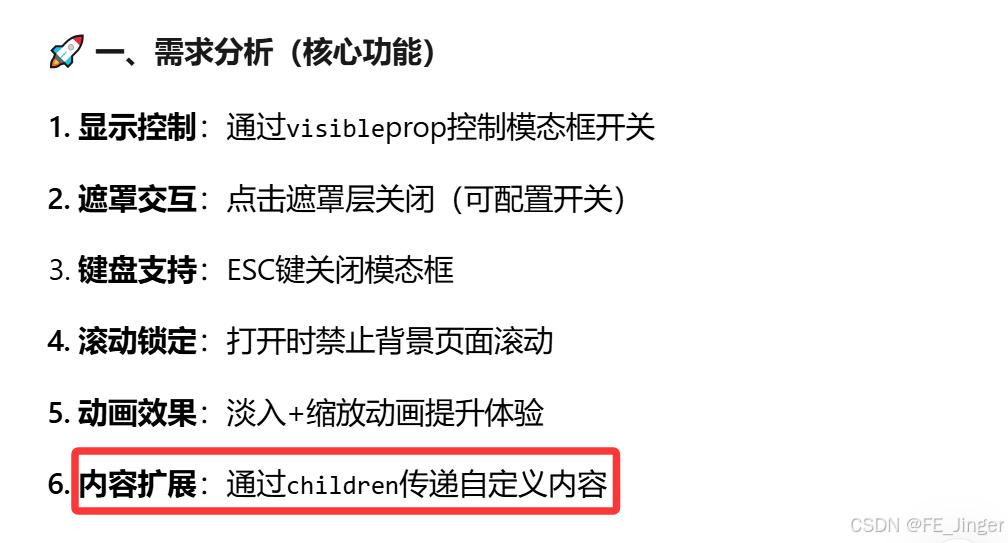
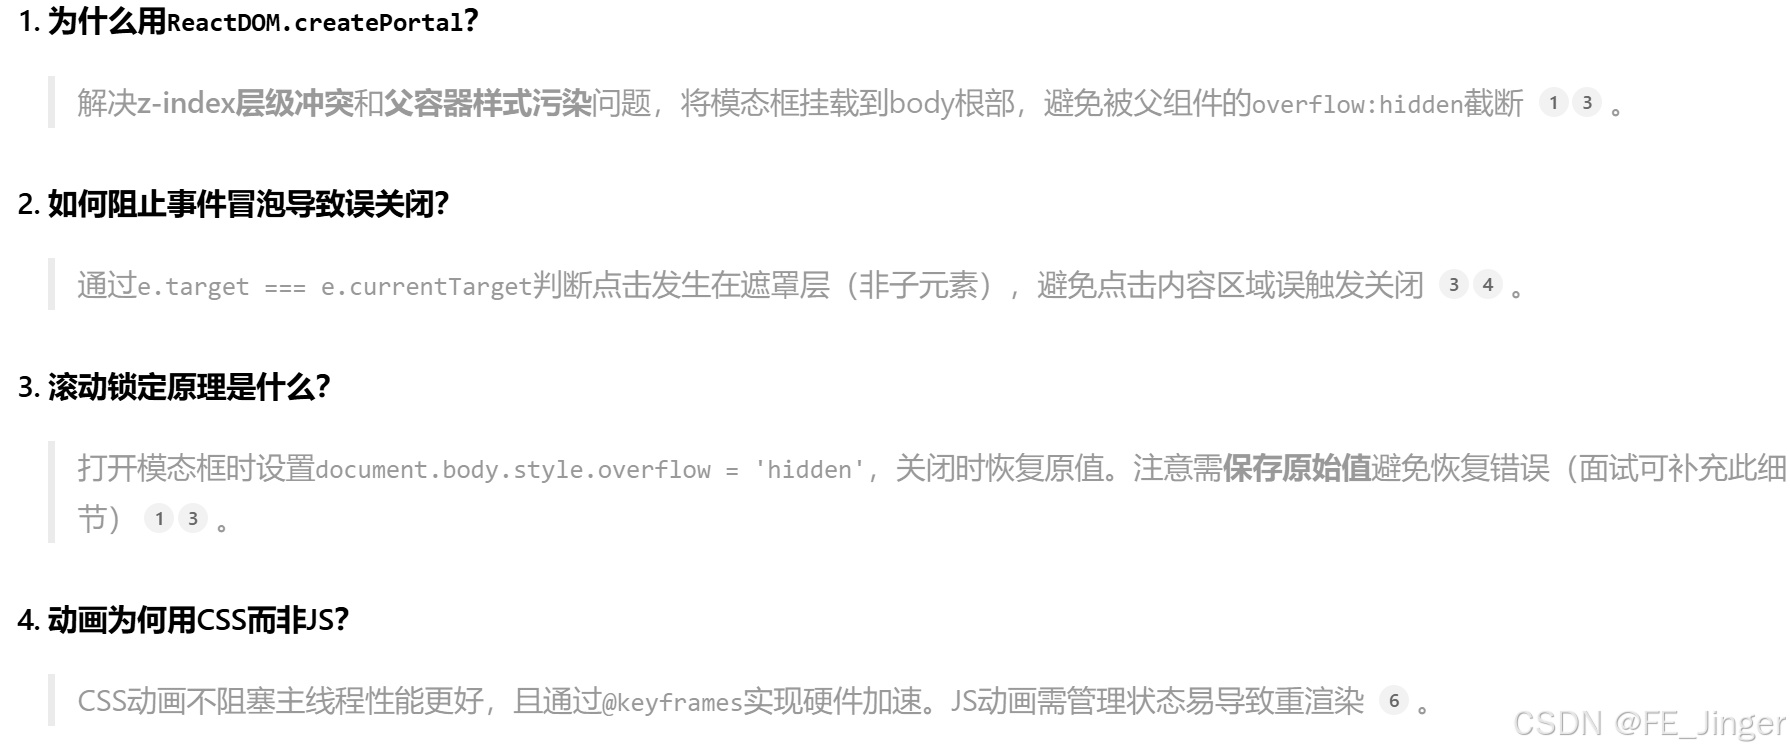
export default ControllerInput;模态框组件
javascript
const Modal=({visible,onClose,children})=>{
	useEffect(()=>{
		if(!visible)return;
		//Esc关闭&滚动锁定
		const handleEsc=(e)=>e.key==="Escape"&&onClose?.();
		document.body.style.overflow="hidden";
		window.addEventListener('keydown',handleEsc);
		return ()=>{
			window.removeEventListenr(ketdown',handleEsc);
			document.body.style.overflow="";
		}
	},[visible,onClose]);
	//Portal挂载到body
	return visible?ReactDOM.createPortal(
	     <div
	     	style={{
	     		position:"fixed",
	     		top:0,left:0,right:0,bottom:0,
	     		display:"flex",
	     		justifyContent:"center",alignItems:"center"
	     		}}
	     >
		     <div className="modal-content"
		     	  style={{
		     	  	  backgroundColor:"white"
		     >
		     	{children}
		     </div>
	     </div>,
	     documnet.body
	     ):null;

}


//父组件
import React, { useState } from 'react';
import Modal from './Modal';

function App() {
  const [isModalVisible, setIsModalVisible] = useState(false);

  // 控制模态框显示
  const showModal = () => {
    setIsModalVisible(true);
  };

  // 关闭模态框
  const hideModal = () => {
    setIsModalVisible(false);
  };

  return (
    <div>
      <button onClick={showModal}>显示模态框</button>

      {/* 渲染模态框,传入 isVisible 和 onClose props */}
      <Modal isVisible={isModalVisible} onClose={hideModal}>
        <h2>欢迎来到模态框</h2>
        <p>这是模态框的内容!</p>
      </Modal>
    </div>
  );
}

export default App;
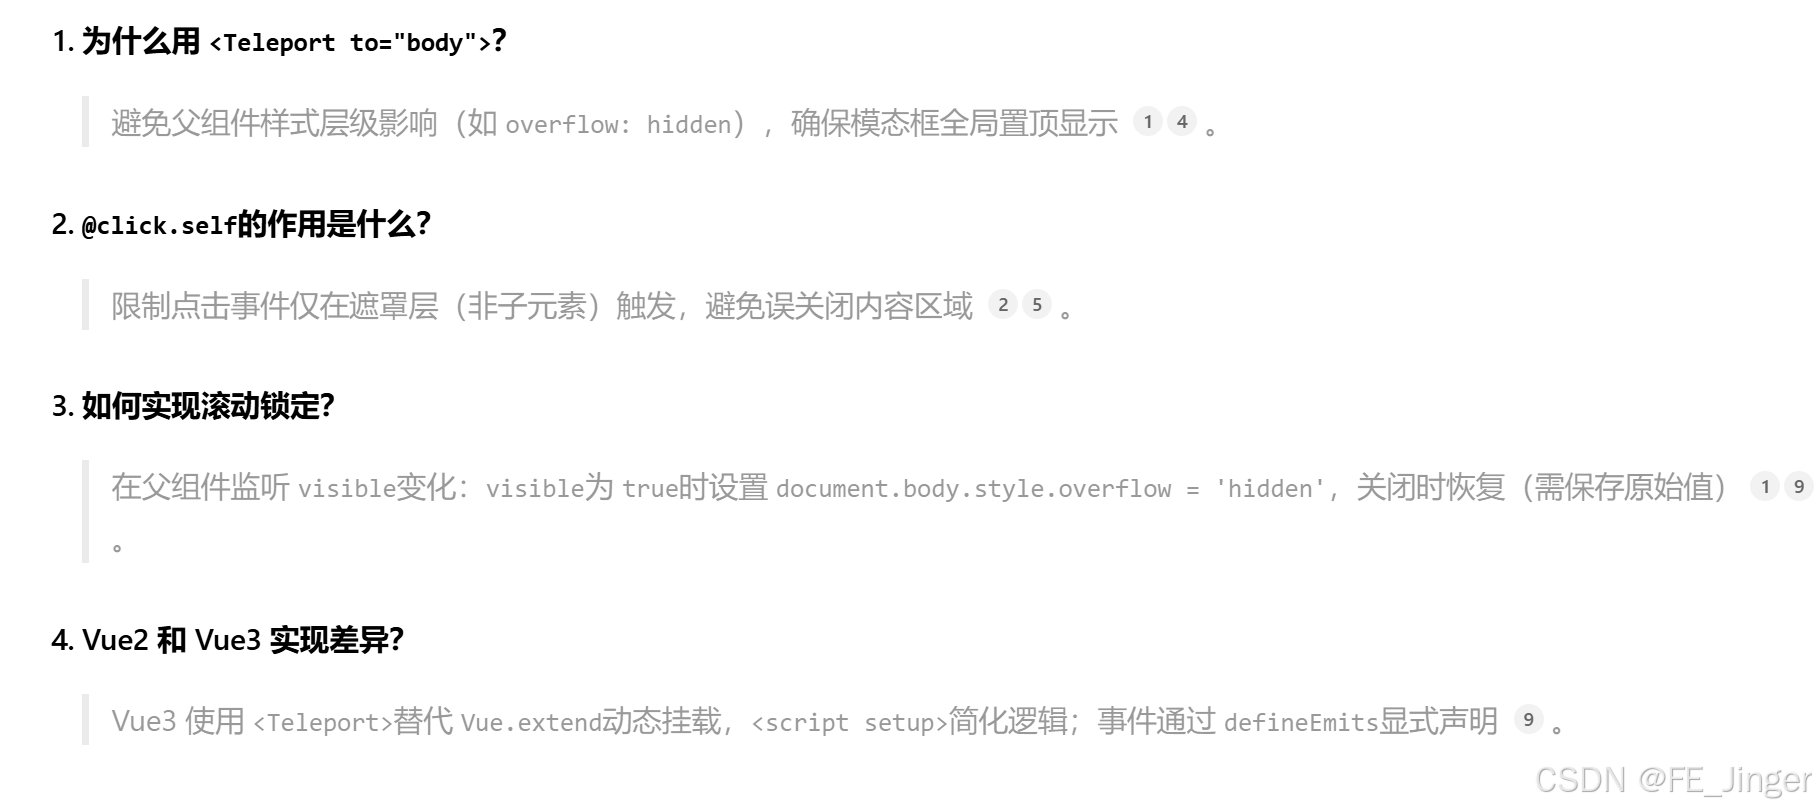
1.Portal挂载解决层级问题
2.双动画CSS实现流畅体验
3.滚动锁定需记录原始值
4.事件隔离精准控制关闭条件
ja<template>
>  <Teleport to="body">
    <Transition name="modal">
      <!-- 遮罩层 -->
      <div
        v-if="visible"
        class="modal-mask"
        @click.self="closeOnOverlayClick && $emit('close')"
      >
        <!-- 模态框内容 -->
        <div class="modal-container">
          <!-- 头部插槽 -->
          <div class="modal-header">
            <slot name="header">
              <h2>默认标题</h2>
            </slot>
          </div>

          <!-- 内容插槽 -->
          <div class="modal-body">
            <slot>默认内容</slot>
          </div>

          <!-- 底部插槽(含关闭按钮) -->
          <div class="modal-footer">
            <slot name="footer">
              <button @click="$emit('close')">关闭</button>
            </slot>
          </div>
        </div>
      </div>
    </Transition>
  </Teleport>
</template>

<script setup>
defineProps({
  visible: Boolean, // 控制显示
  closeOnOverlayClick: { type: Boolean, default: true } // 遮罩点击关闭开关
});
defineEmits(['close']); // 关闭事件

// ESC 关闭监听
import { onMounted, onUnmounted } from 'vue';
const handleEsc = (e) => e.key === 'Escape' && props.visible && emit('close');
onMounted(() => window.addEventListener('keydown', handleEsc));
onUnmounted(() => window.removeEventListener('keydown', handleEsc));
</script>

<style scoped>
.modal-mask {
  position: fixed;
  top: 0; left: 0; right: 0; bottom: 0;
  background: rgba(0,0,0,0.5);
  display: flex;
  align-items: center;
  justify-content: center;
}
.modal-container {
  background: white;
  padding: 20px;
  border-radius: 8px;
  width: 80%;
  max-width: 500px;
}

/* 动画效果 */
.modal-enter-from, .modal-leave-to { opacity: 0; }
.modal-enter-from .modal-container, .modal-leave-to .modal-container {
  transform: scale(0.9);
}
.modal-enter-active, .modal-leave-active {
  transition: opacity 0.3s, transform 0.3s;
}
</style>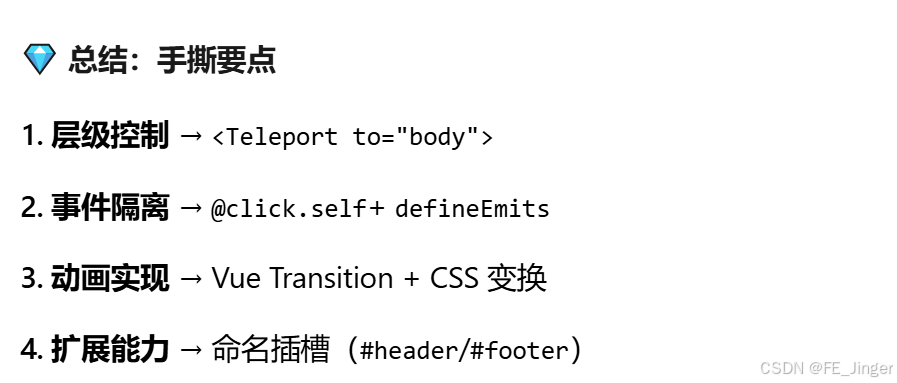
手写一个Tab组件
javascript
const Tabs=({tabs})=>{
	const [activeTab,setActiveTab]=React.useState("tab1");
	const [tabs,setTabs]=useState([
		{label:"Tab1",content:"Tab1内容",id:"tab1" },
		{label:"Tab2",content:"Tab2内容" ,id:"tab2" }
   ]);
   const addTab=()=>{
   		const newId=`tab${tabs.length+1}`;
   		setTabs([...tabs,{label:`Tab${tabs.length+1}`,content:`Tab${tabs.length+1}内容`,id:`tab${tabs.length+1}`])
   	}
   const removeTab=(index)=>{
   		if(tabs.length<=1)return;
   		const newTabs=tabs.filter((item)=>item.id!==index));
   		const setTabs(newTabs);
		//更新activeTab
		if(activeTab>=index&&activeTab!==0){
		    setActiveTab(activeTab-1)
		 }
   }
    return (
    	<div style={{display:"flex",borderBottom:"1px solod #ccc"}}>
    		{tabs.map((tab)=>(
    			<button
    				key={tab.id}
    				style={{borderBottom:activeTab===index?"2px solid blue":"none"}}
    			onClick={()=>setActiveTab(index)}
    			 {tab.label}
    			</button>
    			//+
				<button onClick={addTab}>
				+
				</button>


			<button
              style={{ position: "absolute", top: 0, right: 0, fontSize: 10 }}
              onClick={() => removeTab(tab.id)}
            >
              	×
           	 </button>
    		))}
    		 <button onClick={addTab}>+</button>
    	</div>
    <div style={{padding:20px}}>{tabs[activeTab].content}</div>
    )
}

<Tabs tabs={tabData}/>
在中间加元素
javascript
const addTab = (insertAfterIndex) => {
const newId = `tab${tabs.length + 1}`;
const newTabs = [...tabs];
newTabs.splice(insertAfterIndex + 1, 0, {
label: `Tab${tabs.length + 1}`,
content: `Tab${tabs.length + 1}内容`,
id: newId
});
setTabs(newTabs);
setActiveTab(insertAfterIndex + 1);
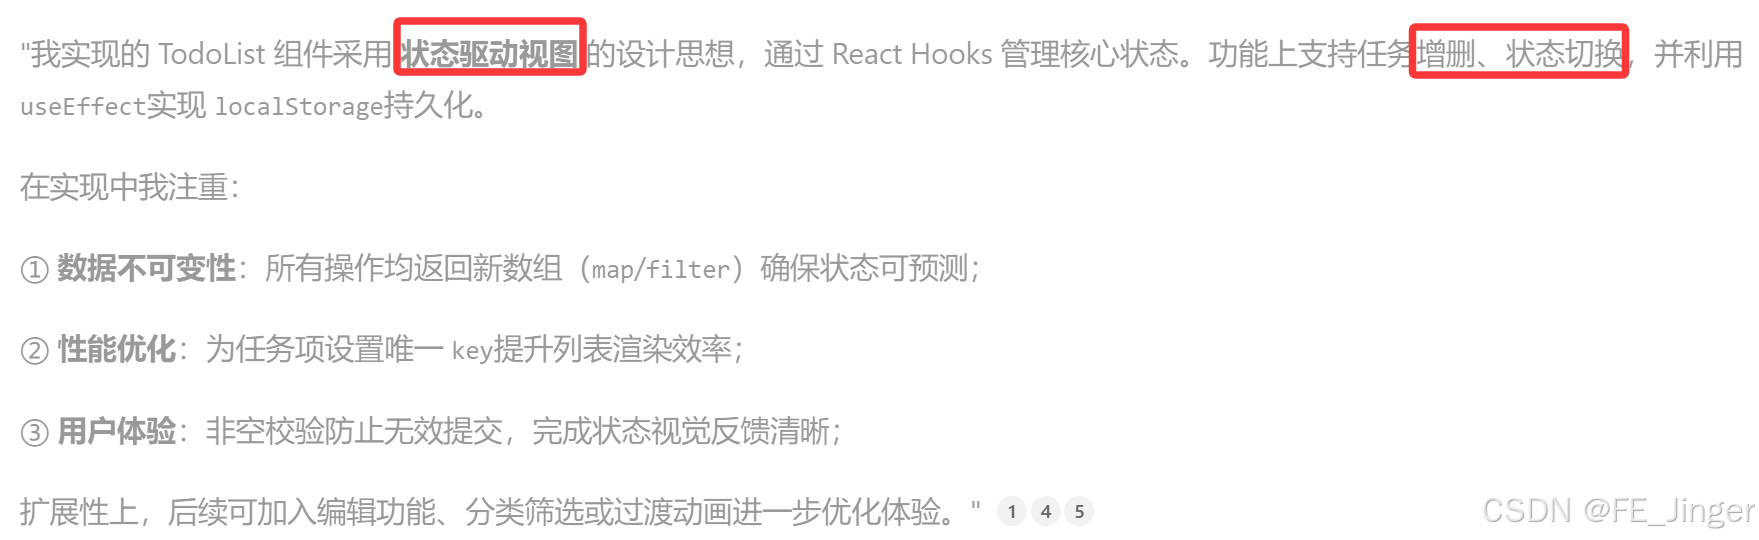
};TODO List
javascript
const TodoList=()=>{
	const [todos,setTodos]=useState([
		{id:Date.now(),content:"to do list content1",complete:false},
		{id:Date.now(),content:"to do list content2",complete:false}
	]);
	const [inputVal,setInputVal]=useState("");
	//数据持久化
	useEffct(()=>{
		const saved=localstorage.getItem('todos');
		saved&&setTodos(JSON.parse(saved))
	},[])

	useEffect(()=>{
			localstorage.setItem('todos',JSON.stringify(todos))
	},[lists]);
	//增加
	const addTodos=()=>{
		if(!inputVal.trim())return;
		setTodos([...todos,{
			id:Date.now(),
			content:inputVal,
			completed:false}
		])
		setInputVal('');
	}
	//完成
	const toggleComplete=(id)=>{
		setTodos(todos.map(item=>item.id===id?{...todo,completed:false}:todo))
	}
  //删除任务
  const deleteTodo=(id)=>{
  	   seteTodos(todos.filter(todo=>todo.id!==id))
  }


	return (
		<div>
			<ul>
				todos.map(todo=>(
					<li key={todo.id}>
						<input type="checkbox" check={todo.completed}
								onChange={()=>toggleComplete(todo.id)}
						/>
						<span style={{textDecoration:todo.complete?'line-through:"none">{todo.text}</span>
					</li>
					<button onClick={()=>deleteTodo(todo.id)}>删除</button>
				))
			</ul>
		 <input  value={inputVal} onChange={(event)=>setInputVal(event.target.value)}  />
		 <button onClick={addTodos}>新增</button>
		</div>
	)
}