【Jenkins】01 - Jenkins安装
文章目录
- [【Jenkins】01 - Jenkins安装](#【Jenkins】01 - Jenkins安装)
笔记整理自尚硅谷在b站的Jenkins公开课
Jenkins,原名 Hudson,2011 年改为现在的名字。它是一个开源的实现持续集成的软件工具。
一:整体架构
服务器1:
- ip -> 192.168.44.101
- 内容 -> 部署gitlab,到时候开发完成的代码会推送到这里, 如果使用docker安装gitlab, 还要下载docker
- 内存要求4G+
服务器2:
- ip -> 192.168.44.102
- 内容 -> jdk8, maven, docker和jenkins
- 内存要求512M+
- 硬盘要求10G+
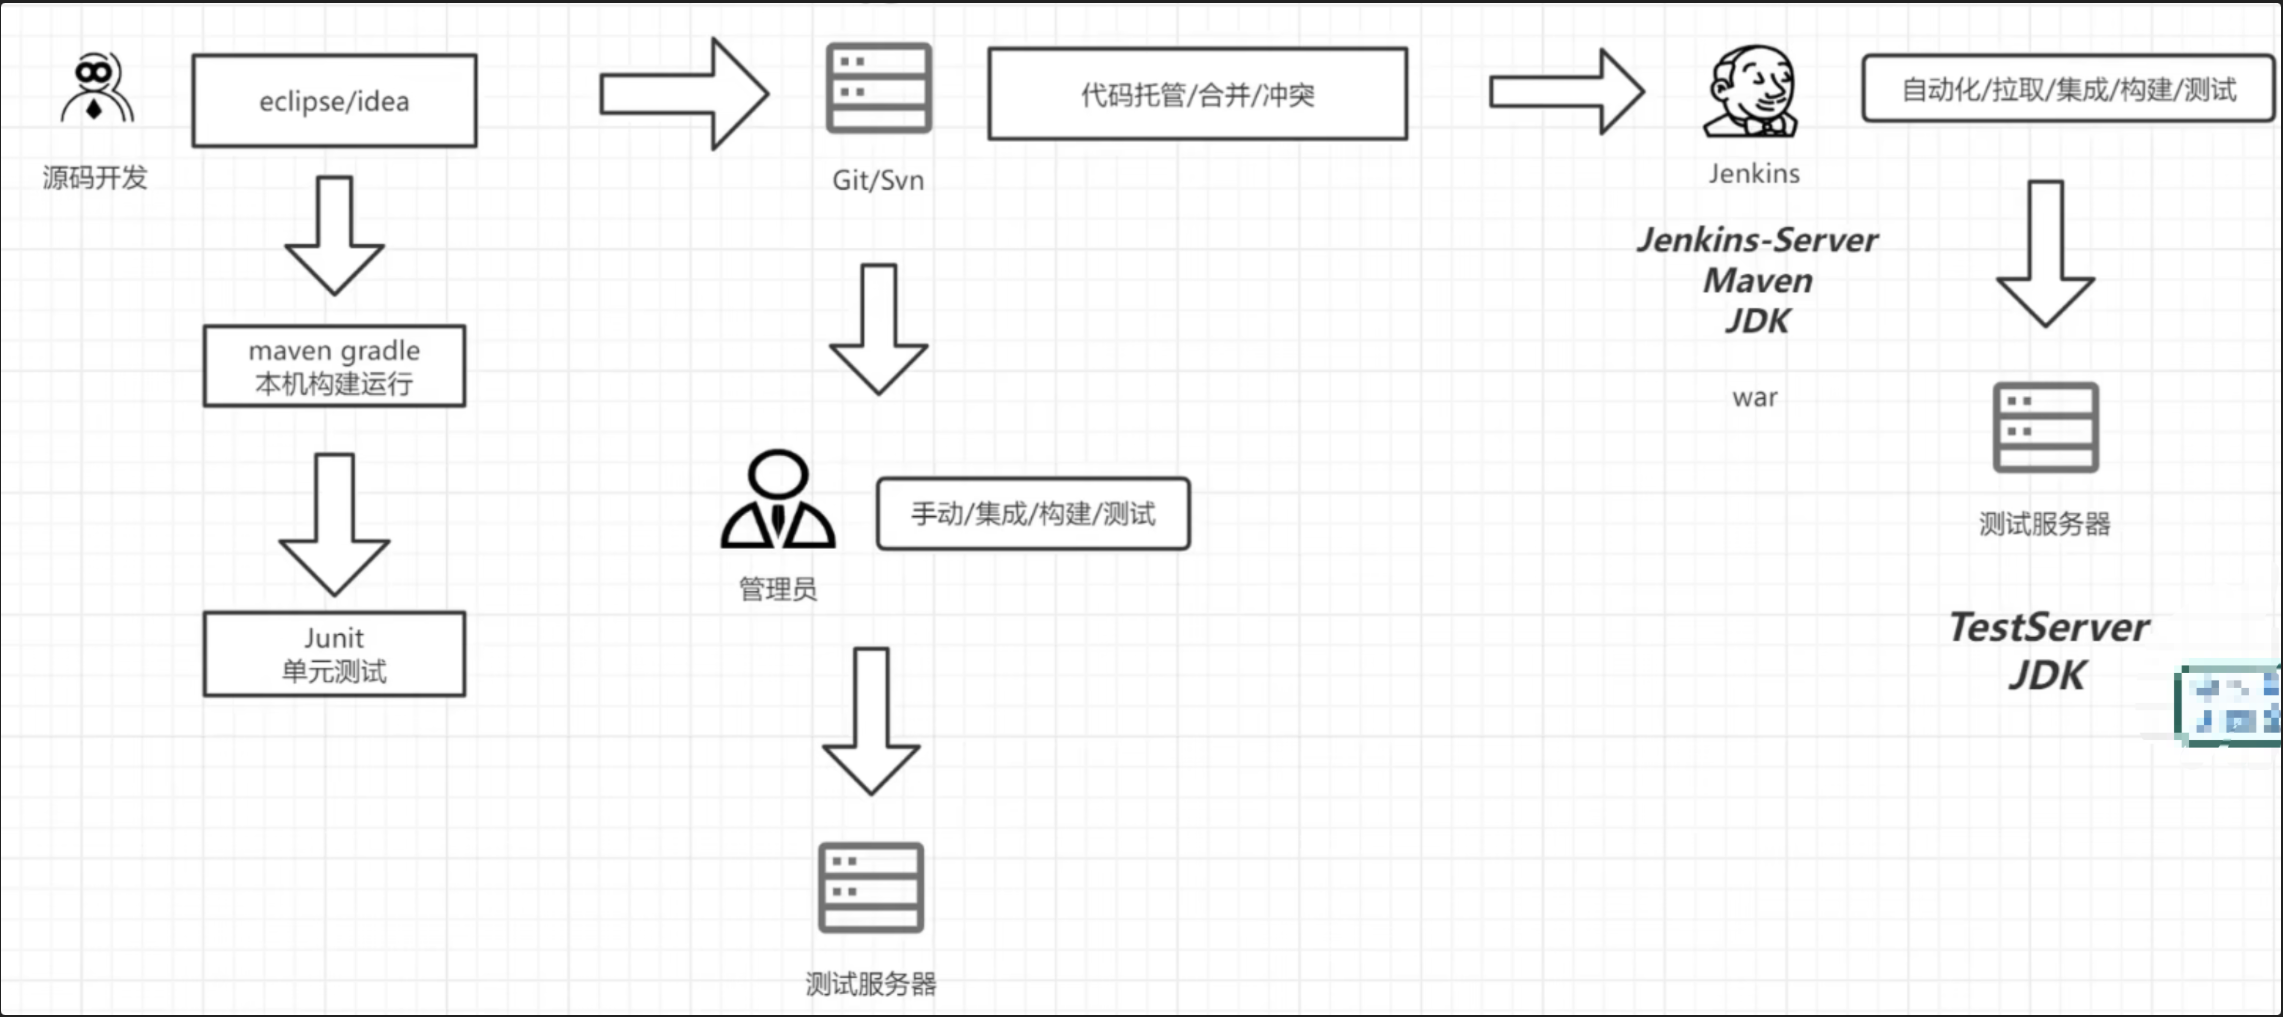
- 开发人员编写代码到eclipse/idea, 通过本地测试运行通过之后推送代码到git/svn
- jenkins拉取代码,然后通过jenkins构建的脚本自动构建和部署到测试服务器
核心来说就是Jenkin代替了人工,对于代码的拉取,集成、构建和测试都是自动化完成
二:Jenkins的安装部署
本次测试使用的环境是centos7,假设你的服务器ip是:
192.168.44.101(ifconfig)
1:gitlab的安装和使用
文档:https://docs.github.cn/jh/install/requirements.html
- 安装所需要的最小内存是4g
1.1:在ssh下安装
shell
# step1:安装对应的依赖sshd等等
sudo yum install -y curl policycoreutils-python openssh-server perl
sudo systemctl enable sshd
sudo systemctl start sshd

# step2:配置镜像
curl -fsSL https://packages.gitlab.cn/repository/raw/scripts/setup.sh | /bin/bash

# step3:开始安装
sudo EXTERNAL_URL="http://192.168.44.101" yum install -y gitlab-jh
除非在安装过程中制定了自定义密码,否则将随机生成一个密码(/etc/gitlab/initial_root_password)
⚠️ 此文件会被第一次 gitlab-ctl reconfigure 自动删除,因此若使用随机密码登录,建议安装成功初始登录成功之后,立即修改初始密码, 使用此密码和用户名root登录
shell
# 常用命令如下:
gitlab-ctl start                  # 启动所有 gitlab 组件;
gitlab-ctl stop                   # 停止所有 gitlab 组件;
gitlab-ctl restart                # 重启所有 gitlab 组件;
gitlab-ctl status                 # 查看服务状态;
gitlab-ctl reconfigure            # 启动服务;


vi /etc/gitlab/gitlab.rb         # 修改默认的配置文件;
gitlab-ctl tail                   # 查看日志;
1.2:在docker下安装
docker的安装,如果已经安装了docker,跳过此步骤
shell
# 这里我们安装docker的底层工具,会自动提示我们下载,很快就会完成了
sudo yum install -y yum-utils device-mapper-persistent-data lvm2

# 增加阿里云的docker下载仓库,默认情况下,Docker的官方是从国外的服务器上下载的,下载速度是非常慢的,甚至失败
# 所以在这里我们是使用yum-config-manager组件来指定一个新的下载资源,指向的是阿里云的应用服务器,以此提高下载速度
sudo yum-config-manager --add-repo http://mirrors.aliyun.com/docker-ce/linux/centos/docker-ce.repo

sudo yum makecache fast # centos stream 9这个镜像没有fast参数,可以不要这个

# 安装docker客户端
sudo yum -y install docker-ce

# 启动docker
sudo service docker start

# 查看版本验证docker是否安装成功
docker version

# 阿里云镜像加速
# https://cr.console.aliyun.com/cn-hangzhou/instances/mirrors
1️⃣ 添加容器
shell
docker run --detach \
  --hostname 192.168.44.101 \   # 设置容器内主机名,如果没有DNS,可以设置为宿主机IP,或者后面在external_url中指定
  --publish 443:443 --publish 80:80 \  # 端口映射
  --name gitlab \
  --restart always \
  --volume /srv/gitlab/config:/etc/gitlab \     # 挂载配置, 宿主机位置/srv/gitlab/config, 容器中的配置的位置/etc/gitlab
  --volume /srv/gitlab/logs:/var/log/gitlab \   # 挂载日志
  --volume /srv/gitlab/data:/var/opt/gitlab \   # 挂载数据
  --shm-size 256m \   # 避免内存不足,特别是运行Sidekiq时
  registry.gitlab.cn/omnibus/gitlab-jh:latest
2️⃣ 启动容器
shell
docker start gitlab3️⃣ 查看已经存在的容器
shell
docker ps -a4️⃣ 进入容器
shell
docker exec -it gitlab /bin/bash1.3:测试访问
访问地址:http://192.168.44.101,当首次运行出现502错误的时候排查两个原因
- 虚拟机内存至少需要4g
- 稍微再等等刷新一下可能就好了
登录用户名:root, 密码在:cat /etc/gitlab/initial_root_password中,登录后需要改密码不然24小时之后会失效
2:Jenkins的安装
中文文档:https://www.jenkins.io/zh/doc/
- 内存大于512M
- 10 GB 的硬盘空间(用于 Jenkins 和 Docker 镜像)
- 前置软件是JDK8(jre或者jdk都行)和docker
2.1:安装jdk
shell
yum search jave|grep jdk

# 这里安装JRE(java runtime environment)
yum install -y java-1.8.0.-openjdk

# 但是Jenkins得运行需要JDK,这里需要再安装一下JDK
yum install -y java-devel
2.2:启动jenkins
方式一
下载war包,然后启动war包
方式2
1️⃣ 下载Jenkins,配置JDK位置
shell
# step1:下载Jenkins
wget https://repo.huaweicloud.com/jenkins/redhat-stable/jenkins-2.190.3-1.1.noarch.rpm

# 安装
rpm -ivh jenkins-2.190.3-1.1.noarch.rpm

# 修改jenkins的配置(需要指定jdk的位置,否则启动失败)
vim /etc/init.d/jenkins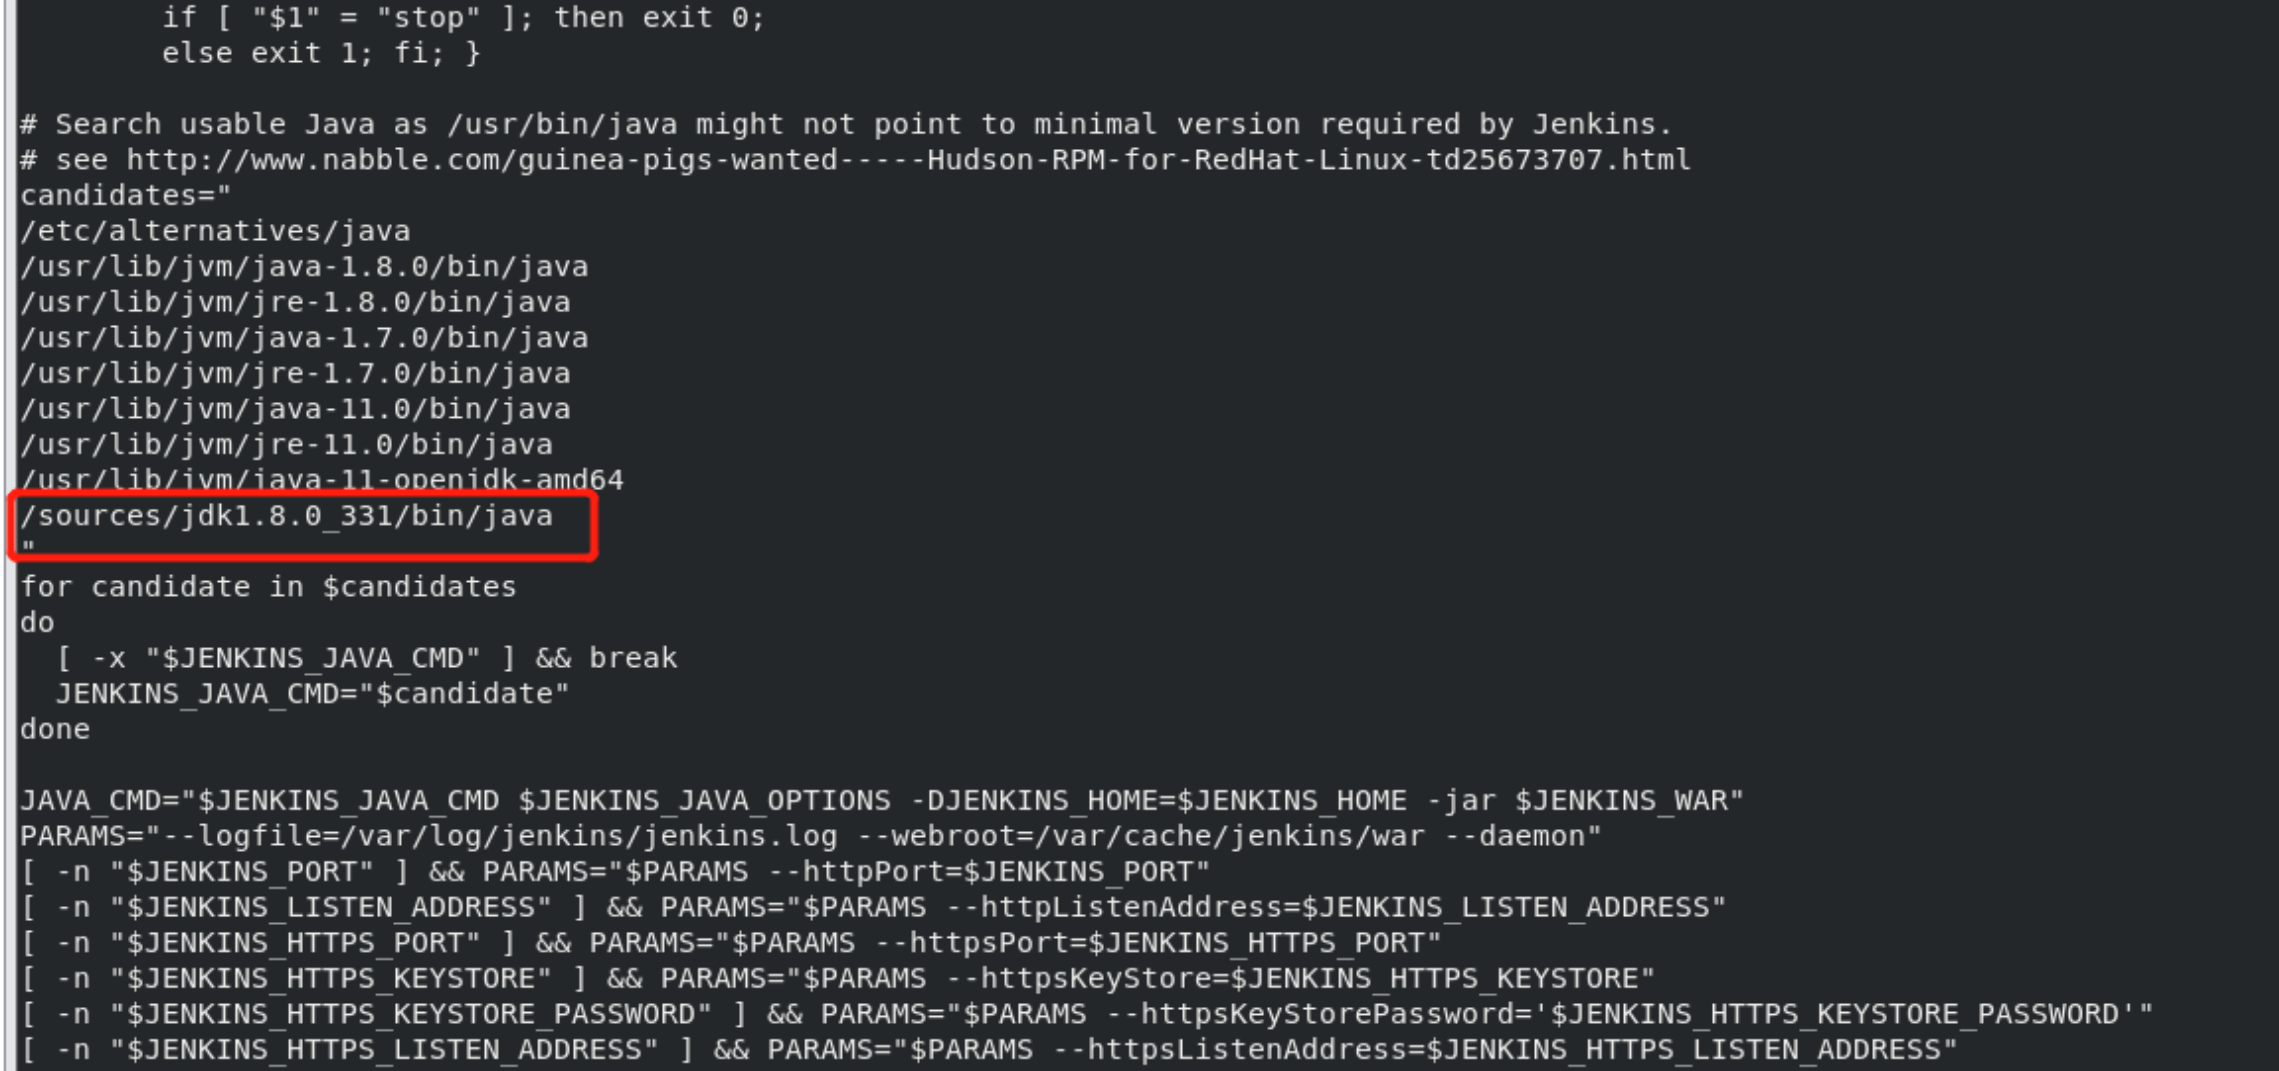
2️⃣ 修改jenkins的默认启动用户,启动Jenkins
shell
vim /etc/sysconfig/jenkins    # Jenkins默认配置文件

JENKINS_USER="root"       # ----> 修改jenkins默认启动用户为root
shell
# 重新加载配置文件
sudo systemctl daemon-reload
# 启动jenkins服务
systemctl start jenkins
# 查看jenkins状态
systemctl status jenkins
# 查看防火墙状态
systemctl status firewalld
# 关闭防火墙状态
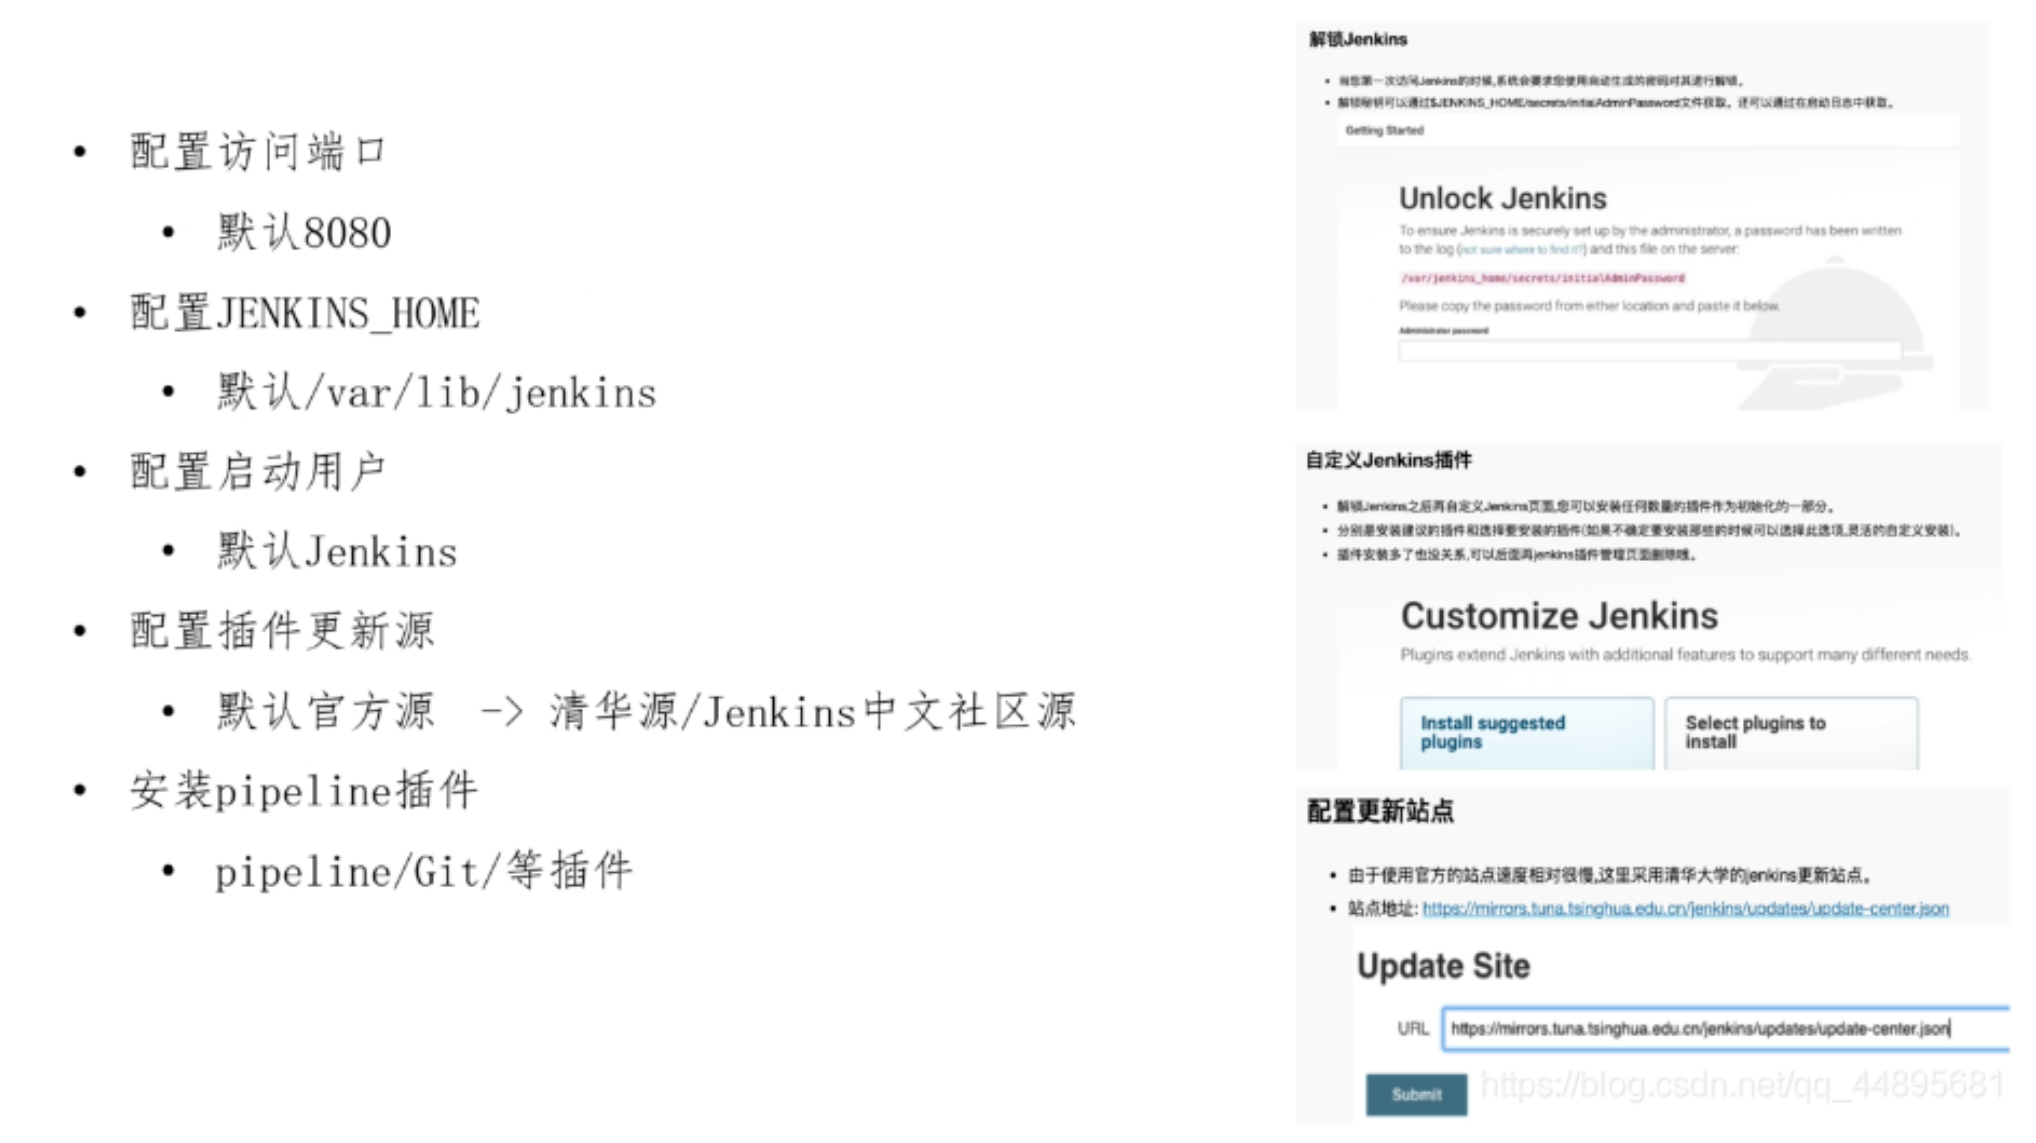
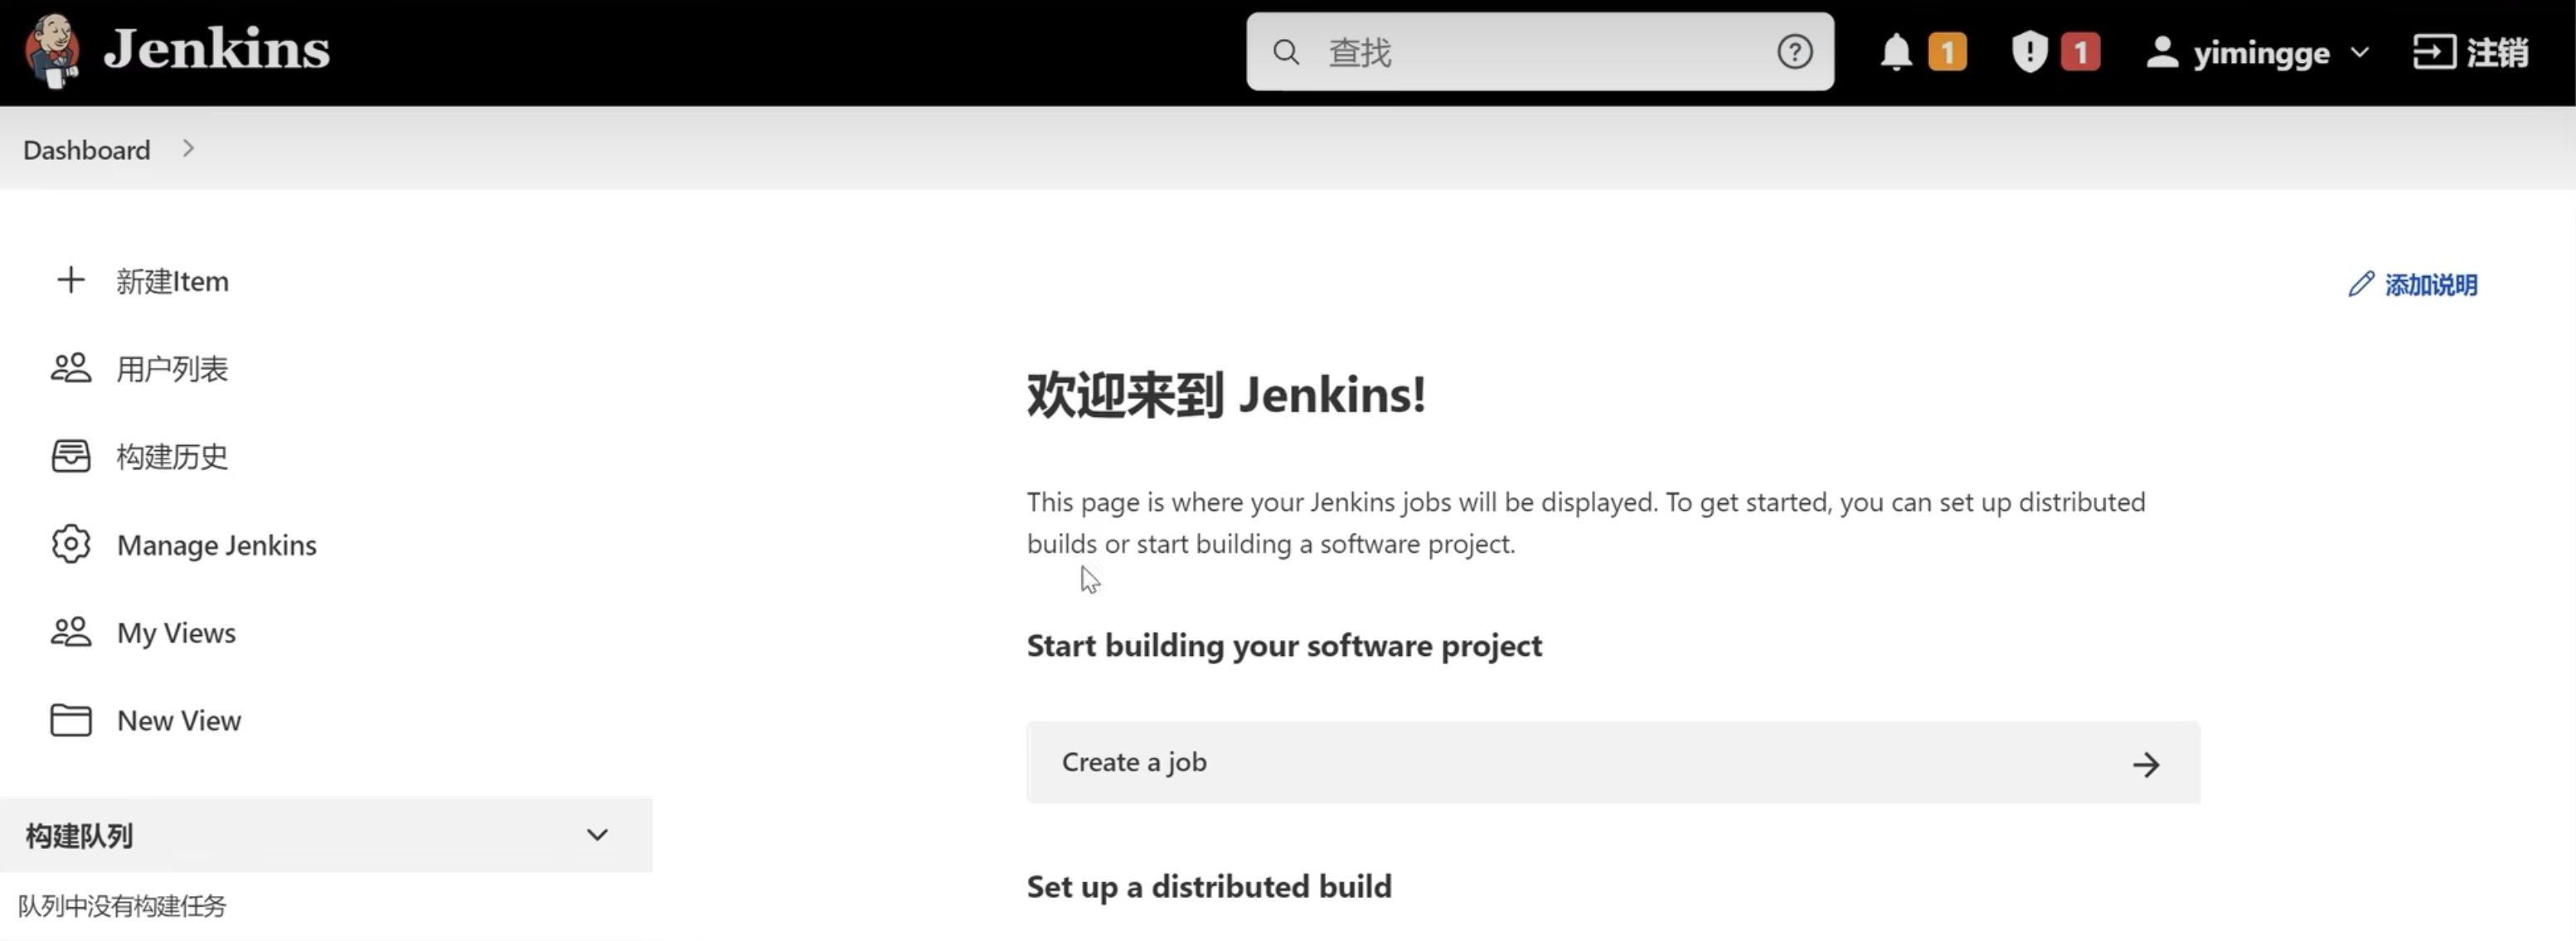
systemctl stop firewalld浏览器访问输入Jekins机器IP地址与默认端口8080, 这里会告诉你管理员密码在哪里
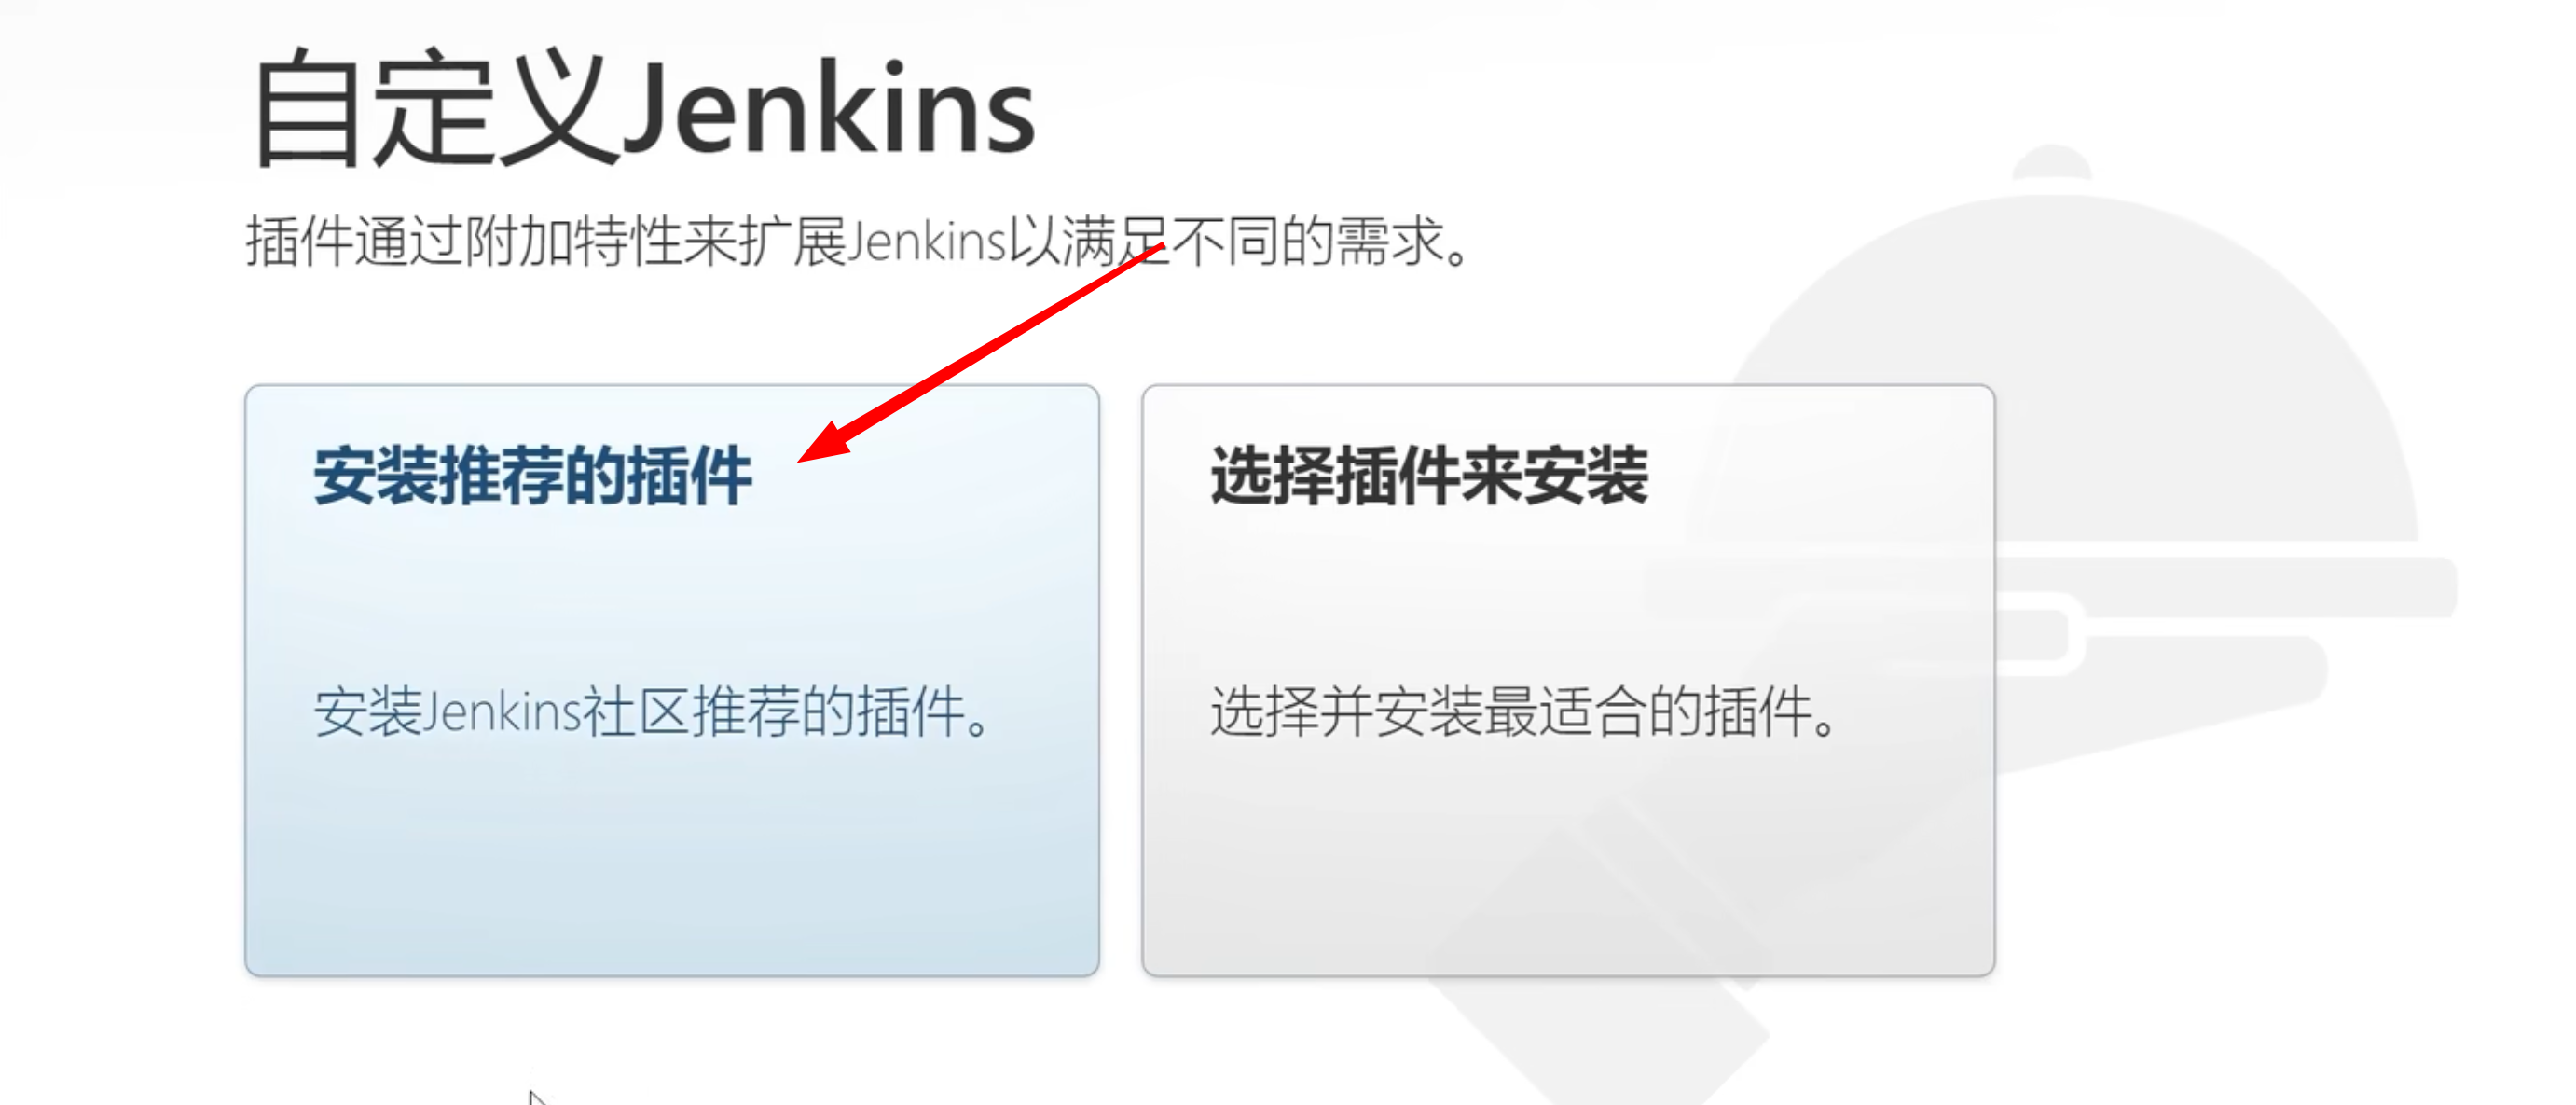
登录之后,如果你用的是比较好的网络,可以安装推荐的插件
🎉 可以先不安装,因为这些插件都在海外,还没有配置清华源,安装大概率失败。
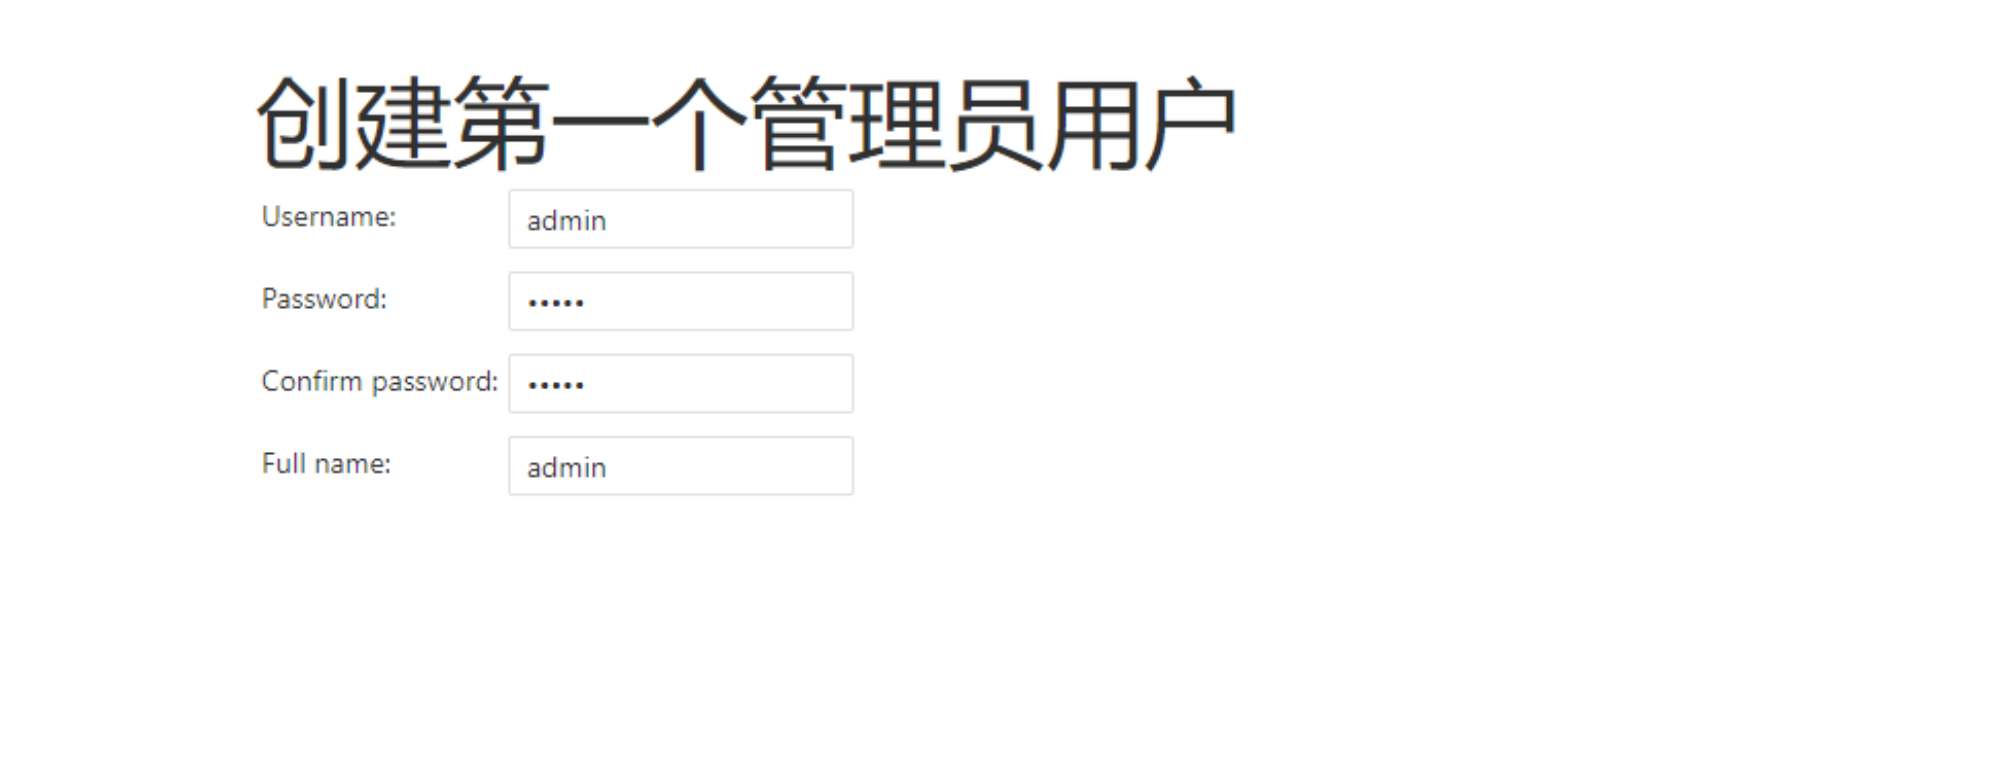
3️⃣ 根据提示创建管理员账号,然后就可以了,管理员账号的密码没有要求
4️⃣ 修改为清华大学Jenkins镜像源(https://mirrors.tuna.tsinghua.edu.cn/jenkins/updates/)
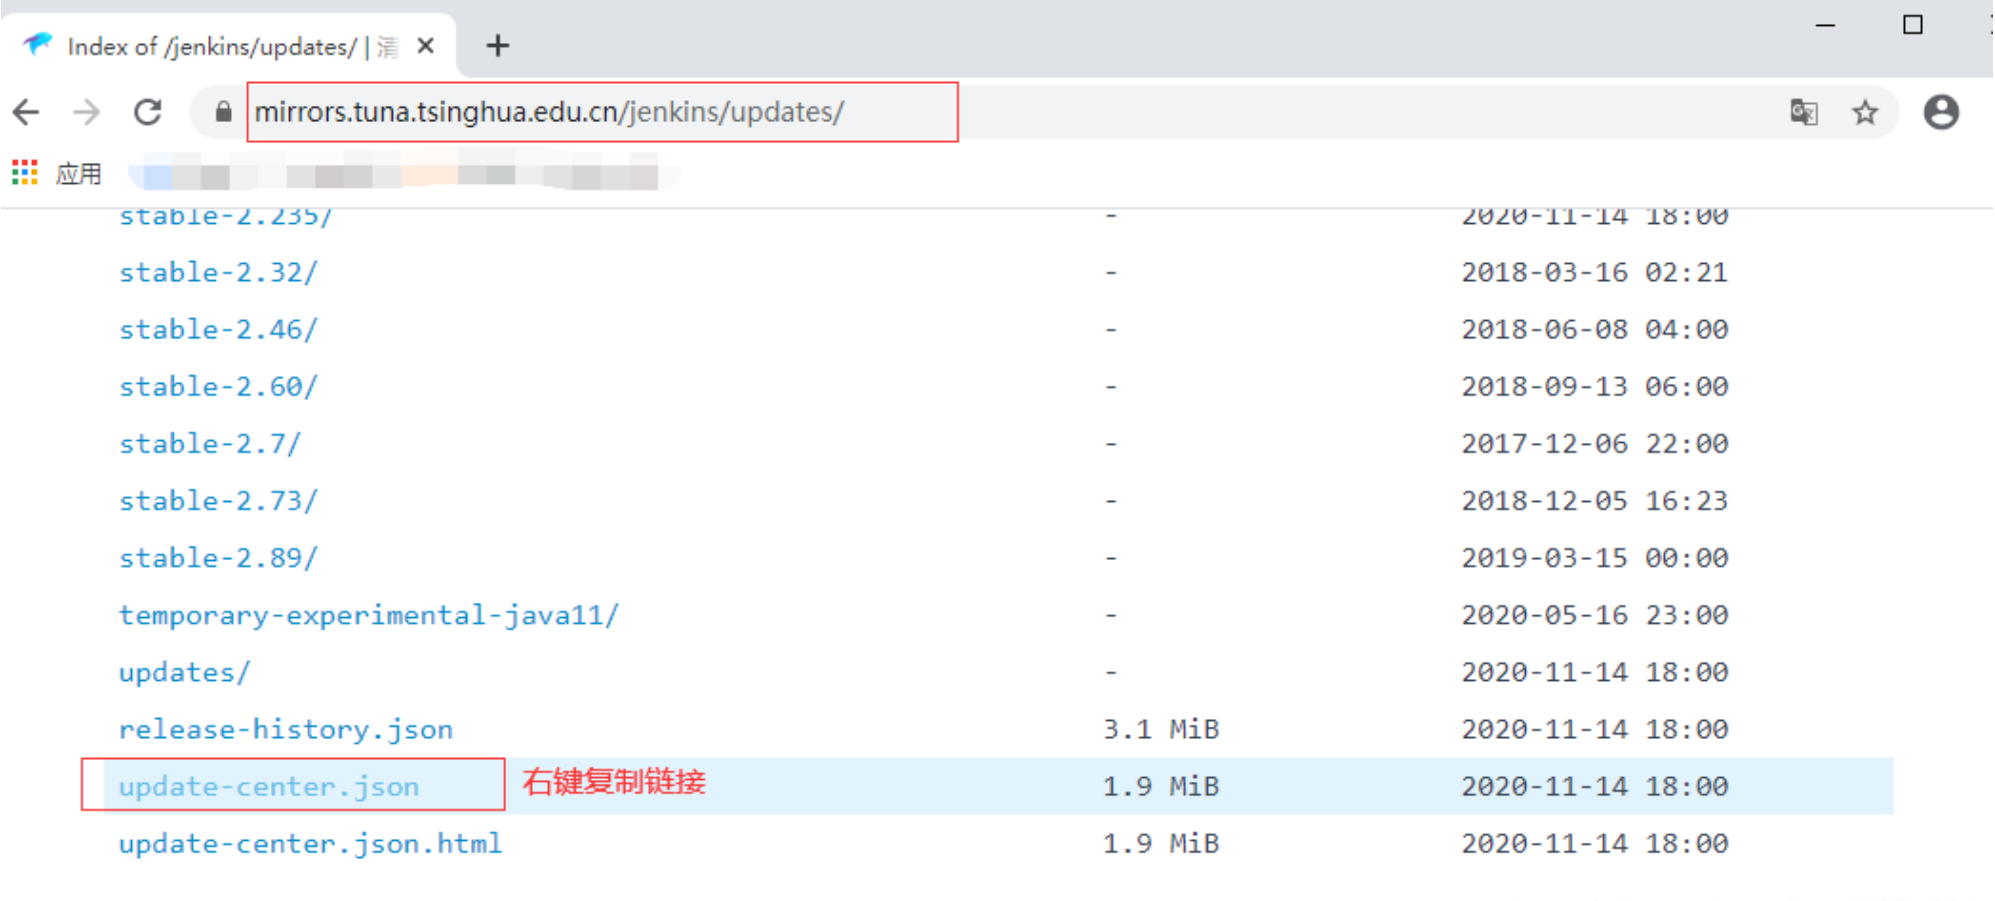
然后修改Jenkins的镜像地址
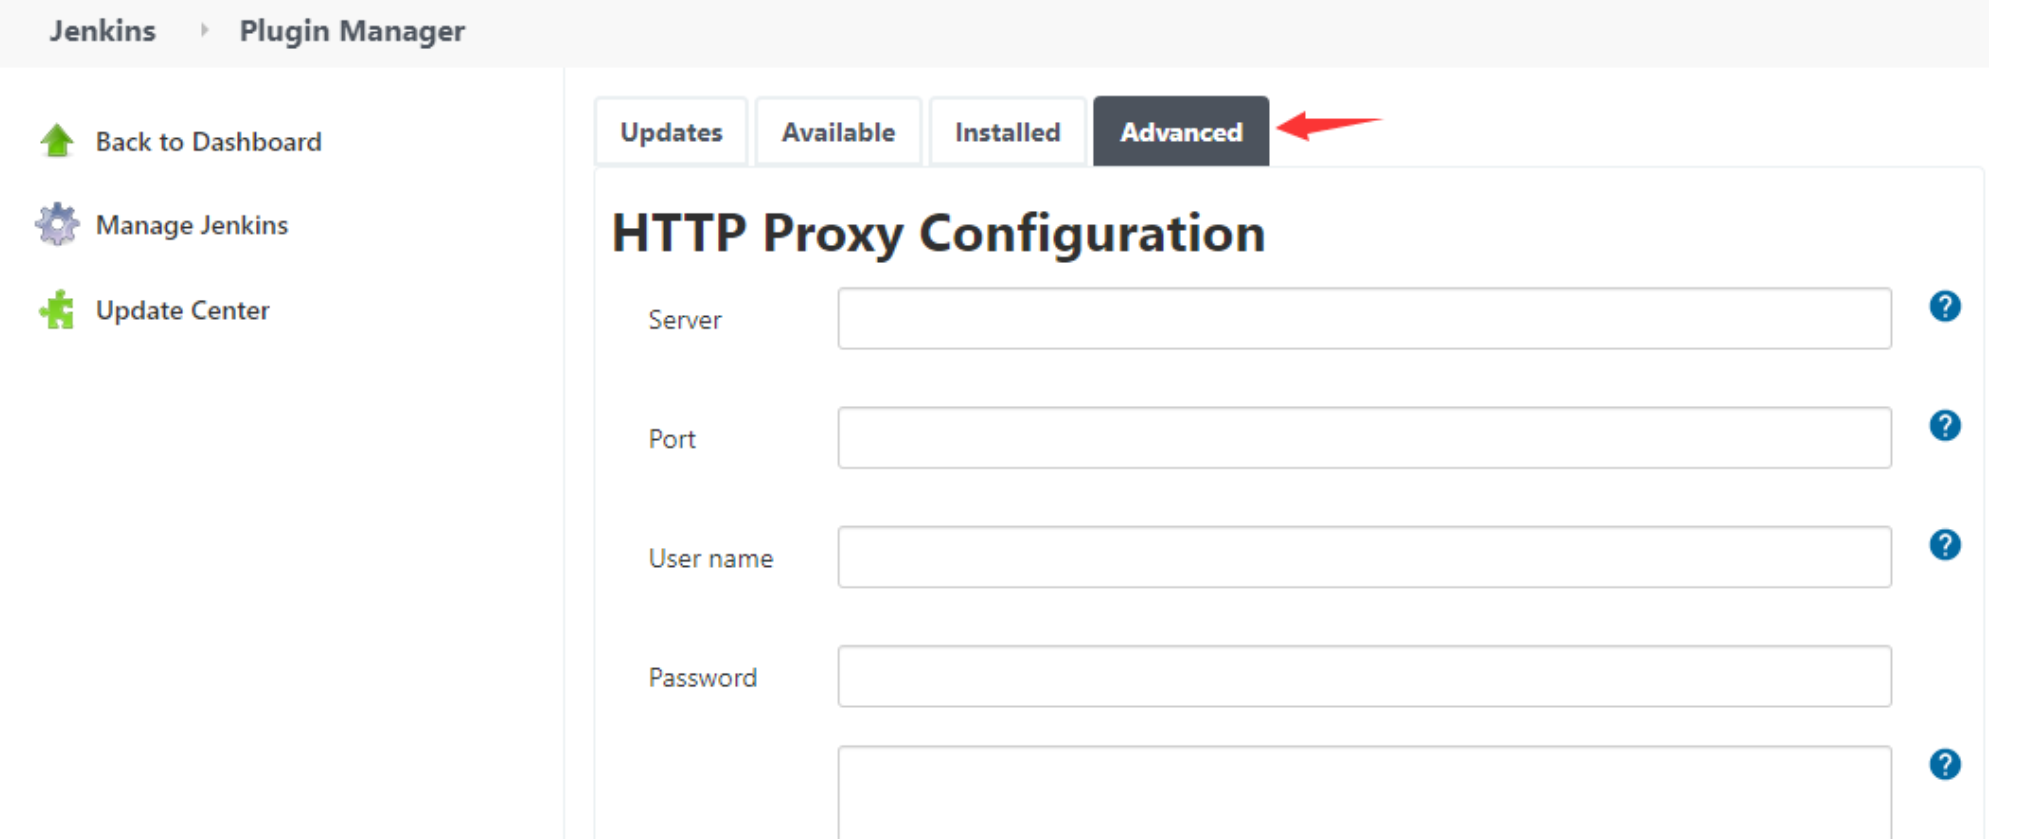
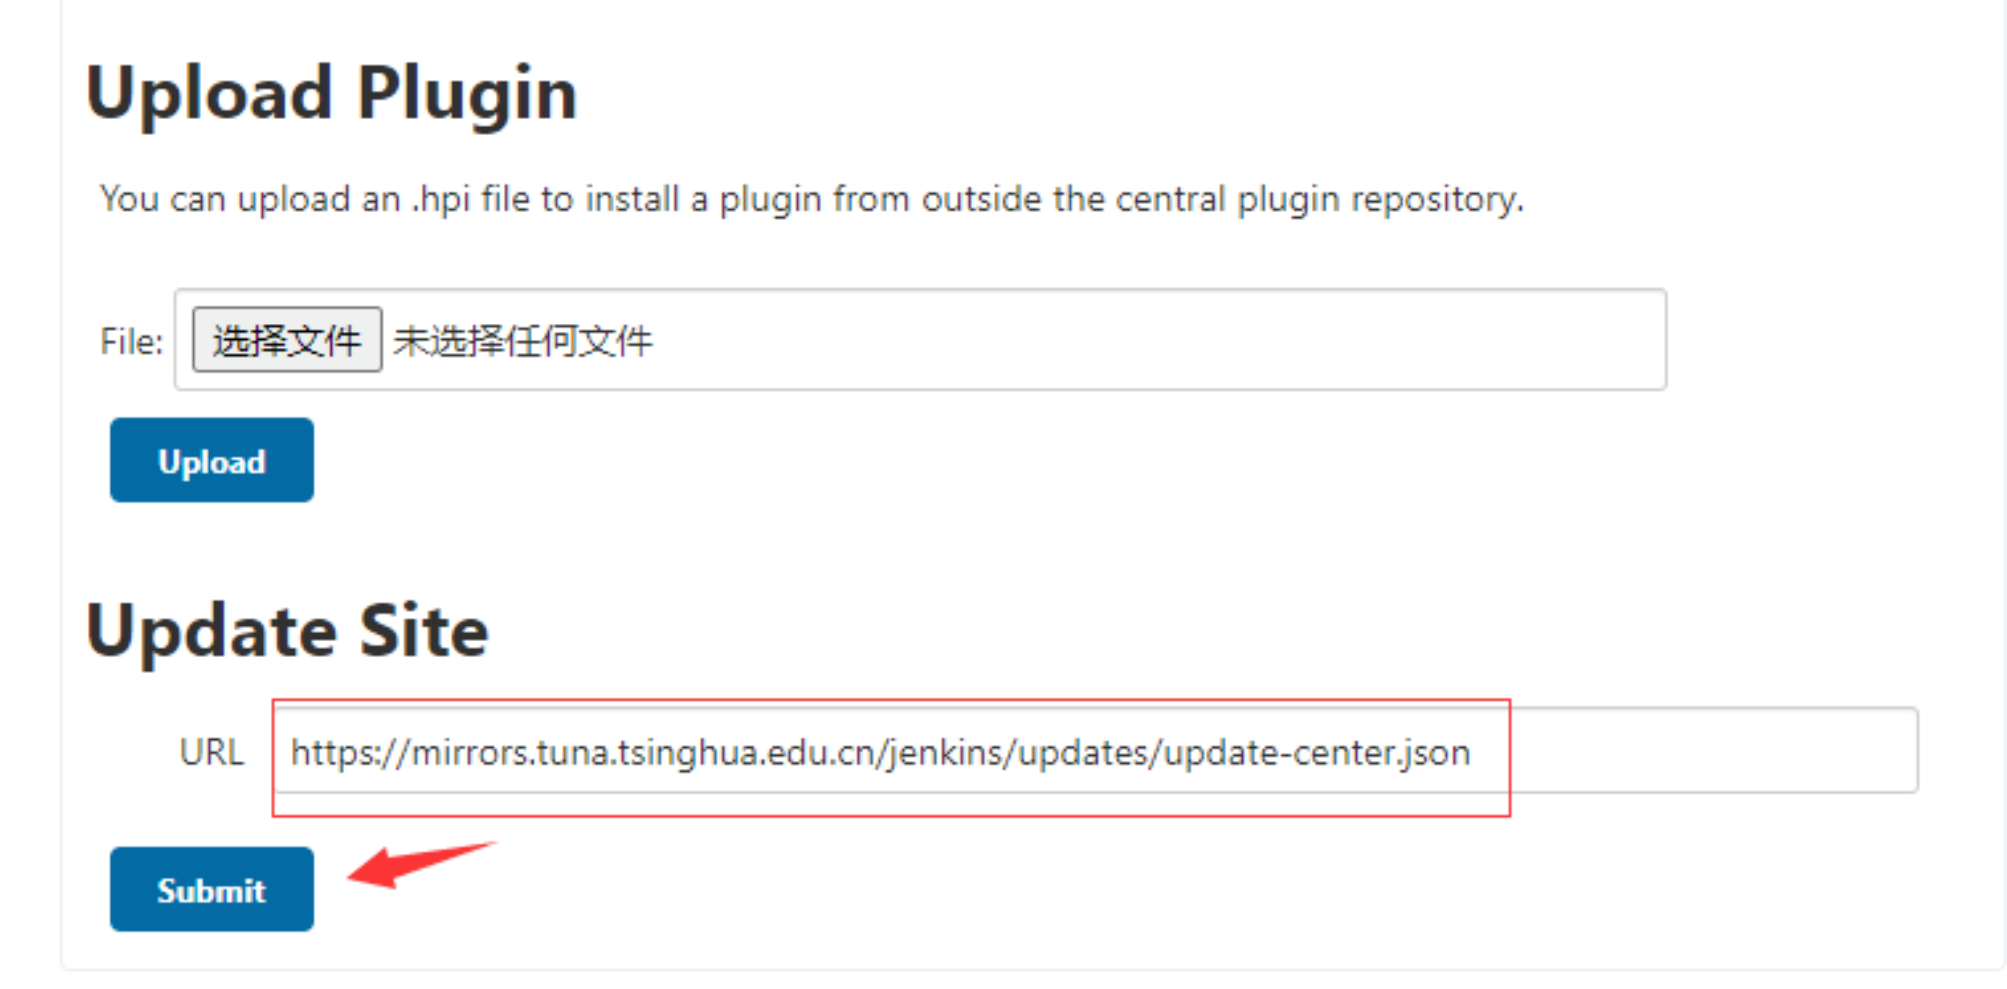
这样在后面安装插件的时候就快了,因为使用的是清华源的镜像
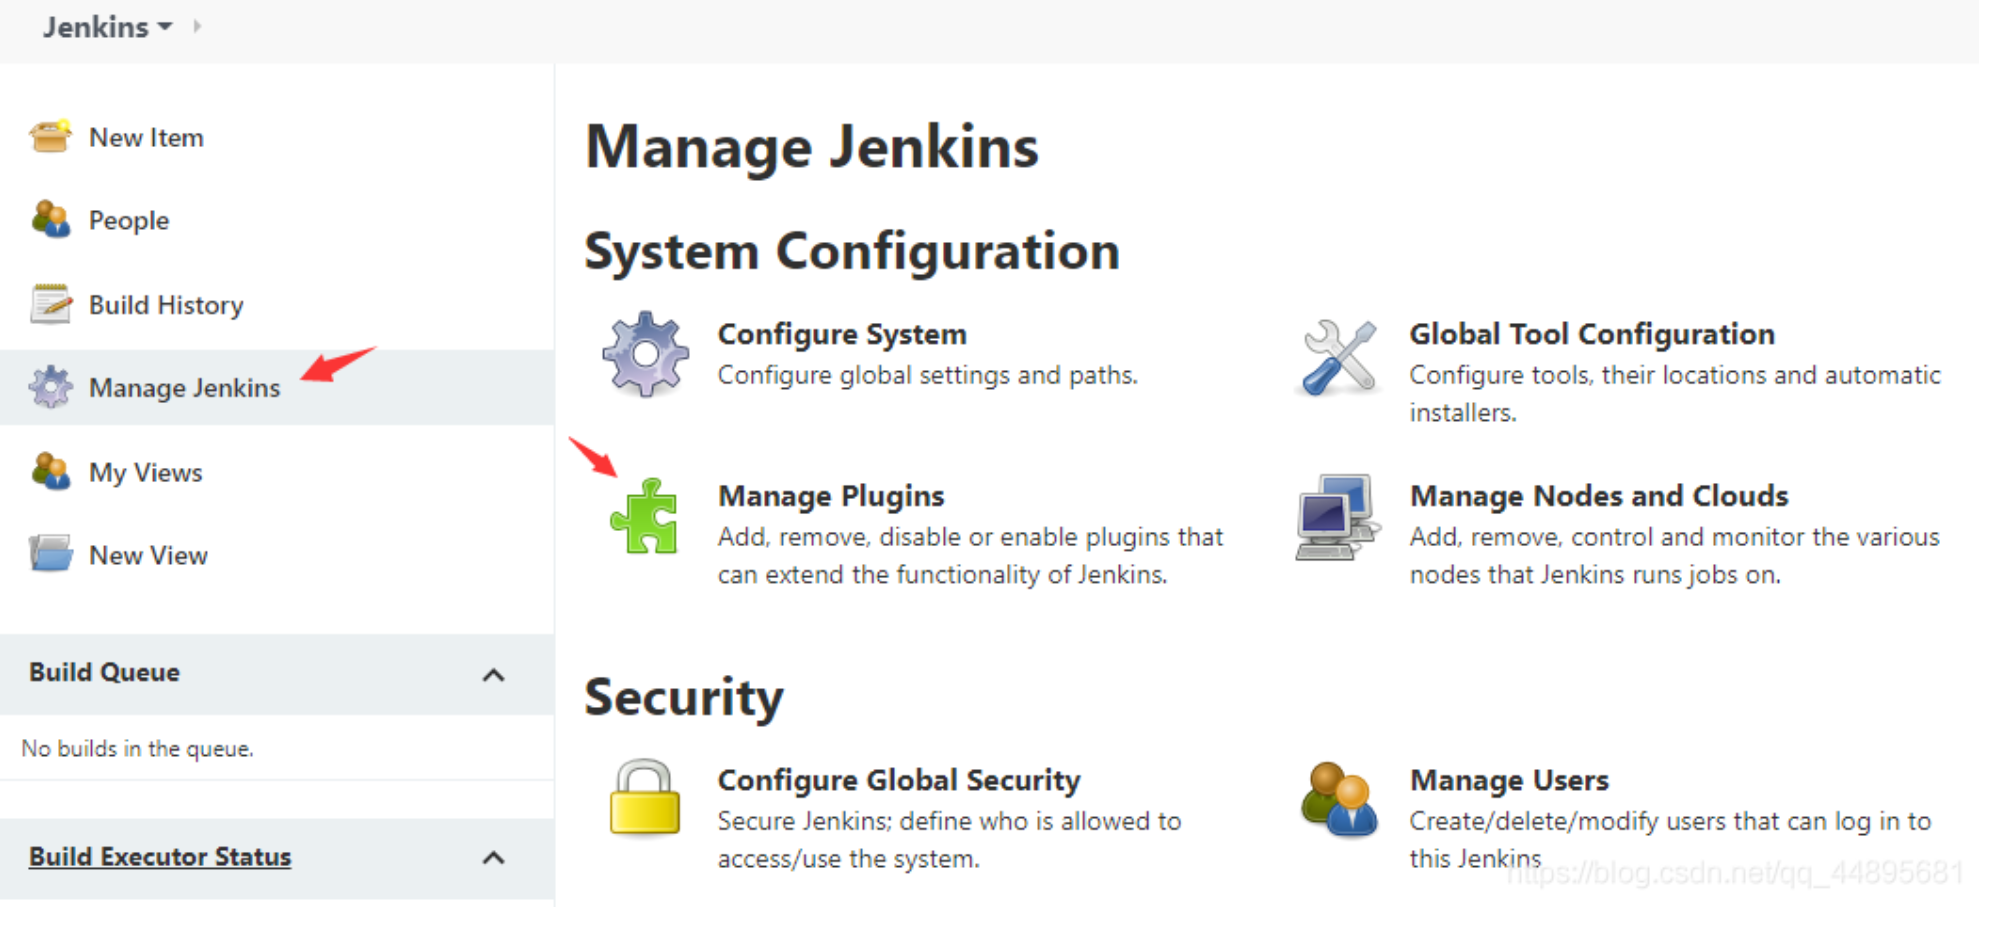
5️⃣ 安装插件
dashboard -> manage Jenkins -> manage plugins-> available
安装git & maven
2.3:安装和配置maven
安装Jenkins
下载maven的tar.gz包 -> https://maven.apache.org/download.cgi
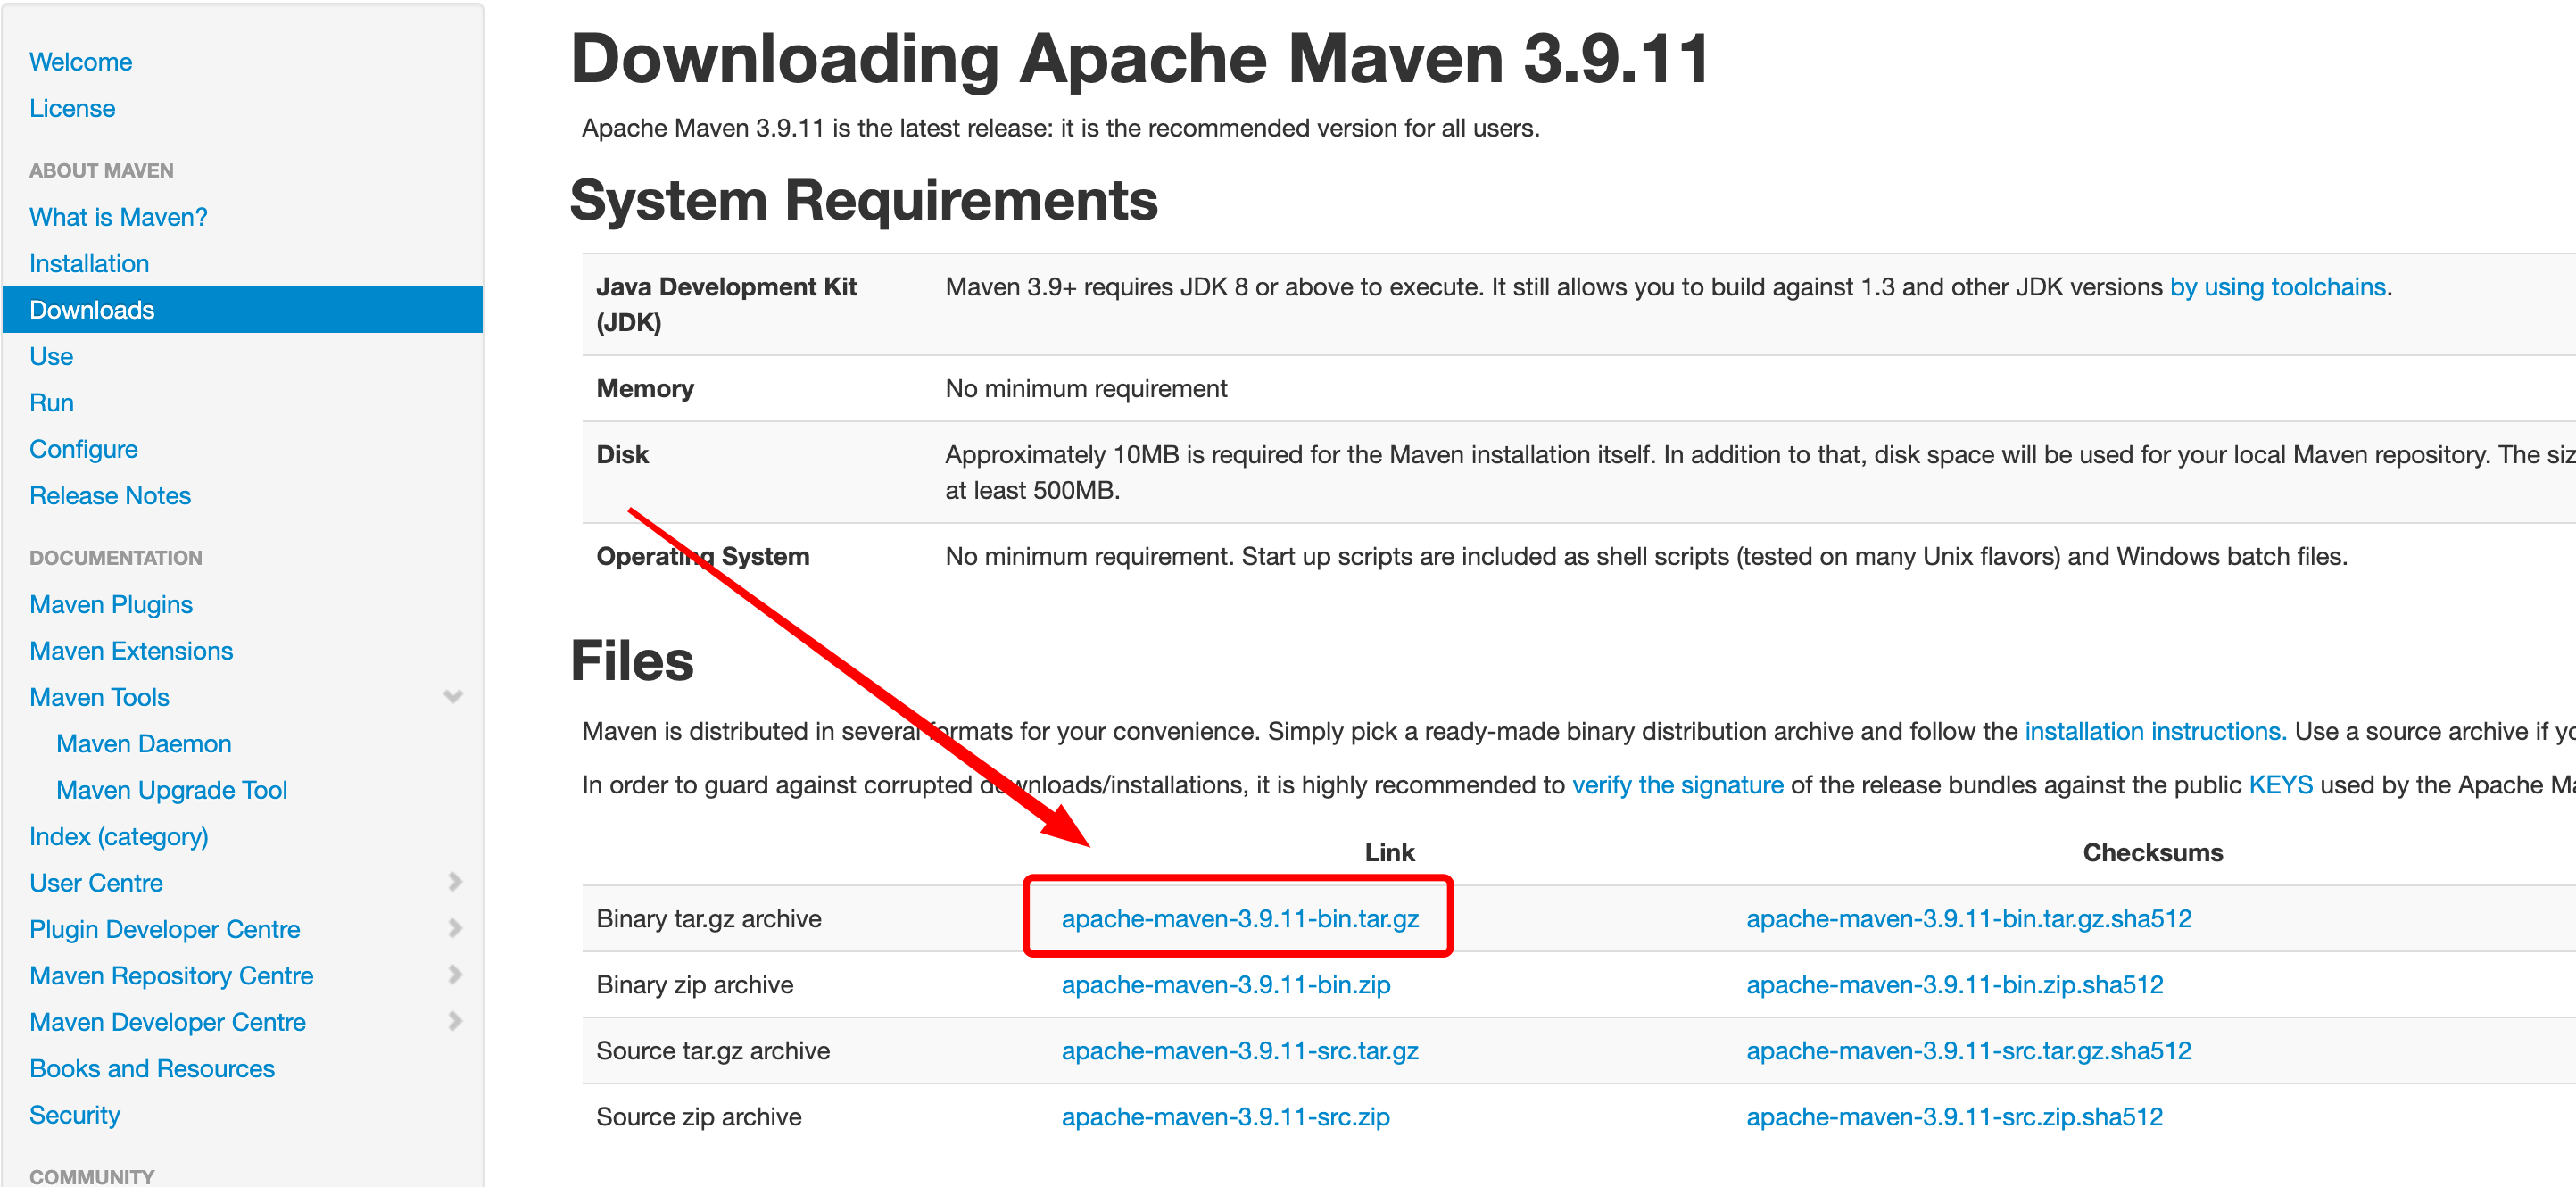
放到服务器上然后解压
shell
tar zxvf apache-maven-3.9.11-bin.tar.gz

# 换地并更名
mv apache-maven-3.9.11 /usr/local/maven
配置maven的配置文件,更新为阿里云镜像
xml
<?xml version="1.0" encoding="UTF-8"?>

<settings xmlns="http://maven.apache.org/SETTINGS/1.0.0"
          xmlns:xsi="http://www.w3.org/2001/XMLSchema-instance"
          xsi:schemaLocation="http://maven.apache.org/SETTINGS/1.0.0 http://maven.apache.org/xsd/settings-1.0.0.xsd">

  <localRepository>${user.home}/.m2/repository</localRepository>

  <pluginGroups>
    <pluginGroup>org.mortbay.jetty</pluginGroup>
  </pluginGroups>

  <proxies>
  </proxies>

  <servers>
    <server>
        <id>releases</id>
        <username>ali</username>
        <password>ali</password>
      </server>
      <server>
        <id>Snapshots</id>
        <username>ali</username>
        <password>ali</password>
      </server>
  </servers>

  <mirrors>
    <mirror>
      <!--This sends everything else to /public -->
      <id>nexus</id>
      <mirrorOf>*</mirrorOf>
      <url>http://maven.aliyun.com/nexus/content/groups/public/</url>
    </mirror>
    <mirror>
      <!--This is used to direct the public snapshots repo in the
          profile below over to a different nexus group -->
      <id>nexus-public-snapshots</id>
      <mirrorOf>public-snapshots</mirrorOf>
      <url>http://maven.aliyun.com/nexus/content/repositories/snapshots/</url>
    </mirror>
    <mirror>
      <!--This is used to direct the public snapshots repo in the
          profile below over to a different nexus group -->
      <id>nexus-public-snapshots1</id>
      <mirrorOf>public-snapshots1</mirrorOf>
      <url>https://artifacts.alfresco.com/nexus/content/repositories/public/</url>
    </mirror>
  </mirrors>

   <profiles>
    <profile>
      <id>development</id>
      <repositories>
        <repository>
          <id>central</id>
          <url>http://central</url>
          <releases><enabled>true</enabled><updatePolicy>always</updatePolicy></releases>
          <snapshots><enabled>true</enabled><updatePolicy>always</updatePolicy></snapshots>
        </repository>
      </repositories>
     <pluginRepositories>
        <pluginRepository>
          <id>central</id>
          <url>http://central</url>
          <releases><enabled>true</enabled><updatePolicy>always</updatePolicy></releases>
          <snapshots><enabled>true</enabled><updatePolicy>always</updatePolicy></snapshots>
        </pluginRepository>
      </pluginRepositories>
    </profile>
    <profile>
      <!--this profile will allow snapshots to be searched when activated-->
      <id>public-snapshots</id>
      <repositories>
        <repository>
          <id>public-snapshots</id>
          <url>http://public-snapshots</url>
          <releases><enabled>false</enabled></releases>
          <snapshots><enabled>true</enabled><updatePolicy>always</updatePolicy></snapshots>
        </repository>
      </repositories>
     <pluginRepositories>
        <pluginRepository>
          <id>public-snapshots</id>
          <url>http://public-snapshots</url>
          <releases><enabled>false</enabled></releases>
          <snapshots><enabled>true</enabled><updatePolicy>always</updatePolicy></snapshots>
        </pluginRepository>
      </pluginRepositories>
    </profile>
  </profiles>

   <activeProfiles>
    <activeProfile>development</activeProfile>
    <activeProfile>public-snapshots</activeProfile>
   </activeProfiles>

</settings>
2.4:安装git
shell
yum install -y git

git config user.name "your_username"
git config user.password "your_password"