在Compose中如何实现一段文字,多种显示效果,多种点击区域?在xml时代我们可以用ClickableSpan,在Compose时代我们用ClickableText 。
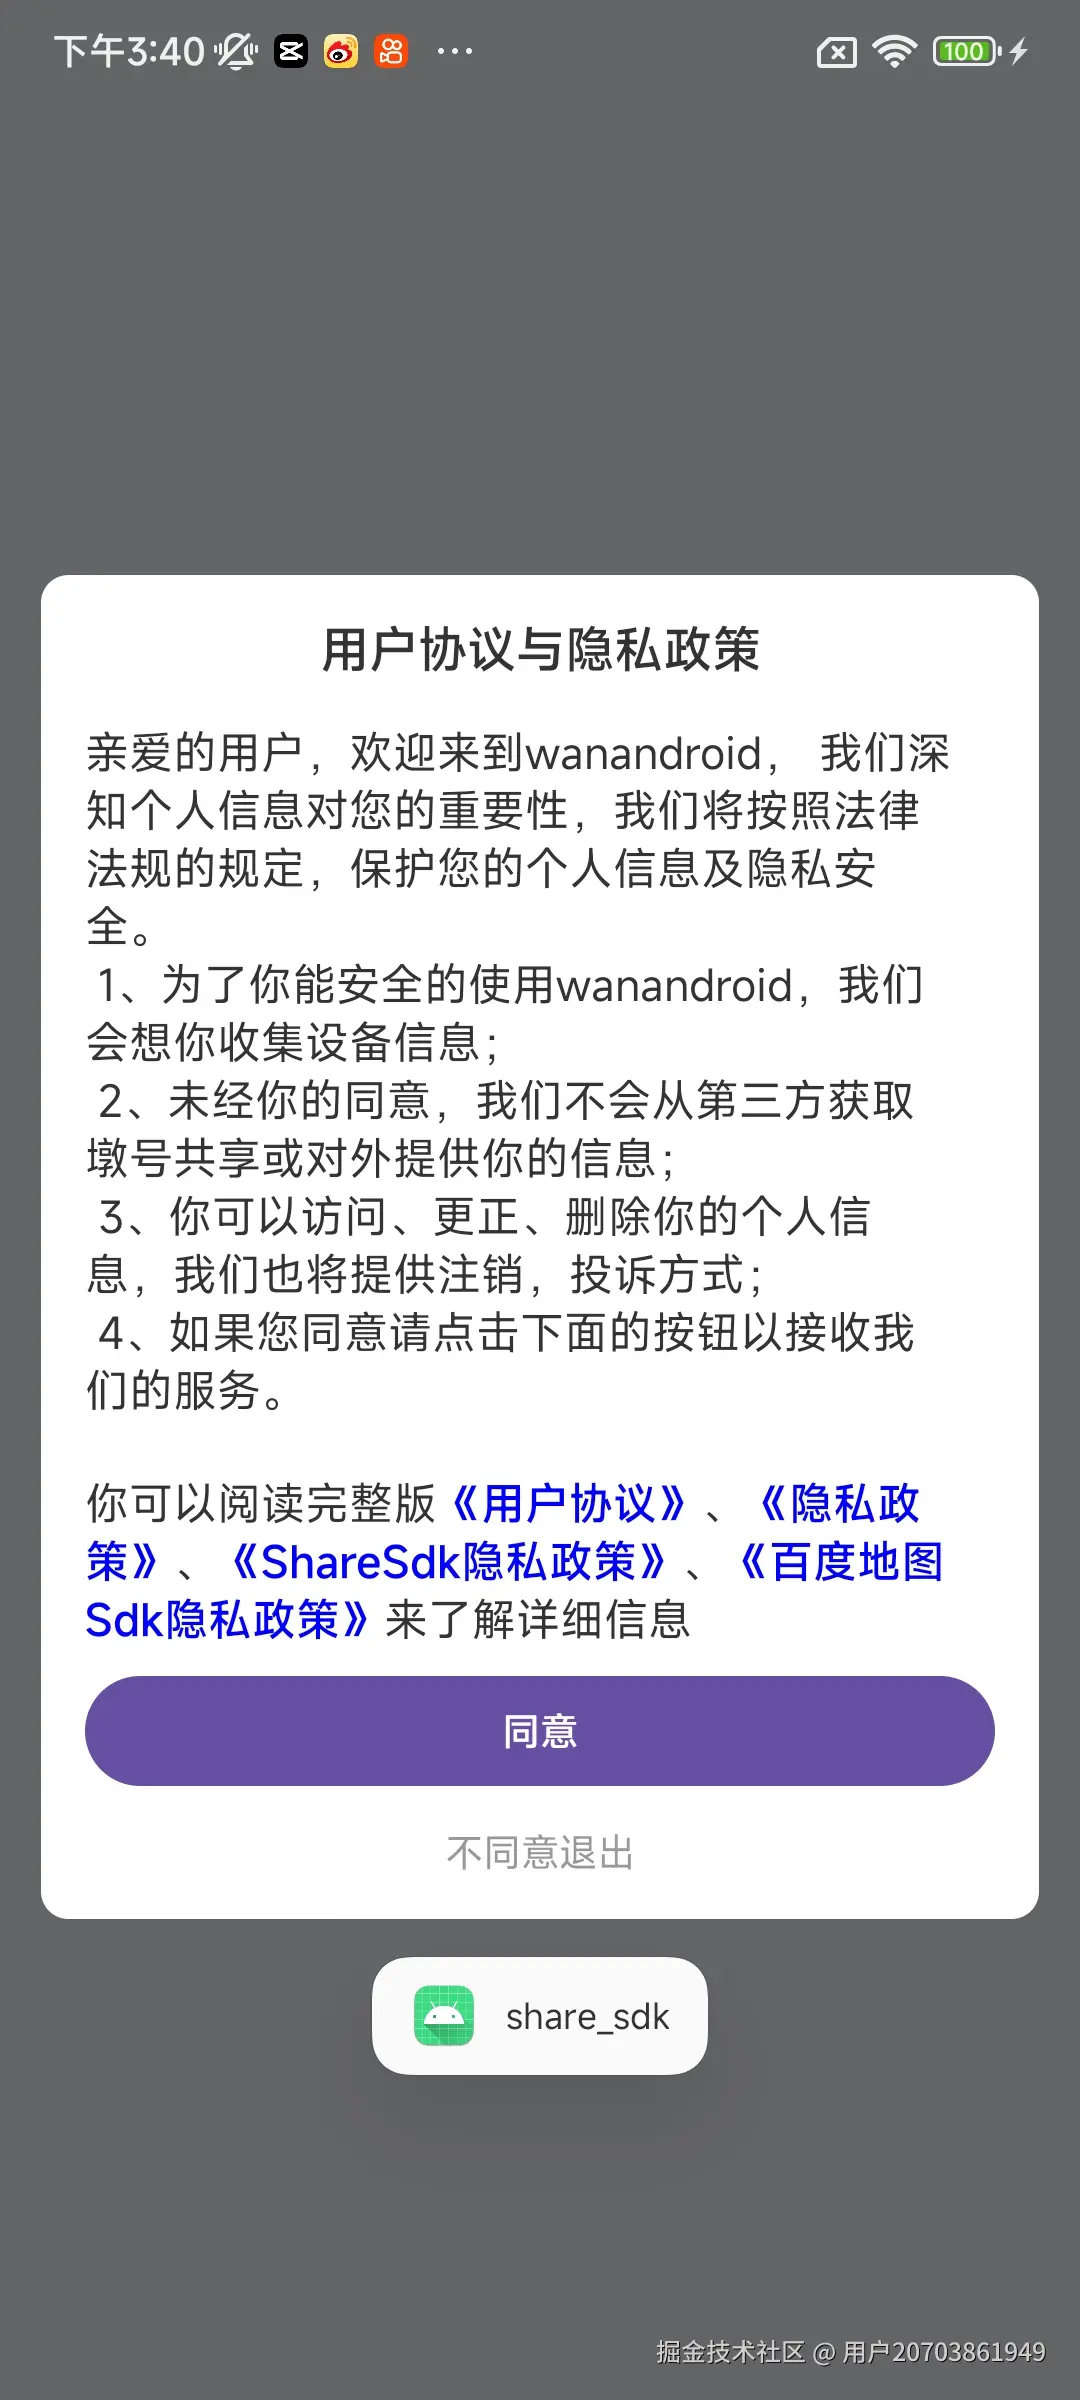
今天实现的效果如下图所示:
1、准备工作,引入相关资源文件(可跳过)
1.1、colors.xml
xml
<?xml version="1.0" encoding="utf-8"?>
<resources>
      <color name="welcome_privacy_title">#333333</color>
      <color name="welcome_privacy_content">#333333</color>
      <color name="welcome_privacy_tip">#333333</color>
      <color name="welcome_privacy_disagree">#999999</color>
</resources>
1.2、strings.xml
xml
<resources>
    <string name="welcome_app_name">module_welcome</string>
    <string name="welcome_privacy_title">用户协议与隐私政策</string>
    <string name="welcome_privacy_content">亲爱的用户,欢迎来到wanandroid,
        我们深知个人信息对您的重要性,我们将按照法律法规的规定,保护您的个人信息及隐私安全。\n
        1、为了你能安全的使用wanandroid,我们会想你收集设备信息;\n
        2、未经你的同意,我们不会从第三方获取墩号共享或对外提供你的信息;\n
        3、你可以访问、更正、删除你的个人信息,我们也将提供注销,投诉方式;\n
        4、如果您同意请点击下面的按钮以接收我们的服务。</string>
    <string name="welcome_privacy_tip">你可以阅读完整版《用户协议》、《隐私政策》、《ShareSdk隐私政策》、《百度地图Sdk隐私政策》来了解详细信息</string>
    <string name="welcome_agree_privacy">同意</string>
    <string name="welcome_disagree_privacy">不同意退出</string>
    <string name="user_agrreement">《用户协议》</string>
    <string name="privacy_policy">《隐私政策》</string>
    <string name="share_sdk">《ShareSdk隐私政策》</string>
    <string name="baidu_map_sdk">《百度地图Sdk隐私政策》</string>
</resources>
2、创建model
kotlin
data class ClickableTextPart (
    val text:String,
    val tag:String,
    val destination: NavigationDestination
)
3、创建 AnnotatedString AnnotatedString是具有多种样式的文本基本数据结构。可通过Builder构造,我们通过 buildAnnotatedString 来创建。
我们的需求是4个协议,需要不同的样式显示,并且每个协议可以单独点击。
我们分两步来处理
3.1、先显示
显示效果的整体逻辑比较简单,就是定位字符串的起始位置和结束位置,然后将起始位置和结束位置之间的字符串处理效果就行了。
举个例子:你可以阅读完整版《用户协议》、《隐私政策》、《ShareSdk隐私政策》、《百度地图Sdk隐私政策》来了解详细信息;你可以阅读完整版、、、来了解详细信息 ;这些字符串按照默认的样式来显示。《用户协议》、《隐私政策》、《ShareSdk隐私政策》、《百度地图Sdk隐私政策》 这些字符串显示指定的效果。
引入基本数据
vbscript
val context = LocalContext.current
val clickableParts = listOf(
    ClickableTextPart(
        context.getString(R.string.user_agrreement),
        "user_agreement",
        NavigationDestination.UserAgreement
    ),
    ClickableTextPart(
        context.getString(R.string.privacy_policy),
        "privacy_policy",
        NavigationDestination.PrivacyPolicy
    ),
    ClickableTextPart(
        context.getString(R.string.share_sdk),
        "share_sdk",
        NavigationDestination.SharedSdkPrivacy
    ),
    ClickableTextPart(
        context.getString(R.string.baidu_map_sdk),
        "baidu_map_sdk",
        NavigationDestination.BaiduMapSdkPrivacy
    )
)

val baseText = context.getString(R.string.welcome_privacy_tip)
ini
val annotatedString = buildAnnotatedString {

    var currentIndex = 0
    clickableParts.forEach { part ->
        val startIndex = baseText.indexOf(part.text, currentIndex)
        //普通文本直接添加,例如第一次进入 startIndex=8 currentIndex=0 那么就需要添加第一个默认字符串
        if (startIndex > currentIndex) {
            val stringInfo=baseText.substring(currentIndex, startIndex)
            append(stringInfo)
        }
        // 添加可点击文本(带样式)
        pushStringAnnotation(tag = part.tag, annotation = part.tag)
        withStyle(
            style = SpanStyle(
                color = Color.Blue,
                fontWeight = FontWeight.Bold
            )
        ) {
            //《用户协议》 《隐私政策》 《ShareSdk隐私政策》 《百度地图Sdk隐私政策》
            append(part.text)
        }
        pop()

        currentIndex = startIndex + part.text.length
    }

    //最后再添加文本末尾那一句
    if (currentIndex < baseText.length) {
        append(baseText.substring(currentIndex))
    }

}
上面的代码注释写的很详细很好理解的,唯一可能有点陌生的是 pushStringAnnotation 和 pop这两个方法, 这个我们稍后再说。到此样式已经显示完毕了,点击效果呢?
点击效果非常简单,下面贴出完整的代码:
ini
@Composable
fun ClickablePrivacyText(viewModel: WellcomeViewModel, modifier: Modifier = Modifier) {

    val context = LocalContext.current
    val clickableParts = listOf(
        ClickableTextPart(
            context.getString(R.string.user_agrreement),
            "user_agreement",
            NavigationDestination.UserAgreement
        ),
        ClickableTextPart(
            context.getString(R.string.privacy_policy),
            "privacy_policy",
            NavigationDestination.PrivacyPolicy
        ),
        ClickableTextPart(
            context.getString(R.string.share_sdk),
            "share_sdk",
            NavigationDestination.SharedSdkPrivacy
        ),
        ClickableTextPart(
            context.getString(R.string.baidu_map_sdk),
            "baidu_map_sdk",
            NavigationDestination.BaiduMapSdkPrivacy
        )
    )

    val baseText = context.getString(R.string.welcome_privacy_tip)


    val annotatedString = buildAnnotatedString {

        var currentIndex = 0
        clickableParts.forEach { part ->
            val startIndex = baseText.indexOf(part.text, currentIndex)
            //普通文本直接添加,例如第一次进入 startIndex=8 currentIndex=0 那么就需要添加第一个默认字符串
            if (startIndex > currentIndex) {
                val stringInfo=baseText.substring(currentIndex, startIndex)
                append(stringInfo)
            }
            // 添加可点击文本(带样式)
            pushStringAnnotation(tag = part.tag, annotation = part.tag)
            withStyle(
                style = SpanStyle(
                    color = Color.Blue,
                    fontWeight = FontWeight.Bold
                )
            ) {
                //《用户协议》 《隐私政策》 《ShareSdk隐私政策》 《百度地图Sdk隐私政策》
                append(part.text)
            }
            pop()

            currentIndex = startIndex + part.text.length
        }

        //最后再添加文本末尾那一句
        if (currentIndex < baseText.length) {
            append(baseText.substring(currentIndex))
        }

    }


    ClickableText(
        text = annotatedString,
        modifier = modifier
            .padding(start = 16.dp, top = 20.dp, end = 16.dp),
        style = TextStyle(
            fontSize = 16.sp,
            color = colorResource(R.color.welcome_privacy_tip)
        ),
        onClick = { offset->
            Log.e("clickOffset","$offset")
           annotatedString.getStringAnnotations(start = offset, end = offset)
               .firstOrNull()
               ?.let { annotation->
                 Toast.makeText(context,annotation.tag,Toast.LENGTH_LONG).show()
               }
        }
    )


}
在点击效果的实现中,程序比较好理解,可能最主要就annotatedString.getStringAnnotations有点点陌生。
4、下面就结合上面的疑问一起来说说。
4.1、首先 pushStringAnnotation 和 pop 方法总是成对的出现的。
pushStringAnnotation(tag: String, annotation: String) 这个方法用于在当前构建位置,压入一个字符串,它需要两个参数,tag和annotation;tag 和 annotation 可以理解为键值对(key,value模型);pop表示已经压入完毕,可以结束了。这样我们再来理解这段程序就非常简单了。
scss
// 添加可点击文本(带样式)
//准备开始压入自定义样式的字符串了,tag就是key annotation就是value
pushStringAnnotation(tag = part.tag, annotation = part.text)
withStyle(
    style = SpanStyle(
        color = Color.Blue,
        fontWeight = FontWeight.Bold
    )
) {
    //《用户协议》 《隐私政策》 《ShareSdk隐私政策》 《百度地图Sdk隐私政策》
    append(part.text)
}
//压入的字符串已经压入完毕了,可以弹出压入了
pop()
getStringAnnotations 看名字就是用来检索这些注解的方法,它接收两个参数start开始检索的区域(包含),end停止检索的区域(不包含)它返回一个List类型,绝大绝大多数情况下至多只有1个。
ini
ClickableText(
    text = annotatedString,
    modifier = modifier
        .padding(start = 16.dp, top = 20.dp, end = 16.dp),
    style = TextStyle(
        fontSize = 16.sp,
        color = colorResource(R.color.welcome_privacy_tip)
    ),
    onClick = { offset->
        Log.e("clickOffset","$offset")
       annotatedString.getStringAnnotations(start = offset, end = offset)
           .firstOrNull()
           ?.let { annotation->
              Log.e("clickOffset",annotation.tag+"****"+annotation.item)
           }
    }
)
举个例子:
makefile
文本: "C l i c k   H E R E"
索引:  0 1 2 3 4 5 6 7 8 9
假入我们 HERE 使用了pushStringAnnotation 压入,那么当点击E的时候,getStringAnnotations(start=7,end=7)他就返回了一个List集合,就能找到HERE对象,并通过tag 和 item 拿到我们存入的信息。
为什么是tag和Item我们刚刚不是传入了tag和annotation吗?( pushStringAnnotation(tag = part.tag, annotation = part.tag))问得好,我们看看源码
kotlin
/**
 * Attach the given [annotation] to any appended text until a corresponding [pop]
 * is called.
 *
 * @sample androidx.compose.ui.text.samples.AnnotatedStringBuilderPushStringAnnotationSample
 *
 * @param tag the tag used to distinguish annotations
 * @param annotation the string annotation attached on this AnnotatedString
 * @see getStringAnnotations
 * @see Range
 */
fun pushStringAnnotation(tag: String, annotation: String): Int {
    MutableRange(item = annotation, start = text.length, tag = tag).also {
        styleStack.add(it)
        annotations.add(it)
    }
    return styleStack.size - 1
}
金光闪闪的item=annotation
总结:
1、 pushStringAnnotation 和 pop 方法总是成对的出现的 ,pushStringAnnotation表示开始压入需要处理的字符串,pop方法表示压入字符串操作已经结束了;getStringAnnotations就是查询我们刚刚压入的字符串。
2、pushStringAnnotation(tag: String, annotation: String) tag和annotation就是一个键值对,可以在后面的getStringAnnotations中查询出来,其中annotation在getStringAnnotations中用item表示。
3、最后我们创建的 AnnotatedString需要在ClickableText中显示,才能发挥效果。