点击 "AladdinEdu,同学们用得起的【H卡】算力平台",H卡级别算力 ,按量计费 ,灵活弹性 ,顶级配置 ,学生专属优惠。
GPU加速计算 × 梯度自动求解 × 自定义网络层
读者收获:掌握动态图编程优势
PyTorch的动态计算图遇上GPU的并行能力,深度学习开发效率实现质的飞跃。本文将带你体验即时的梯度反馈和灵活的模型设计,彻底释放神经网络创新的无限可能。
一、PyTorch核心优势:动态图 vs 静态图
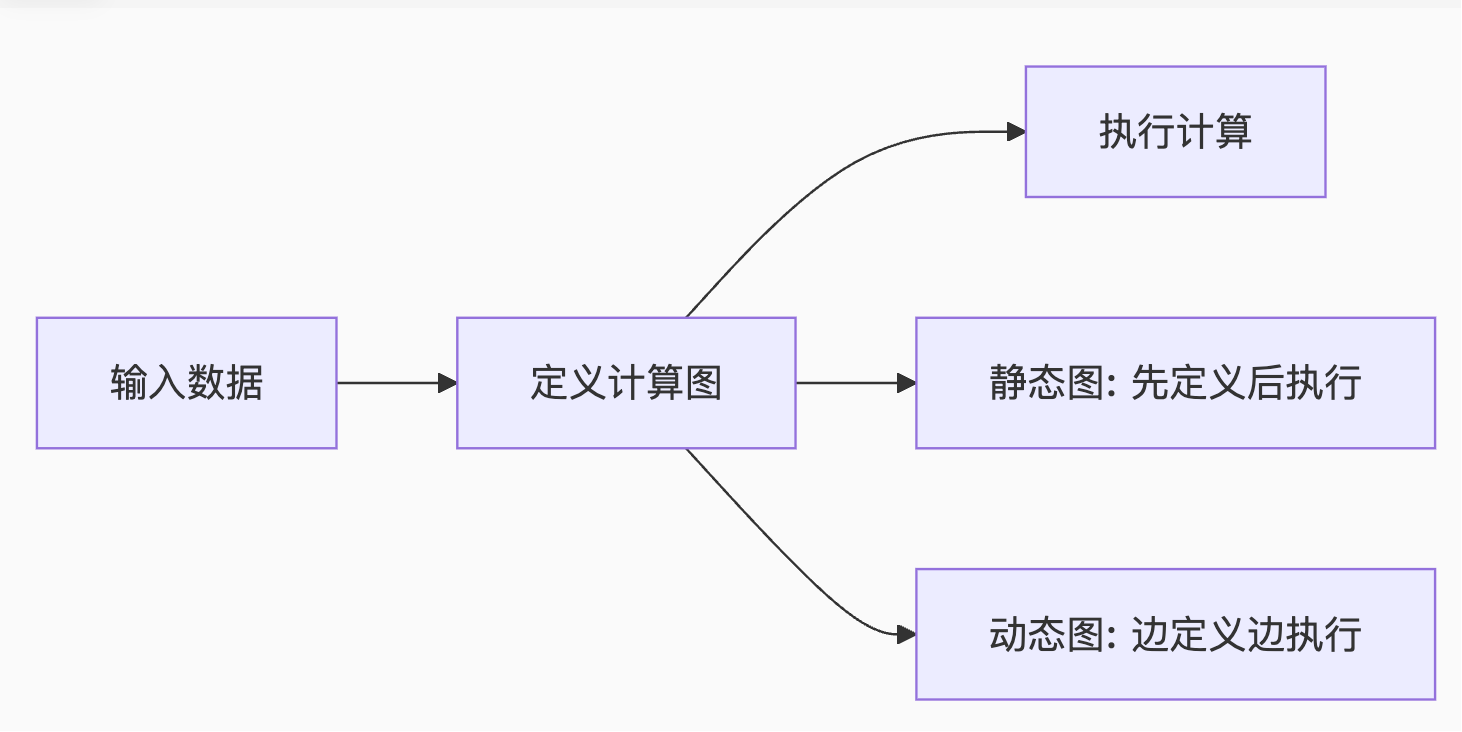
1.1 计算图范式对比

动态图核心优势:
- 实时调试:像NumPy一样即时检查结果
- 灵活控制:支持条件分支、循环等动态结构
- 直观理解:计算流程符合编程直觉
1.2 环境配置与验证
bash
# 创建conda环境
conda create -n pytorch_env python=3.9
conda activate pytorch_env

# 安装PyTorch(根据CUDA版本选择)
pip install torch torchvision torchaudio --index-url https://download.pytorch.org/whl/cu118

# 验证安装
python -c "import torch; print(f'PyTorch版本: {torch.__version__}, CUDA可用: {torch.cuda.is_available()}')"
二、张量操作:GPU加速的NumPy
2.1 张量创建与转换
python
import torch
import numpy as np

# 从列表创建
tensor_cpu = torch.tensor([[1, 2], [3, 4]])

# 从NumPy转换
numpy_array = np.array([[5, 6], [7, 8]])
tensor_from_np = torch.from_numpy(numpy_array)

# 指定设备创建
tensor_gpu = torch.tensor([[1, 2], [3, 4]], device='cuda')
2.2 张量属性详解
python
tensor = torch.randn(3, 4, requires_grad=True)

print("形状:", tensor.shape)        # torch.Size([3, 4])
print("设备:", tensor.device)       # cpu/cuda:0
print("数据类型:", tensor.dtype)     # torch.float32
print("是否需要梯度:", tensor.requires_grad)  # True
2.3 GPU加速实战对比
python
# 创建大矩阵
size = 10000
cpu_tensor = torch.randn(size, size)
gpu_tensor = cpu_tensor.cuda()

# 矩阵乘法性能测试
import time

def benchmark(device):
    start = time.time()
    tensor = torch.randn(size, size, device=device)
    result = tensor @ tensor.T
    torch.cuda.synchronize()  # 等待GPU完成
    return time.time() - start

print(f"CPU时间: {benchmark('cpu'):.4f}s")
print(f"GPU时间: {benchmark('cuda'):.4f}s")
典型结果:GPU比CPU快50-100倍
三、自动微分:深度学习引擎核心
3.1 梯度计算基础
python
# 需要梯度的张量
x = torch.tensor(2.0, requires_grad=True)
y = torch.tensor(3.0, requires_grad=True)

# 计算函数
z = x**2 + y**3 + 5

# 自动求导
z.backward()

print(f"∂z/∂x = {x.grad}")  # 4.0 (2*x at x=2)
print(f"∂z/∂y = {y.grad}")  # 27.0 (3*y^2 at y=3)
3.2 计算图可视化

3.3 梯度累积机制
python
# 多次反向传播需要累积梯度
x = torch.ones(2, requires_grad=True)

for _ in range(3):
    y = x.sum()
    y.backward()  # 梯度累积
    print(f"梯度: {x.grad}")

# 清零梯度
x.grad.zero_()
四、自定义网络层:灵活构建模型
4.1 基础自定义层
python
import torch.nn as nn
import torch.nn.functional as F

class CustomLinear(nn.Module):
    def __init__(self, input_size, output_size):
        super().__init__()
        self.weight = nn.Parameter(torch.randn(output_size, input_size))
        self.bias = nn.Parameter(torch.randn(output_size))

    def forward(self, x):
        return F.linear(x, self.weight, self.bias)

# 测试自定义层
linear_layer = CustomLinear(5, 3)
x = torch.randn(10, 5)
output = linear_layer(x)
print(f"输入形状: {x.shape}, 输出形状: {output.shape}")
4.2 带激活函数的复合层
python
class ActivatedLinear(nn.Module):
    def __init__(self, input_size, output_size, activation='relu'):
        super().__init__()
        self.linear = nn.Linear(input_size, output_size)
        self.activation = self._get_activation(activation)

    def _get_activation(self, name):
        activations = {
            'relu': nn.ReLU(),
            'sigmoid': nn.Sigmoid(),
            'tanh': nn.Tanh(),
            'leaky_relu': nn.LeakyReLU(0.1)
        }
        return activations.get(name, nn.Identity())

    def forward(self, x):
        return self.activation(self.linear(x))

# 测试不同激活函数
for act in ['relu', 'sigmoid', 'tanh']:
    layer = ActivatedLinear(10, 5, act)
    x = torch.randn(3, 10)
    print(f"{act}: {layer(x)}")
五、实战:端到端回归任务
5.1 数据准备与模型定义
python
# 生成合成数据
X = torch.linspace(-1, 1, 100).reshape(-1, 1)
y = X**2 + 0.2*torch.randn(X.shape)

# 定义网络
class RegressionNet(nn.Module):
    def __init__(self):
        super().__init__()
        self.hidden = ActivatedLinear(1, 20, 'relu')
        self.output = nn.Linear(20, 1)

    def forward(self, x):
        x = self.hidden(x)
        return self.output(x)

model = RegressionNet()
5.2 训练循环与梯度监控
python
optimizer = torch.optim.Adam(model.parameters(), lr=0.01)
criterion = nn.MSELoss()

losses = []
for epoch in range(100):
    # 前向传播
    pred = model(X)
    loss = criterion(pred, y)

    # 反向传播
    optimizer.zero_grad()
    loss.backward()

    # 监控梯度
    total_norm = 0
    for p in model.parameters():
        if p.grad is not None:
            param_norm = p.grad.norm(2)
            total_norm += param_norm.item() ** 2
    total_norm = total_norm ** 0.5

    # 参数更新
    optimizer.step()

    losses.append(loss.item())
    if epoch % 20 == 0:
        print(f"Epoch {epoch}, Loss: {loss.item():.4f}, Grad Norm: {total_norm:.4f}")
5.3 可视化训练过程
python
import matplotlib.pyplot as plt

plt.figure(figsize=(12, 4))

# 损失曲线
plt.subplot(121)
plt.plot(losses)
plt.title('Training Loss')
plt.xlabel('Epoch')

# 拟合结果
plt.subplot(122)
plt.scatter(X, y, label='True')
plt.plot(X, model(X).detach().numpy(), 'r-', label='Predicted')
plt.legend()
plt.show()
六、动态图高级特性
6.1 条件控制流
python
class DynamicNet(nn.Module):
    def __init__(self):
        super().__init__()
        self.layers = nn.ModuleList([
            nn.Linear(10, 20),
            nn.Linear(20, 20),
            nn.Linear(20, 5)
        ])

    def forward(self, x, use_shortcut=False):
        # 动态条件执行
        if use_shortcut and x.shape[1] == 10:
            return self.layers[2](x)  # 跳过中间层

        for i, layer in enumerate(self.layers):
            x = layer(x)
            if i < len(self.layers) - 1:
                x = F.relu(x)
        return x

# 测试动态前向传播
model = DynamicNet()
x = torch.randn(4, 10)
print("正常路径:", model(x).shape)
print("快捷路径:", model(x, use_shortcut=True).shape)
6.2 循环动态网络
python
class RecurrentNet(nn.Module):
    def __init__(self, input_size, hidden_size):
        super().__init__()
        self.rnn_cell = nn.RNNCell(input_size, hidden_size)
        self.hidden_size = hidden_size

    def forward(self, x, n_steps=None):
        # 动态步数控制
        if n_steps is None:
            n_steps = x.shape[1]

        hiddens = []
        hx = torch.zeros(x.shape[0], self.hidden_size)

        for t in range(n_steps):
            hx = self.rnn_cell(x[:, t, :], hx)
            hiddens.append(hx)

        return torch.stack(hiddens, dim=1)

# 测试可变长度输入
model = RecurrentNet(5, 8)
x = torch.randn(3, 10, 5)  # (batch, seq, features)
output = model(x, n_steps=7)  # 只处理前7步
print(f"输出形状: {output.shape}")  # torch.Size([3, 7, 8])
七、性能优化技巧
7.1 内存优化
python
# 使用梯度检查点(时间换空间)
from torch.utils.checkpoint import checkpoint

class MemoryEfficientNet(nn.Module):
    def forward(self, x):
        # 分段计算,减少峰值内存
        x = checkpoint(self.layer1, x)
        x = checkpoint(self.layer2, x)
        return self.layer3(x)
7.2 计算优化
python
# 混合精度训练
from torch.cuda.amp import autocast, GradScaler

scaler = GradScaler()

with autocast():
    output = model(input)
    loss = criterion(output, target)

scaler.scale(loss).backward()
scaler.step(optimizer)
scaler.update()
7.3 分布式训练
python
# 多GPU数据并行
model = nn.DataParallel(model)

# 分布式数据并行
model = nn.parallel.DistributedDataParallel(
    model,
    device_ids=[local_rank],
    output_device=local_rank
)
八、调试与可视化工具
8.1 梯度流向分析
python
# 注册钩子监控梯度
def gradient_hook(grad):
    print(f"梯度形状: {grad.shape}, 均值: {grad.mean().item():.6f}")
    return grad

for name, param in model.named_parameters():
    if 'weight' in name:
        param.register_hook(gradient_hook)
8.2 计算图可视化
python
# 导出计算图
from torchviz import make_dot

x = torch.randn(1, 10, requires_grad=True)
y = model(x)
make_dot(y, params=dict(model.named_parameters())).render("model", format="png")
8.3 使用TensorBoard监控
python
from torch.utils.tensorboard import SummaryWriter

writer = SummaryWriter()

for epoch in range(100):
    # ... 训练代码
    writer.add_scalar('Loss/train', loss.item(), epoch)
    writer.add_histogram('weights', model.layer1.weight, epoch)

writer.close()
结语:动态图的无限可能
当你在PyTorch中体验到即时的梯度反馈和灵活的网络设计,深度学习开发将变得前所未有的直观和高效。这种"所想即所得"的编程体验,正是创新算法诞生的最佳土壤。
关键能力提升:
- 张量操作:GPU加速的数值计算基础
- 自动微分:深度学习核心引擎的深度掌握
- 自定义网络:打破预制模型的限制
- 动态图编程:实现真正灵活的算法设计
进阶学习路径:

现在运行你的第一个PyTorch程序,体验动态图的魅力:
python
import torch
x = torch.tensor(1.0, requires_grad=True)
y = x**2
y.backward()
print(f"梯度值: {x.grad}")  # 这就是自动微分的力量!
附录:PyTorch速查表
| 功能 | 代码示例 |
|---|---|
| 张量创建 | torch.tensor([1,2,3], device='cuda') |
| 自动微分 | x.backward() |
| 自定义层 | class MyLayer(nn.Module): |
| 模型保存 | torch.save(model.state_dict(), 'model.pth') |
| 模型加载 | model.load_state_dict(torch.load('model.pth')) |
| 梯度清零 | optimizer.zero_grad() |
| 设备转移 | tensor.cuda() / tensor.cpu() |
| 形状变换 | tensor.view() / tensor.reshape() |
| 矩阵运算 | torch.mm() / @ |
| 梯度裁剪 | torch.nn.utils.clip_grad_norm_() |