当你踏入 Rust 嵌入式开发的世界,控制 ESP32 单片机点亮 LED 灯并让它规律闪烁,就像与硬件进行的第一次对话。
在上一篇 rust 嵌入式esp23 《hello word》的的基础上
修改代码
添加引脚配置
rs
use esp_hal::{
    clock::CpuClock,
    gpio::{Output, OutputConfig, Level}, //新增的引脚配置
    main,
    time::{Duration, Instant},
};
声明引脚变量
config:默认的输出引脚配置
Level::High:高电压输出
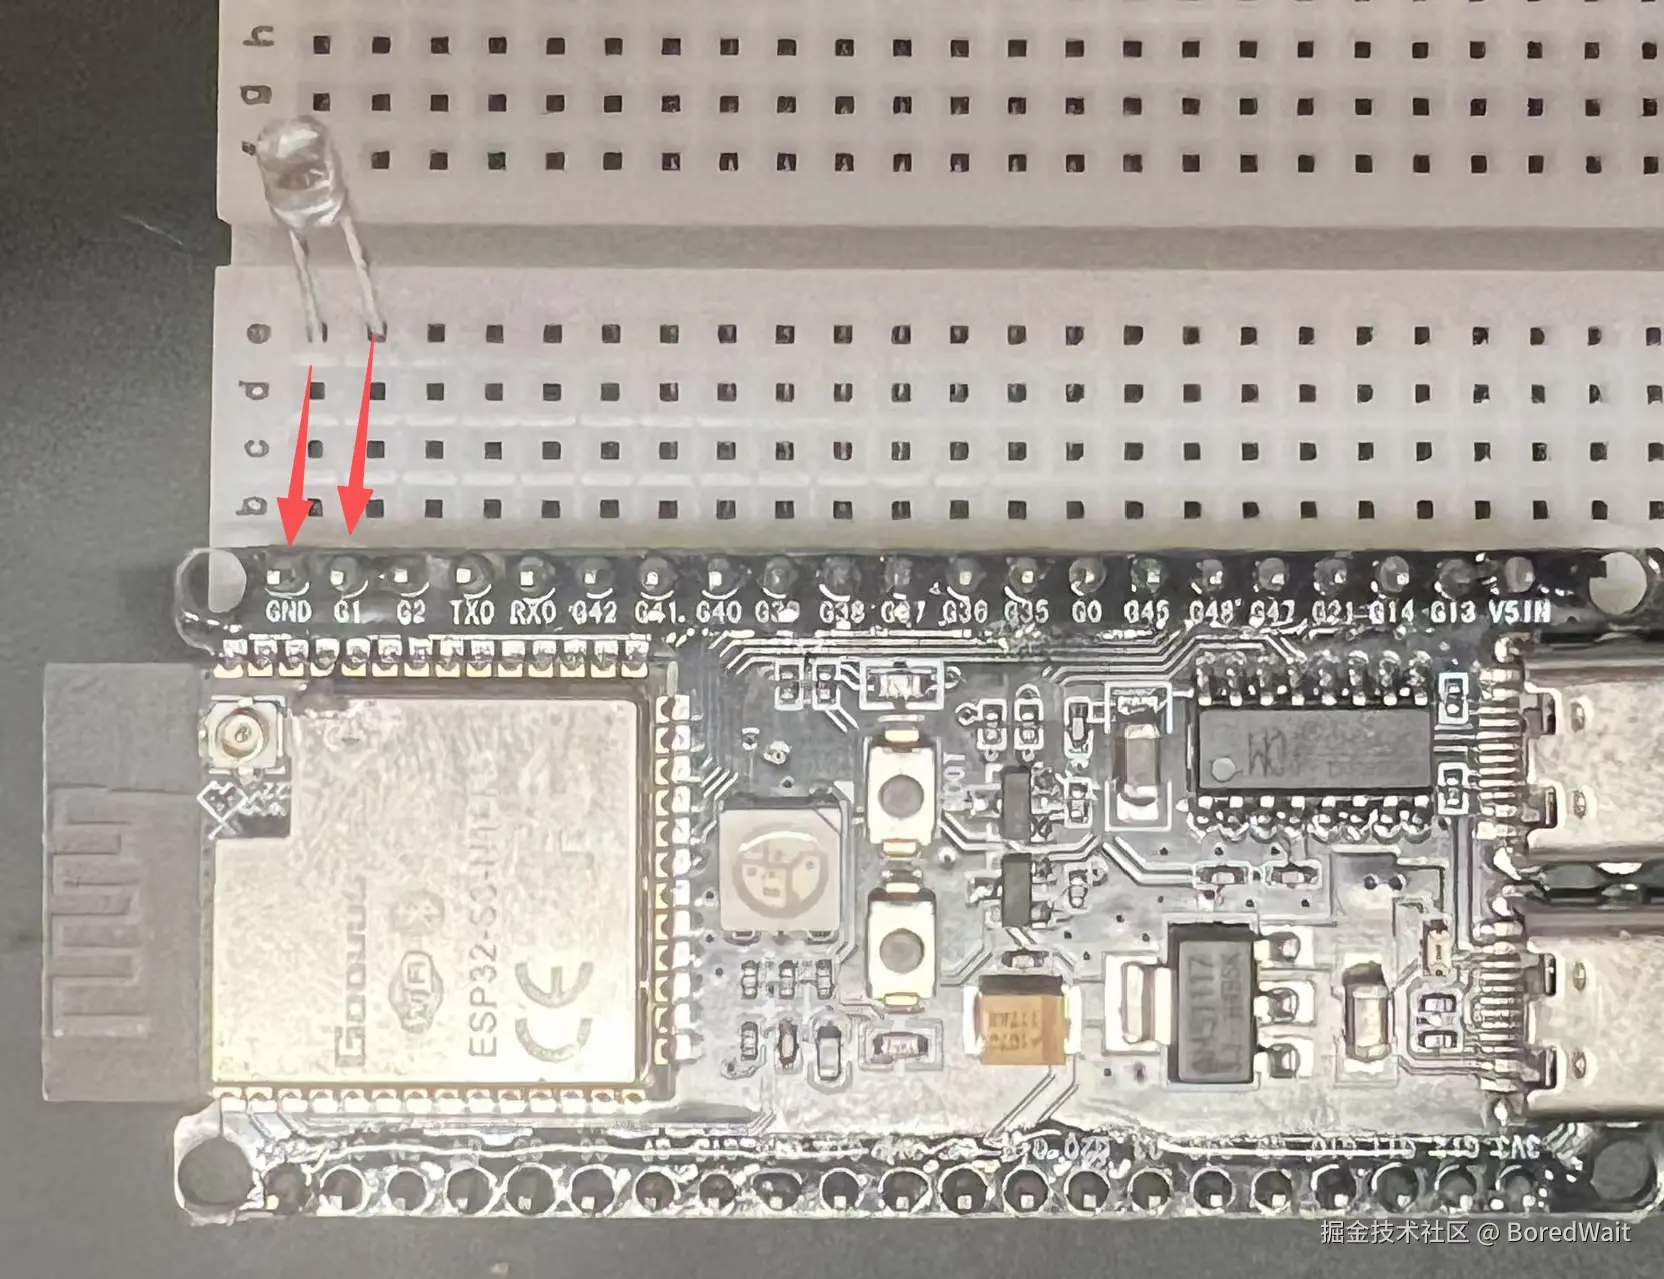
peripherals.GPIO1:绑定G1引脚
js
    ...
    let peripherals = esp_hal::init(config);
    let config = OutputConfig::default(); //声明输出引脚默认配置
    let mut led = Output::new(peripherals.GPIO1, Level::High, config); //引脚绑定G1 并配置高电压输出
    ...
控制led灯闪烁
led.toggle():实现高低电压的切换
rs
 ...
    loop {
        led.toggle();//切换电压输出模式
        let delay_start = Instant::now();
  ...
完整代码
rs
#![no_std]
#![no_main]
#![deny(
clippy::mem_forget,
reason = "mem::forget is generally not safe to do with esp_hal types, especially those \
holding buffers for the duration of a data transfer."
)]
use esp_hal::{
clock::CpuClock,
gpio::{Output, OutputConfig, Level},
main,
time::{Duration, Instant},
};
use esp_println::println;
#[panic_handler]
fn panic(_: &core::panic::PanicInfo) -> ! {
loop {
println!("111 world!");
println!("Panic!");
}
}
// This creates a default app-descriptor required by the esp-idf bootloader.
// For more information see: <https://docs.espressif.com/projects/esp-idf/en/stable/esp32/api-reference/system/app_image_format.html#application-description>
esp_bootloader_esp_idf::esp_app_desc!();
#[main]
fn main() -> ! {
// generator version: 0.5.0
let config = esp_hal::Config::default().with_cpu_clock(CpuClock::max());
let peripherals = esp_hal::init(config);
let config = OutputConfig::default();
let mut led = Output::new(peripherals.GPIO1, Level::High, config);
loop {
led.toggle();
let delay_start = Instant::now();
while delay_start.elapsed() < Duration::from_millis(500) {}
}
// for inspiration have a look at the examples at https://github.com/esp-rs/esp-hal/tree/esp-hal-v1.0.0-rc.0/examples/src/bin
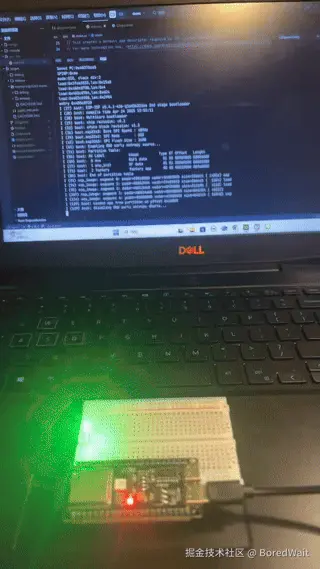
}硬件连接
将led灯的一个角接G1,另外一个接GND(接地)
usb连接电脑
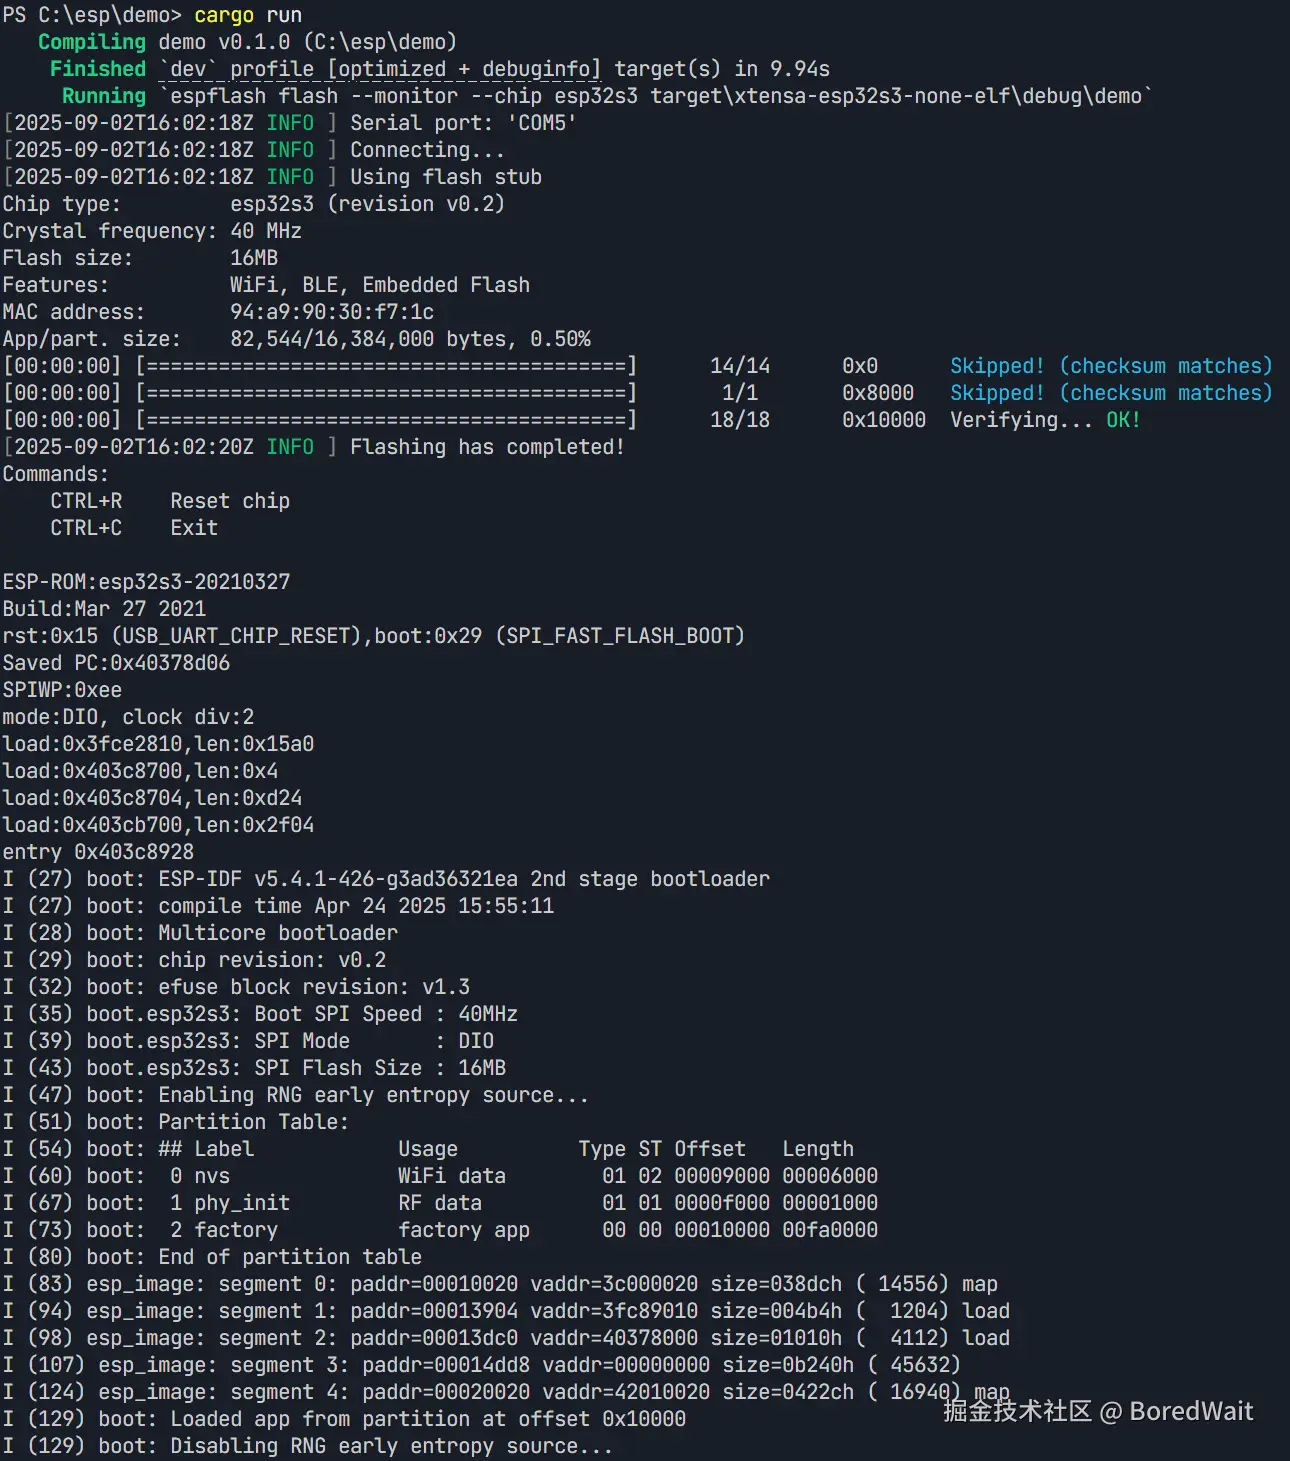
运行命令
shell
cargo run 结果如图所示
成果展示