目标
用 Twitter 登录 - 拿到用户 Twitter 账户信息(如用户名、头像、粉丝数等)。
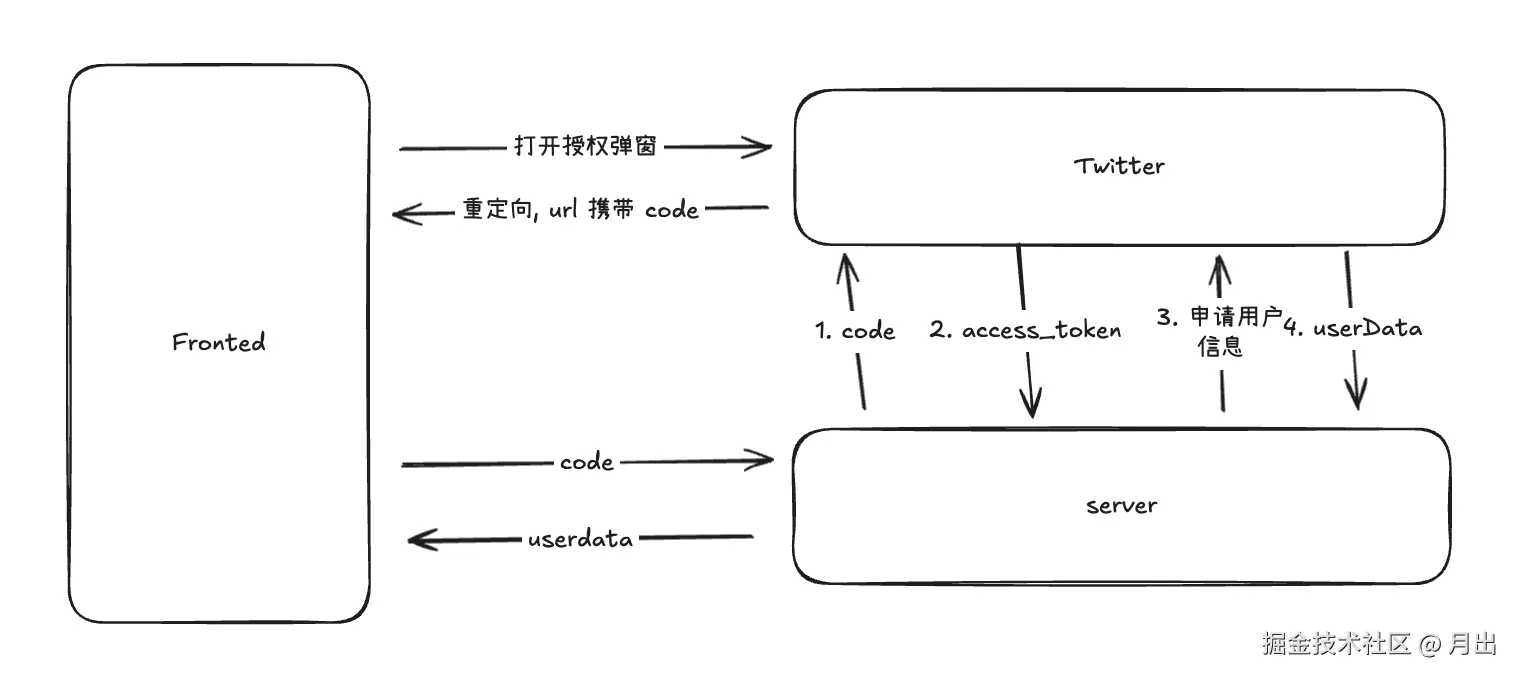
核心流程
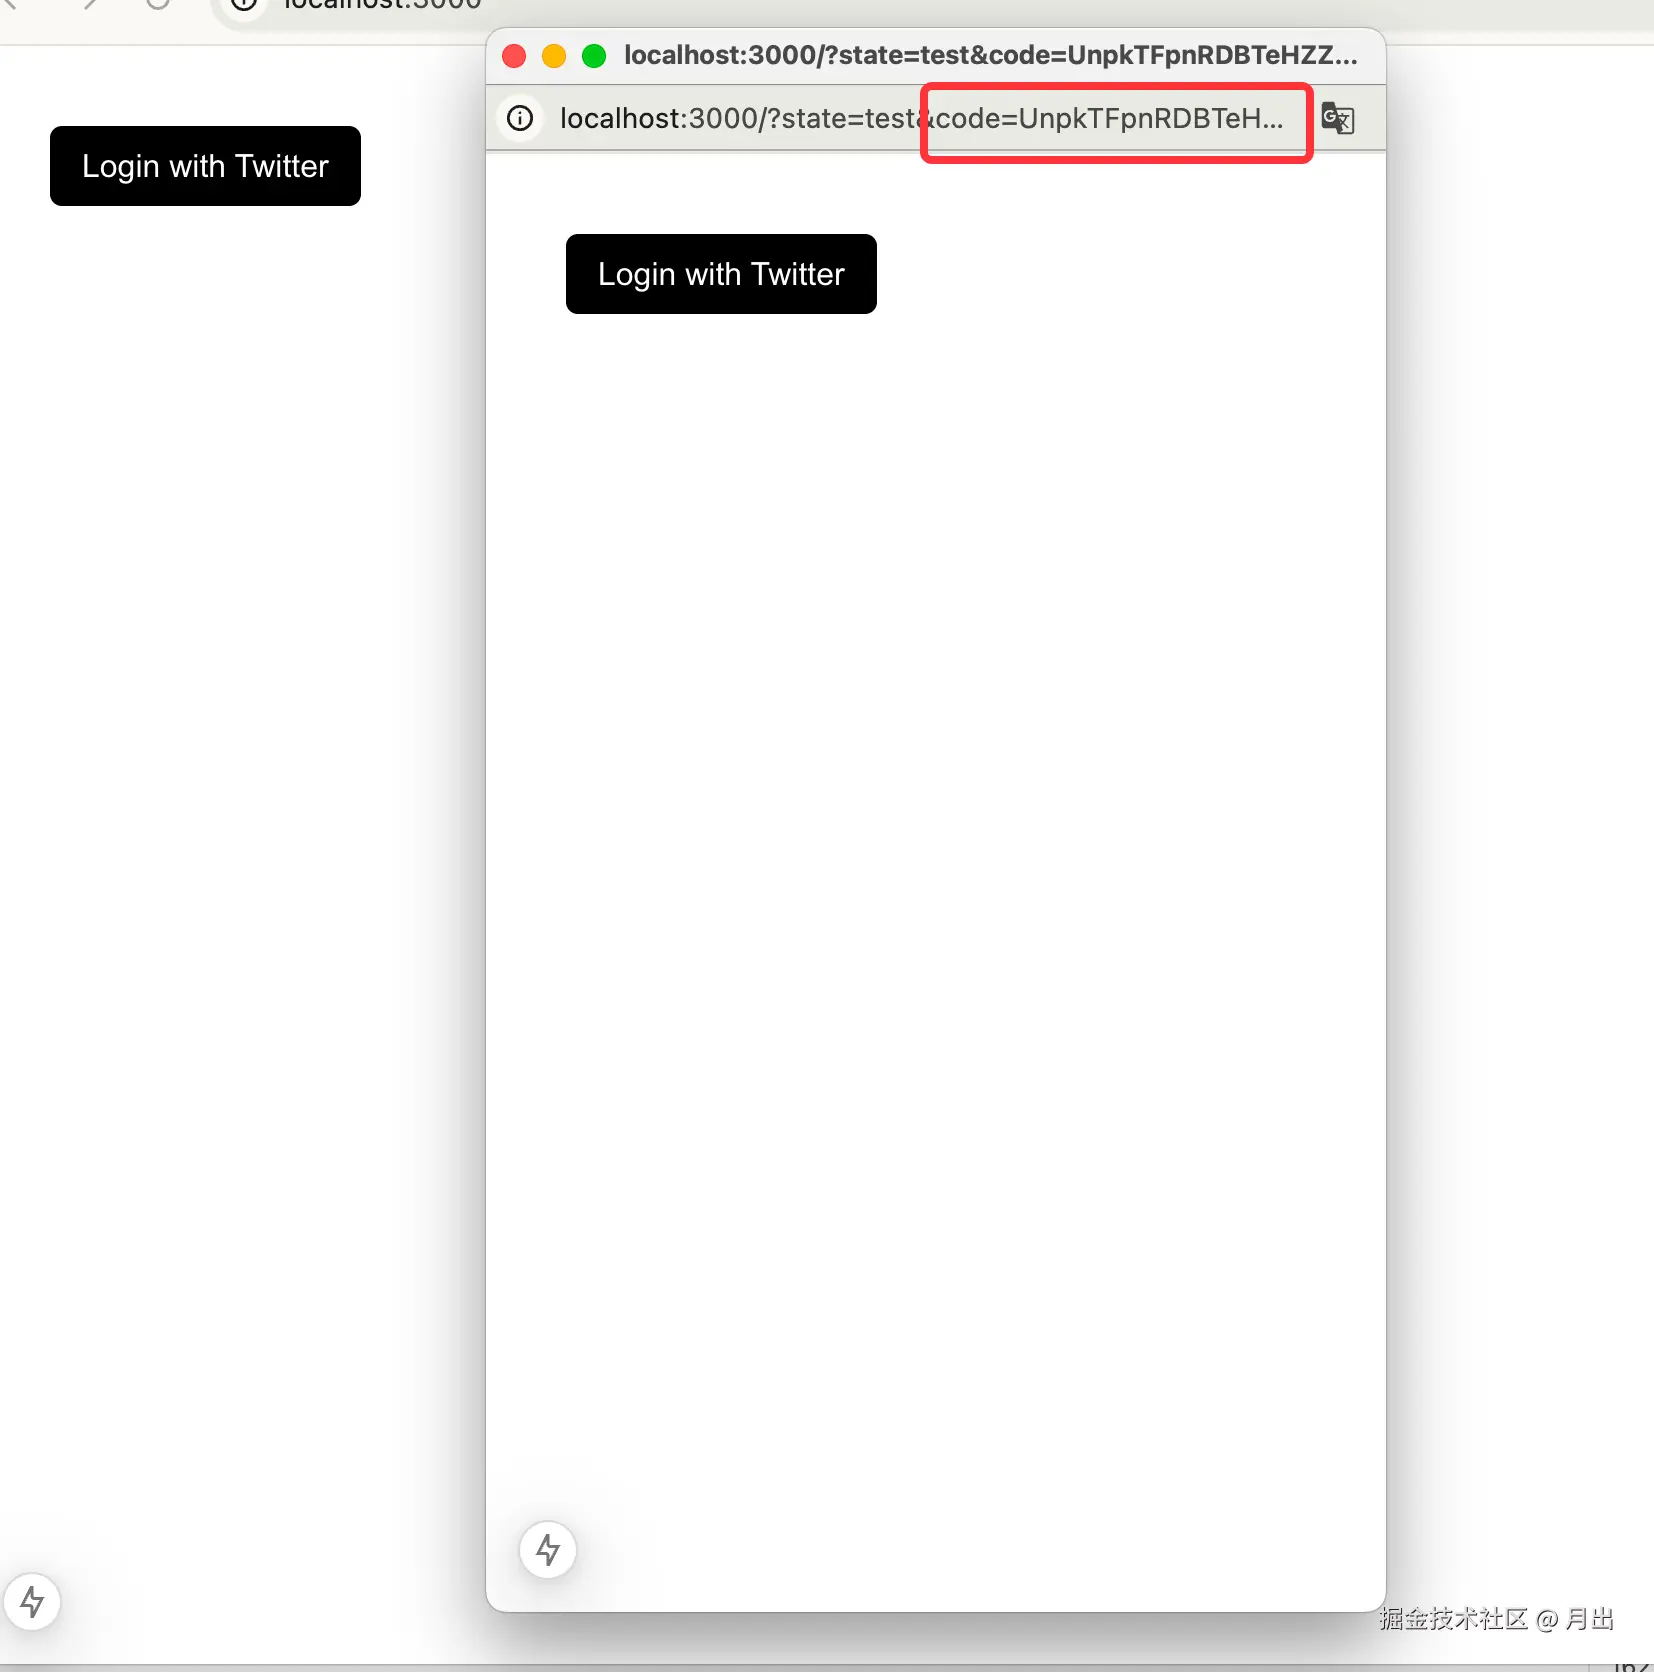
- 前端"发起授权",跳转至 Twitter 授权页面,授权通过后重定向回前端页面,并在 URL 中携带 授权码(code) 。
- 前端将授权码发送给后端,后端通过授权码调用 Twitter API 换取 访问令牌(access_token) ,再使用 access_token 调用用户信息接口,最终返回用户数据给前端。
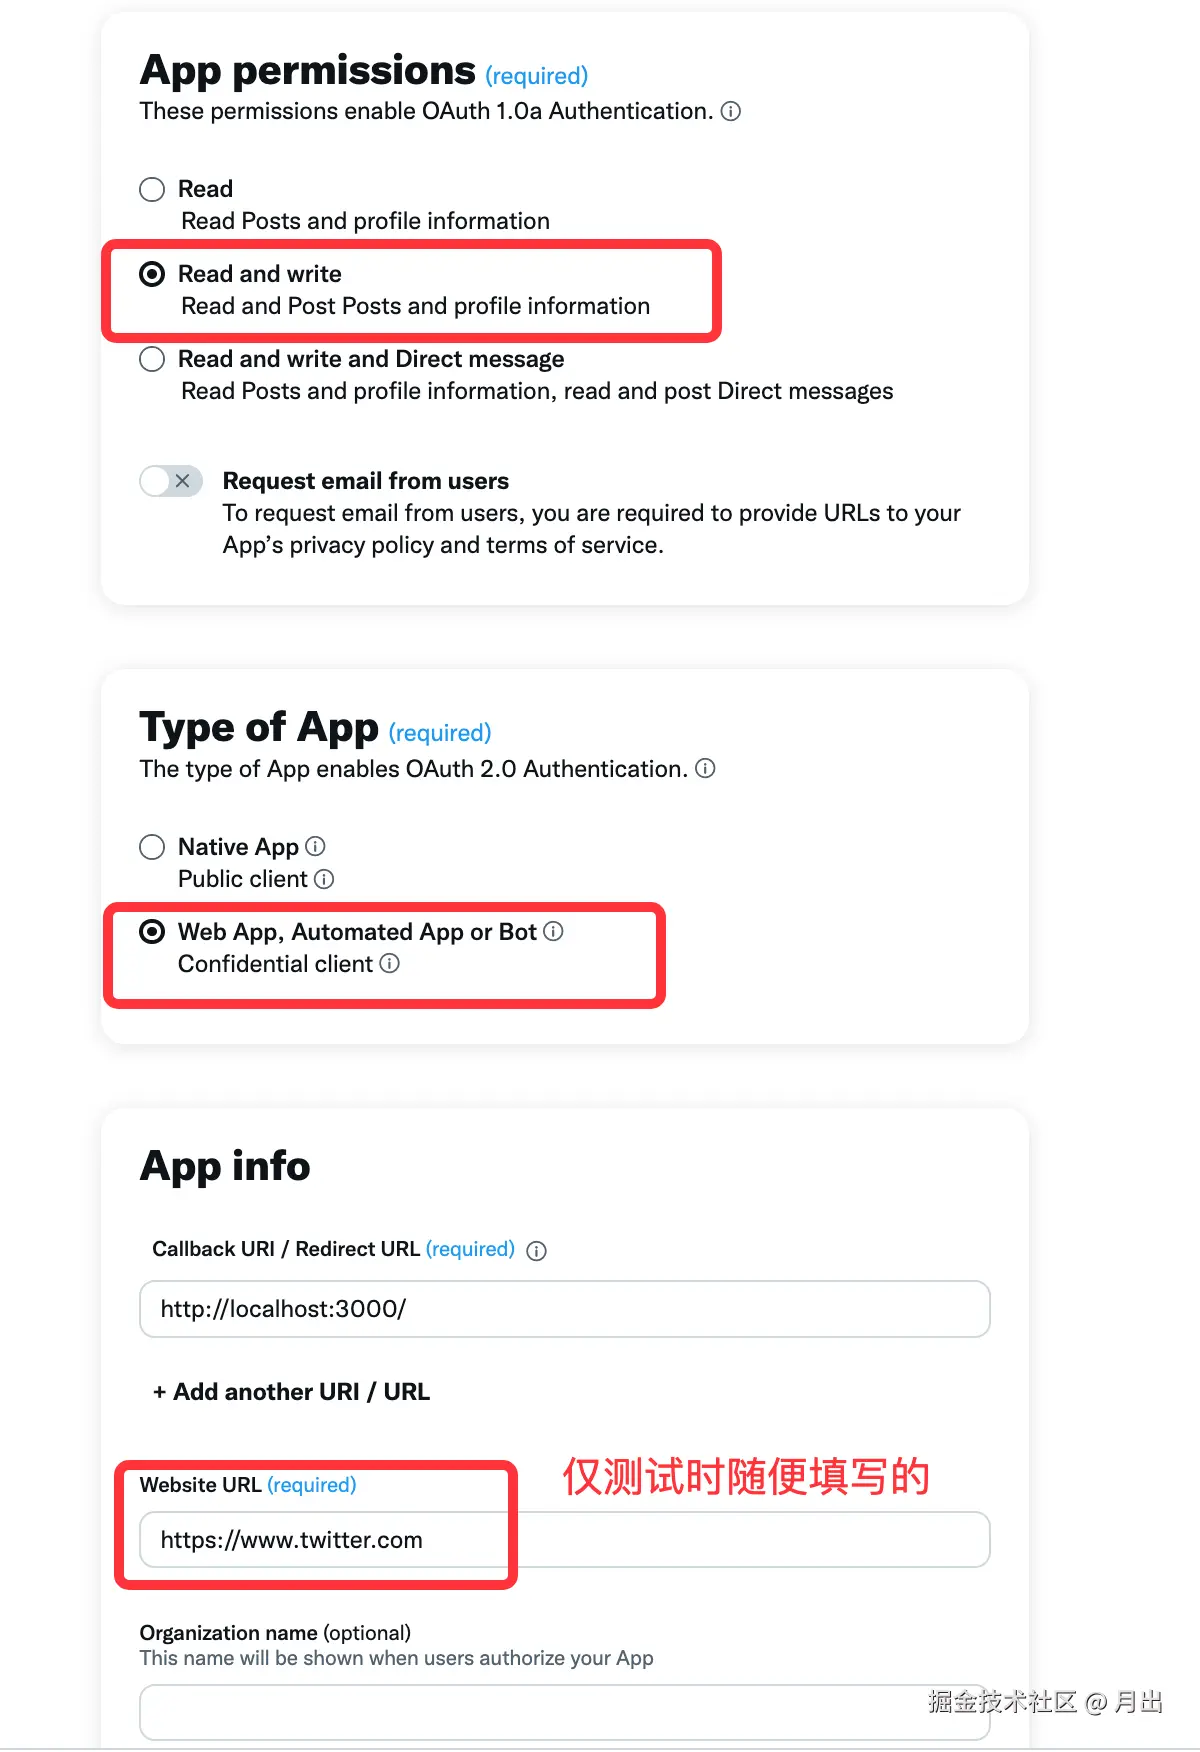
配置应用(Twitter Developer)
-
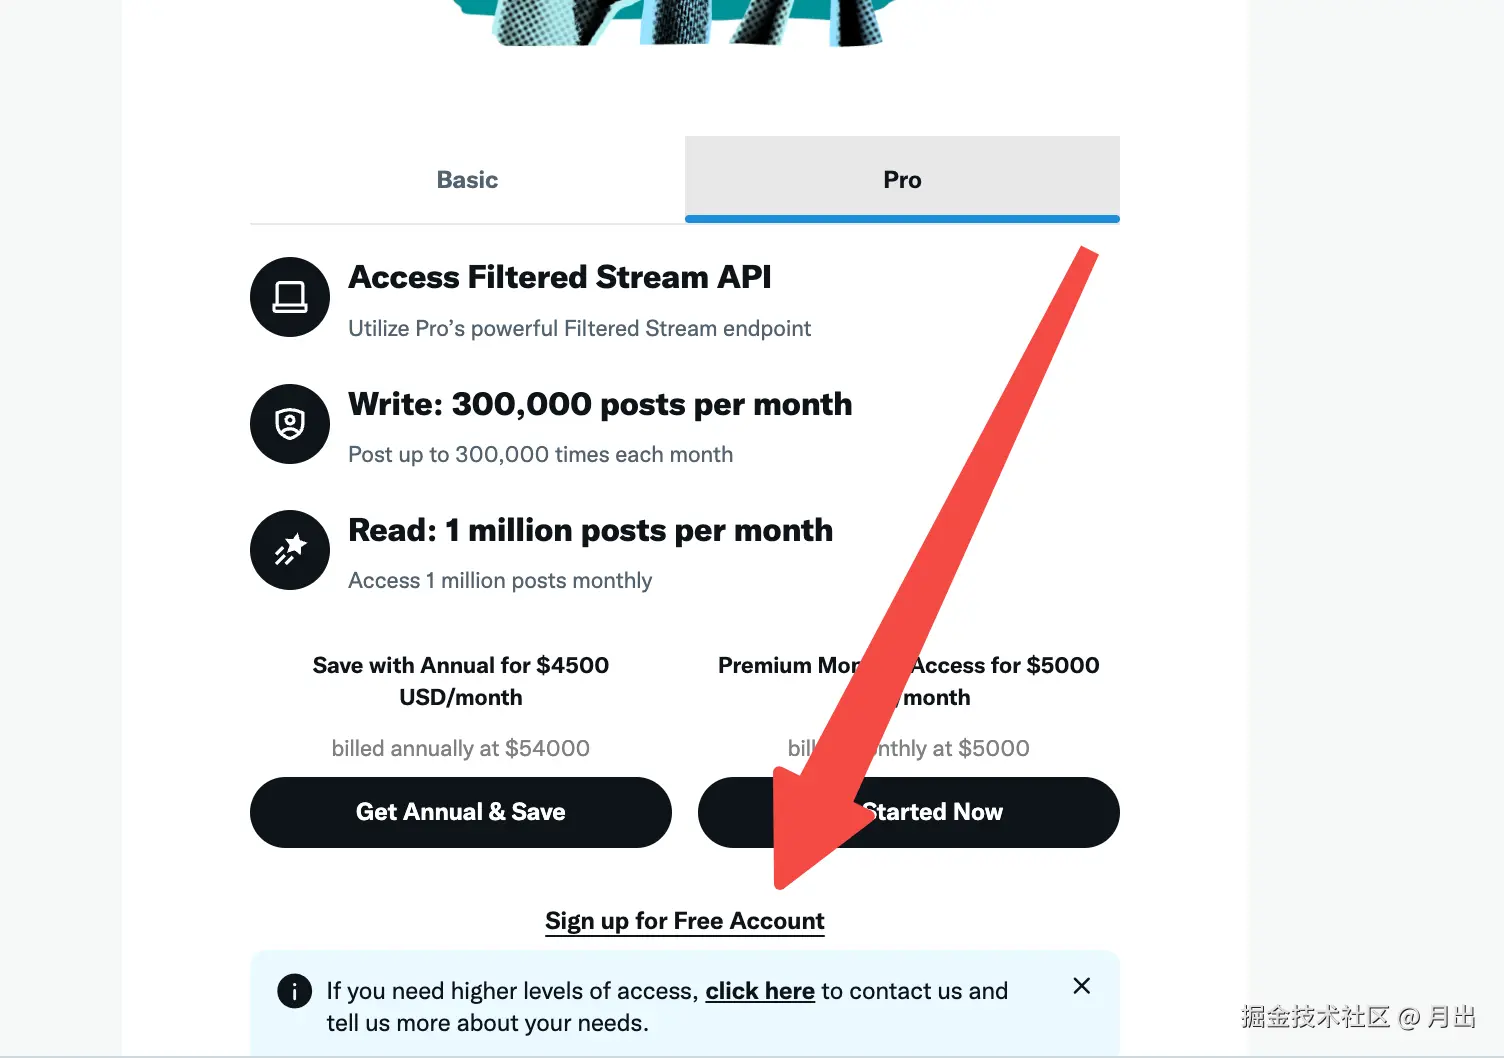
申请一个twitter的开发这账号: developer.x.com/en/portal/p...
-
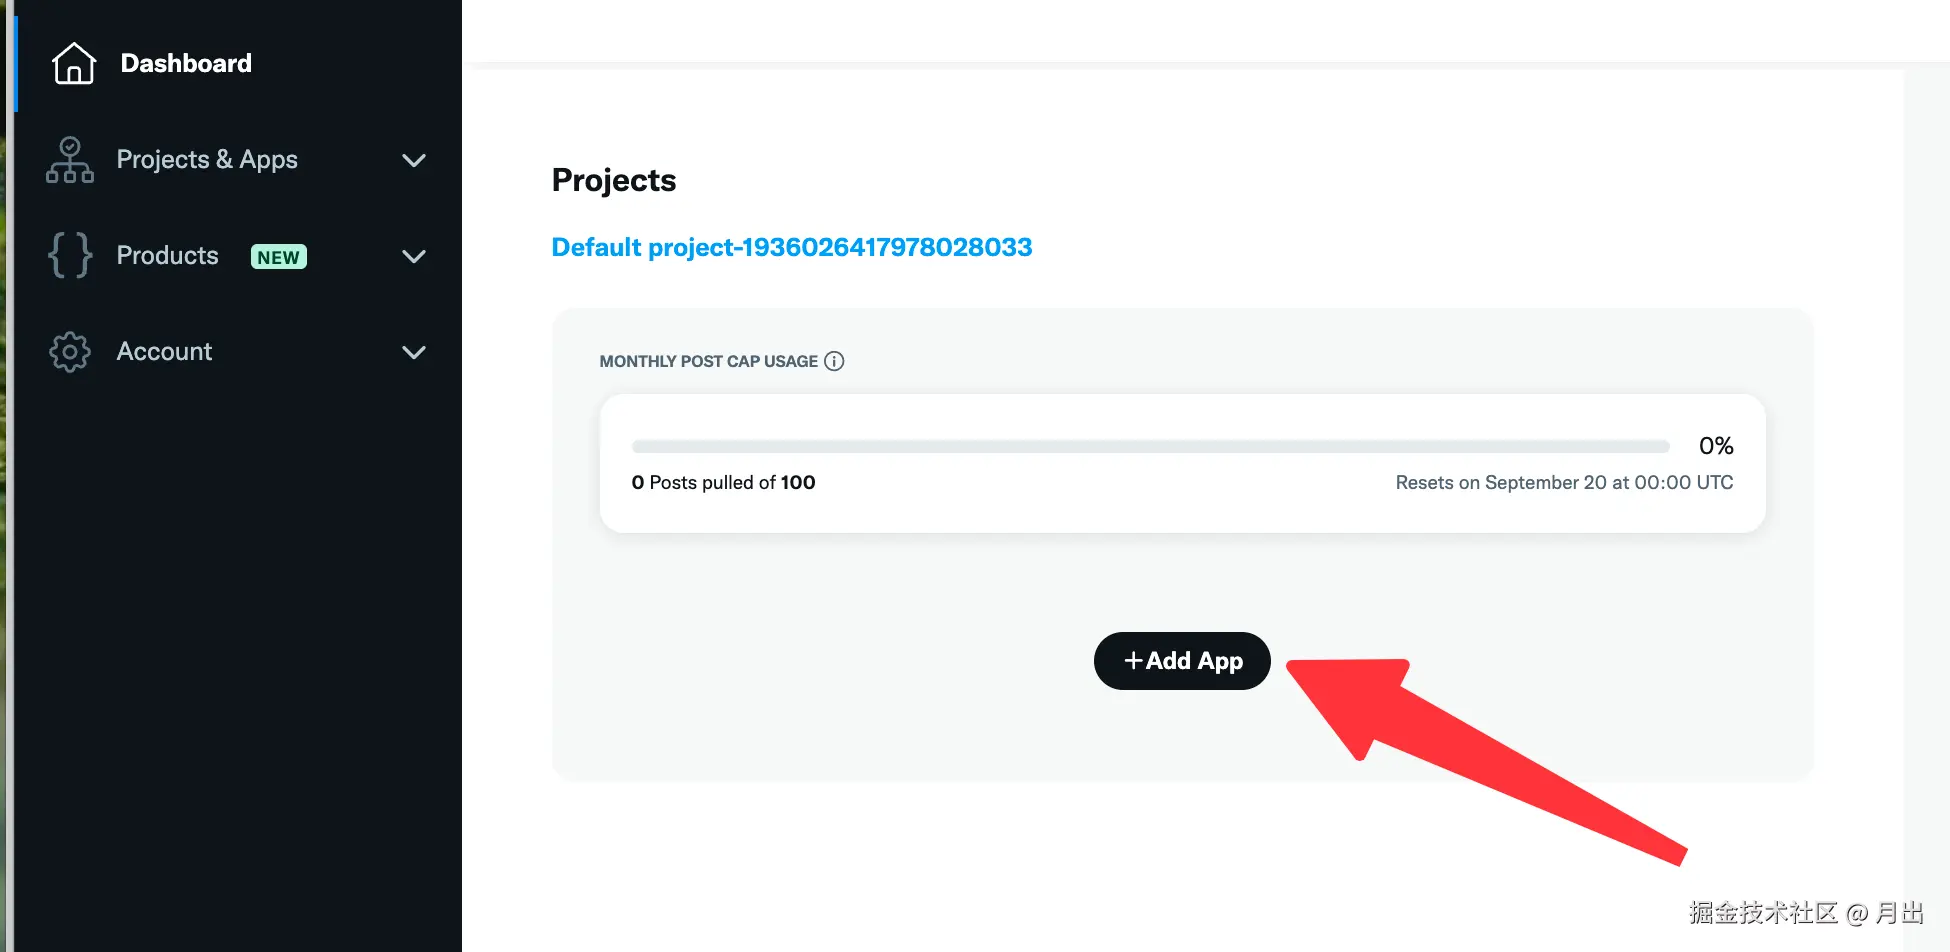
进入 Dashboard ,创建一个新的 App
-
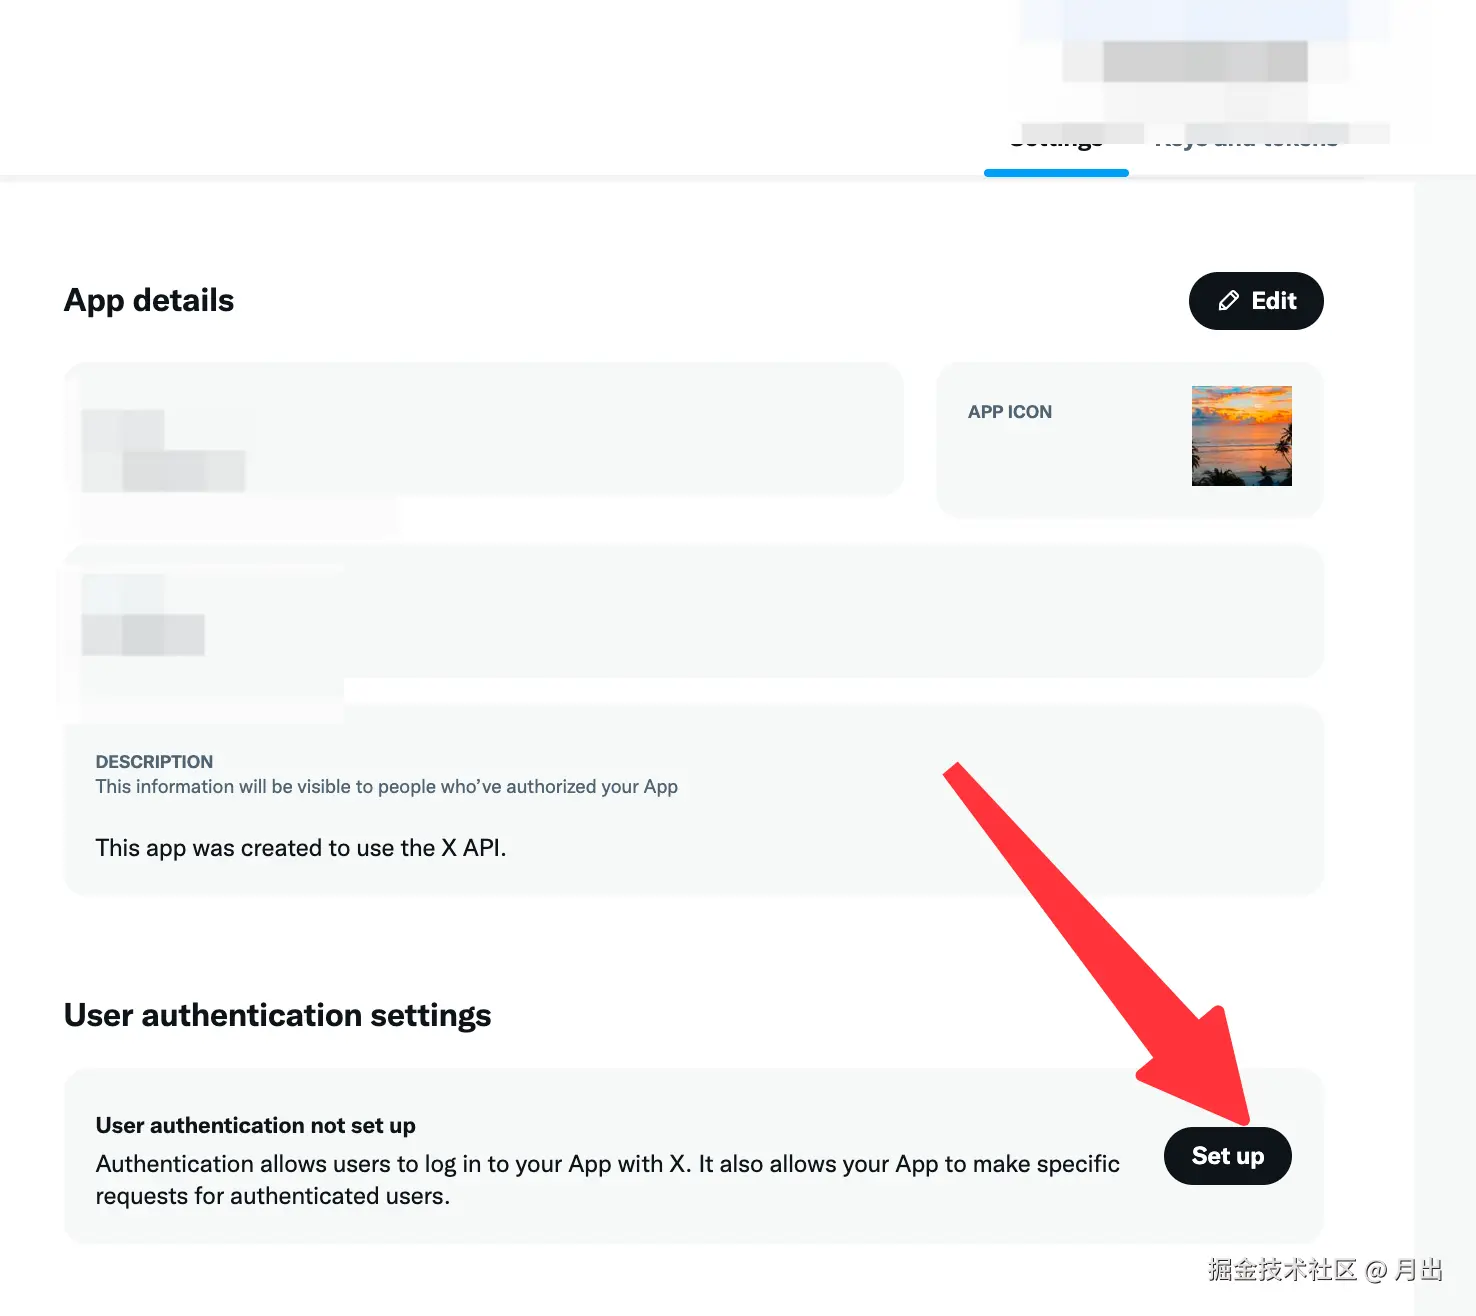
记录应用的 client_id(不是 API Key)并在 App 的 Callback URLs 添加你的 redirect_uri (前端常用的开发环境 localhost 也是可以直接使用的,但注意必须一致,哪怕是最后的 / )
前端获取授权码(code)
- 打开 twitter 授权弹窗
typescript
'use client';

export const LoginButton = () => {

	const handleLogin = () => {
	  // 上面步骤中的clientId 与 url
		const client_id = '';
		const redirect_uri = '<http://localhost:3000/>';
		const scope = 'users.read tweet.read';
		const state = 'test';

		const twitterUrl = `https://twitter.com/i/oauth2/authorize?response_type=code
		&client_id=${client_id}
		&redirect_uri=${encodeURIComponent(redirect_uri)}
		&scope=${encodeURIComponent(scope)}
		&state=${state}
		&code_challenge=challenge&code_challenge_method=plain`;

		const popup = window.open(twitterUrl, 'twitter', 'width=450,height=730');
	}

	return (
		<button
			className="bg-black text-white px-4 py-2 rounded-md"
			onClick={() => { handleLogin() }}
		>
			Login with Twitter
		</button>
	)
}- 获取 code
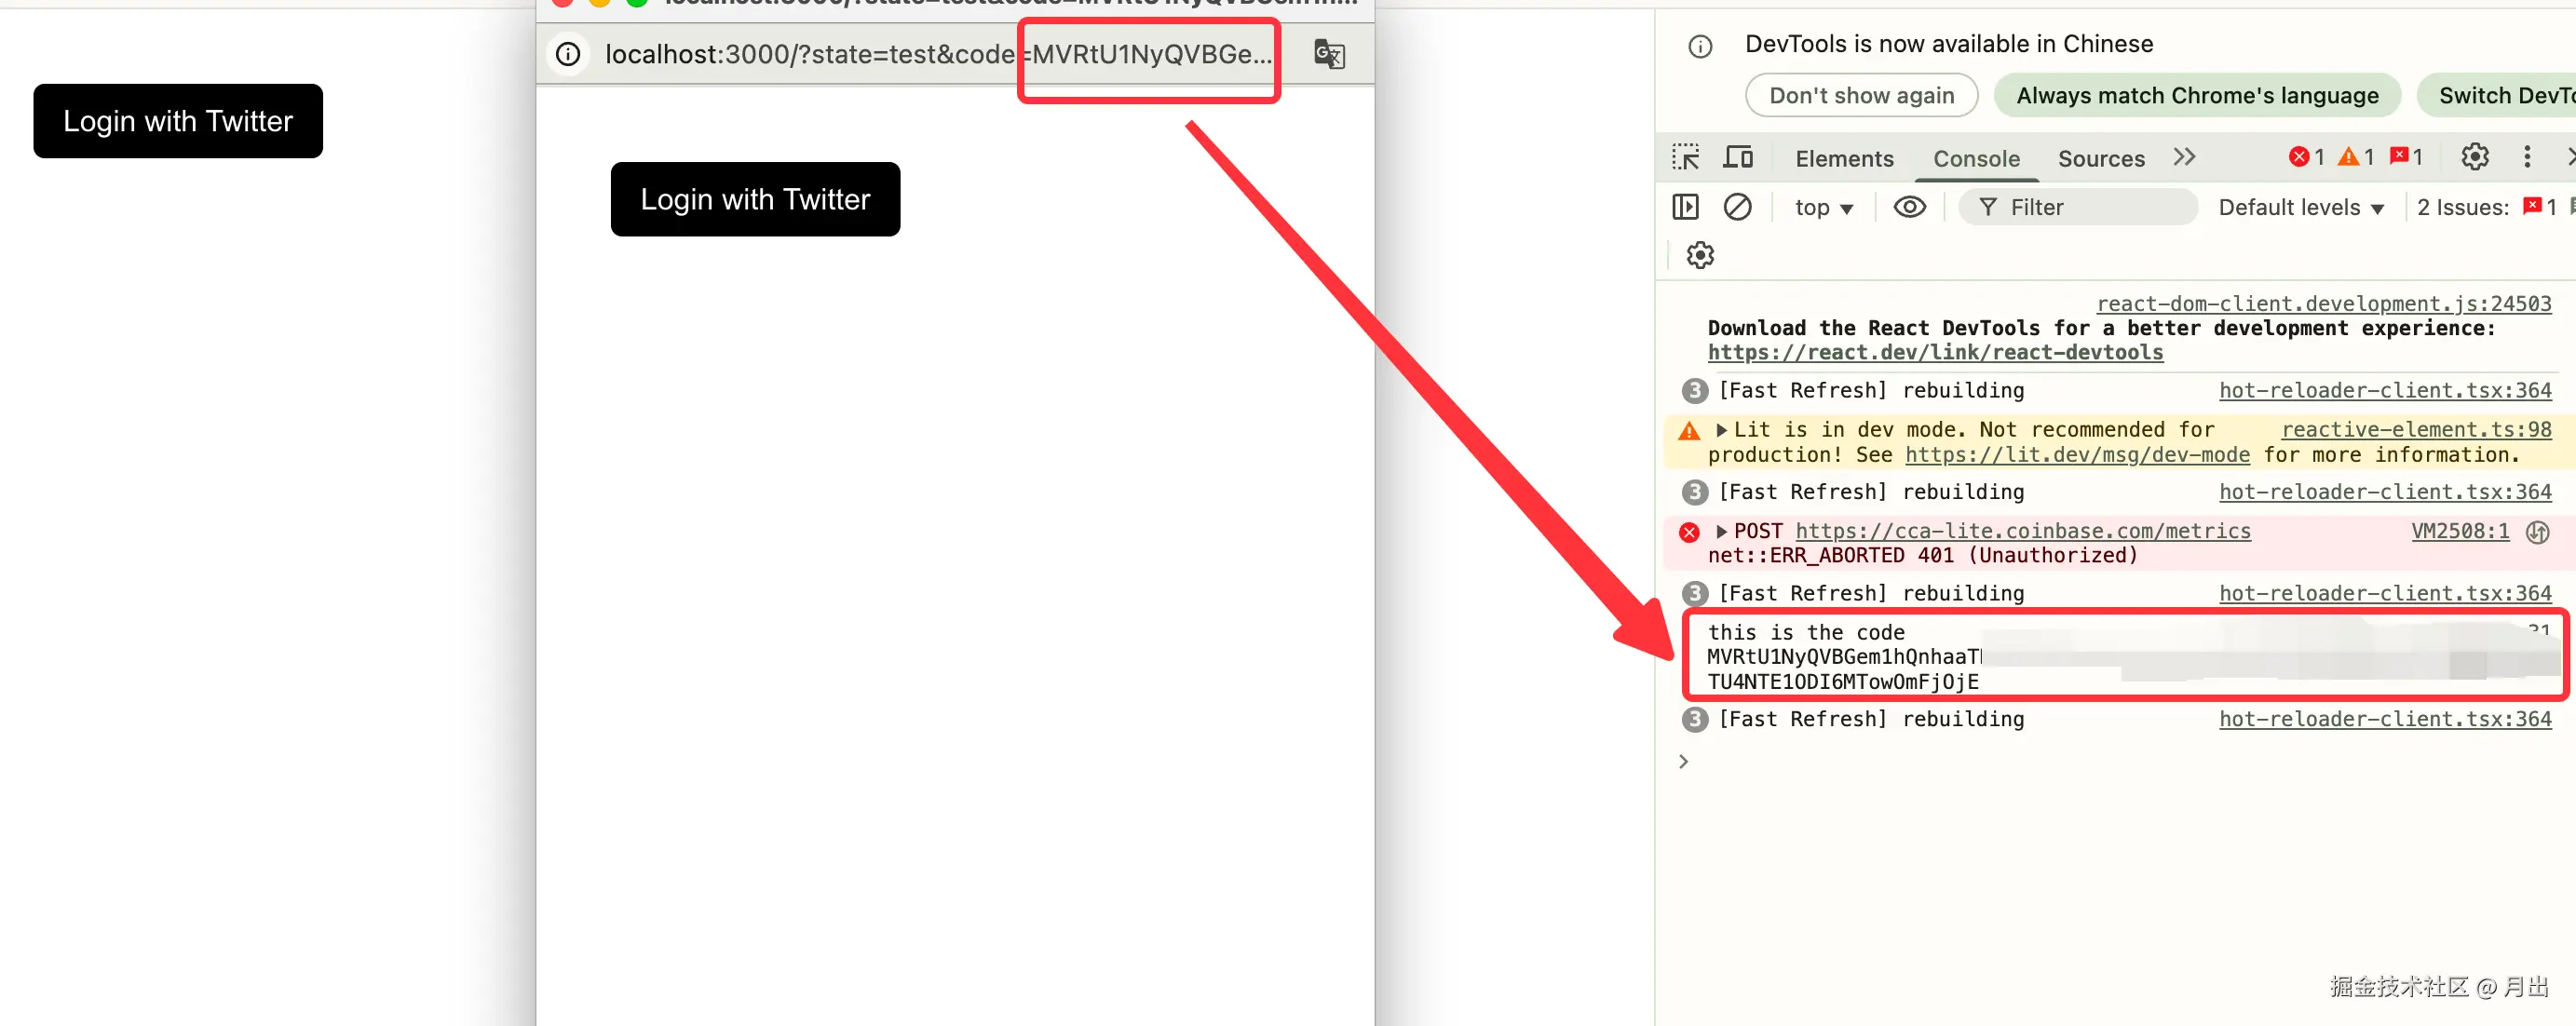
授权后,重定向回指定url的页面时,url中已经带上了对应的code, 但这个数据在弹窗中,而不在原页面,我们可以使用 PostMessage 在窗口间传递数据
现在我们成功跨窗口收到了对应的code数据(别忘了关闭弹窗)
typescript
'use client';
import { useEffect } from "react";
import { LoginButton } from "./components/LoginButton";
import { useSearchParams } from "next/navigation";
import { getUserInfo } from "./api/twitter";

export default function Home() {
  const params = useSearchParams();

  useEffect(() => {
    // 从url中获取code
    const code = params.get('code');

    if (code) {
      // 发送消息给父窗口
      window.opener.postMessage({
        type: 'twitter_login_success',
        data: code
      }, '<http://localhost:3000/>');

      // 关闭当前窗口
      window.close();
    }
  }, []);

  useEffect(() => {
    const allowedOrigin = '<http://localhost:3000>';

    // 监听消息
    const onMessage = async (event: MessageEvent) => {
      if (event.origin !== allowedOrigin) return;

      const data = event.data;
      if (!data || typeof data !== 'object') return;
      if (data.type !== 'twitter_login_success') return;

      // 从消息中获取code
      const code = data.data;

      // 发送 token 给服务端获取用户信息
      const userInfo = await getUserInfo(code);

      console.log("this is the user info", userInfo);
    };

    window.addEventListener('message', onMessage);
    return () => window.removeEventListener('message', onMessage);
  }, []);

  return (
    <div className="p-10">
      <LoginButton />
    </div>
  );
}
服务端获取用户信息
(由于不是很会后端,所以让ai 生成了一份接口,测试部署下来是可行, 有不足之处还请各位大佬多多见谅)
用授权码换取 access_token
- 请求:POST api.twitter.com/2/oauth2/to...
typescript
	// 1. 换取 access_token
	const tokenRes = await fetch('<https://api.twitter.com/2/oauth2/token>', {
		method: 'POST',
		headers: {
			'Content-Type': 'application/x-www-form-urlencoded',
			Authorization: `Basic ${basic}`,
		},
		body: tokenParams.toString(),
	});
	if (!tokenRes.ok) return json({ error: 'Twitter token error' }, env, 400);
	const token = (await tokenRes.json()) as { access_token?: string };
	if (!token.access_token) return json({ error: 'No access token received' }, env, 400);
获取用户信息
- 请求:GET [api.twitter.com/2/users/me?...}
typescript
	// 2. 拉取用户信息
	const fields =
		'created_at,description,entities,id,location,name,pinned_tweet_id,profile_image_url,protected,public_metrics,url,username,verified,withheld';
	const meRes = await fetch(`https://api.twitter.com/2/users/me?user.fields=${fields}`, {
		headers: { Authorization: `Bearer ${token.access_token}` },
	});
	if (!meRes.ok) return json({ error: 'Twitter profile error' }, env, 400);
	const me = (await meRes.json()) as { data?: any; errors?: any[] };
	if (!me.data) return json({ error: 'No user data received' }, env, 400);

	// 3. 返回用户对象
	const user = {
		avatar: me.data.profile_image_url,
		username: me.data.username,
		name: me.data.name,
		id: me.data.id,
		verified: me.data.verified,
		followers_count: me.data.public_metrics?.followers_count ?? 0,
		following_count: me.data.public_metrics?.following_count ?? 0,
		tweet_count: me.data.public_metrics?.tweet_count ?? 0,
		created_at: me.data.created_at,
		description: me.data.description,
		location: me.data.location,
	};