如何通过 Gitee API 上传文件到指定仓库

首先,进入Gitee官方API文档:https://gitee.com/api/v5/swagger#/postV5ReposOwnerRepoContentsPath,找到仓库 --> 新建文件接口 -->点击申请授权
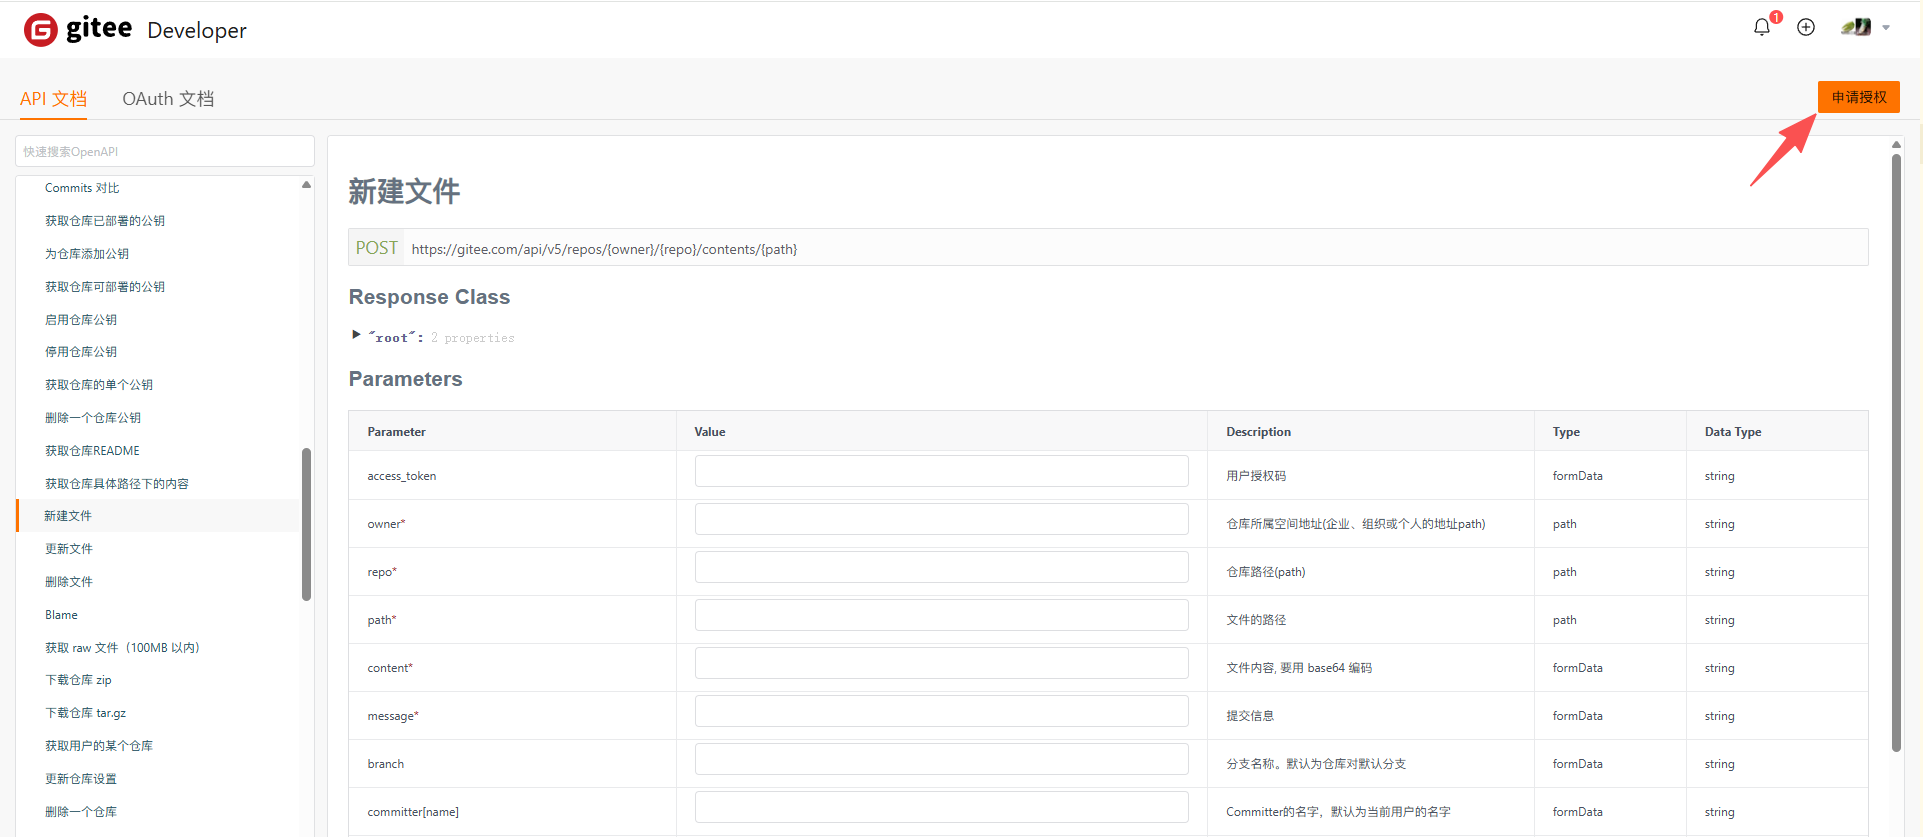
找到接口 https://gitee.com/api/v5/repos/{owner}/{repo}/contents/{path}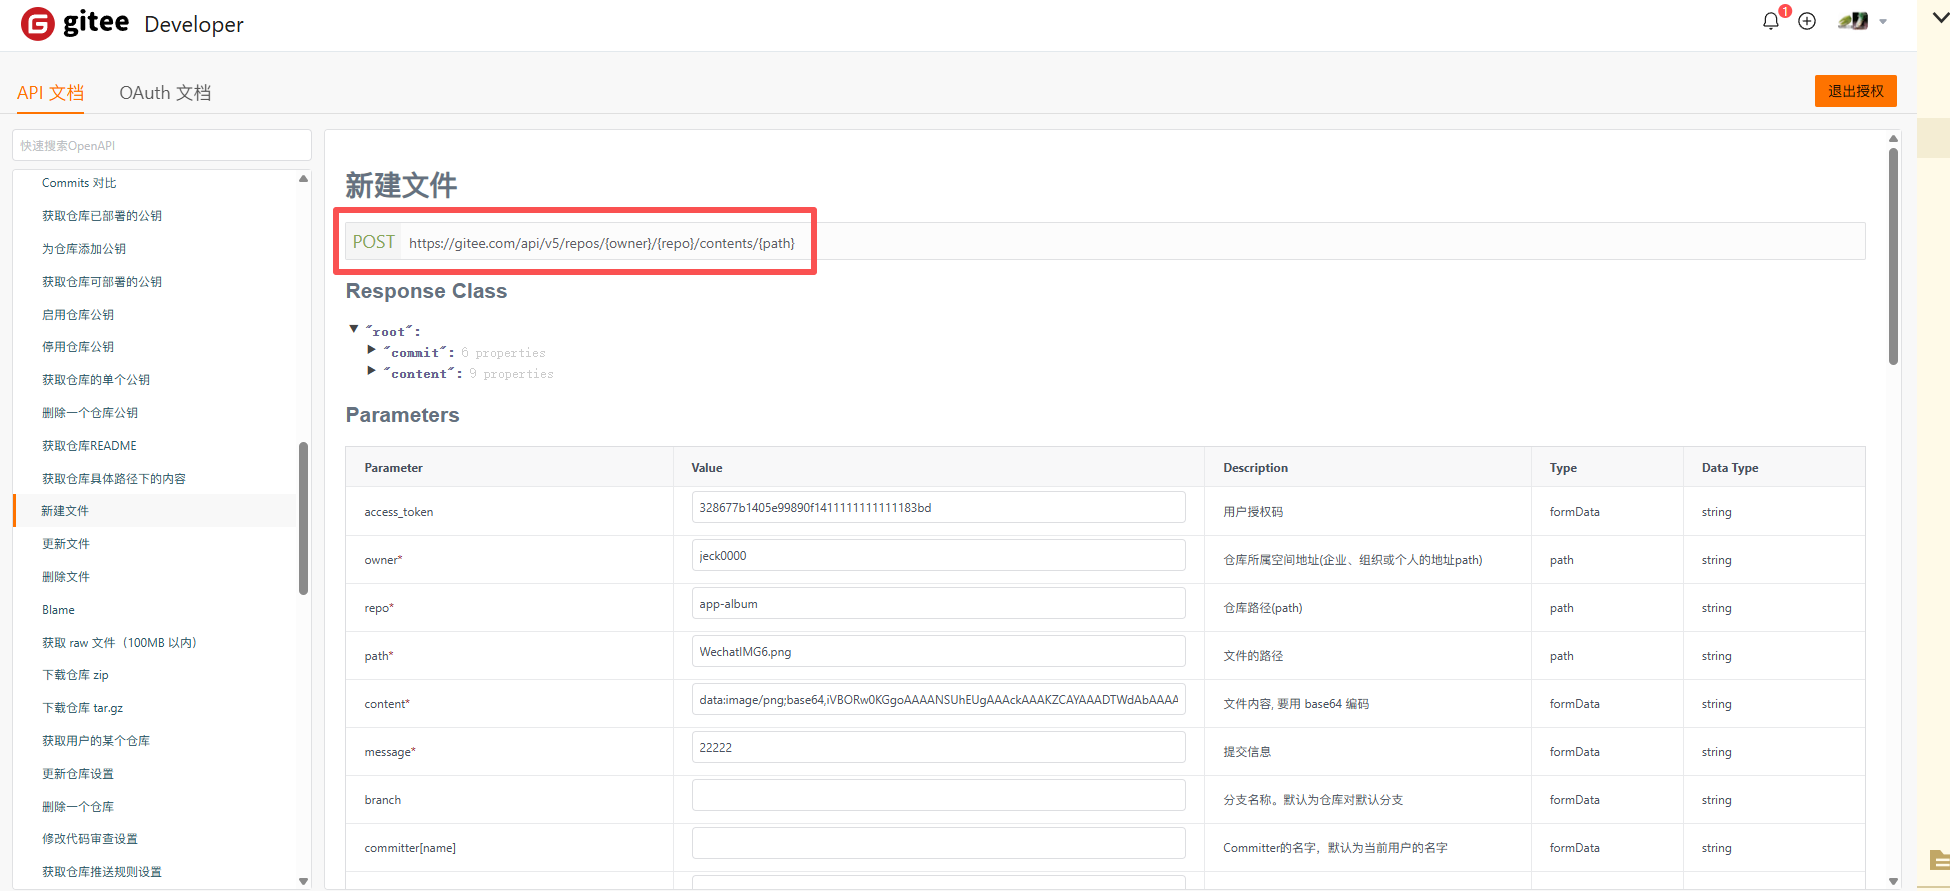
填写基本信息 access_token,owner,repo,path,content,message,branch 等必要参数信息。
| 参数 | Value |
|---|---|
| access_token | 你自己申请的授权 key |
| owner | 用户名称 |
| repo | 项目名称 |
| path | 文件名称或者图片名称 |
| content | 必须是base64的字符串 |
| message | 随便写 |
| branch | 分支名称 |

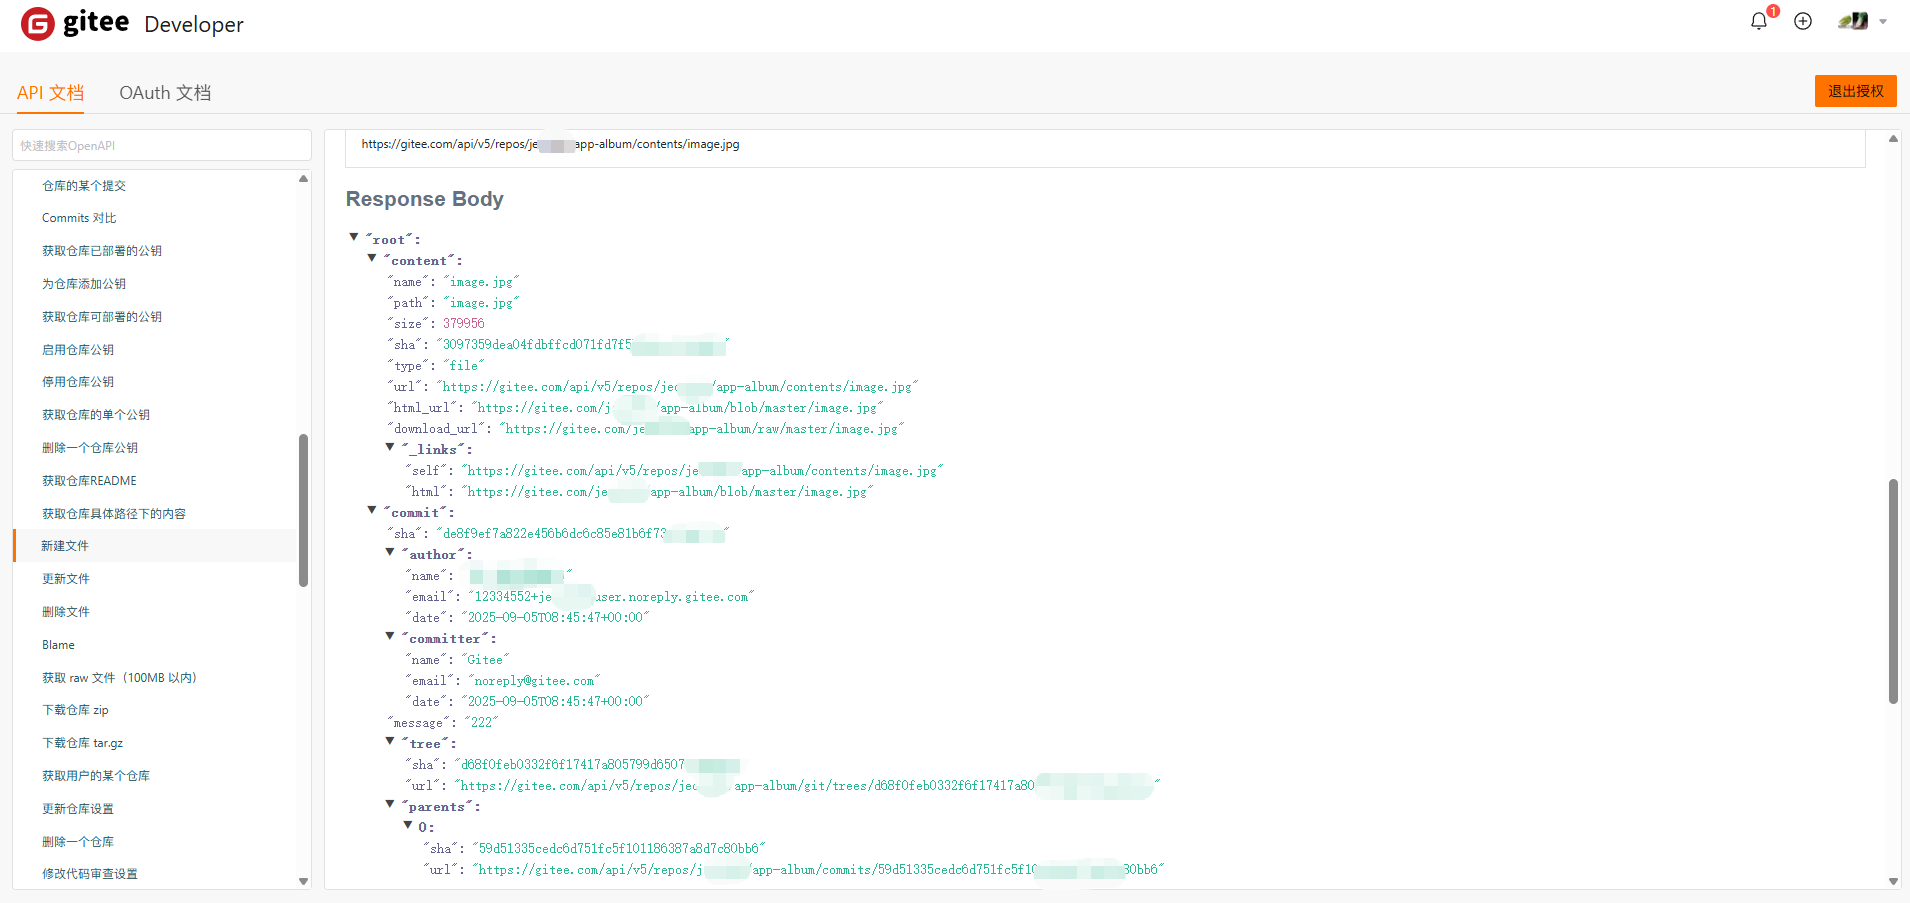
点击左下方【测试】按钮,查看是否成功
( 如果出现404 或者其他 就是没成功)
下方是测试成功的
代码逻辑
<template>
  <view class="container">
    <button @click="chooseMedia">选择图片/视频</button>
    <button @click="uploadToGitee" :disabled="!selectedFiles.length">上传到Gitee</button>

    <view class="preview-container">
      <view v-for="(file, index) in selectedFiles" :key="index" class="preview-item">
        <image v-if="file.type === 'image'" :src="file.path" mode="aspectFit" class="preview-image"></image>
        <video v-else-if="file.type === 'video'" :src="file.path" controls class="preview-video"></video>
        <text class="file-name">{{ file.name }}</text>
      </view>
    </view>

    <view v-if="uploading" class="upload-status">
      上传中... {{ uploadedCount }}/{{ selectedFiles.length }}
    </view>
    <view v-if="uploadError" class="error-message">
      上传失败: {{ uploadError }}
    </view>
    <view v-if="uploadSuccess" class="success-message">
      上传成功!
    </view>
  </view>
</template>

<script>
export default {
  data() {
    return {
      selectedFiles: [],
      uploading: false,
      uploadedCount: 0,
      uploadError: null,
      uploadSuccess: false,
      // Gitee 配置 - 替换为你的实际信息
      giteeConfig: {
        owner: 'your-gitee-username',
        repo: 'your-repo-name',
        branch: 'master',
        token: 'your-gitee-access-token'
      }
    }
  },
  methods: {
    async chooseMedia() {
      try {
        const res = await uni.chooseMedia({
          count: 9,
          mediaType: ['image', 'video'],
          sourceType: ['album', 'camera'],
          maxDuration: 30,
          camera: 'back'
        })

        this.selectedFiles = res.tempFiles.map(file => ({
          path: file.tempFilePath,
          name: this.generateFileName(file.tempFilePath),
          type: file.fileType === 'image' ? 'image' : 'video',
          file: file
        }))

        this.uploadError = null
        this.uploadSuccess = false
      } catch (err) {
        uni.showToast({
          title: '选择文件失败',
          icon: 'none'
        })
        console.error(err)
      }
    },

    generateFileName(filePath) {
      const ext = filePath.split('.').pop()
      const timestamp = new Date().getTime()
      const random = Math.floor(Math.random() * 10000)
      return `file_${timestamp}_${random}.${ext}`
    },

    async uploadToGitee() {
      if (!this.selectedFiles.length) return

      this.uploading = true
      this.uploadedCount = 0
      this.uploadError = null
      this.uploadSuccess = false

      try {
        for (const file of this.selectedFiles) {
          await this.uploadSingleFile(file)
          this.uploadedCount++
        }

        this.uploadSuccess = true
        uni.showToast({
          title: '全部文件上传成功',
          icon: 'success'
        })
      } catch (err) {
        this.uploadError = err.message || '上传失败'
        uni.showToast({
          title: '上传失败',
          icon: 'none'
        })
        console.error(err)
      } finally {
        this.uploading = false
      }
    },

    async uploadSingleFile(file) {
      // 1. 读取文件内容
      const fileContent = await this.readFileAsBase64(file.path)

      // 2. 准备上传数据
      const uploadData = {
        access_token: this.giteeConfig.token,
        content: fileContent,
        message: `Upload ${file.name}`,
        branch: this.giteeConfig.branch
      }

      // 3. 调用 Gitee API 上传文件
      const response = await uni.request({
        url: `https://gitee.com/api/v5/repos/${this.giteeConfig.owner}/${this.giteeConfig.repo}/contents/${file.name}`,
        method: 'POST',
        data: uploadData,
        header: {
          'Content-Type': 'application/json;charset=UTF-8'
        }
      })

      if (response[1].statusCode !== 201) {
        throw new Error(response[1].data.message || '上传失败')
      }

      return response[1].data
    },

    readFileAsBase64(filePath) {
      return new Promise((resolve, reject) => {
        plus.io.resolveLocalFileSystemURL(filePath, entry => {
          entry.file(file => {
            const reader = new plus.io.FileReader()
            reader.onloadend = evt => {
              // 移除 data URL 前缀
              const base64 = evt.target.result.split(',')[1]
              resolve(base64)
            }
            reader.onerror = reject
            reader.readAsDataURL(file)
          }, reject)
        }, reject)
      })
    }
  }
}
</script>

<style>
.container {
  padding: 20px;
}

button {
  margin: 10px 0;
  padding: 10px;
  background-color: #007AFF;
  color: white;
  border-radius: 5px;
}

button:disabled {
  background-color: #cccccc;
}

.preview-container {
  margin-top: 20px;
}

.preview-item {
  margin-bottom: 15px;
  border: 1px solid #eee;
  padding: 10px;
  border-radius: 5px;
}

.preview-image {
  width: 100%;
  height: 200px;
}

.preview-video {
  width: 100%;
  height: 200px;
}

.file-name {
  display: block;
  margin-top: 5px;
  font-size: 12px;
  color: #666;
}

.upload-status, .error-message, .success-message {
  margin-top: 10px;
  padding: 10px;
  border-radius: 5px;
}

.upload-status {
  background-color: #f0f0f0;
}

.error-message {
  background-color: #ffeeee;
  color: #ff0000;
}

.success-message {
  background-color: #eeffee;
  color: #00aa00;
}
</style>