OpenAPI Specification 系列笔记 III
postman 的学习差不多也到了下一个阶段了,感觉目前对 swagger 的学习也到了一种自己比较满足的情况,所以差不多改一改这个笔记就可以放出来了
上两篇笔记分别是:
https://github.com/GoldenaArcher/open-api-3.x-study
security
security 这块就是验证相关的内容了,同样比较常见的做法,是在 components → securitySchemes 中定义对应的验证,随后在 security 中调用
security 可以在 root 下和 path 下使用,分别对应全局验证以及 API 验证,下面是登陆验证和 Bearer Token 的实现:
yaml
security:
  - BearerAuth: []
  - BasicAuth: []

components:
  securitySchemes:
    BasicAuth:
      type: http
      scheme: basic
    BearerAuth:
      type: http
      scheme: bearer
      bearerFormat: JWT
因为 security 是在 root 下使用的,所以 swagger 默认会要求全局验证:
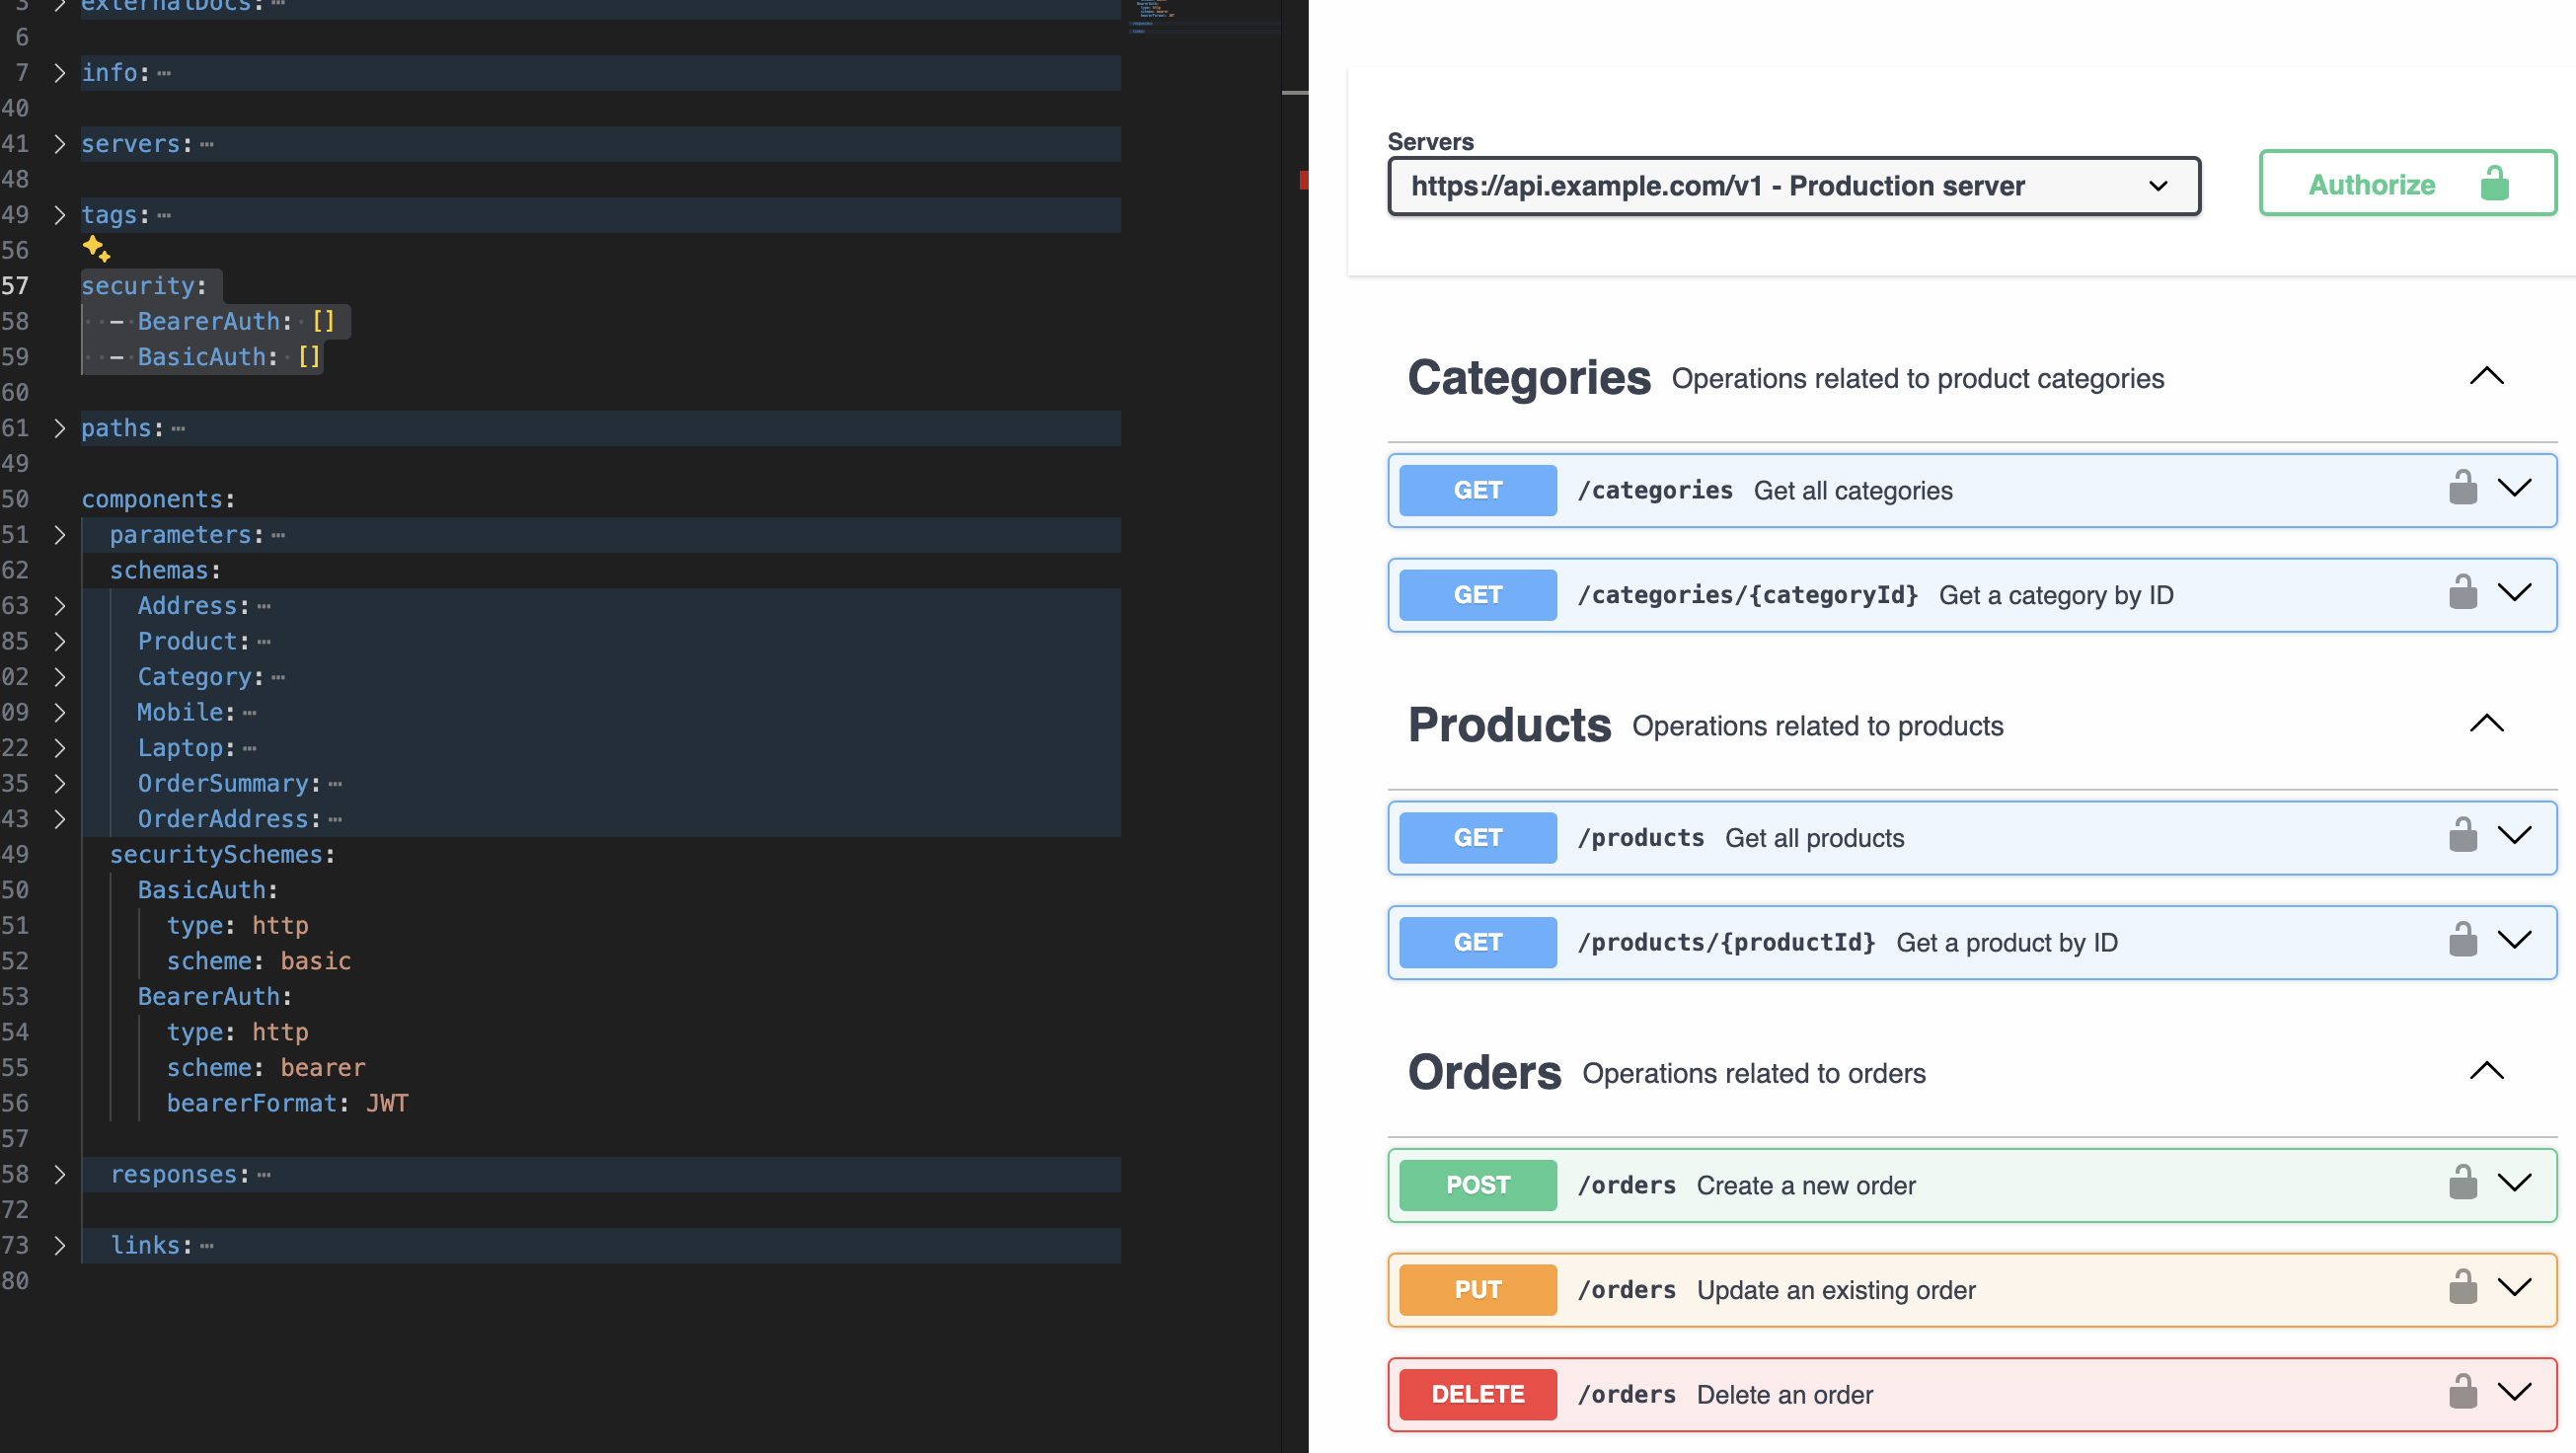
点击 🔒 的时候可以看到验证方法:
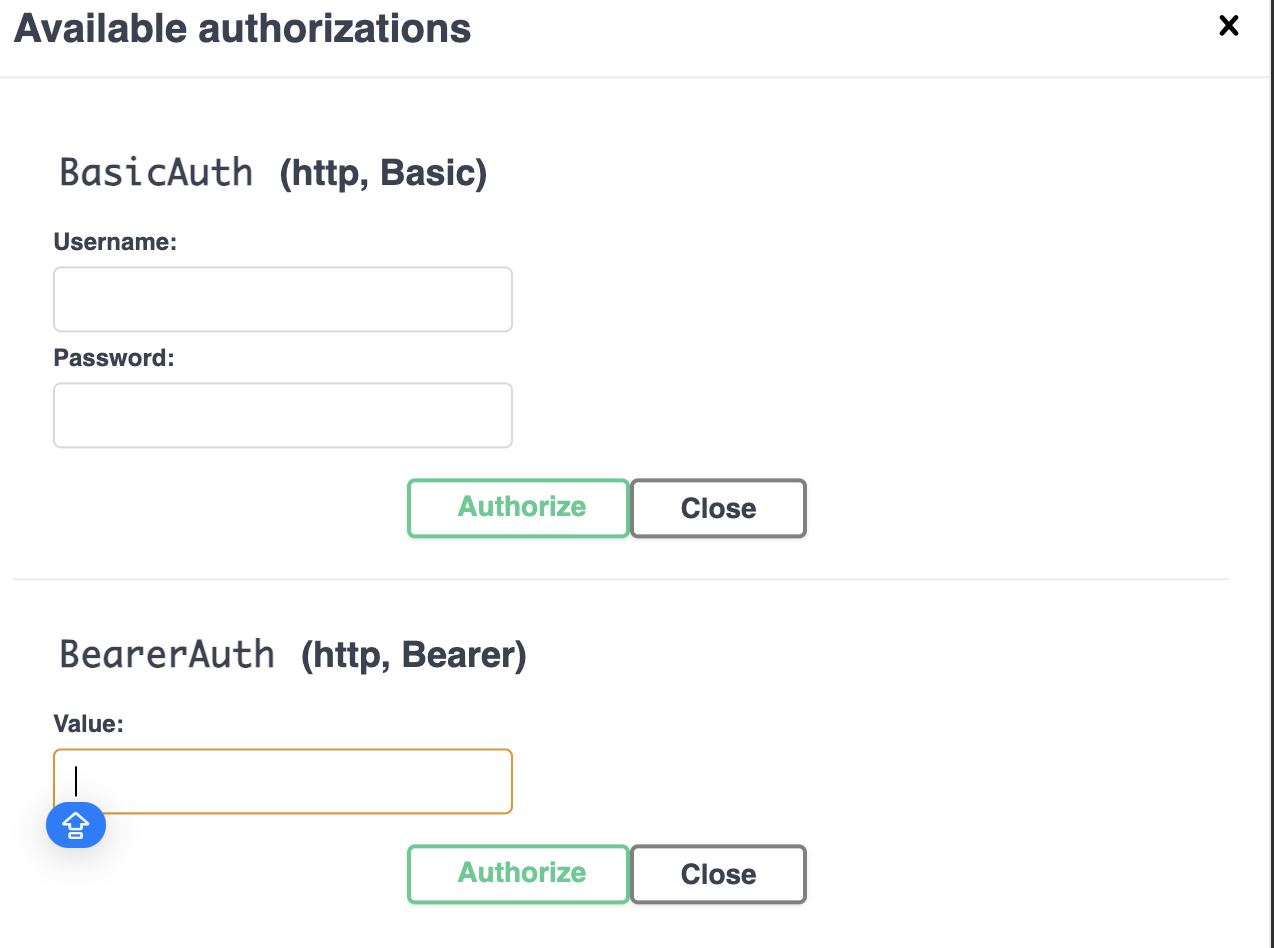
⚠️:我尝试了一下,只是定义 security ,不是所有的 mock server 都会自动添加验证,比如说下面使用 prism mock 后,我尝试过没有添加 bearer token 直接访问,server 也会正常返回数据。这种情况,如果要强制验证其实没啥特别好的方法,只能检查 header 中是否包含对应的 token,比如说 bearer 有 Bearer XXXX 这个格式。具体需要用户登录的验证方法,我还真没想到有什么特别好的解决方法......
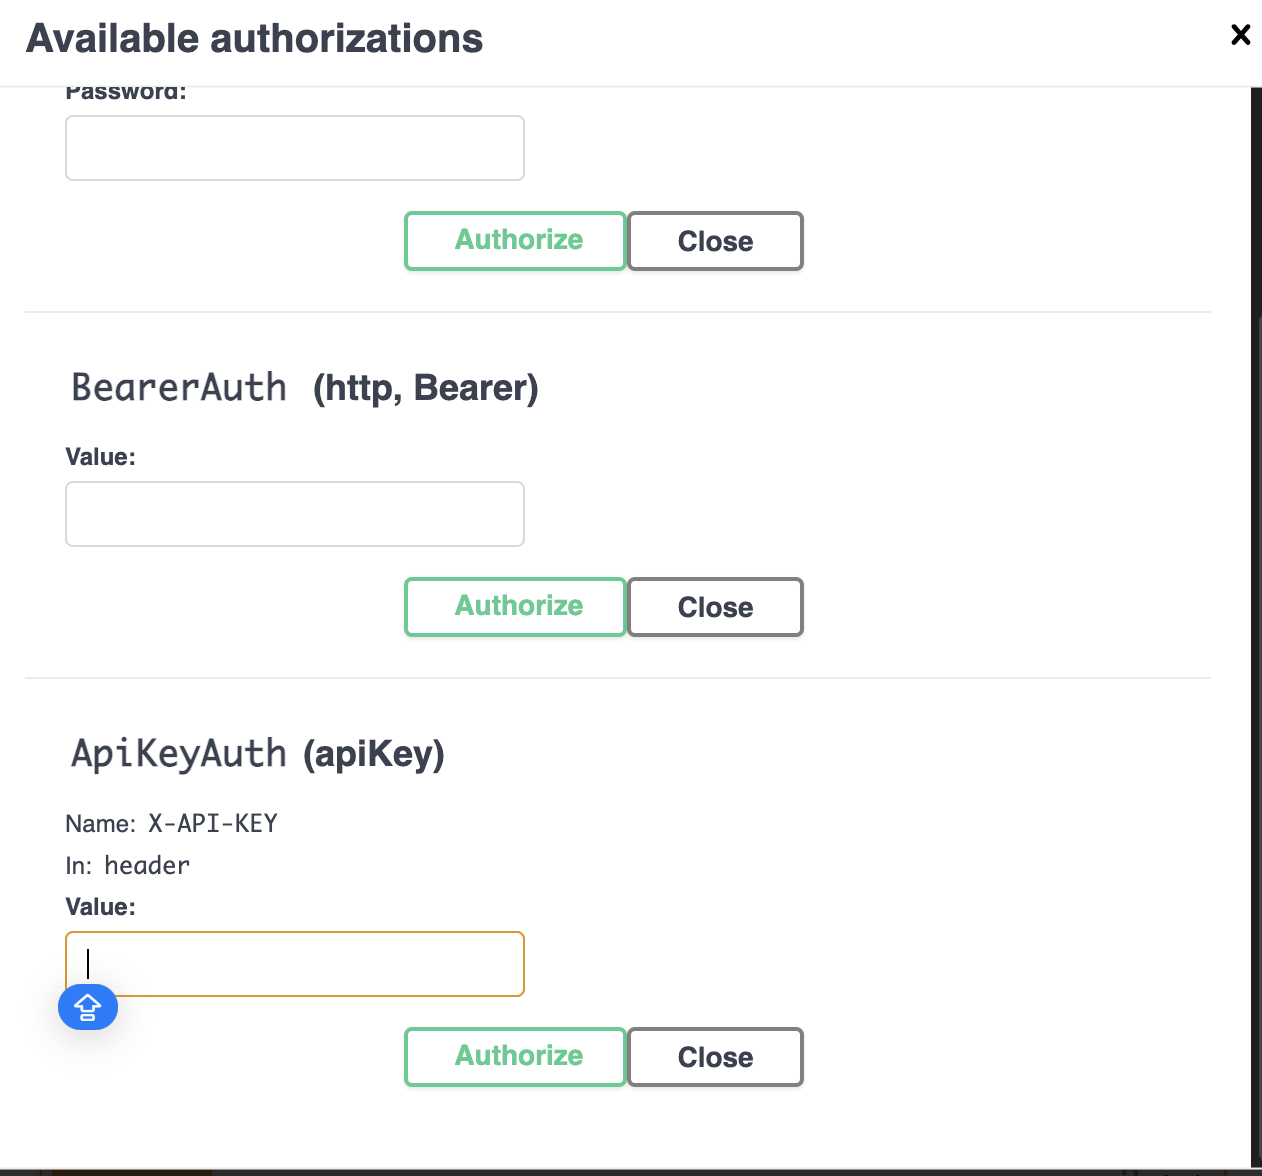
API Keys
这个功能需要对接第三方的会比较熟,就是使用别人提供的 API 时,需要传输的 API key 和/或 secret,这里的 API key 也可以进行验证:
yaml
security:
  - BearerAuth: []
  - BasicAuth: []
  - ApiKeyAuth: []

components:
  securitySchemes:
    BasicAuth:
      type: http
      scheme: basic
    BearerAuth:
      type: http
      scheme: bearer
      bearerFormat: JWT
    ApiKeyAuth:
      type: apiKey
      in: header
      name: X-API-KEY
实现效果如下:
OAuth 2.0
这是另一种验证方法,大概配置如下:
yaml
security:
  - BearerAuth: []
  - BasicAuth: []
  - ApiKeyAuth: []
  - OAuth2AuthCode: [read, write, admin]

components:
  securitySchemes:
    BasicAuth:
      type: http
      scheme: basic
    BearerAuth:
      type: http
      scheme: bearer
      bearerFormat: JWT
    ApiKeyAuth:
      type: apiKey
      in: header
      name: X-API-KEY
    OAuth2AuthCode:
      type: oauth2
      flows:
        authorizationCode:
          authorizationUrl: "https://example.com/oauth/authorize"
          tokenUrl: "https://example.com/oauth/token"
          scopes:
            read: Grants read access
            write: Grants write access
            admin: Grants access to admin operations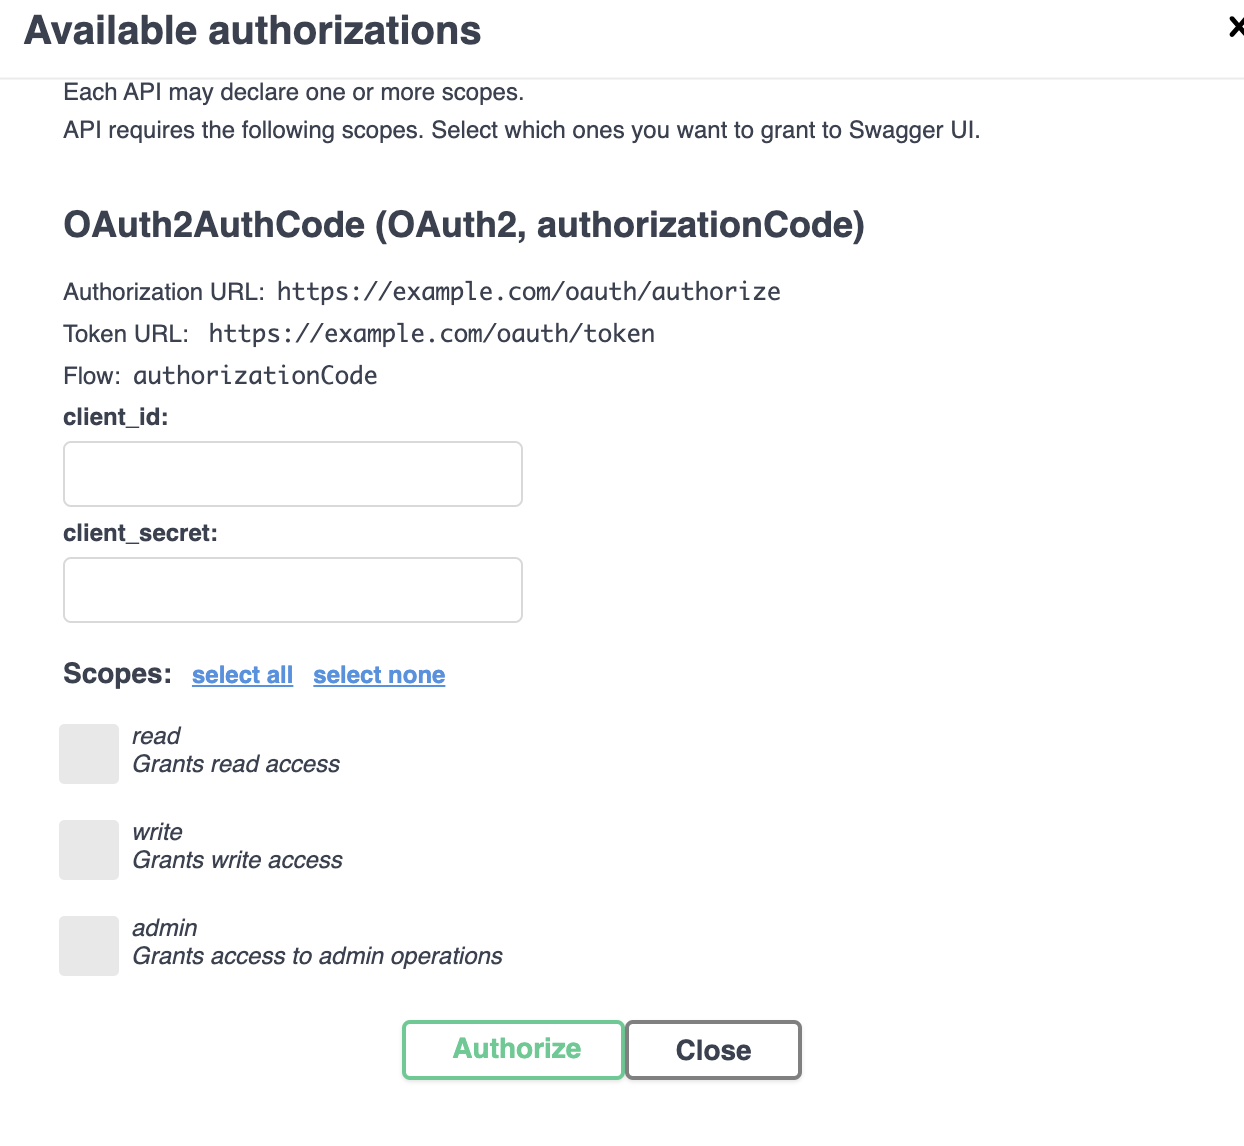
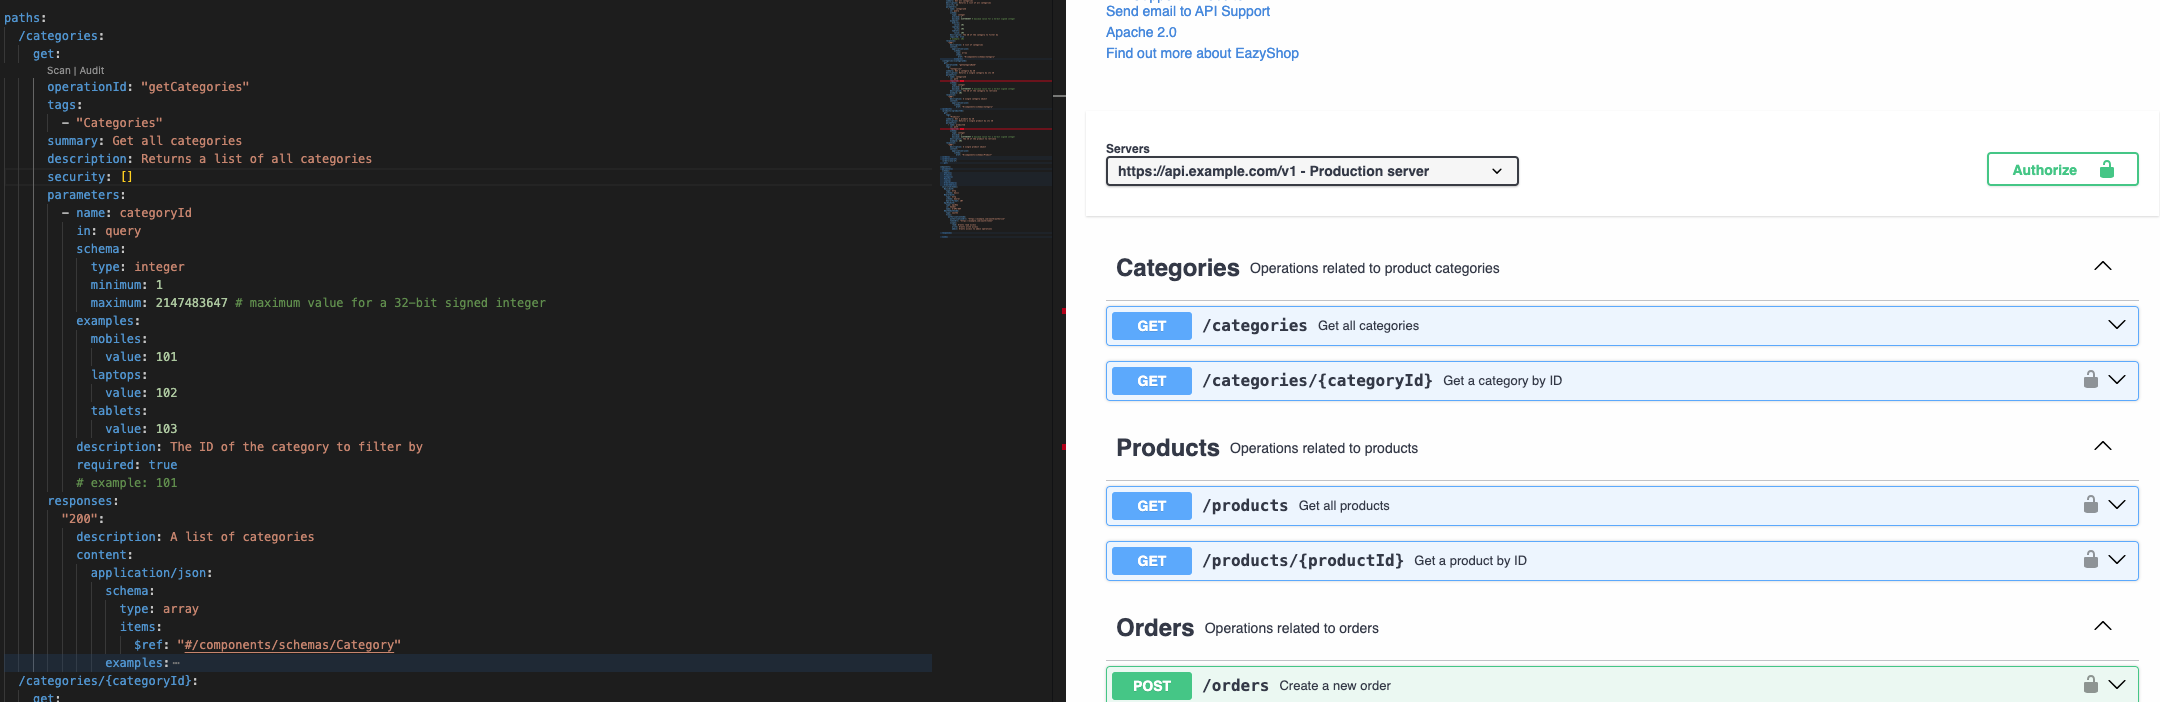
path 层使用 security
这里就是在单独的 API 级别使用 security ,这里的实现会重载 root level 的实现
下面的案例中,会在 getCategories 这里使用 security: [],这样就会放弃所有的验证,同时也能看到,🔒 在 getCategories 这里消失了:
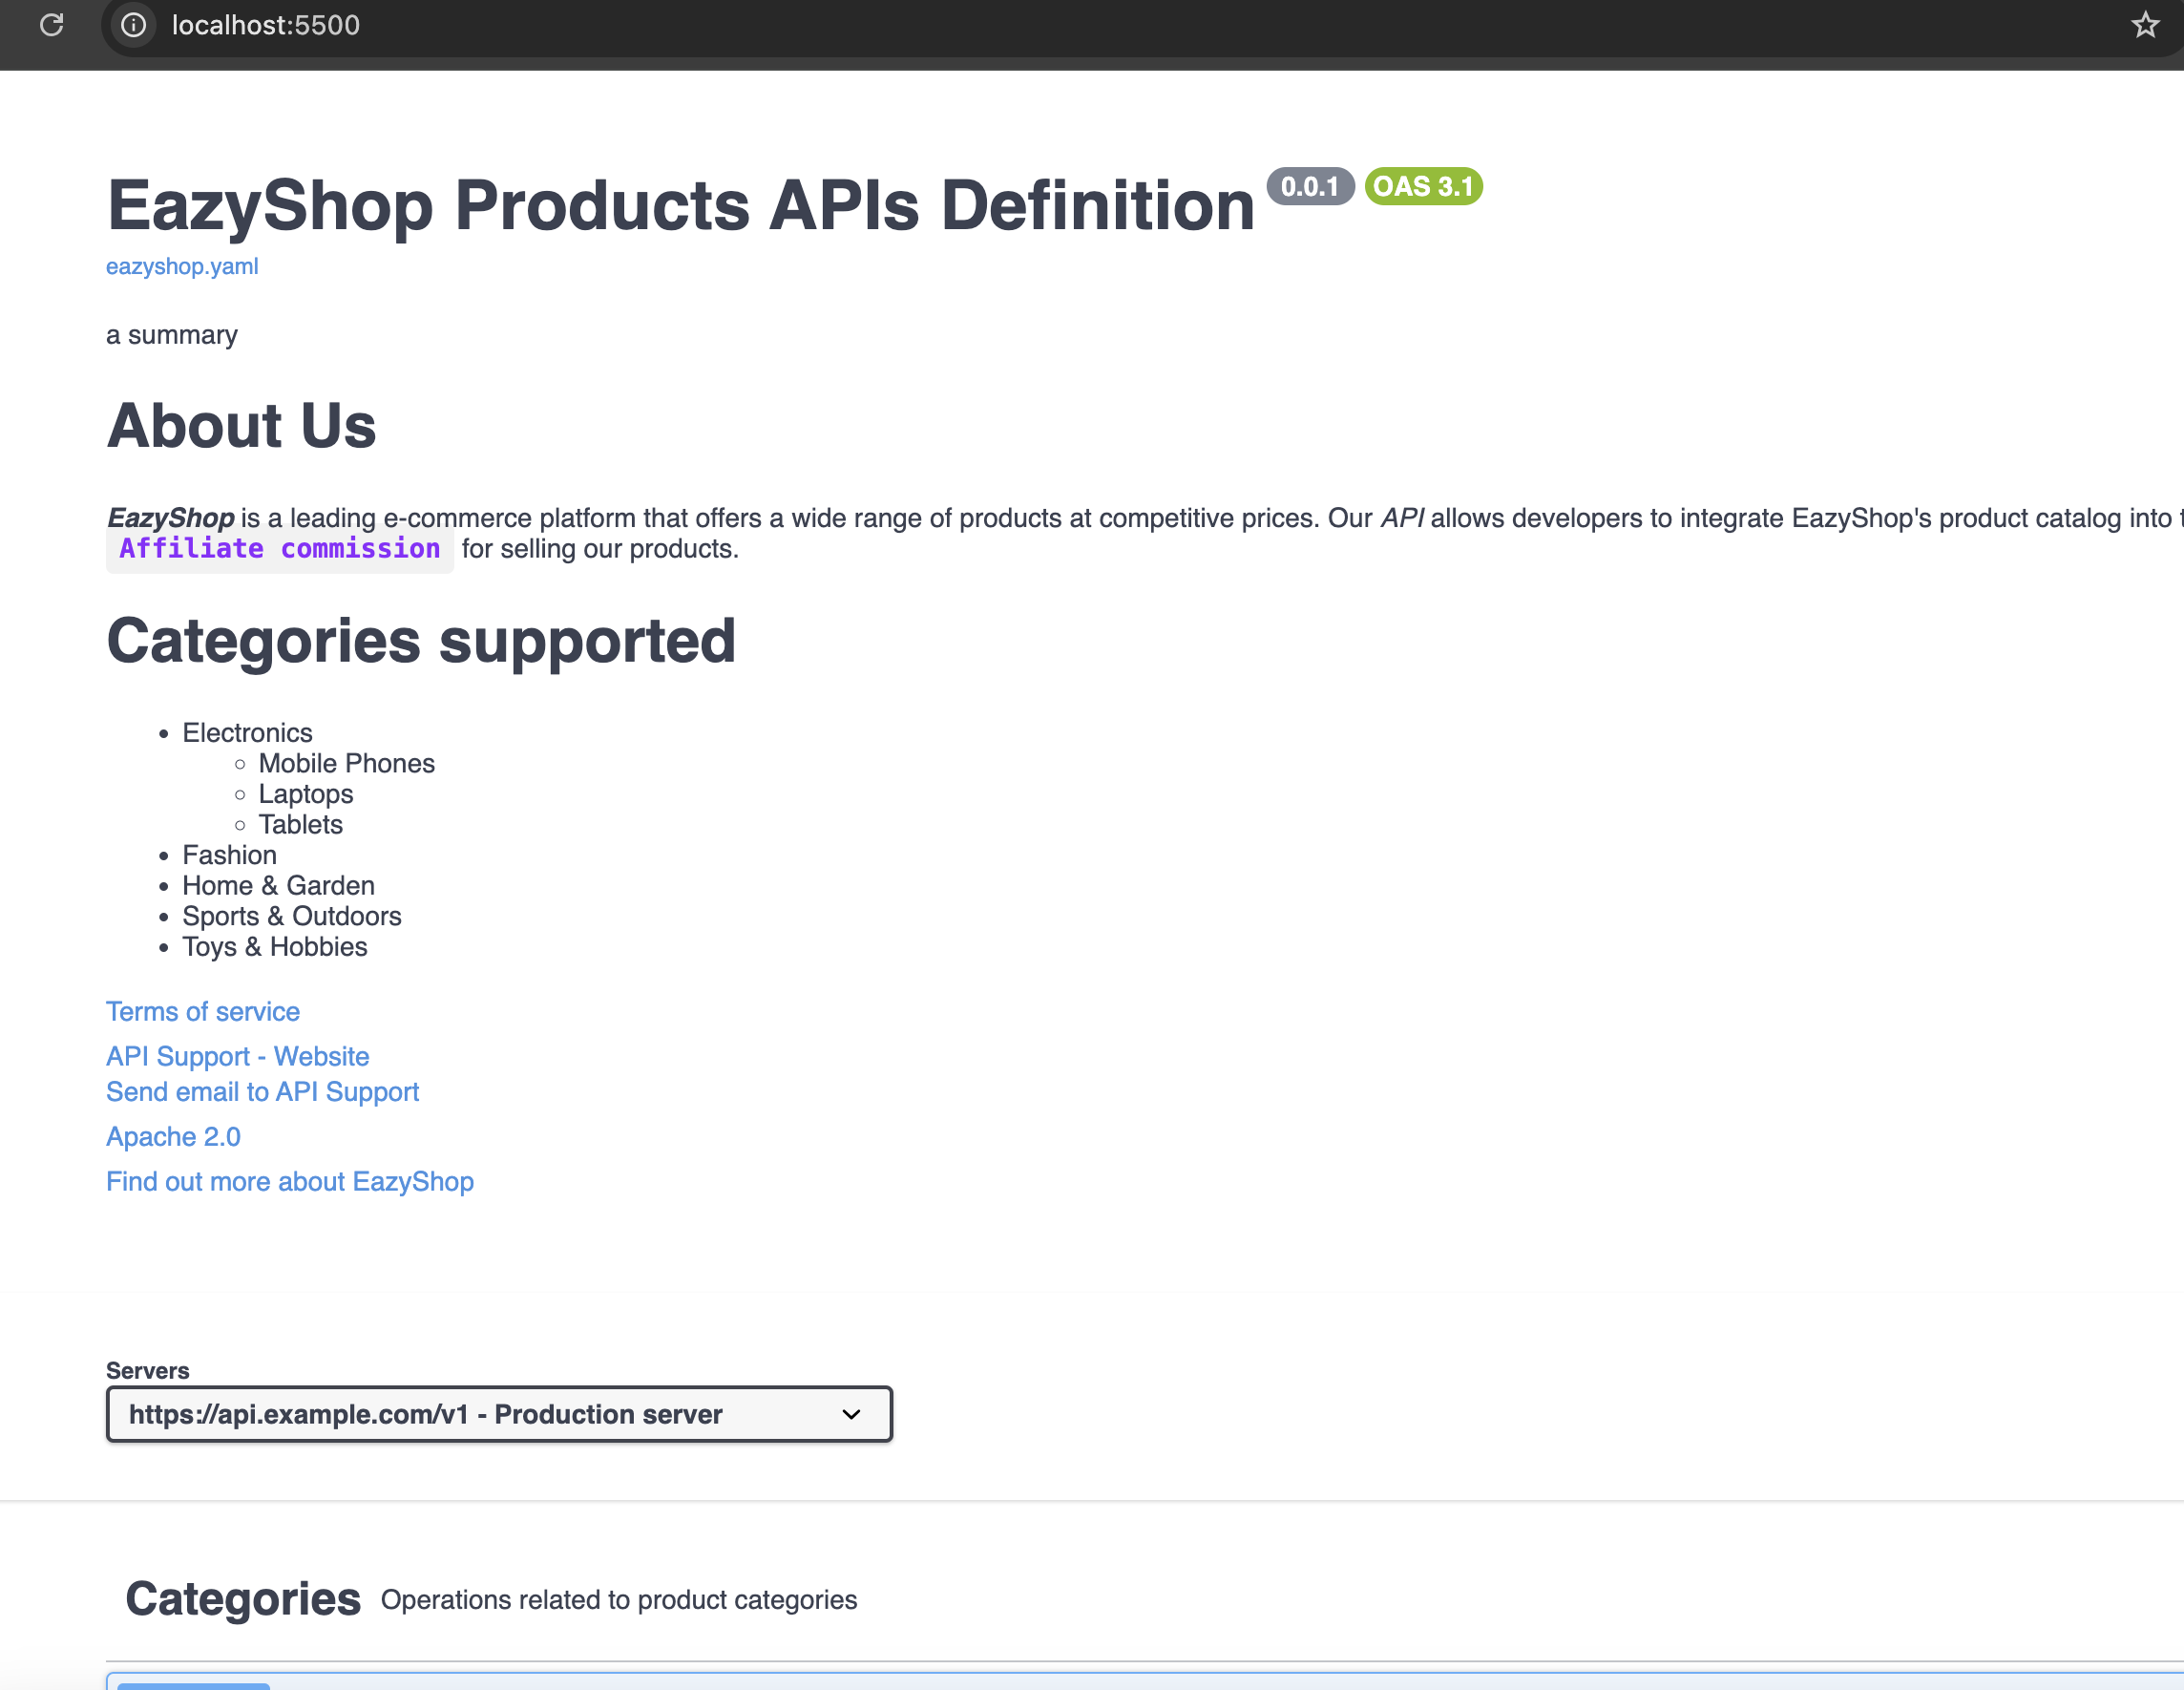
使用 github pages host 网页
在线预览地址在:https://goldenaarcher.github.io/open-api-3.x-study/
我放弃使用私有域名啦,继续用 GH 默认的了,然后发现之前的域名被人注册了 OTL
下面包含了 index.html 的实现方式,本质上来说就是通过 CDN,导入 swagger 的 JS 和 CSS,然后在对应的锚点完成渲染即可:
html
<!DOCTYPE html>
<html lang="en">
<head>
<meta charset="UTF-8" />
<meta name="viewport" content="width=device-width, initial-scale=1.0" />
<link
rel="stylesheet"
href="https://cdnjs.cloudflare.com/ajax/libs/swagger-ui/5.27.1/swagger-ui.css"
/>
<title>EazyShop API Documentation</title>
</head>
<body>
<div id="eazyshop-oas"></div>
<script src="https://cdnjs.cloudflare.com/ajax/libs/swagger-ui/5.27.1/swagger-ui-bundle.js"></script>
<script>
const ui = SwaggerUIBundle({
url: "eazyshop.yaml",
dom_id: "#eazyshop-oas",
deepLinking: true,
});
</script>
</body>
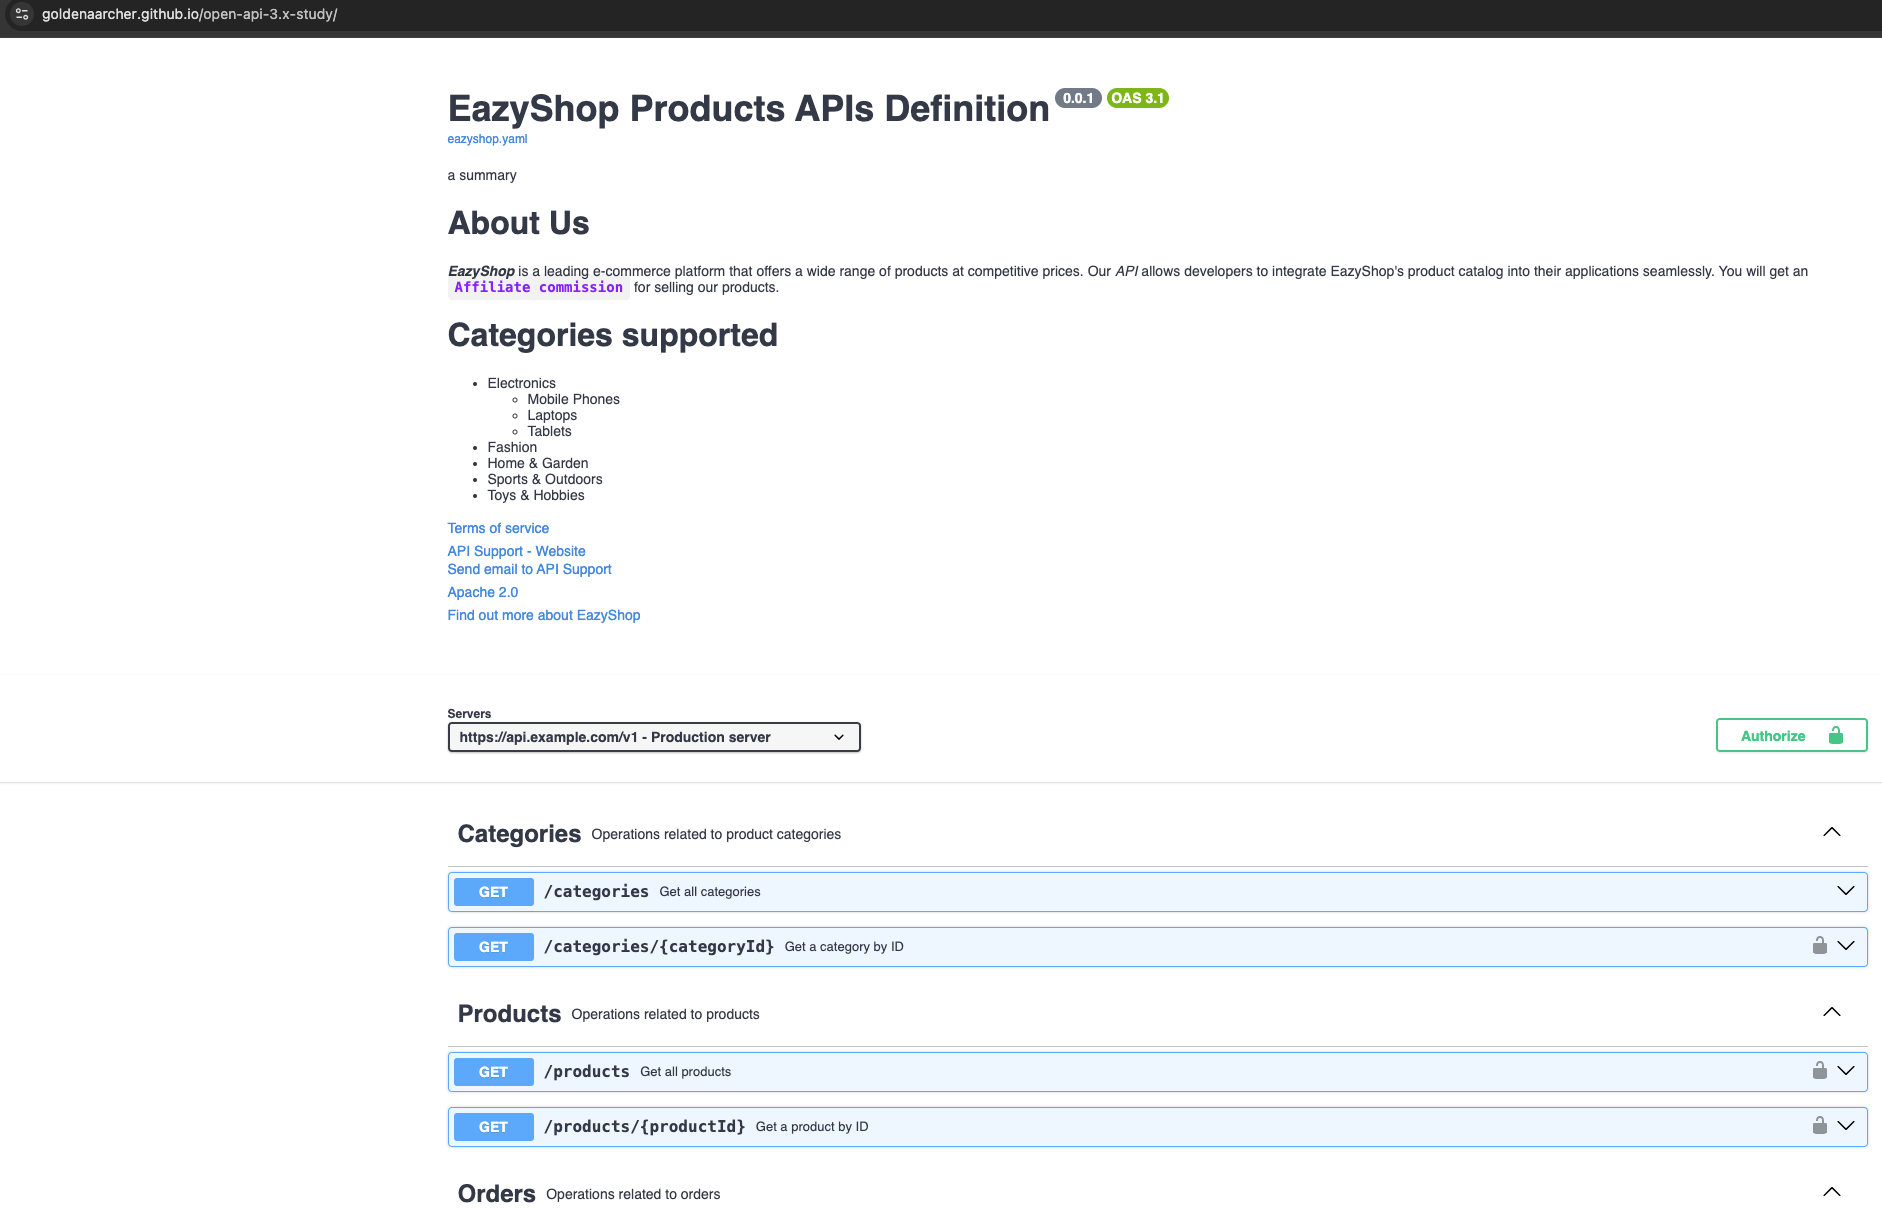
</html>最终效果如下:
具体的 endpoint:
mock api
这里就使用 prism 去 mock,具体的使用方式还是很简单的,下面是 package.json :
json
{
  "name": "swagger",
  "version": "1.0.0",
  "main": "index.js",
  "scripts": {
    "mock": "prism mock ./eazyshop.yaml -p 8080"
  },
  "repository": {
    "type": "git",
    "url": "git+https://github.com/GoldenaArcher/open-api-3.x-study.git"
  },
  "keywords": [],
  "author": "",
  "license": "ISC",
  "bugs": {
    "url": "https://github.com/GoldenaArcher/open-api-3.x-study/issues"
  },
  "homepage": "https://github.com/GoldenaArcher/open-api-3.x-study#readme",
  "description": "",
  "dependencies": {
    "@stoplight/prism-cli": "^5.14.2"
  }
}
运行 npm run mock 后:
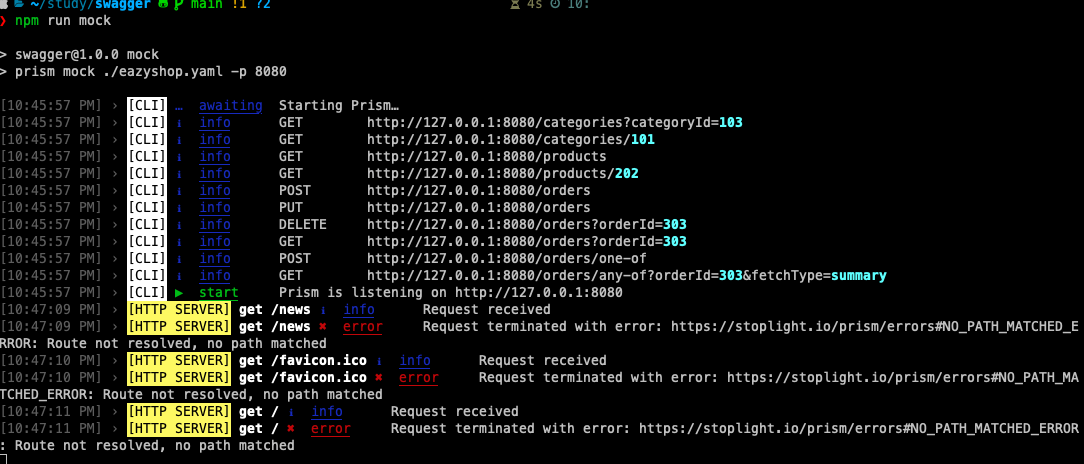
对应的 endpoint 效果如下:
- 网页

- curl

如果实现了多个 examples,可以通过 prefer 去分别 query 不同的 example:
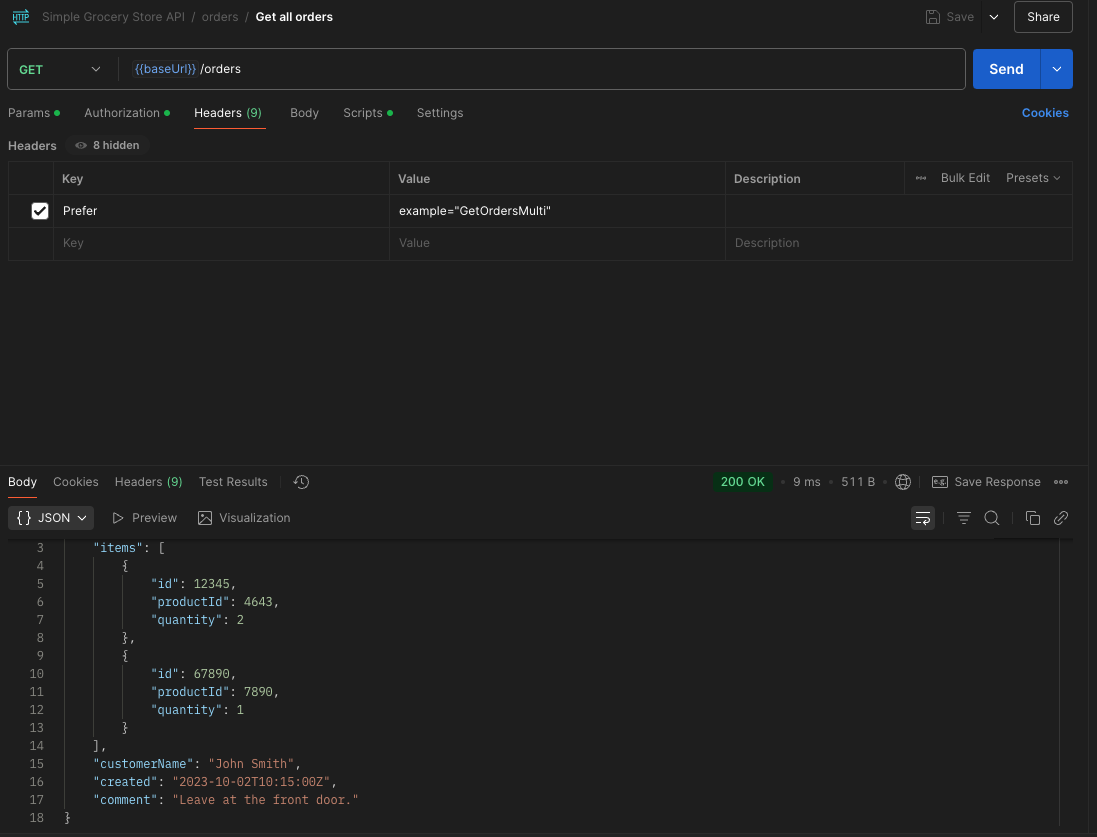
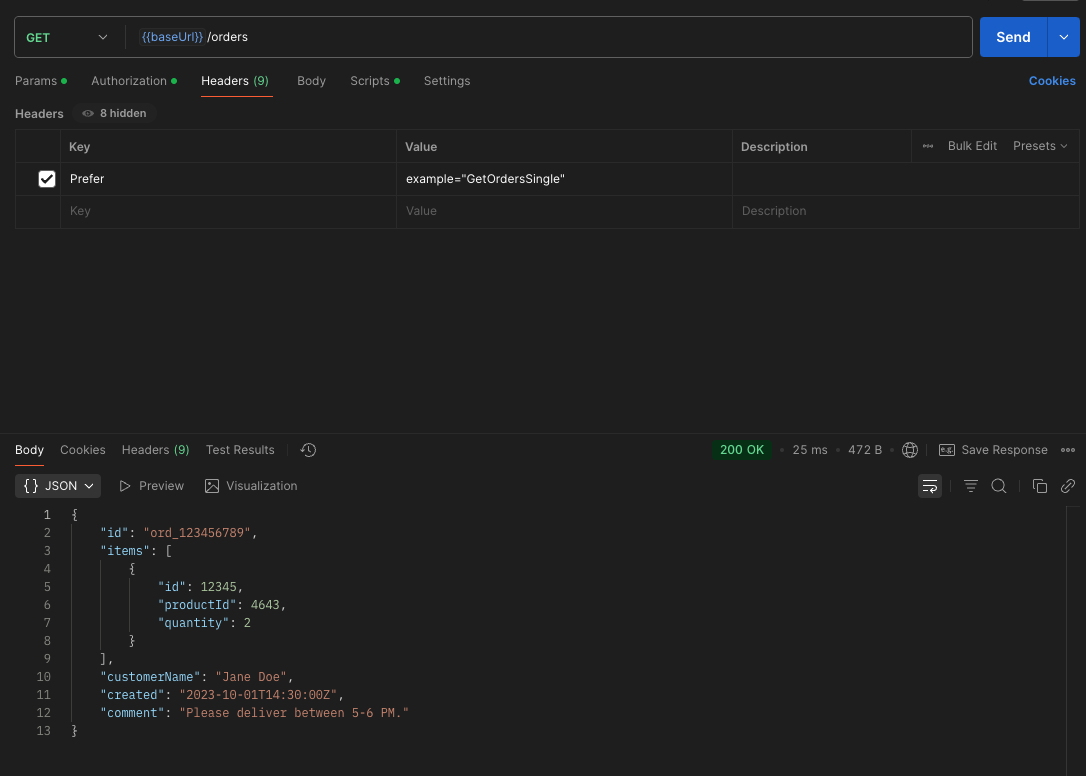
⚠️:这个案例是另一个项目的,学 postman 的时候稍微用了一下
生成服务端模板代码(server stub)
照了下,主流的选项有两个:Swagger Codegen 和 OpenAPI Generator
前者是 SmartBear------收购 swagger 的公司做的维护,后者是社区开源维护。我现在用的版本是 OAS3.1,而 Swagger Codegen 对 OAS3.1 的支持比较差,所以案例中选用了后者
调用的方式也有几种,我这里选择使用 node cli 搞定:
bash
❯ npm i @openapitools/openapi-generator-cli

added 146 packages, and audited 331 packages in 8s

53 packages are looking for funding
  run `npm fund` for details

found 0 vulnerabilities
生成对应的 stub 也就是通过 -g 控制
-
生成 Java stub
bash❯ npx openapi-generator-cli generate \ -i ./eazyshop.yaml \ -g spring \ -o ./out/spring [main] WARN o.o.codegen.DefaultCodegen - OpenAPI 3.1 support is still in beta. To report an issue related to 3.1 spec, please kindly open an issue in the Github repo: https://github.com/openAPITools/openapi-generator. [main] INFO o.o.codegen.DefaultGenerator - Generating with dryRun=false [main] INFO o.o.c.ignore.CodegenIgnoreProcessor - Output directory (/Users/luhan/study/swagger/./out/spring) does not exist, or is inaccessible. No file (.openapi-generator-ignore) will be evaluated. [main] INFO o.o.codegen.DefaultGenerator - OpenAPI Generator: spring (server) [main] INFO o.o.codegen.DefaultGenerator - Generator 'spring' is considered stable. [main] INFO o.o.codegen.languages.SpringCodegen - ---------------------------------- [main] INFO o.o.c.languages.AbstractJavaCodegen - Environment variable JAVA_POST_PROCESS_FILE not defined so the Java code may not be properly formatted. To define it, try 'export JAVA_POST_PROCESS_FILE="/usr/local/bin/clang-format -i"' (Linux/Mac) [main] INFO o.o.c.languages.AbstractJavaCodegen - NOTE: To enable file post-processing, 'enablePostProcessFile' must be set to `true` (--enable-post-process-file for CLI). [main] INFO o.o.codegen.InlineModelResolver - Inline schema created as getOrders_200_response_inner. To have complete control of the model name, set the `title` field or use the modelNameMapping option (e.g. --model-name-mappings getOrders_200_response_inner=NewModel,ModelA=NewModelA in CLI) or inlineSchemaNameMapping option (--inline-schema-name-mappings getOrders_200_response_inner=NewModel,ModelA=NewModelA in CLI).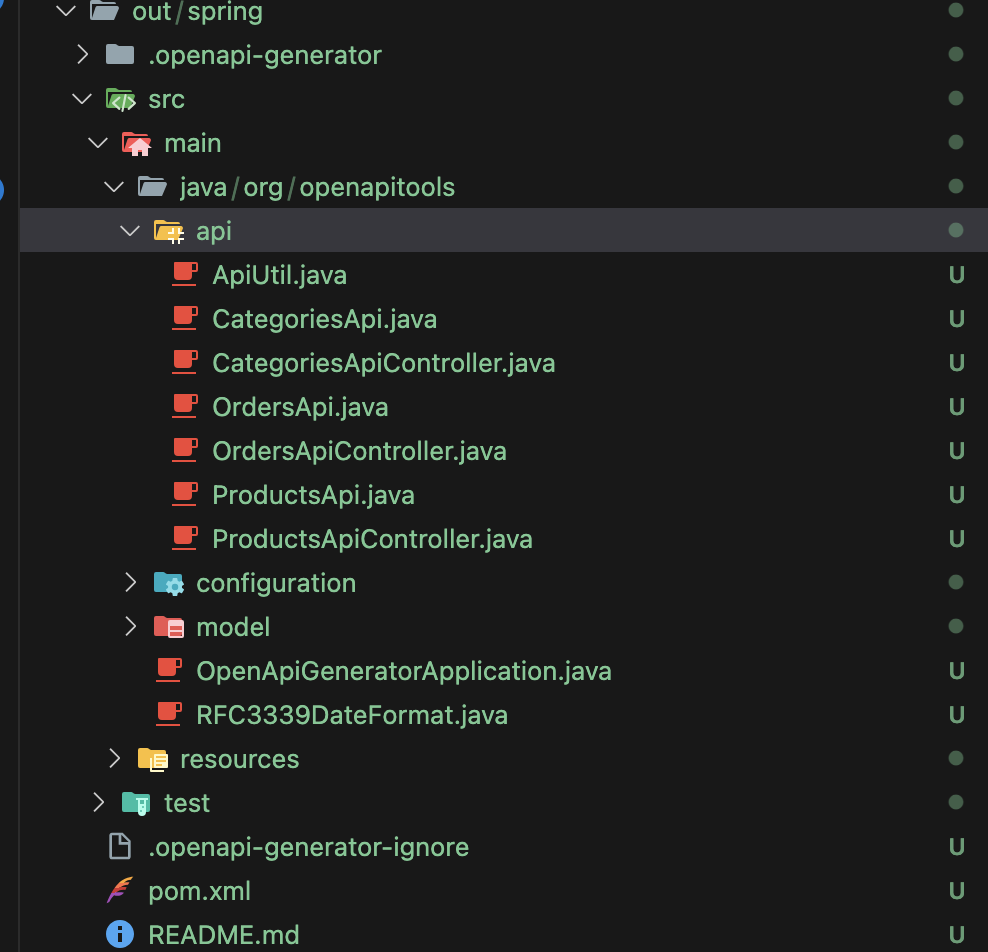
-
生成 node stub
bash❯ npx openapi-generator-cli generate \ -i ./eazyshop.yaml \ -g nodejs-express-server \ -o ./out/node [main] WARN o.o.codegen.DefaultCodegen - OpenAPI 3.1 support is still in beta. To report an issue related to 3.1 spec, please kindly open an issue in the Github repo: https://github.com/openAPITools/openapi-generator. [main] INFO o.o.codegen.DefaultGenerator - Generating with dryRun=false [main] INFO o.o.c.ignore.CodegenIgnoreProcessor - Output directory (/Users/luhan/study/swagger/./out/node) does not exist, or is inaccessible. No file (.openapi-generator-ignore) will be evaluated. [main] INFO o.o.codegen.DefaultGenerator - OpenAPI Generator: nodejs-express-server (server) [main] INFO o.o.codegen.DefaultGenerator - Generator 'nodejs-express-server' is considered beta. [main] INFO o.o.c.l.NodeJSExpressServerCodegen - Environment variable JS_POST_PROCESS_FILE not defined so the JS code may not be properly formatted. To define it, try 'export JS_POST_PROCESS_FILE="/usr/local/bin/js-beautify -r -f"' (Linux/Mac) [main] INFO o.o.c.l.NodeJSExpressServerCodegen - NOTE: To enable file post-processing, 'enablePostProcessFile' must be set to `true` (--enable-post-process-file for CLI). [main] INFO o.o.codegen.InlineModelResolver - Inline schema created as getOrders_200_response_inner. To have complete control of the model name, set the `title` field or use the modelNameMapping option (e.g. --model-name-mappings getOrders_200_response_inner=NewModel,ModelA=NewModelA in CLI) or inlineSchemaNameMapping option (--inline-schema-name-mappings getOrders_200_response_inner=NewModel,ModelA=NewModelA in CLI). [main] INFO o.o.codegen.InlineModelResolver - Inline schema created as _orders_put_request. To have complete control of the model name, set the `title` field or use the modelNameMapping option (e.g. --model-name-mappings _orders_put_request=NewModel,ModelA=NewModelA in CLI) or inlineSchemaNameMapping option (--inline-schema-name-mappings _orders_put_request=NewModel,ModelA=NewModelA in CLI). [main] INFO o.o.codegen.InlineModelResolver - Inline schema created as _orders_post_request. To have complete control of the model name, set the `title` field or use the modelNameMapping option (e.g. --model-name-mappings _orders_post_request=NewModel,ModelA=NewModelA in CLI) or inlineSchemaNameMapping option (--inline-schema-name-mappings _orders_post_request=NewModel,ModelA=NewModelA in CLI). [main] INFO o.o.codegen.InlineModelResolver - Inline schema created as _orders_post_201_response. To have complete control of the model name, set the `title` field or use the modelNameMapping option (e.g. --model-name-mappings _orders_post_201_response=NewModel,ModelA=NewModelA in CLI) or inlineSchemaNameMapping option (--inline-schema-name-mappings _orders_post_201_response=NewModel,ModelA=NewModelA in CLI).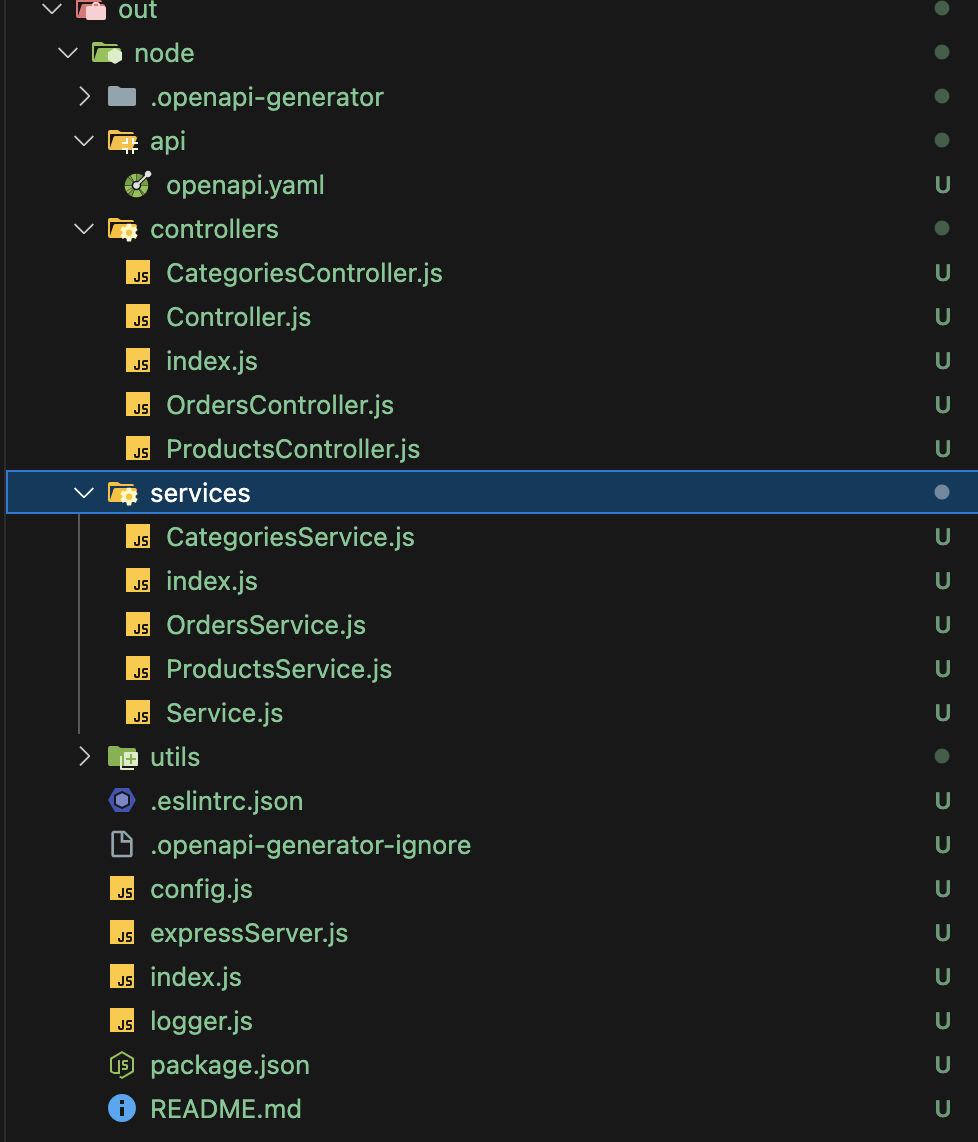
生成客户端代码(Client SDK)
使用方法和生成后段代码一样,都是通过 -g 控制,不过可以添加 --additional-properties 去添加不同的集成,具体用什么框架,还是得查看官方文档
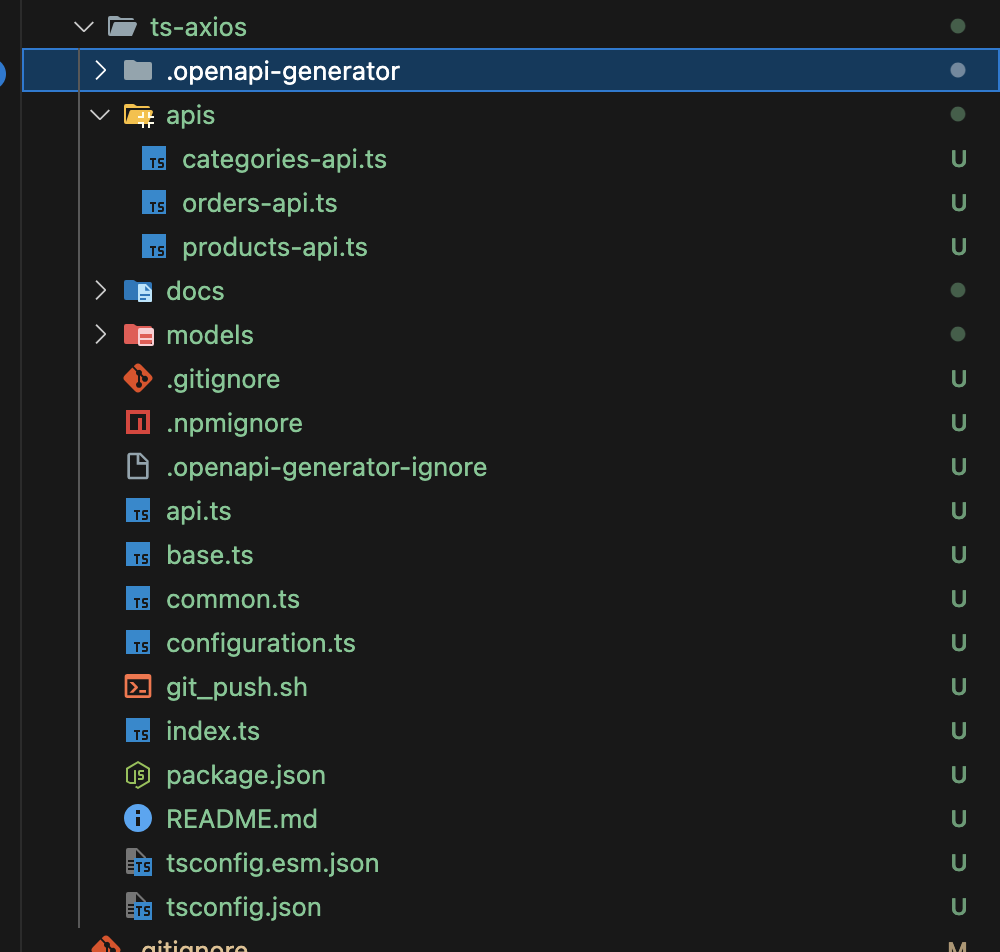
下面的案例是使用 TS+axios:
bash
❯ npx openapi-generator-cli generate \
  -i ./eazyshop.yaml \
  -g typescript-axios \
  -o ./out/ts-axios \
  --additional-properties=supportsES6=true,useSingleRequestParameter=true,withSeparateModelsAndApi=true,apiPackage=apis,modelPackage=models,npmName=@acme/api-axios

[main] WARN  o.o.codegen.DefaultCodegen - OpenAPI 3.1 support is still in beta. To report an issue related to 3.1 spec, please kindly open an issue in the Github repo: https://github.com/openAPITools/openapi-generator.
[main] INFO  o.o.codegen.DefaultGenerator - Generating with dryRun=false
[main] INFO  o.o.c.ignore.CodegenIgnoreProcessor - Output directory (/Users/luhan/study/swagger/./out/ts-axios) does not exist, or is inaccessible. No file (.openapi-generator-ignore) will be evaluated.
[main] INFO  o.o.codegen.DefaultGenerator - OpenAPI Generator: typescript-axios (client)
[main] INFO  o.o.codegen.DefaultGenerator - Generator 'typescript-axios' is considered stable.
[main] INFO  o.o.c.l.AbstractTypeScriptClientCodegen - Hint: Environment variable 'TS_POST_PROCESS_FILE' (optional) not defined. E.g. to format the source code, please try 'export TS_POST_PROCESS_FILE="/usr/local/bin/prettier --write"' (Linux/Mac)
[main] INFO  o.o.c.l.AbstractTypeScriptClientCodegen - Note: To enable file post-processing, 'enablePostProcessFile' must be set to `true` (--enable-post-process-file for CLI).
[main] INFO  o.o.codegen.InlineModelResolver - Inline schema created as getOrders_200_response_inner. To have complete control of the model name, set the `title` field or use the modelNameMapping option (e.g. --model-name-mappings getOrders_200_response_inner=NewModel,ModelA=NewModelA in CLI) or inlineSchemaNameMapping option (--inline-schema-name-mappings getOrders_200_response_inner=NewModel,ModelA=NewModelA in CLI).
⚠️:这里生成的是 client SDK,不是 web client
这个生成的部分完全可以只作为 API 调用的接口
如果要实现 auto-refresh 的功能,可以在这之上进行一个包装------如封装 axios interceptor,这样可以将这部分的代码作为 API 调用的 single source of truth,也不用担心 merge conflict 的问题
额外补充
3.1 中 null 的使用
在第二篇笔记的时候我简单的提了一下 null 作为数据类型的存在,并且说明了 nullable 在 OAS3.1 中已经废弃了
这里简单的提一下 null 的具体用法
yaml
Example:
	name:
		type: [string, 'null']
3.1 中 unevaluatedProperties
这个是对 allOf, anyOf 这种组合子进行的兜底验证,我现在也用过一两次,大概的感觉就是,用 unevaluatedProperties 会拦截没有被子组合验证过的属性,比如:
yaml
Base:
  type: object
  properties: { name: { type: string } }

Addr:
  type: object
  properties: { address: { type: string } }

Person:
  type: object
  allOf:
    - $ref: "#/Base"
    - $ref: "#/Addr"
  unevaluatedProperties: false
{ "name": "A", "address": "X", "state": "ANY" } 这种例子,在没有 unevaluatedProperties 的情况下是一个合法的对象,但是使用了 unevaluatedProperties 就不合法,因为它包含了一个 schema 中不存在的属性
⚠️:在具体的实现过程中,我发现用 additional-properties 和 optional fields 会有一些冲突,特别是在这种 nested 的情况下,所以用 unevaluatedProperties 会更好一些
3.1 中 patternProperties
如其名,如果满足对应的 pattern 即可,经常与 unevaluatedProperties 和 additional-properties 搭配使用
3.1 中 inheritance & polymorphism
-
const的使用完全相等的一个判断,规定某个值必须是指定的参数
下面 if / then / else 里会有例子
这个搭配新的一些语法,用起来能够组不少非常活的 combo
-
支持 if / then / else 的语法
语法如下:
yamlcomponents: schemas: Pet: type: object properties: kind: type: string enum: [dog, cat] bark: type: boolean meow: type: boolean required: [kind] allOf: - if: properties: kind: { const: dog } then: required: [bark] else: required: [meow] additionalProperties: false -
unevaluatedProperties可以对额外的性进行验证 -
dependentSchemas的存在这是一个满足了 A 就必须要有 B 的存在,如下面这个例子:
yamltype: object properties: paymentMethod: { enum: [card, paypal] } cardNumber: { type: string } cardCvv: { type: string } paypalId: { type: string } dependentSchemas: paymentMethod: allOf: - if: { properties: { paymentMethod: { const: card } } } then: { required: [cardNumber, cardCvv] } - if: { properties: { paymentMethod: { const: paypal } } } then: { required: [paypalId] }这个的用法就是,如果当前的 schema 中出现了
paymentMethod,那么就要满足下面这个allOf的需求,如果没出现,则略过不做检查
allOf则是用了一个if/then定义了,如果是信用卡支付,则必须要卡号、cvv,如果是 paypal,则需要paypalId,所以同时满足的是{paymentMethod: card, cardNumber: '', cardCvv: ''}或{paymentMethod: paypal, paypalId: ''}两种格式上面的这个约束其实可以有其他的实现方法,但是用
dependentSchemas的实现会更加的直观一些 -
dependentRequired,和上面的 schema 类似,如果没有对 schema 的要求,用这个属性即可
3.0 discriminator
这是之前学习没有学到的部分------大概率是因为之前学的内容比较简单,没有太多 mapping 的需求吧
我大概学了一下,理解就是,如果要做 mapping 的话,在 3.0 就只能用 **discriminator,**以上面的支付方法为例, discriminator 的用法为:
yaml
components:
  schemas:
    Pet:
      type: object
      required: [petType]
      properties:
        petType:
          type: string
          enum: [dog, cat]
      oneOf:
        - $ref: "#/components/schemas/Dog"
        - $ref: "#/components/schemas/Cat"
      discriminator:
        propertyName: petType
        mapping:
          dog: "#/components/schemas/Dog"
          cat: "#/components/schemas/Cat"

    Dog:
      type: object
      required: [petType, bark]
      properties:
        petType: { const: dog }
        bark: { type: boolean }

    Cat:
      type: object
      required: [petType, meow]
      properties:
        petType: { const: cat }
        meow: { type: boolean }
当然,这里还是加了一些 3.1 的新用法......
同样,如果有些对象比较大,需要分文件处理的话,这时候也可以用 discriminator 去处理,如:
yaml
Pet:
  oneOf:
    - $ref: "./Dog.yaml"
    - $ref: "./Cat.yaml"
  discriminator:
    propertyName: petType
    mapping:
      dog: "./Dog.yaml"
      cat: "./Cat.yaml"
这样所有的定义都不需要被限制在单一的文件中
x-* 的使用
在上一篇的时候,只是简单地提了一下 **custom info,**但是实际折腾一下之后发现,这里能够折腾的东西远比单纯储藏一个 custom info 要多
下面的用法就是将两个对象存在 x-snippets 中,作为可以重复引用的参数:
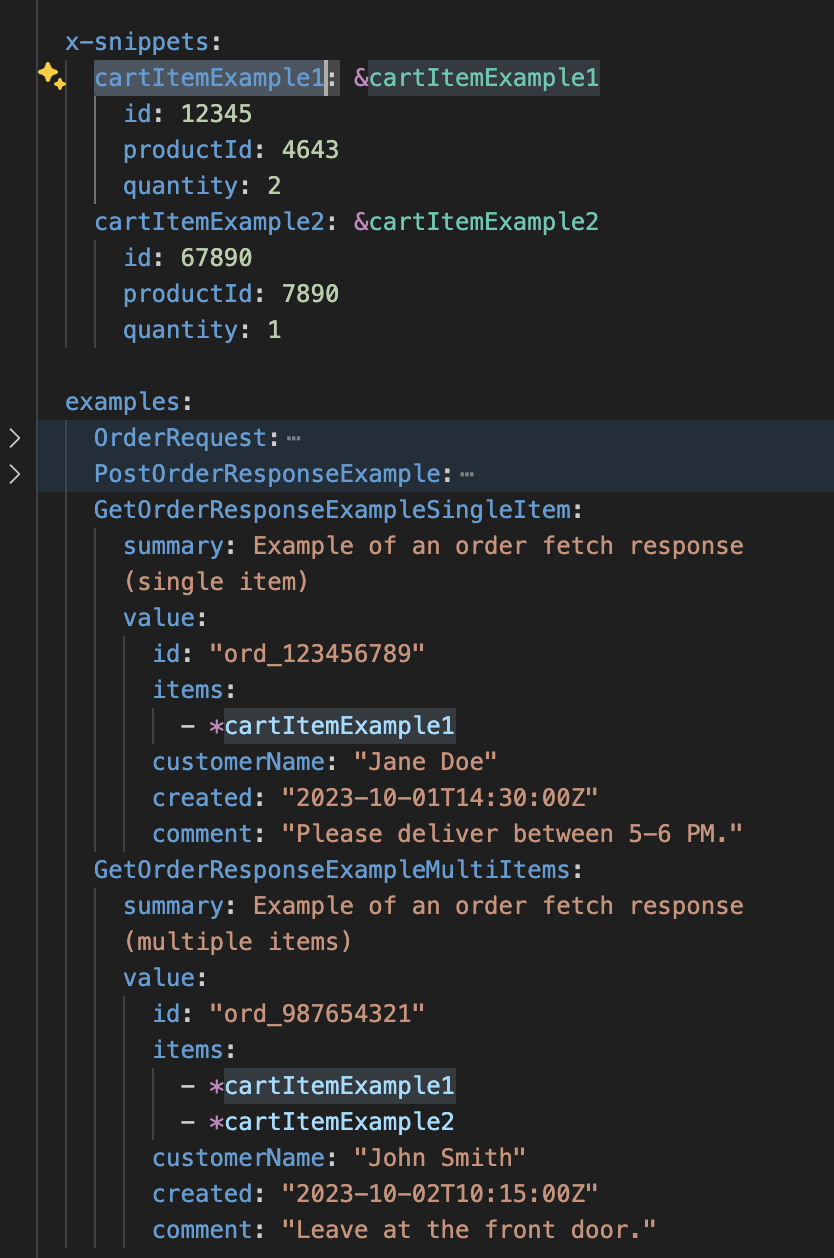
需要注意的是,这种使用 snippet 的方法只能将引用值作为纯 data input 使用,而且我目前没有找到能够让 custom snippet 跨文件传输的方法,所以如果不同的文件需要用同一个引用,还是尽可能的放到 schema 或者 example 里去复用比较好
external ref
在文件 A 中引用文件 B,我这里使用了一个学习 postman 的例子,因为 endpoints 还是比较多的,所以我每个 endpoints 都分了对应的文件去实现,最后在 root 中 reference,这样可以导出一个完整的 specs 文件,具体用法如下:

需要注意的是,endpoint 中的 / 会被转译成 ~1 防止和文件路径产生冲突
在其他的 schema 中引用的方法如下:
基本上可以看到都是依赖于 $ref + 路径 + identifier 去找到对应的 reference