前言
本专栏是关于uniapp的相关介绍,如果你对uniapp感兴趣,不妨来看看。
环境配置
系统:windows10
平台:HBuilderX4.76
语言:vue、javascript
库:uni
概述
本文是基于uniapp,编写一个自定义组件,一个直线带箭头的指针组件,效果图如下:
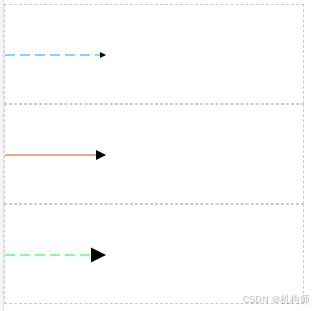
1、组件简介
这个组件的功能就是生成一个带箭头的直线指针,可以设置长度、颜色、角度等参数,内部是使用了svg封装的,之所以要写这样的组件,是因为我为了实现时钟的效果,想着添加时针、秒针这样的元素,而且为了模拟时钟,秒针还需要每秒变化,效果如下:
所以想着,为了方便调用,将指针单独写成一个组件,这样不仅制作秒针等场景时可以使用,如果有其他场景,需要这样的一个指针,也可以直接调用。
2、组件实现
如上所述,组件内部就是一个svg,分为两部分,直线、箭头。
我们先来看下内部svg的结构:
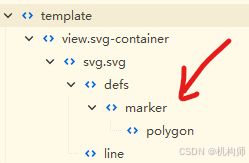
1、箭头部分
箭头部分即marker包裹的内容,箭头当然可以是任意形状,但我们此处使用的是比较通用的三角形箭头,箭头包括了图形的长度、宽度、顶点坐标等,如下:
js
<marker
					id="arrow"
					:markerWidth="10"
					:markerHeight="10"
					:refX="9"
					:refY="5"
					orient="auto"
				>
					<polygon points="0 0,10 5,0 10" fill="#000000"></polygon>
				</marker>
不过,我们可以将这些参数用变量来表示,我们设置三种规格的箭头:small、normal、big,通过属性markerMode来选择:
js
//根据模式选择marker配置
	const getMarkerConfig = (mode)=>{
		const config = {
			small: { id:'small', markerWidth:6,  markerHeight:6,   refX:5,  refY:3,   },
			normal:{ id:'normal', markerWidth:10, markerHeight:10,  refX:9,  refY:5,   },
			big:   { id:'big', markerWidth:15, markerHeight:15,  refX:14,  refY:7.5,},
		};
		return config[mode] || config.normal;
	};
	const polygonPoints= computed(()=>{
		if (props.markerMode === 'normal'){
			return "0 0,10 5,0 10"
		} else if(props.markerMode === 'small'){
			return "0 0,6 3,0 6"
		} else if(props.markerMode == 'big'){
			return "0 0,15 7.5,0 15"
		} else{
			return "0 0,10 5,0 10"
		}

	});
如上,我们添加getMarkerConfig函数来根据mode返回不同配置,然后我们使用v-bind绑定它:
js
<marker
						v-bind="getMarkerConfig(props.markerMode)"
						orient="auto"
					>
						<polygon :points="polygonPoints" fill="#000000" />
					</marker>
这样,我们调用组件时,只需要设置markerMode即可:
js
<linePointer
						:startP="startP"
						:lineDistance="100"
						lineColor="#55aaff"
						:isDashed="true"
						markerMode="big"
					></linePointer>
箭头效果:

2、直线部分
直线部分用于渲染直线,先看结构:
js
	<line
					:x1="xx1"
					:y1="yy1"
					:x2="xx2"
					:y2="yy2"
					:stroke-width="lineWidth"
					:stroke="lineColor"
					:stroke-dasharray="isDashed? '10,5' : 'none'"
					:marker-end="`url(#${props.markerMode})`"
					>
				</line>
要显示直线,需要知道直线的起点、终点,还需要设置直线的宽度、颜色、是否虚线,marker-end是将箭头添加到直线末端。(也可以在起始端添加箭头,但本组件不使用),双箭头效果:
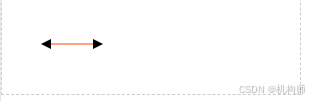
我们为组件设置属性:起点坐标、长度,然后来计算终点坐标:
js
const angle = computed(()=>{
		if(!props.lineAngle) return 0;
		return props.lineAngle;
	});
	const rad = computed(()=>{
		return (angle.value * Math.PI) / 180
	});
	const distance = computed(()=>{
		if(!props.lineDistance) return 100;
		return props.lineDistance
	});
const xx2 = computed(()=>{
		return (xx1.value + distance.value * Math.cos(rad.value))
	});
	const yy2 = computed(()=>{
		return (yy1.value + distance.value * Math.sin(rad.value))
	});
使用计算属性,可以自动响应变化。
看一下演示效果: