项目初始化(创建项目)
vue create longchi
(node:20704) [DEP0040] DeprecationWarning: The `punycode` module is deprecated. Please use a userland alternative instead.
(Use `node --trace-deprecation ...` to show where the warning was created)


Vue CLI v5.0.9
// 手动选择功能  点击空格为选中,可以移动上下箭头自由选择
? Please pick a preset: Manually select features
// 下选择 Babel, Router, Vuex
? Check the features needed for your project: Babel, Router, Vuex
// 选择 vue2.0
? Choose a version of Vue.js that you want to start the project with 2.x
// 使用路由器的历史模式
? Use history mode for router? (Requires proper server setup for index fallback in production) Yes
// 选择 package.json 包管理
? Where do you prefer placing config for Babel, ESLint, etc.? In package.json
// 将此设为预设,以便日后项目使用
? Save this as a preset for future projects? Yes
// 将预设保存为 uniapp_longchi
? Save preset as: uniapp_longchi

🎉  Preset uniapp_longchi saved in C:\Users\Administrator\.vuerc


Vue CLI v5.0.9
✨  Creating project in D:\workspace_uniapp\longchi.
🗃  Initializing git repository...
⚙️  Installing CLI plugins. This might take a while...

yarn install v1.22.22
info No lockfile found.
[1/4] Resolving packages...
[2/4] Fetching packages...
[3/4] Linking dependencies...
[4/4] Building fresh packages...
success Saved lockfile.
Done in 13.47s.
🚀  Invoking generators...
📦  Installing additional dependencies...

yarn install v1.22.22
[1/4] Resolving packages...
[2/4] Fetching packages...
[3/4] Linking dependencies...
[4/4] Building fresh packages...

success Saved lockfile.
Done in 5.38s.
⚓  Running completion hooks...

📄  Generating README.md...

🎉  Successfully created project longchi.
👉  Get started with the following commands:

 $ cd longchi
 $ yarn serve


cd longchi

yarn serve
yarn run v1.22.22
$ vue-cli-service serve
 INFO  Starting development server...


 DONE  Compiled successfully in 5340ms
#ifndef #endif以及 #ifdef #endif的作用
import App from './App'
// uView2.x
import uView from '@/uni_modules/uview-ui'
Vue.use(uView)
// #ifndef VUE3
import Vue from 'vue'
import './uni.promisify.adaptor'
Vue.config.productionTip = false
App.mpType = 'app'
const app = new Vue({
...App
})
// 引入请求封装,将app参数传递到配置中
require('@/utils/request.js')(app)
app.$mount()
// #endif
// #ifdef VUE3
import {
createSSRApp
} from 'vue'
export function createApp() {
const app = createSSRApp(App)
return {
app
}
}
// #endif
代码解释:
#ifndef VUE3
...
#endif
表示在VUE3代码中不生效
#ifdef VUE3
...
#endif
表示在VUE3代码中生效
// #ifndef H5
config.baseURL = 'https://uata.banluu.xuexiluxian.com/'; /* 根域名 */
// config.baseURL = 'https://www.longchi.xyz';
// #endif
代码解释:
以上代码表示在H5端不生效,在非H5端生效 这是 #ifndef #endif的作用
该方法将贯穿整个项目,重点掌握
[点击并拖拽以移动]
项目功能介绍
前台的uniapp部分
1, 登录:由微信一键登录和手机验证号码登录

2,支付,从选择商品的规格到确认订单到微信支付,包含退款是原路返回

3,查询,商品发货货可以查询,物流信息,包括地址的管理,订单的管理,个人中心等等模块。
后台管理系统
从登录开始,左侧菜单的权限以及按钮权限控制,他的模块有:
1, 商城管理
2, 财务管理
3, 运营管理
4,系统管理
5,系统监控
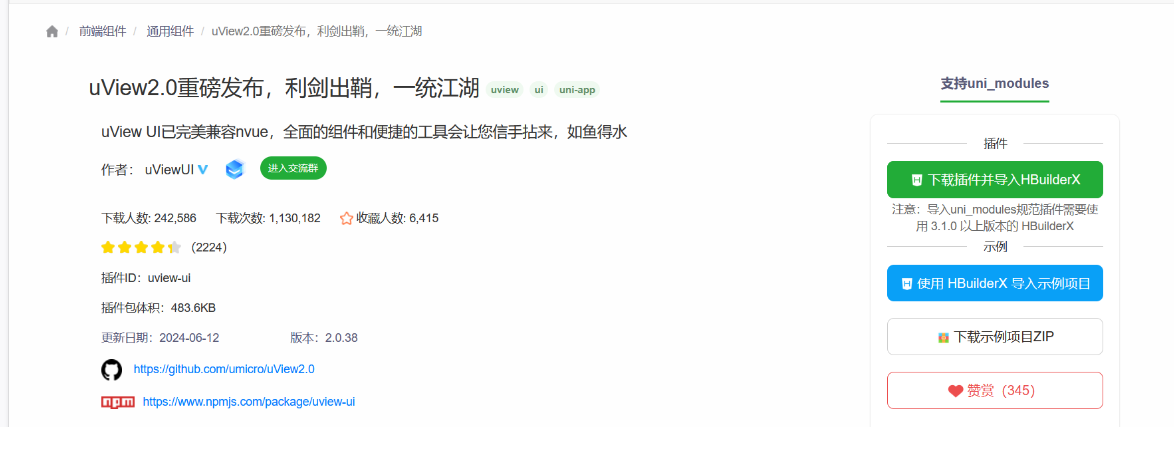
多平台快速开发的UI框架
uView UI,是全面兼容nvue的uni-app生态框架,全面的组件和便捷的工具会让您信手拈来,如鱼得水
https://uviewui.com/
UI插件
https://ext.dcloud.net.cn/
https://ext.dcloud.net.cn/plugin?id=1593
1,去插件市场搜索uview,找到 如下图所示 uview
2, 点击下载
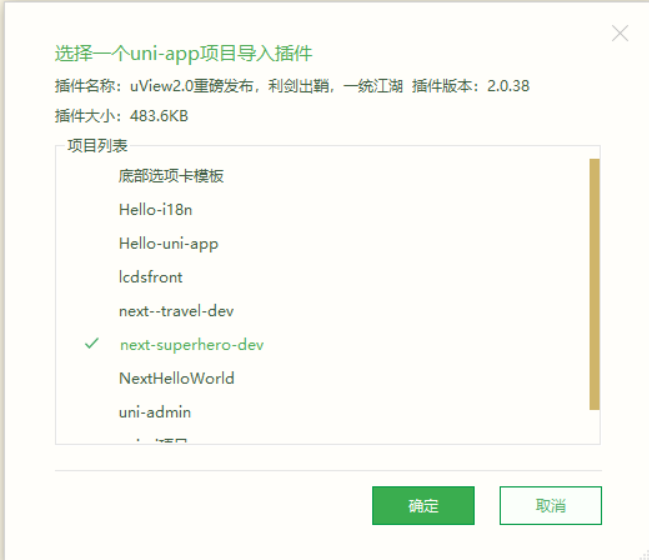
3,点击 '下载插件并导入HBuildX'
4, 选择要导入的项目 比如 next-superhero-dev
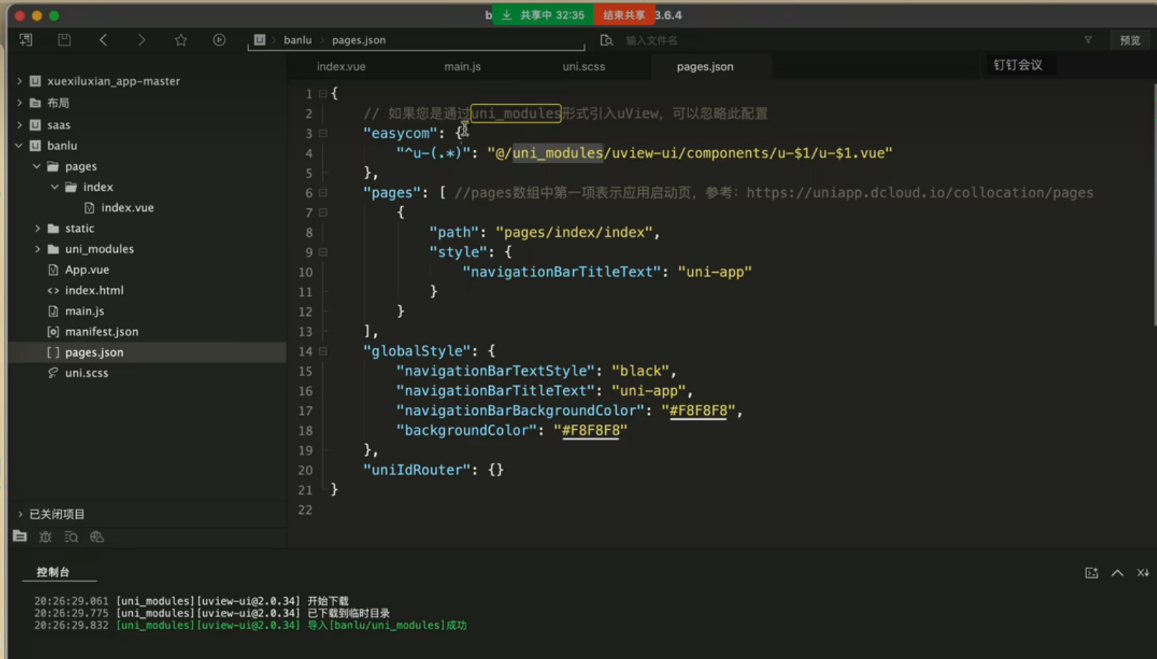
5, 如下图所示,uview导入成功
配置步骤
1,引入 uView主JS库
在项目根目录中的 main.js 中,引入并使用 uView的JS库,注意这两行要放在 import Vue 之后
// main.js
import uView from '@/uni_modules/uview-ui'
Vue.use(uView)
2, 在引入 uView的全局SCSS主题文件
在项目根目录的 uni.scss中引入此文件。
/* uni.scss */
@import '@/uni_modules/uview-ui/theme.scss';
3, 引入uview基础样式
注意:在App.vue中,首行的位置引入,注意给style标签加入 lang="scss" 属性
<style lang="scss">
	/*注意给style标签加入 lang="scss" 属性*/
	@import '@/uni_modules/uview_ui/index.scss';
</style>
4, 配置 easycom组件模式
此配置需要在项目根目录的pages.json中进行.
// pages.json
{
	// 如果您是通过uni_modules形式引入uView,可以忽略此配置
	"easycom": {
		"^u-(.*)": "@/uni_modules/uview-ui/components/u-$1/u-$1.vue"
	},

	// 此为本身已有的内容
	"pages": [
		// ......
	]
}
温馨提示
uni-app为了调试性能的原因,修改easycom规则不会实时生效,配置完后,您需要重启HX或者重新编译项目才能正常使用uView的功能。
请确保您的pages.json中只有一个easycom字段,否则请自行合并多个引入规则。
如果您是通过uni_modules形式引入uView,可以忽略此配置
如下图所示表示已经成功配置
手机浏览器打开的 网页是不可以到顶部的
手机APP打开的 app端可以到顶部的
请求二次封装流程
$u 表示uview内置的一个对象,相当于
uni.$u 二次封装  相当于
uni.request({})
他为什么可以直接用?在pages.json中引入了其实就是uview插件

{
	// 如果您是通过uni_modules形式引入uView,可以忽略此配置
	"easycom": {
		"^u-(.*)": "@/uni_modules/uview-ui/components/u-$1/u-$1.vue"
	},
	"pages": [],
}
封装主要在以下四个文件中操作
1, 在main.js中引入如下文件
// 引入请求封装,将app参数传递到配置中
require('@/utils/request.js')(app)
完整代码如下: main.js
import App from './App'
// uView2.x
import uView from '@/uni_modules/uview-ui'
Vue.use(uView)
// #ifndef VUE3
import Vue from 'vue'
import './uni.promisify.adaptor'
Vue.config.productionTip = false
App.mpType = 'app'
const app = new Vue({
...App
})
// 引入请求封装,将app参数传递到配置中
require('@/utils/request.js')(app)
app.$mount()
// #endif
// #ifdef VUE3
import {
createSSRApp
} from 'vue'
export function createApp() {
const app = createSSRApp(App)
return {
app
}
}
// #endif
2, pages/index/index.vue
<template>
<view class="content">
<u-button type="primary" shape="circle" text="按钮形状"></u-button>
<image class="logo" src="/static/logo.png"></image>
<view class="text-area">
<text class="title">{{title}}</text>
</view>
</view>
</template>
<script>
import {
agreement
} from '@/utils/api/login.js';
export default {
data() {
return {
title: 'Hello'
}
},
onLoad() {
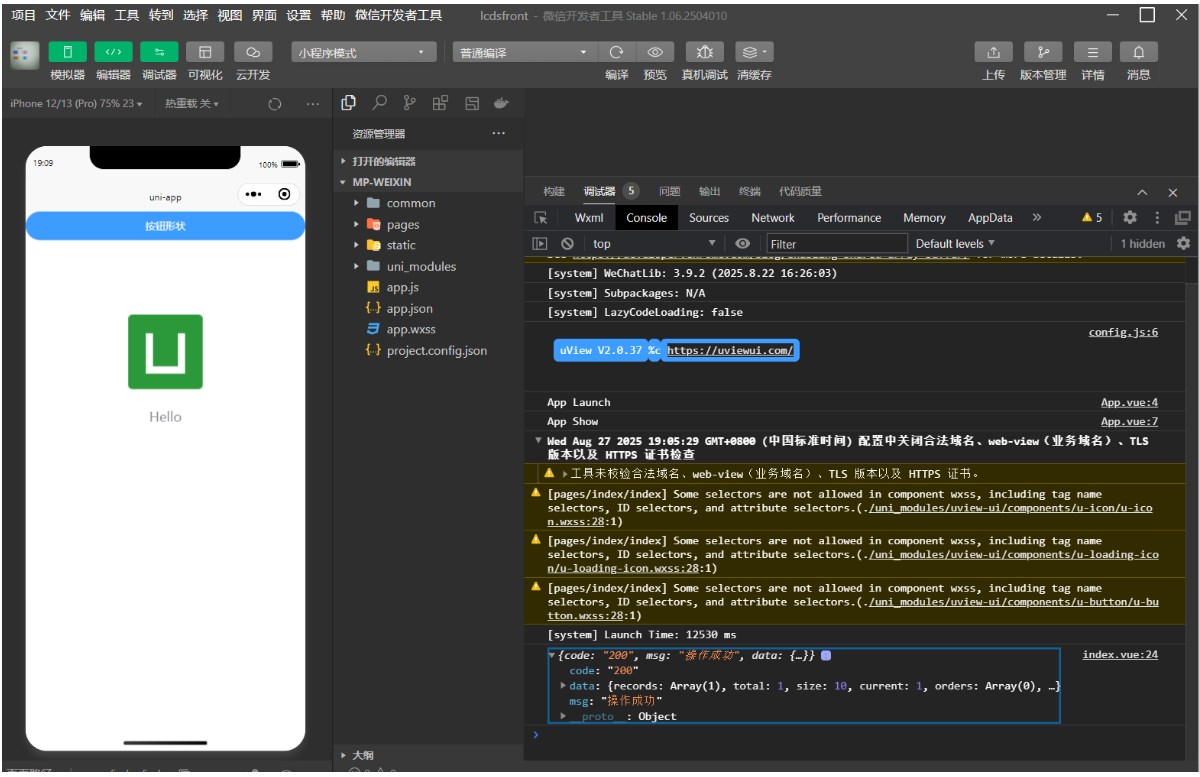
agreement().then(res => {
console.log(res)
})
},
methods: {
}
}
</script>
<style>
.content {
display: flex;
flex-direction: column;
align-items: center;
justify-content: center;
}
.logo {
height: 200rpx;
width: 200rpx;
margin-top: 200rpx;
margin-left: auto;
margin-right: auto;
margin-bottom: 50rpx;
}
.text-area {
display: flex;
justify-content: center;
}
.title {
font-size: 36rpx;
color: #8f8f94;
}
</style>
3, utils/api/login.js
const http = uni.$u.http
// post请求,获取菜单
// export const postMenu = (params, config = {}) => http.post('/ebapi/public_api/index', params, config)
// get请求,获取菜单,注意:get请求的配置等,都在第二个参数中,详见前面解释
// export const getMenu = (data) => http.get('/ebapi/public_api/index', data)
export const postMenu = (data) => http.post('/ebapi/public_api/index', data)
//查询地区(通过上级ID)
export const agreement = (data) => http.get('/agreement', {
params: data
})
4, utils/request.js 请求二次封装
// 请求二次封装
// 此vm参数为页面的实例,可以通过它引用vuex中的变量
module.exports = (vm) => {
// 初始化请求配置
uni.$u.http.setConfig((config) => {
/* config 为默认全局配置*/
config.baseURL = 'http://uat.banlu.xuexiluxian.cn/'; /* 根域名 */
return config
})
// 请求拦截 客户端发送到服务端的请求
uni.$u.http.interceptors.request.use((config) => {
return config
}, config => {
return Promie.reject(config)
})
// 响应拦截 服务端返回到客户端的数据
uni.$u.http.interceptors.response.use((response) => {
const data = response.data
return data === undefined ? {} : data;
}, (response) => {
// 对响应错误做点什么 (statusCode !== 200)
return Promise.reject(response)
})
// // 请求拦截
// uni.$u.http.interceptors.request.use((config) => { // 可使用async await 做异步操作
// // 初始化请求拦截器时,会执行此方法,此时data为undefined,赋予默认{}
// config.data = config.data || {}
// // 根据custom参数中配置的是否需要token,添加对应的请求头
// if (config?.custom?.auth) {
// // 可以在此通过vm引用vuex中的变量,具体值在vm.$store.state中
// config.header.token = vm.$store.state.userInfo.token
// }
// return config
// }, config => { // 可使用async await 做异步操作
// return Promise.reject(config)
// })
// // 响应拦截
// uni.$u.http.interceptors.response.use((response) => {
// /* 对响应成功做点什么 可使用async await 做异步操作*/
// const data = response.data
// // 自定义参数
// const custom = response.config?.custom
// if (data.code !== 200) {
// // 如果没有显式定义custom的toast参数为false的话,默认对报错进行toast弹出提示
// if (custom.toast !== false) {
// uni.$u.toast(data.message)
// }
// // 如果需要catch返回,则进行reject
// if (custom?.catch) {
// return Promise.reject(data)
// } else {
// // 否则返回一个pending中的promise,请求不会进入catch中
// return new Promise(() => {})
// }
// }
// return data.data === undefined ? {} : data.data
// }, (response) => {
// // 对响应错误做点什么 (statusCode !== 200)
// return Promise.reject(response)
// })
}
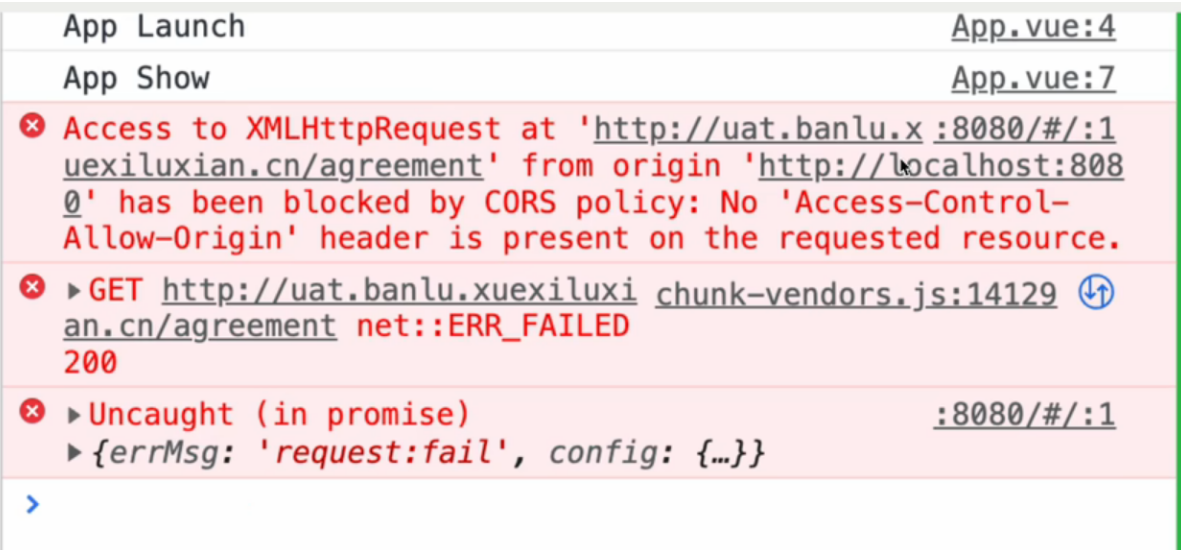
H5端有跨域问题,这里可以设置代理解决跨域问题 如下图所示
第1种解决方式:
"h5": {
		"devServer": {
			"port": 8083, // 端口号
			"disableHostCheck": true, // 关闭主机检查
			"proxy": {
				"/api": { // 代理路径前缀
					"target": "http://localhost: 8866/", // 目标接口域名
					"changeOrigin": true, // 是否跨域	允许跨域
					"secure": false // 设置支付https协议代理
				}
			}
		}
	}
第2种解决方式: 打开vite.config.js文件,配置如下代码
// const TransformPages = require('uni-read-pages')
// const {
// 	webpack
// } = new TransformPages()

// 只是在H5端生效,在小程序端不生效
module.exports = {
	devServer: {
		proxy: {
			'/': {
				target: 'http://uat.banlu.xuexiluxian.cn/',
				changeOrigin: true
			}
		}
	}
	// configureWebpack: {
	// 	plugins: [
	// 		new webpack.DefinePlugin({
	// 			ROUTES: webpack.DefinePlugin.runtimeValue(() => {
	// 				const tfPages = new TransformPages({
	// 					includes: ['path', 'name', 'aliasPath']
	// 				});
	// 				return JSON.stringify(tfPages.routes)
	// 			}, true)
	// 		})
	// 	]
	// }
}
小程序端没有跨域问题
接下来先去做登录这一块
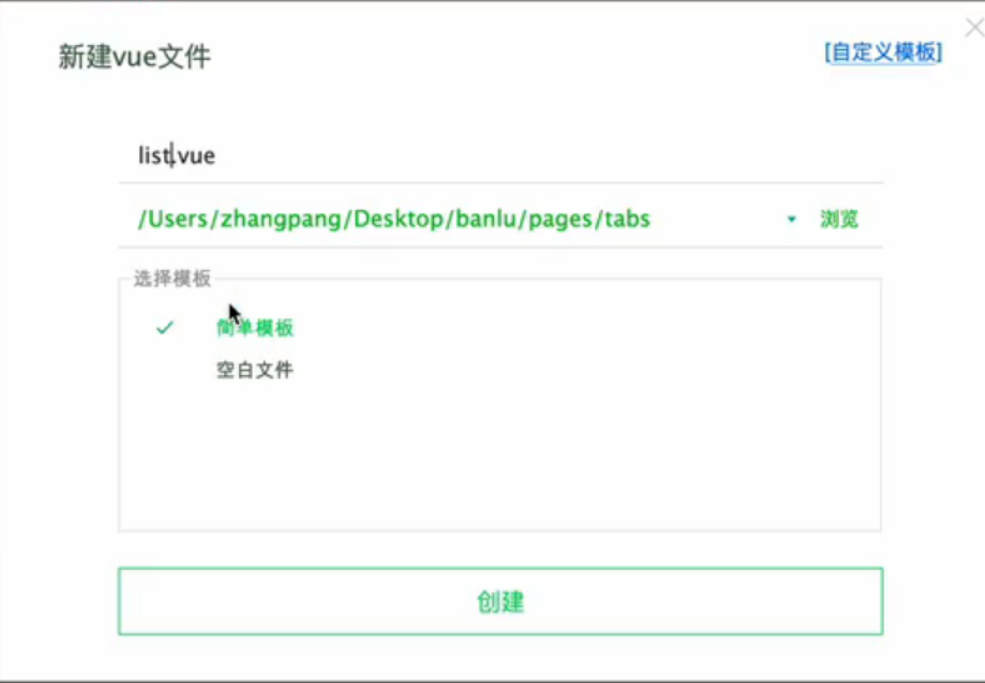
新建文件
备份 pages/index/index.vue
<template>
	<view class="content">
		<u-button type="primary" shape="circle" text="按钮形状"></u-button>

		<image class="logo" src="/static/logo.png"></image>
		<view class="text-area">
			<text class="title">{{title}}</text>
		</view>
	</view>
</template>

<script>
	import {
		agreement
	} from '@/utils/api/login.js';
	export default {
		data() {
			return {
				title: 'Hello'
			}
		},
		onLoad() {
			agreement().then(res => {
				console.log(res)
			})
		},
		methods: {
			request() {
				uni.request({
					url: 'http://uat.banlu.xuexiluxian.cn/agreement',
					method: 'GET',
					data: {},
					success: res => {},
					fail: () => {},
					complete: () => {}
				});
			}
		}
	}
</script>

<style>
	.content {
		display: flex;
		flex-direction: column;
		align-items: center;
		justify-content: center;
	}

	.logo {
		height: 200rpx;
		width: 200rpx;
		margin-top: 200rpx;
		margin-left: auto;
		margin-right: auto;
		margin-bottom: 50rpx;
	}

	.text-area {
		display: flex;
		justify-content: center;
	}

	.title {
		font-size: 36rpx;
		color: #8f8f94;
	}
</style>
首页文件配置 pages.json
{
	// 如果您是通过uni_modules形式引入uView,可以忽略此配置
	"easycom": { // u-$1 表示components下所有u-*都可以,u-$.vue 表示u-*.vue所有文件都可以,即表示全局引入ui组件所有内容
		"^u-(.*)": "@/uni_modules/uview-ui/components/u-$1/u-$1.vue"
	},
	"pages": [ //pages数组中第一项表示应用启动页,参考:https://uniapp.dcloud.io/collocation/pages
		{
			"path": "pages/tabs/index",
			"style": {
				"navigationBarTitleText": "uni-app"
			}
		}
	],
	"globalStyle": {
		"navigationBarTextStyle": "black",
		"navigationBarTitleText": "uni-app",
		"navigationBarBackgroundColor": "#F8F8F8",
		"backgroundColor": "#F8F8F8"
	},
	"uniIdRouter": {}
}
pages,json完整配置文件
{
	// 如果您是通过uni_modules形式引入uView,可以忽略此配置
	"easycom": { // u-$1 表示components下所有u-*都可以,u-$.vue 表示u-*.vue所有文件都可以,即表示全局引入ui组件所有内容
		"^u-(.*)": "@/uni_modules/uview-ui/components/u-$1/u-$1.vue"
	},
	"pages": [ //pages数组中第一项表示应用启动页,参考:https://uniapp.dcloud.io/collocation/pages
		{
			"path": "pages/tabs/index",
			"style": {
				"navigationBarTitleText": "推荐",
				"navigationStyle": "custom"
			}
		},
		{
			"path": "pages/tabs/list",
			"style": {
				"navigationBarTitleText": "分类"
			}
		},
		{
			"path": "pages/tabs/me",
			"style": {
				"navigationBarTitleText": "我的",
				"navigationStyle": "custom"
			}
		},
		{
			"path": "pages/login/login",
			"style": {
				"navigationBarTitleText": "微信一键登录"
			}
		},
		{
			"path": "pages/login/bindPhone",
			"style": {
				"navigationBarTitleText": "绑定手机号"
			}
		}
	],
	"tabBar": {
		"color": "#7A7E83",
		"selectedColor": "#3cc51f",
		"borderStyle": "black",
		"backgroundColor": "#ffffff",
		"list": [{
			"pagePath": "pages/tabs/index",
			"iconPath": "/static/icon/recommend.png",
			"selectedIconPath": "/static/icon/recommend-hl.png",
			"text": "推荐"
		}, {
			"pagePath": "pages/tabs/list",
			"iconPath": "/static/icon/classify.png",
			"selectedIconPath": "/static/icon/classify-hl.png",
			"text": "分类"
		}, {
			"pagePath": "pages/tabs/me",
			"iconPath": "/static/icon/mine.png",
			"selectedIconPath": "/static/icon/mine-hl.png",
			"text": "我的"
		}]
	},

	"globalStyle": {
		"navigationBarTextStyle": "black",
		"navigationBarTitleText": "uni-app",
		"navigationBarBackgroundColor": "#F8F8F8",
		"backgroundColor": "#F8F8F8"
	},
	"uniIdRouter": {}
}