前言
Android 提供了两种拖拽 API,分别是 ViewDragHelper 和 OnDragListener。
OnDragListener
我们先看第二种 OnDragListener,代码如下:
kotlin
class DragListenerView(context: Context, attrs: AttributeSet) : ViewGroup(context, attrs) {

    private var columns = 0
    private var rows = 0

    private val dragListener = OnDragListener { v, event ->
        when (event.action) {
            // 拖拽开始
            DragEvent.ACTION_DRAG_STARTED -> {
                if (event.localState === v) {
                    v.visibility = INVISIBLE
                }
            }

            // 拖拽进入某个View的区域,初始拖拽时也会触发,因为初始进入了被拖拽的View的区域
            DragEvent.ACTION_DRAG_ENTERED -> {
                if (event.localState !== v) {
                    // 此时 v 为拖拽进入的目标view
                    sortChildView(v)
                }
            }

            // 拖拽离开某个View的区域
            DragEvent.ACTION_DRAG_EXITED -> {
            }

            // 拖拽结束
            DragEvent.ACTION_DRAG_ENDED -> {
                if (event.localState === v) {
                    v.visibility = VISIBLE
                }
            }
        }

        true
    }

    private var draggedView: View? = null

    private var orderedChildView: MutableList<View> = mutableListOf()

    override fun onMeasure(widthMeasureSpec: Int, heightMeasureSpec: Int) {
        columns = 2
        rows = childCount / columns + 1

        val widthSpec = MeasureSpec.getSize(widthMeasureSpec)
        val heightSpec = MeasureSpec.getSize(heightMeasureSpec)
        val childWidthMeasureSpec =
            MeasureSpec.makeMeasureSpec(widthSpec / columns, MeasureSpec.EXACTLY)
        val childHeightMeasureSpec =
            MeasureSpec.makeMeasureSpec(heightSpec / rows, MeasureSpec.EXACTLY)
        measureChildren(childWidthMeasureSpec, childHeightMeasureSpec)
        setMeasuredDimension(widthSpec, heightSpec)
    }

    override fun onLayout(
        changed: Boolean,
        l: Int,
        t: Int,
        r: Int,
        b: Int,
    ) {
        for (i in 0 until childCount) {
            val child = getChildAt(i)
            child.layout(
                0,
                0,
                child.measuredWidth,
                child.measuredHeight
            )
            child.translationX = (i % columns * child.measuredWidth).toFloat()
            child.translationY = (i / columns * child.measuredHeight).toFloat()
        }
    }

    override fun onFinishInflate() {
        super.onFinishInflate()
        for (i in 0 until childCount) {
            val child = getChildAt(i)
            orderedChildView.add(child)

            child.setOnLongClickListener { v ->
                draggedView = v
                v.startDragAndDrop(null, DragShadowBuilder(v), v, 0)
                true
            }

            child.setOnDragListener(dragListener)
        }
    }


    fun sortChildView(targetView: View) {
        // 重新排序View列表
        var targetViewIndex = 0
        var draggedViewIndex = 0
        orderedChildView.forEachIndexed { index, view ->
            if (view === targetView) {
                targetViewIndex = index
            }
            if (view === draggedView) {
                draggedViewIndex = index
            }
        }
        swapElements(orderedChildView, targetViewIndex, draggedViewIndex)
        // 使用动画重新布局
        for (i in 0 until orderedChildView.size) {
            val child = orderedChildView[i]
            val x = (i % columns * child.measuredWidth).toFloat()
            val y = (i / columns * child.measuredHeight).toFloat()
            child.animate()
                .translationX(x)
                .translationY(y)
                .setDuration(300)
                .start()
        }
    }

    private fun swapElements(list: MutableList<View>, index1: Int, index2: Int) {
        val temp = list[index1]
        list[index1] = list[index2]
        list[index2] = temp
    }

}
布局代码:
xml
<?xml version="1.0" encoding="utf-8"?>
<com.example.dragview.DragListenerView xmlns:android="http://schemas.android.com/apk/res/android"
    android:id="@+id/main"
    android:layout_width="match_parent"
    android:layout_height="match_parent">

    <View
        android:layout_width="wrap_content"
        android:layout_height="wrap_content"
        android:background="#F44336" />

    <View
        android:layout_width="wrap_content"
        android:layout_height="wrap_content"
        android:background="#E91E63" />

    <View
        android:layout_width="wrap_content"
        android:layout_height="wrap_content"
        android:background="#9C27B0" />

    <View
        android:layout_width="wrap_content"
        android:layout_height="wrap_content"
        android:background="#673AB7" />

    <View
        android:layout_width="wrap_content"
        android:layout_height="wrap_content"
        android:background="#3F51B5" />

</com.example.dragview.DragListenerView>
运行效果:
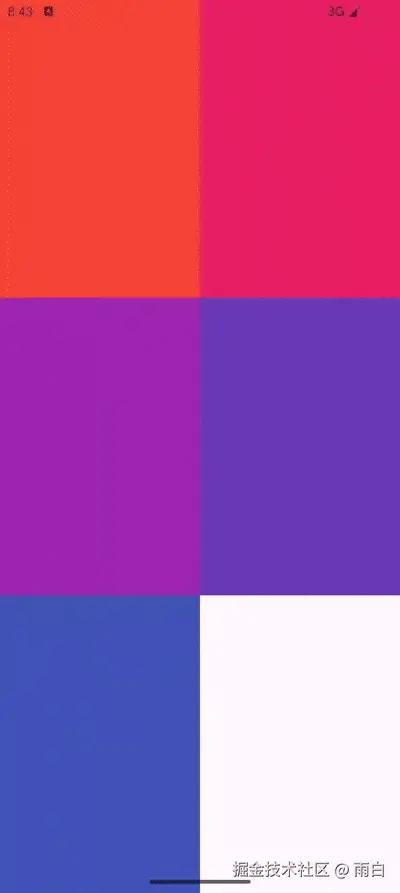
我们来讲解一下是如何实现的。
首先,对每个子 View 进行测量和布局。
kotlin
// onLayout 方法中
for (i in 0 until childCount) {
    val child = getChildAt(i)
    child.layout(
        0,
        0,
        child.measuredWidth,
        child.measuredHeight
    )
    child.translationX = (i % columns * child.measuredWidth).toFloat()
    child.translationY = (i / columns * child.measuredHeight).toFloat()
}
在布局过程中,我们先调用 layout 方法将每个子 View 摆放在了 (0,0) 位置,然后再使用 translationX/Y 移动子 View 到对应的位置。
这是为了让动画过程更简单,动画时,只需考虑移动后的位置,而无需关心初始的位置和移动前的位置。
kotlin
// onFinishInflate 方法中
for (i in 0 until childCount) {
    val child = getChildAt(i)
    orderedChildView.add(child)

    child.setOnLongClickListener { v ->
        draggedView = v
        v.startDragAndDrop(null, DragShadowBuilder(v), v, 0)
        true // 表示消费长按事件
    }

    child.setOnDragListener(dragListener)
}
然后在布局加载完成、视图都创建好后,我们为每一个子 View 设置了长按监听器。在长按时,会调用子 View 的 View.startDragAndDrop 方法,开始拖拽。
设置了拖拽监听器,在拖拽时,能够回调 OnDragListener.onDrag 方法。
还将每个 View 放入 orderedChildView 列表中,以便后续使用。在长按回调中,更新了当前被拖拽的 View。
kotlin
private val dragListener = OnDragListener { v, event ->
    when (event.action) {
        DragEvent.ACTION_DRAG_STARTED -> {
            if (event.localState === v) {
                v.visibility = INVISIBLE
            }
        }

        DragEvent.ACTION_DRAG_ENTERED -> {
            if (event.localState !== v) {
                sortChildView(v)
            }
        }

        DragEvent.ACTION_DRAG_EXITED -> {
        }

        DragEvent.ACTION_DRAG_ENDED -> {
            if (event.localState === v) {
                v.visibility = VISIBLE
            }
        }
    }

    true
}
在拖拽过程中,每个注册了的子 View 都会收到拖拽的回调。
其中 localState 就是开始拖拽时传入的数据,也就是 startDragAndDrop 方法的第三个参数 myLocalState,就是当前正在被拖拽的 View,这个数据我们可以随时拿取。
此方法的第一个参数 ClipData data 也可以传递数据,但它只能在释放了被拖拽的数据后才能拿取,在 DragEvent.ACTION_DROP 事件中。
我们让正在被拖拽的 View 在开始拖拽时隐藏,在拖拽结束后显示。每当拖拽进某个 View 的区域时,我们就调用 sortChildView 方法,以动画的形式重排每个 View 的位置。
kotlin
fun sortChildView(targetView: View) {
// 获取目标View和被拖拽View的索引
var targetViewIndex = 0
var draggedViewIndex = 0
orderedChildView.forEachIndexed { index, view ->
if (view === targetView) {
targetViewIndex = index
}
if (view === draggedView) {
draggedViewIndex = index
}
}
// 交换两个元素
swapElements(orderedChildView, targetViewIndex, draggedViewIndex)
// 使用动画重新布局
for (i in 0 until orderedChildView.size) {
val child = orderedChildView[i]
val x = (i % columns * child.measuredWidth).toFloat()
val y = (i / columns * child.measuredHeight).toFloat()
child.animate()
.translationX(x)
.translationY(y)
.setDuration(300)
}
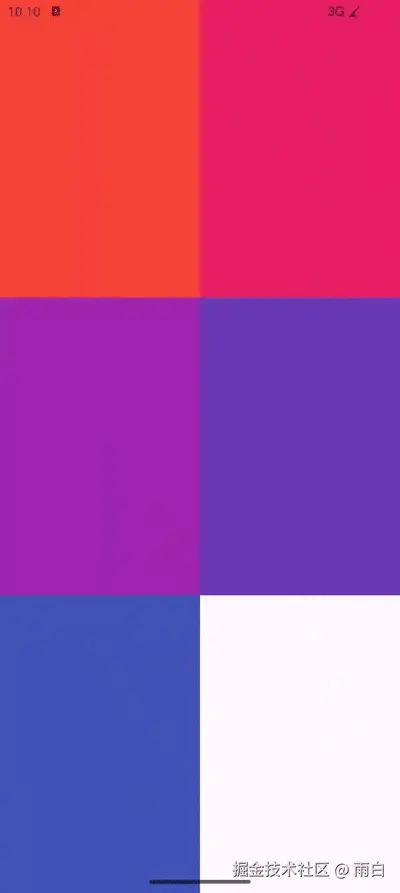
}如果拖拽时并不隐藏,运行效果将会是:
为什么拖起来的是半透明的,原来的东西还在?
这是因为 startDragAndDrop 方法启动的是系统级的拖拽。我们拖动的并不是一个 View,而是一个影子,它被绘制在了最顶层,能够遮挡住状态栏、导航栏,甚至其他应用。
系统只关心这个影子和要传递的数据,并不管原来的 View 是否存在。所以,我们需要手动在 ACTION_DRAG_STARTED 中将 View 隐藏,在 ACTION_DRAG_ENDED 中显示。
ViewDragHelper
再来看第一种 ViewDragHelper,完整代码:
kotlin
class DragHelperView(context: Context, attrs: AttributeSet?) : ViewGroup(context, attrs) {

    private var viewDragHelper = ViewDragHelper.create(this, DragHelperCallback())

    inner class DragHelperCallback : ViewDragHelper.Callback() {
        override fun tryCaptureView(
            child: View,
            pointerId: Int,
        ): Boolean {
            return true
        }

        override fun onViewDragStateChanged(state: Int) {
            if (state == ViewDragHelper.STATE_IDLE) {
                val capturedView = viewDragHelper.capturedView
                capturedView?.elevation--
            }
        }

        override fun clampViewPositionHorizontal(
            child: View,
            left: Int,
            dx: Int,
        ): Int {
            return left
        }

        override fun clampViewPositionVertical(
            child: View,
            top: Int,
            dy: Int,
        ): Int {
            return top
        }

        var capturedLeft = 0f
        var capturedTop = 0f
        override fun onViewCaptured(capturedChild: View, activePointerId: Int) {
            capturedChild.elevation = elevation + 1
            capturedLeft = capturedChild.left.toFloat()
            capturedTop = capturedChild.top.toFloat()
        }

        override fun onViewPositionChanged(
            changedView: View,
            left: Int,
            top: Int,
            dx: Int,
            dy: Int,
        ) {

        }

        override fun onViewReleased(
            releasedChild: View,
            xvel: Float,
            yvel: Float,
        ) {
            viewDragHelper.settleCapturedViewAt(capturedLeft.toInt(), capturedTop.toInt())
            postInvalidateOnAnimation()
        }
    }

    override fun computeScroll() {
        if (viewDragHelper.continueSettling(true)) {
            ViewCompat.postInvalidateOnAnimation(this)
        }
    }


    // 行列数
    private var columns: Int = 0
    private var rows: Int = 0

    override fun onMeasure(widthMeasureSpec: Int, heightMeasureSpec: Int) {
        columns = 2
        rows = childCount / columns + 1

        val widthSpec = MeasureSpec.getSize(widthMeasureSpec)
        val heightSpec = MeasureSpec.getSize(heightMeasureSpec)
        val childWidthMeasureSpec =
            MeasureSpec.makeMeasureSpec(widthSpec / columns, MeasureSpec.EXACTLY)
        val childHeightMeasureSpec =
            MeasureSpec.makeMeasureSpec(heightSpec / rows, MeasureSpec.EXACTLY)
        measureChildren(childWidthMeasureSpec, childHeightMeasureSpec)
        setMeasuredDimension(widthSpec, heightSpec)
    }

    override fun onLayout(
        changed: Boolean,
        l: Int,
        t: Int,
        r: Int,
        b: Int,
    ) {
        for (i in 0 until childCount) {
            val child = getChildAt(i)
            child.layout(
                i % columns * child.measuredWidth,
                i / columns * child.measuredHeight,
                i % columns * child.measuredWidth + child.measuredWidth,
                i / columns * child.measuredHeight + child.measuredHeight
            )
        }
    }

    override fun onInterceptTouchEvent(ev: MotionEvent): Boolean {
        return viewDragHelper.shouldInterceptTouchEvent(ev)
    }

    override fun onTouchEvent(event: MotionEvent): Boolean {
        viewDragHelper.processTouchEvent(event)
        return true
    }

}
运行效果:
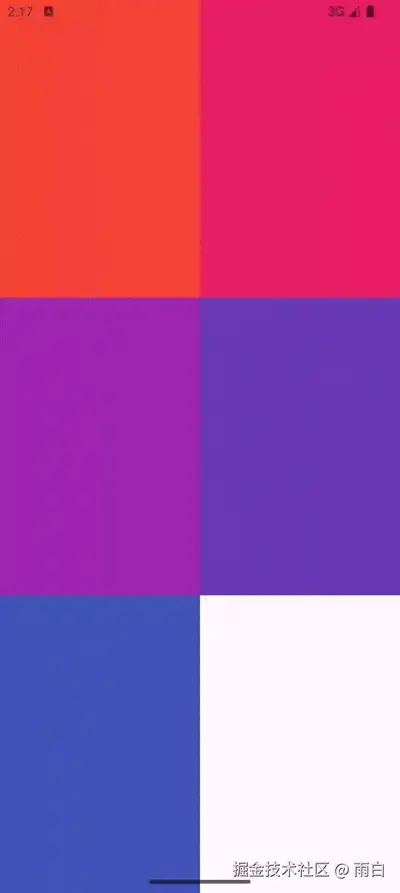
会发现在手指触碰的瞬间,就开始了拖拽。并且拖拽开始后,子 View 不是半透明的,还会被状态栏、导航栏挡住(图中没展示出来)。
和刚才的不一样,为什么呢?
因为 ViewDragHelper 不是系统级的拖拽功能,只是一个辅助工具(Helper)。
我们用它来拖动 View 本身,它在实时地修改 View 的 left 和 top 坐标,所以这个 View 还在它原来的父布局里中,自然会被父布局裁剪、被状态栏挡住,也不是半透明的。
讲解一下实现方式。
kotlin
private var viewDragHelper = ViewDragHelper.create(this, DragHelperCallback())

override fun onInterceptTouchEvent(ev: MotionEvent): Boolean {
    return viewDragHelper.shouldInterceptTouchEvent(ev)
}

override fun onTouchEvent(event: MotionEvent): Boolean {
    viewDragHelper.processTouchEvent(event)
    return true
}
首先,我们创建了 ViewDragHelper 对象,然后让它去判断是否拦截和处理事件。必须要在这两个方法中将事件交给它,这样才能正常工作。
我们再来看各个回调方法,首先是 tryCaptureView。
它会在手指触摸到子 View 的一瞬间被调用,询问是否抓住这个 View。如果返回 true,子 View 就会跟着手指移动,否则,不移动。
kotlin
override fun clampViewPositionHorizontal(
    child: View,
    left: Int,
    dx: Int,
): Int {
    return left
}

override fun clampViewPositionVertical(
    child: View,
    top: Int,
    dy: Int,
): Int {
    return top
}
这两个回调用于限制移动的范围,这里并没有限制,因为总是返回内部计算出的建议位置。如果返回 0,就无法拖动子 View。
kotlin
var capturedLeft = 0f
var capturedTop = 0f
override fun onViewCaptured(capturedChild: View, activePointerId: Int) {
    capturedChild.elevation = elevation + 1
    capturedLeft = capturedChild.left.toFloat()
    capturedTop = capturedChild.top.toFloat()
}
当子 View 被拖拽时,会被调用,我们将该 View 的层级加一,让它可以显示在最前方。并保存了初始位置,以便后续能够吸附回原来的位置。
kotlin
override fun onViewPositionChanged(
    changedView: View,
    left: Int,
    top: Int,
    dx: Int,
    dy: Int,
) {

}
被拖拽的子 View 位置改变时会调用此方法,你可以在这实现拖拽重排的功能。
kotlin
override fun onViewReleased(
    releasedChild: View,
    xvel: Float,
    yvel: Float,
) {
    viewDragHelper.settleCapturedViewAt(capturedLeft.toInt(), capturedTop.toInt())
    postInvalidateOnAnimation()
}
这个是松手的回调,我们调用 settleCapturedViewAt 方法让被拖拽的 View 回到之前的位置,然后调用了 postInvalidateOnAnimation() 进行重绘。
kotlin
override fun computeScroll() {
    if (viewDragHelper.continueSettling(true)) {
        ViewCompat.postInvalidateOnAnimation(this)
    }
}
重绘时会调用 computeScroll 方法,我们调用 continueSettling() 方法检查 View 是否在移动过程中,如果在,就继续触发重绘,直到 View 回到原本位置。
最后,在回到空闲状态时,需要降低层级。
kotlin
override fun onViewDragStateChanged(state: Int) {
    if (state == ViewDragHelper.STATE_IDLE) {
        val capturedView = viewDragHelper.capturedView
        capturedView?.elevation--
    }
}
这些回调方法就讲解完毕了。
最后,为了防止同时拖拽多个子 View,可以添加一个标记。
kotlin
var isDragging = false

override fun tryCaptureView(
    child: View,
    pointerId: Int,
): Boolean {
    return !isDragging
}

override fun onViewDragStateChanged(state: Int) {
    if (state == ViewDragHelper.STATE_IDLE) {
        isDragging = false
        // ...
    }
}

override fun onViewCaptured(capturedChild: View, activePointerId: Int) {
    isDragging = true
    // ...
}
实际应该怎么选?
在 OnDragListener 中,我们说到开始拖拽时传递数据的方式有 data 和 myLocalState 参数,它们可用的时机不同。
为什么要这么设计?
其实 data 数据 (类型为 ClipData,剪贴板数据),它是可以跨进程的。我们可以拖动图片或是文字到另一个应用中。
所以 OnDragListener 主要关注的是拖起、放下动作以及数据的传递,并不关心 View 的移动,只关心数据从 A 移动到了 B。它拖动的半透明影子是全局的,所以可以跨应用,盖住所有东西。
而 ViewDragHelper 关注的是界面中的子 View 的拖动,它会修改子 View 的坐标。比如侧滑菜单(DrawerLayout)、底部弹窗(BottomSheet),都是通过它来实现的。
总结:
-
要做跨应用、传数据的拖拽,就使用
OnDragListener。 -
要在自定义 ViewGroup 中,实现子 View 拖动或滑动控制,就使用
ViewDragHelper。